How to install and activate Neve Pro
If you just purchased Neve Pro and you are wondering how to activate it, below is a video that should help.
Check out this video
In case you can't access the video, you can follow the steps below.
1. Install the Neve theme, using these instructions.
2. Go to ThemeIsle store and insert your credentials.
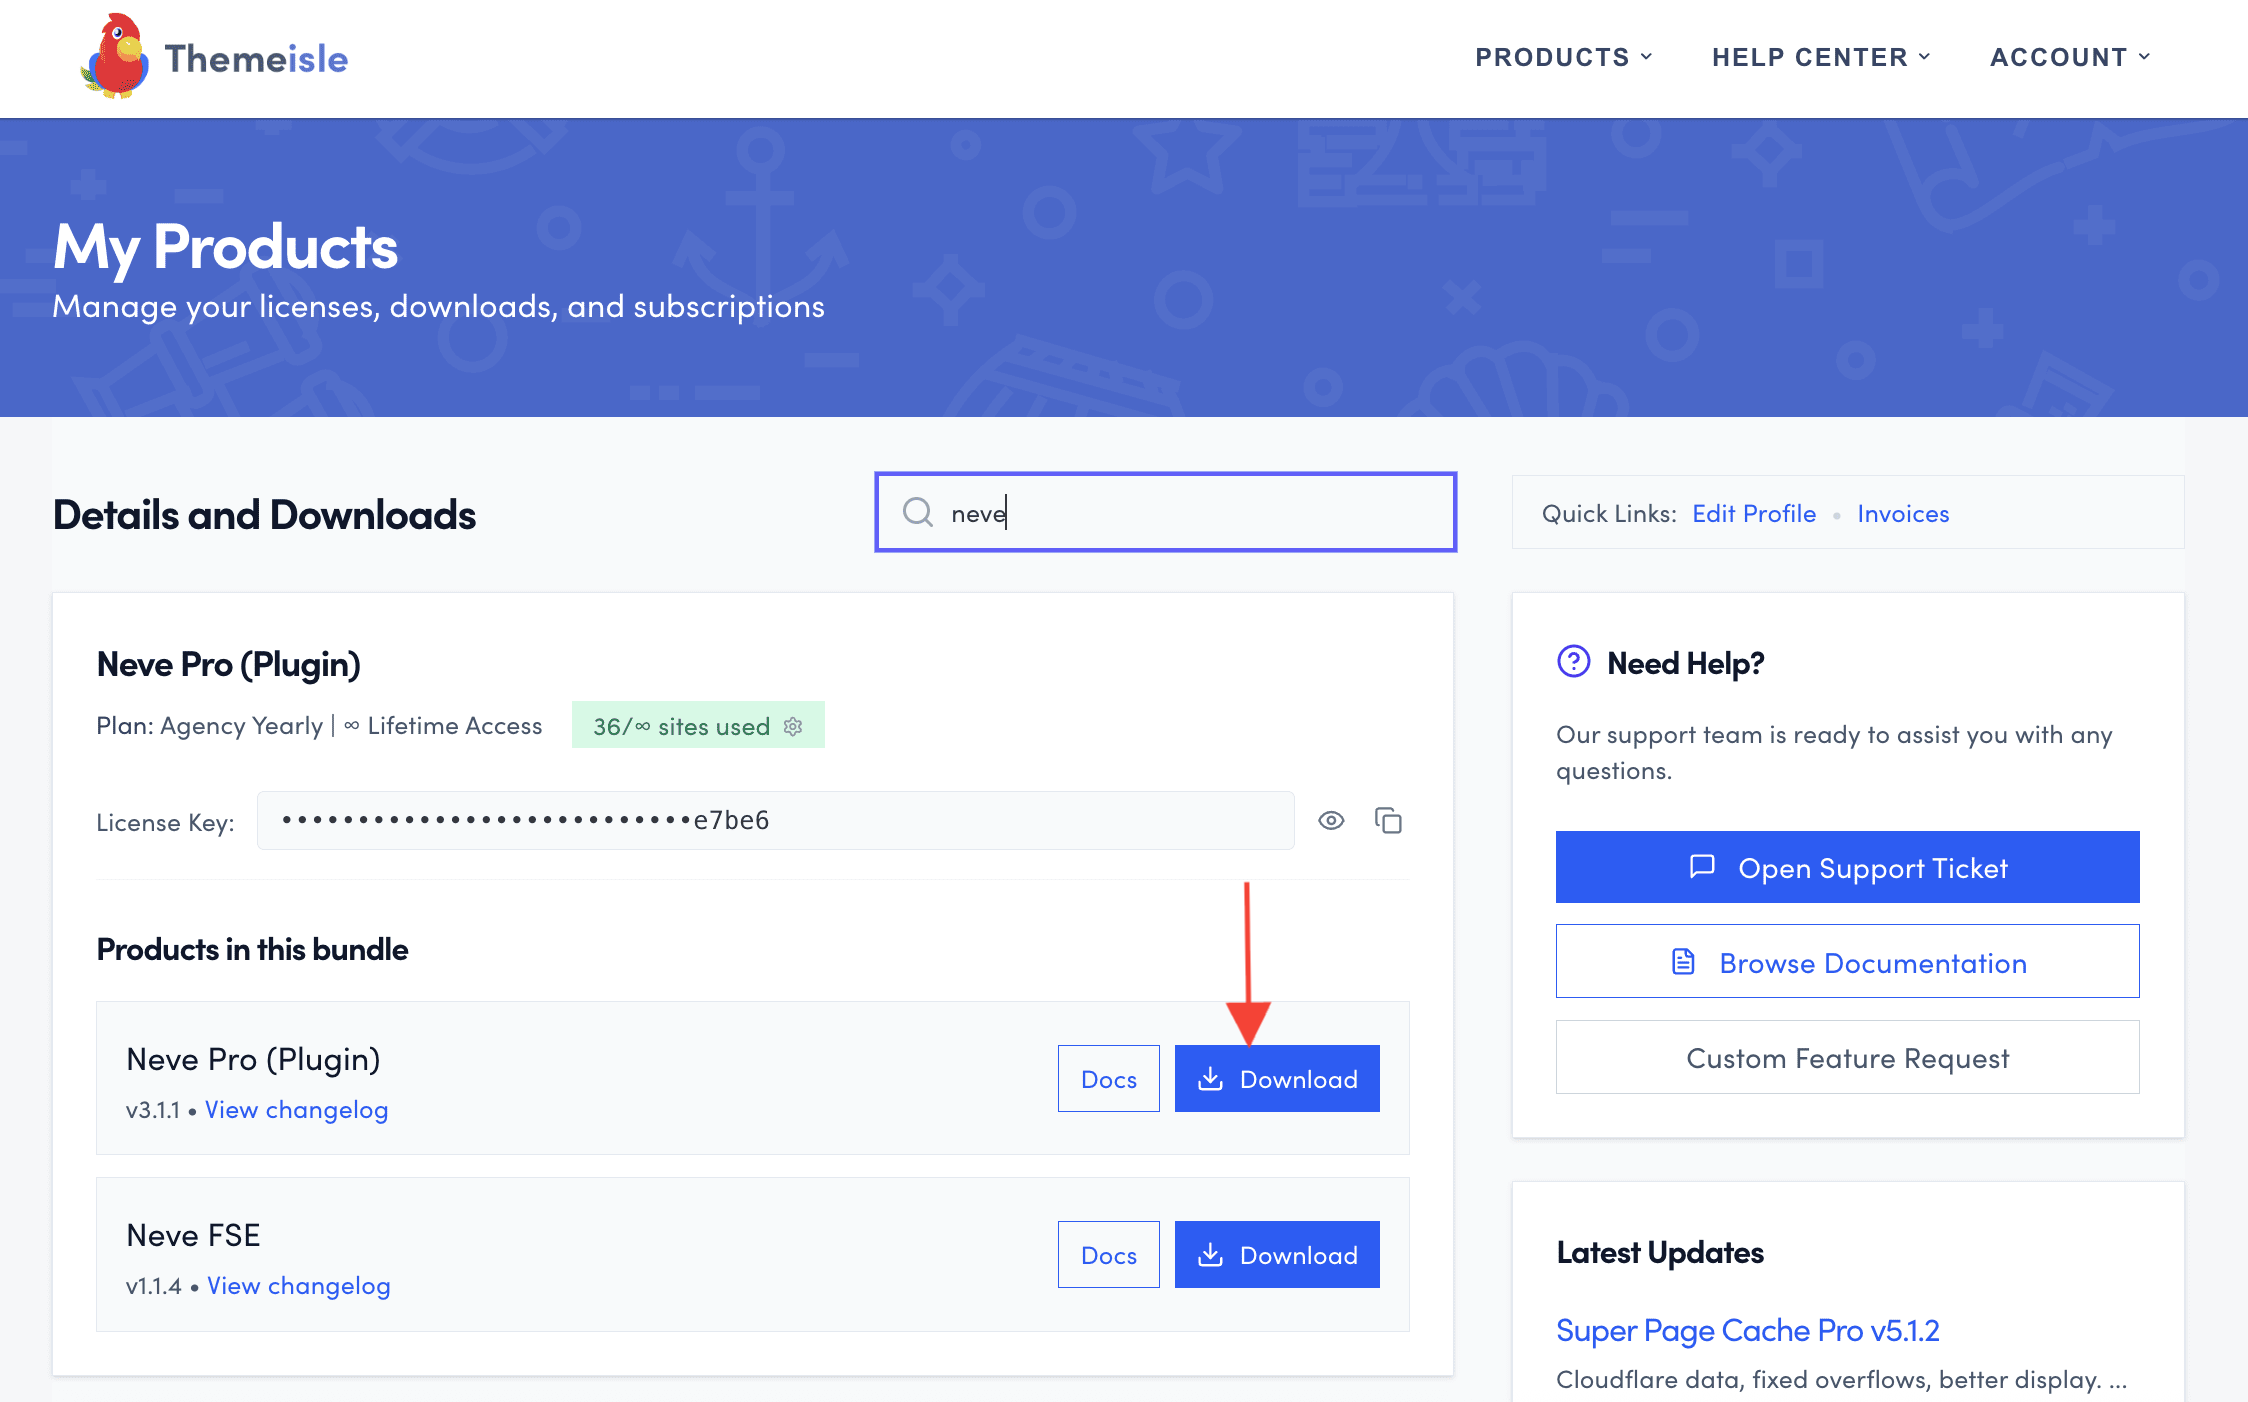
3. Access the Purchase history, scroll down and find Neve Pro ( Plugin ).
4. Click on the Download button to download the archive.
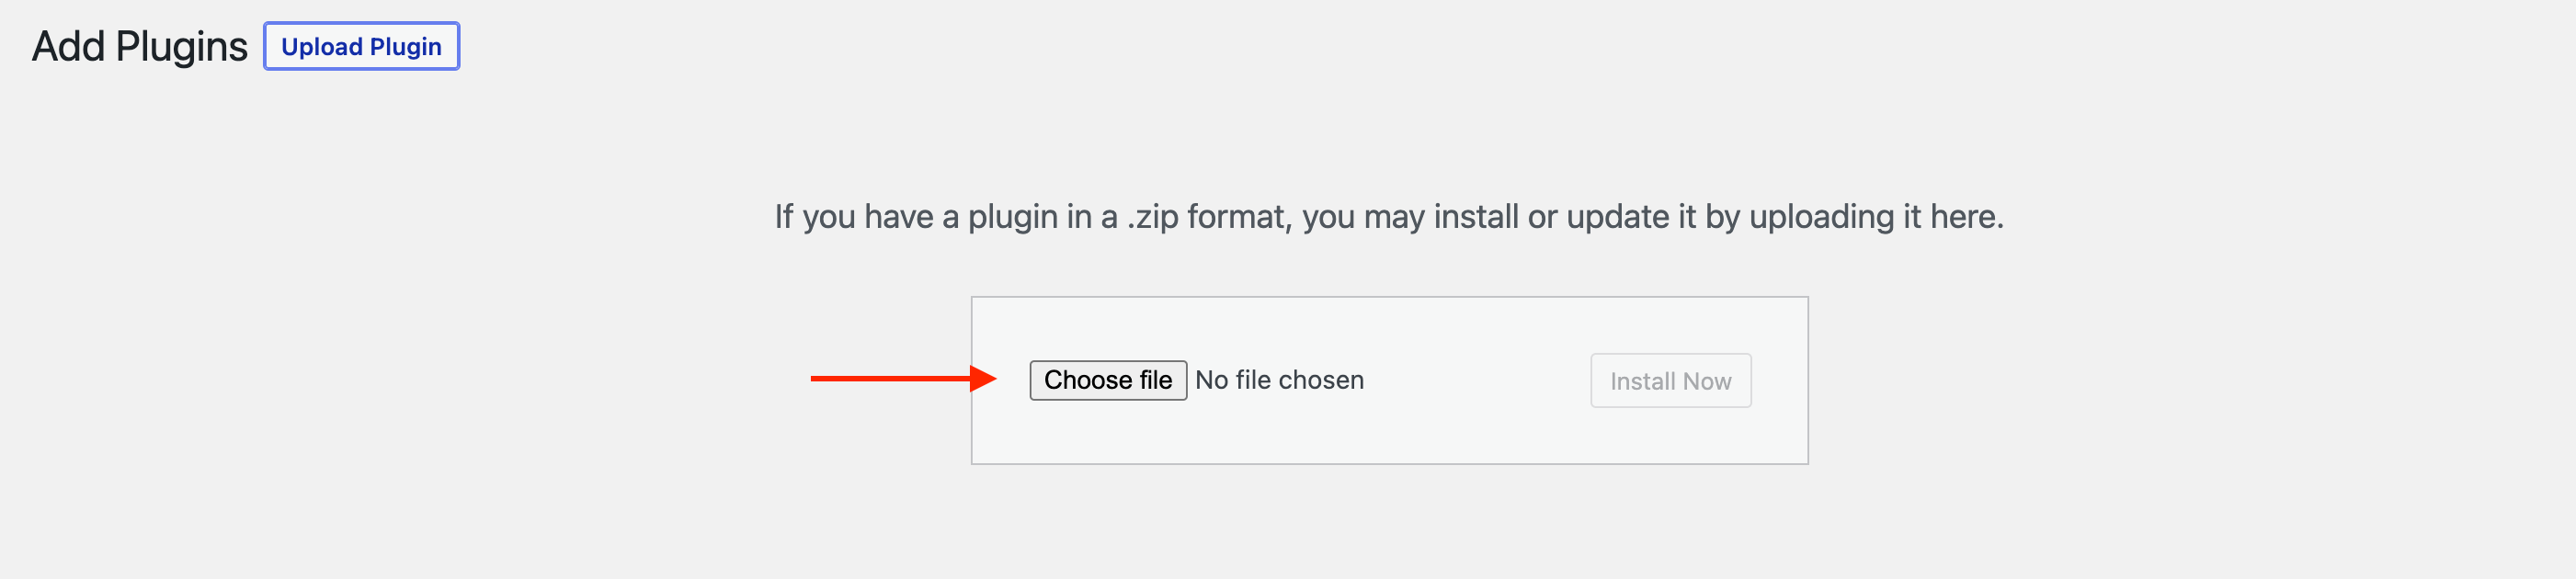
5. Navigate to Dashboard > Appearance > Plugins.
6. Click on Add New and upload the Neve Pro ( Plugin ) .zip, then click on Activate.

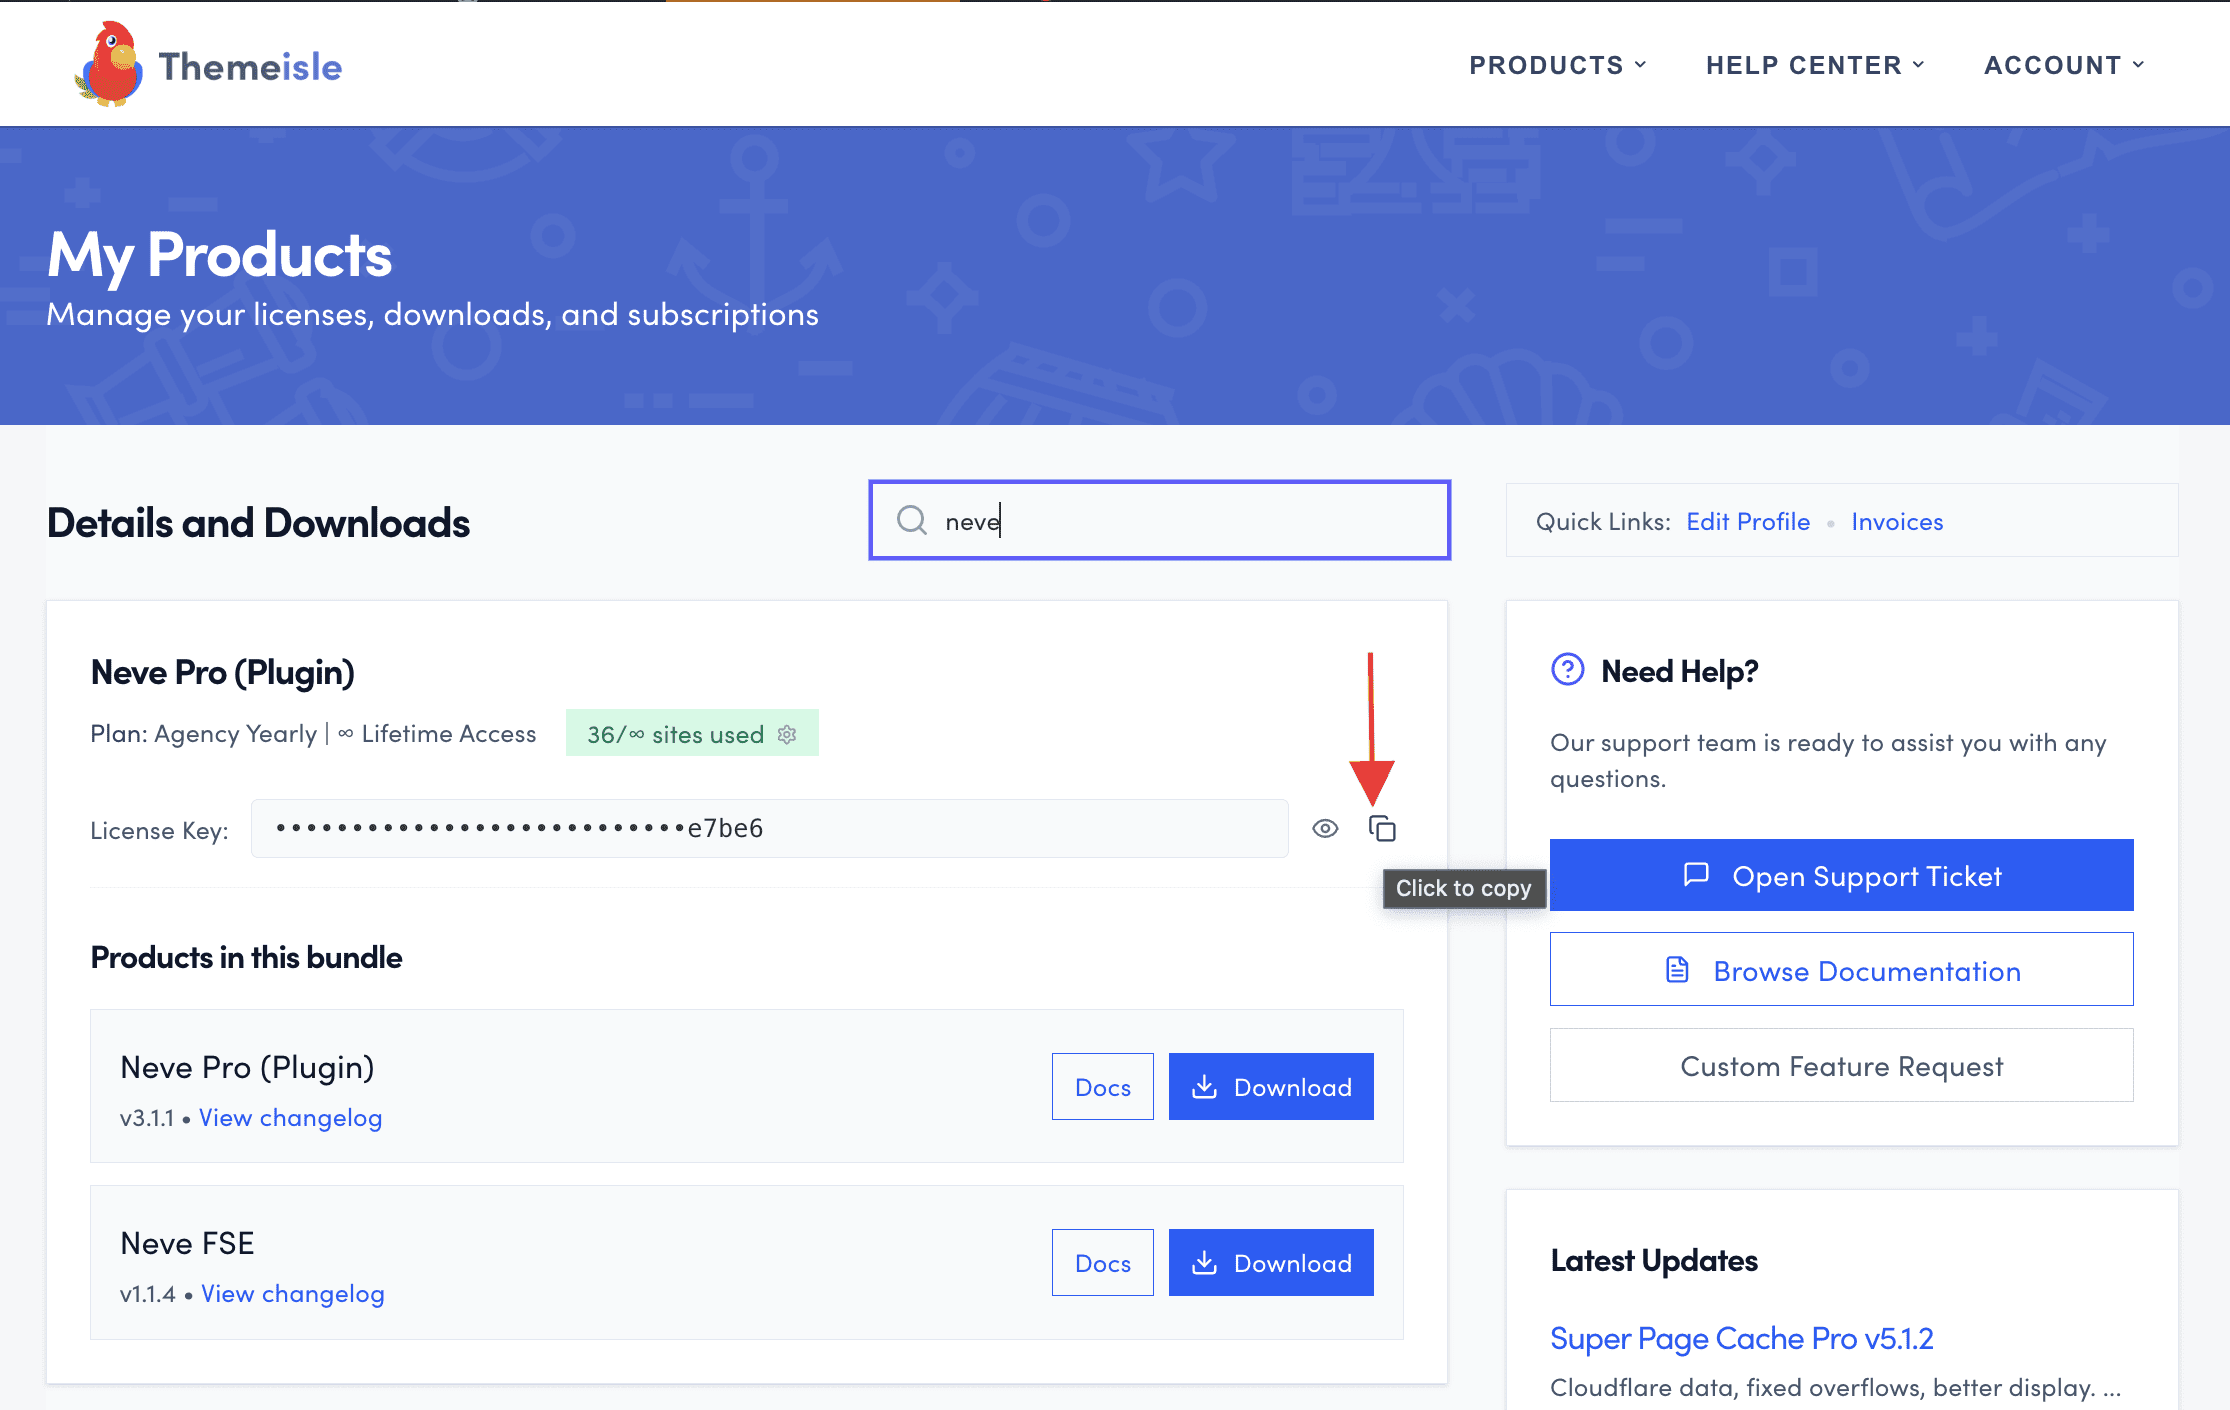
7. The license key is usually activated by default. If it's not, you can manually activate it. Click on it in the Themeisle store.
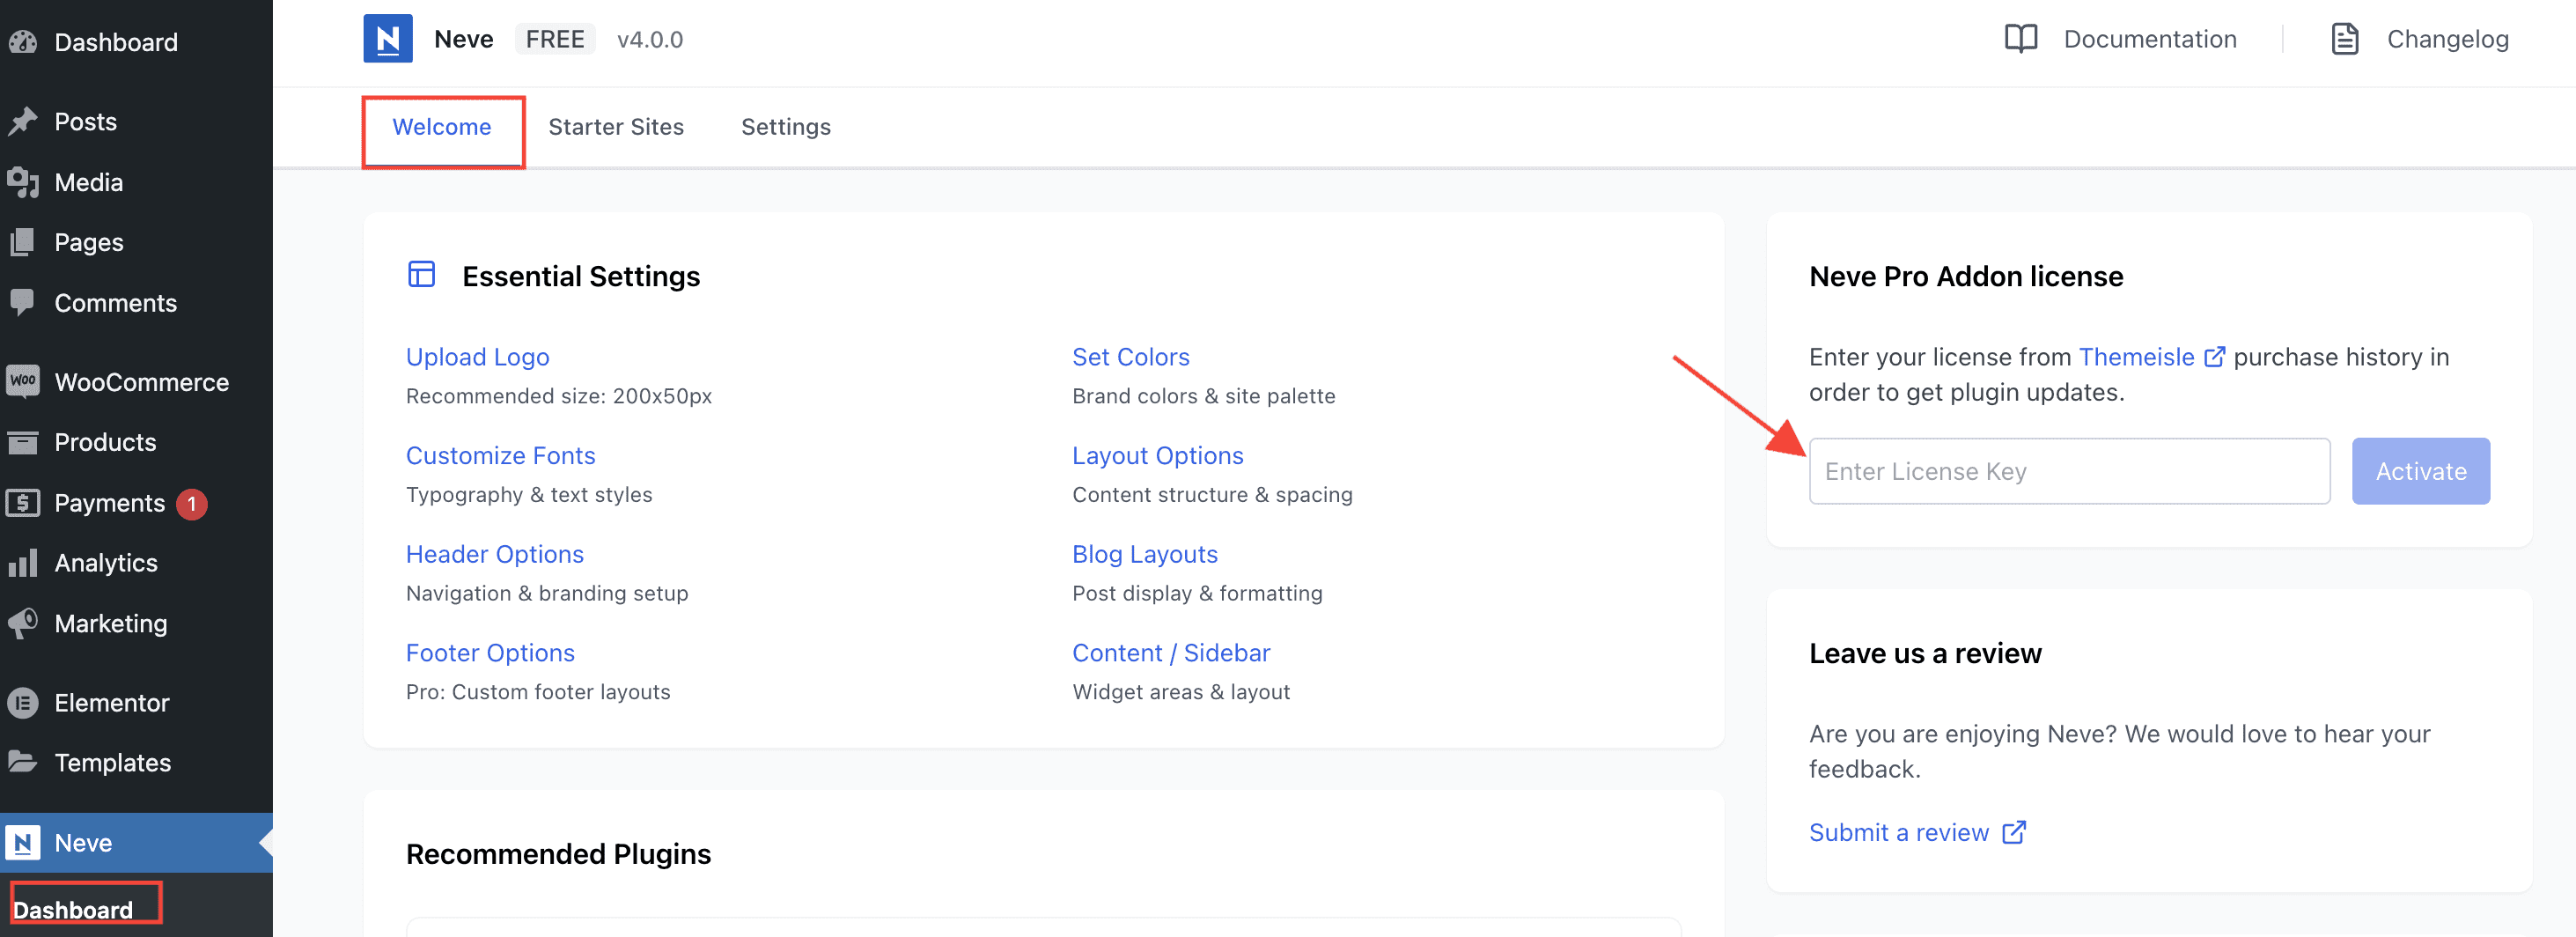
8. Go to Neve > Dashboard > Welcome and paste the license key.

Troubleshooting activation errors
"License Already Active" error on a new site
If you see a License Already Active error when activating Neve Pro on a new site, the most common cause is a corrupted or outdated plugin ZIP file downloaded previously.
📝 Note: Neve Pro licenses support unlimited activations, so you do not need to deactivate the license on other sites before activating it on a new one.
To fix this error, follow these steps:
- Log in to the ThemeIsle store with your credentials.
- Go to Purchase history, find Neve Pro (Plugin), and click Download to get a fresh copy of the plugin ZIP.
- In your WordPress dashboard, go to Plugins > Installed Plugins, deactivate Neve Pro, then click Delete to remove it.
- Go to Plugins > Add New, upload the freshly downloaded Neve Pro ZIP, and click Activate.
- Go to Neve > Dashboard > Welcome and re-enter your license key if prompted.
After completing these steps, the activation error should be resolved. If the issue persists after a server migration or domain change, see the section below.
License activation after server migration or domain change
If you have recently migrated your site to a new server, or changed your domain, you might see one of these two situations:
- Neve > Dashboard is blank or does not finish loading.
- The dashboard loads, but license activation fails.
If Neve Dashboard is blank after migration
The Neve > Dashboard screen depends on the WordPress REST API. If your REST API endpoint returns a 404 error after migration, dashboard data and license controls might not load.
To check this, open https://yourdomain.com/wp-json/ in your browser (replace yourdomain.com with your real domain).
- If it loads JSON data, the REST API is reachable.
- If it returns a 404 error, follow the permalink refresh steps below.
Fix REST API 404 errors by refreshing permalinks
- In your WordPress dashboard, go to Settings > Permalinks.
- Click Save Changes once.
- If
https://yourdomain.com/wp-json/still returns 404, select a different permalink structure and click Save Changes. - Switch back to your preferred structure (for example, Post name) and click Save Changes again.
- Recheck
https://yourdomain.com/wp-json/and then reload Neve > Dashboard.
If /wp-json/ still returns 404
After saving permalinks, a persistent 404 usually means URL rewriting is still not working on the server.
- On Apache, make sure your site is using the standard WordPress
.htaccessrewrite rules. - On Nginx, make sure WordPress rewrite rules are configured correctly for pretty permalinks.
- Contact your hosting provider and ask them to verify URL rewriting and REST API routing after the migration.
If the dashboard loads but activation still fails
If Neve > Dashboard loads correctly, continue with the old-domain unlinking flow below to remove the previous domain from your ThemeIsle account and activate on the new site.
To remove the old domain and activate on your new site:
- Log in to the ThemeIsle store with your credentials.
- Go to Purchase history, find Neve Pro (Plugin), and click sites used.

- Locate the old server or domain in the list and click the remove icon next to it to unlink it from your license.

- Go to your new site's WordPress dashboard, navigate to Neve > Dashboard > Welcome, and paste your license key to activate it.
Once activation completes, your new site should appear in the Manage your domains list in your ThemeIsle account, confirming the license is active on the new site.
📝 Note: If you no longer have access to the old server, you can skip deactivating the license there — removing the domain from your ThemeIsle account is sufficient.
If the issue persists after following these steps, contact support for further assistance.
