
Custom Layouts Module Documentation
The Custom Layouts module in Neve PRO lets you create and assign custom header, footer, sidebar, and content layouts to any part of your site using conditional logic.
For more details check out the full Neve documentation and Neve PRO documentation.
Important: The Custom Layouts module is part of all three Neve PRO plans: Personal, Business and Agency.
In this article
Using the Module
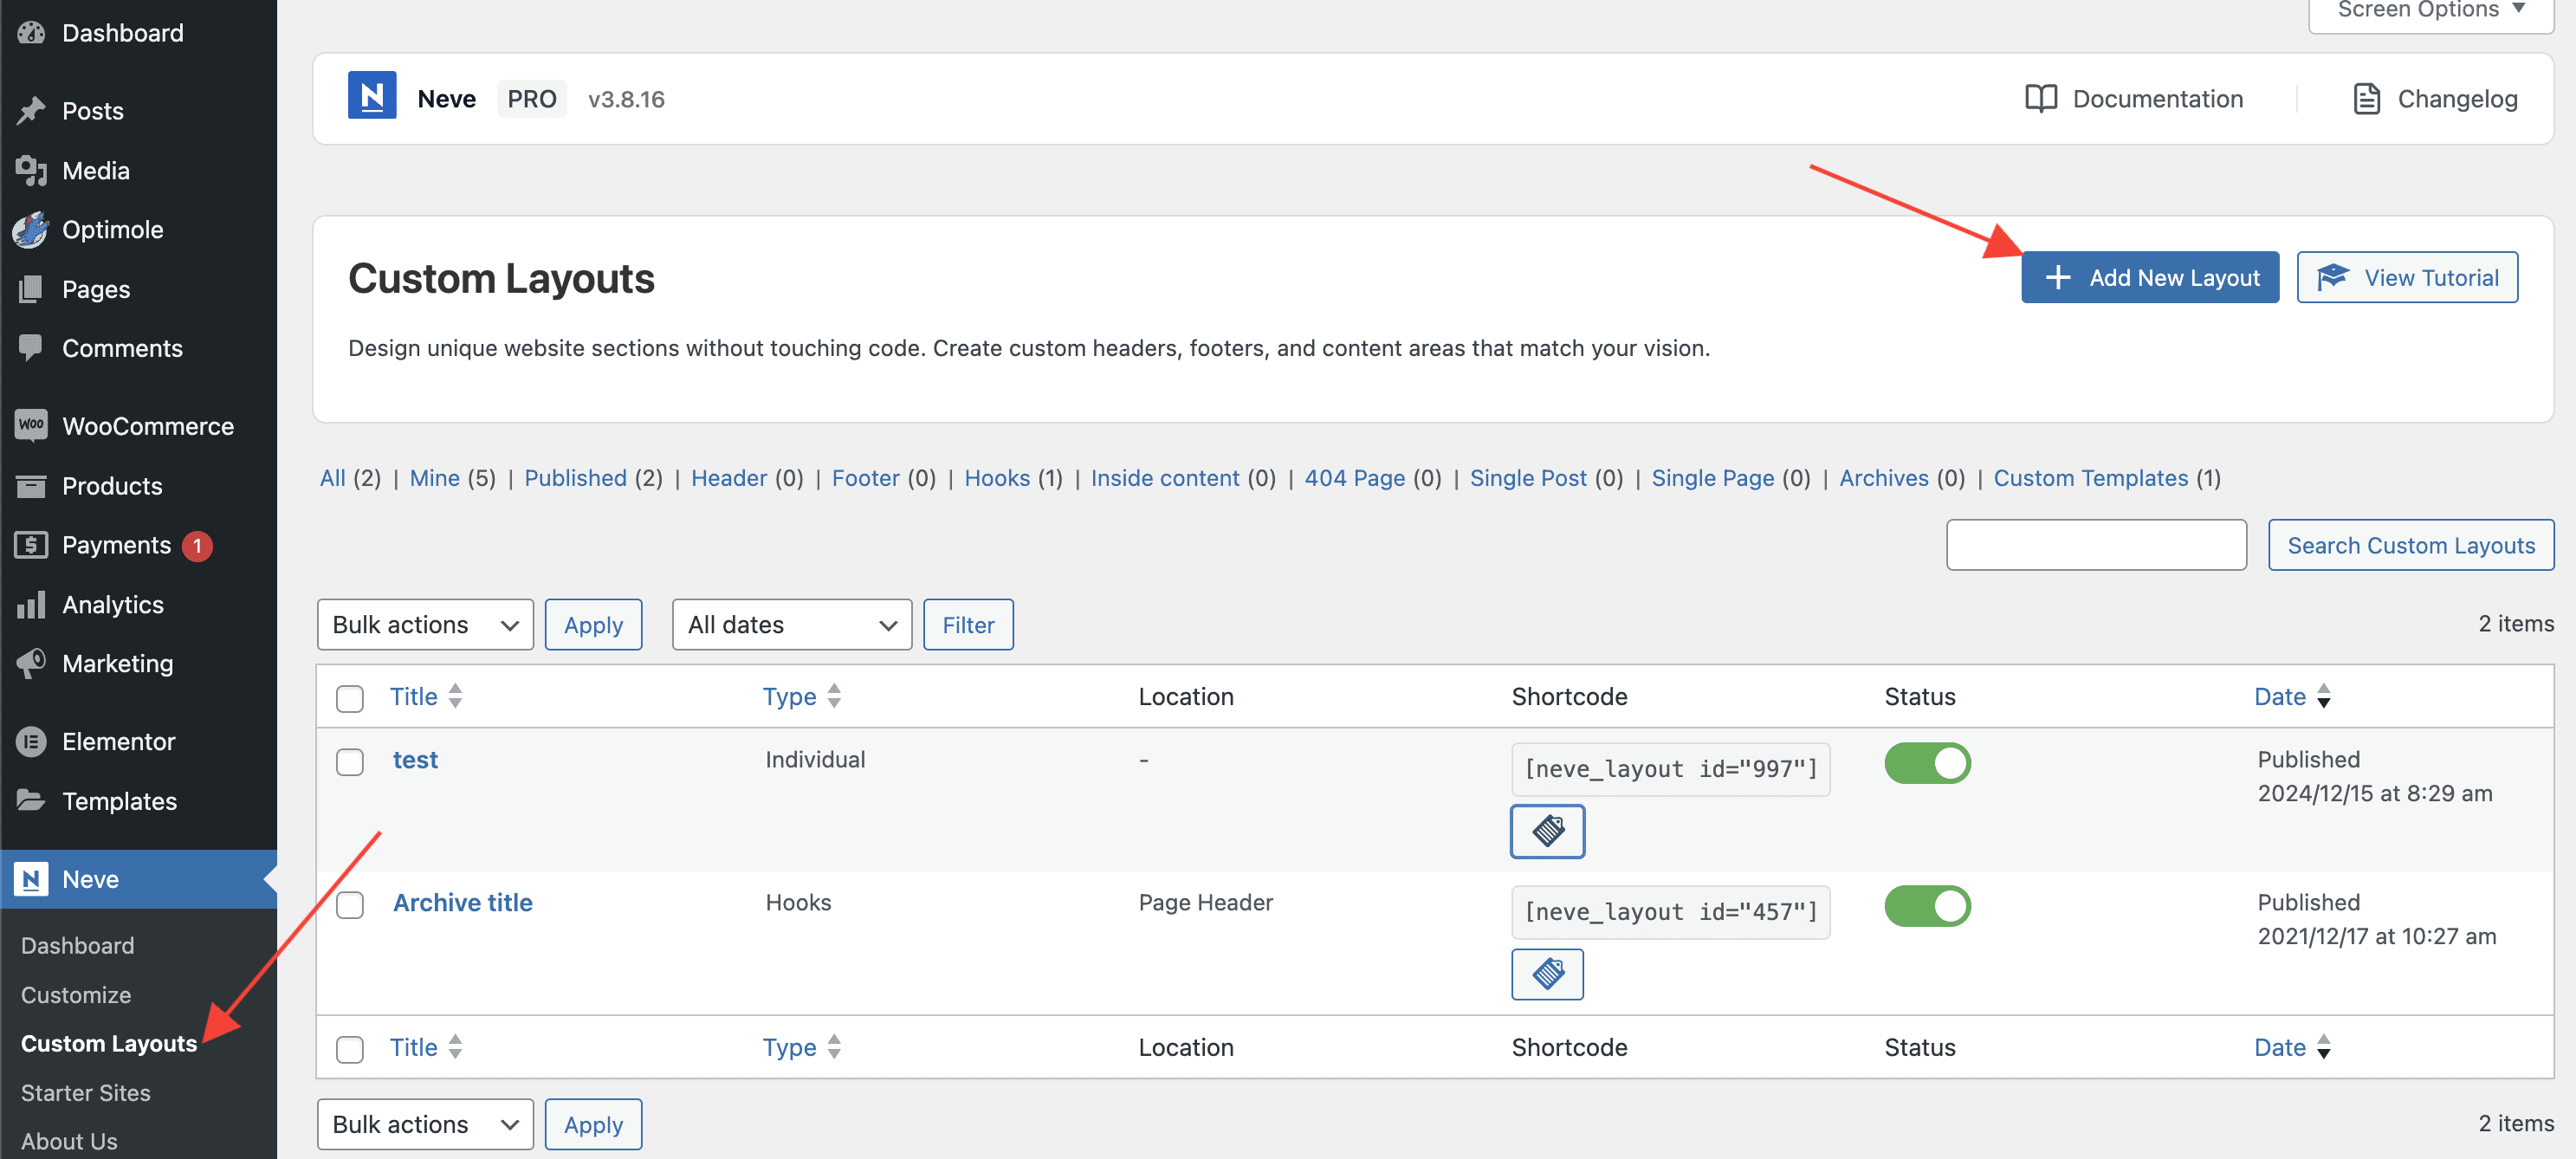
1. Navigate to Neve > Custom Layouts.
2. Click on the Add New button.
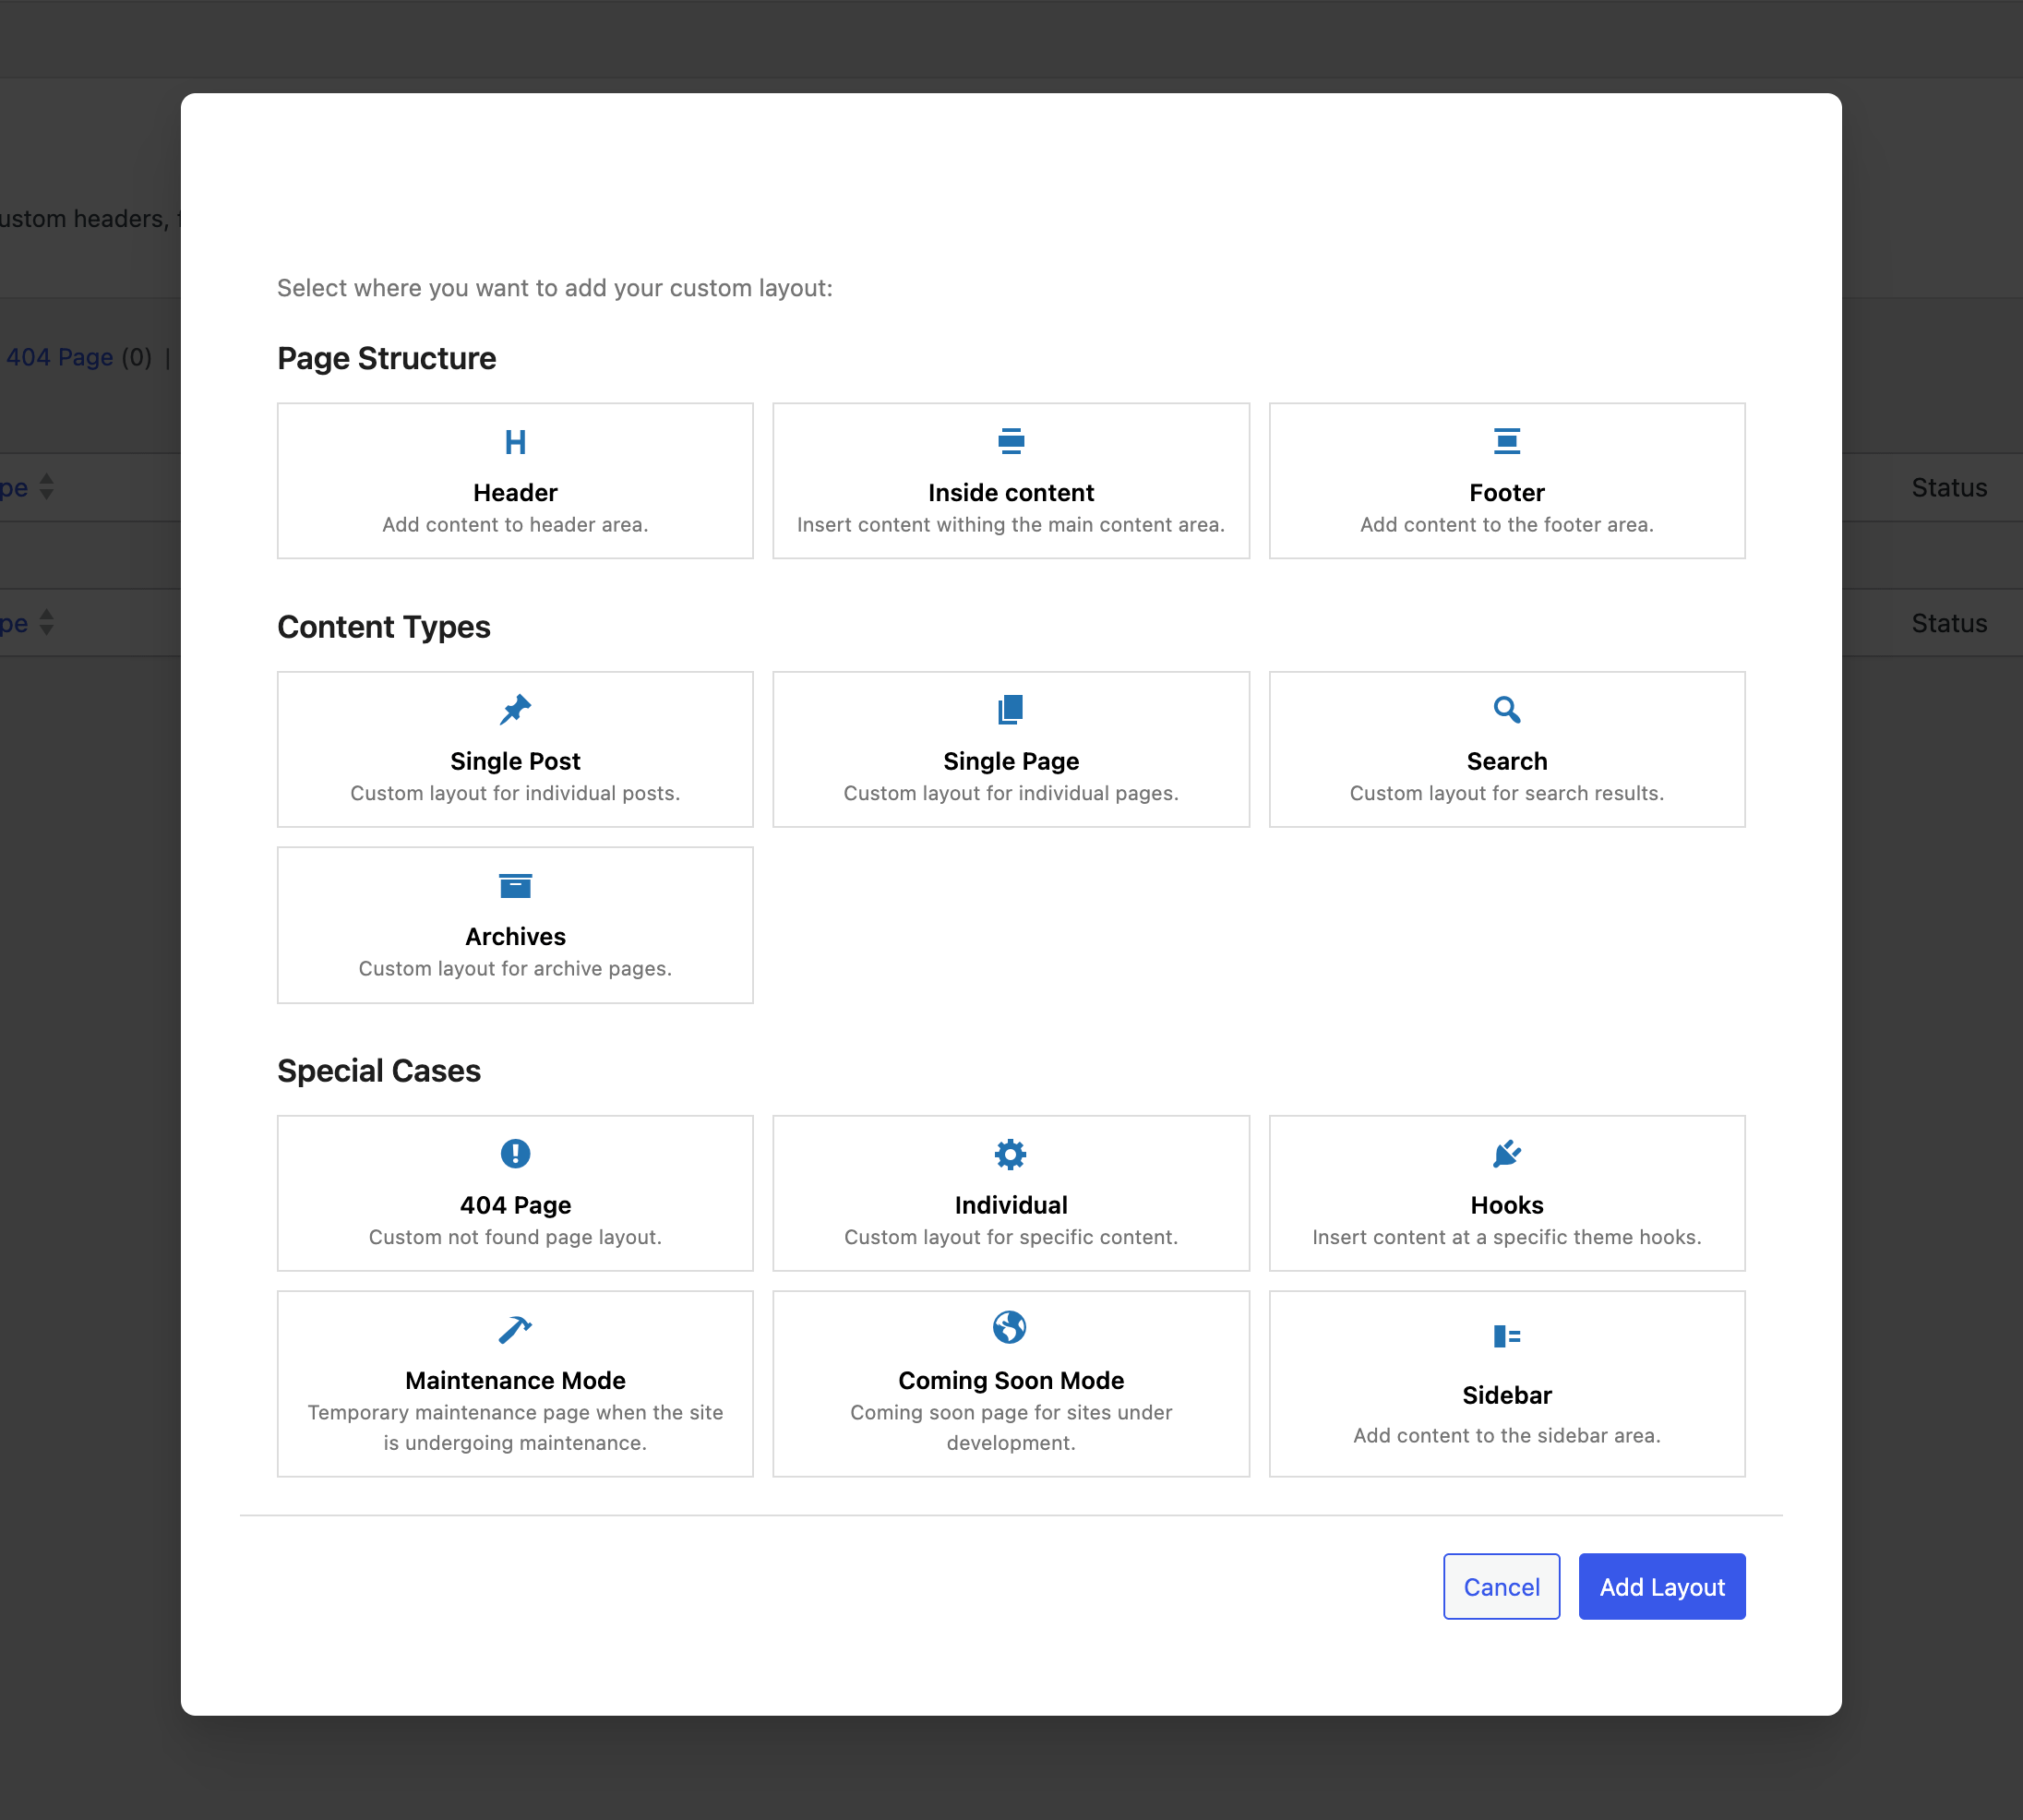
3. From this moment, you need to decide what type of custom layout you want to create, and depending on what you choose, the settings and locations will be different.
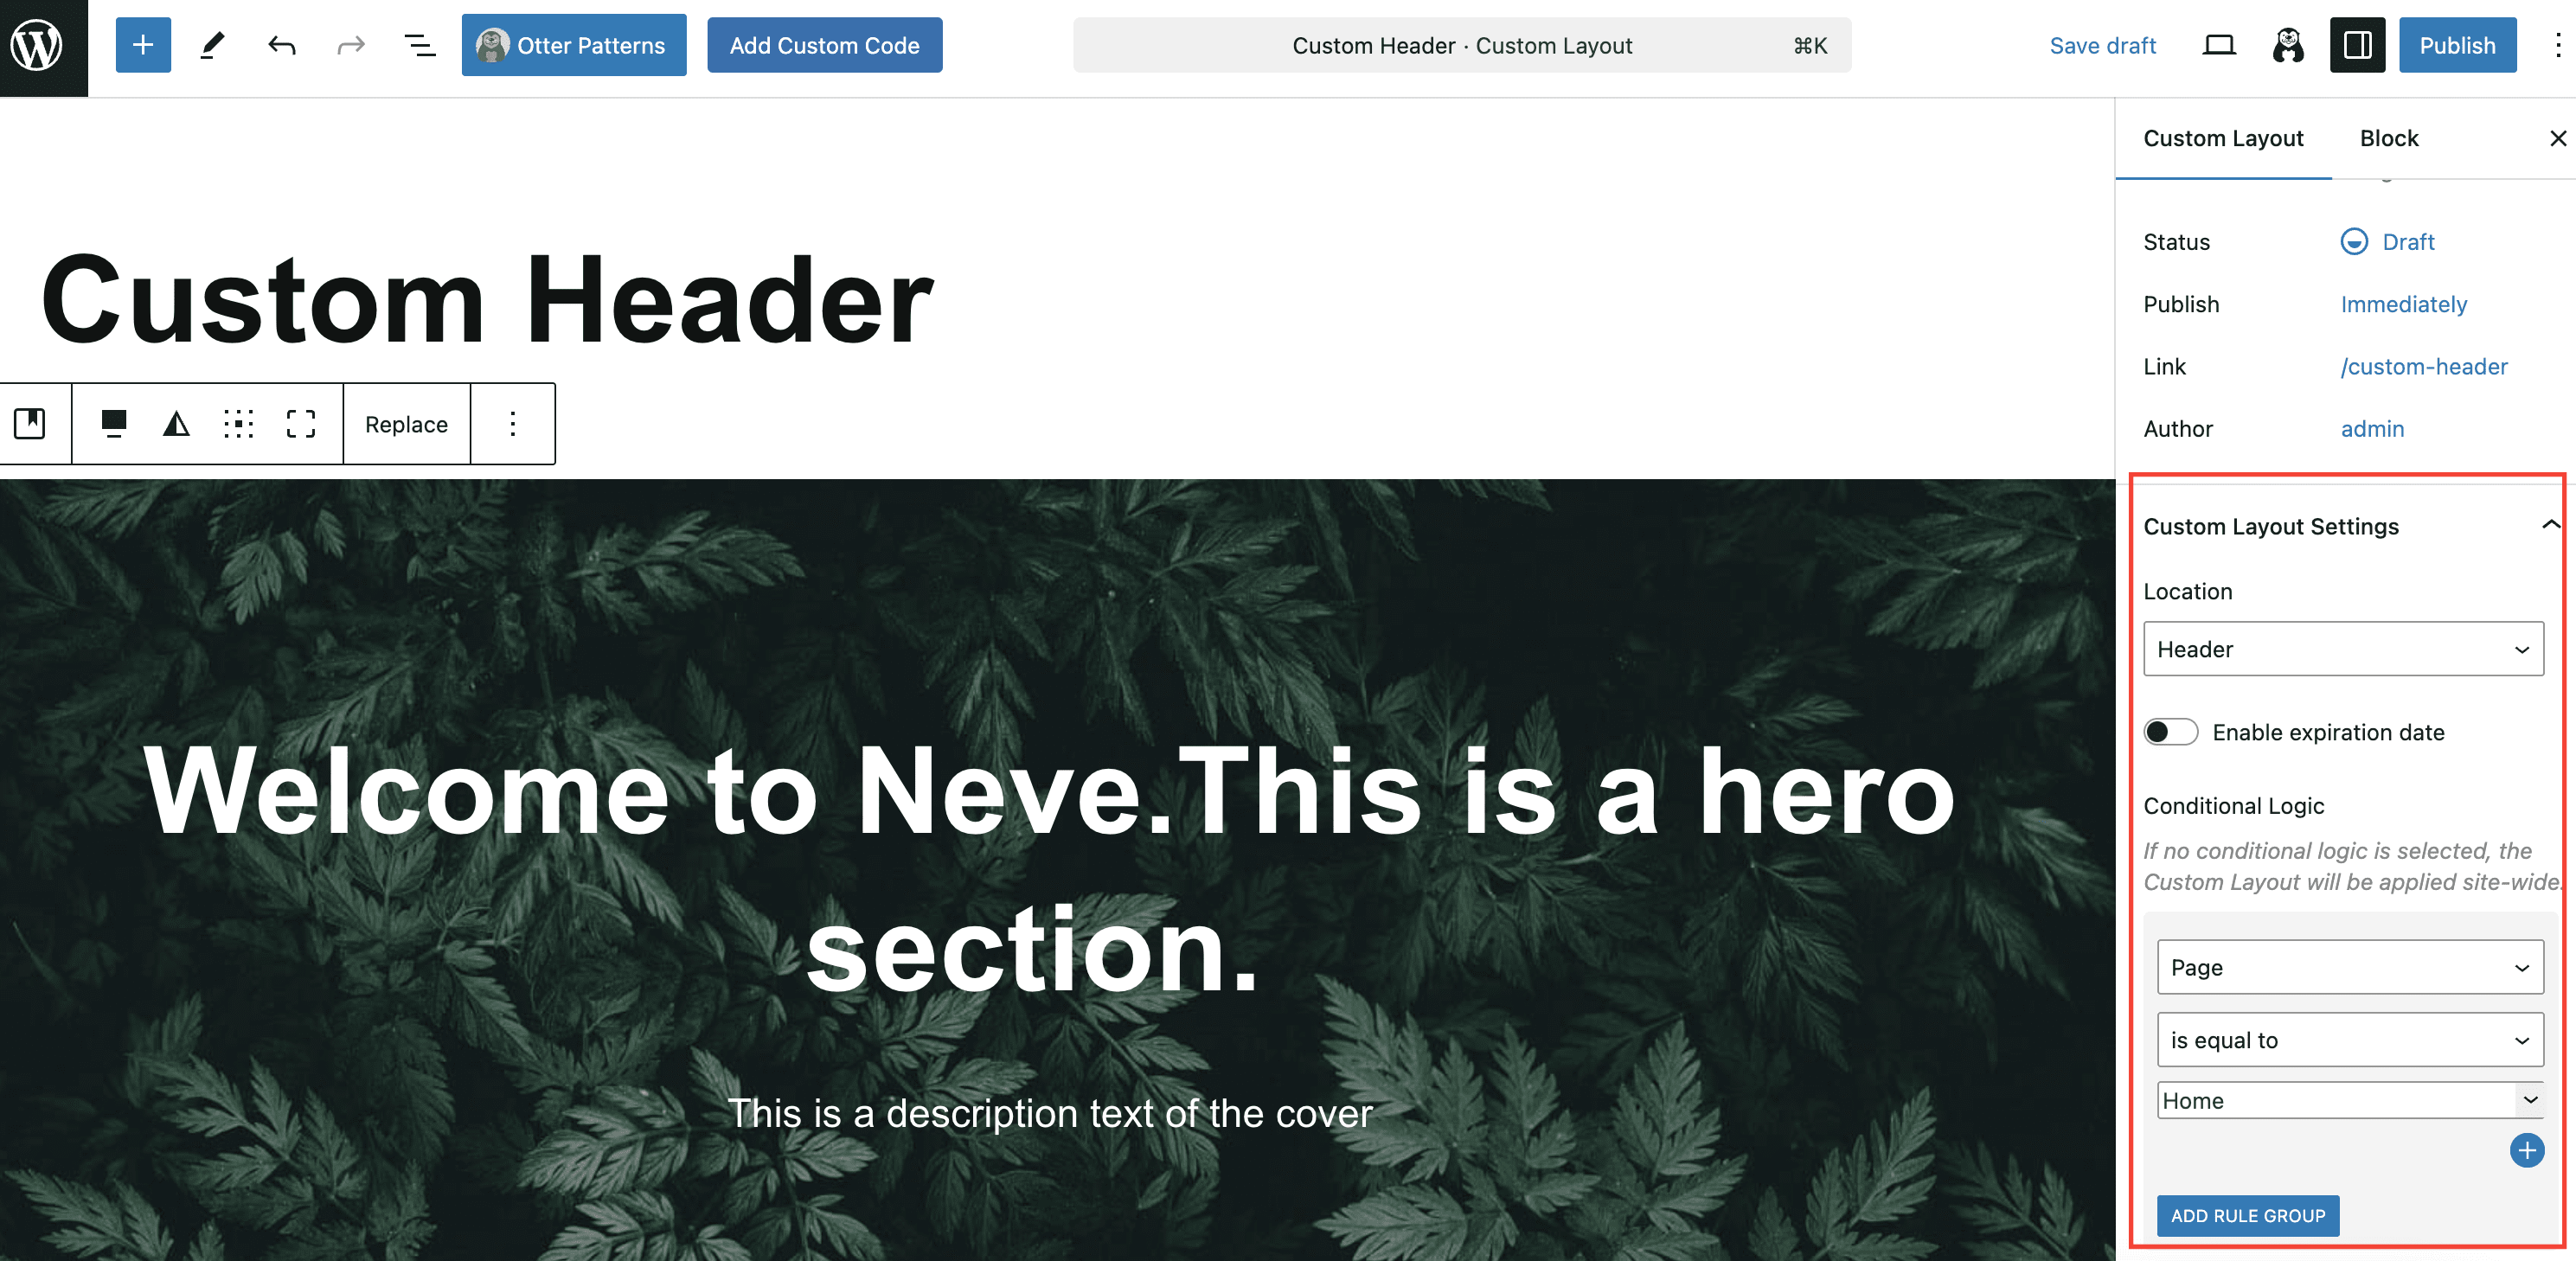
In the Conditional Logic section, you decide the criteria based on which the Custom Layout will be used on a page or not.
Depending on that, you will also have access to dedicated Magic Tags to display dynamic content for each page.
Layout Types
The following layout types are available when creating a Custom Layout:
Page Structure
- Header: Add content to the header area.
- Inside content: Insert content within the main content area.
- Footer: Add content to the footer area.
Content Types
- Single Post: Custom layout for individual posts.
- Single Page: Custom layout for individual pages.
- Search: Custom layout for search results pages.
- Archives: Custom layout for archive pages.
Special Cases
- 404 Page: Custom layout for the "not found" page.
- Individual: Custom layout for specific content items.
- Hooks: Insert content at a specific theme hook location. See Neve Hooks for details.
- Maintenance Mode: Displays a temporary maintenance page to all non-logged-in visitors while the site is being updated.
- Coming Soon Mode: Displays a landing page for sites that are still under construction.
- Sidebar: Add content to the sidebar area.
Neve Hooks
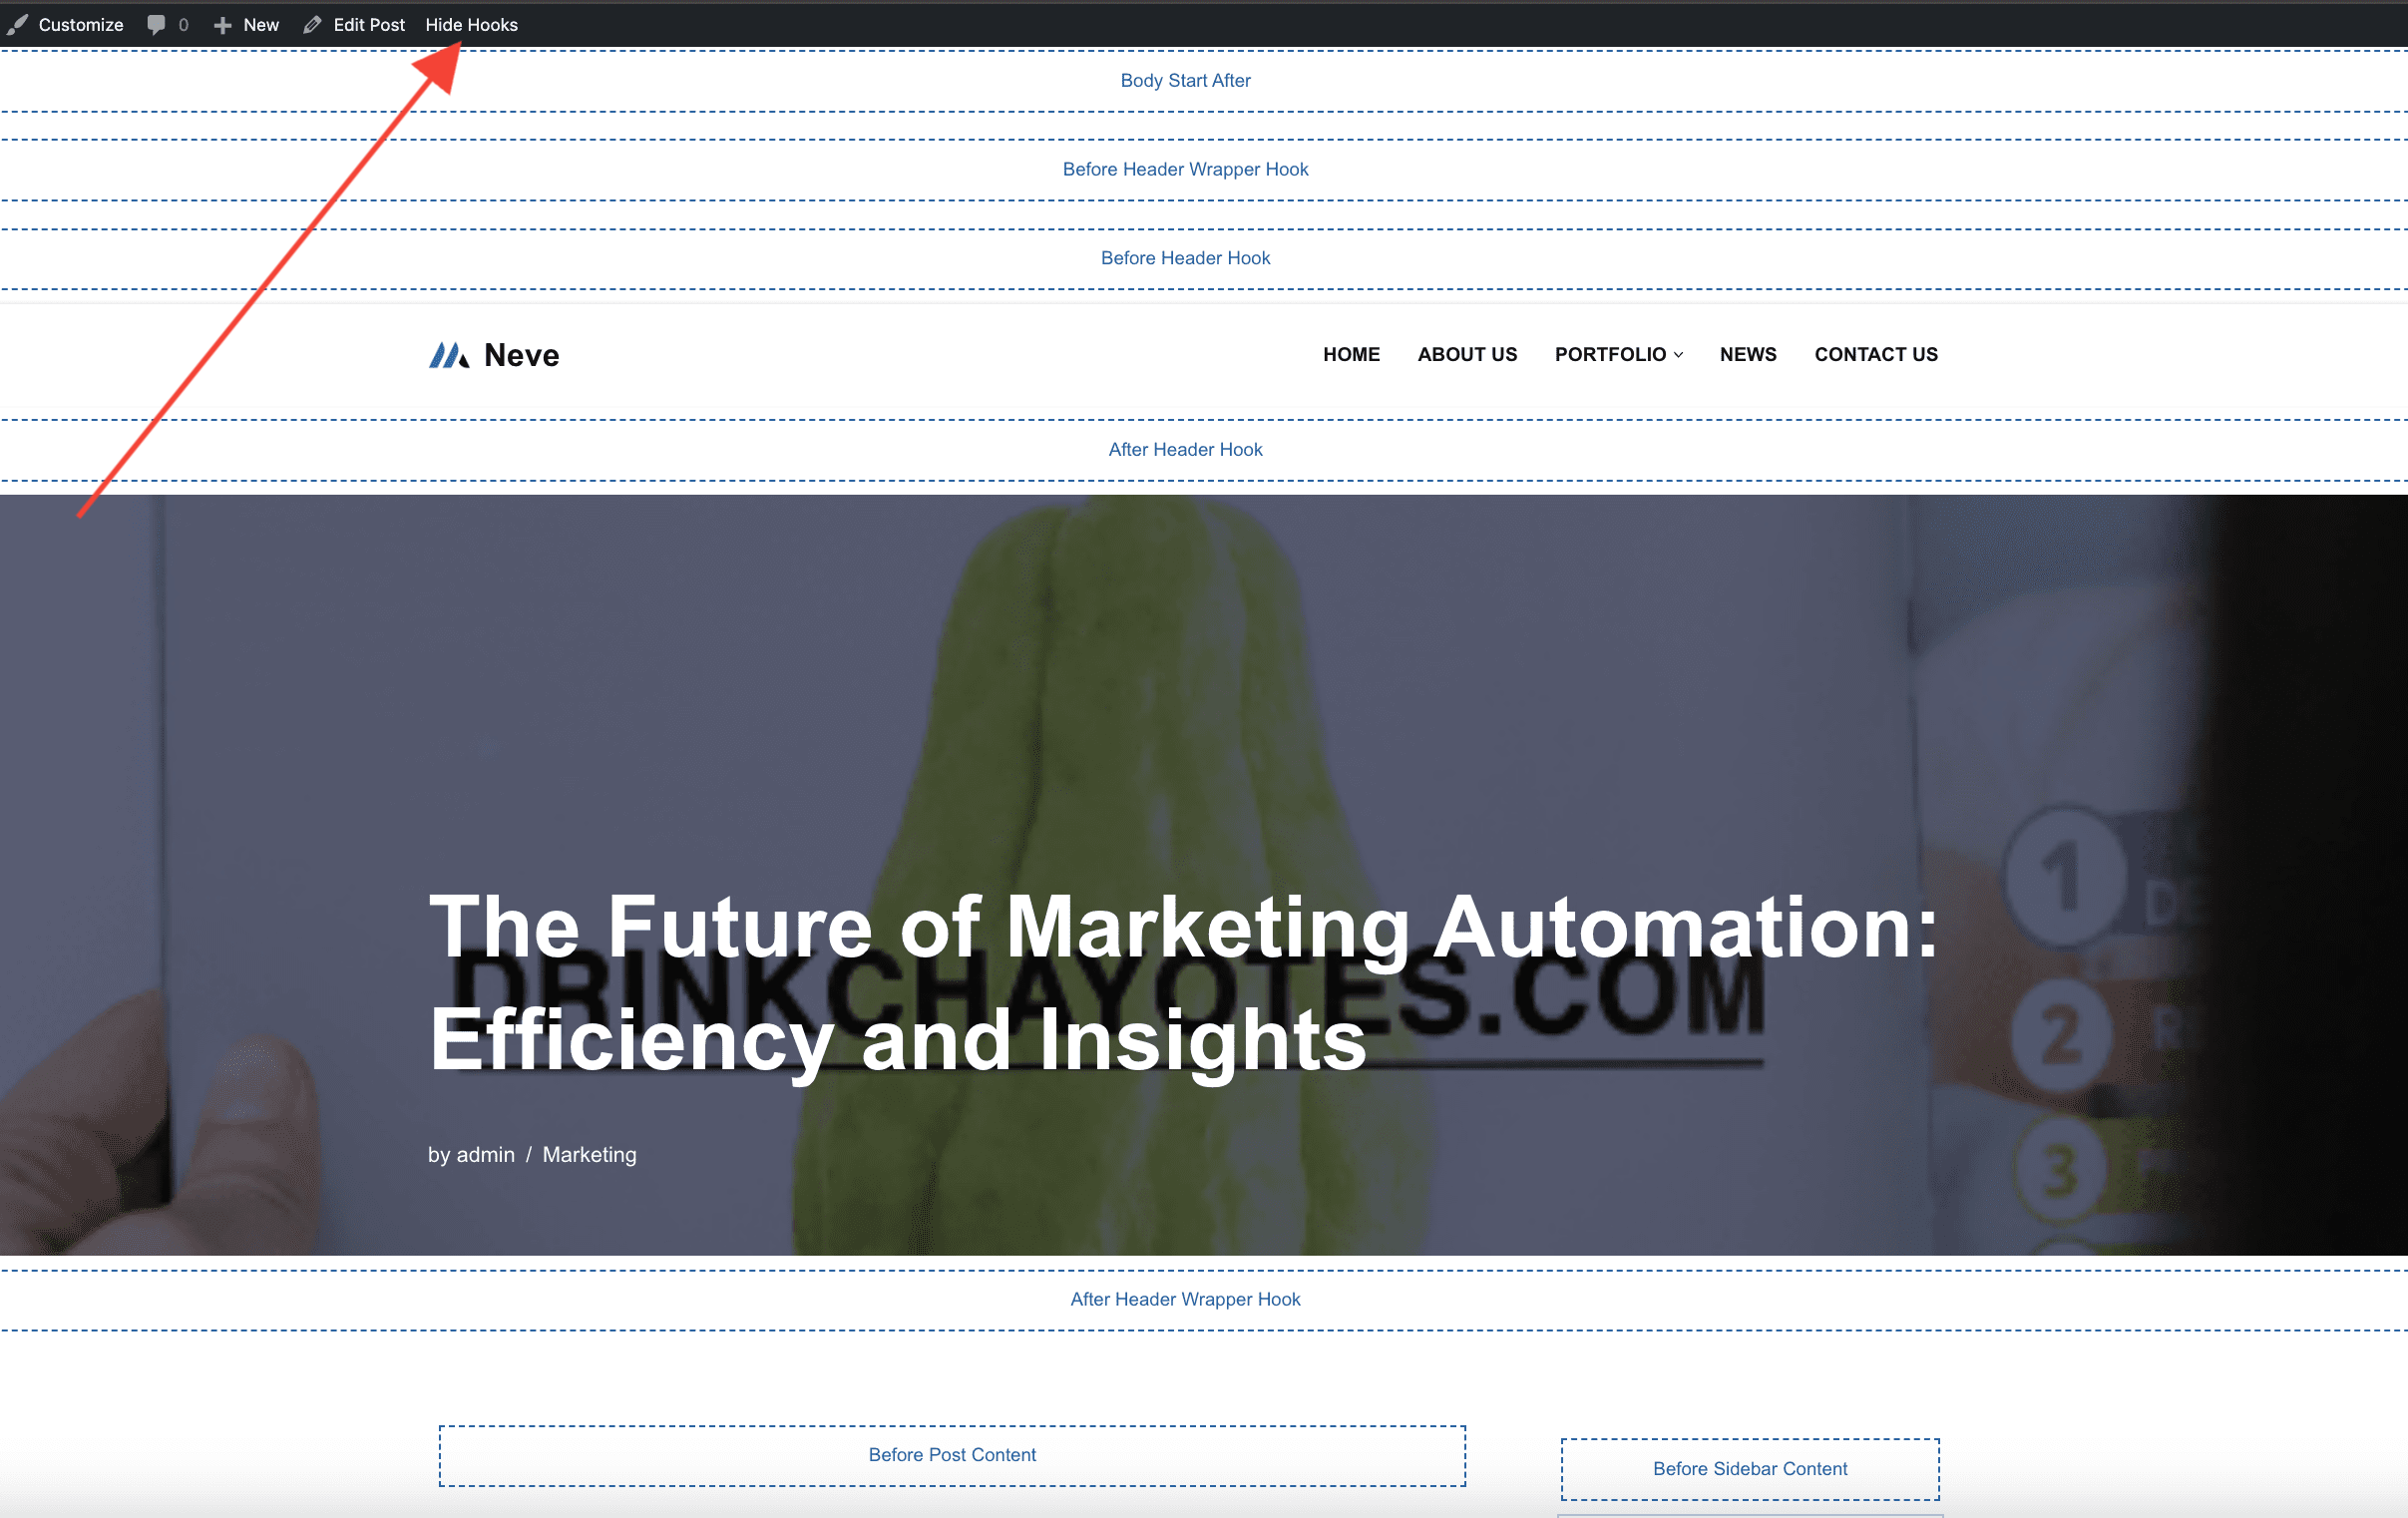
Custom Layouts can be inserted in specific places (hooks) of the theme. To have a visual representation of where each hook is located, just click on the Show Hooks link in the top admin bar, when visiting your site.
Troubleshooting: Custom Layout or blocks not appearing
If your Custom Layout changes are visible in the editor but not on the live site, check the following before contacting support:
- Make sure the layout is Published and that its Conditional Logic matches the page where you are testing.
- Test as a visitor (logged out), because some layouts are configured by user role or logged-in state.
- Clear all caches that can serve old page output:
- Browser cache
- WordPress/page cache plugin cache
- Server cache (hosting-level)
- CDN cache (if enabled)
- Retest in a private/incognito window and, if possible, from another device or network.
If the Custom Layout is not loaded at all
- Recheck the layout type and where it should appear (for example Header, Hooks, Single Post, or Archives).
- Review Conditional Logic include/exclude rules and make sure they match the exact page type you are testing.
- Confirm there are no other Custom Layouts with overlapping conditions that could override the expected output.
If the layout is missing only on translated pages
- Check that the shortcode on the translated page still uses the original-language layout ID, not the translated layout's ID.
- Confirm the translated layout is linked to the original as its translation rather than created as a separate layout.
- See Individual layouts on multilingual sites for the full explanation.
If the layout loads but a block inside it does not display
- The layout can be active while an embedded block still fails to render or trigger on the front end.
- This is common with dynamic or trigger-based blocks (for example Otter Popup blocks) when cached page output is still being served.
- After changing either the block settings or the Custom Layout conditions, purge all caches again and retest in an incognito window.
If a plugin's output appears more than once
Some plugins add their output only once while the page content is being processed. A Custom Layout is processed the same way as the page content, so those plugins can run again and repeat their output. The most common symptom is duplicated inline <script> blocks in the page source. This is usually harmless, but it matters when the repeated code counts something, such as analytics events.
This applies to Custom Layouts built with the default WordPress editor. Layouts built with Elementor, Brizy, or Beaver Builder are not affected.
To render Custom Layout content without running the global the_content filter a second time, add the following to your child theme's functions.php file or to a code snippets plugin:
add_filter( 'neve_custom_layout_use_the_content_filter', '__return_false' );Neve then processes the layout content through its own scoped content filter, so blocks and shortcodes still render. The filter also receives the ID of the Custom Layout being rendered as a second argument, so you can limit the change to specific layouts.
⚠️ Warning: Some plugins and blocks rely on the global the_content filter to work inside Custom Layouts. If something in your layout stops rendering after you add this filter, remove it.
When using triggered blocks such as Otter Popup
Popup triggers and query-parameter-based behavior can appear inconsistent if a cached version of the page is loaded.
⚠️ Warning: If your layout conditions are correct but the popup does not trigger, clear browser, plugin, server, and CDN caches, then test again in a private/incognito window or from another device/network.