
How to create a child theme for Neve
If you using Neve and want to make some changes in the theme without the fear of losing them on the next theme update, a child theme is a good solution. It inherits the functionality, features, and styles of the Neve theme and can be customized according to your needs. When a new Neve version appears, you can update it, and the customizations available in the child theme will stay the same.
- 🔁 secure updates - you never modify the parent Neve theme, so you can safely update it once a release is made.
- 🪄 simple to customize - enables you to make changes to template files and functions with ease.
In this article
Install child theme
1. Download the basic child-theme using this link.
⚠️ Important: The downloaded file is a child theme, not a plugin. Do not upload it from Plugins > Add New — it must be installed as a theme. See Common mistake: uploading the child theme as a plugin if you received an installation error.
2. In your WordPress Dashboard, go to Appearance > Themes.
3. Click Add New, then click Upload Theme.
4. Click Choose File, select the child theme ZIP you downloaded, then click Install Now.
5. Once the installation completes, click Activate.
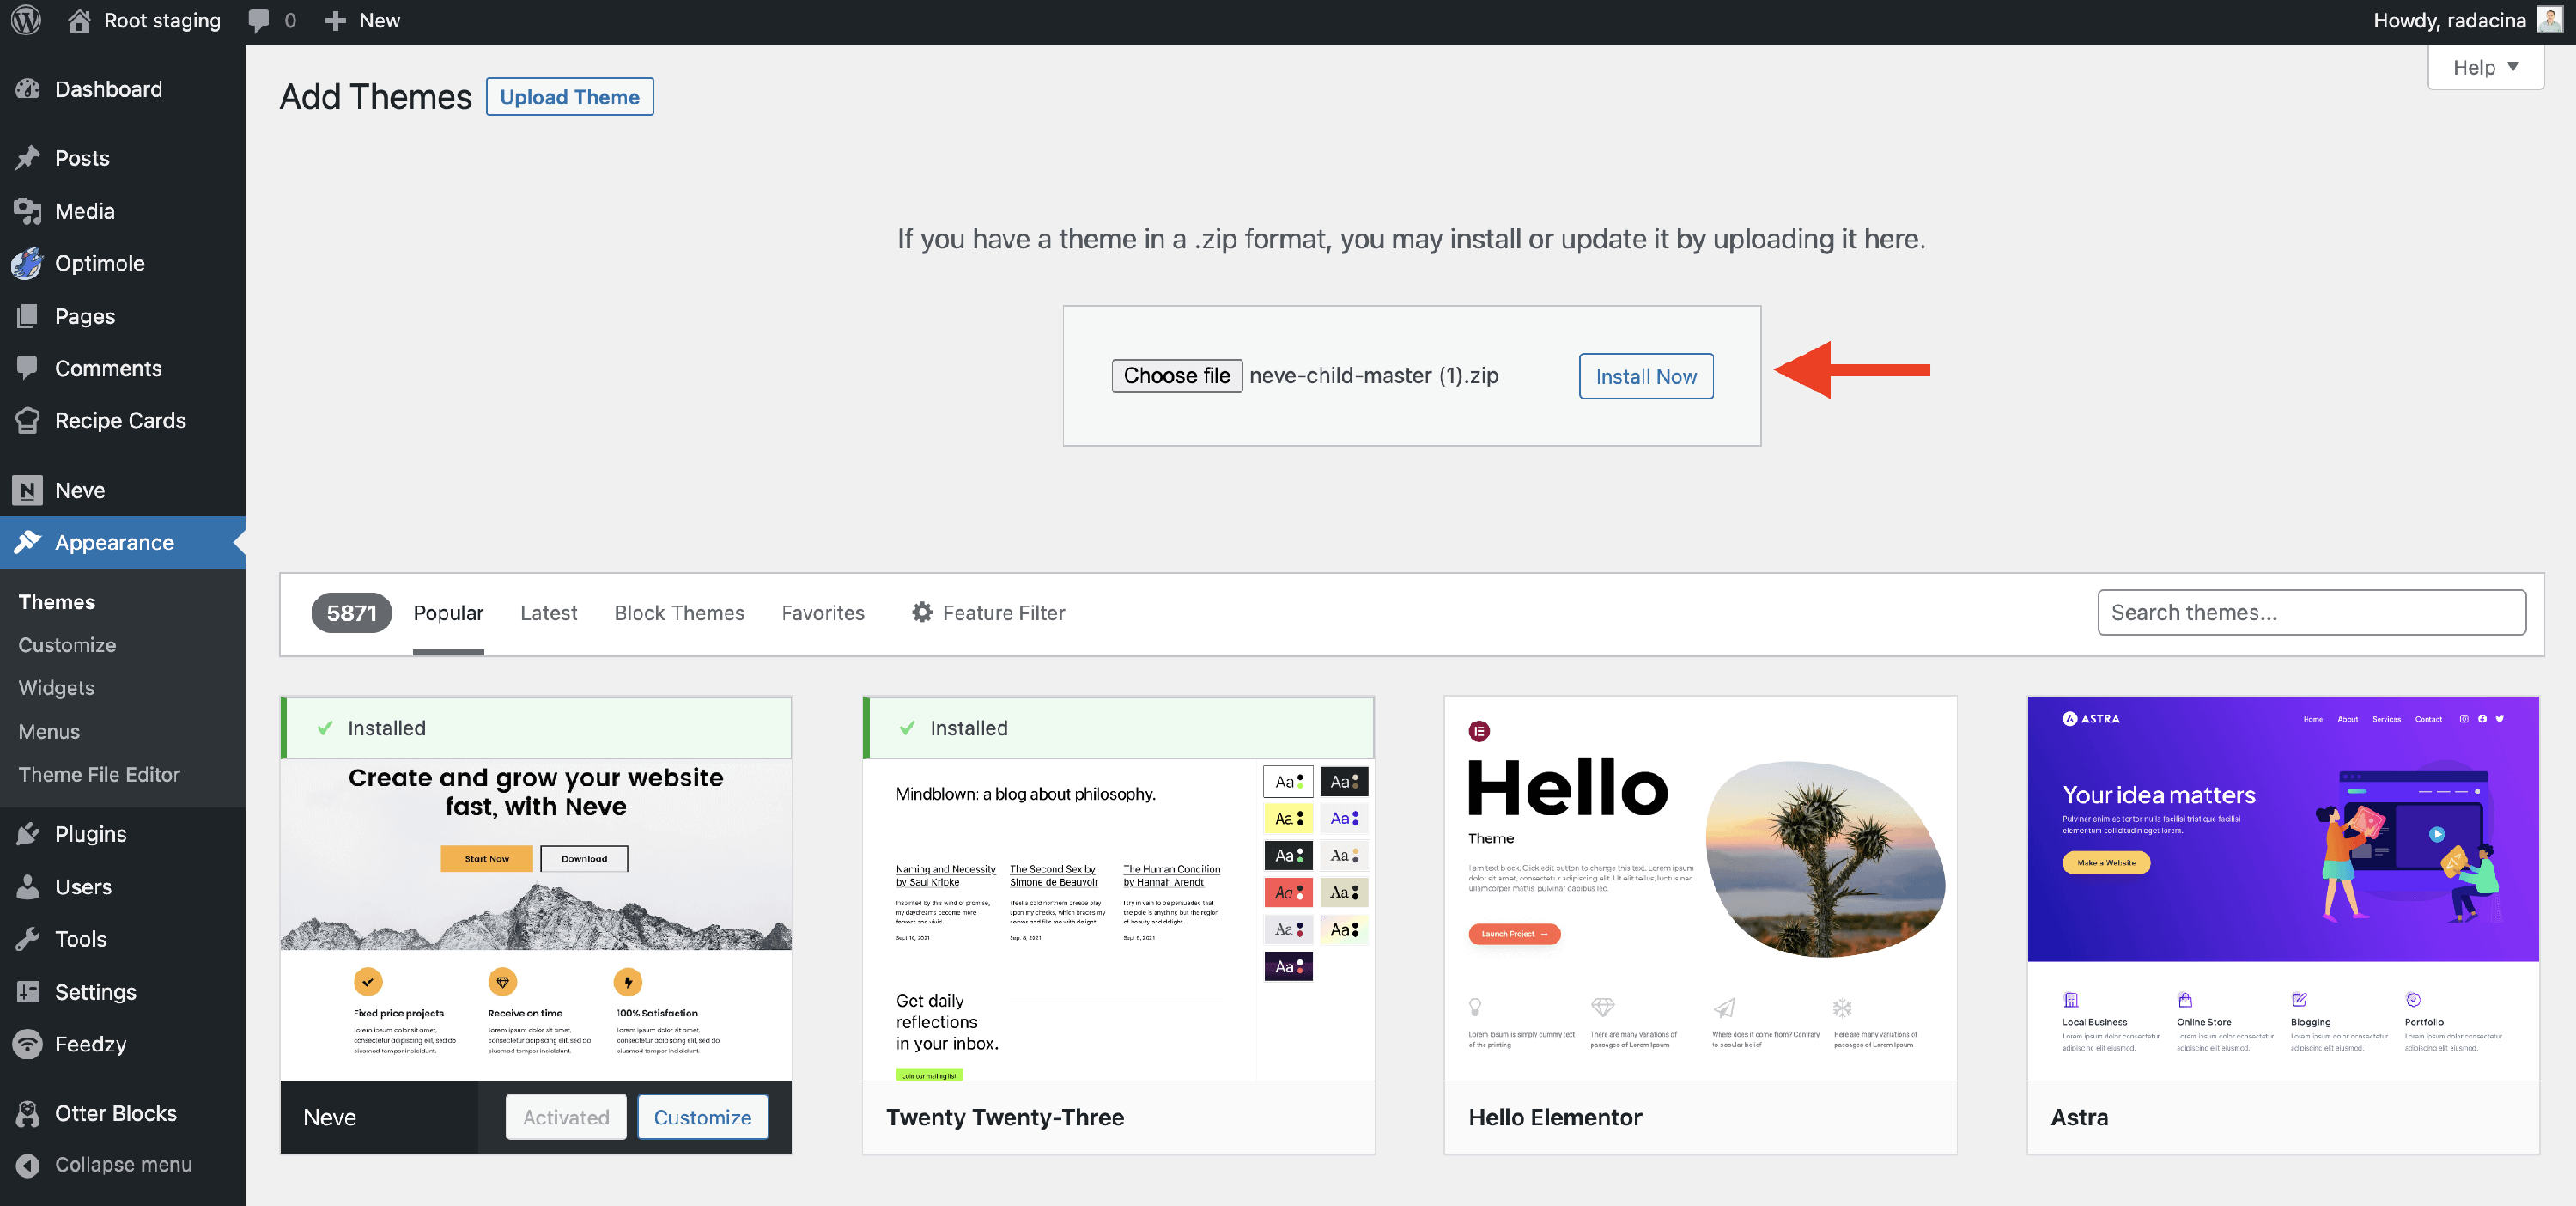
From this moment, you can start using custom code, filters, etc., using the functions.php file of the child theme or the Additional CSS panel in the Customizer.
Common mistake: uploading the child theme as a plugin
The Neve child theme ZIP is a theme and must be installed under Appearance > Themes, not Plugins > Add New.
This confusion is easy to make because Neve Pro is installed as a plugin. However, the Neve child theme is a separate package and follows the standard WordPress theme installation path — even if you have Neve Pro active.
If you see an installation error after uploading the ZIP from Plugins > Add New, follow these steps to fix it:
- Go to Appearance > Themes in your WordPress Dashboard.
- Click Add New, then Upload Theme.
- Select the same child theme ZIP file and click Install Now.
- Click Activate once the installation finishes.
Advanced Changes
If you want to make more advanced changes to the child theme, follow the steps below:
1. Locate the inc/views/ folder inside Neve and copy it inside the child theme's folder.
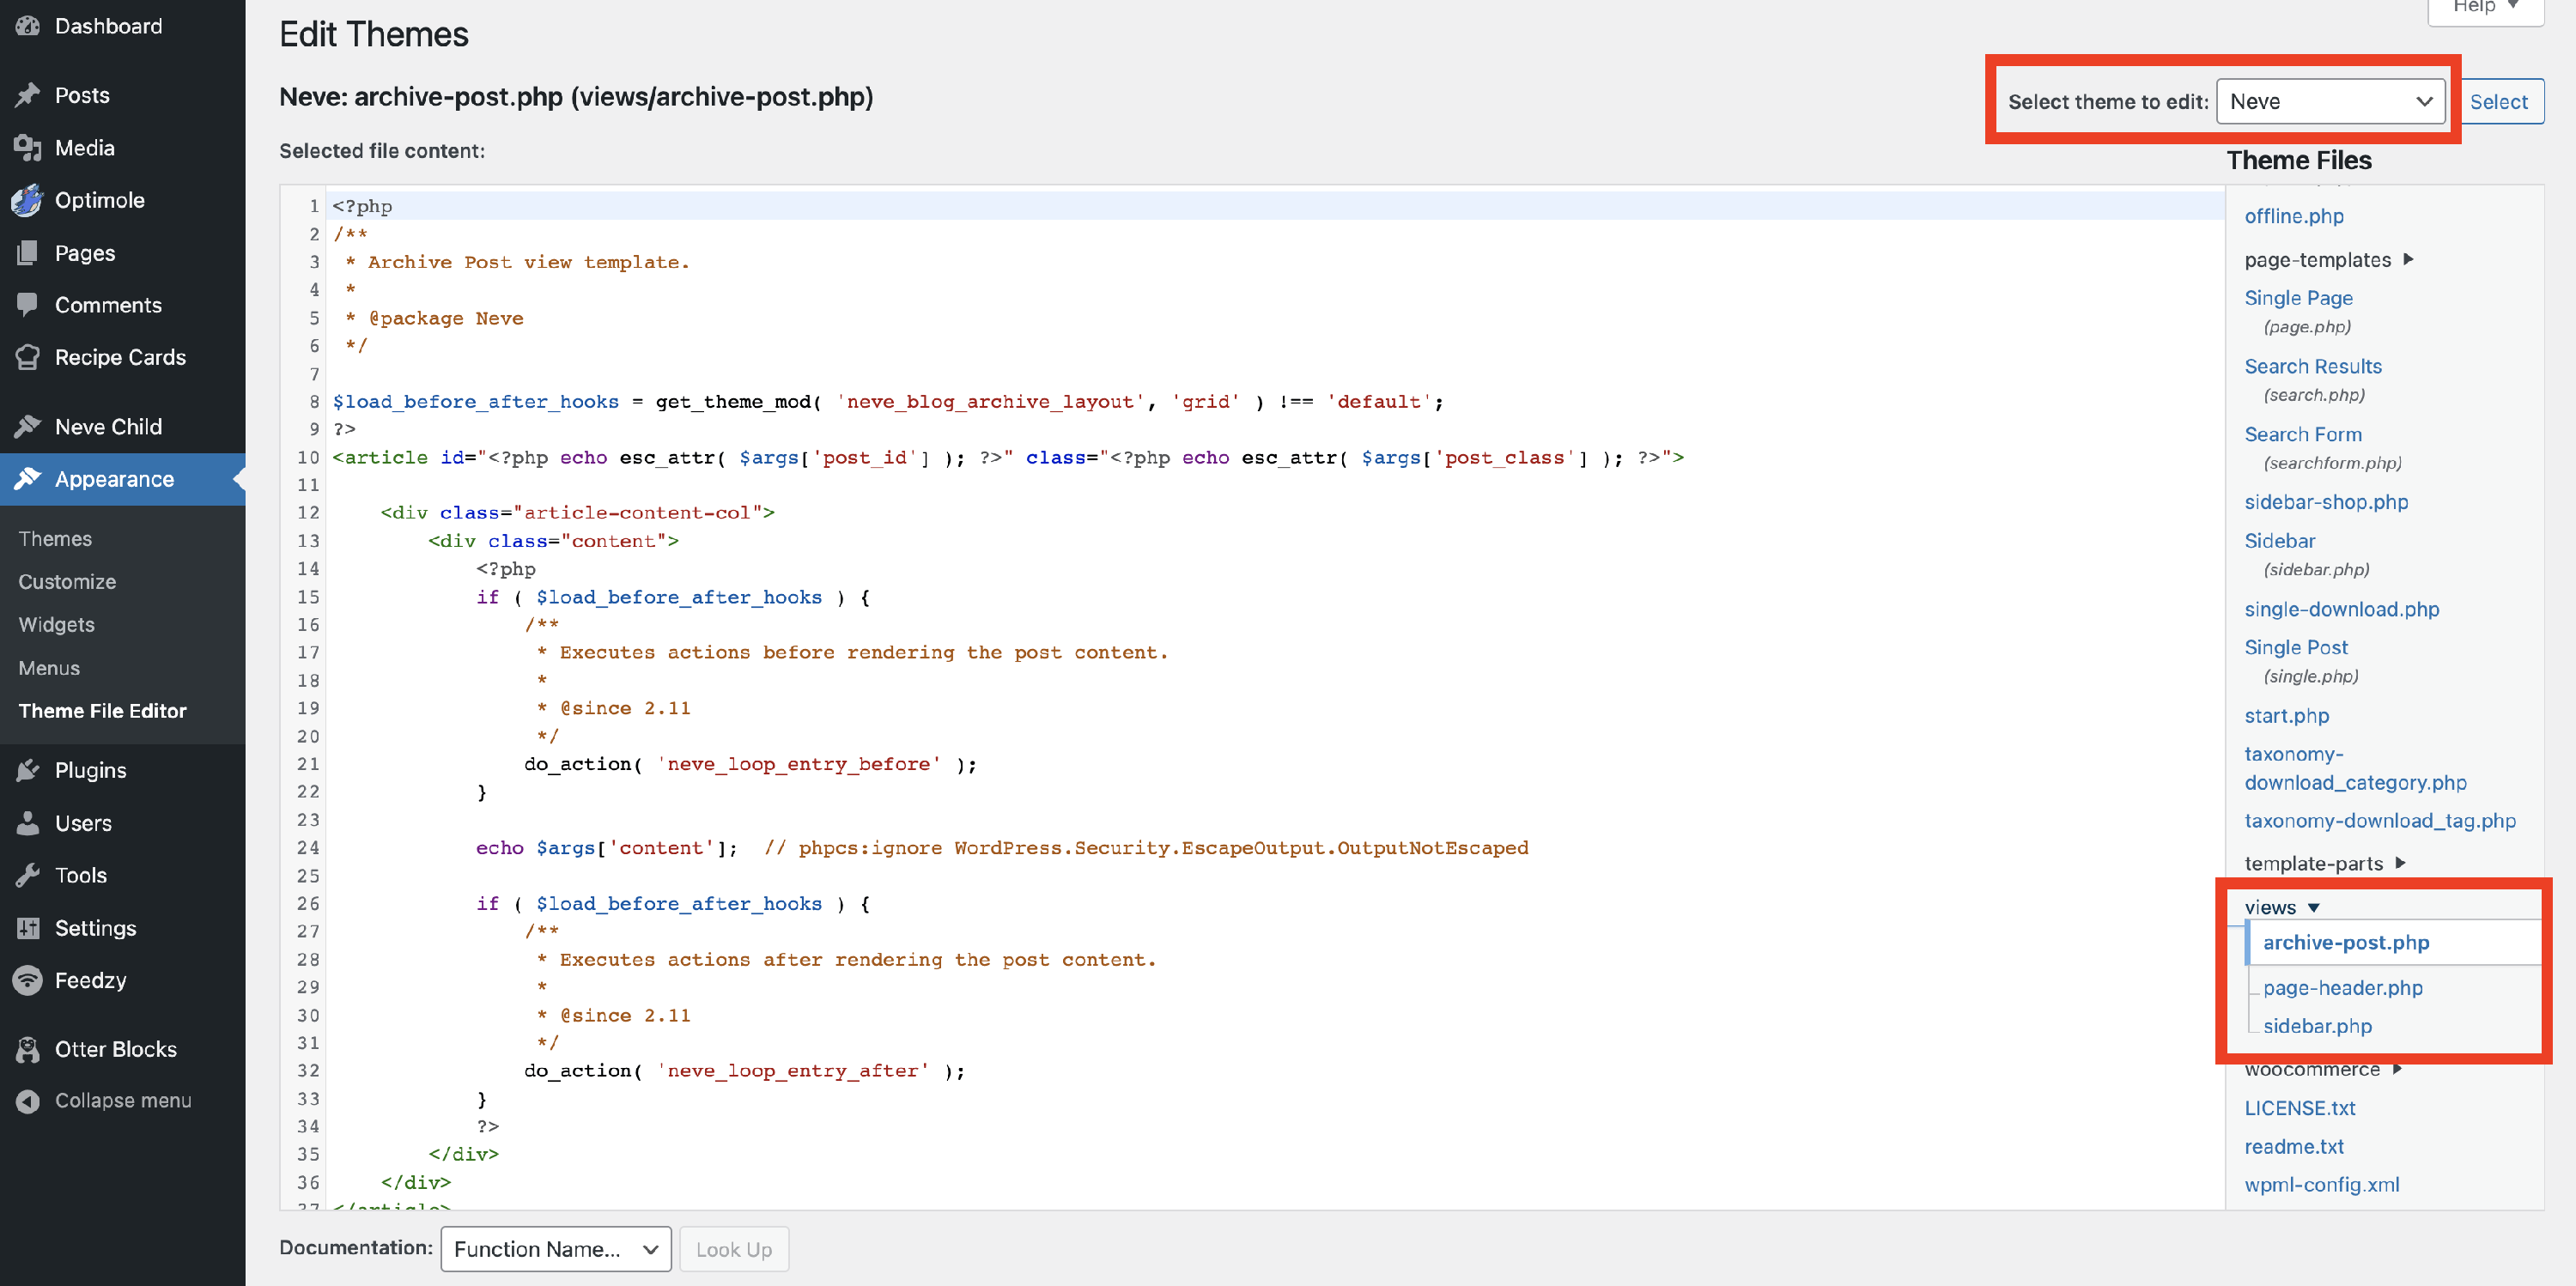
2. Make any changes you need in the views folder of the child theme.
3. Save all changes.
At this point, the views folder does not cover all possible cases, as there are unlimited changes that can be done to the theme through a child theme. If there is something that you would like to update using a child theme, let us know and we will take it into consideration.
Troubleshooting
- If your site crashes after activating the child theme, see Fix: Neve Child Theme Causes a Critical Error or Site Crash.