Custom Sidebars Module Documentation
For more details check out the full Neve documentation and Neve PRO documentation.
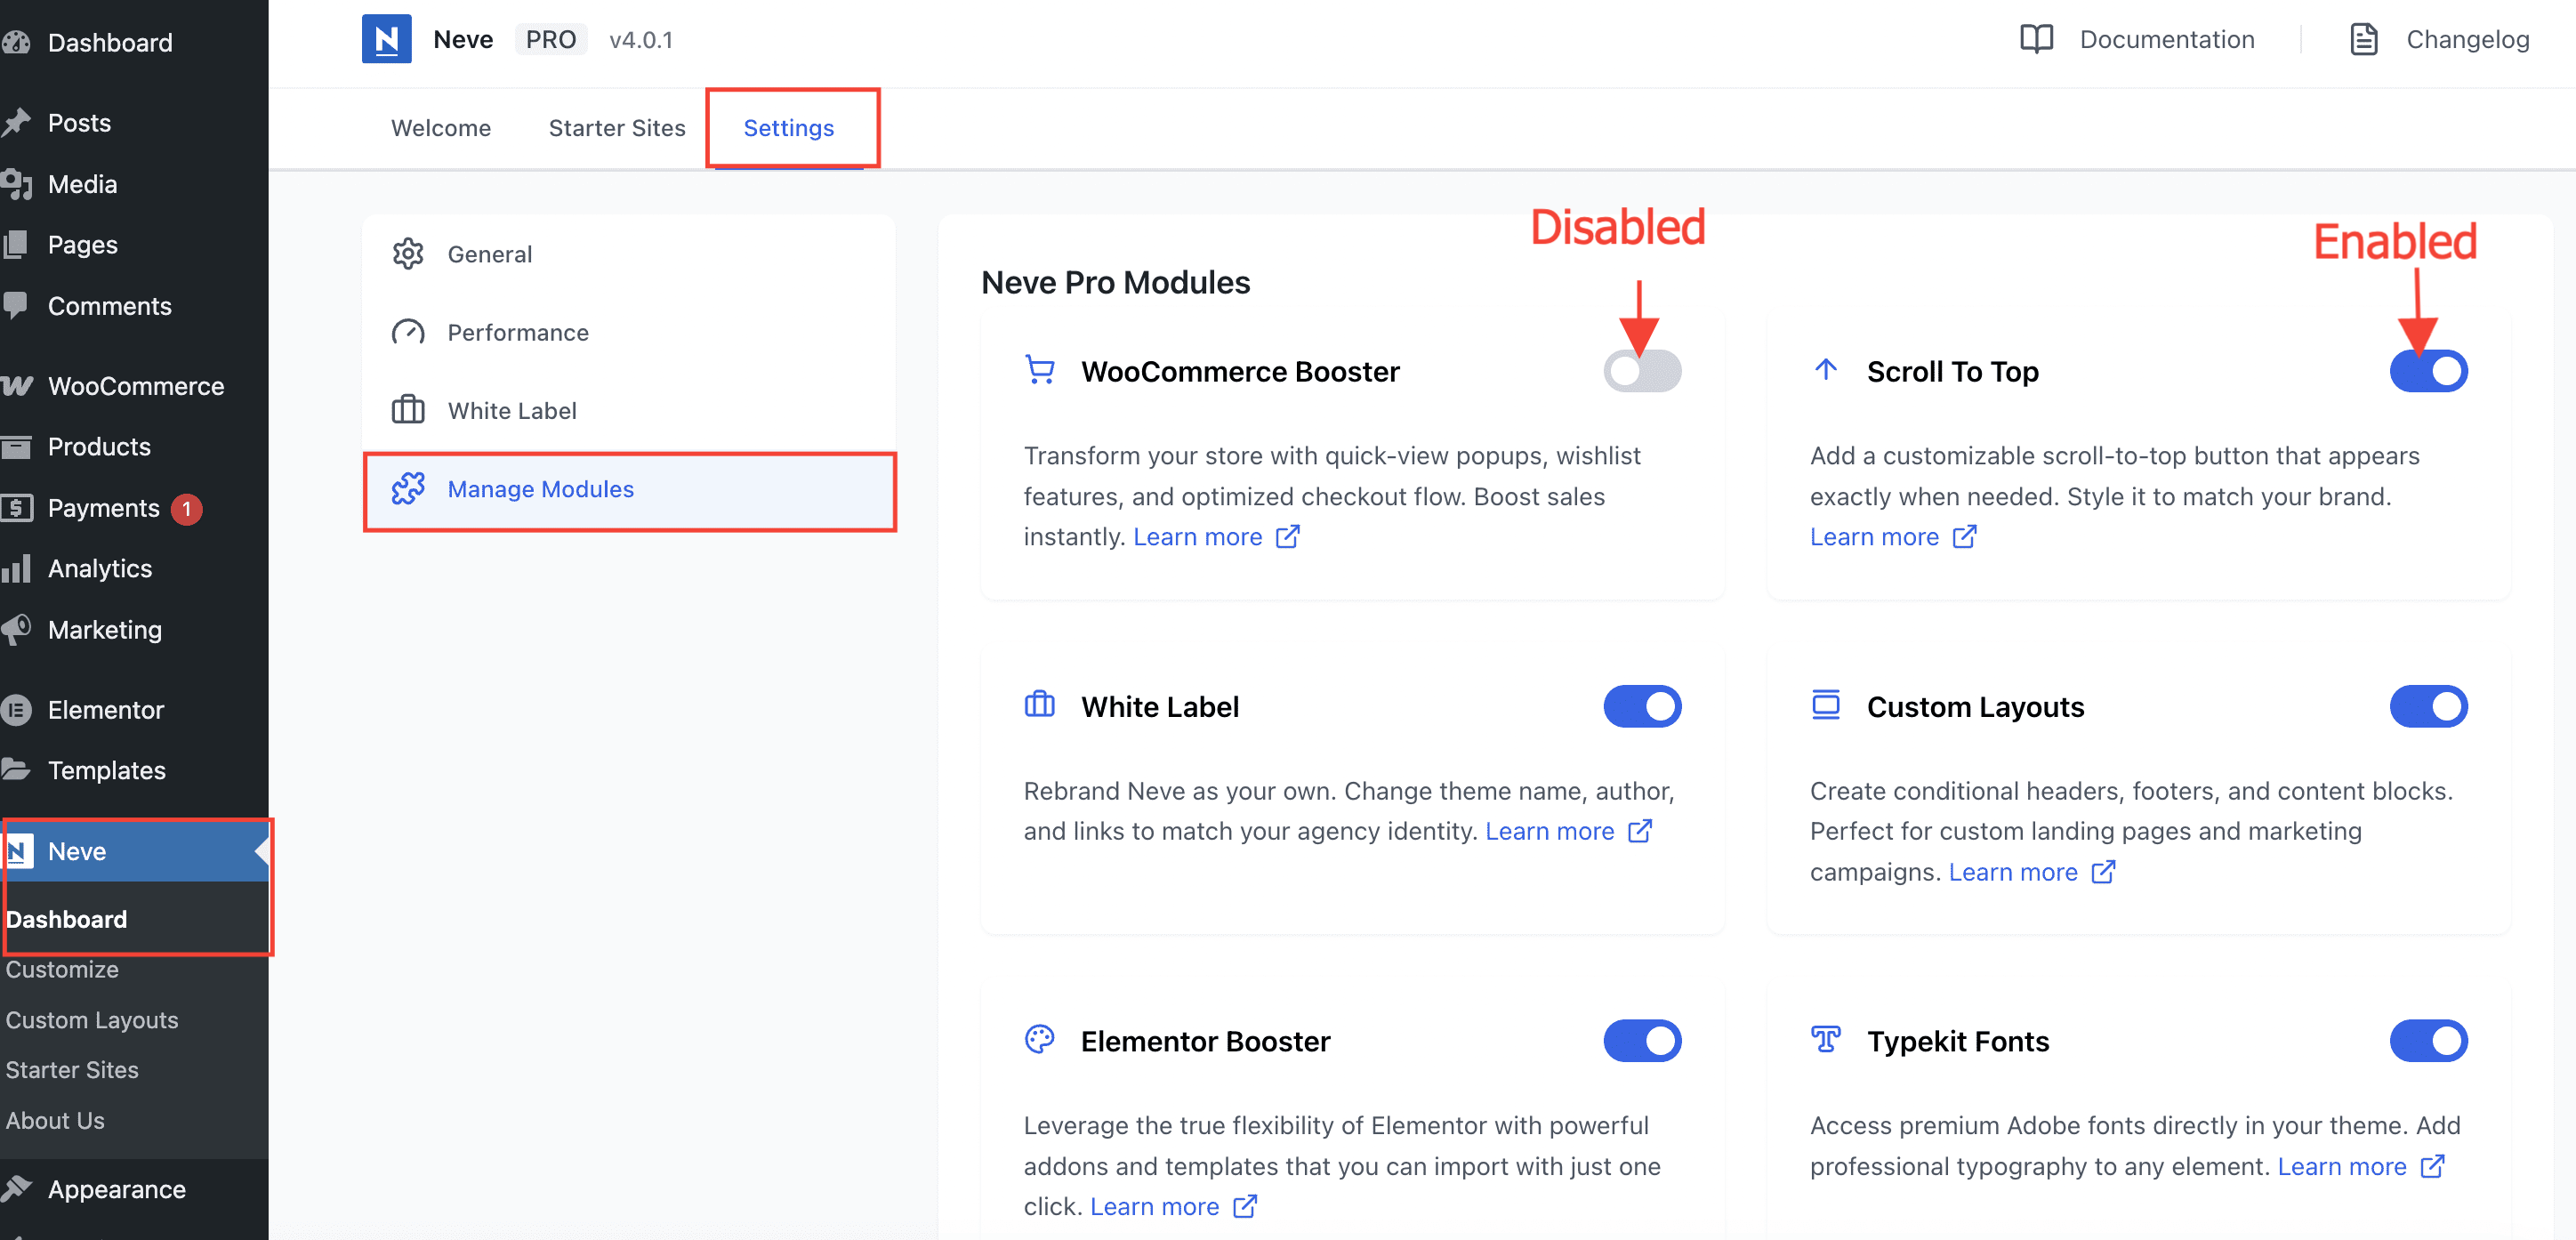
Enable or disable modules
Part of Neve PRO options consists of modules which can be enabled/disabled if used or not.
To enable/disable modules, navigate to Neve > Dashboard > Settings > Manage Modules.
Use the module
Important: The Custom Sidebars module is part of all three Neve PRO plans: Personal, Business and Agency.
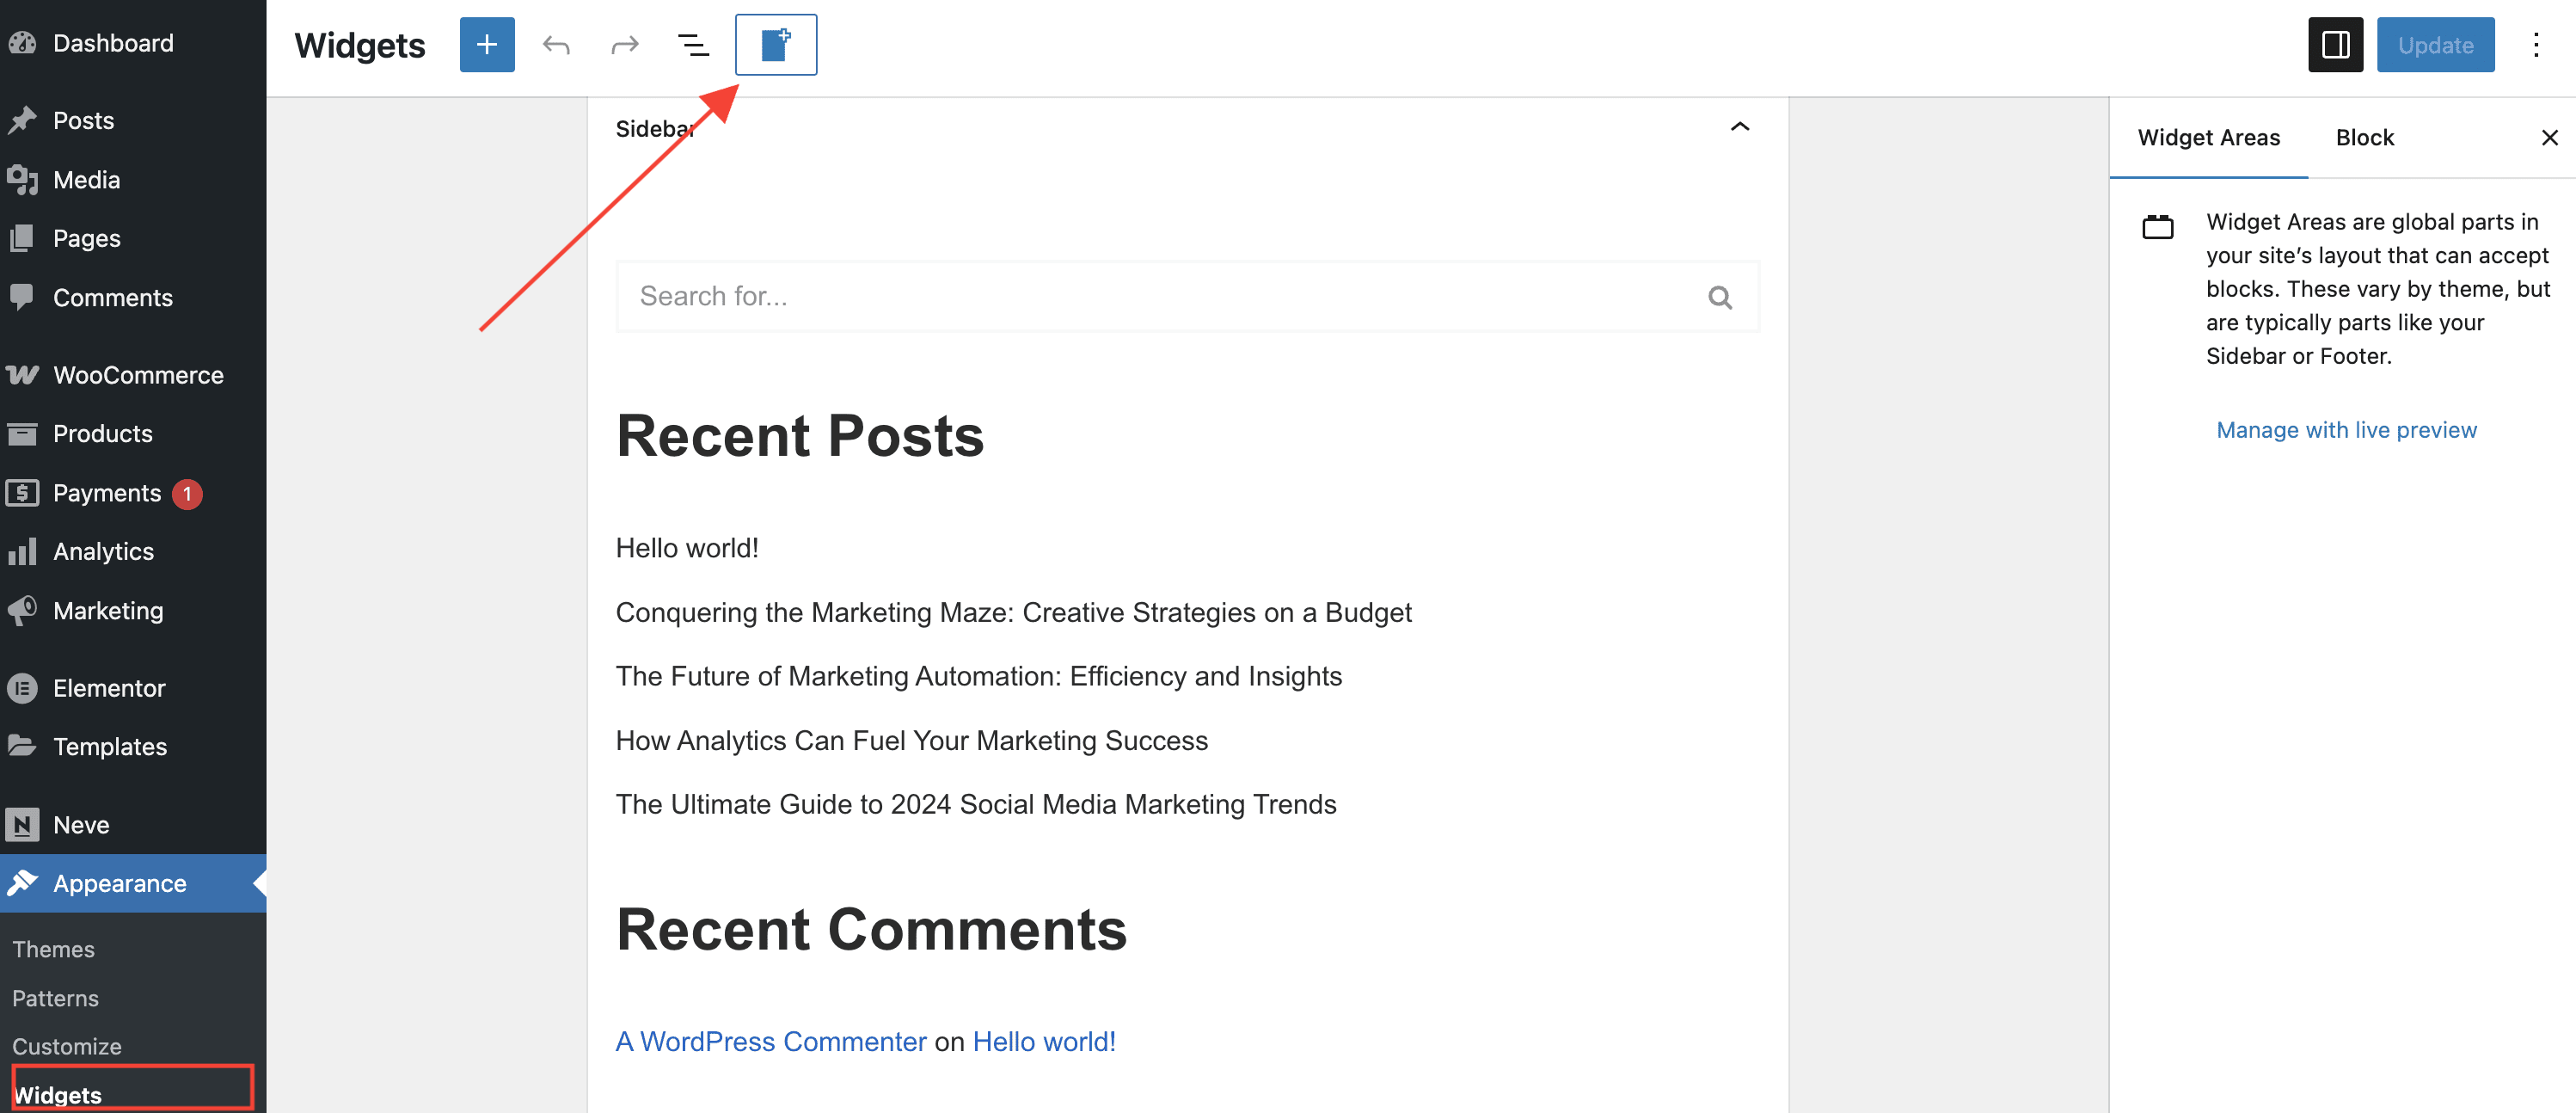
Navigate to Appearance > Widgets, click on the Add new Custom Sidebar button at the top of the page, add a custom name and save it to create a new sidebar.
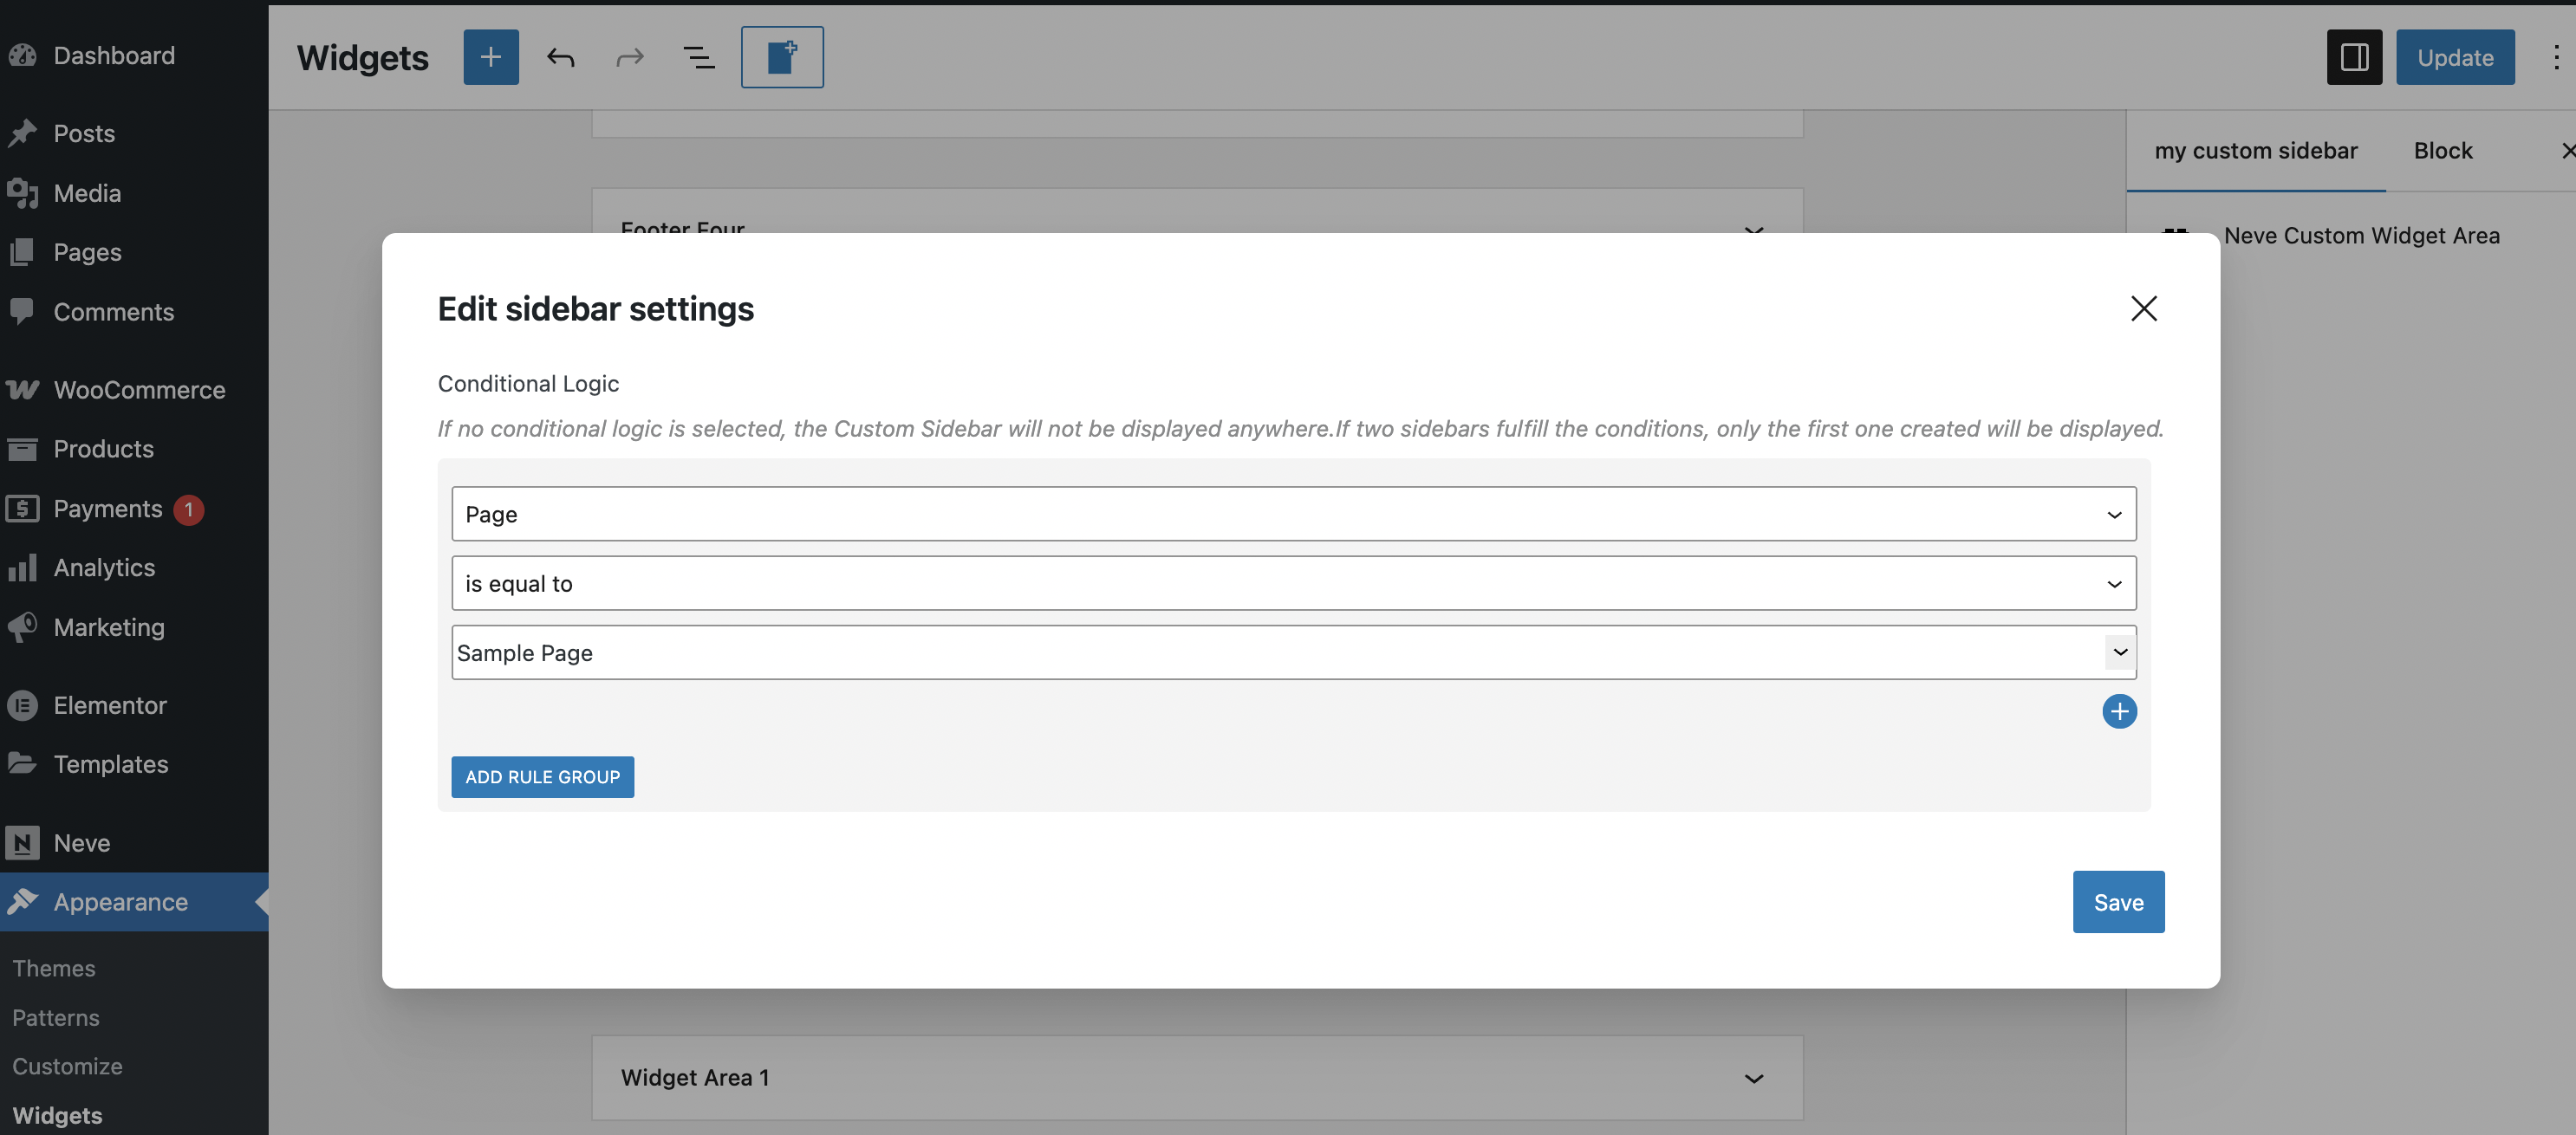
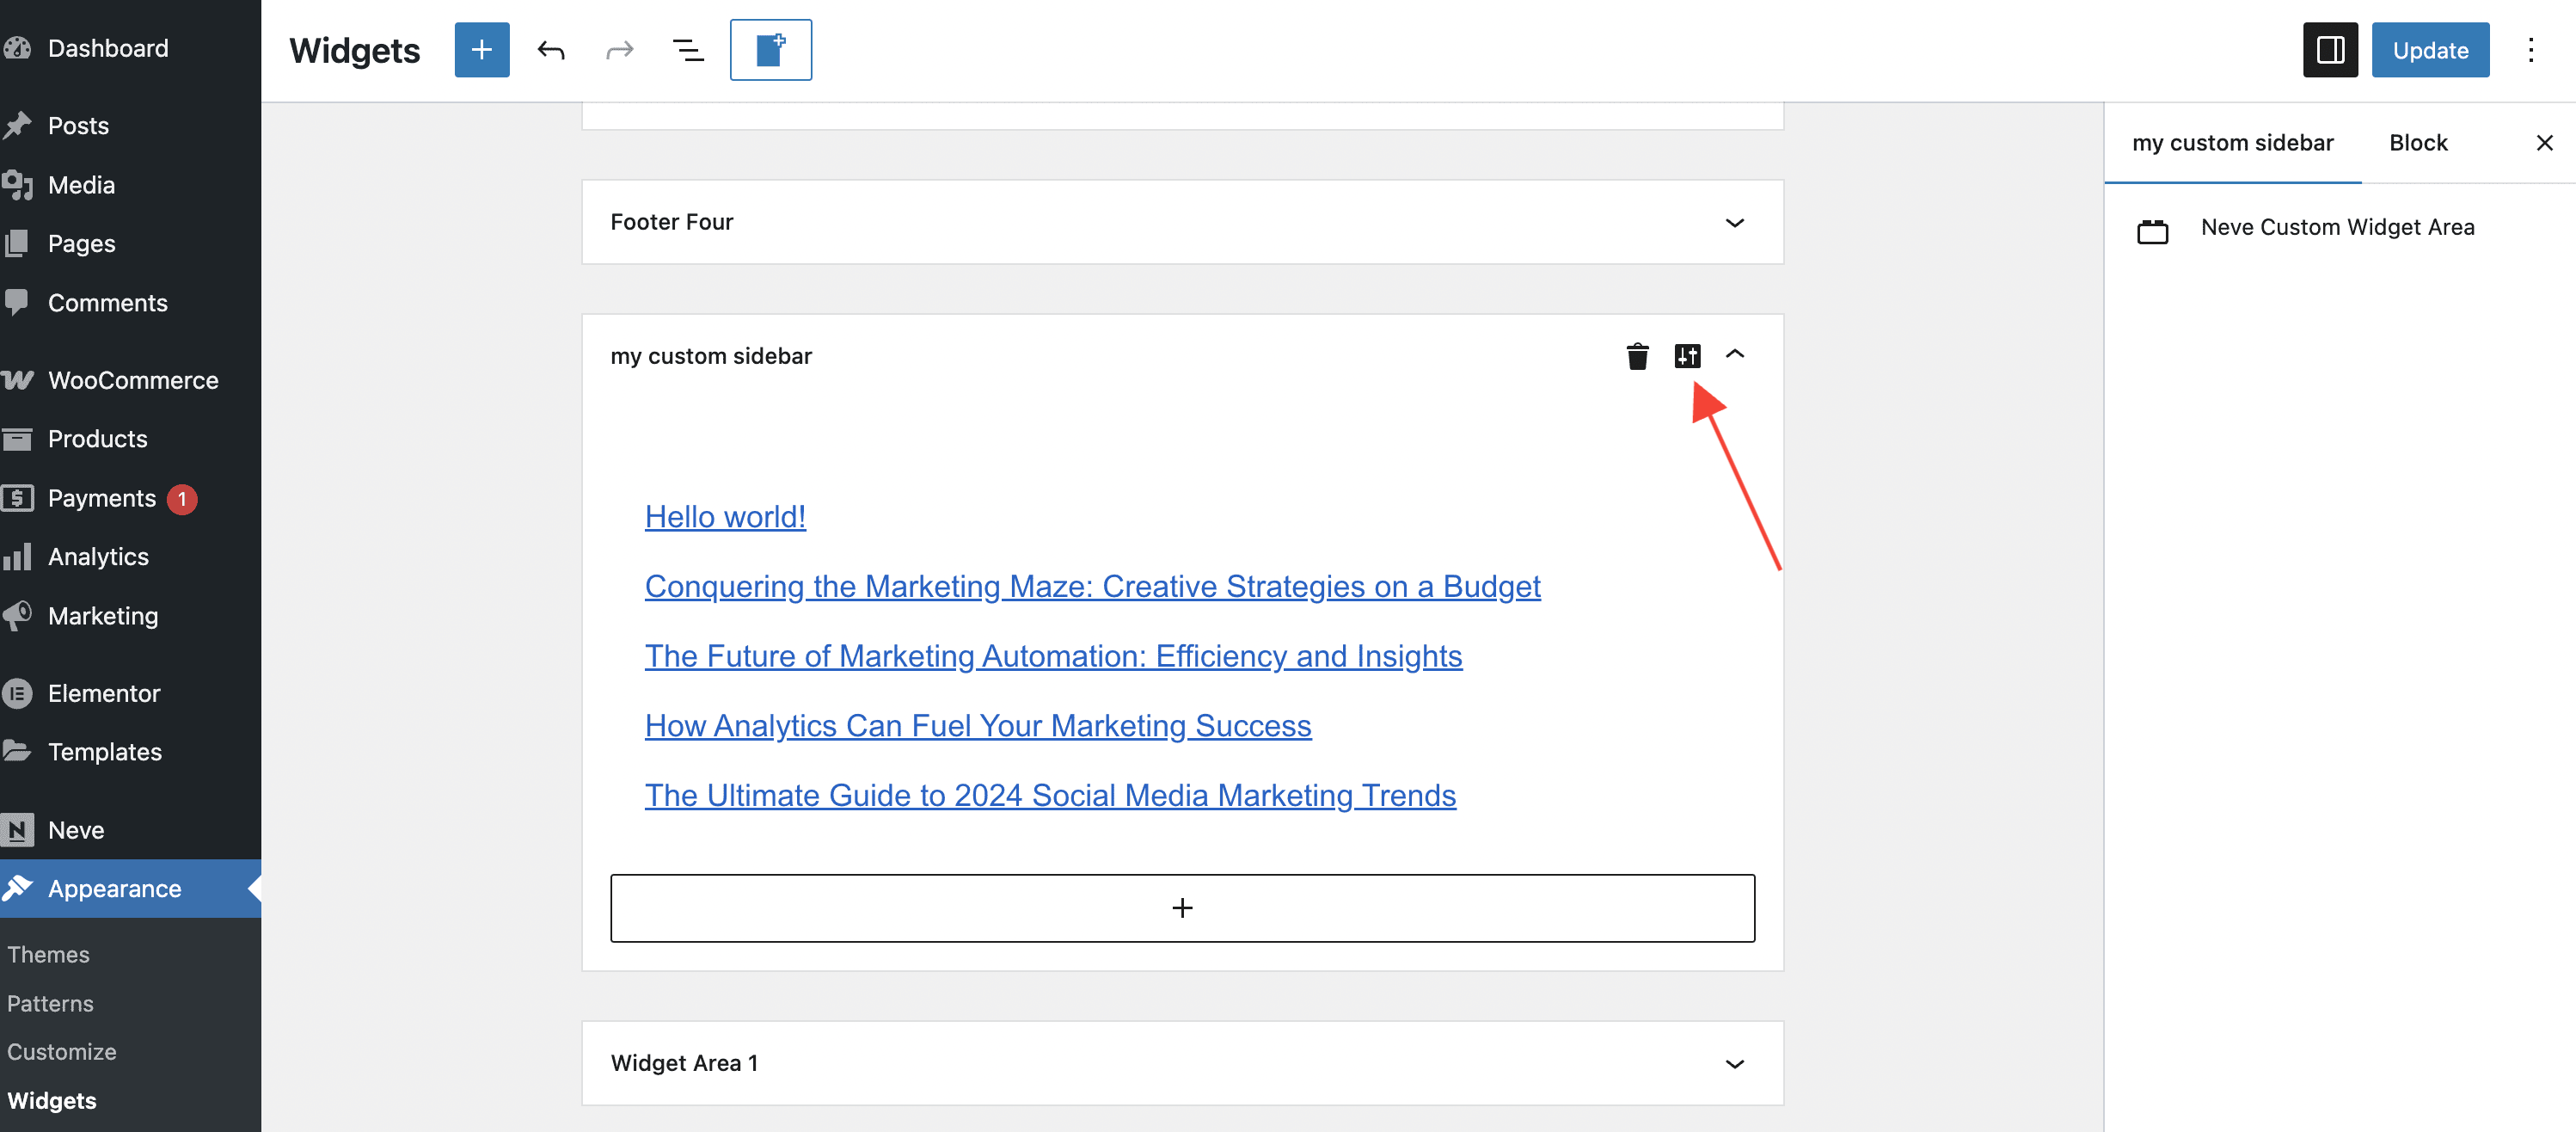
Populate the newly created sidebar with the widgets of your choice and click on this custom icon to open the sidebar settings to choose on which pages/under which conditions will the sidebar show up.
Note: Multiple conditions can be selected. For example, to show the sidebar of the Blog page, just for users that are Administrators of the site.