
How to install Hestia PRO?
This guide will explain how to activate Hestia Pro without losing the work done with the free version of Hestia. The same steps work even if you didn't use Hestia free before.
📝Note: If you used Hestia free before, do not remove it; let the theme active and follow the steps below. The previous changes will be automatically migrated to Hestia Pro.
In this article
1. Download the theme file
The theme file can be downloaded from your Themeisle account, it's called hestia-pro.zip.
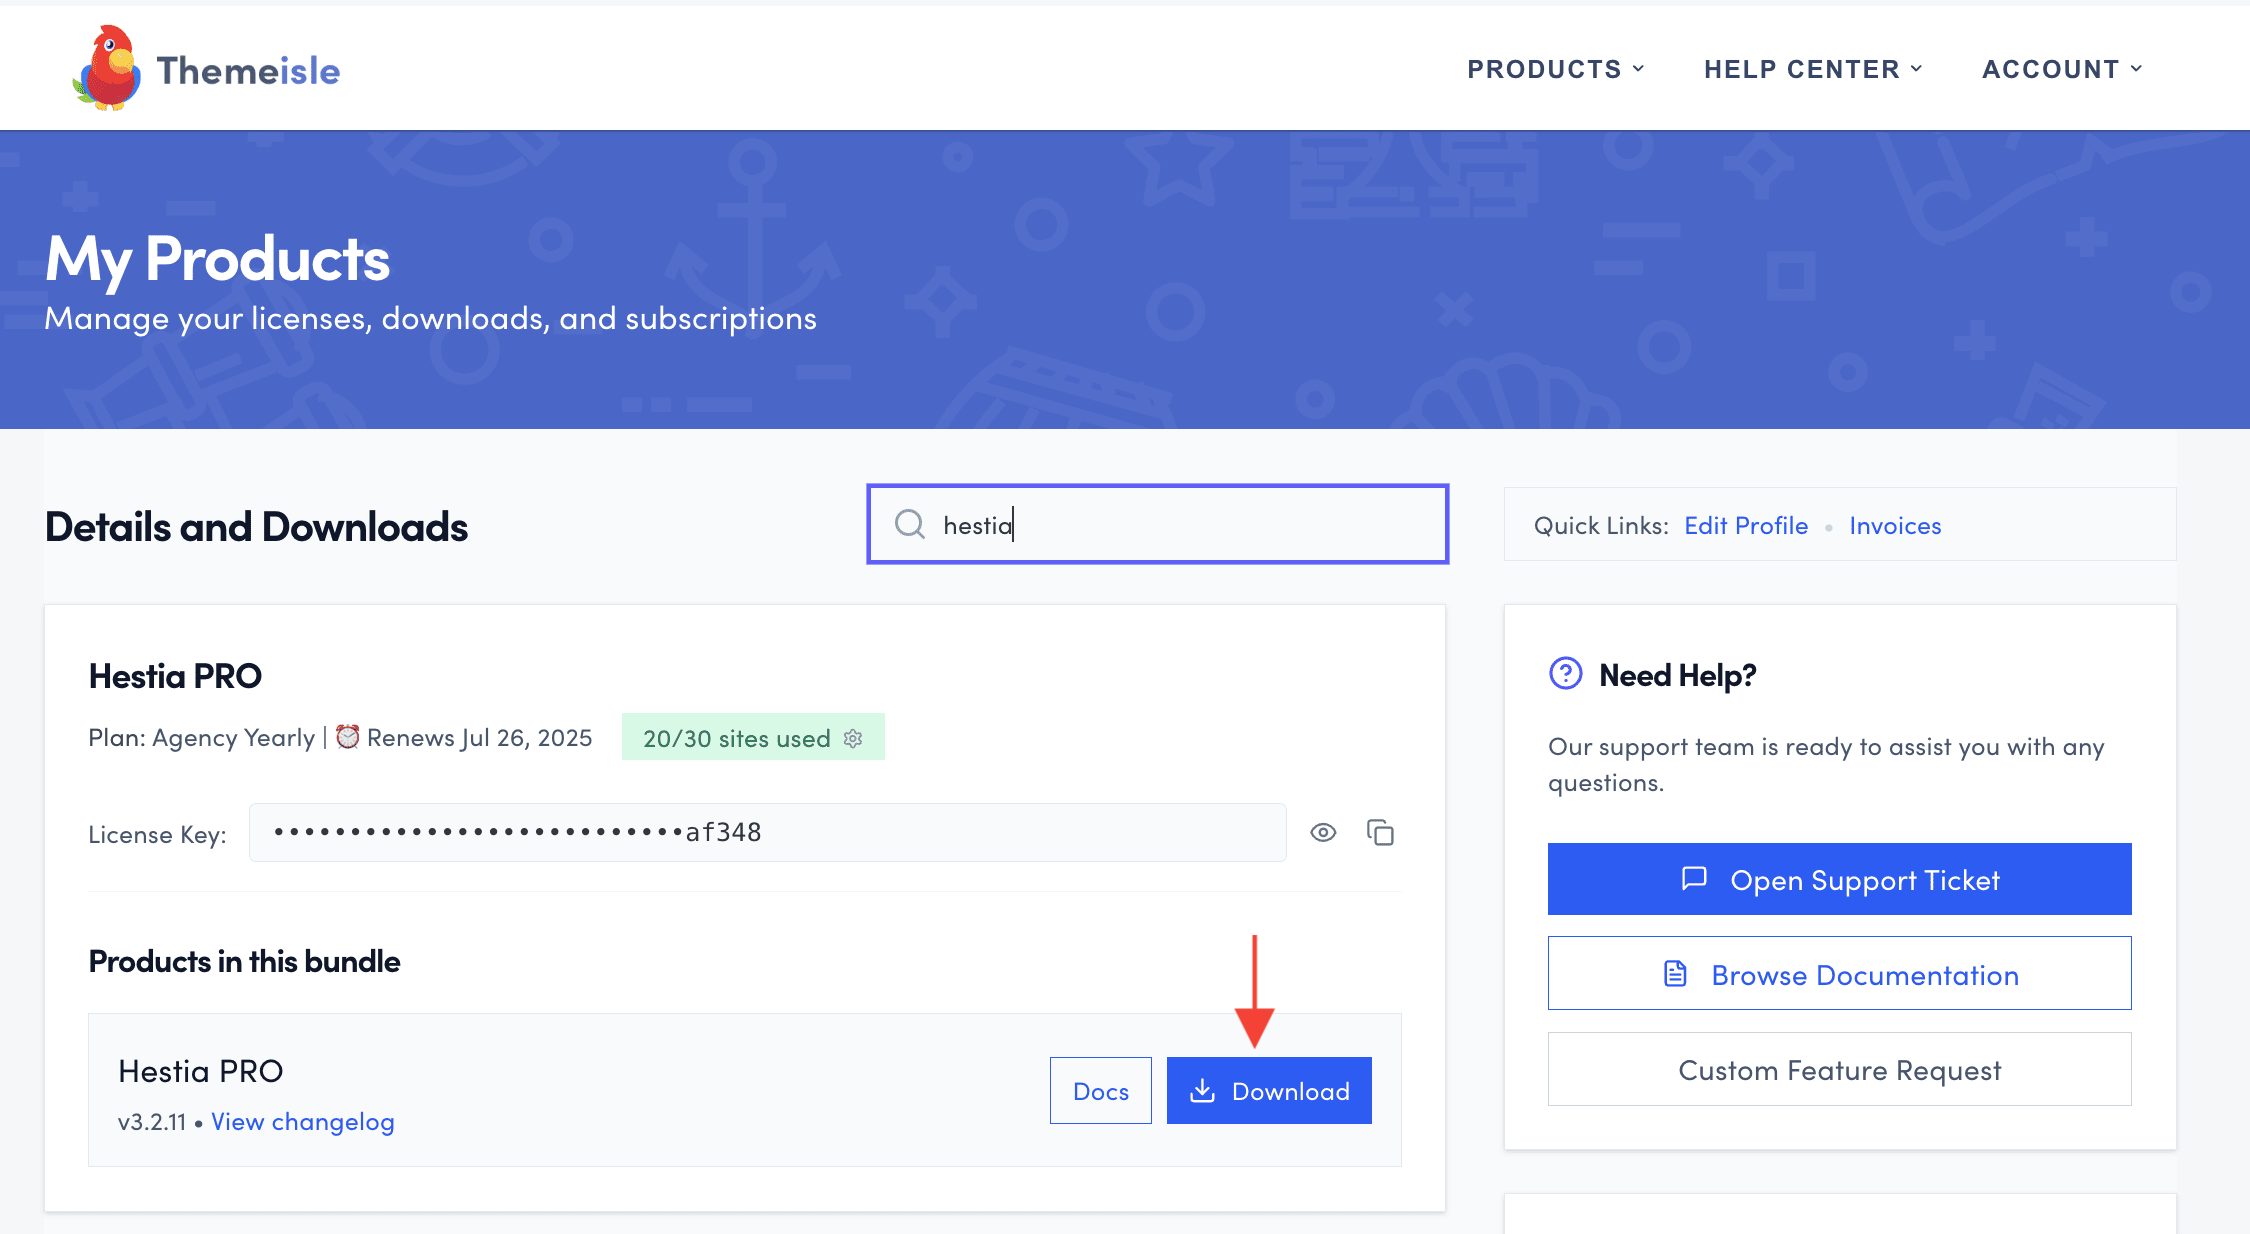
2. Install it as a new theme
Install it as a new theme by uploading the zip file in Dashboard > Appearance > Themes > Add new, upload file. When it's ready, activate the new theme.
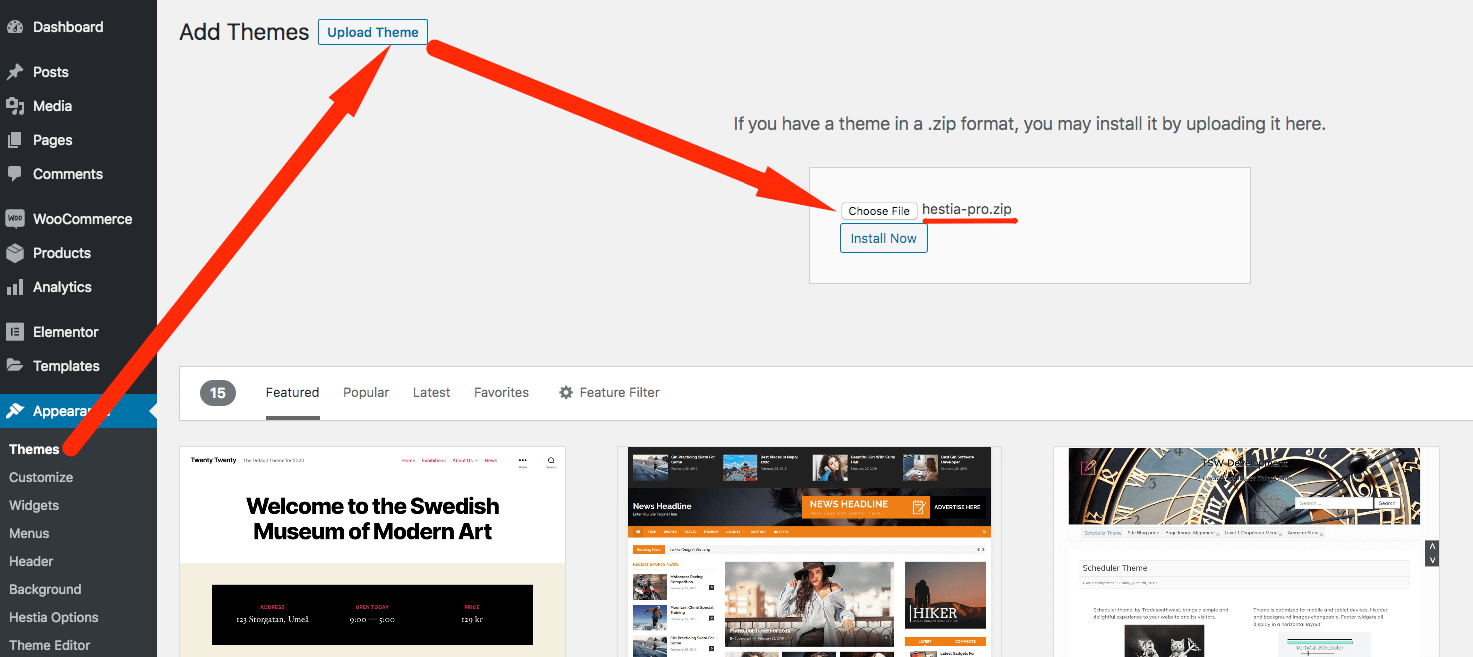
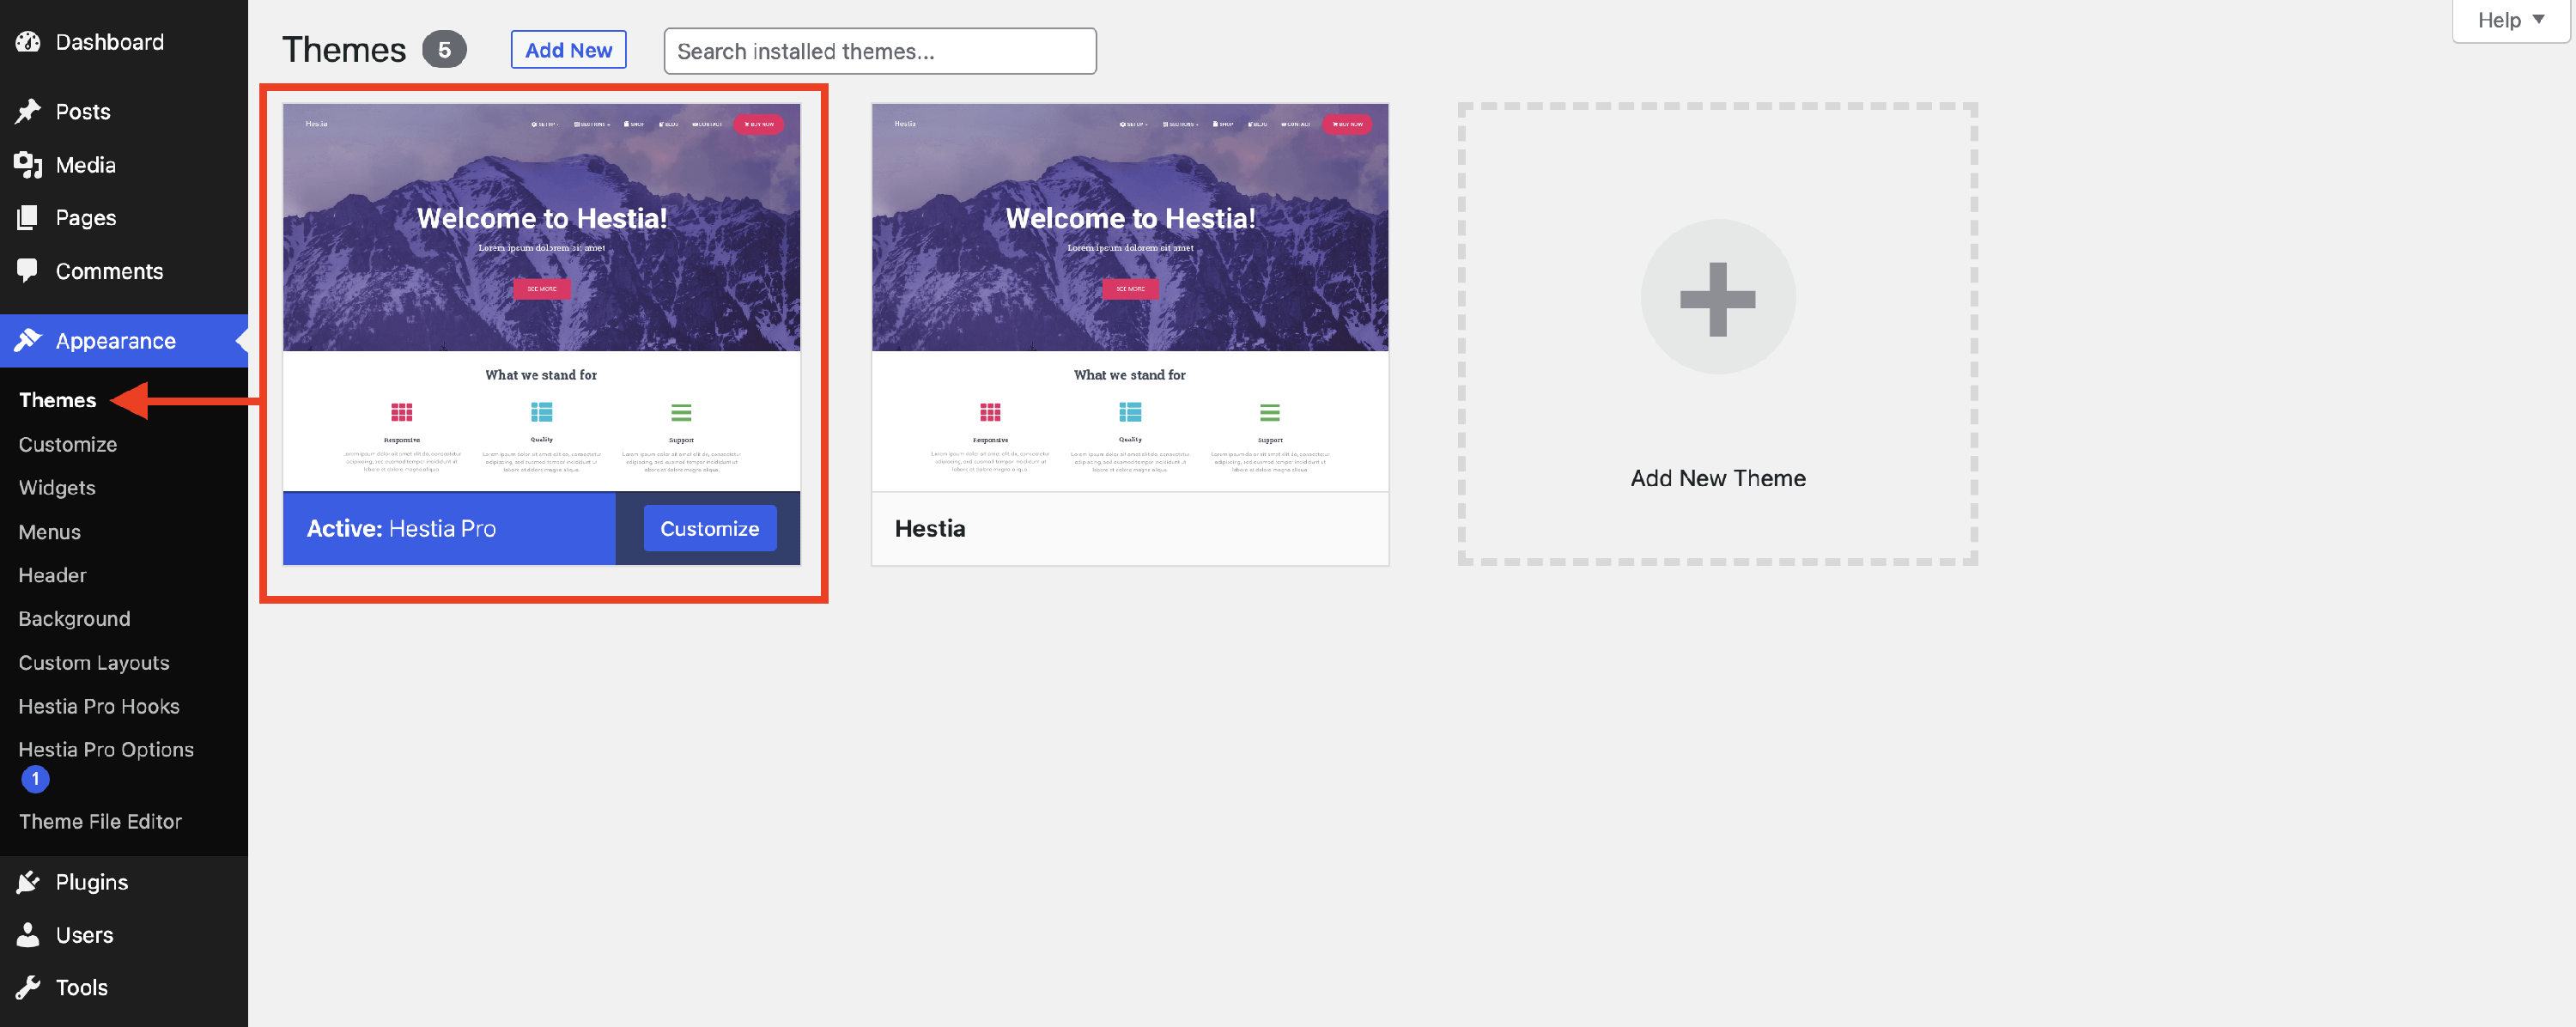
📝 Note: The PRO version of Hestia acts like a separate theme. If you want to migrate the settings from Hestia Free to Pro, keep the free version in the themes portfolio too.
If WordPress shows an error saying the archive does not have a style.css file, see Troubleshooting: Hestia Pro Installation Fails with "The theme does not have a style.css file".
⚠️ Troubleshooting: "The link you followed has expired" during upload
If WordPress displays "The link you followed has expired" after you upload hestia-pro.zip, this is not a problem with the Hestia PRO package itself. It is a WordPress installer message that typically appears when the uploaded file exceeds your server's PHP upload or size limits, or when the upload takes longer than the server's maximum execution time allows.
To resolve this, increase the following PHP settings on your server or local environment:
upload_max_filesize— set to at least64Mpost_max_size— set to at least64Mmax_execution_time— set to at least300
For step-by-step instructions on how to raise these limits using php.ini, .htaccess, or functions.php, see How to fix: 'The uploaded file exceeds the upload_max_filesize' error. The same limit changes resolve the "link expired" message.
If you are using a local development environment (such as LocalWP, MAMP, or XAMPP), update the PHP configuration file for your local stack and restart the local web server or PHP service before retrying the upload. If you cannot change these settings yourself, contact your hosting provider and ask them to increase the upload and execution-time limits.
3. Activate the license key
Get the license key from your Themeisle account.
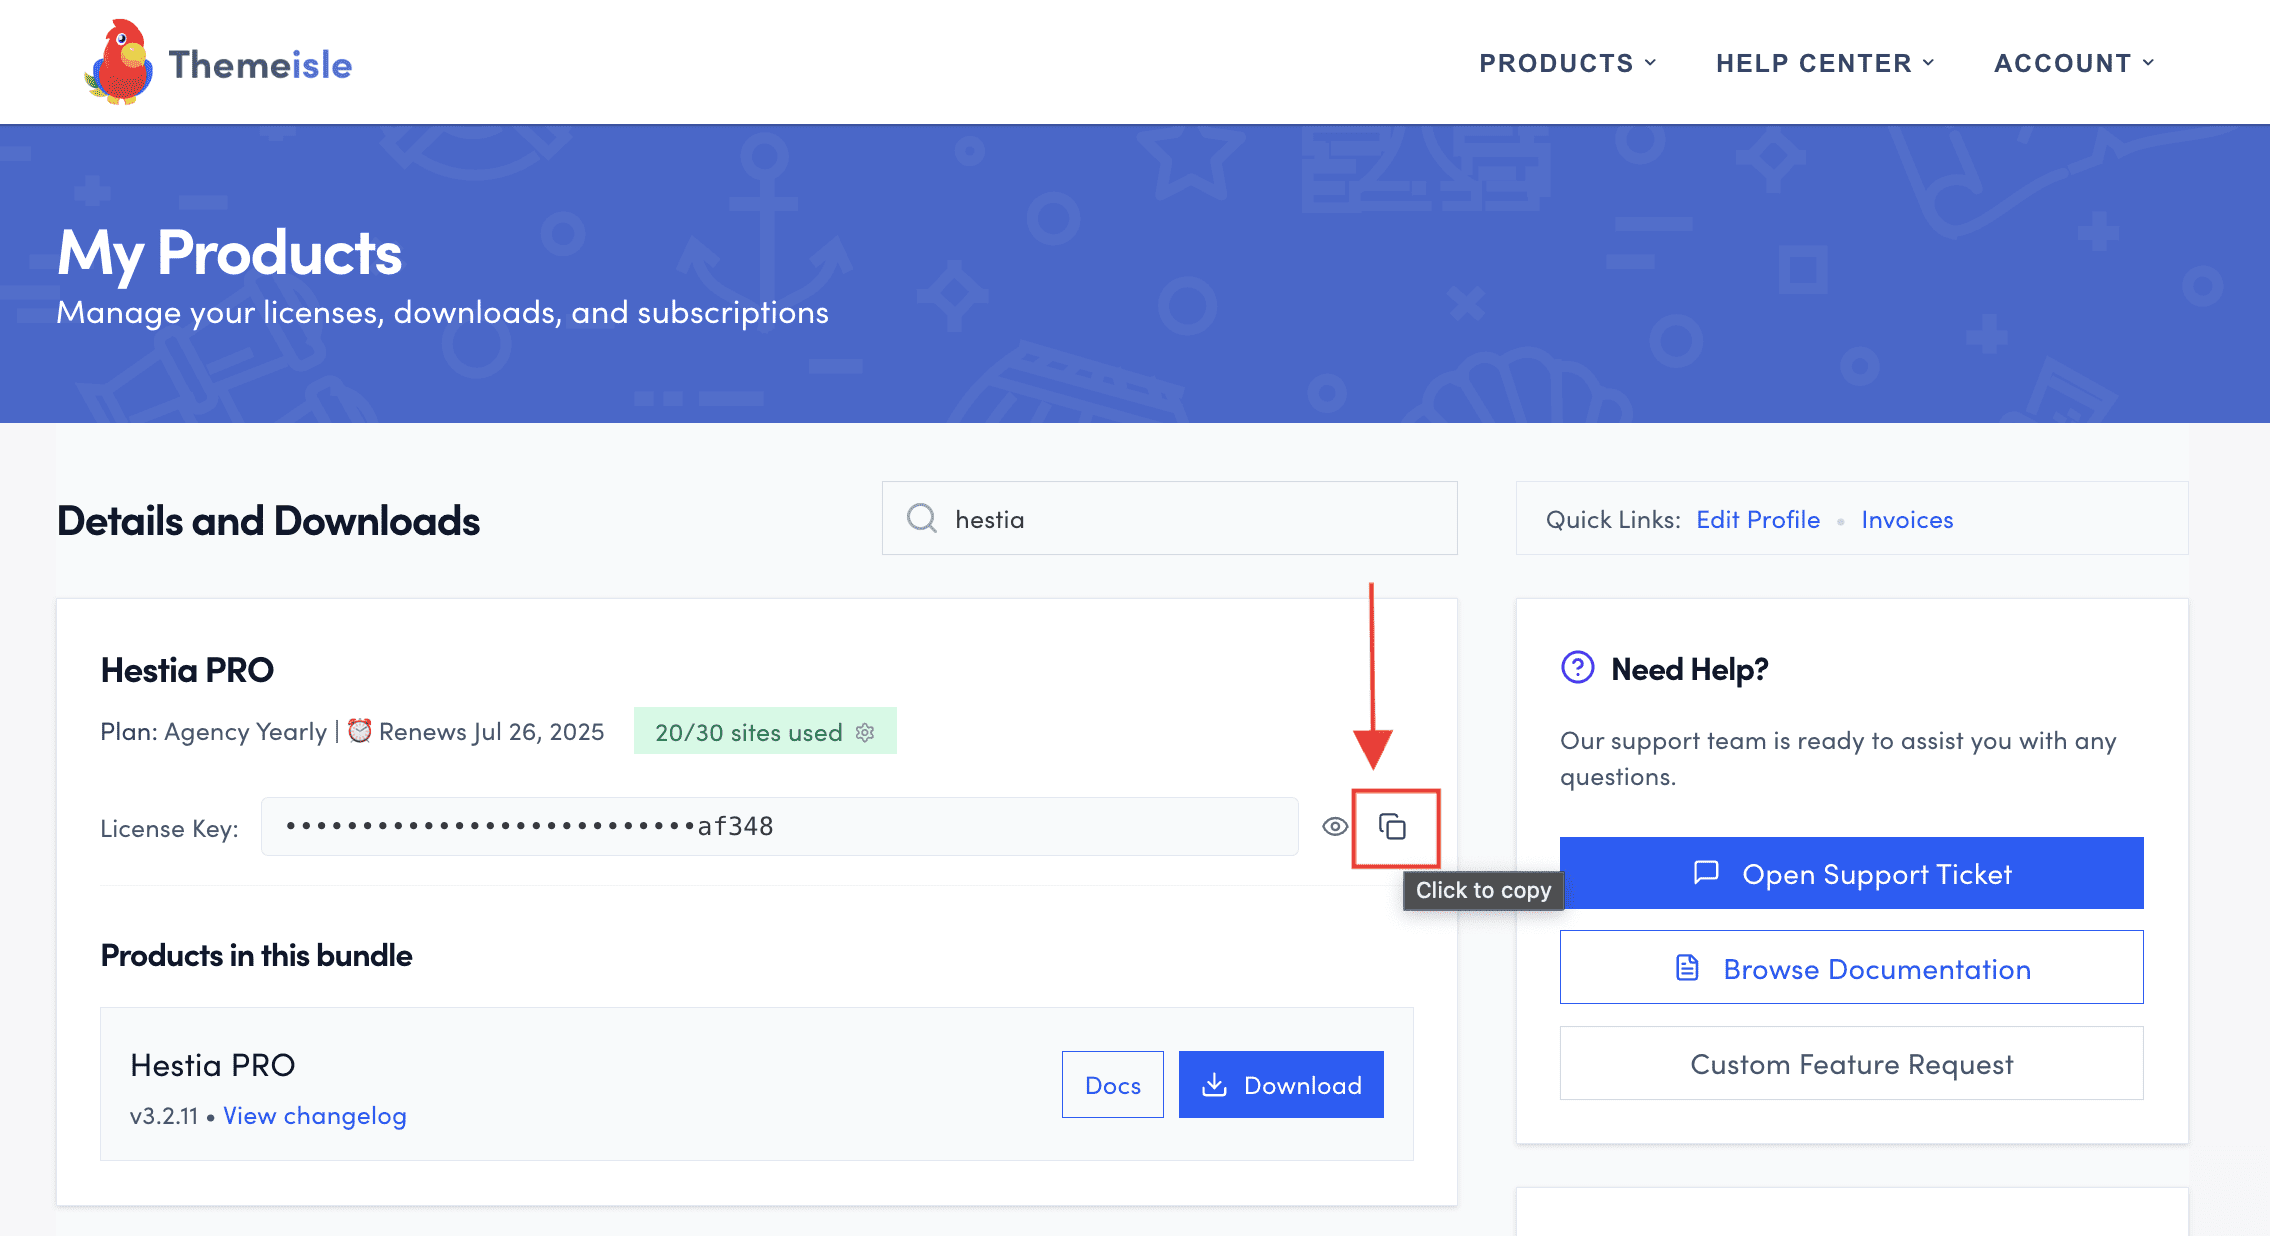
Activate the license key in Hestia Pro > Hestia Pro Options > License Key.
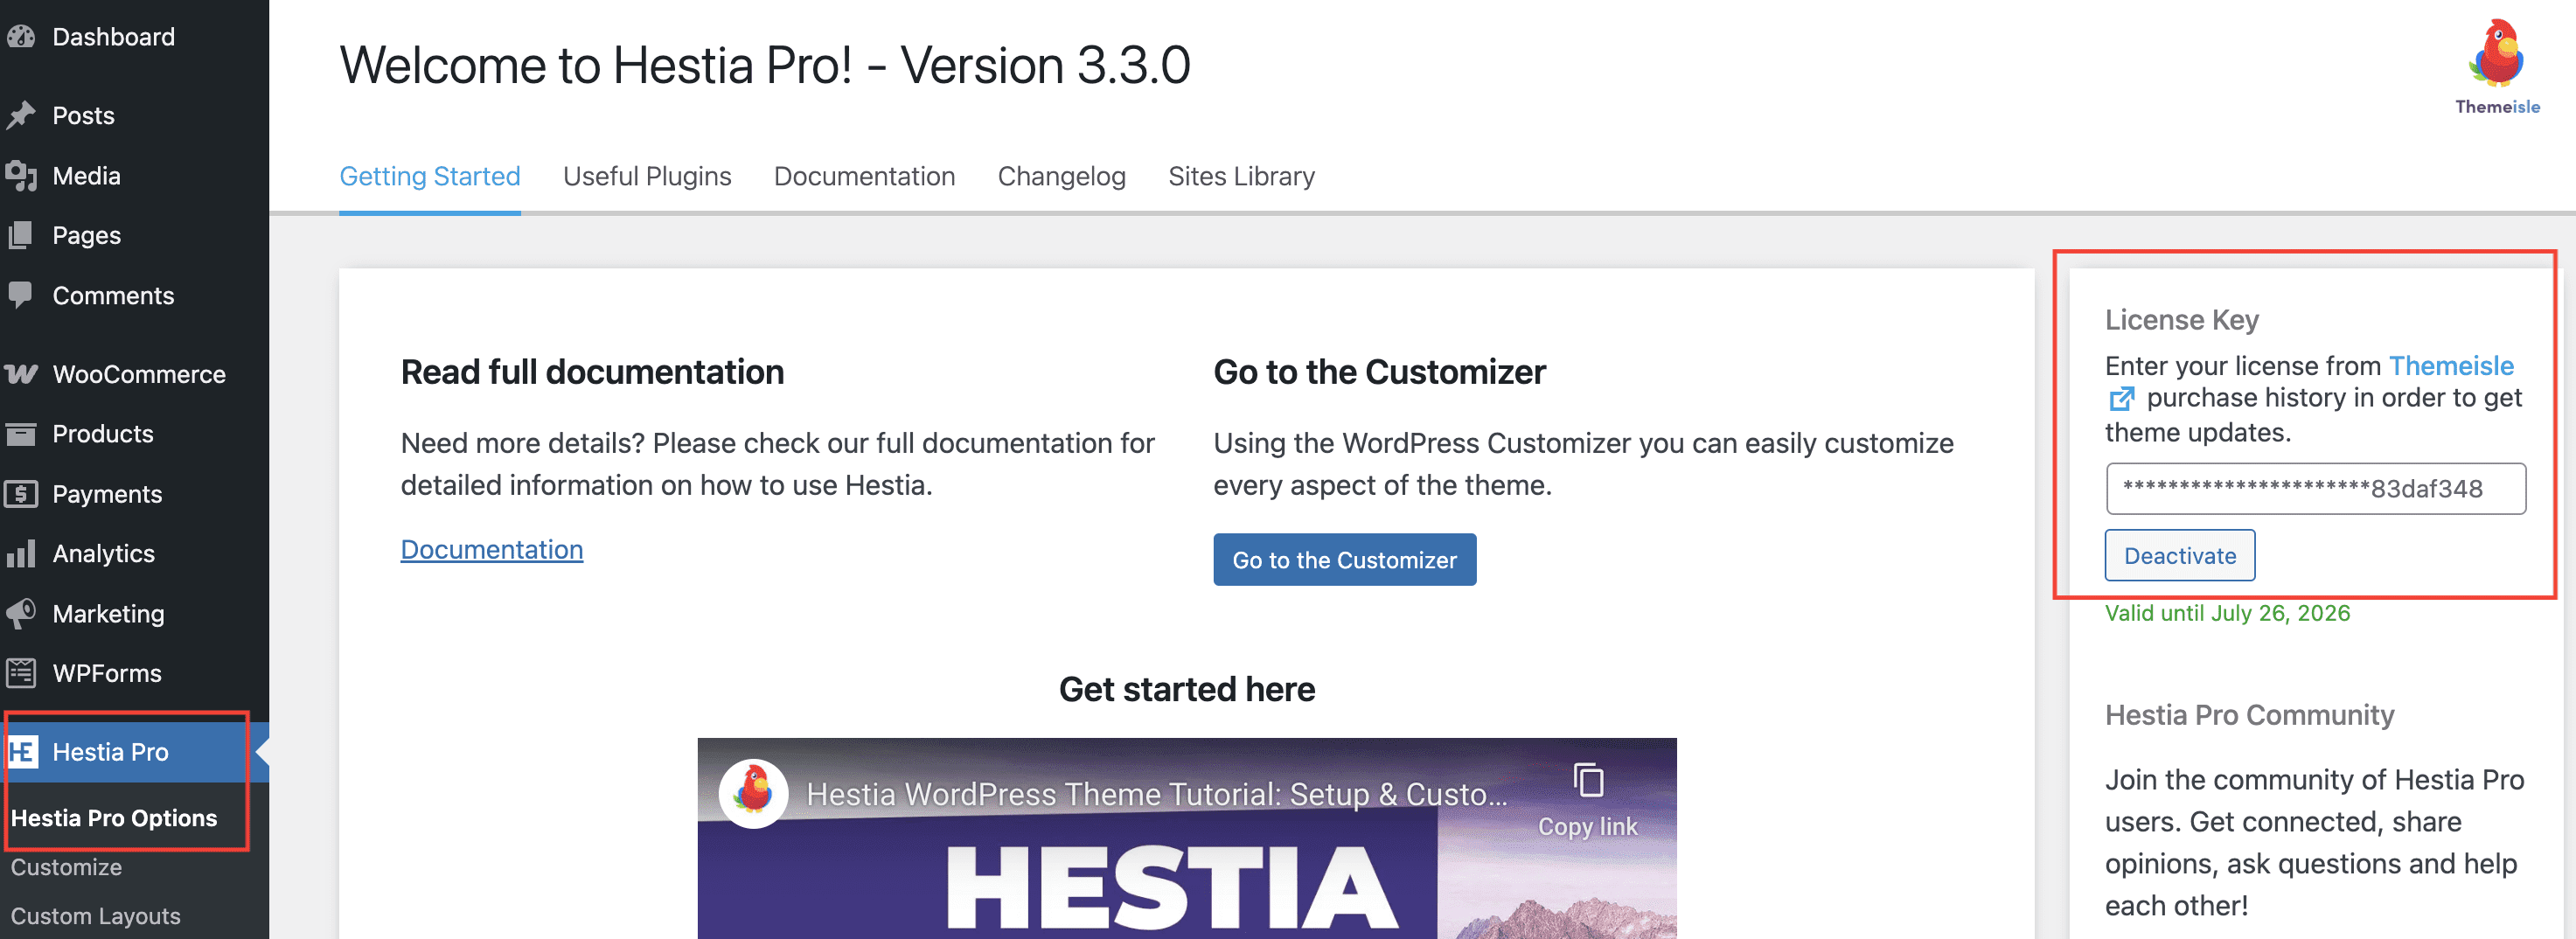
📝 Note: For exploring all the theme options, we recommend checking this article.
Troubleshooting: License Key field is missing
If you navigate to Hestia Pro > Hestia Pro Options and the License Key field is not visible, first make sure Hestia Pro is updated. On installations that have not been updated for a long time, the dashboard license-management field may not be available yet.
Update Hestia Pro, reload Hestia Pro > Hestia Pro Options, and check again for the License Key field. For the complete built-in update flow and the replacement-upload method, follow How to update to the latest version.
If the License Key field is still missing after updating Hestia Pro, the White Label Enable License Hiding setting is the next thing to check. When this option is active, all license-related UI — including the License Key field and license admin notices — is intentionally removed from the dashboard. This cause applies only on the Agency plan, because White Label is available only on that plan — on the Personal and Business plans White Label cannot hide the License Key field.
To restore the License Key field when White Label hiding is enabled:
- Go to Dashboard > Appearance > Customize > White Label, then click White Label Settings, or navigate directly to
/wp-admin/admin.php?page=ti-white-label. - Uncheck Enable License Hiding.
- Click Save Changes.
- Return to Hestia Pro > Hestia Pro Options and enter your license key.
📝 Note: If the White Label panel itself is hidden from your dashboard, use the direct URL /wp-admin/admin.php?page=ti-white-label to access it. For more details on what White Label options are available, see the White Label section in the Hestia Pro Documentation.
Using your Hestia Pro license on a staging or demo site
Yes, you can activate the same Hestia Pro license key on a staging, demo, development, or migration site — as long as your plan has an available activation slot.
Every separate WordPress installation counts as one activation, including:
- Staging and development sites
- Demo sites and subdomains (e.g.
staging.example.com) - Subdirectory installs (e.g.
example.com/staging)
📝 Note: If your plan only includes one activation and it is already used by your live site, you will need to deactivate it there before you can activate on a staging site. Consider upgrading your plan to add more activation slots if you need both active at the same time.
After testing: Once you are done with the staging or demo site, deactivate or remove the license there to free up the activation slot for your live site.
For more details on how activations are counted and how to manage your sites, see: