Custom Layouts in Hestia Pro
📝 Note: Custom Layouts are available in Hestia Pro, which you can get from here.
The Custom Layouts module within Hestia Pro allows you to create a section, that can be edited with the WordPress editor or Elementor and display it on the desired place of the website based on the hooks available in the theme. Such a layout can also be used as a global header/footer.
In this article
How to create a new layout
After installing and activating the Hestia Pro theme, navigate from your Dashboard to Hestia PRO > Custom Layouts, and create a new one.
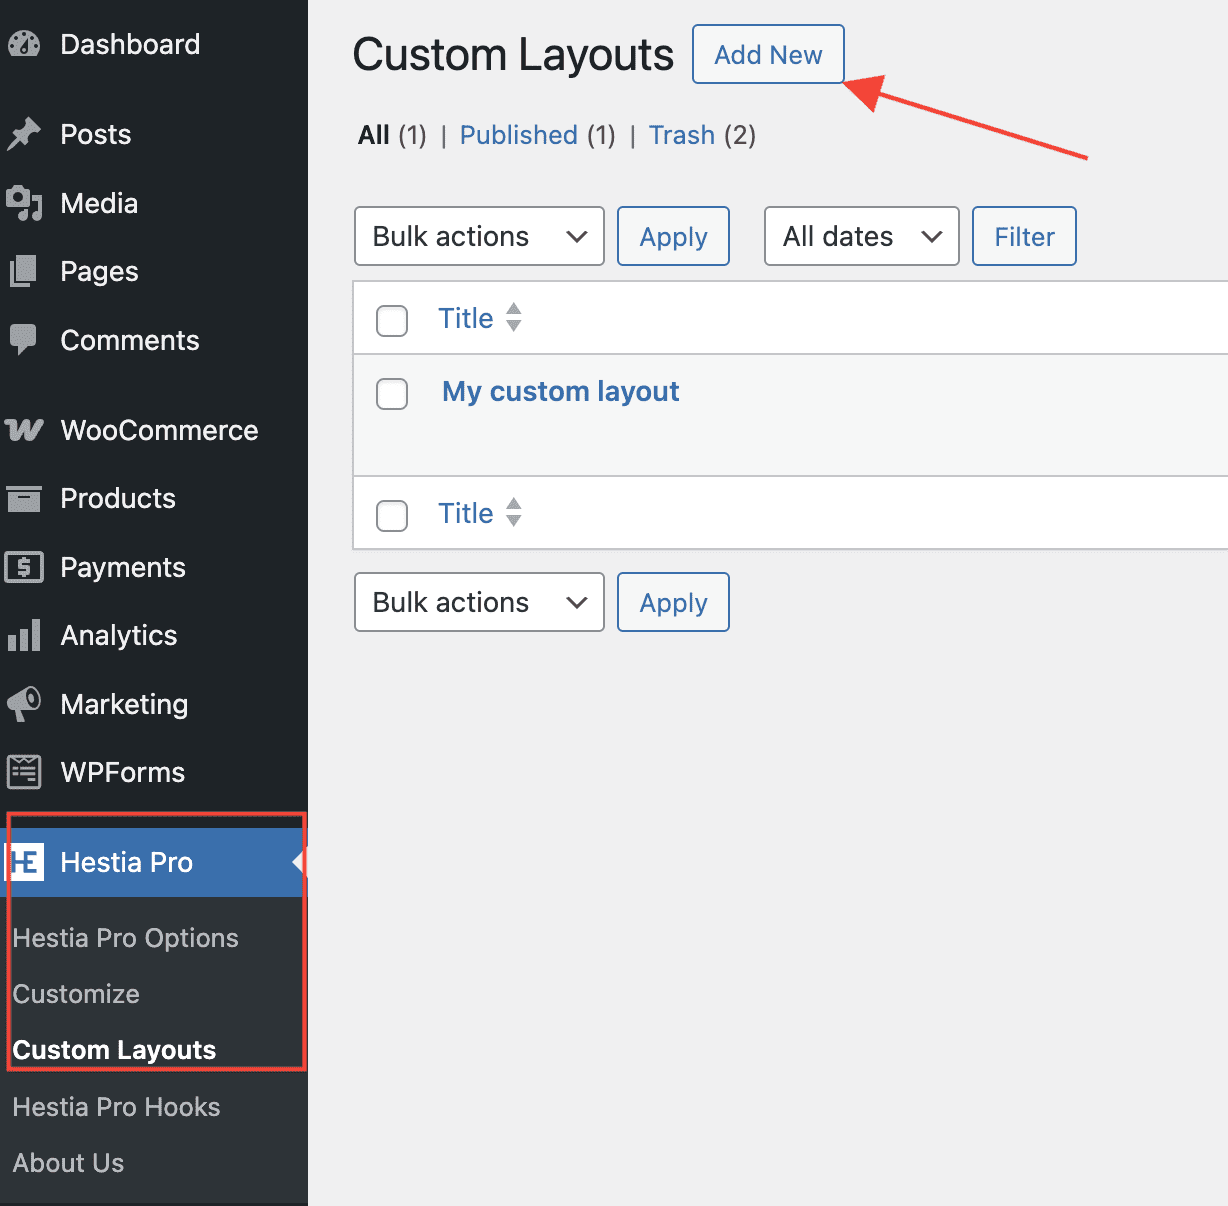
You can now edit it as any other post, with the desired editor.
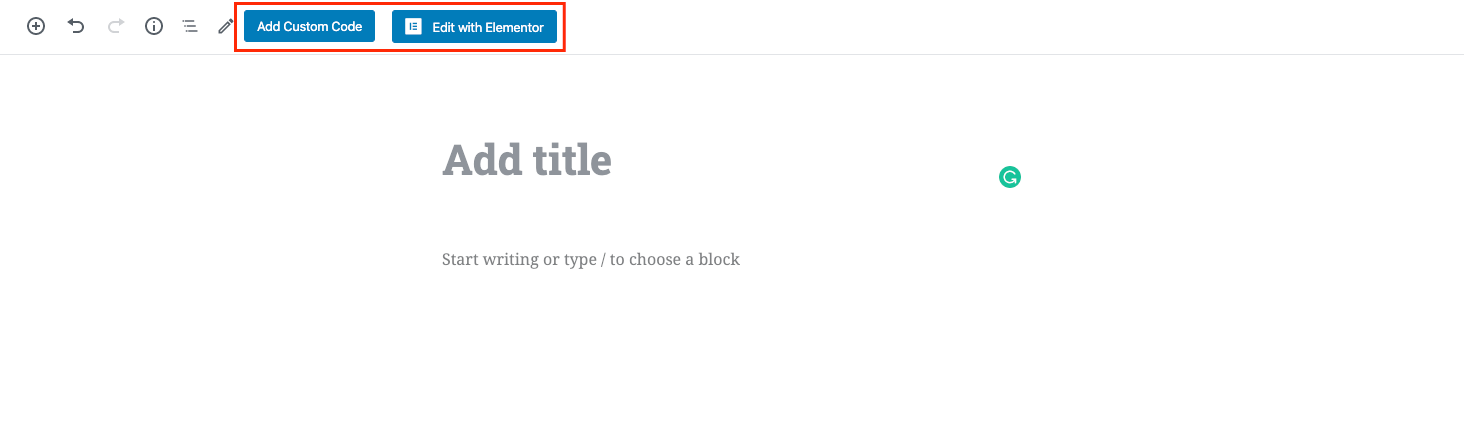
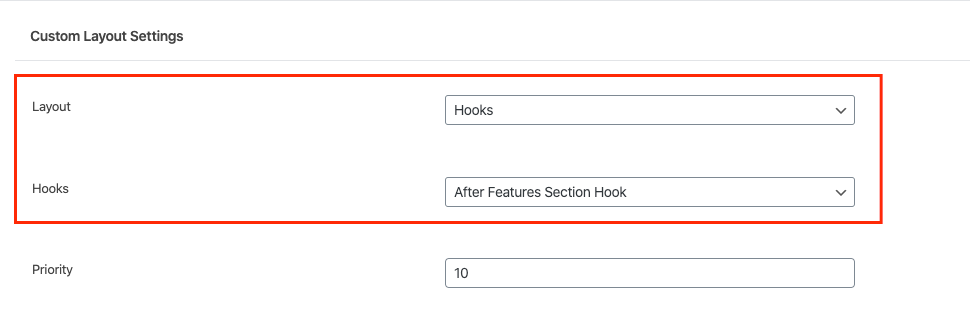
After editing the layout content, scroll down below the content editor to find the Custom Layout Settings meta box. This is where you choose where the layout appears on your site, which hook it targets, and any conditional display rules.
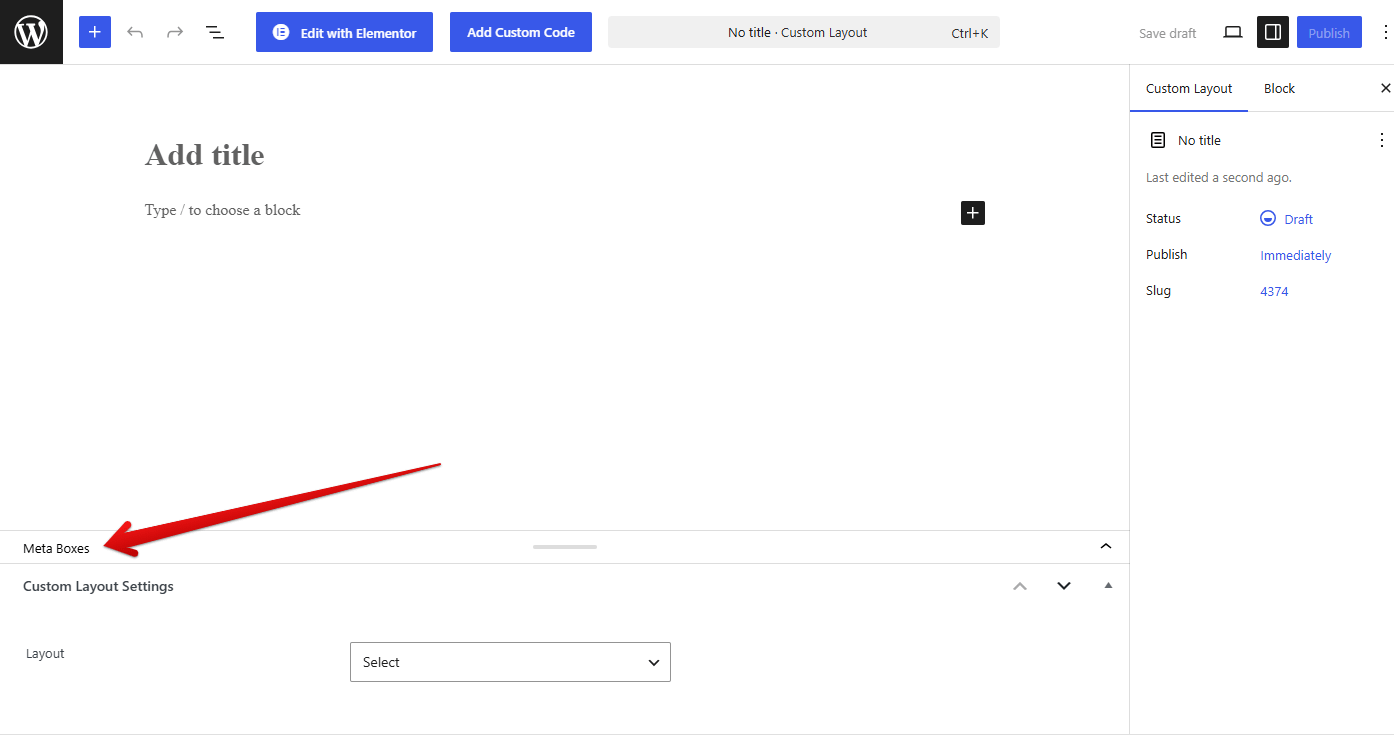
💡 Tip: If you do not see the Custom Layout Settings panel, it may be hidden. Click the Options menu (the three-dot ⋮ icon in the top-right corner of the editor), select Preferences, open the Panels tab, and enable Custom Layout Settings. Return to the layout editor and scroll down to access the settings.
⚠️ Important: After finishing your edits, make sure the layout status is set to Published (not draft). A layout saved as a draft will not appear on your site.
Where to show it
From the layout settings, you can choose where you want it to be displayed.
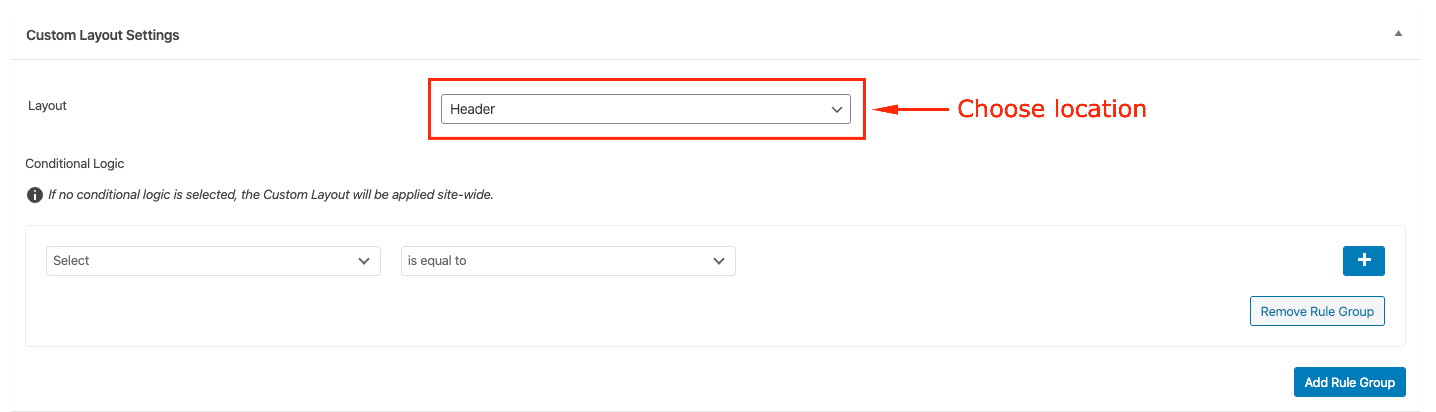
Header
By creating a new layout and choosing the Header location, it is possible to replace the default header of the theme on all pages.

Header Location
Below are images of how the theme header will be replaced with a custom one. It is also possible to have a custom header based on the page type. This can be achieved by choosing the Header location and adding the desired conditional logic - more details in this section.

Default Header

Custom Header
Page Header
By creating a new layout and choosing the Page Header location, it is possible to replace the default page header of the theme on all pages.

Page Header Location
Below are images of how the default page header will be replaced with a custom one. It is also possible to have a custom header based on the page type. This can be achieved by choosing the Page Header location and adding the desired conditional logic - more details in this section.

Default Page Header

Custom Page Header
Footer
By creating a new layout and choosing the Footer location, it is possible to replace the default footer of the theme on all pages.

Footer Location
Below are images of how the default footer will be replaced with a custom one. It is also possible to have a custom footer based on the page type. This can be achieved by choosing the Footer location and adding the desired conditional logic - more details in this section.

Default Footer
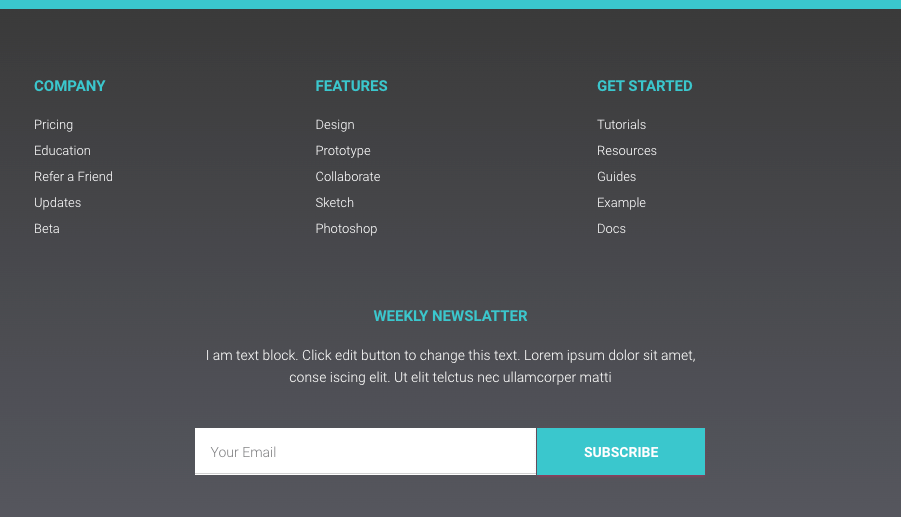
Custom Footer
404 Page
This module allows you to change the default 404 Page of the theme. This can be achieved by creating a new layout with your own version of this page and choosing the 404 Page location in the Layout Settings. Below is a screenshot of how this page looks like by default.

404 Page Location
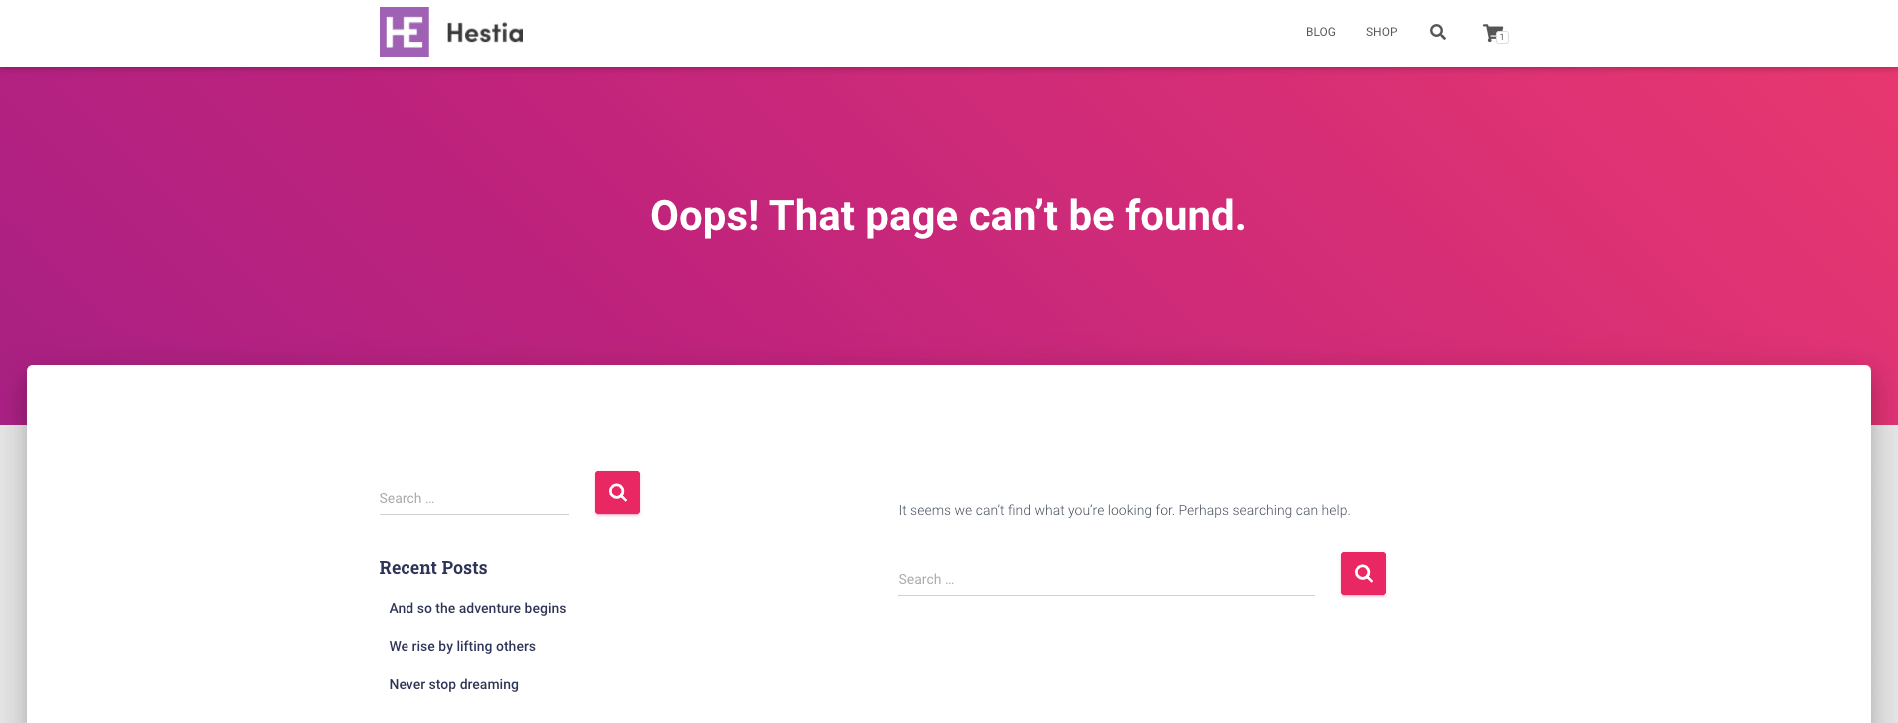
404 Default Page
Hooks
The hooks are in various locations registered in the theme. You can check them on each page by using the Show Hooks button available in the admin navbar.
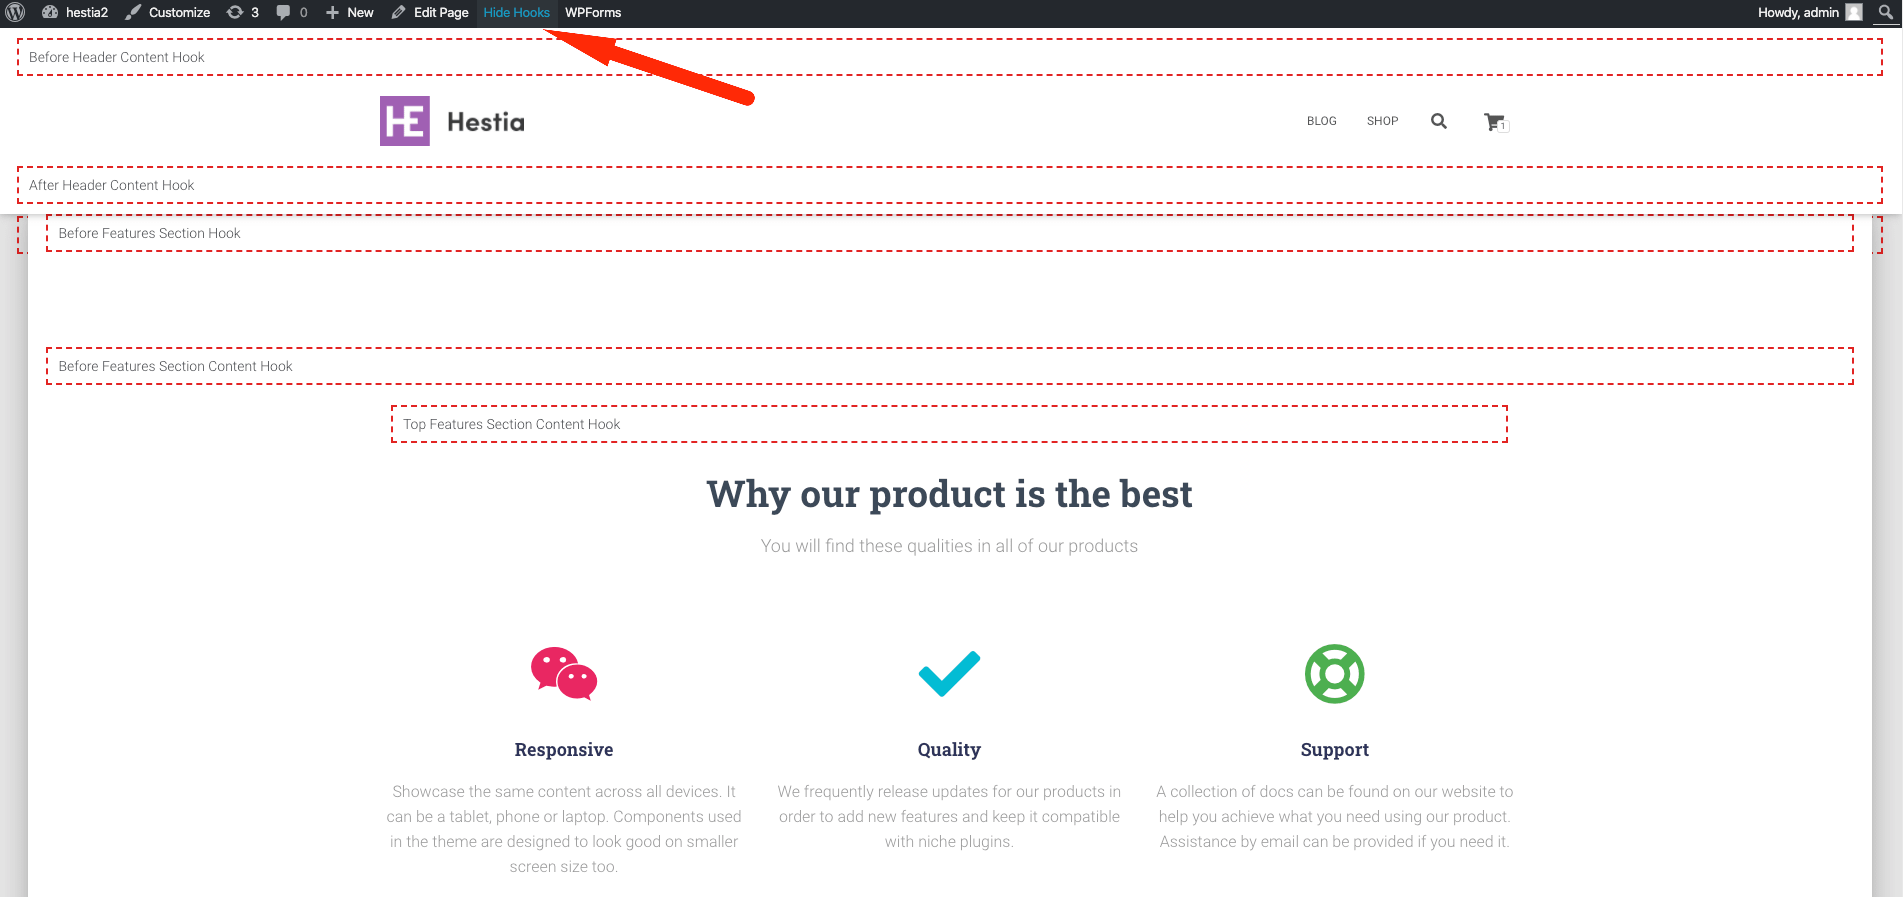
Those can be very helpful for adding a custom section between the ones available on the front page.
⚠️ Important: Hook locations tied to a specific section (e.g., Before Feature Section or After Feature Section) will only display if that section is enabled in Customizer > Frontpage Sections. If the target section is disabled, the hooked layout will not appear on the page.
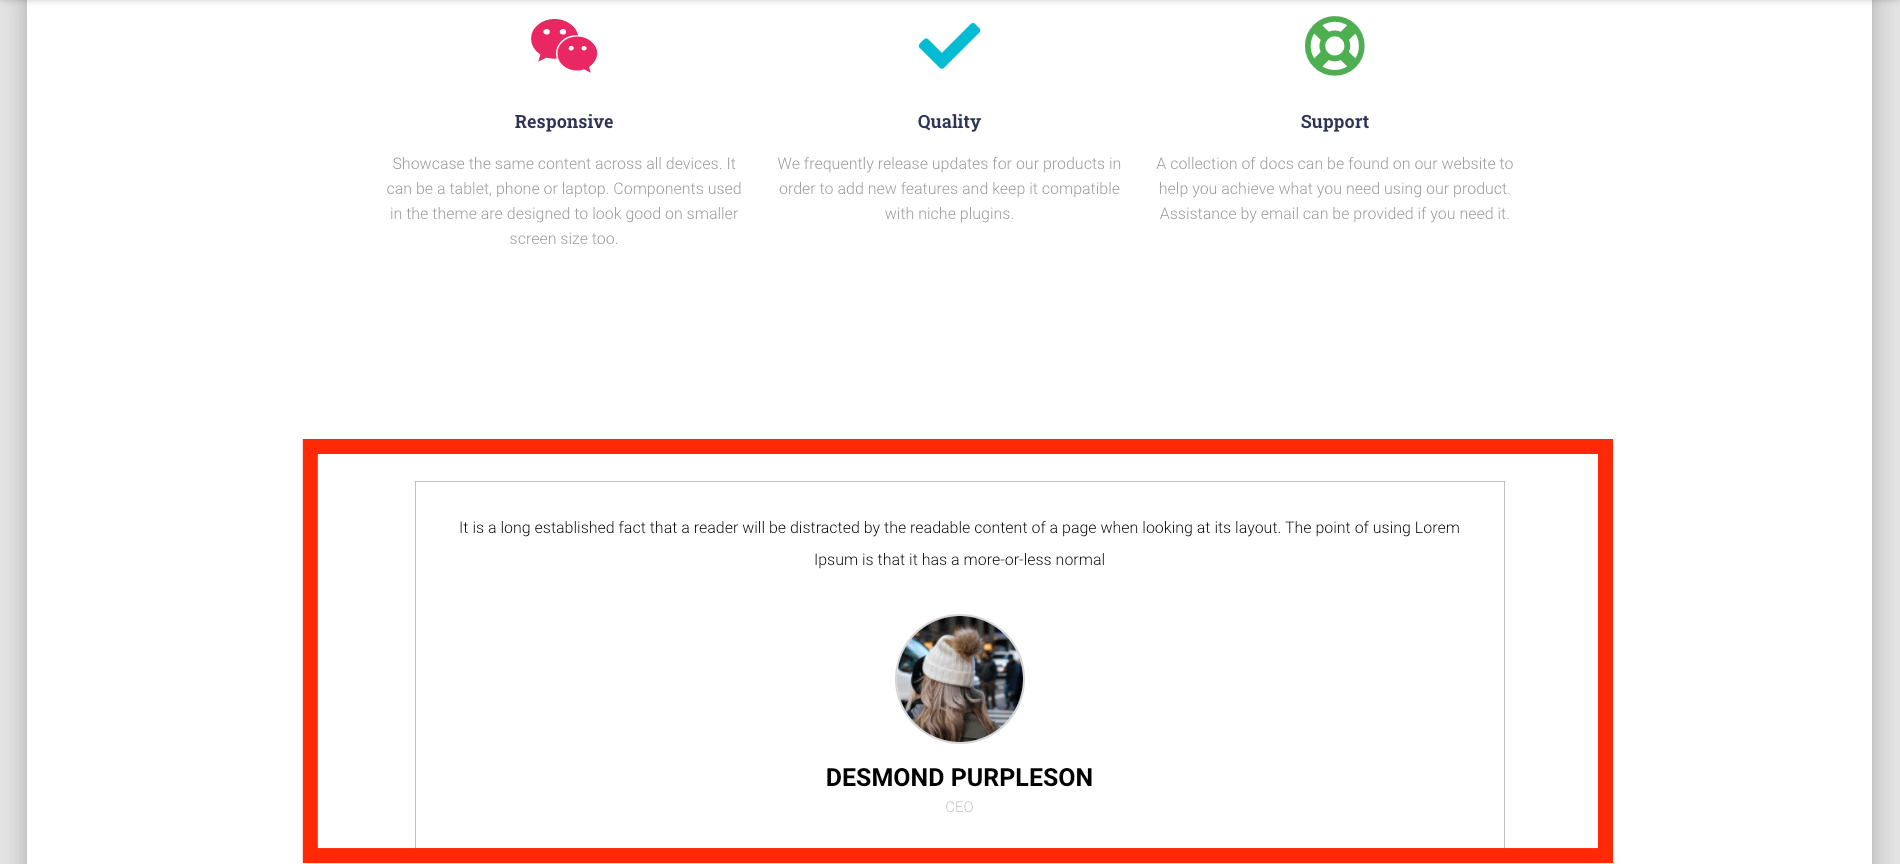
Below is an example of adding a custom section after the features section.
💡 Custom Layouts vs. Hestia Pro Hooks page: Custom Layouts use the visual WordPress/Elementor editor. If you need to inject raw HTML or PHP code into hook locations, use Appearance > Hestia Pro Hooks instead — that is a separate, code-based interface and is not the same as the Custom Layouts module. Do not enter layout names or shortcodes in the Hestia Pro Hooks fields.
Conditional Display
Now that you have decided on a place on the page for the Custom Layouts, it's time to select on each page you want the Custom Layout to be displayed.
📝 Note: By default, if nothing is selected the Custom Layout will apply on all pages of the site.
But if you want more control, you can add specific rules, that you can combine in order to achieve what you need.
Let's look at a few examples. These are just some cases, you can play with them by adding AND or OR rules.
a) Will apply only on WooCommerce's Shop page

b) Will apply only on the Blog page

c) Will apply on all Products' single pages

d) Will apply on all pages that have the Page Builder Full Width template and only for the admin user.

Troubleshooting Visibility Issues
If your Custom Layout is not appearing on the homepage or live site, work through the following checks:
Layout is not published — Go to Hestia PRO > Custom Layouts and confirm the layout's status is Published. If it shows as Draft, click Quick Edit and change the status to Published.
Target section is disabled — Hook locations like Before Feature Section only work if the corresponding section (e.g., Features) is enabled. Go to Appearance > Customize > Frontpage Sections and make sure the target section is toggled on.
Use "Show Hooks" to verify placement — While logged in as an admin, visit the homepage and click the Show Hooks button in the admin bar. This overlays all available hook positions on the page, letting you confirm the hook name you selected in the layout settings matches an active location.
How to hide a custom layout
In order to hide a custom layout click on Quick Edit and save it as a draft.

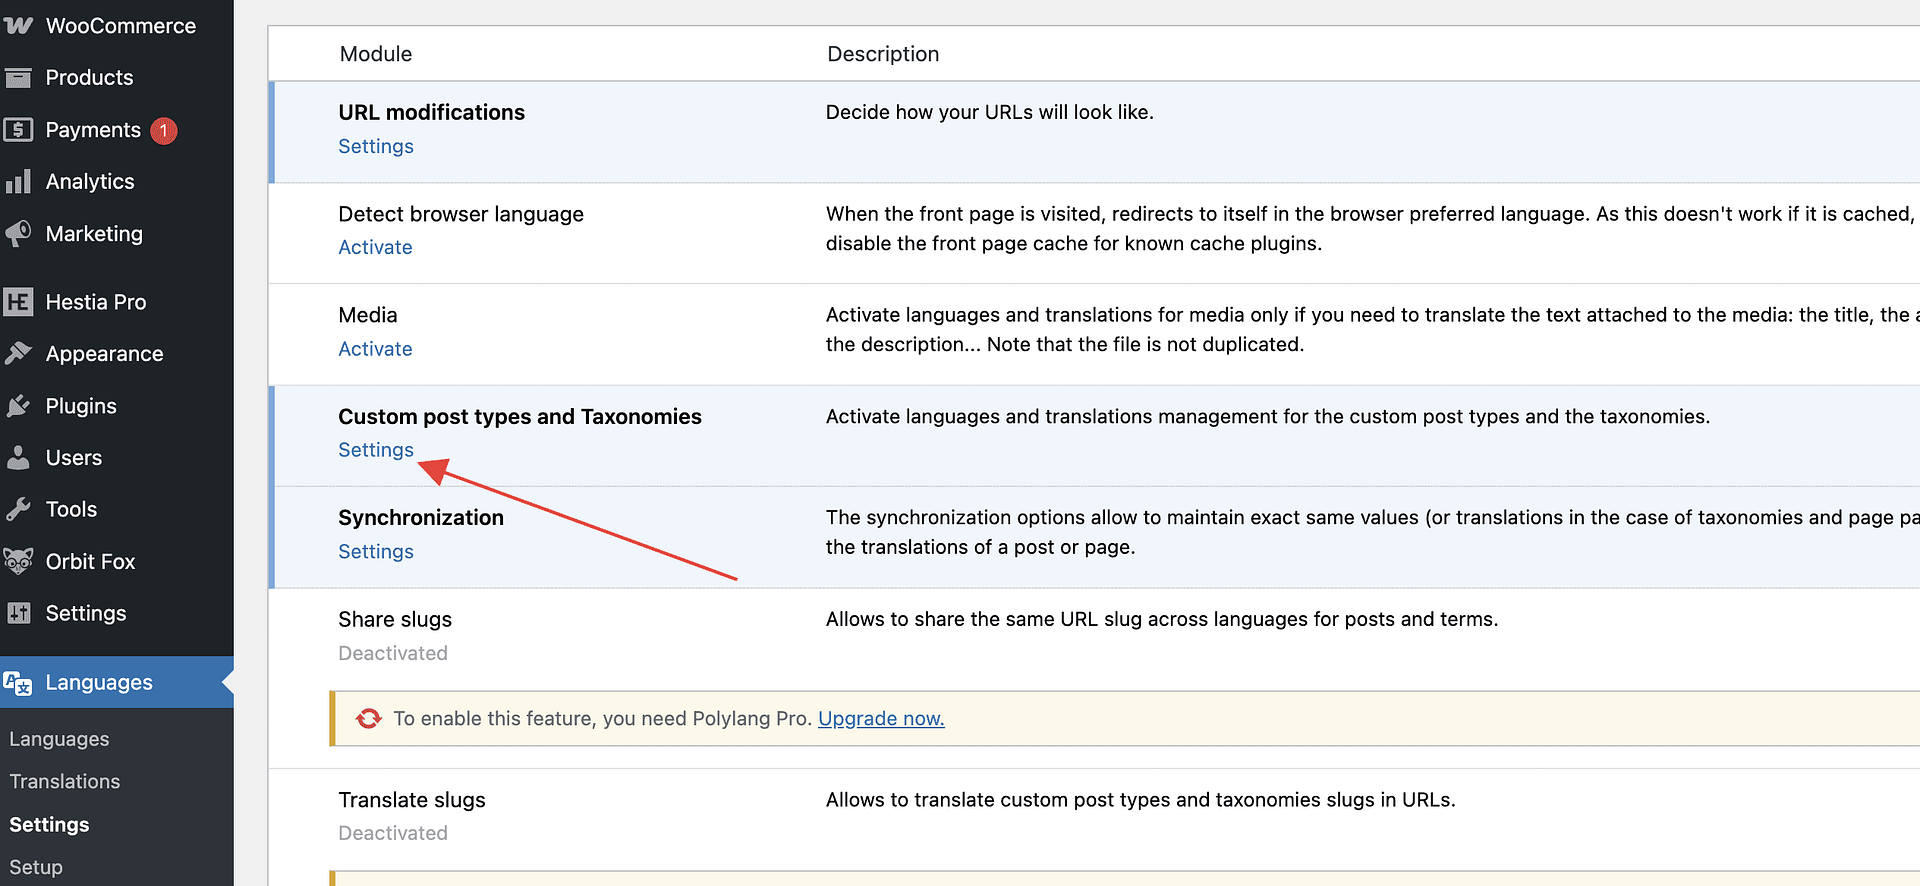
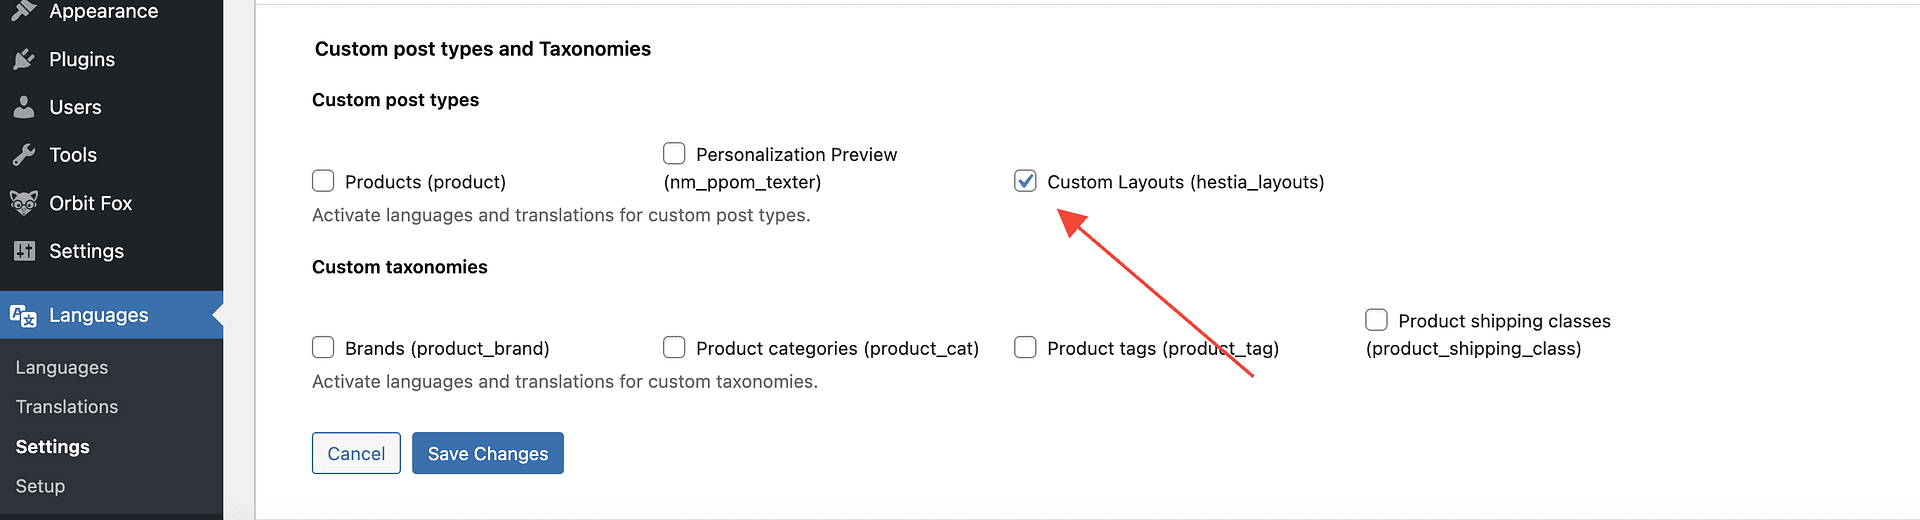
How to translate a custom layout
Hestia PRO's Custom Layouts act as normal custom post types and can be translated as any other custom post type, using a plugin that support this.
For example, using Polylang, navigate to Languages > Settings > Custom Post Types and Taxonomies and click on Settings, there you should be able to enable using Polylang for Custom Layouts.