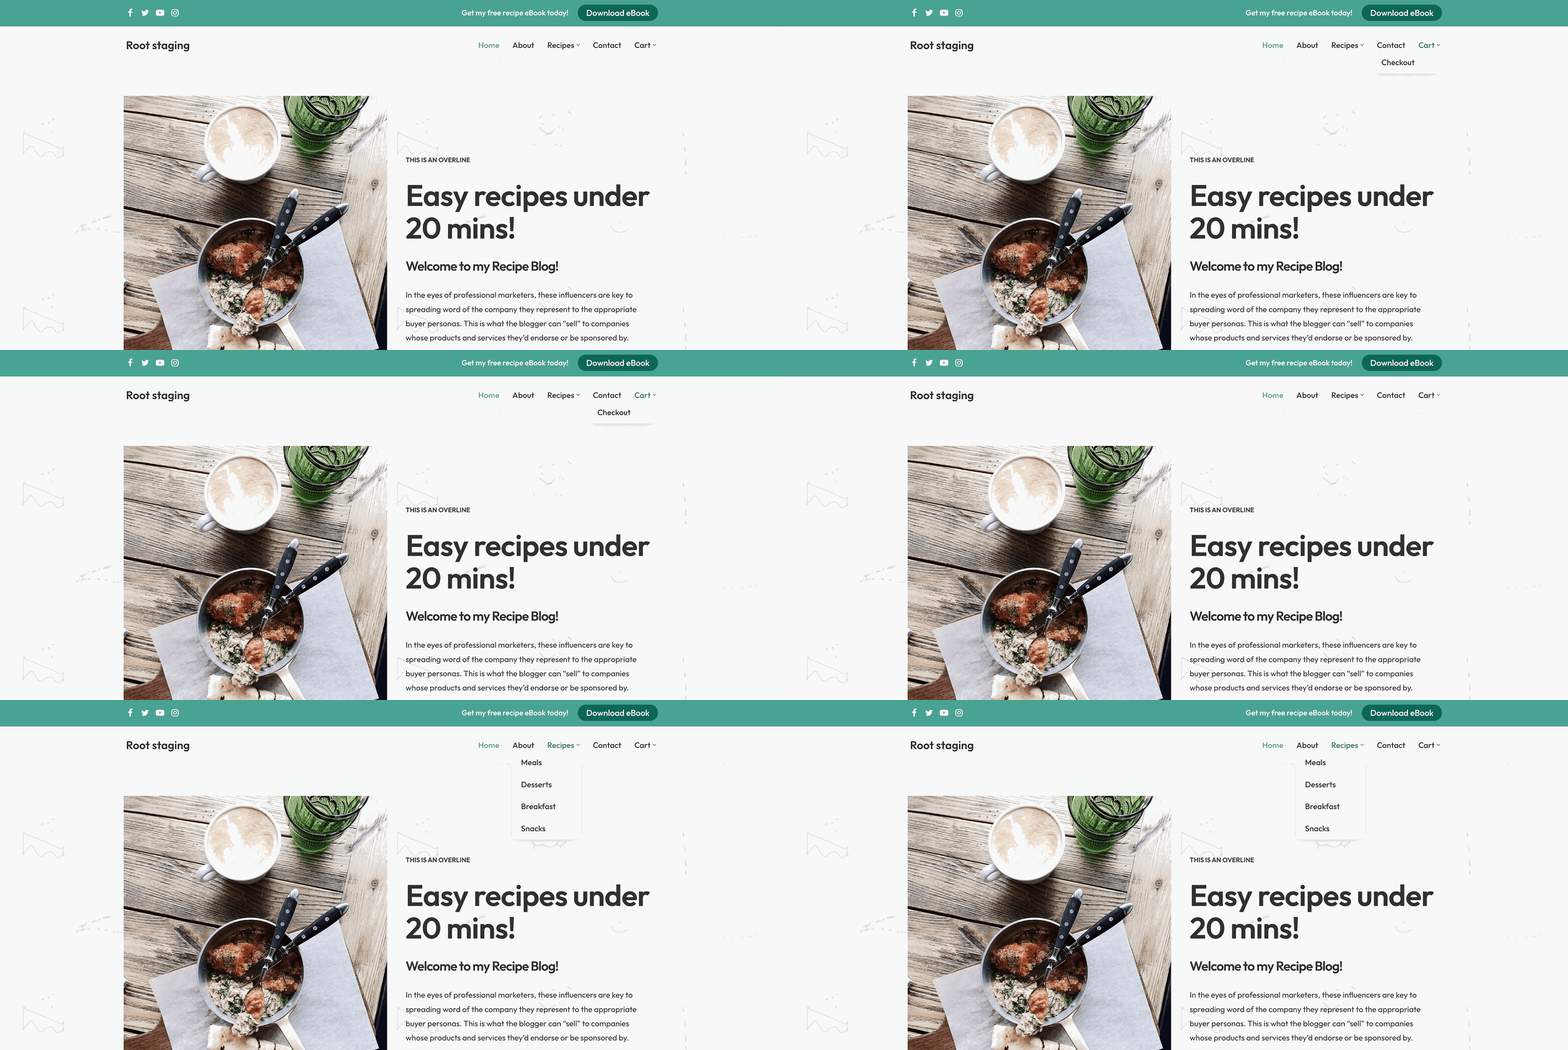
How to create a submenu in WordPress
📝 Note: Please note that this guide refers to classic themes. If you need to add subitems to FSE themes, here is a useful guide.
Submenu items are secondary menus that appear beneath the primary menu items, used mainly to organize related content for an efficient experience.
1. Navigate to Appearance > Menus.
2. Select from the dropdown list the menu that you want to edit.
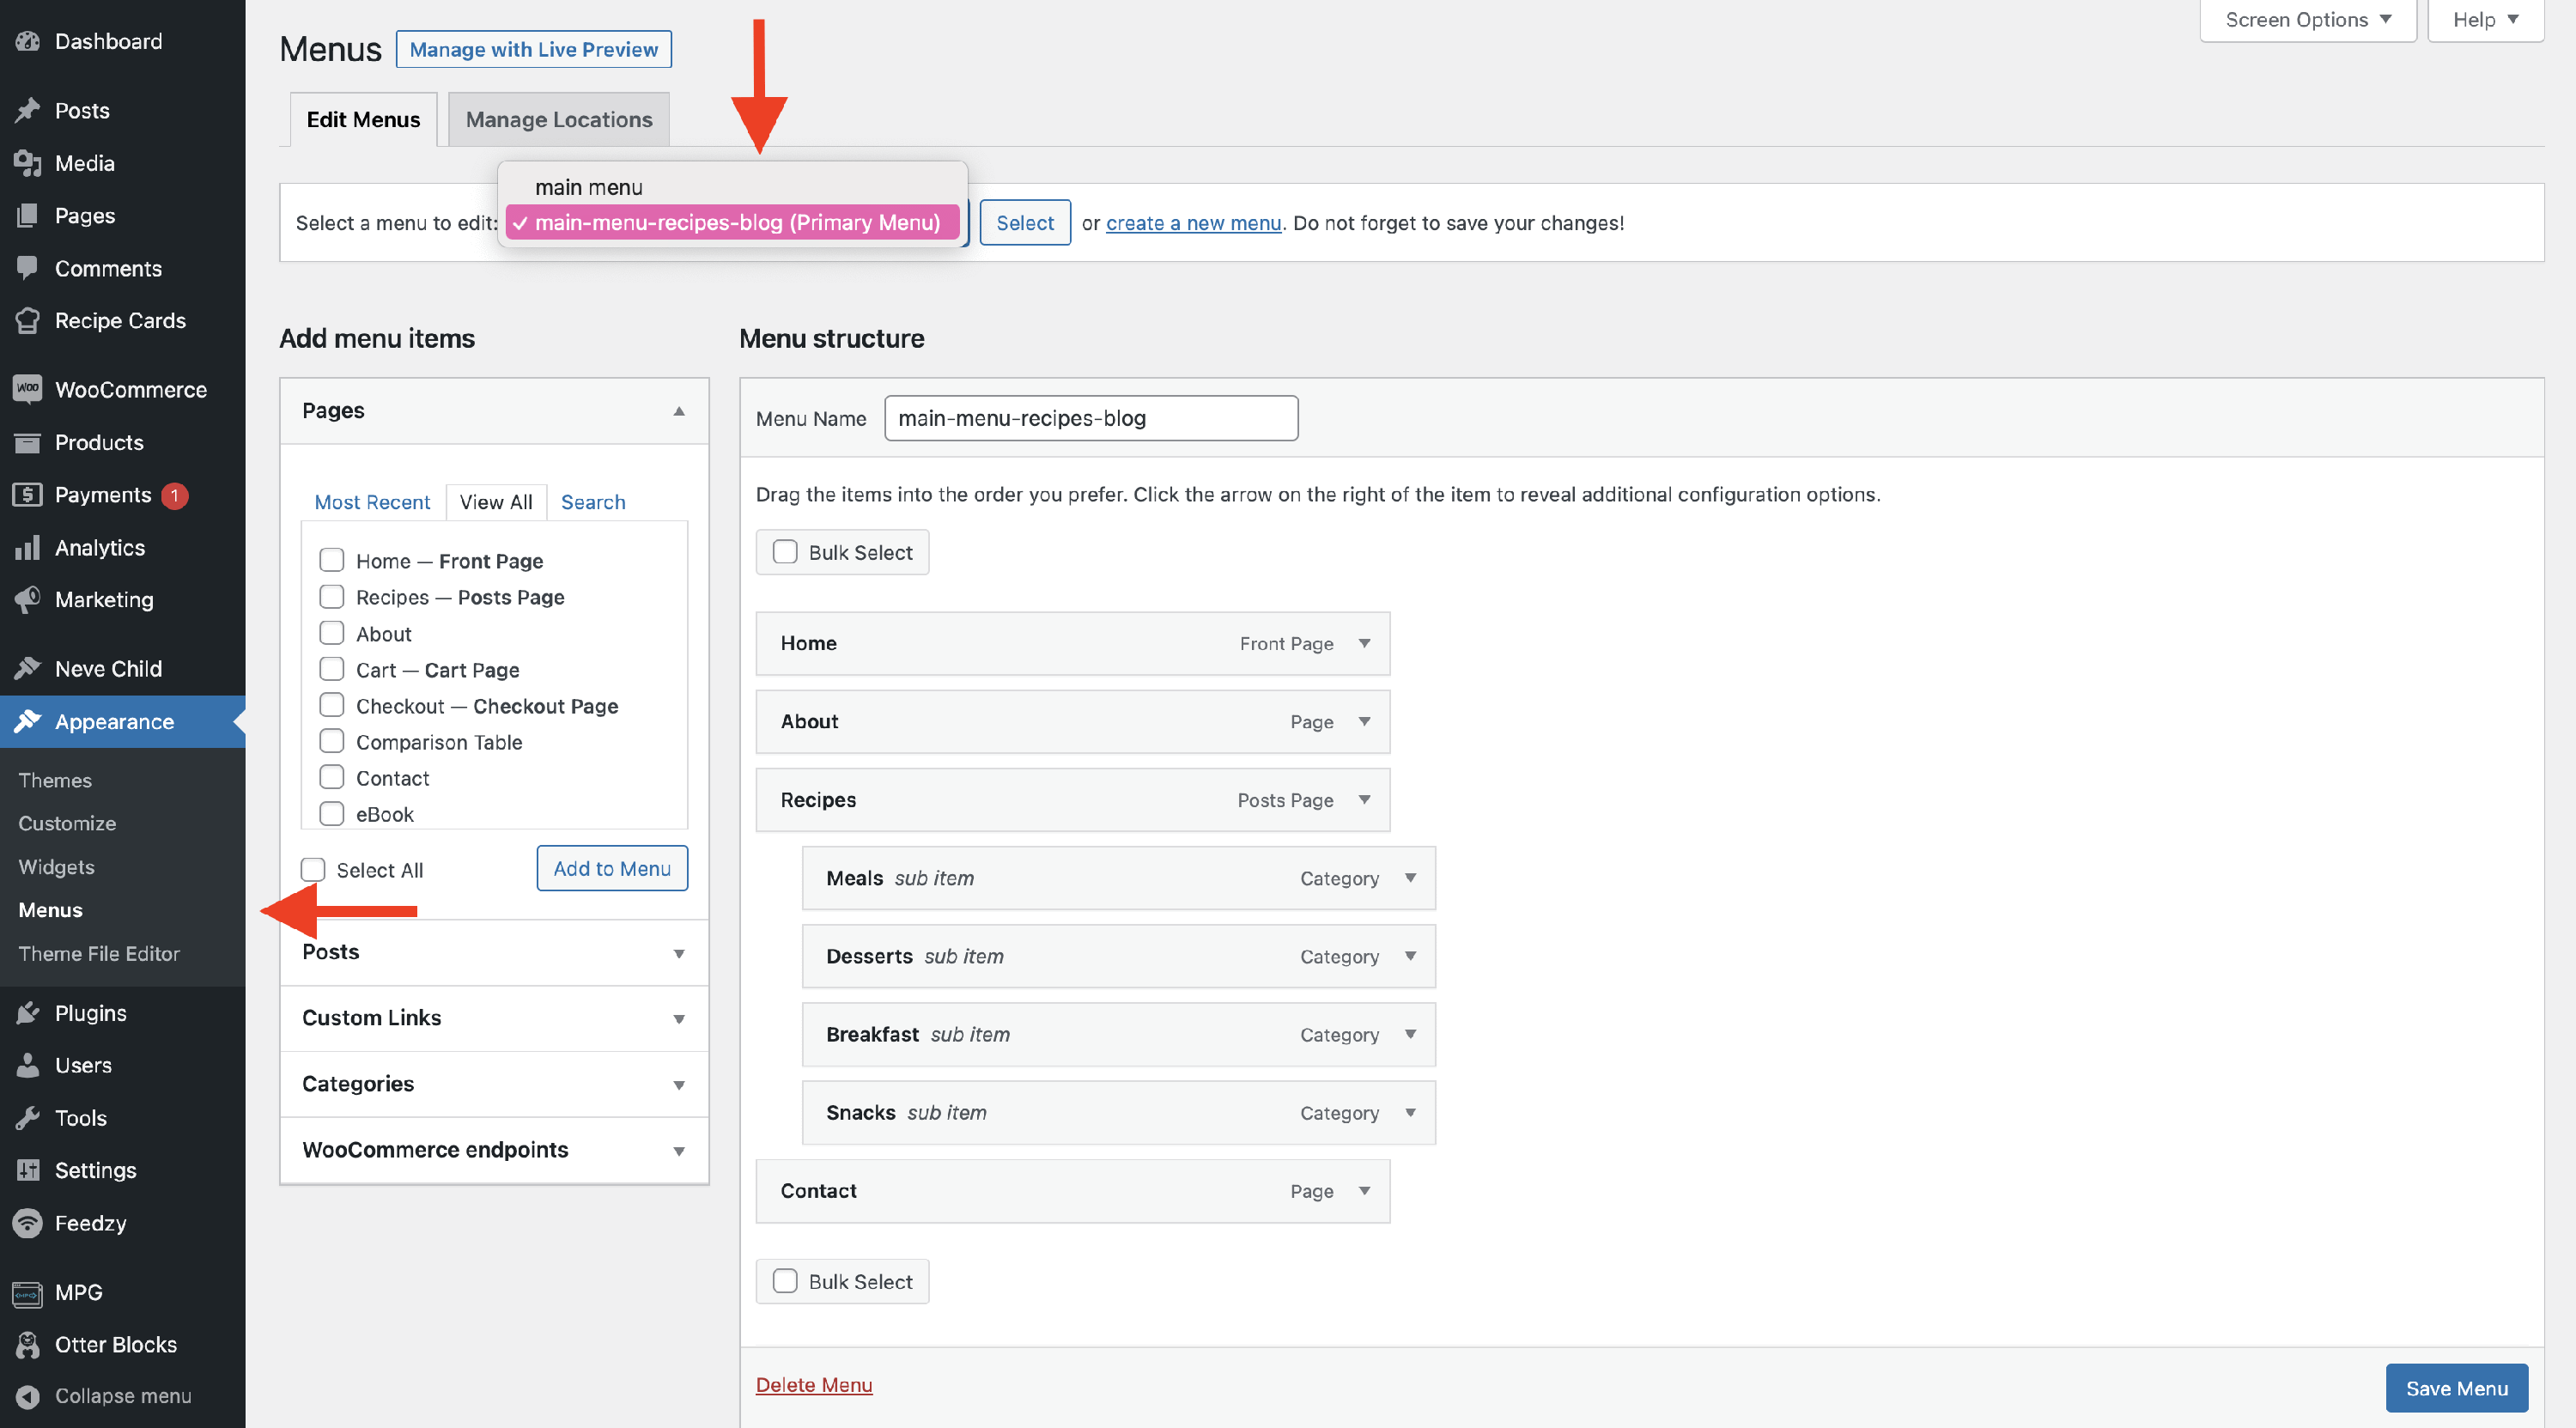
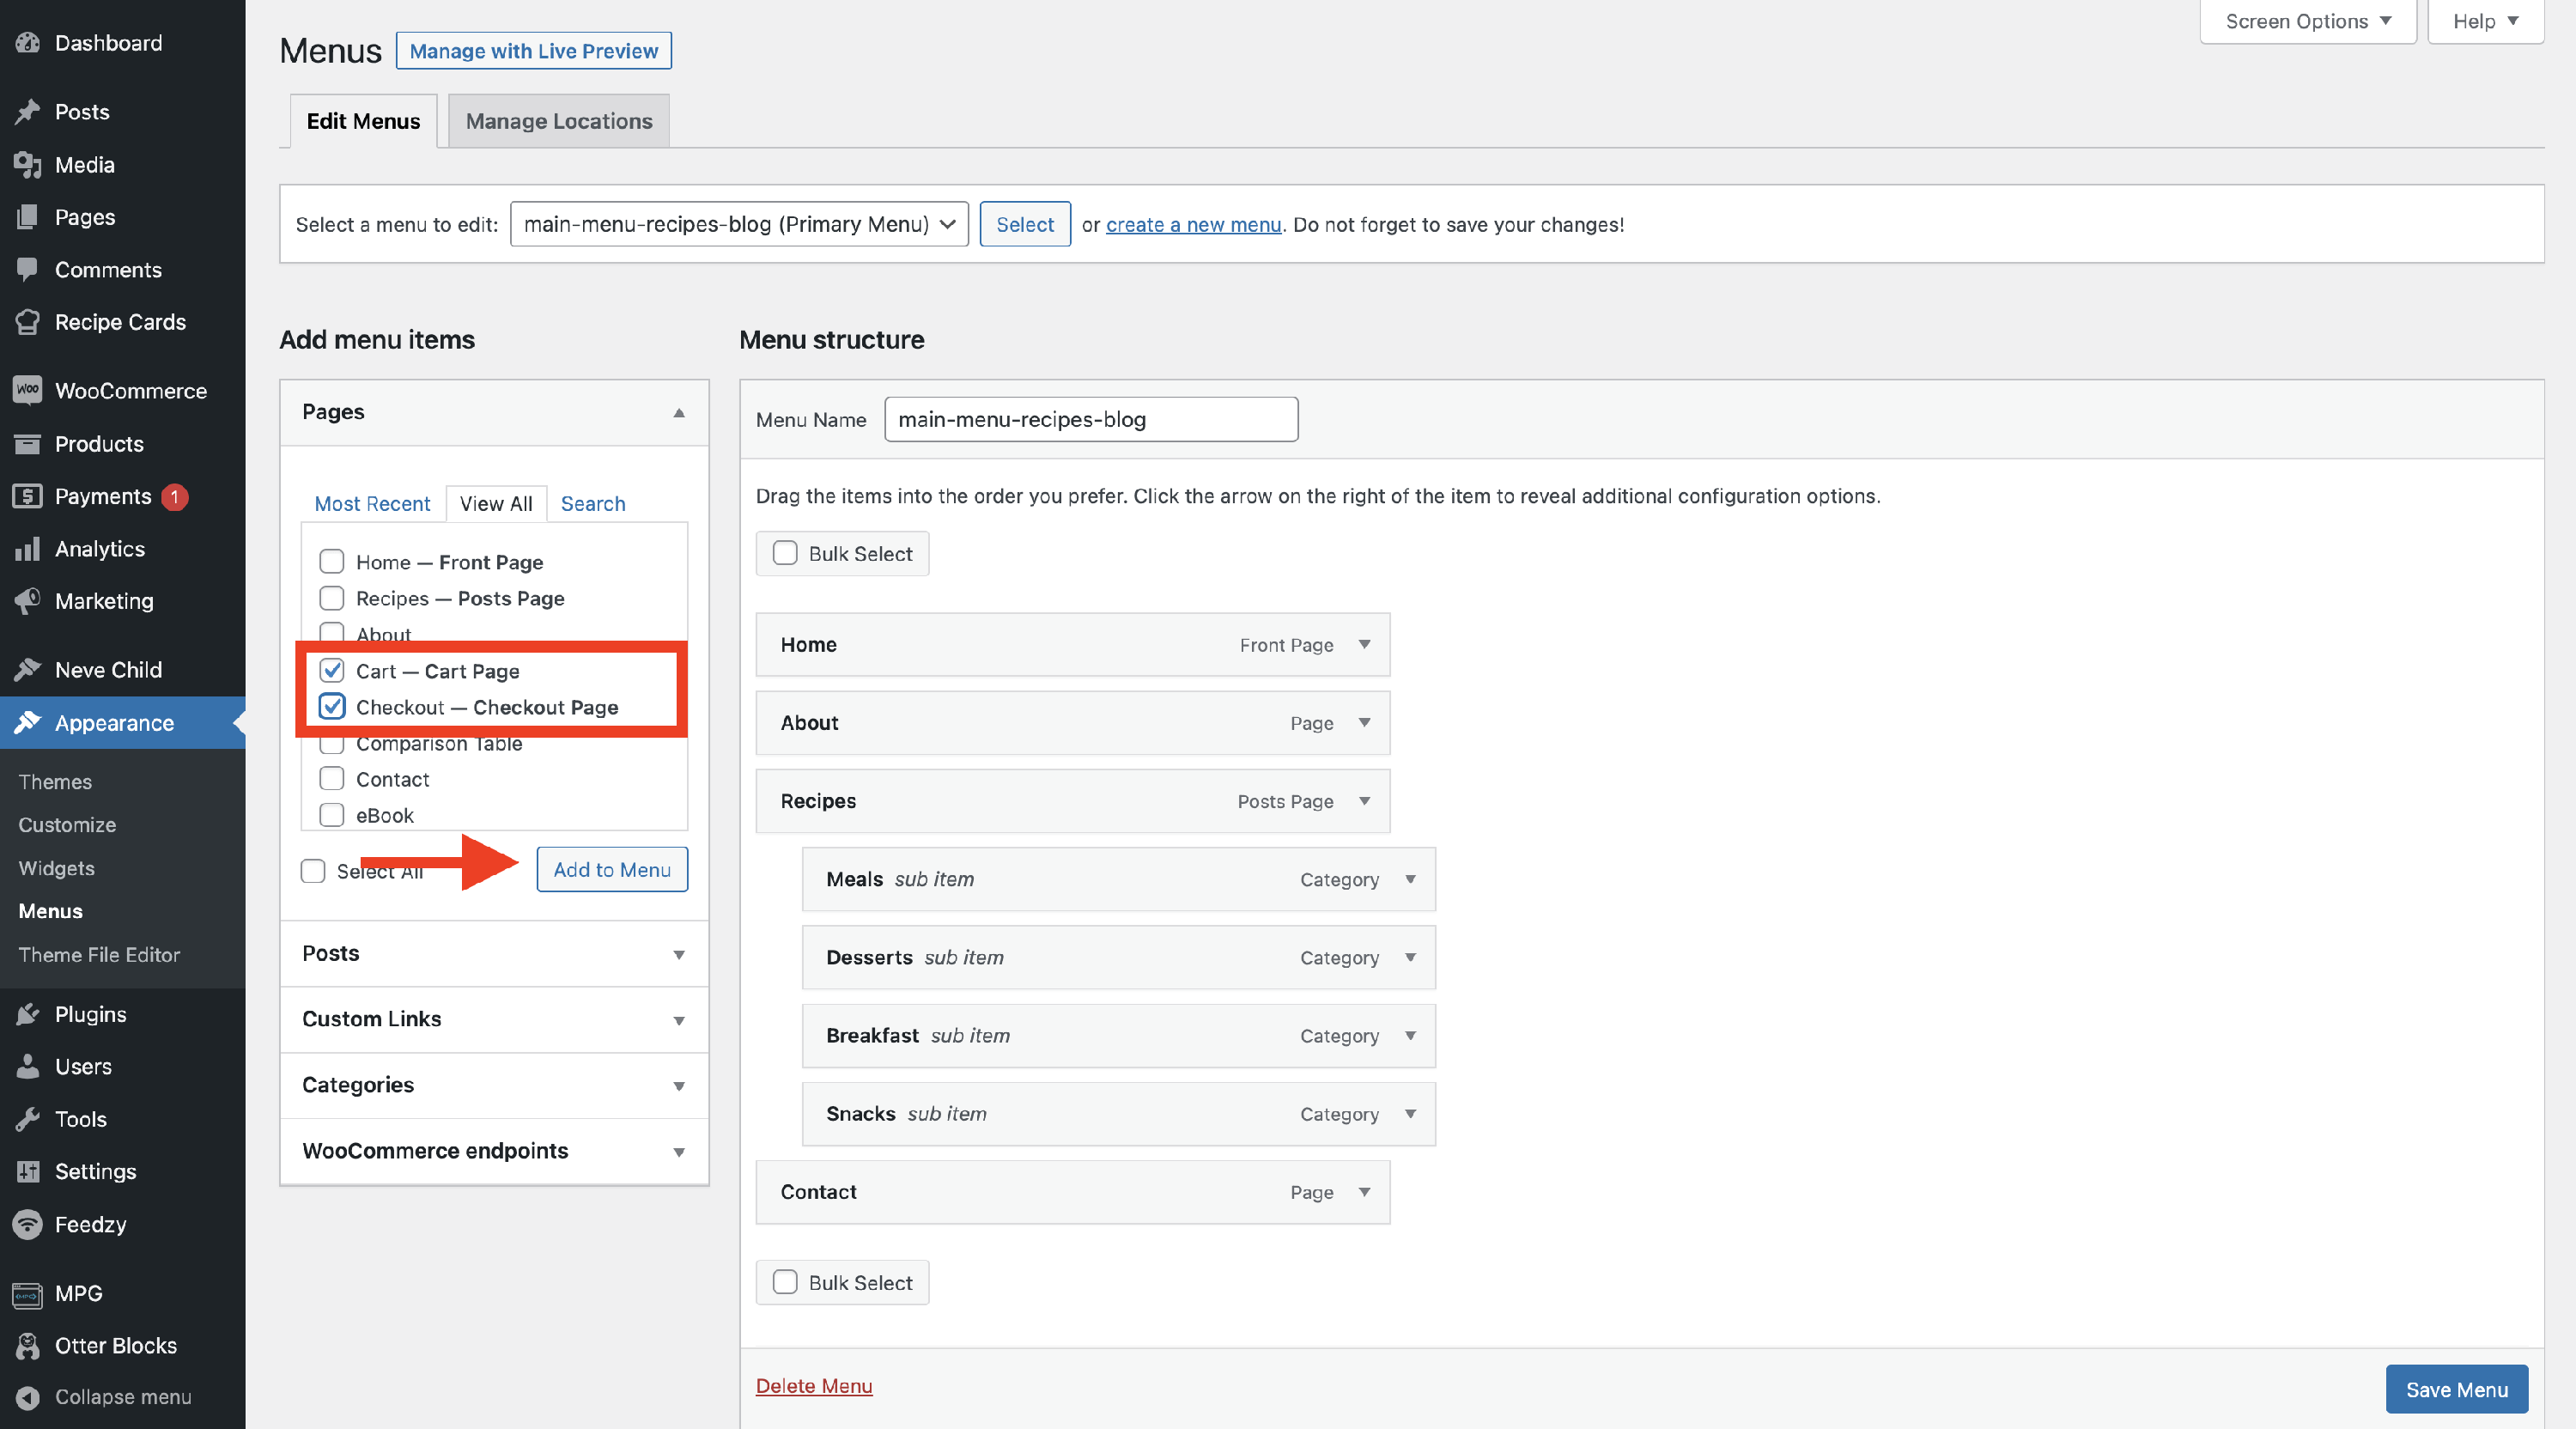
3. From the Add menu items area, check the subitem and click on Add to Menu.
📝Note: If the subitem represents a page that already exists on your site, add it from the Add menu items area instead of recreating it as a Custom Link. If you do need a Custom Link — for example, to link to an external page — enter the page's full, current URL rather than a shortened or outdated link that redirects to the destination. WordPress needs to match the menu item's URL to the page you are viewing to mark that item, and its parent, as active; a redirecting or outdated link can load the right page while leaving the menu without its active styling.
4. After adding it, choose the subitem and drag it under the primary item.
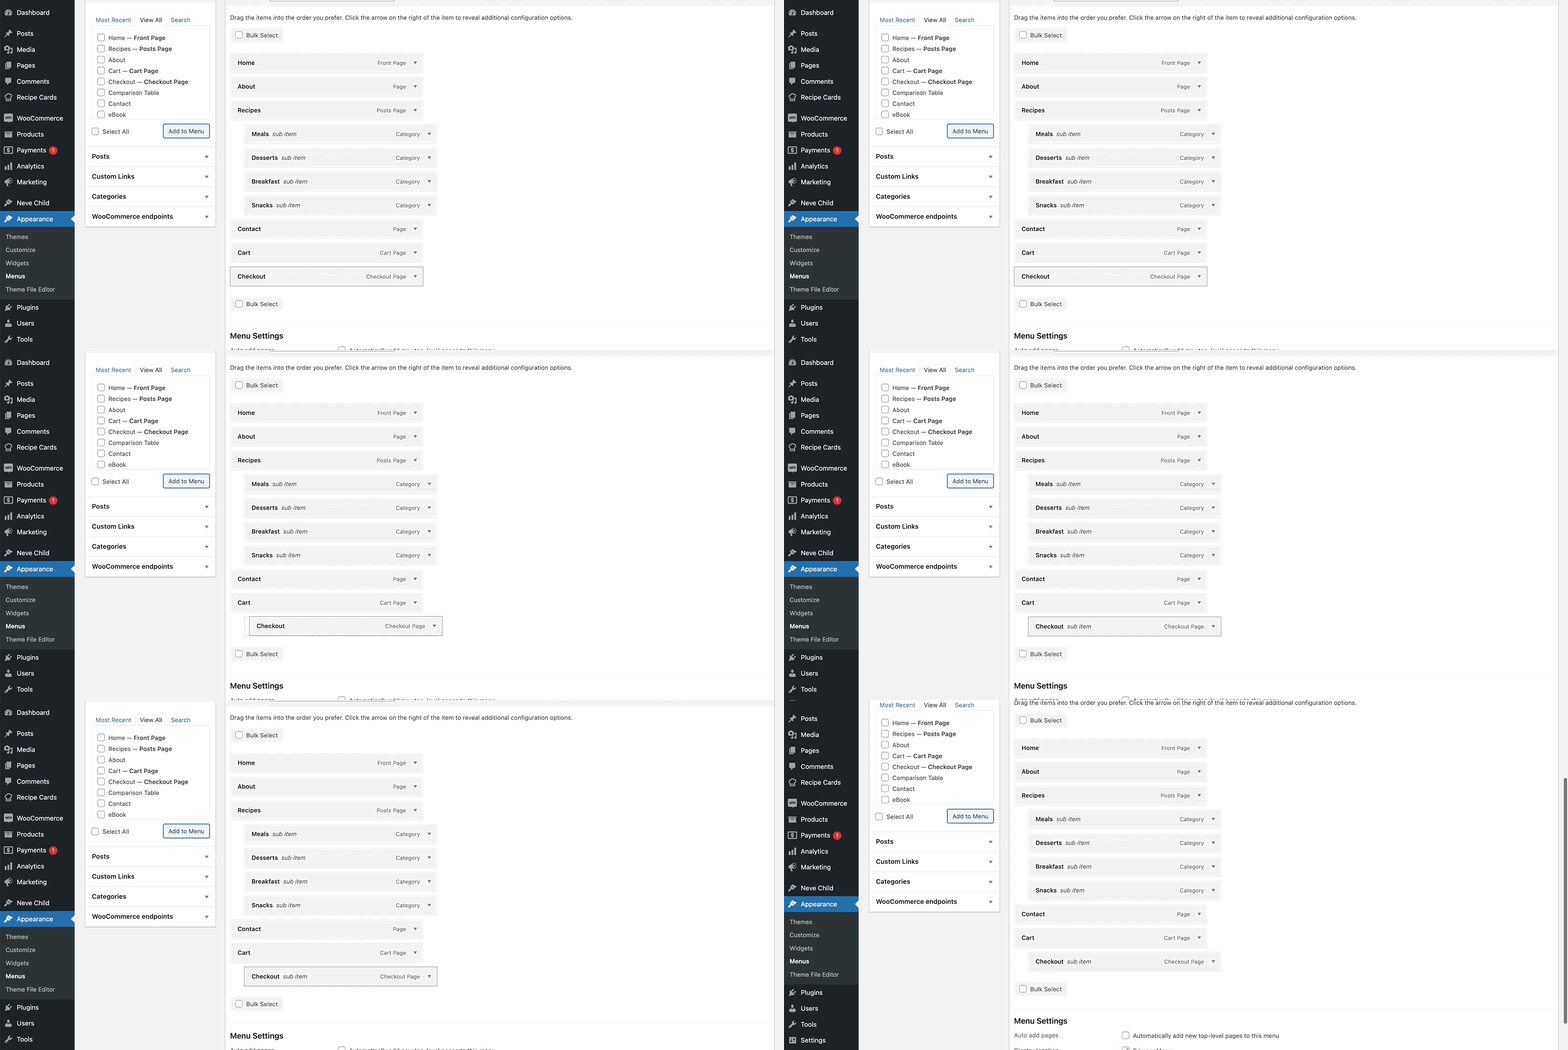
5. When everything is ready, click on the Save Menu button.
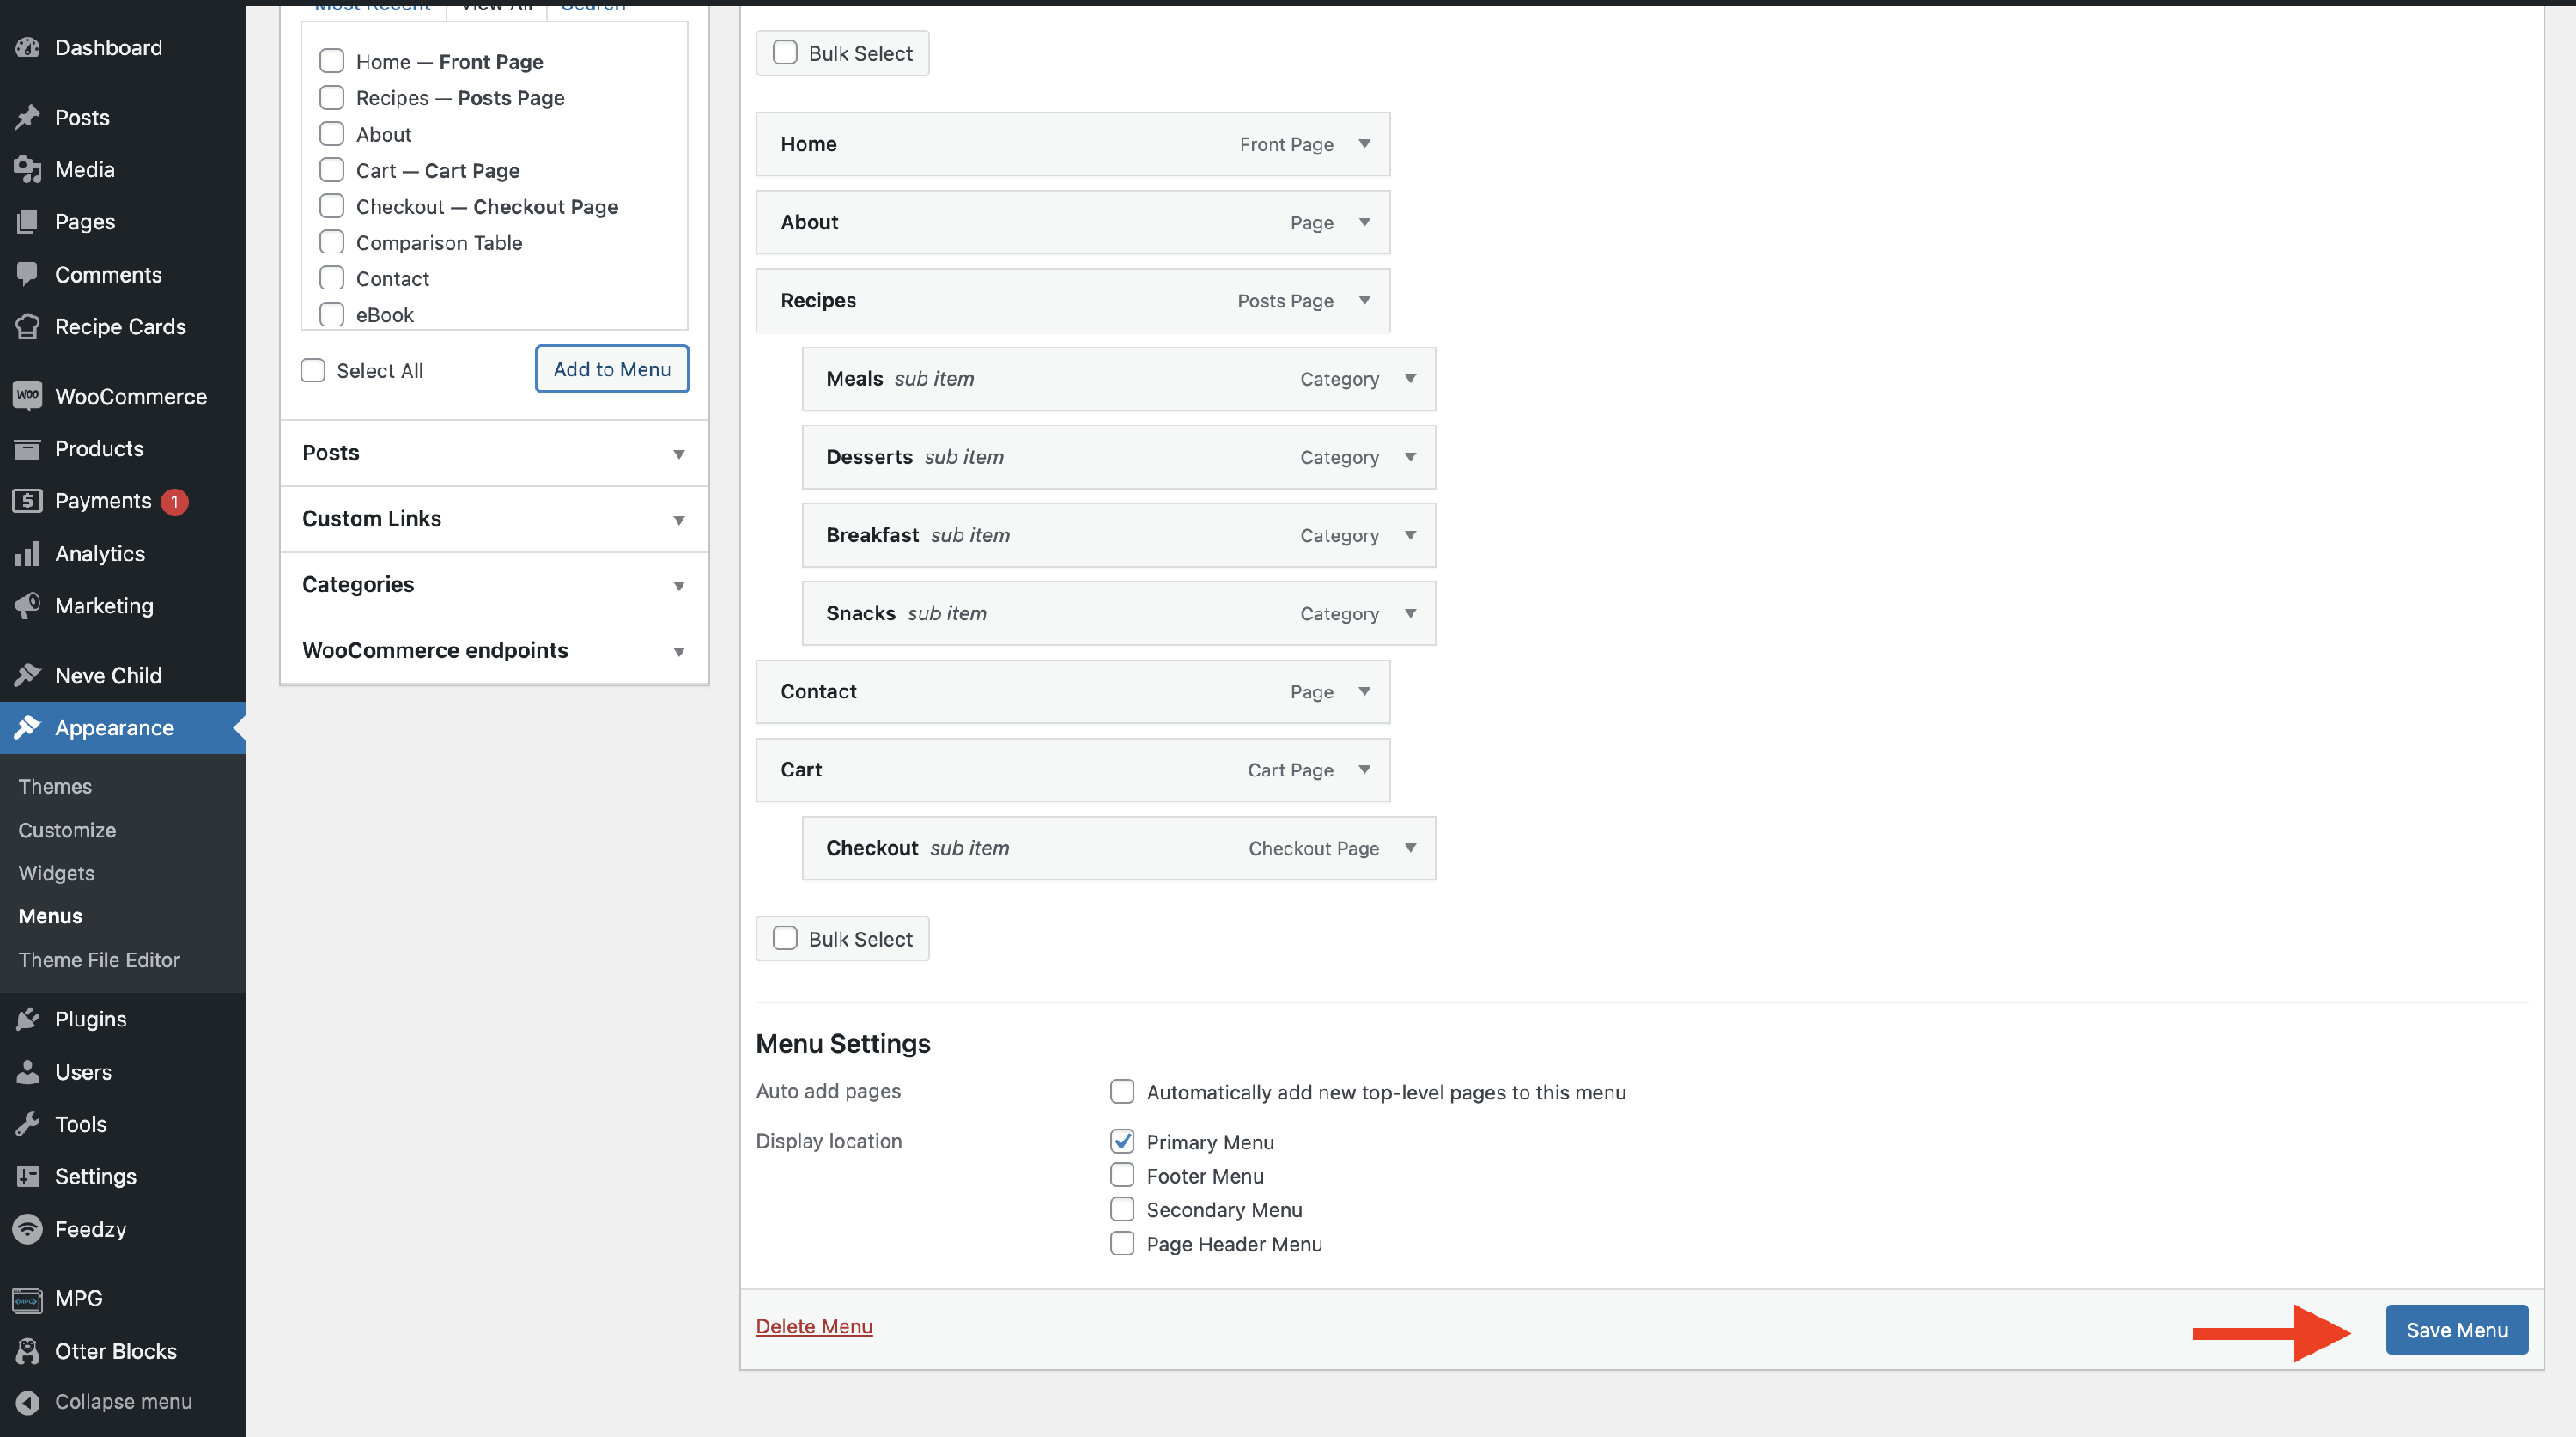
After saving, visit the submenu item's page on the front end and confirm that both the submenu item and its parent menu item display the theme's active styling. If the change is not reflected there, clear your site's caching plugin or server cache and reload the page.
📝Note: If you want to make the menu items more suggestive using menu icons, check this doc.
Result