How to integrate Google Analytics with your WordPress website
In this article, you will find out how to integrate Google Analytics with your WordPress website.
- using the Google Site Kit dedicated plugin
Step 1:
Install and Activate the Google Site Kit plugin.
📝 Note: Here is a guide about how to install a WordPress plugin.
Step 2:
Once installed, navigate to Dashboard > Site Kit and start configuring the account by clicking on the Start Setup/Sign in with Google blue button:
- Sign in with Google
- Choose your Google account
- Check the two checkboxes
- Setting up by pressing the buttons:
- Proceed
- Allow
- Add site
- Go to my Dashboard
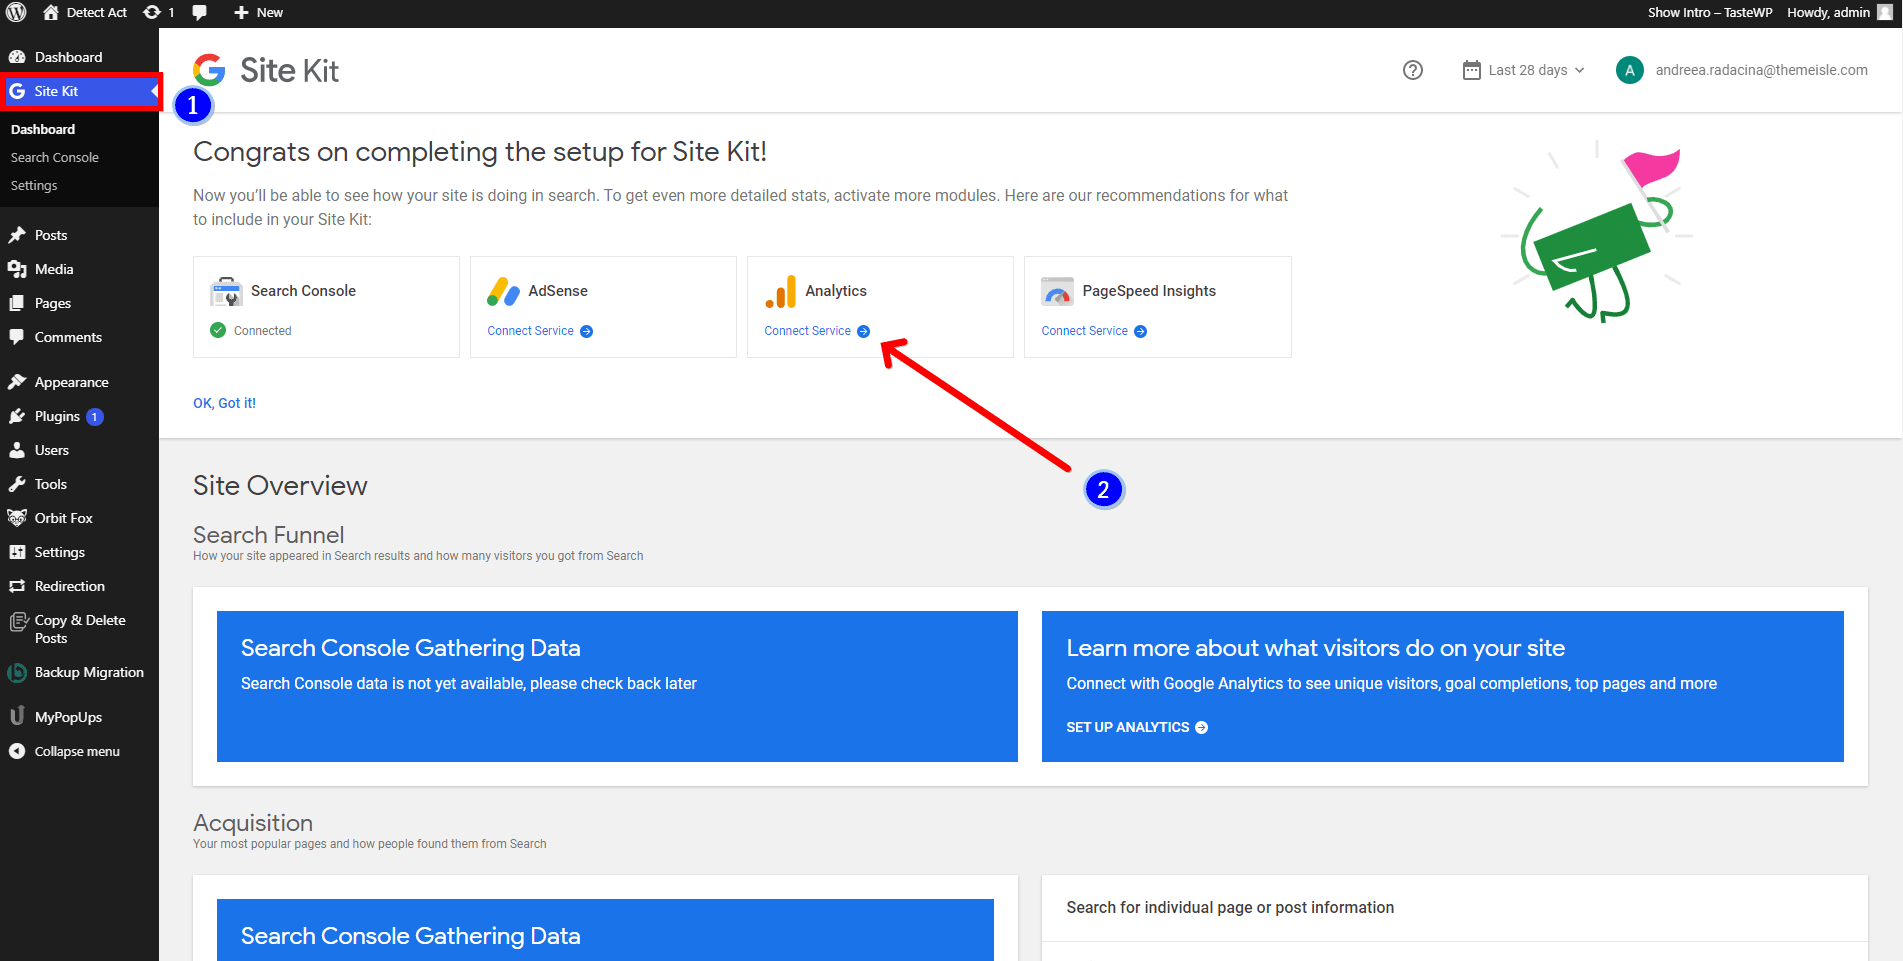
Step 3:
You will be redirected to Site Kit's dashboard (1) :
- Click on "Connect Service" for the module you want to activate (eg. Analytics (2) ).
Step 4:
After clicking on " Connect Service", a Sign in with Google pop up will appear:
- select your Google account.
- check the access that you give to Site Kit (in the GIF below, I have used an already configured account).
- click on Continue.

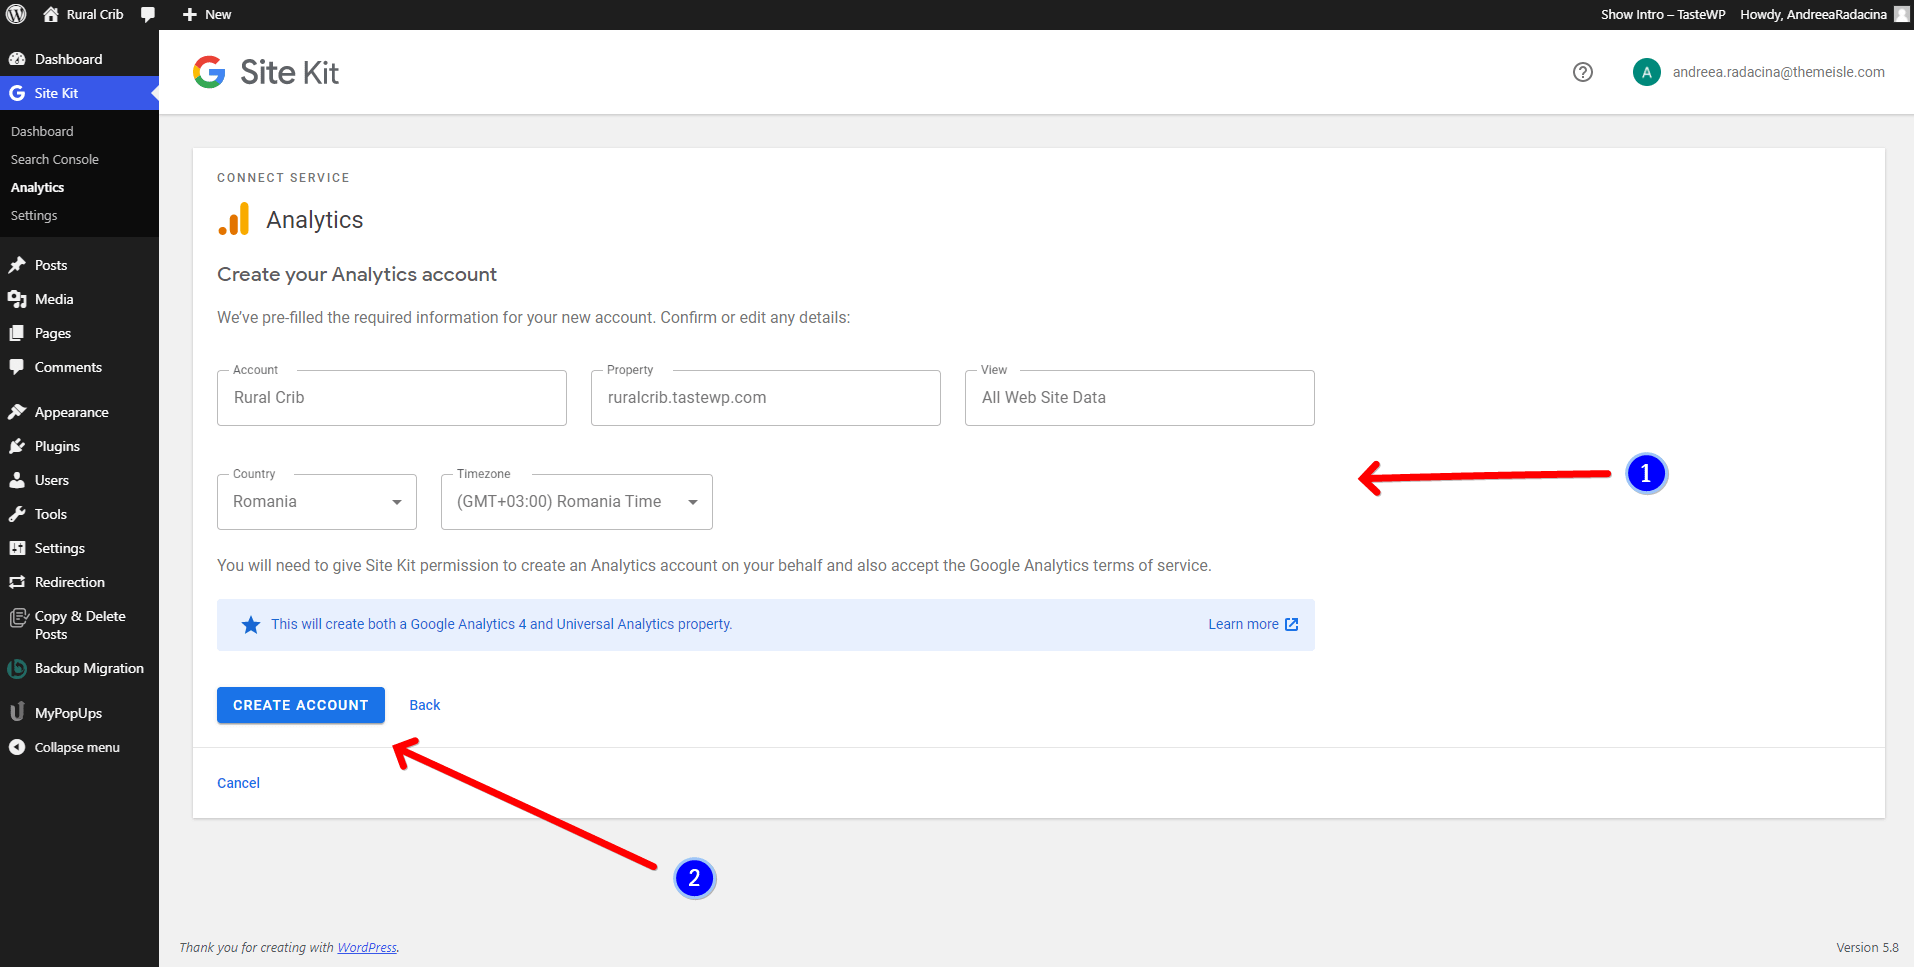
Step 5:
Complete the details (1) of the site and click on "Create Account" (2).
Step 6:
Check Google Analytics Terms of Agreement and click on the Go to my Dashboard button.
Done! You have successfully configured Google Analytics for your website.
📌 You can check the statistics by navigating to Site Kit > Analytics.
📝 Note: Here is a blog article dedicated to Google Analytics for beginners.