How to install WordPress Plugins
📝 Note: If you purchased a Themeisle plugin please refer to this guide in order to get started with it.
A Plugin is a tool that extends a website's functionality by adding new features or by creating new options. There are 2 scenarios that you may follow to install a WordPress Plugin:
Directly from WordPress
1. Log into your website admin page, then go to Appearance > Plugins.
2. Click on the Add New button.
3. Type the name of the plugin in the Search bar.
4. Once the plugin's name appears, click on the Install button.
5. After finishing the installation, make sure you activate the plugin by clicking on the Activate button.
📝 Note: Check this link to learn more about Themeisle's Plugins.
Uploading its file
1. Log into your website admin page. , then go to Appearance >Plugins. You will see all the plugins currently installed in your dashboard listed there.
2. To install a new WordPress plugin, simply click on the Add New tab.
3. Click the Upload Plugin button in the WordPress Dashboard.
4. Click the Choose File button, select the ZIP archive of your plugin from your local computer and press the Install Now button.
5. Click on the Activate button under the "Plugin installed successfully" message. 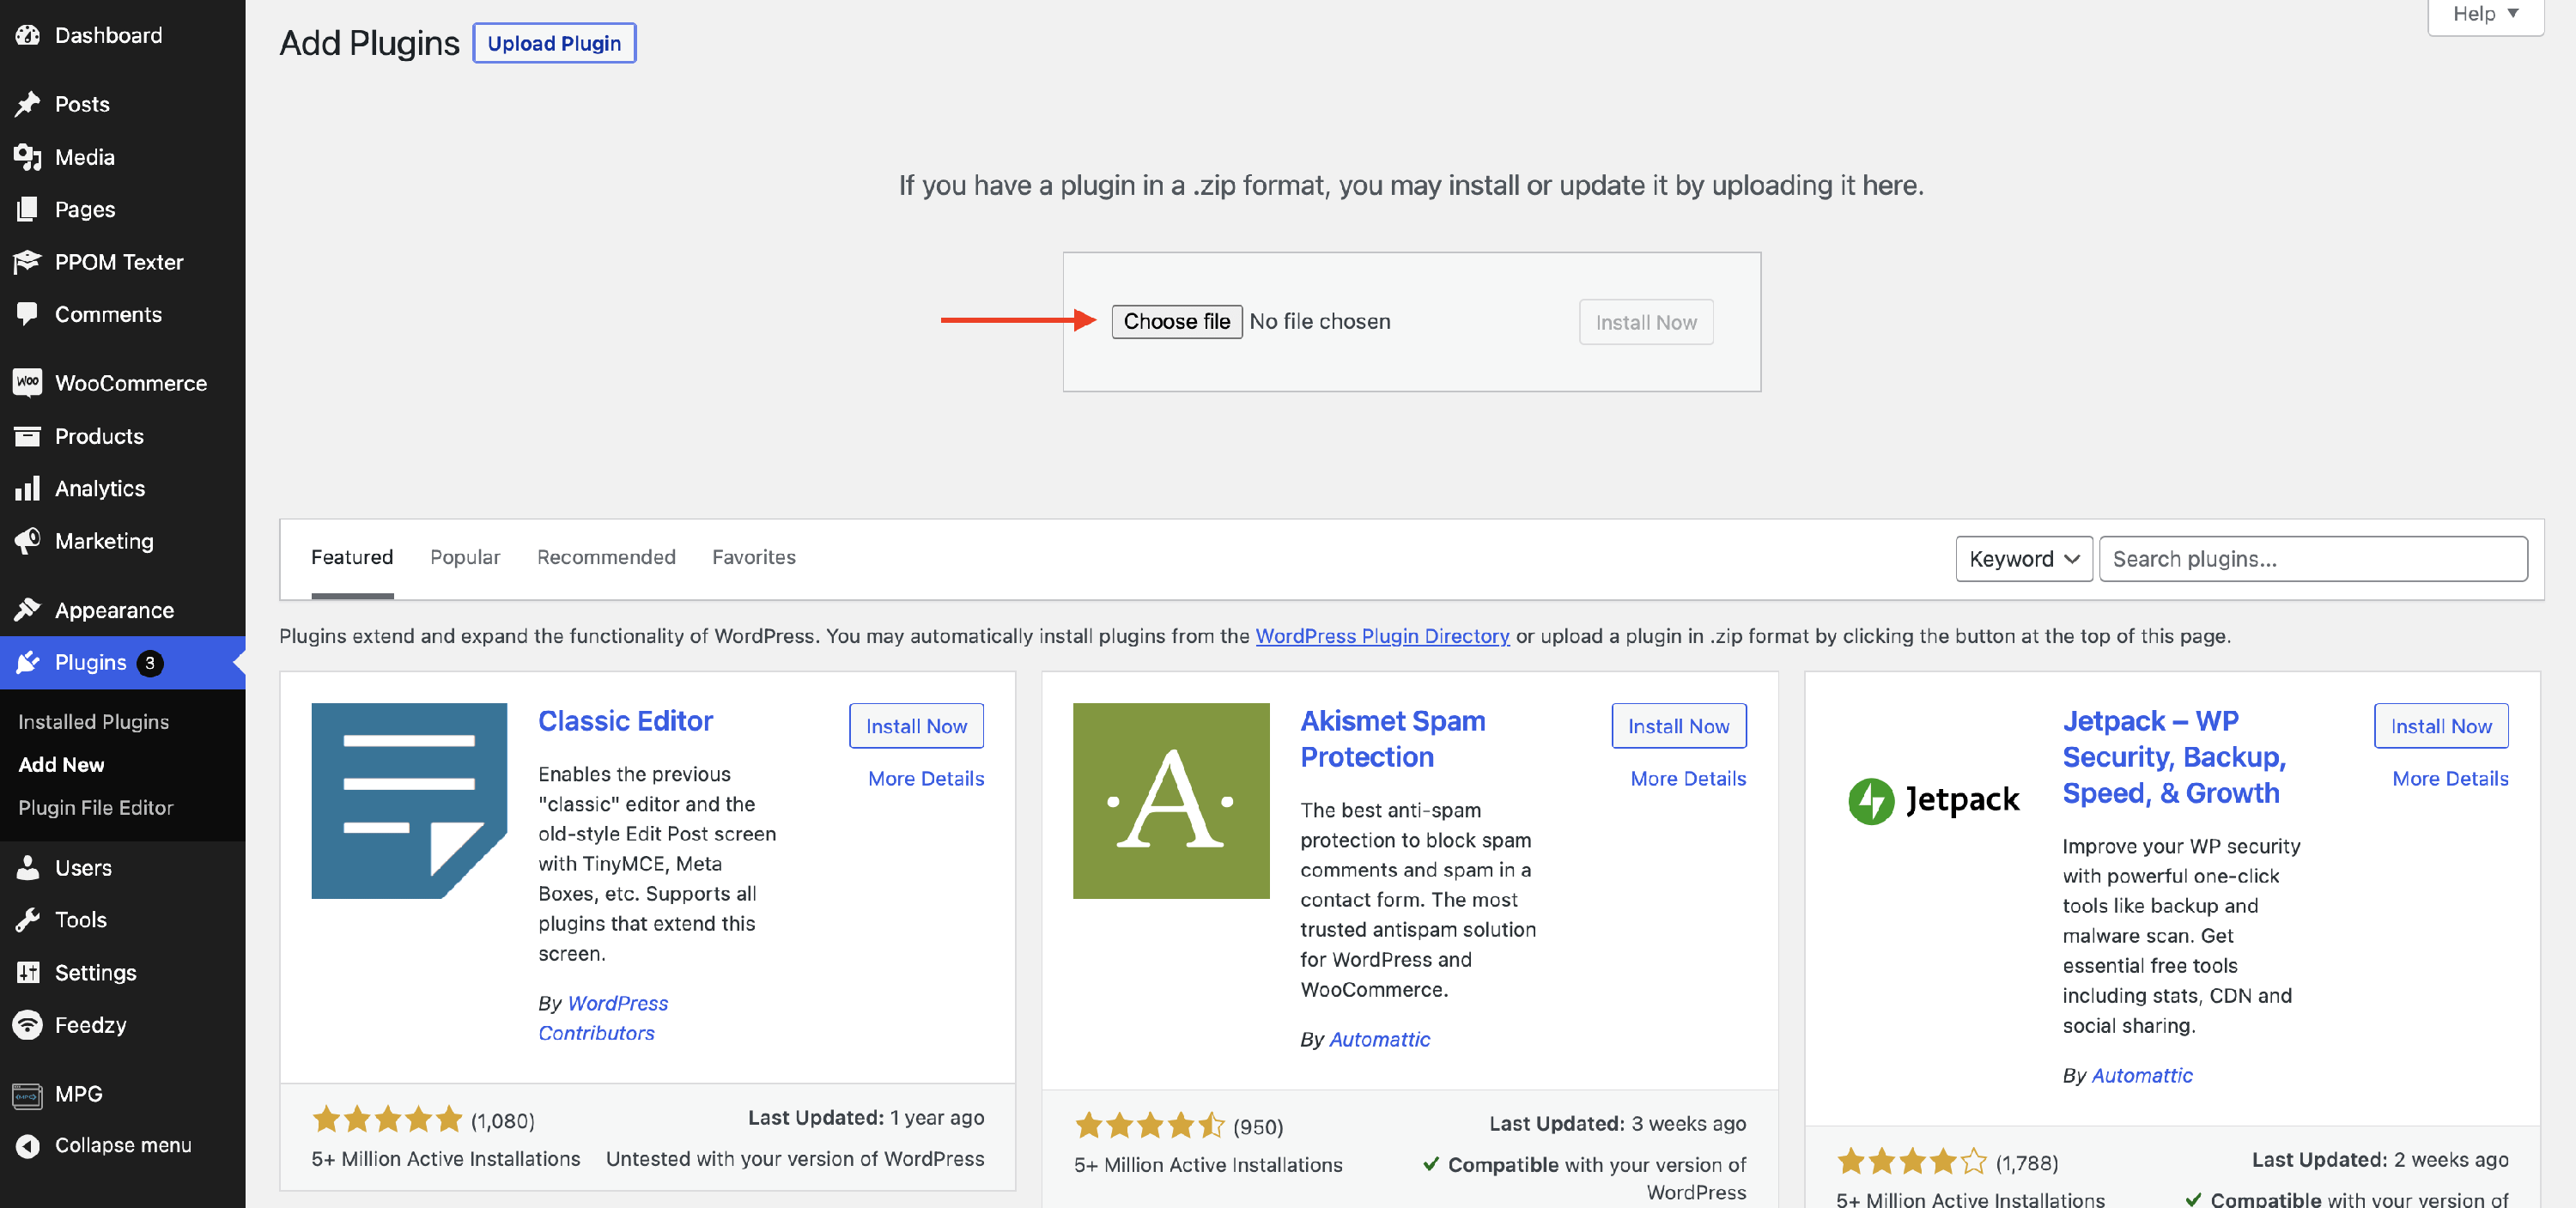
We're done! You have successfully installed your WordPress plugin. You can now go to the front end of your site and start making changes with the newly installed plugin.