
The Section Block
The Section block lets you build flexible, multi-column page layouts in the block editor. It allows the creation of more pleasing content by combining different blocks in multiple columns, with separate settings for the section container and each individual column.
In this article
📝 Note: These blocks are part of the Otter Blocks plugin, which you can get from here.
📝 Note: The blocks' appearance can be improved using the Otter features, such as Transform to Sticky, Visibility conditions, Dynamic Values or Images, as well as Counting / Typing / Loading animations, and 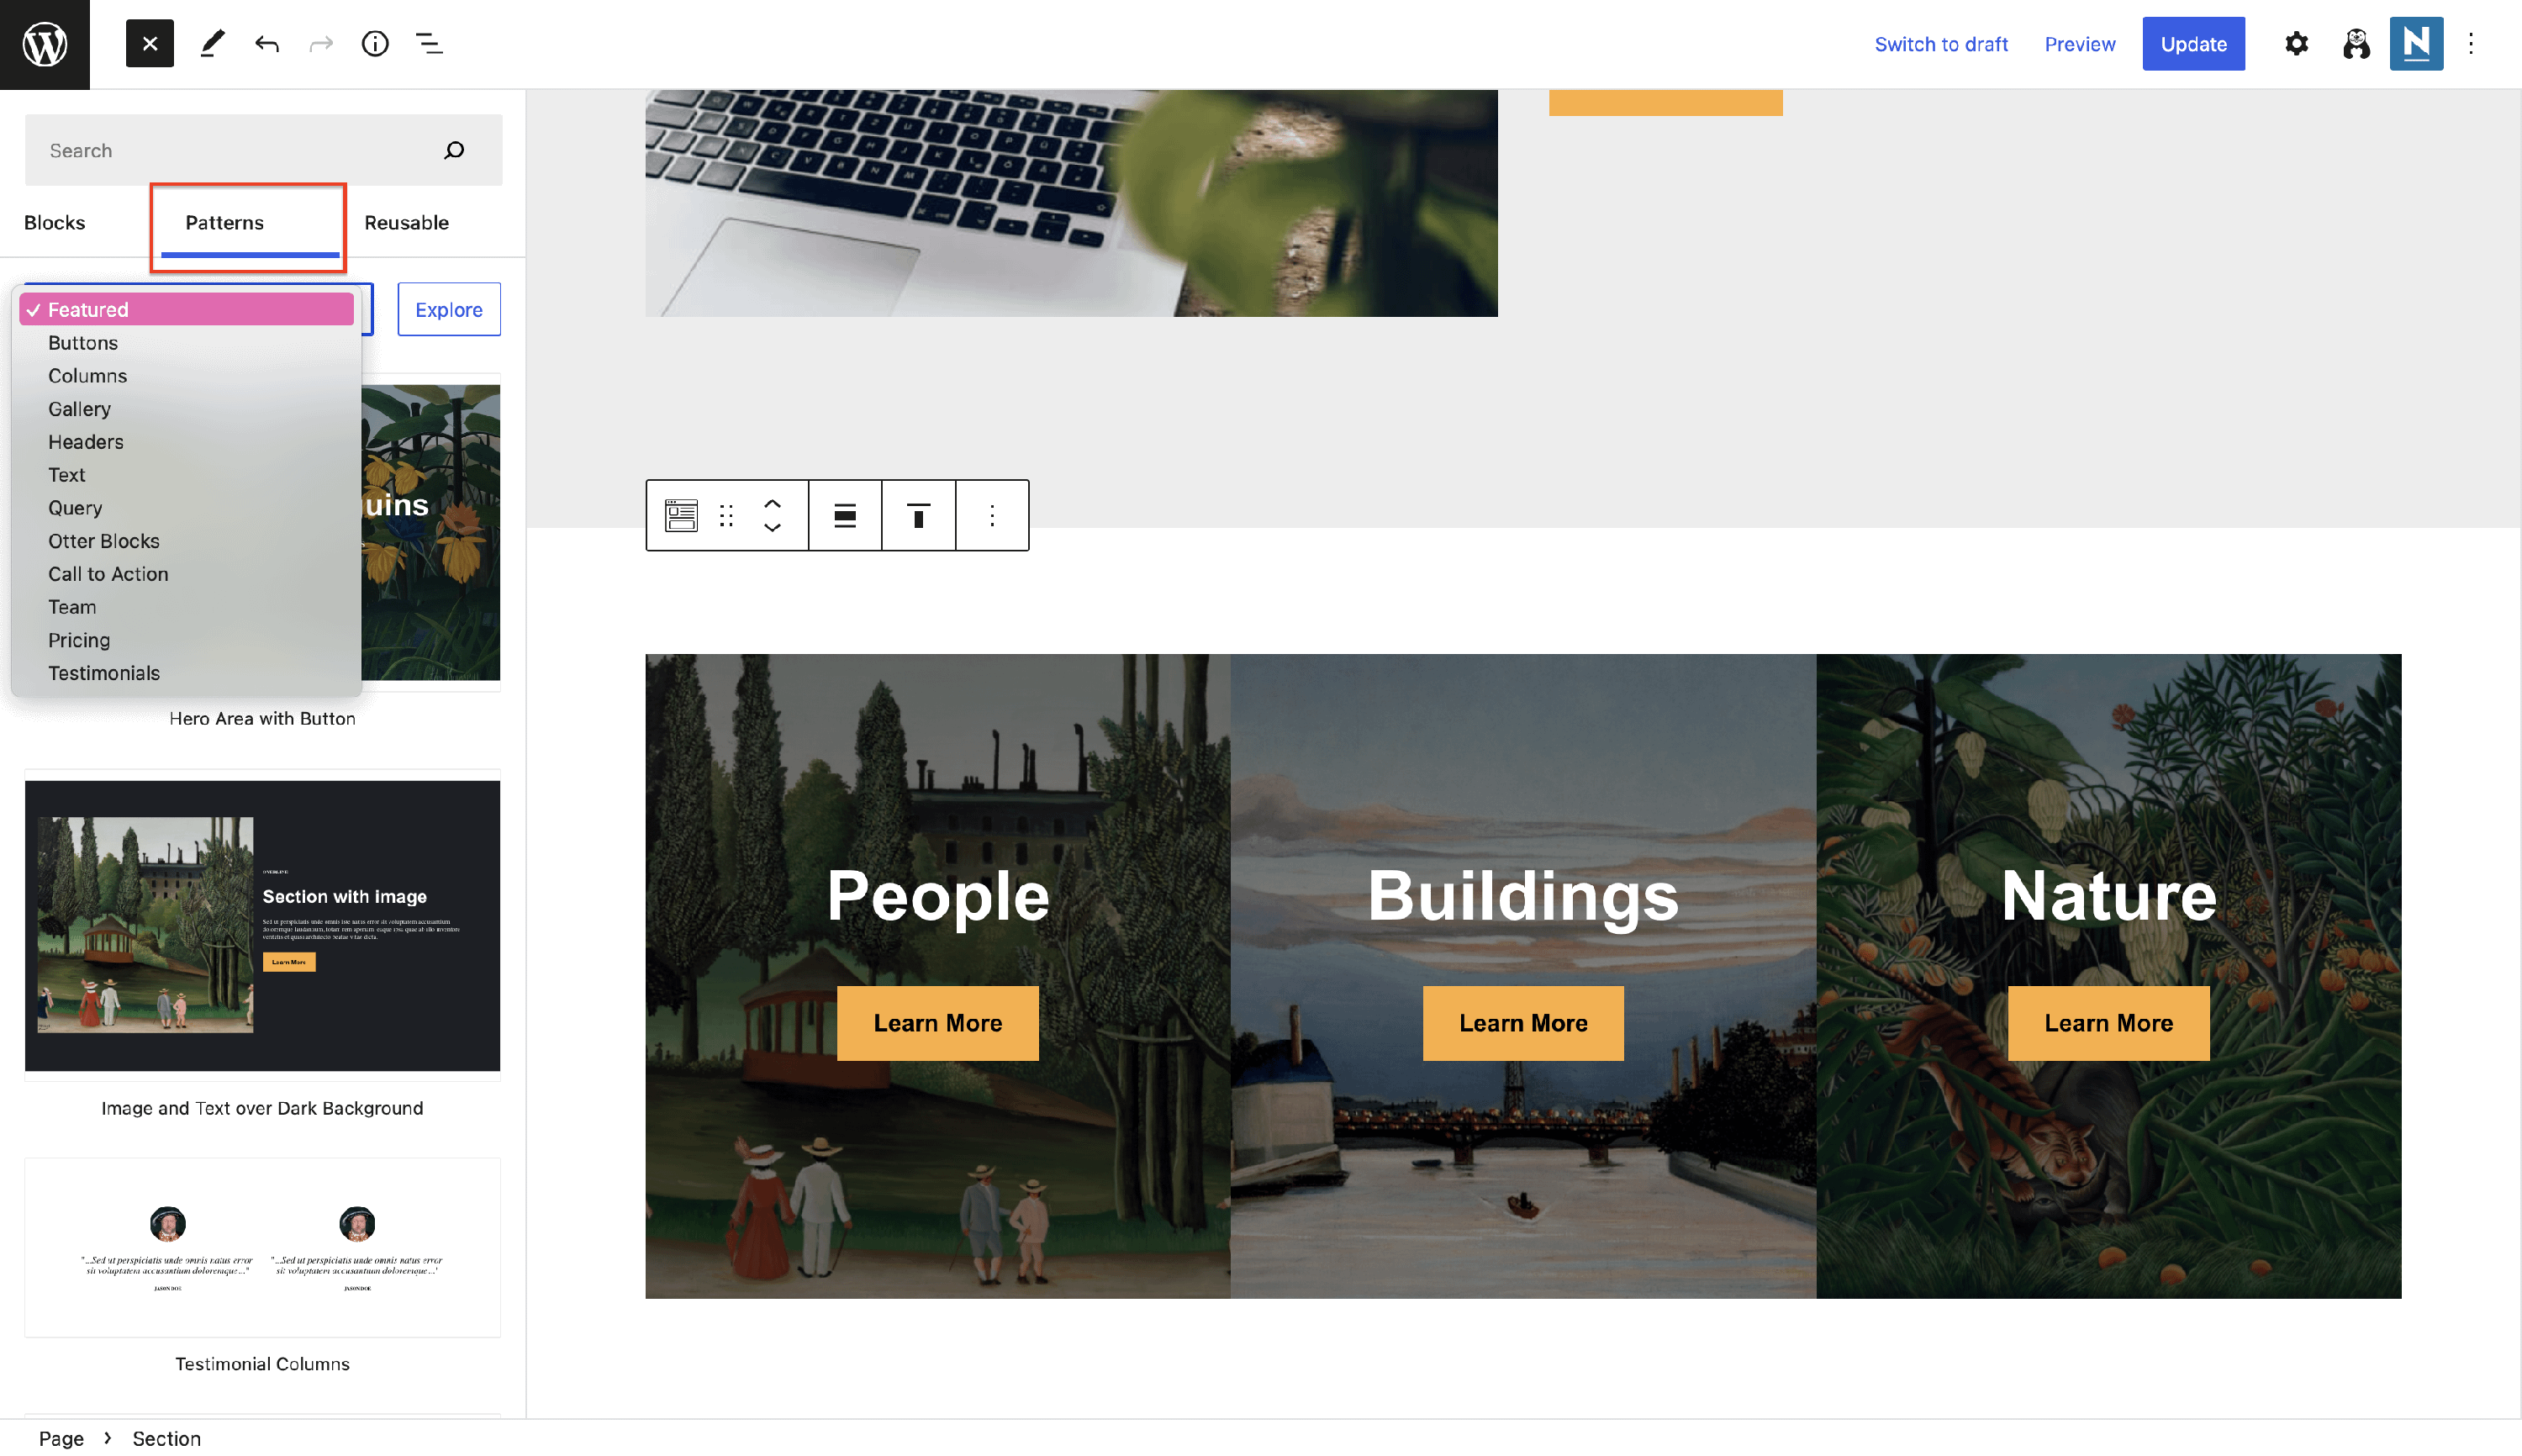 Patterns.
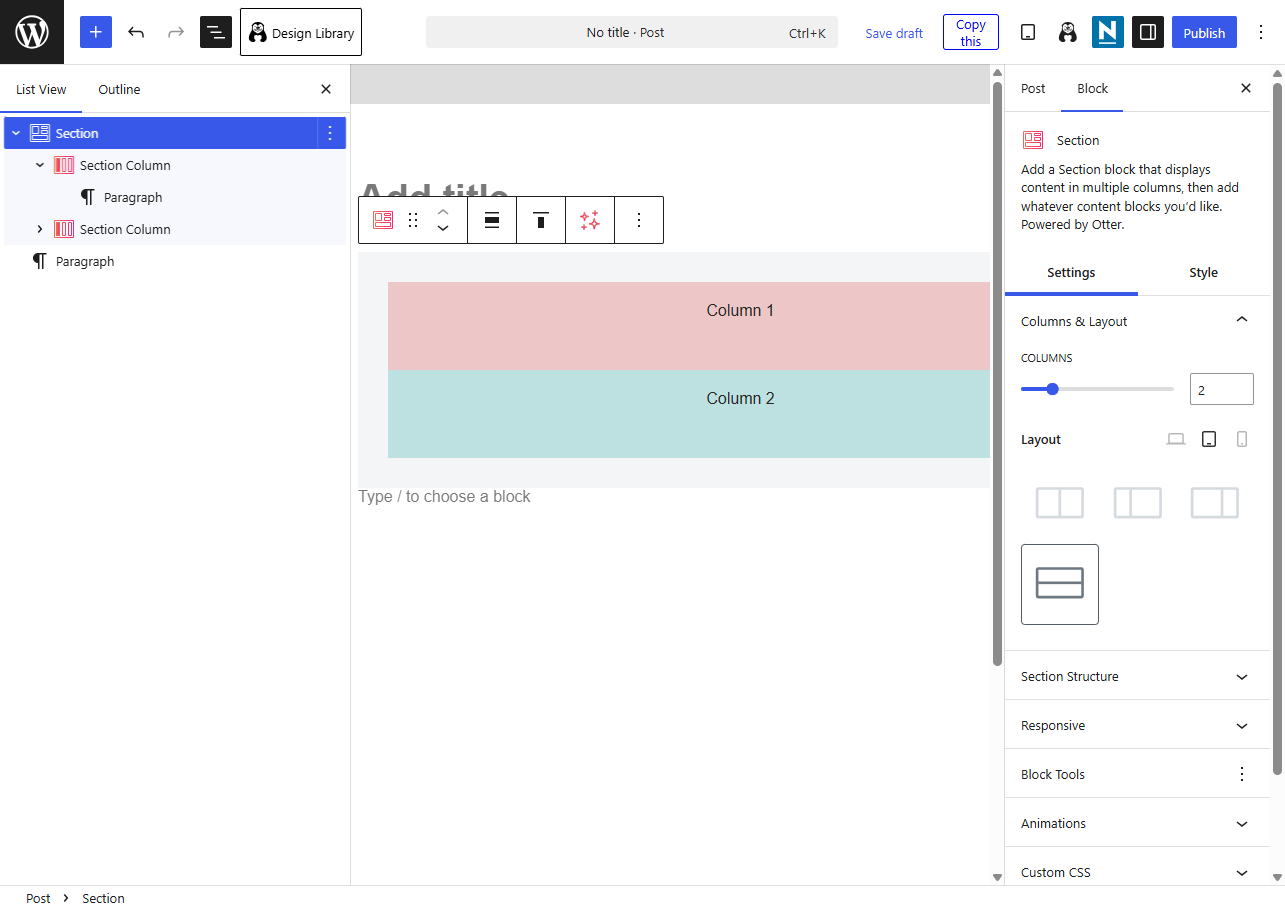
Apart from the general options that are available for any block, there are specific customizations available for the section parent (hovered with blue) and section column (right under the Section).
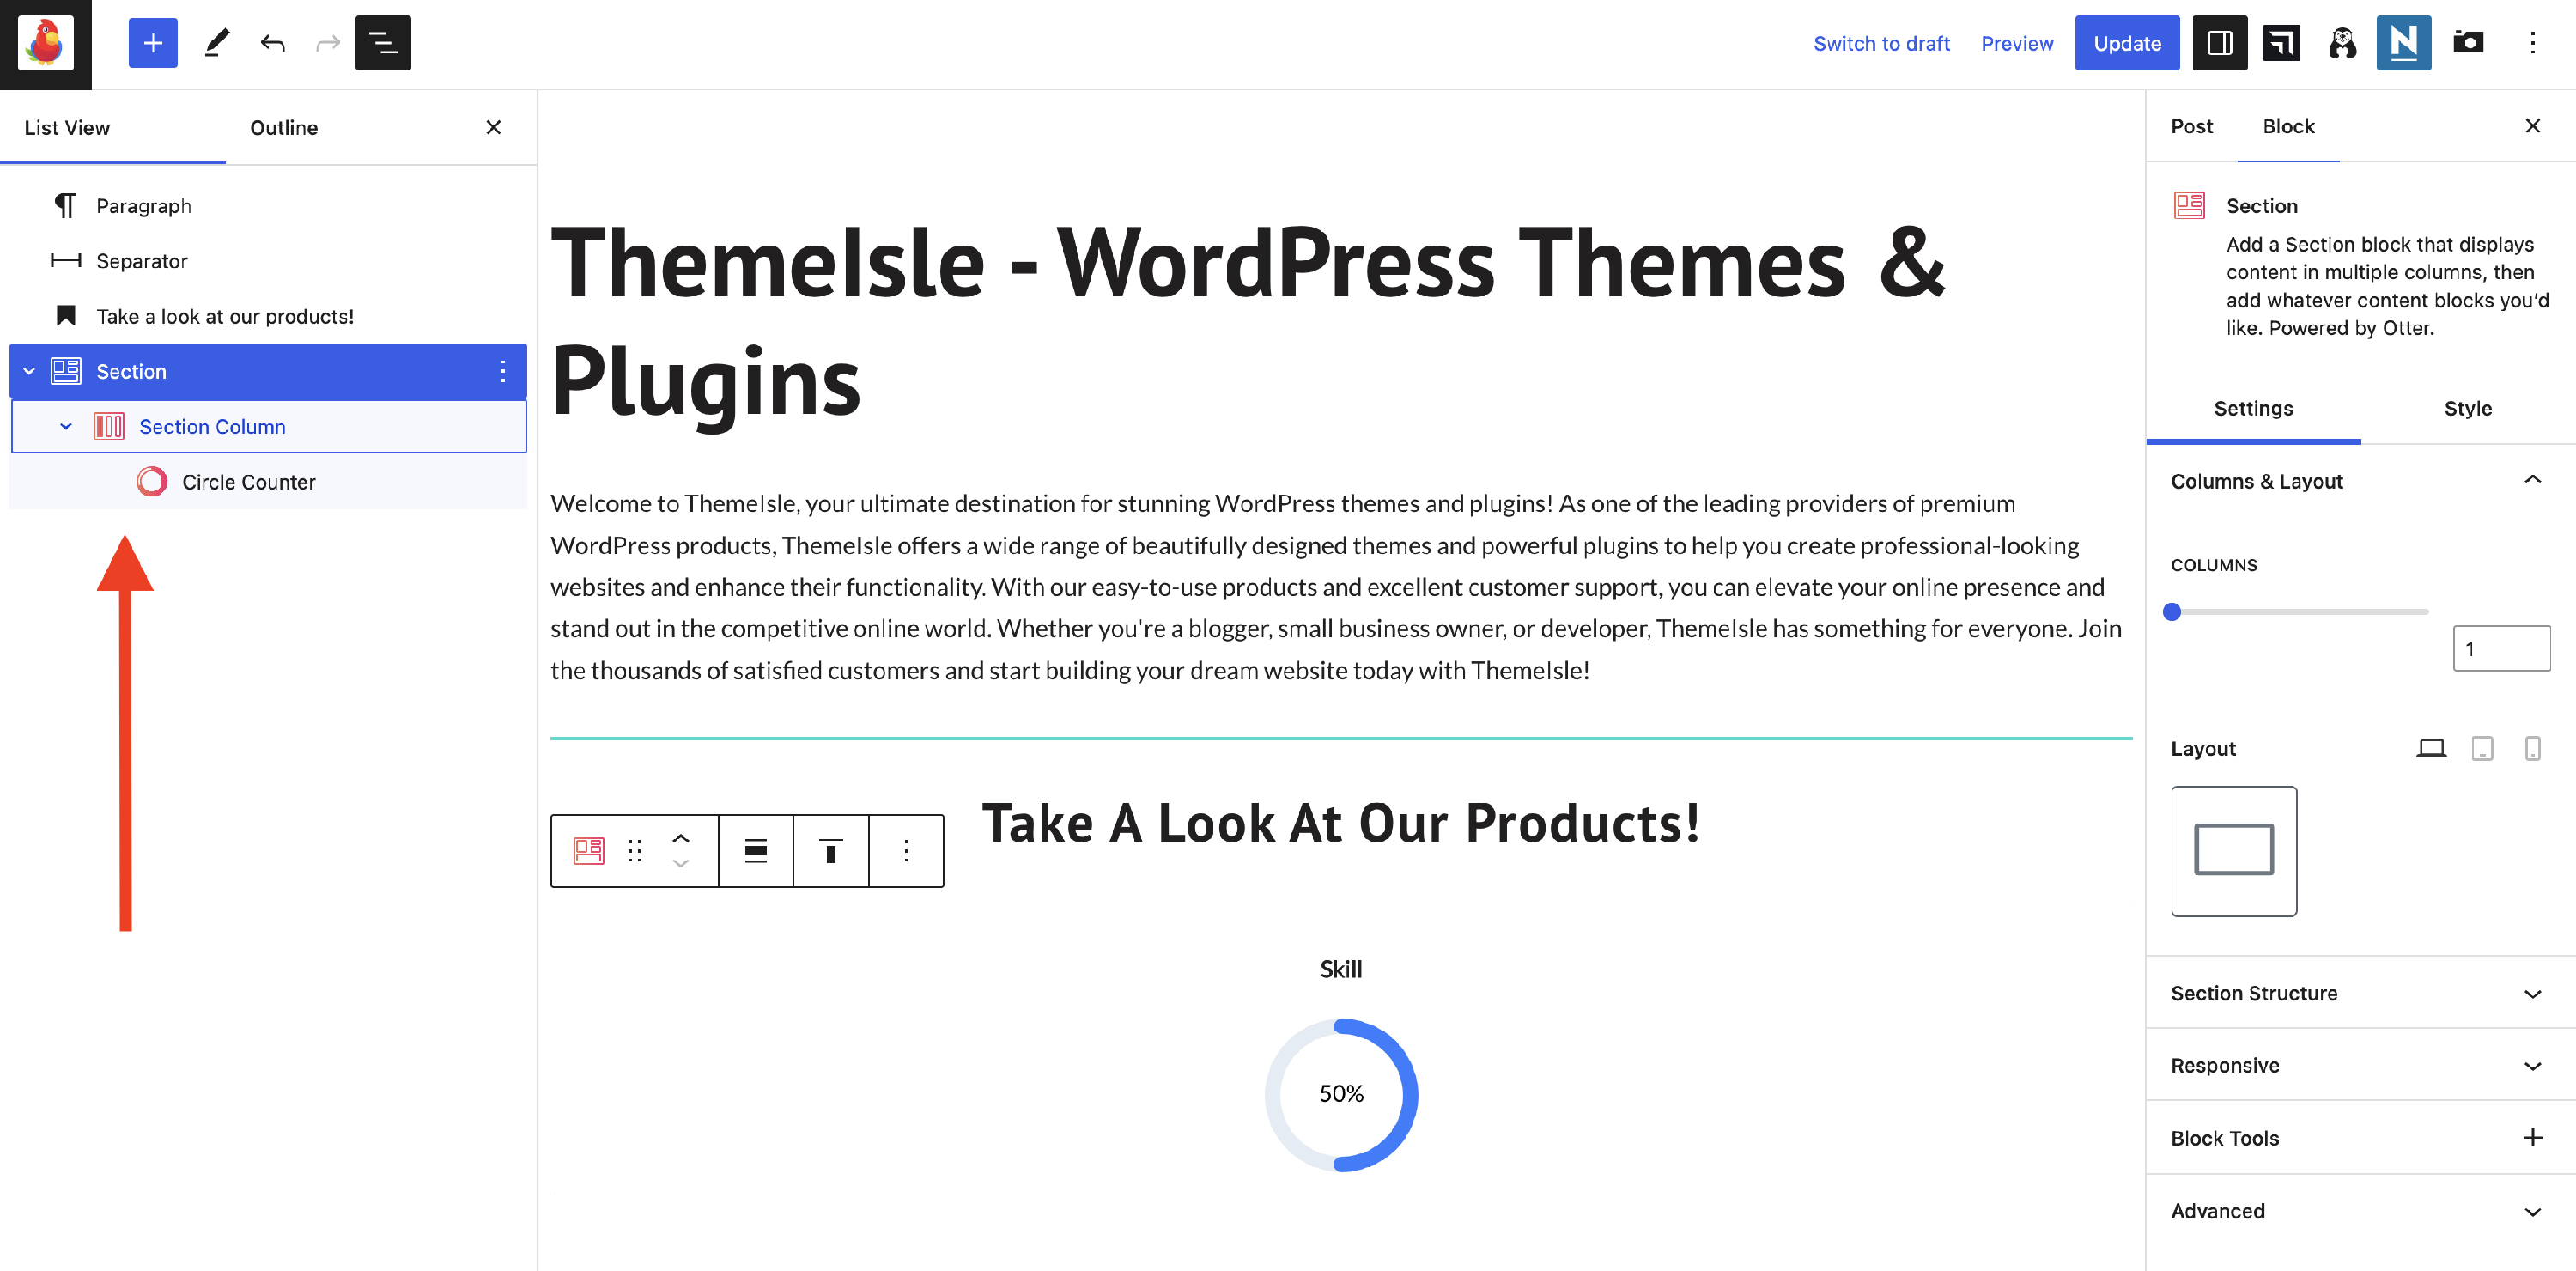
Section Parent
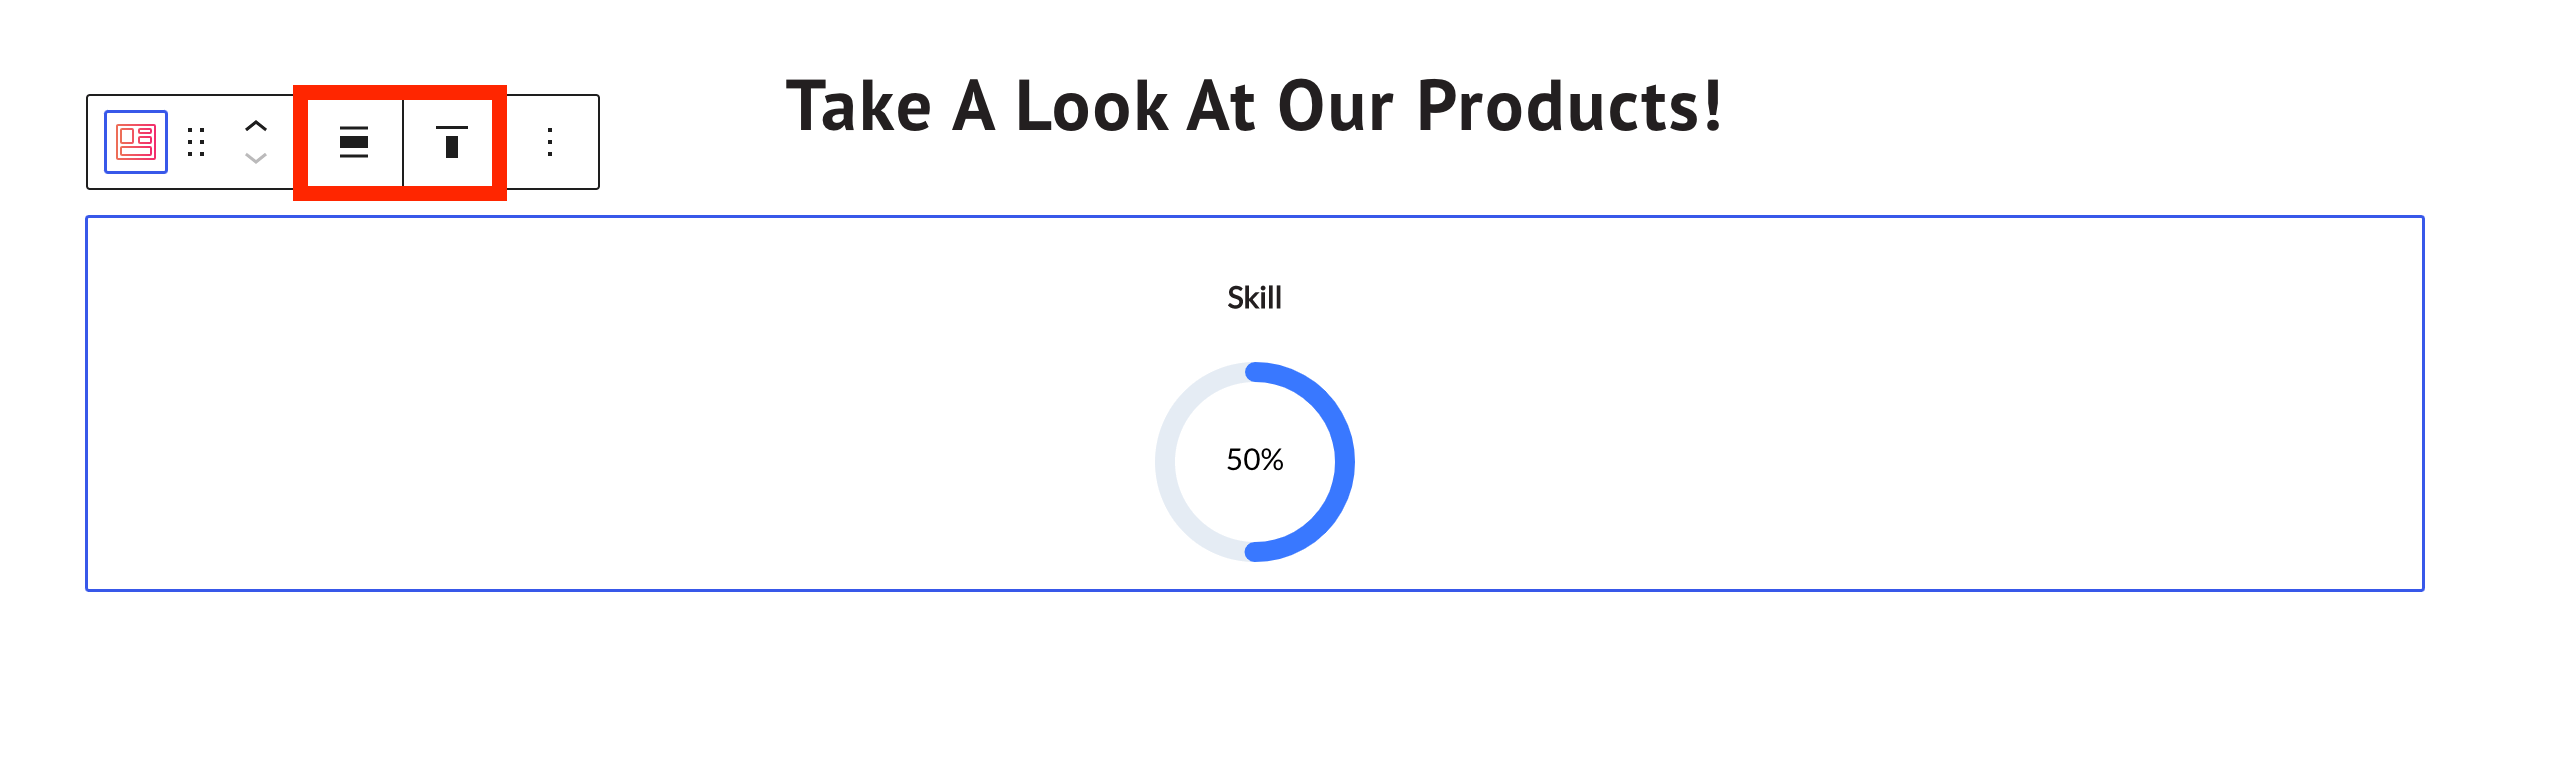
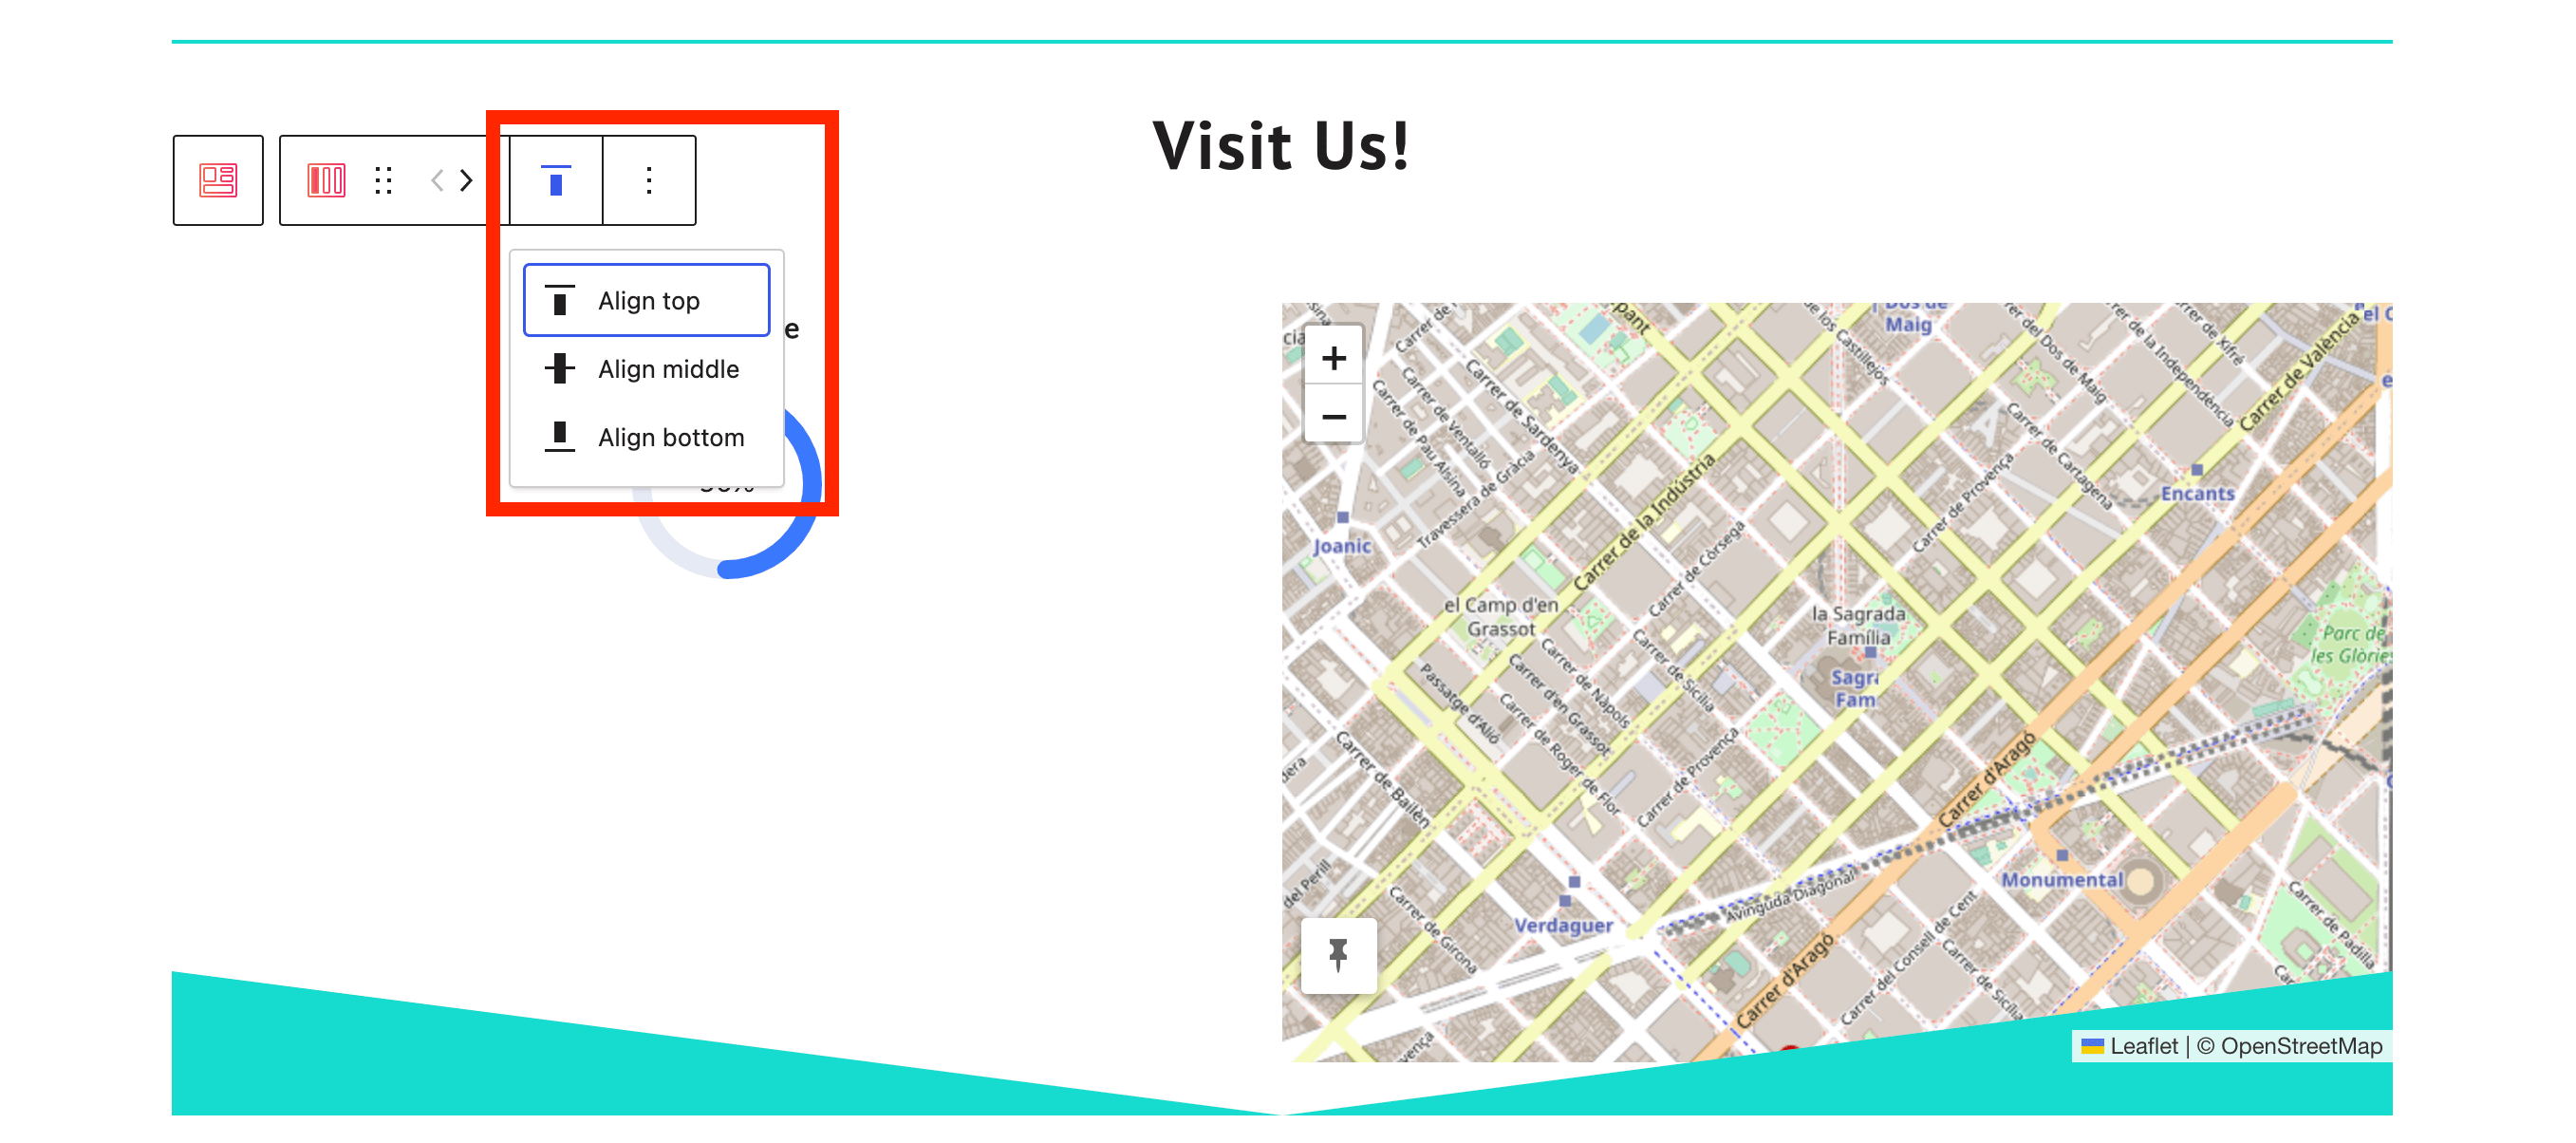
The section parent is the top level of the section, which has different customizations than the columns. It allows you to set a full-width or a wide width, which can be useful in the case of Hero Images/Sections. Apart from this, you can control the vertical alignment of the inside block:
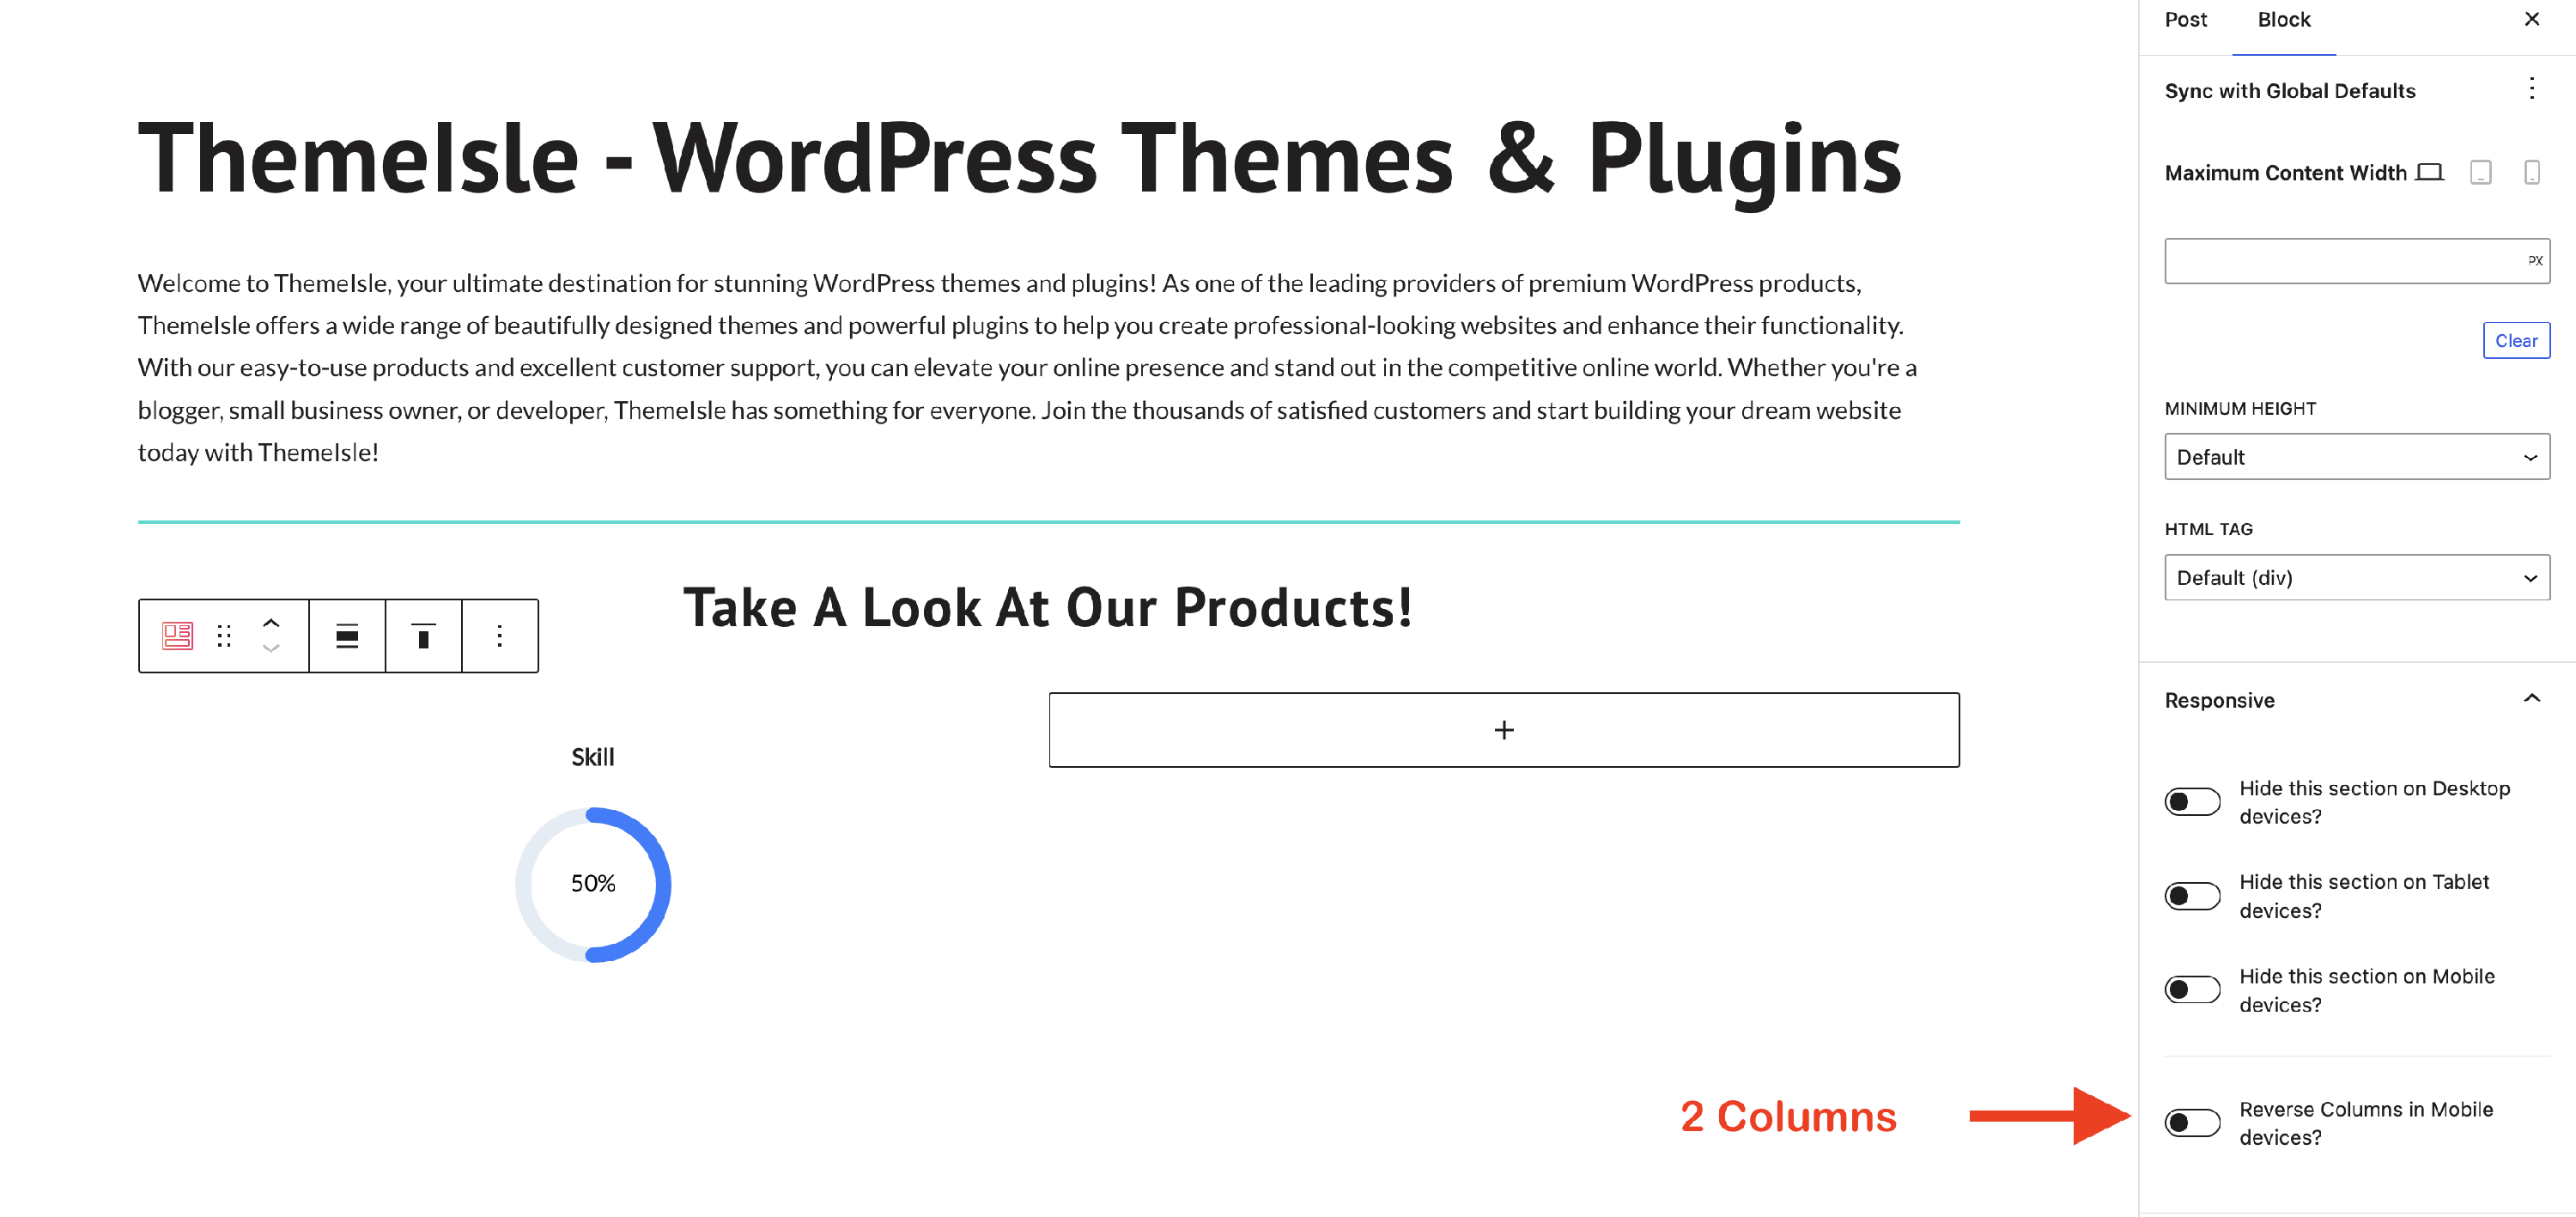
In the right sidebar, you will find two panels with available options:
Settings
- Columns & Layout - change the number of columns, which will unlock multiple layout options.
- Section Structure - here, you can control the dimensions of the section block, like the maximum content width and minimum height, as well as the HTML tag.
- Responsive - here, you will find options to hide the section on desktop/tablet/mobile. Also, if you have more than one column, an option to reverse the columns will be available for both tablet and mobile devices.
Style
- Dimensions - adjust the padding and margin according to the device type.
- Background & Content - create a more attractive appearance by adding colors to the available areas.
- Border - set a distinct color, adjust the width and radius, or add a box shadow to the section.
- Shape Divider - customize the section using outstanding shapes.
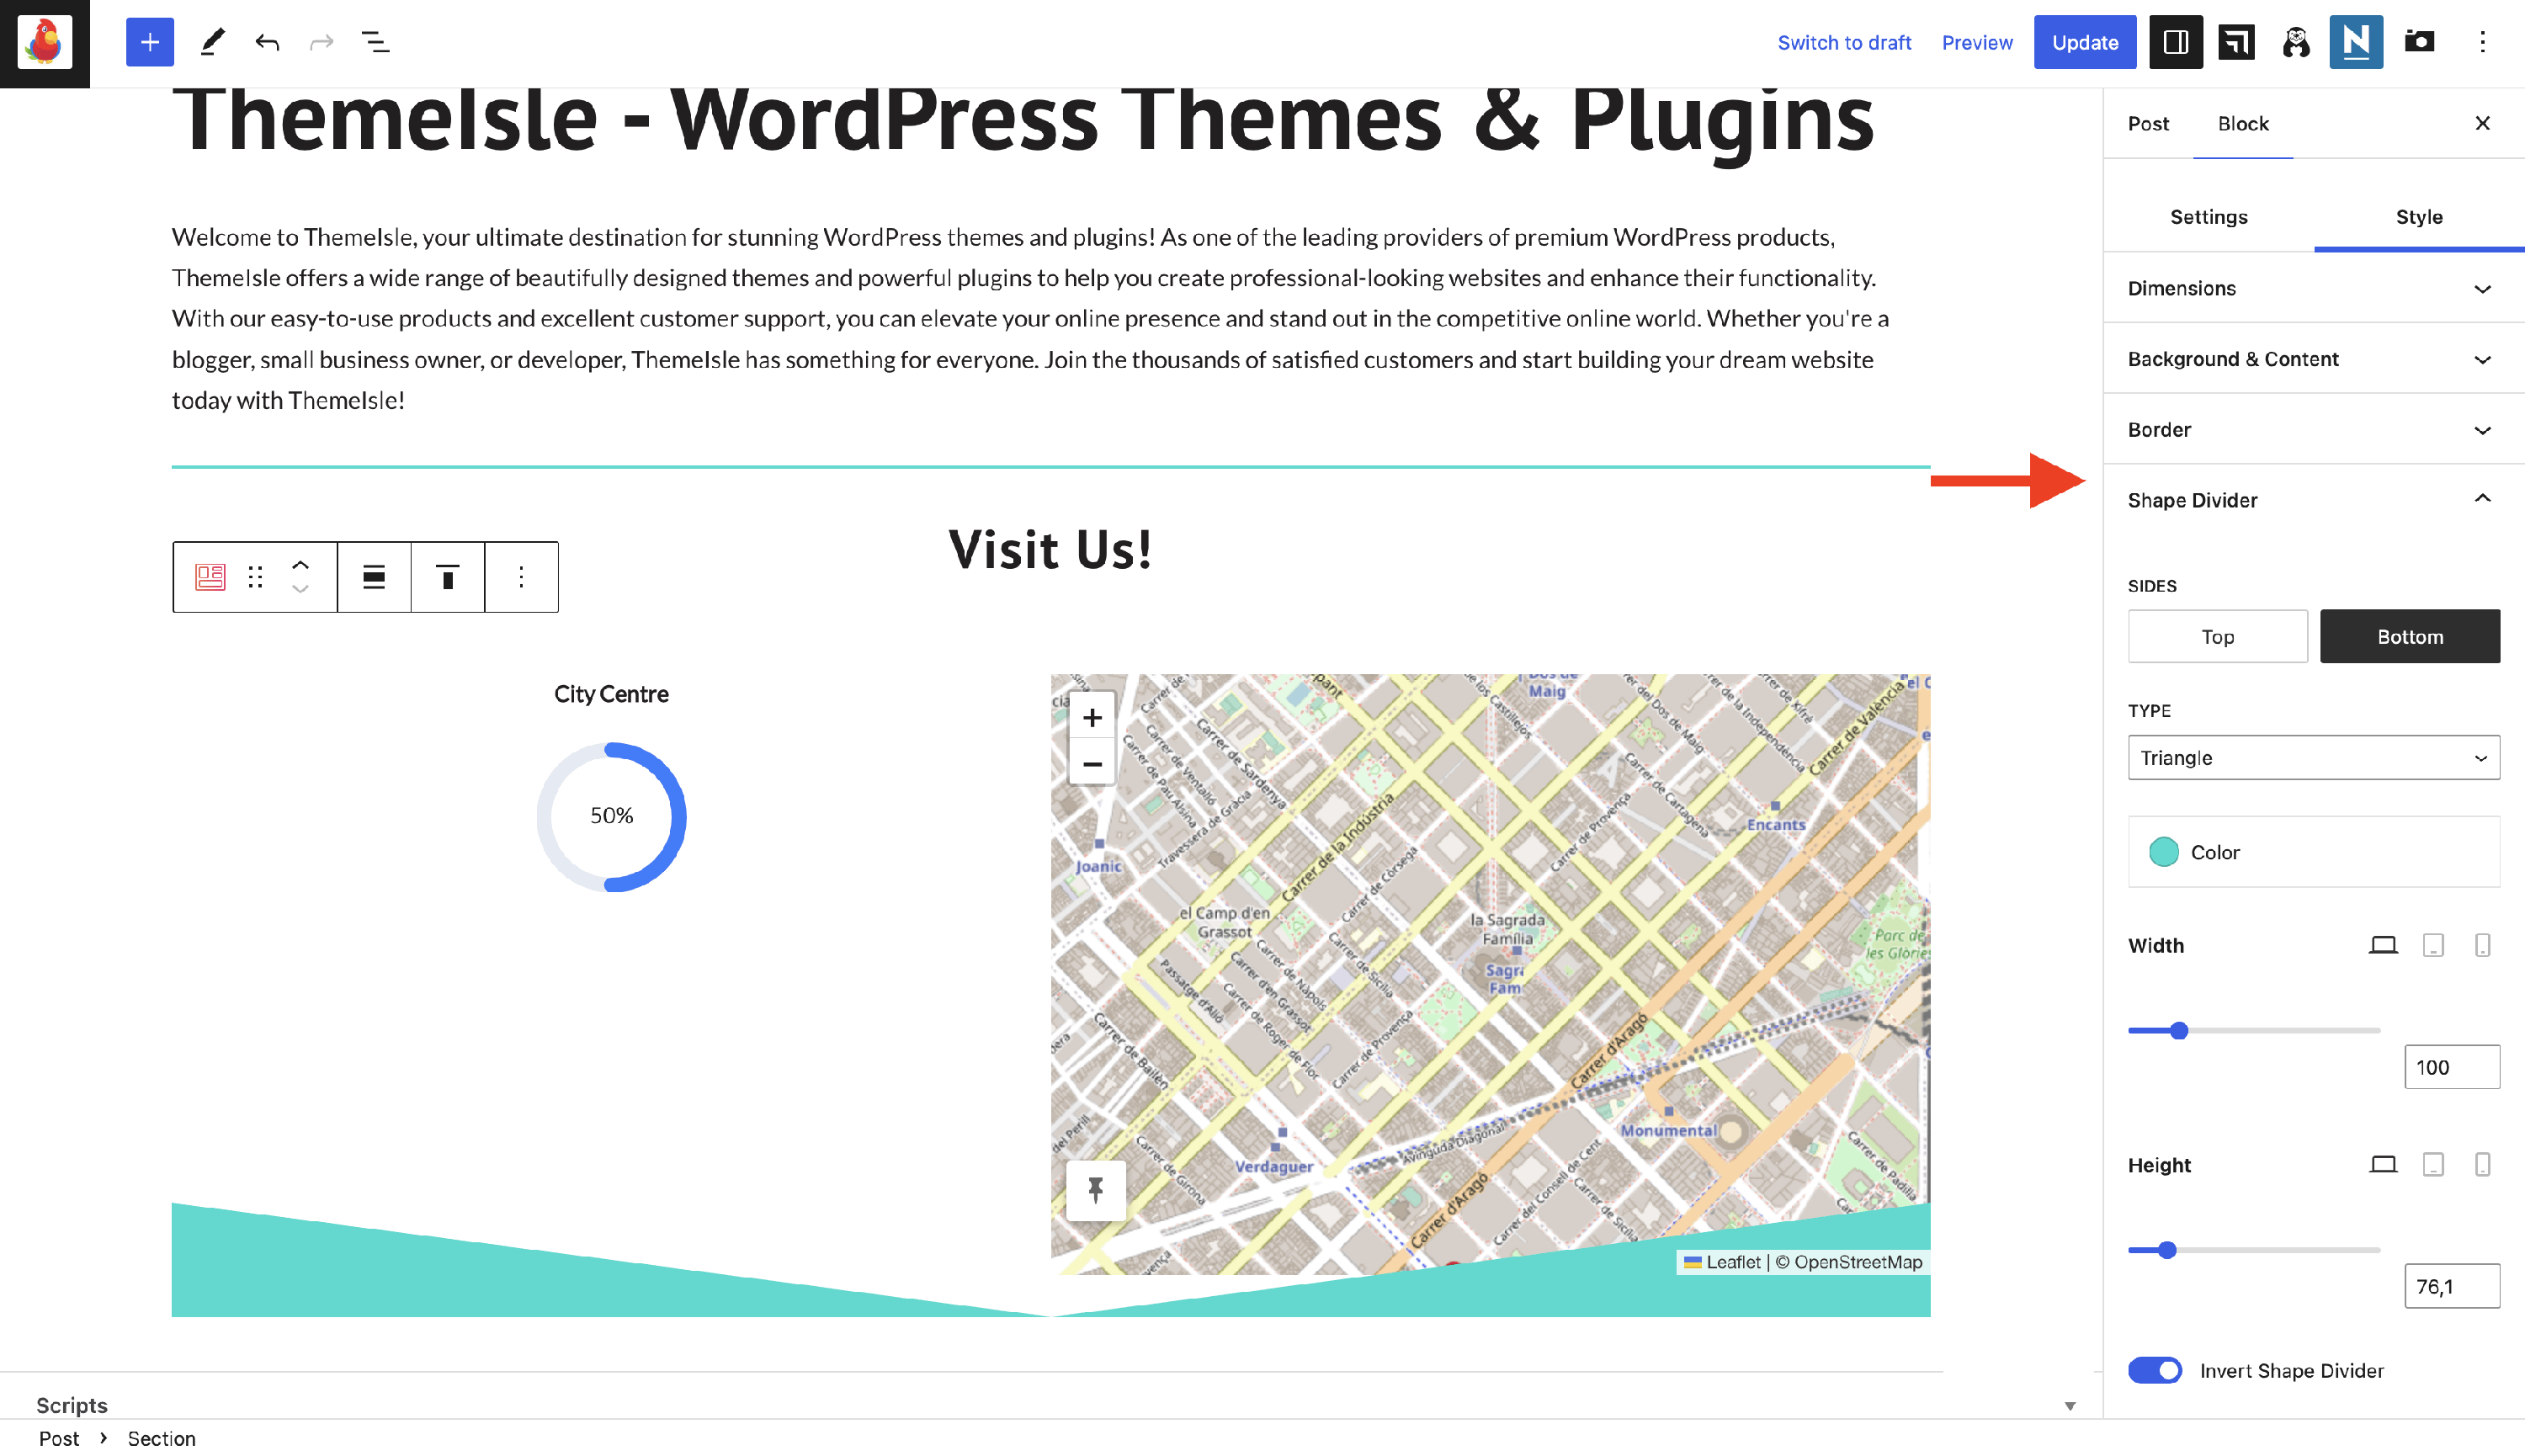
If a background image set in Background & Content appears zoomed in or cropped, see How to fix cropped banner and hero background images in WordPress.
Responsive column layout and breakpoints
The Section block arranges its columns differently on three fixed screen sizes:
- Desktop - screens 960px and wider.
- Tablet - screens between 600px and 959px.
- Mobile - screens 599px and narrower.
These breakpoints are built into the block. There is no setting, global option, or filter to change the width at which the block switches between desktop, tablet, and mobile.
For each screen size, you can choose how the columns are arranged. Switch the editor's device preview using the Desktop / Tablet / Mobile icons in the top toolbar, then select the whole section and open Settings > Columns & Layout > Layout. The layout you pick applies only to the device you are previewing.
To make your columns stack on top of each other on smaller screens, choose the Collapsed Rows layout for that device. By default, a multi-column section uses Collapsed Rows on mobile, so columns stack below 600px, but keeps them side by side on tablet. This is why two-column layouts can still look cramped between 600px and 959px. Switching the Tablet layout to Collapsed Rows stacks the columns across the whole tablet range without any custom code.
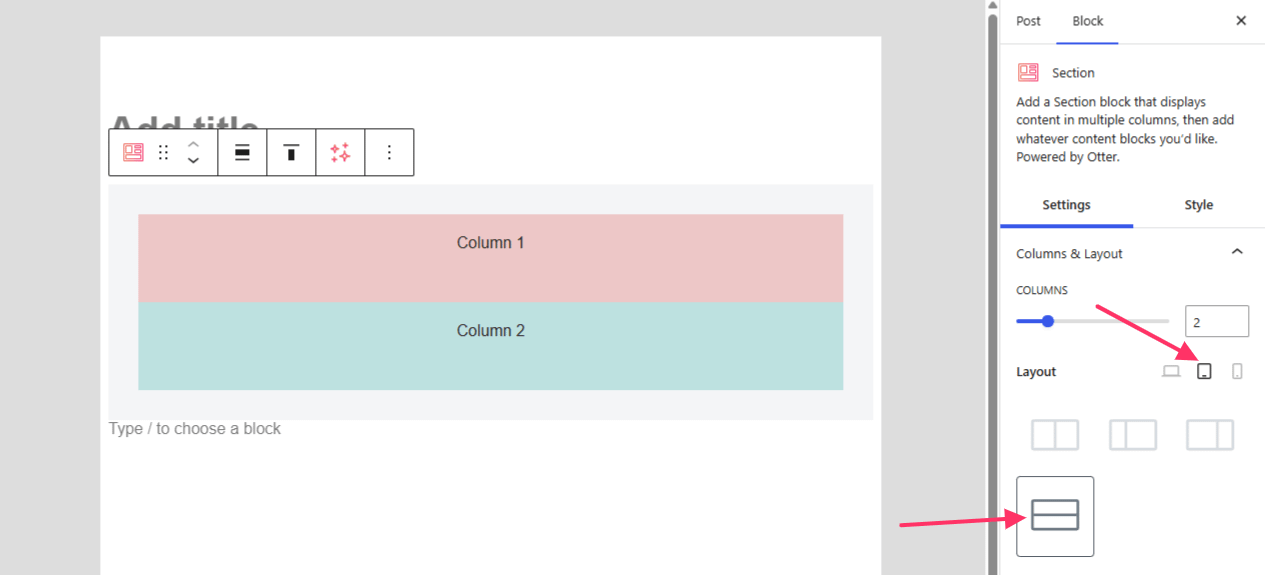
📝 Note: The Reverse columns option appears only when the layout for that device is set to Collapsed Rows. See How to reverse columns on mobile using Otter's section block.
Force columns to stack at a custom width
Because the breakpoints are fixed, the built-in layouts can only switch at 600px and 960px. If you need the columns to stack at a different width - for example, to stack a two-column section up to 767px but keep it side by side above that - add custom CSS with your own media query.
To apply the change to all Section blocks, navigate to Appearance > Customize > Additional CSS and add a snippet like the following:
@media (max-width: 767px) {
  .wp-block-themeisle-blocks-advanced-columns > .innerblocks-wrap {
    flex-direction: column;
  }
}
To target a single section only, use its unique CSS ID. You can find the ID by inspecting the section element in your browser's developer tools - it follows the pattern wp-block-themeisle-blocks-advanced-columns-ID, where ID is the section's unique number:
@media (max-width: 767px) {
  #wp-block-themeisle-blocks-advanced-columns-ID > .innerblocks-wrap {
    flex-direction: column;
  }
}- Replace
767pxwith the width below which you want the columns to stack. - Replace
IDwith the actual number shown in the section's ID attribute.
💡 Tip: A broad selector like .wp-block-themeisle-blocks-advanced-columns affects every Section block on your site. Use the section's unique ID when only one layout needs the override.
Section Column
The section column offers different customizations. You can control its vertical alignment too.
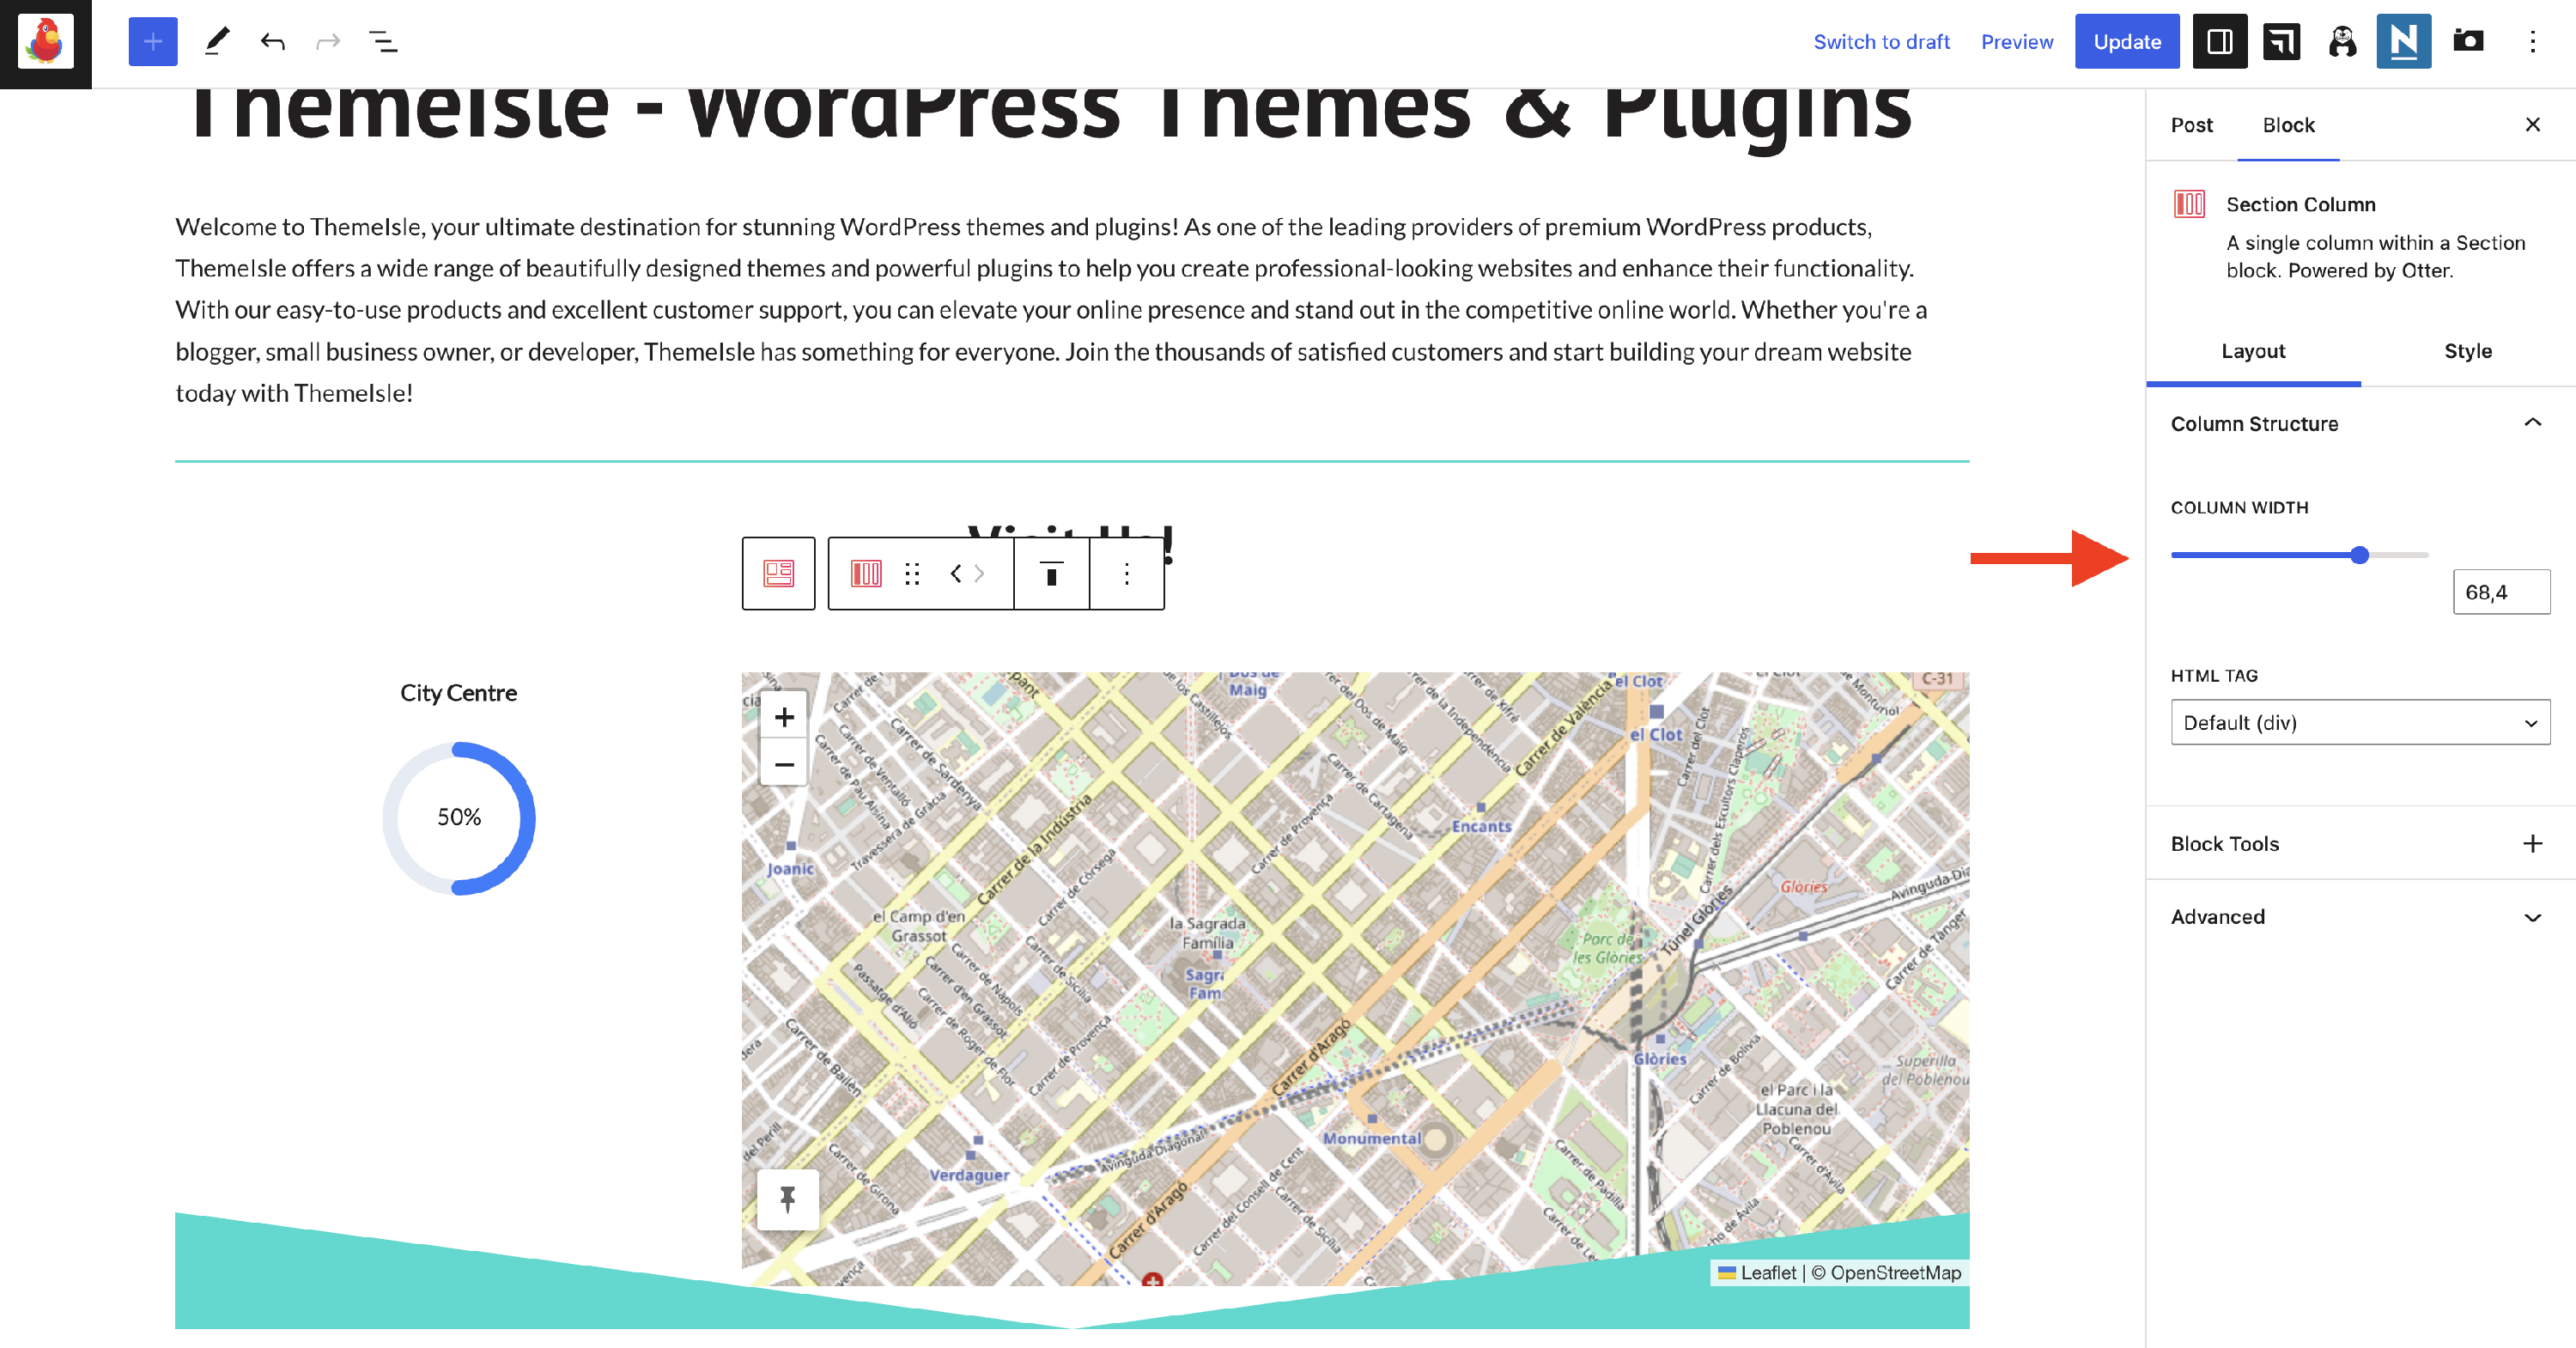
Unlike the parent block, the settings are less diverse, and they are divided into Layout and Style.
Layout
Column Structure- here, you can control the column width and the HTML tag.
Style
Here, all the options of the parent block are available except for the Shape Divider:
- Dimensions - adjust the padding and margin according to the device type.
- Background & Content - create a more attractive appearance by adding colors to the available areas.
- Border - set a distinct color, adjust the width and radius, or add a box shadow to the column.
📝 Note: Border width is not responsive and applies globally across all devices. Unlike Dimensions (padding and margin), there is no per-device control for border width on Section Columns. To apply different border widths on specific screen sizes, use custom CSS with media queries — see Custom CSS Workarounds for Non-Responsive Controls below.
Custom CSS Workarounds for Non-Responsive Controls
Some Section Column style properties, such as border width, do not have per-device responsive controls. To apply device-specific values for these properties, you can add custom CSS using media queries.
Example: Set a different border width on mobile
Navigate to Appearance > Customize > Additional CSS and add a snippet like the following.
To apply the change to all Section columns:
@media (max-width: 600px) {
  .wp-block-themeisle-blocks-advanced-column {
    border-width: 4px !important;
  }
}
To target a specific column only, use its unique CSS ID. You can find the ID by inspecting the column element in your browser's developer tools — it follows the pattern wp-block-themeisle-blocks-advanced-column-ID, where ID is the column's unique number:
@media (max-width: 600px) {
  #wp-block-themeisle-blocks-advanced-column-ID {
    border-width: 4px !important;
  }
}- Replace
4pxwith the border width you want on mobile. - Replace
IDwith the actual number shown in the element's ID attribute. - The
max-width: 600pxbreakpoint targets screens up to 600 pixels wide. Adjust this value to match your theme's mobile breakpoint if needed. - The
!importantflag is needed here to override the inline styles that the block editor applies directly to the element.
💡 Tip: Responsive controls are available for padding, margin, block visibility, and column order. Border width is not included in these responsive controls and requires the CSS approach described above.
Use cases for the Section block
- building a stunning partners section
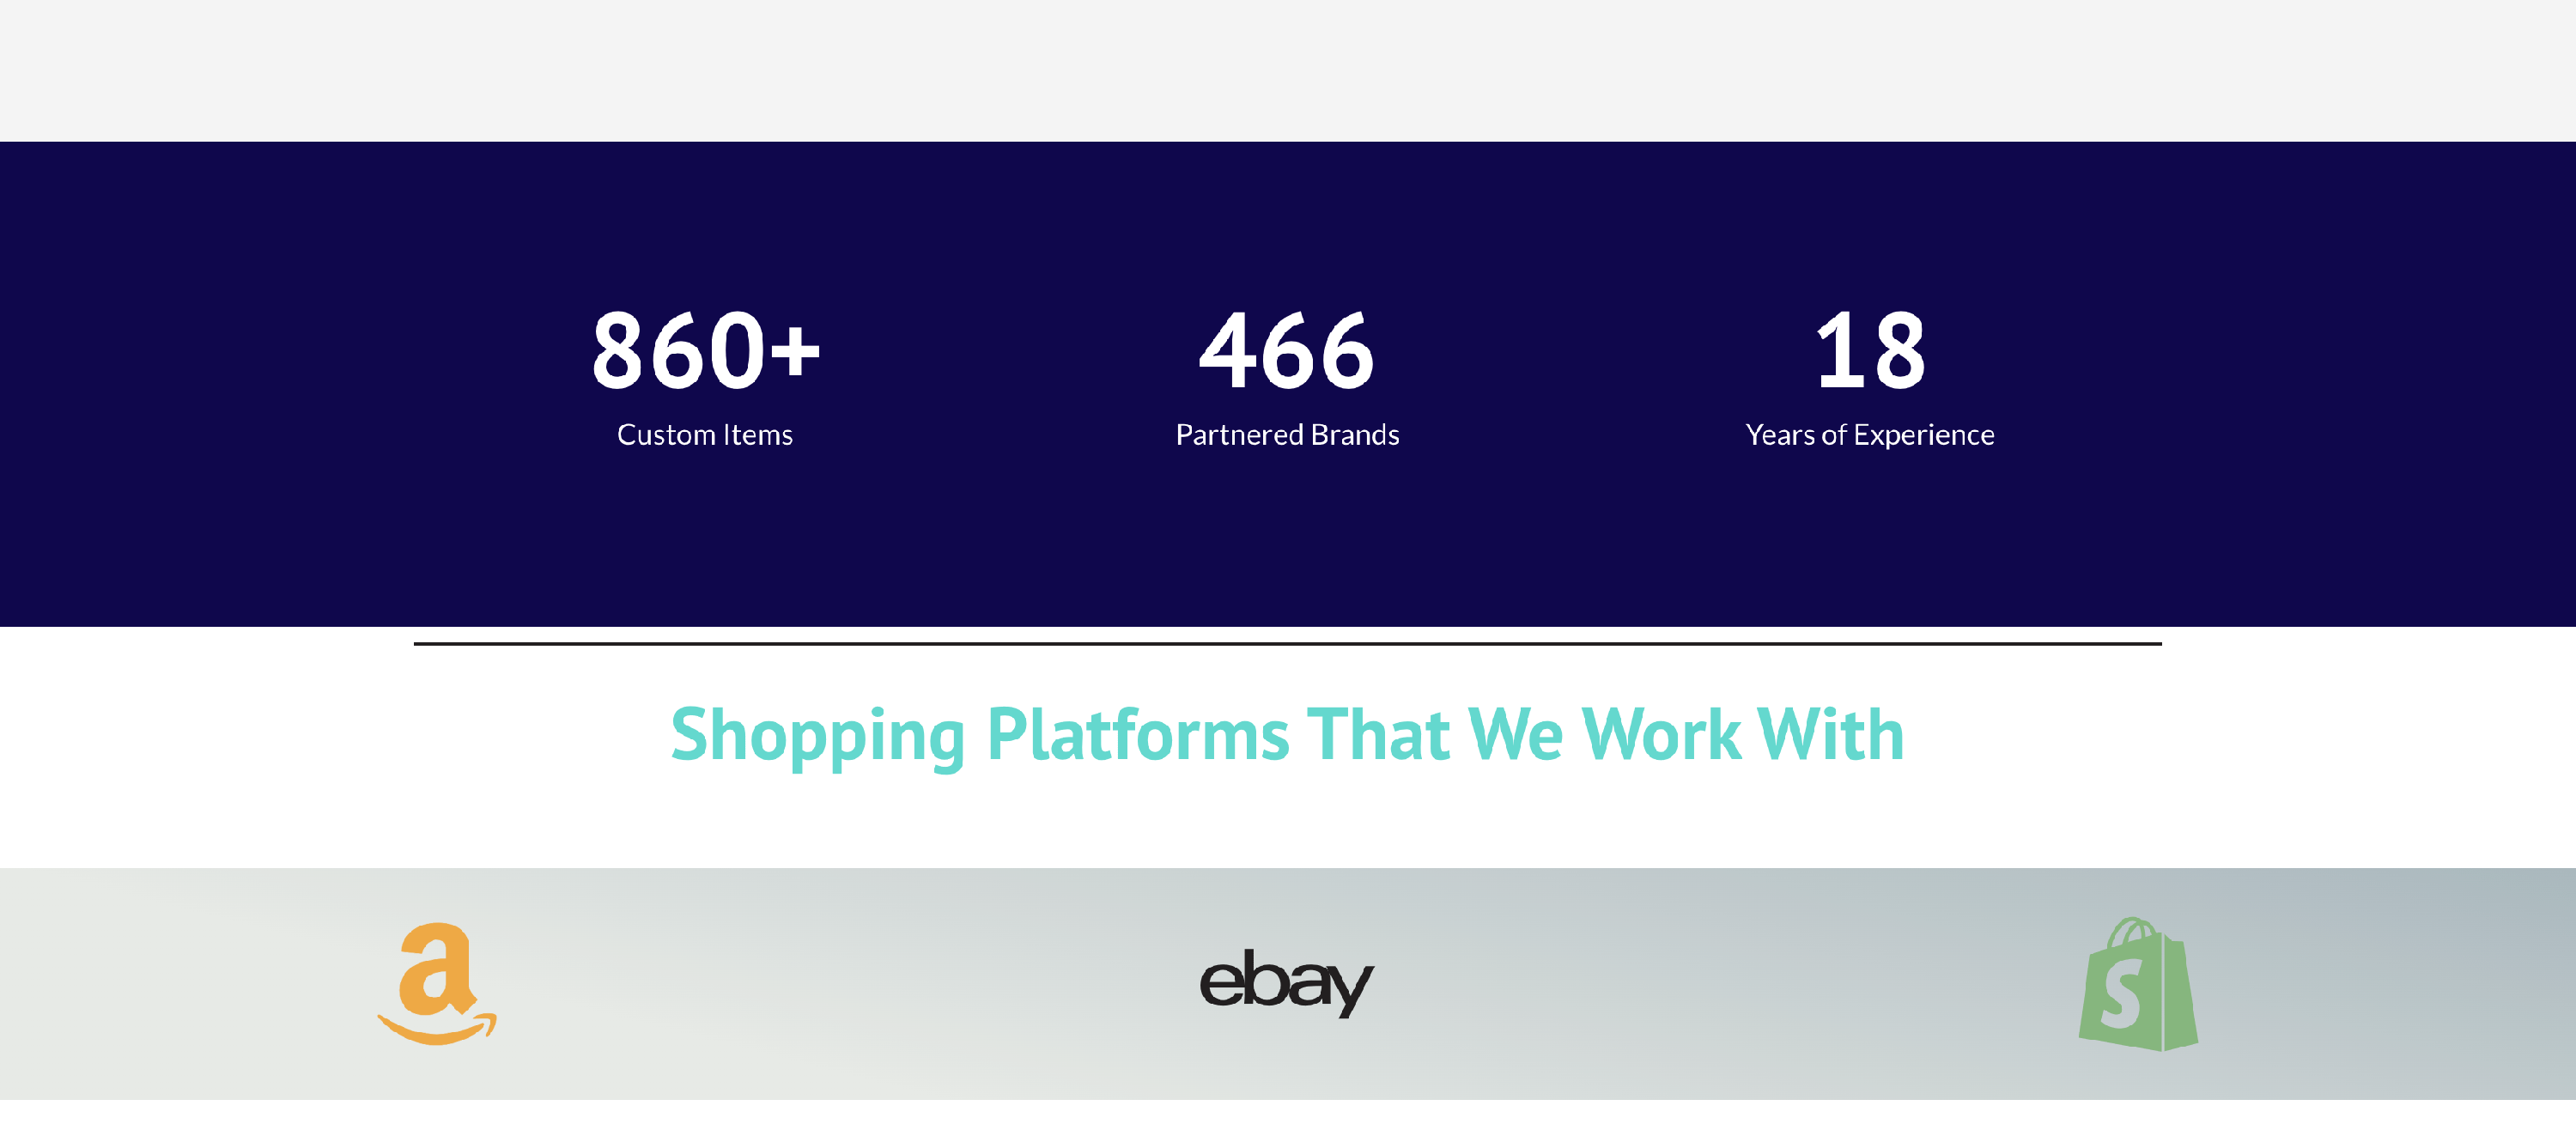
📝 Note: In this example, we have used the section block in combination with the icon block to present multiple platforms' logos and to take benefit of the section settings, such as full-width layout, gradient background, and 3 columns layout.
creating a responsive About Me section
building a custom Blog Header using the Custom Layouts
Edit content inside a Section
Sections built by a Starter Site or an imported template are often several levels deep — a Section contains columns, and a column can contain other blocks before you reach the heading, paragraph, or image you want to change. Clicking directly in the editor often selects one of those wrapper blocks instead of the block you meant.
Select a nested block with List View
- Open the page in the block editor and click the List View icon in the top toolbar.
- Find the Section that contains the content you want to edit, then click the arrow beside it to expand it.
- Keep expanding the Section Column and any inner blocks until you see the exact Heading, Paragraph, Image, or other child block.
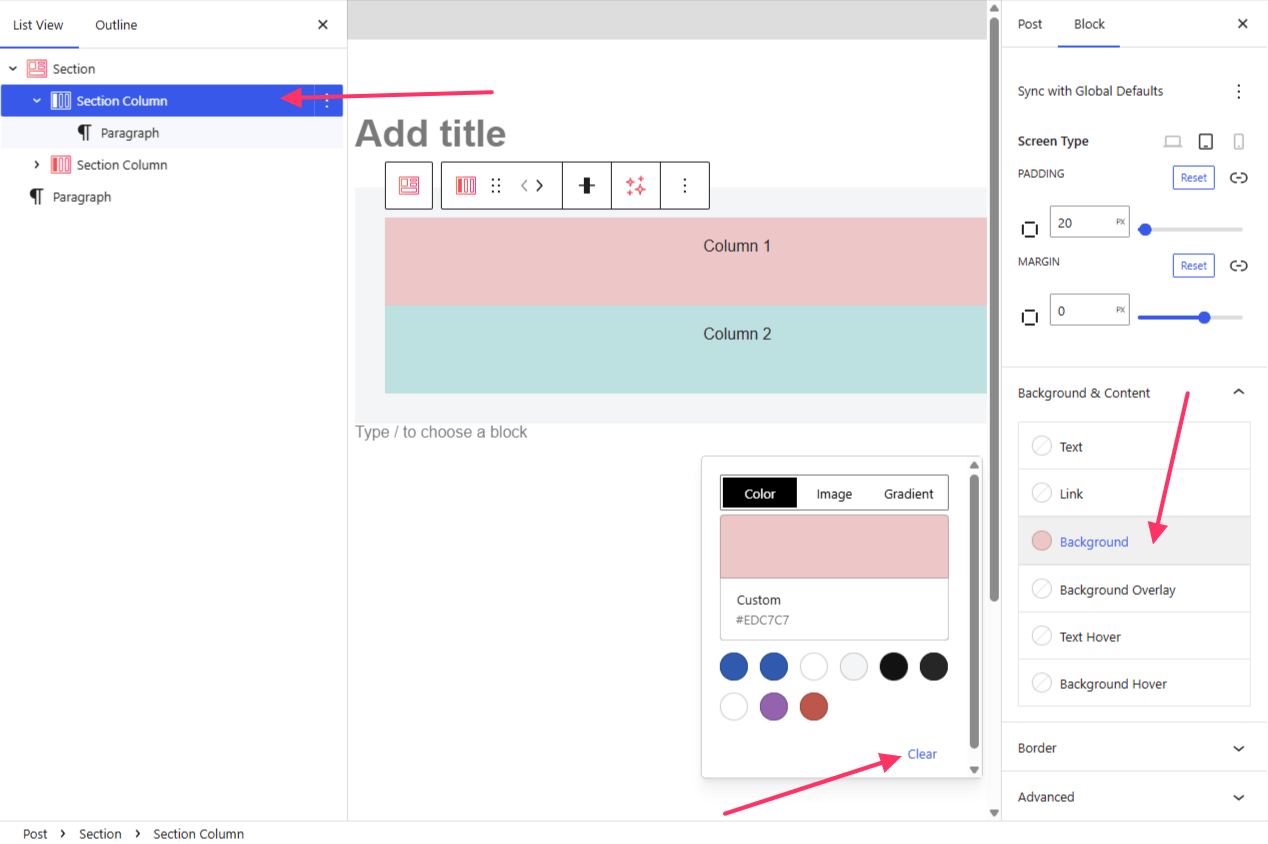
- Click that block in List View to select it. The right sidebar now shows the settings for that block only.
Where each color setting applies
Each level of a Section has its own Background & Content settings, and each level stores only its own values:
- Section (the parent) — its Background covers the whole section. Its Text color is inherited by everything inside the section that does not set a color of its own.
- Section Column — its Background covers that one column. Its Text color is inherited by the blocks in that column only.
- A child block, such as Heading or Paragraph — its own color settings apply to that block alone, and they override any color inherited from the Section or the column.
This is why a heading can keep a background or text color you did not expect: the value is stored on the heading itself, so changing the Section or the column has no visible effect on it. Imported Starter Site layouts often arrive with colors already set at the child-block level.
To clear a color that is set on a child block:
- Select the child block in List View.
- In the right sidebar, open the Color panel.
- Hover over the entry you want to clear — for example Background — and click the minus (–) button beside it to reset it.
- Apply the text or background color you want directly on that block, or leave it empty so the block inherits the Section or column color.
Troubleshooting: unsupported block message after moving or copying a site
The Section block is provided by the Otter Blocks plugin, not by your theme. If Otter Blocks is not active on a site, the block editor cannot render sections built with it and shows a message such as:
Your site doesn't include support for the 'themeisle-blocks/advanced-columns' block.On the front end, the same pages can look broken — columns and sidebars move out of place and icons may appear as question marks — because the markup and styles that Otter Blocks adds are missing.
This usually happens after you move or copy a site to a new, local, or staging install and the plugins are not carried over with it. The theme is not the cause, and reinstalling or updating the theme does not resolve it.
To restore the blocks:
- Go to Plugins > Add New, search for Otter Blocks, then click Install Now and Activate. If Otter Blocks is already installed but inactive, activate it from Plugins > Installed Plugins instead.
- Reopen the affected page or post in the editor and confirm the message is gone.
📝 Note: The free Otter Blocks plugin provides the Section block and its columns. If a different block still reports missing support after Otter Blocks is active, that block comes from another plugin or from an Otter Pro add-on — install and activate the plugin that provides it.
Troubleshooting: one column is wider than the others
When columns sit side by side, the Section block gives each one a percentage width — for example, 33.33% for every column of an equal three-column layout. That percentage is a starting width, not a maximum. A column can never become narrower than its longest unbreakable piece of content, so a single long string with no spaces or hyphens — a place name, a product code, or a long URL — pushes that column past its configured share and squeezes the others.
The column settings are not at fault here, and re-applying an equal layout does not change the result. To hold the columns at their configured widths, let the long string break.
To apply the change to all Section columns, navigate to Appearance > Customize > Additional CSS and add the following:
.wp-block-themeisle-blocks-advanced-column {
  min-width: 0;
  overflow-wrap: break-word;
}
min-width: 0lets the column shrink back to its configured percentage.overflow-wrap: break-wordlets the long string wrap onto another line inside the column instead of overflowing it.
To target a single column only, use its unique CSS ID, found the same way as described in Custom CSS Workarounds for Non-Responsive Controls:
#wp-block-themeisle-blocks-advanced-column-ID {
  min-width: 0;
  overflow-wrap: break-word;
}
If you would rather not add CSS and the content allows it, insert a space or a hyphen at a natural break point in the long word so the browser has somewhere to wrap.
After making the change, check the section with the Desktop, Tablet, and Mobile previews in the editor, and then on the front end. By default, columns stack to full width below 600px, so uneven widths are only visible where the columns are side by side.
📝 Note: This affects any content inside a column, not only headings. Long URLs pasted as plain text are the most common cause.