
The AI Block - Otter Blocks Library
📝 Note: These blocks are part of the Otter Blocks plugin, which you can get from here.
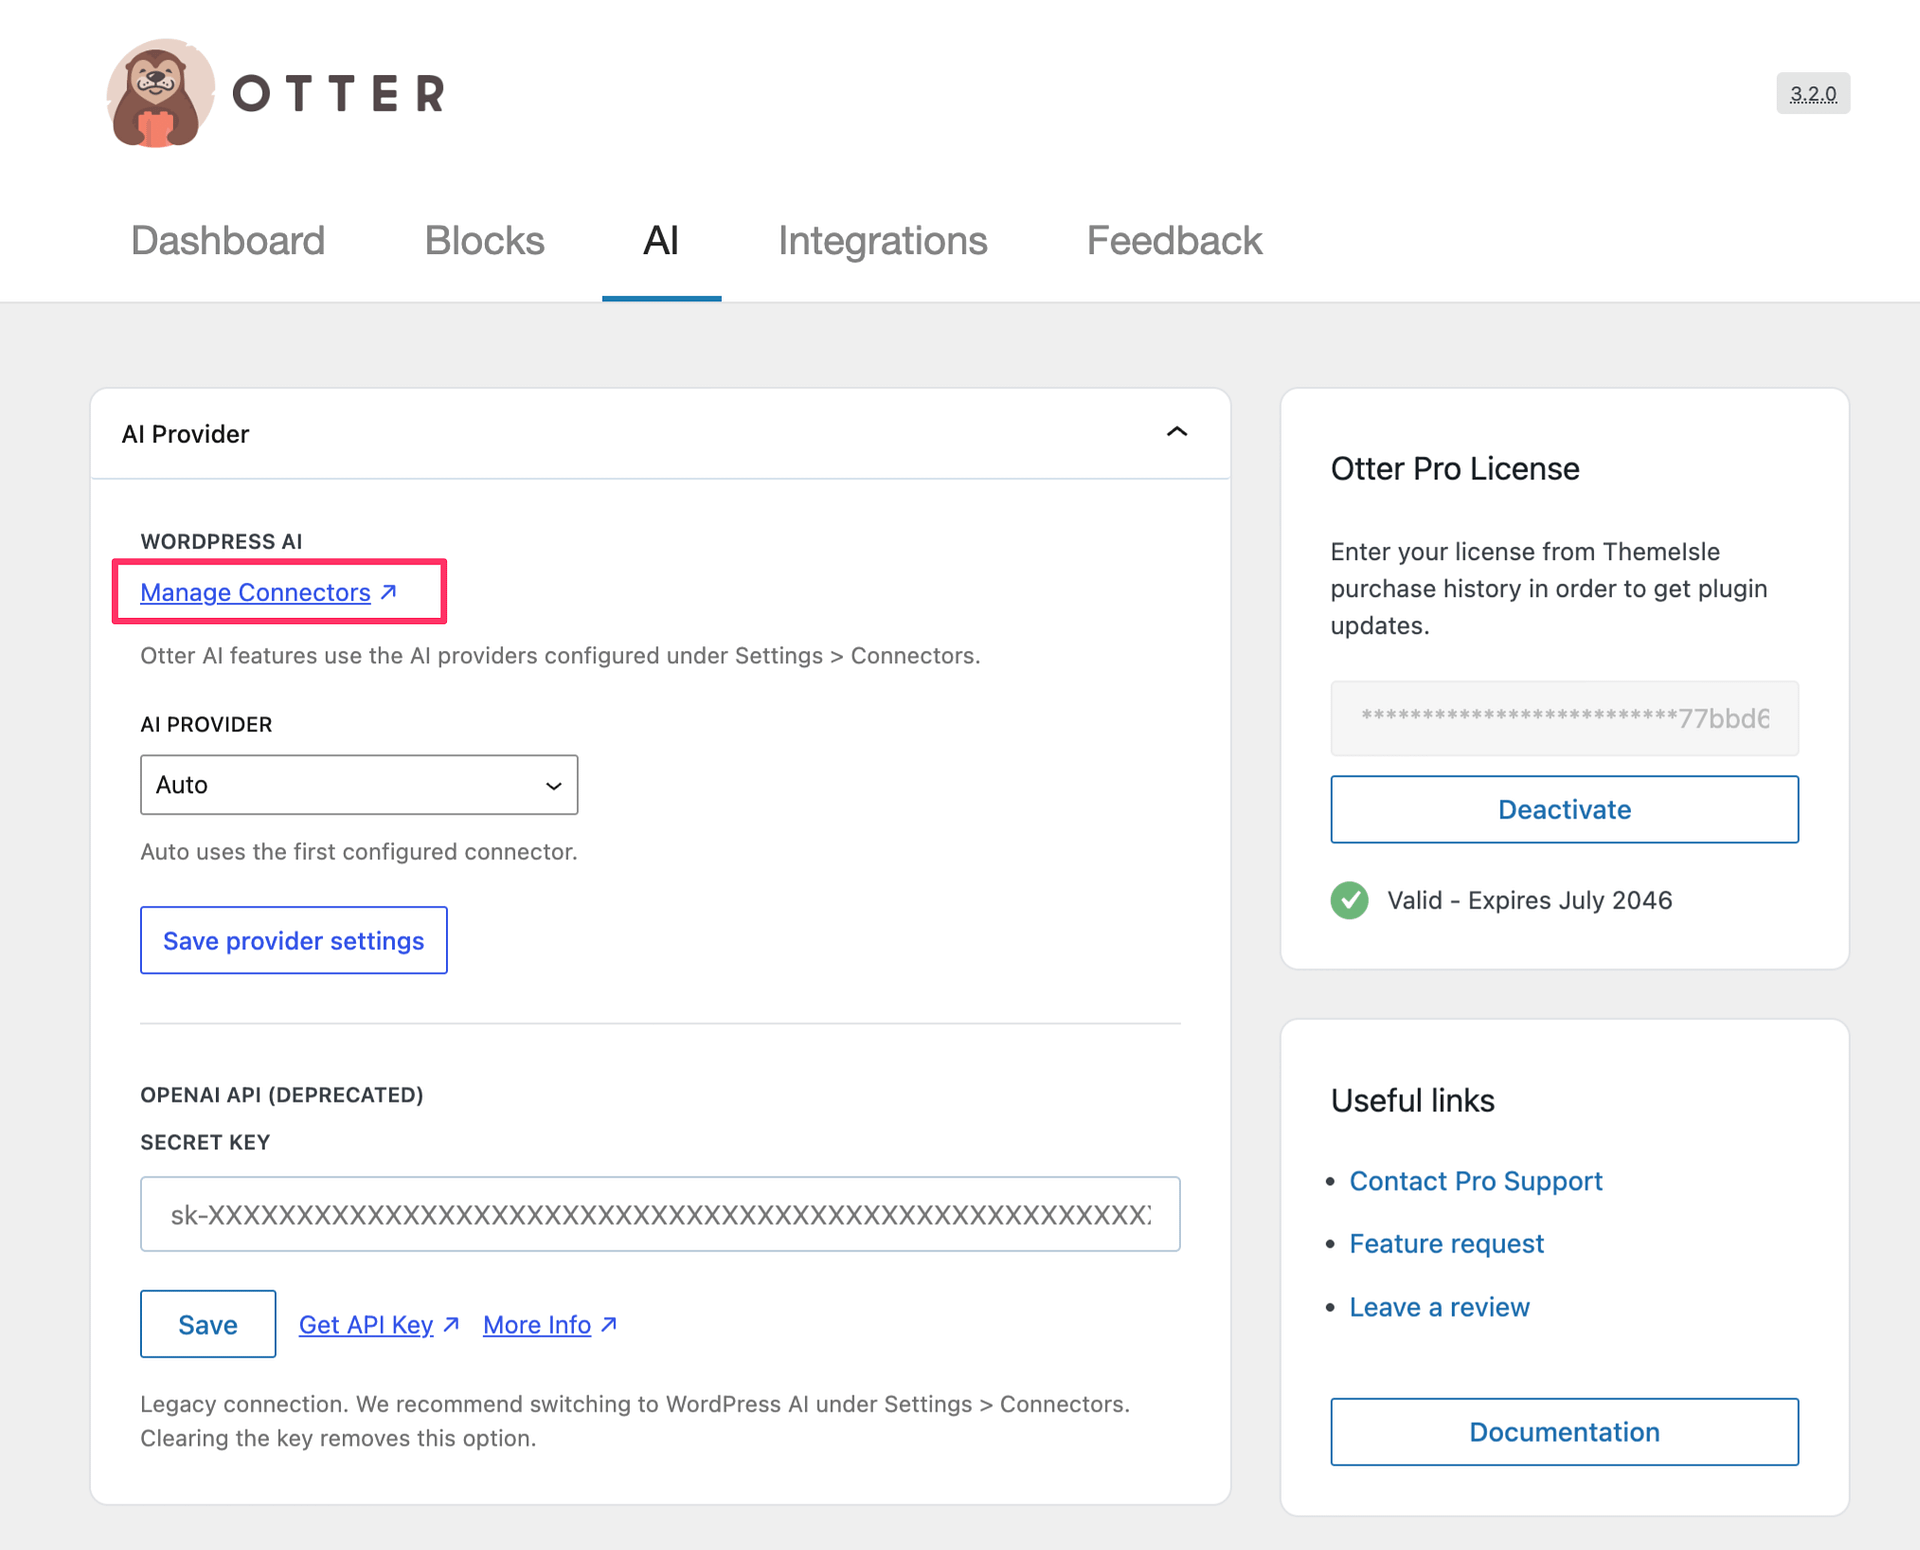
The AI Block and Otter's AI toolbar actions need an AI provider. Which route you use depends on your site. If your site has native WordPress AI support, you set up a provider under Settings > Connectors. If it does not, you connect a legacy OpenAI API key under Otter Blocks > Settings on the AI Provider panel — follow this guide to generate one.
When a connector is configured, the AI Provider panel adds AI provider and Model dropdowns. Both default to Auto, which uses the first configured connector and lets WordPress choose the model.
In this article
Using the Block
1. Navigate to the pages/posts where you want to use the AI Block.
2. Click on the plus button to add new blocks.
3. Search for the AI Block and insert it into the page.
AI Content Generator
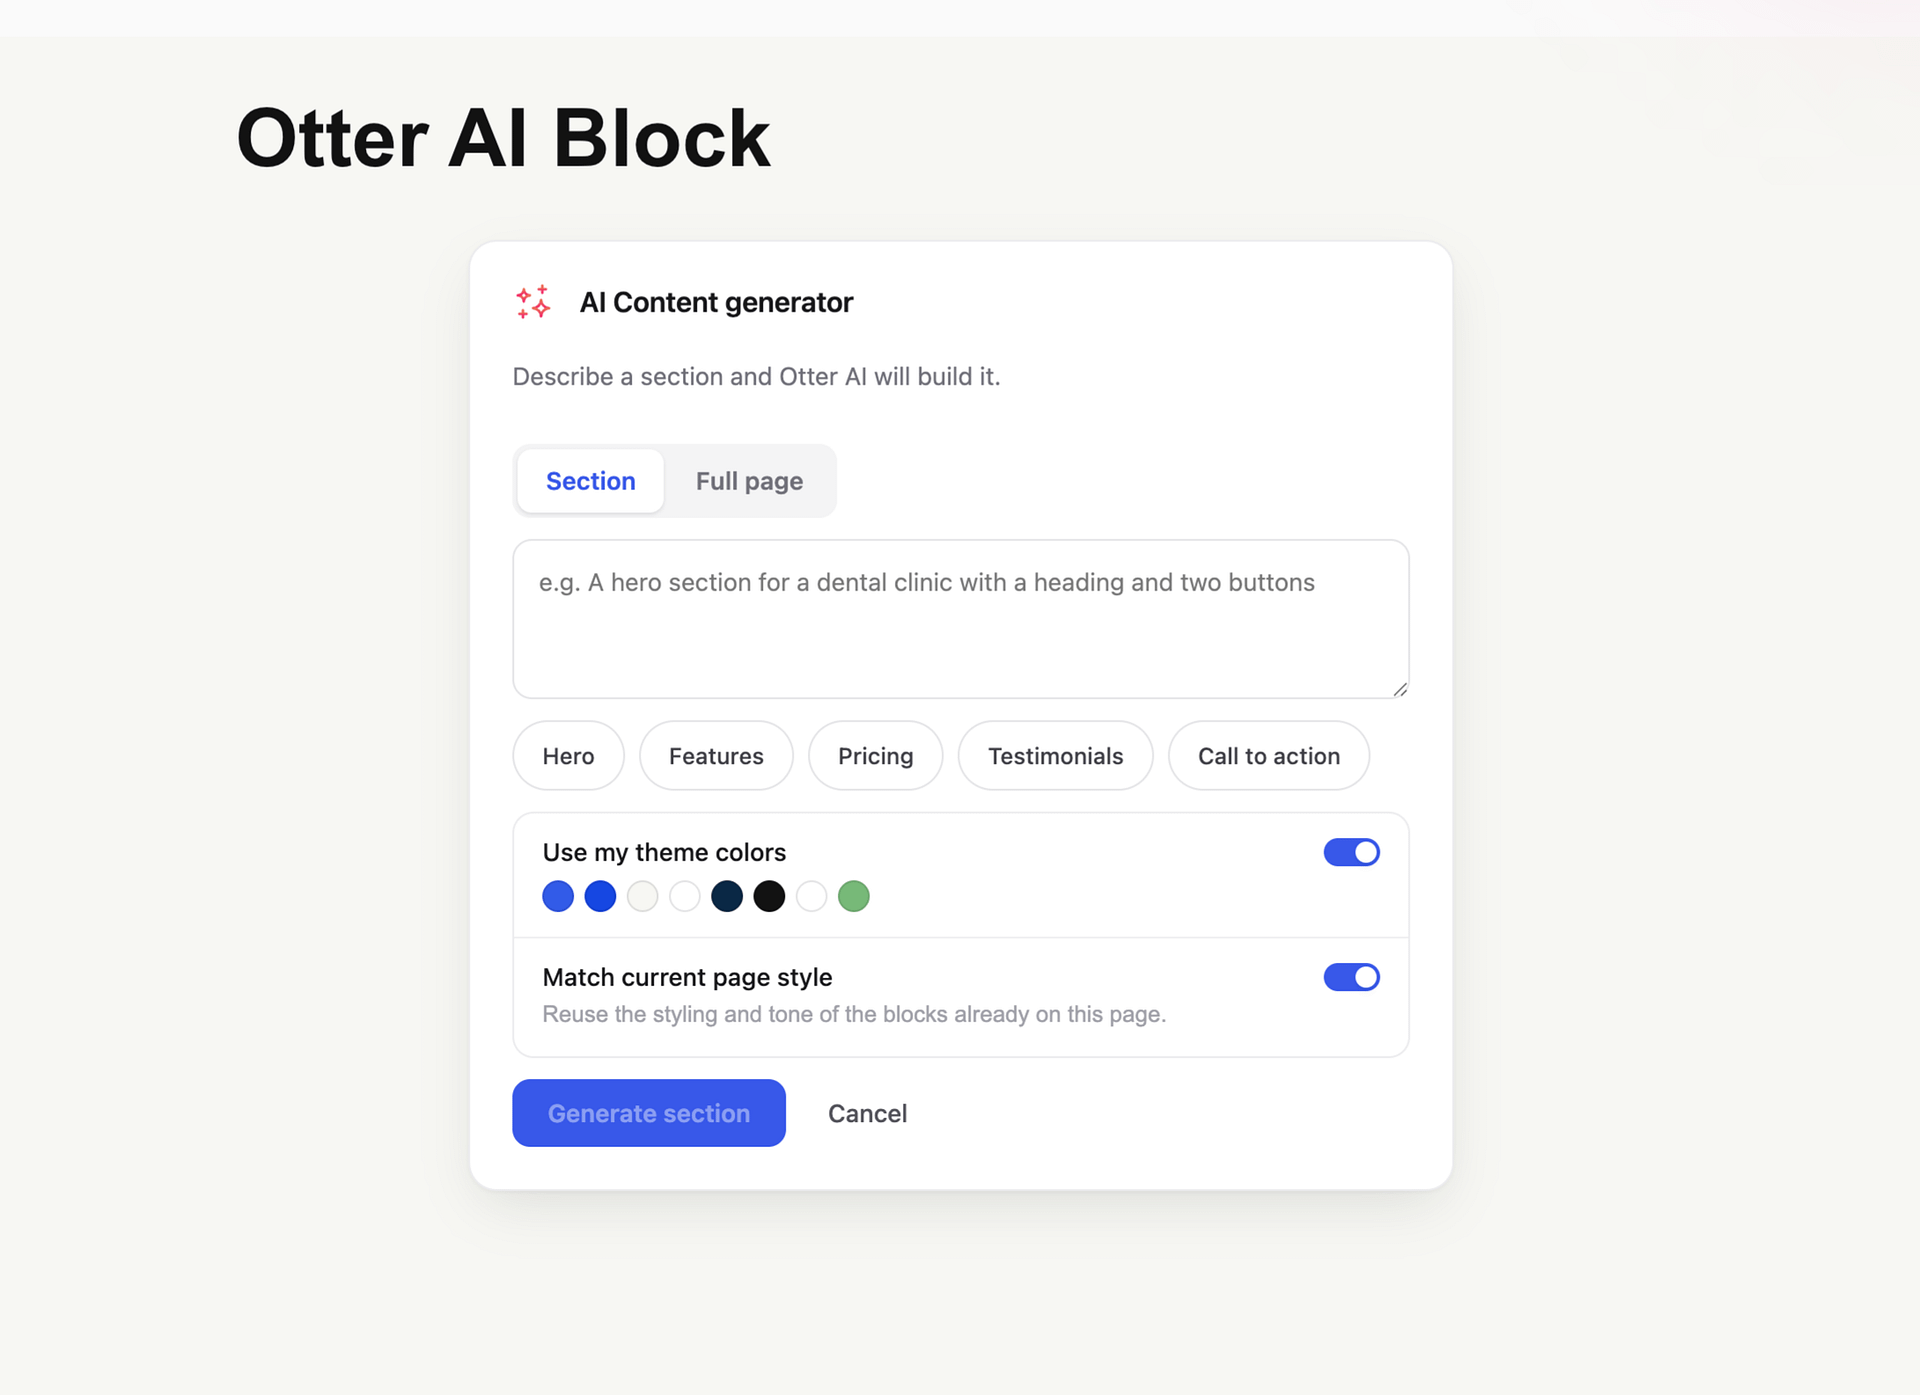
Use the AI Content generator to build new content from a prompt. In the block, first choose what to generate:
- Section — a single section, such as a hero, features grid, or call to action.
- Full page — a complete page made of several sections.
Type a prompt describing what you want, or click one of the suggested starter prompts. You can also fine-tune two options before generating:
- Use my theme colors — build the content using your theme's color palette. Turn this off to let the AI choose its own colors.
- Match current page style — reuse the styling and tone of the blocks already on the page so the new content fits in.
Click Generate section or Generate page to open the AI modal.
📝 Note: The AI Content generator builds with Otter's Atomic Wind blocks. If they are disabled, the block prompts you to enable them before you can generate content.
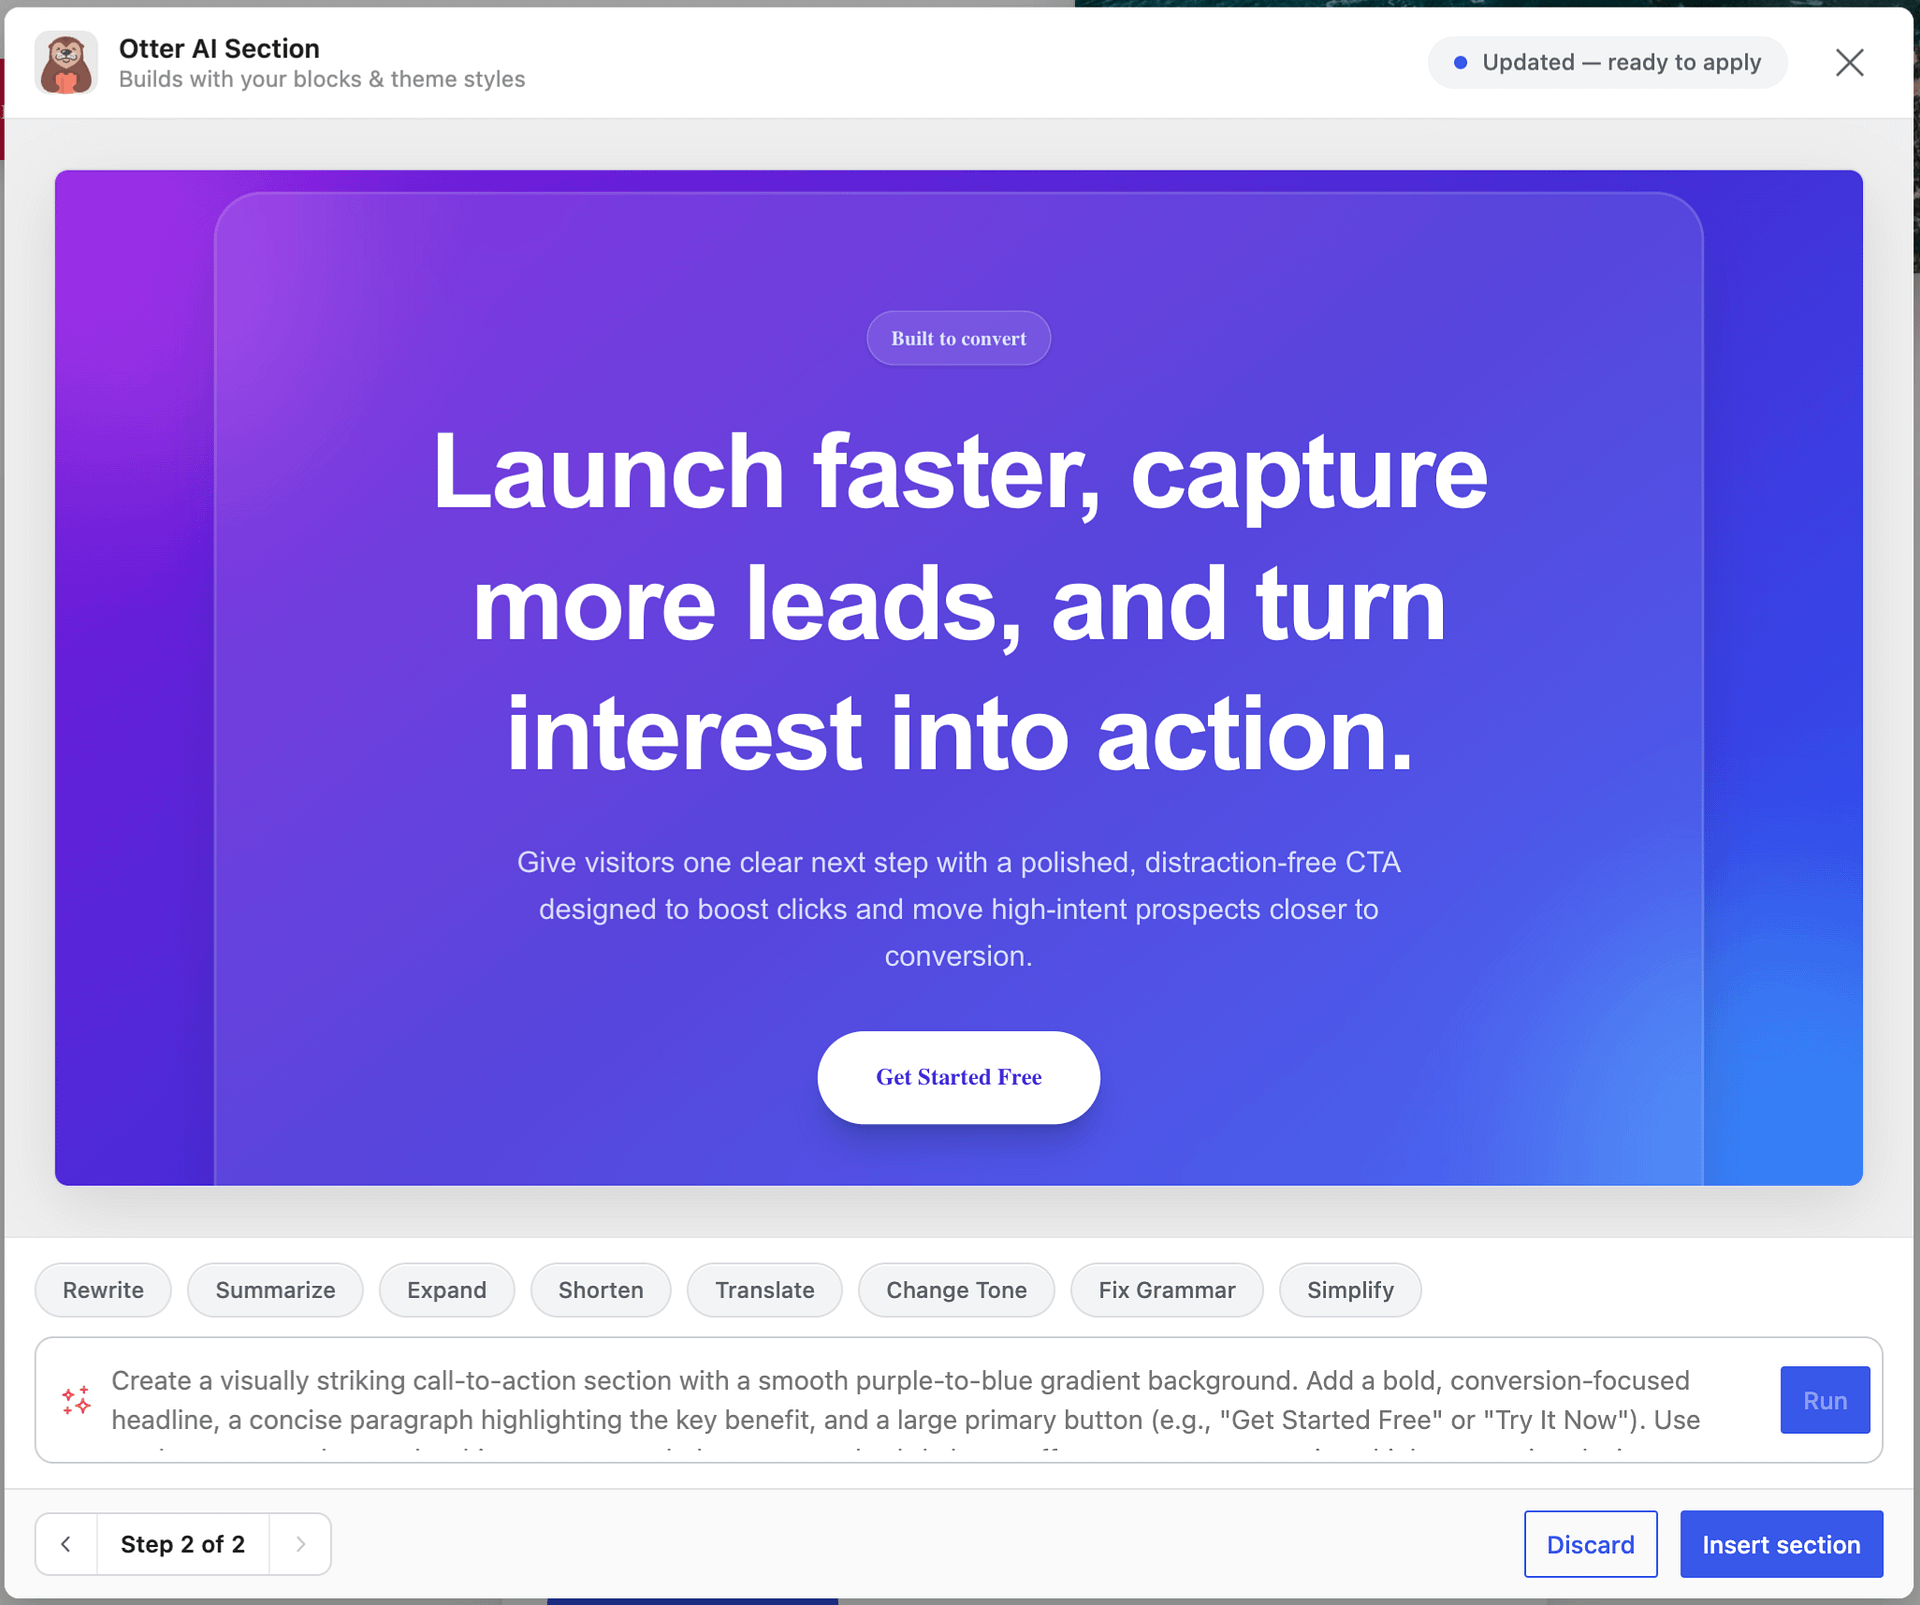
In the modal, Otter AI generates a preview of the result. From here you can:
- Refine the result by entering a follow-up prompt and clicking Run.
- Step back and forth through previous versions with the arrows.
- Click Insert section or Insert page to place the result in the editor, or Discard to close without inserting.
If you generate a blog or magazine card and want it to display real posts automatically, follow this guide: How to Display Blog Posts in AI-Generated Layouts with Otter.
AI Content Toolbar
When the AI Block Toolbar Module is enabled, Otter adds an AI shortcut to the toolbar of supported editor blocks. Select a block (or a multi-block selection), then click the AI shortcut to open the AI modal and run an action on the selected content.
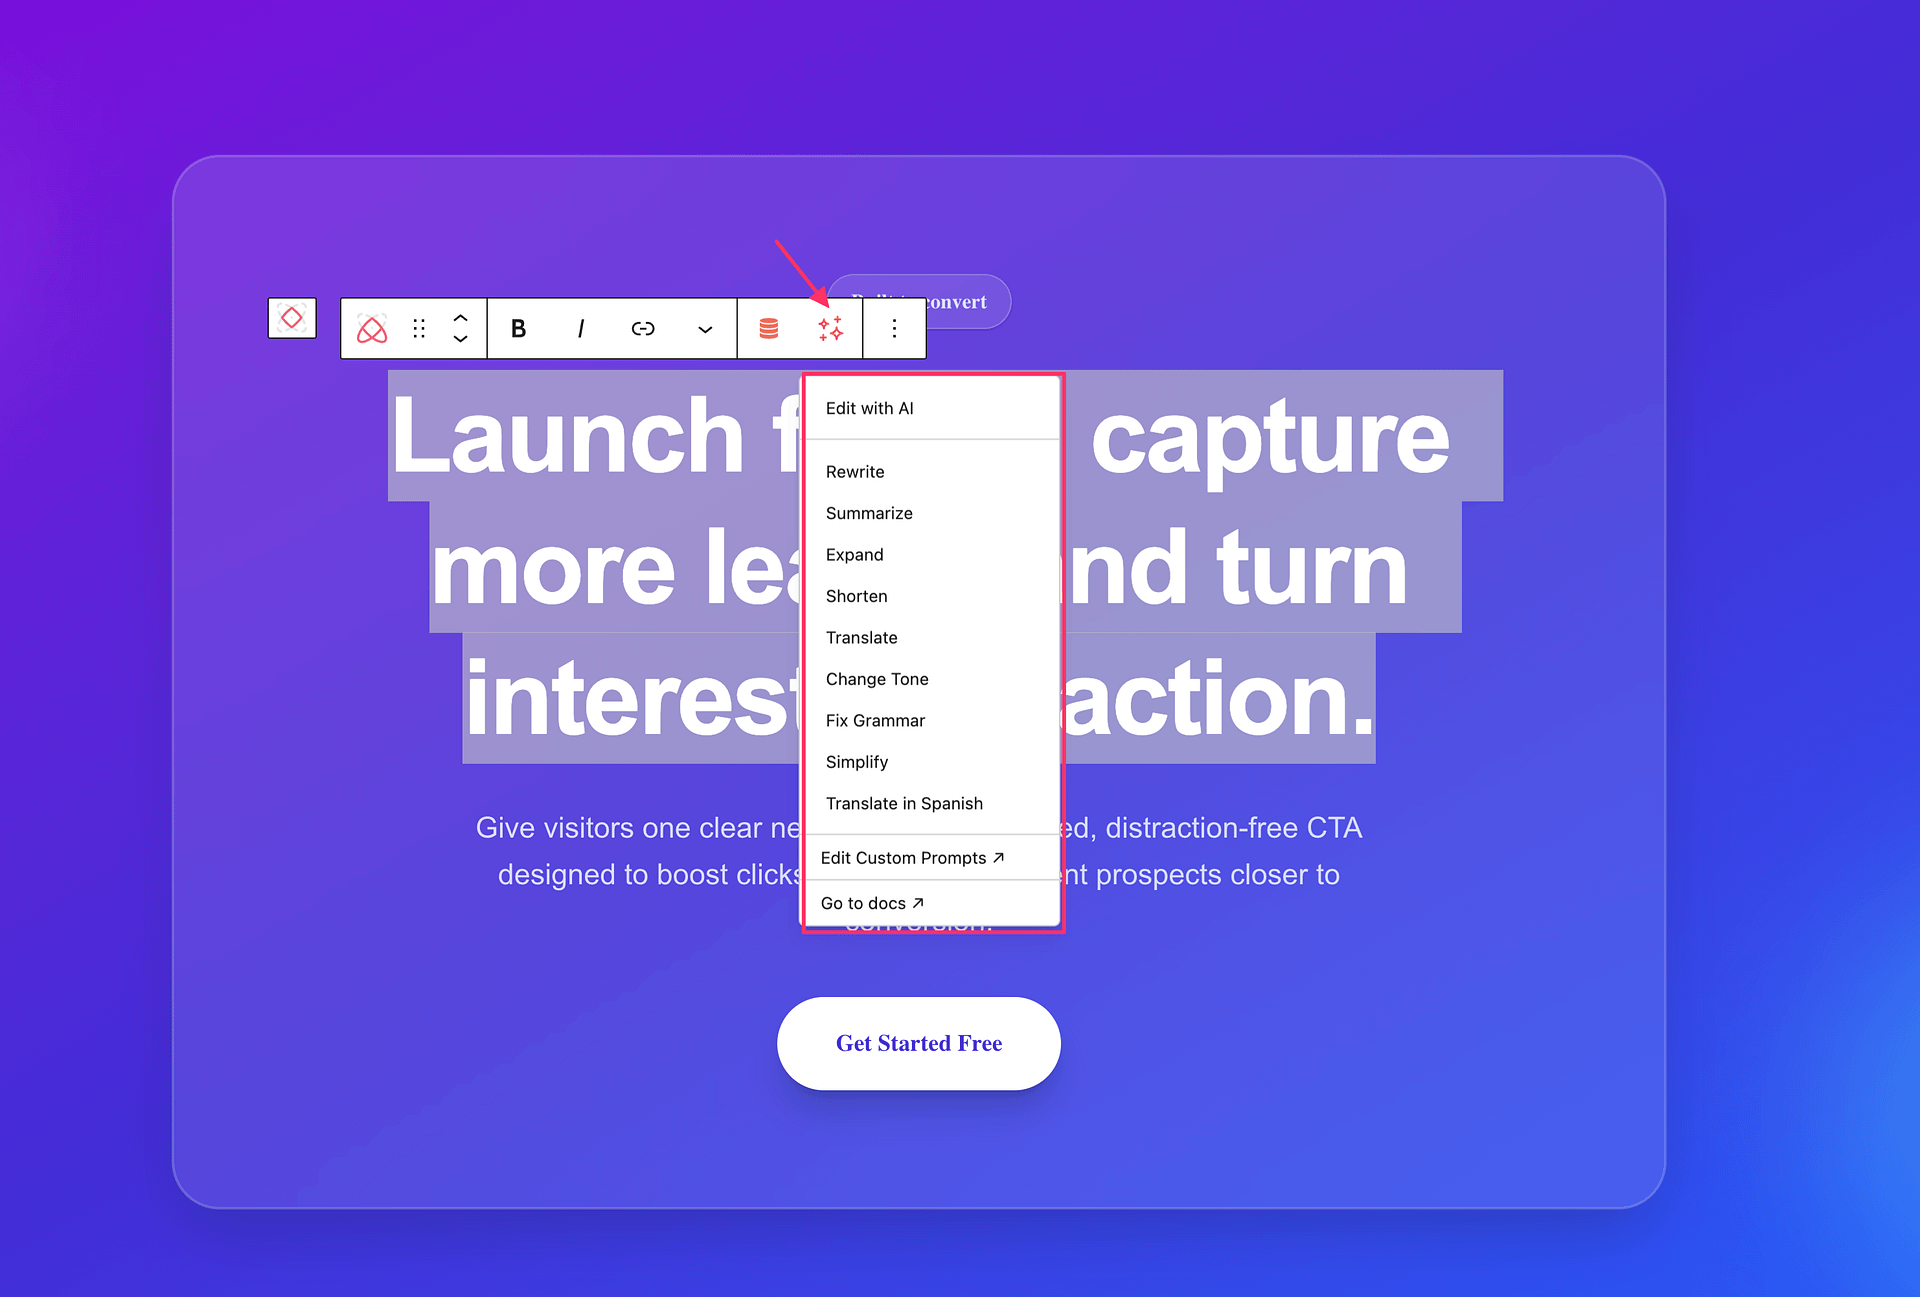
The modal offers a set of built-in quick actions. By default these are:
- Rewrite — rewrite the content for clarity and flow.
- Summarize — condense the content.
- Expand — add useful supporting detail.
- Shorten — make the content shorter while keeping the key meaning.
- Translate — translate the content.
- Change Tone — rewrite the content in a different tone.
- Fix Grammar — correct spelling and grammar.
- Simplify — make the content easier to read.
Pick an action to seed the prompt, or type your own instruction, then click Run. Review the preview and click Apply to replace the selected content, or Discard to keep the original.
If you added your own actions in the Toolbar Actions panel, they appear in the same list. The Toolbar Actions list on the AI tab of Otter Blocks > Settings is where you rename an action, change its prompt, enable or disable it, drag it into a different order, or add up to five custom actions.
Fix the "Please add an AI provider in the AI settings" notice
When Otter has no AI provider to send requests to, it shows Please add an AI provider in the AI settings. in the AI modal, and Please set up an AI provider in Integrations. in the AI toolbar menu. Both messages mean the same thing.
This is a setup prompt, not an installation, license, or activation error. It appears even when Otter and Otter Pro are installed and activated correctly, because connecting an AI provider is a separate step.
📝 Note: Otter Pro does not include an AI provider. You connect your own provider account, and any usage that provider bills you is separate from your Otter Pro purchase.
To clear the notice:
1. Click Go to Dashboard in the message, or open Otter Blocks > Settings and select the AI tab.
2. On the AI Provider panel, connect a provider using the option your site offers:
- If the panel shows Manage Connectors, your site has native WordPress AI support. Use that link to add a provider under Settings > Connectors, then come back to the AI Provider panel and click Save provider settings. Leave AI provider and Model on Auto unless you want to pick a specific one.
- If the panel shows an OpenAI API field instead, your site does not have native WordPress AI support. Paste your OpenAI API key and click Save. This field also stays visible on sites with native support if you saved a key previously.
3. Go back to the editor and run the AI Block or the toolbar action again.
The notice no longer appears once a provider is available, and the AI actions become clickable.