How to Display Blog Posts in AI-Generated Layouts with Otter
You can use an AI-generated card design from Otter and connect it to real WordPress posts automatically. The key is to place one designed card inside a Query Loop block's Post Template, then map its content to dynamic post data.
In this article
Understand the layout structure before you start
Before you build the layout, make sure Otter Dynamic Content is enabled at Otter Blocks > Settings > Dashboard > Modules > Enable Dynamic Content Module.
In this setup:
- The Query Loop chooses which posts to load.
- The Post Template repeats one card design for each post in that query.
- Otter Dynamic Values, Dynamic Images, and Dynamic Link replace static placeholder content with each post's real data.
If you still need to generate the card design first, use the AI Block guide. This tutorial focuses on connecting that design to live post data.
Create the repeating post-card layout
1. Open the page where you want to display your post cards.
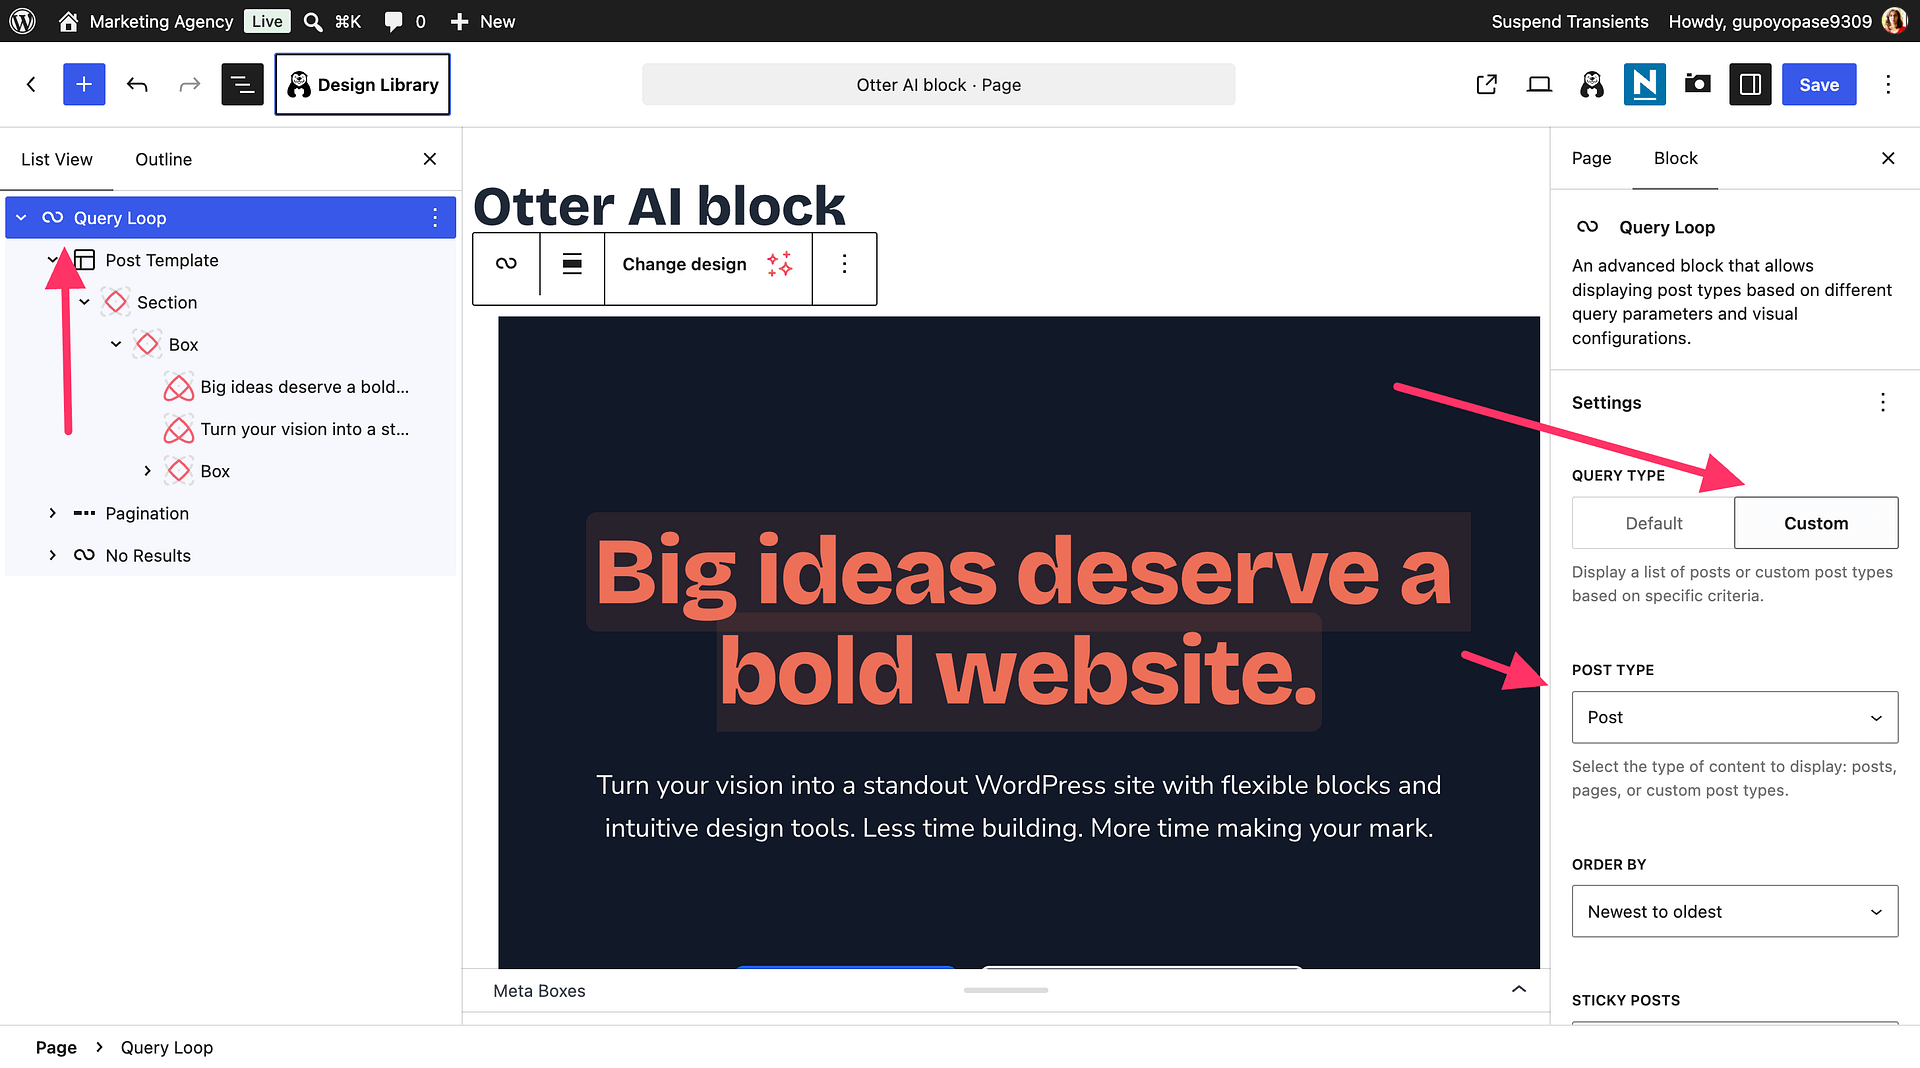
2. Add a Query Loop block.
3. In the Query Loop settings, choose the post type and filters you want to show (for example, latest posts or a specific category).
4. Open the Post Template area inside the Query Loop.
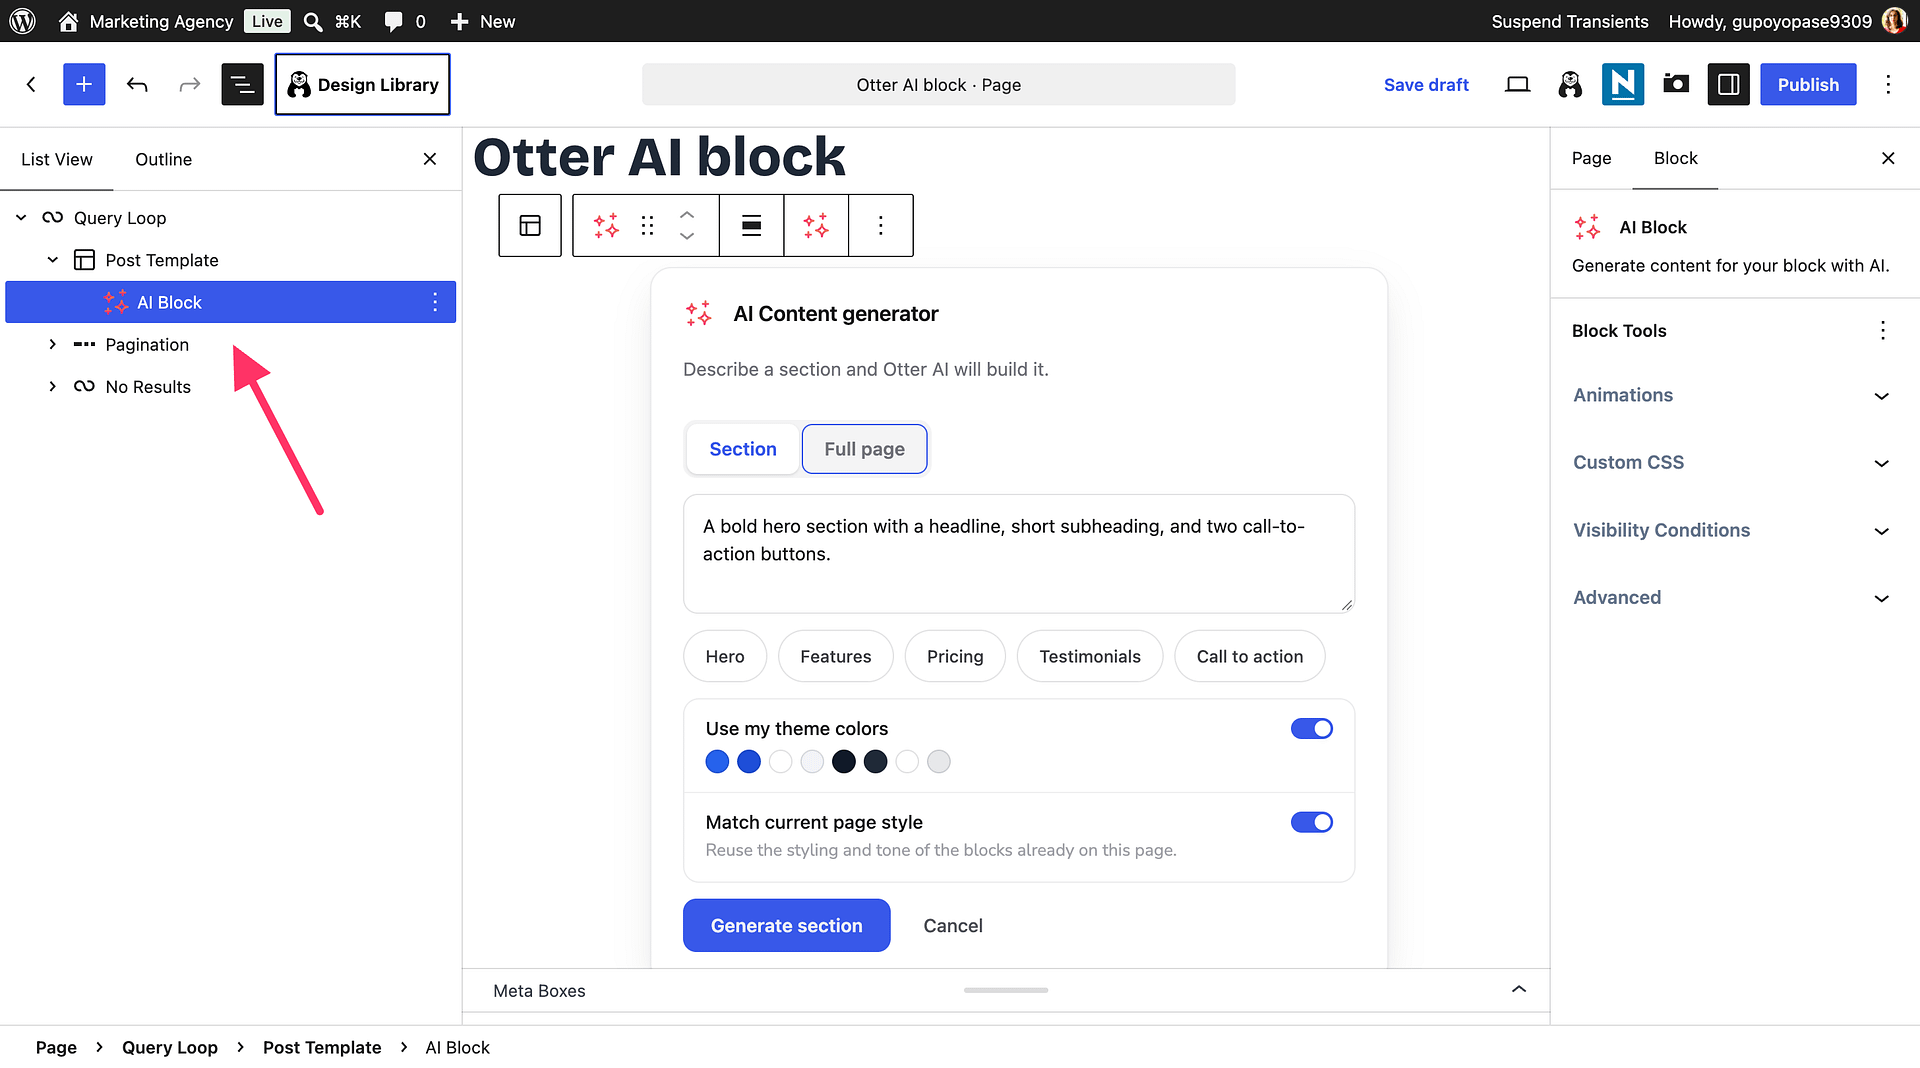
5. Insert one AI-generated card layout inside Post Template.
Only one card belongs here. WordPress repeats that same card automatically for every post returned by the query.
Connect each card element to post data
Keep your existing spacing, colors, typography, and other styling settings as they are. You only need to replace static content sources.
Map text fields with Dynamic Values
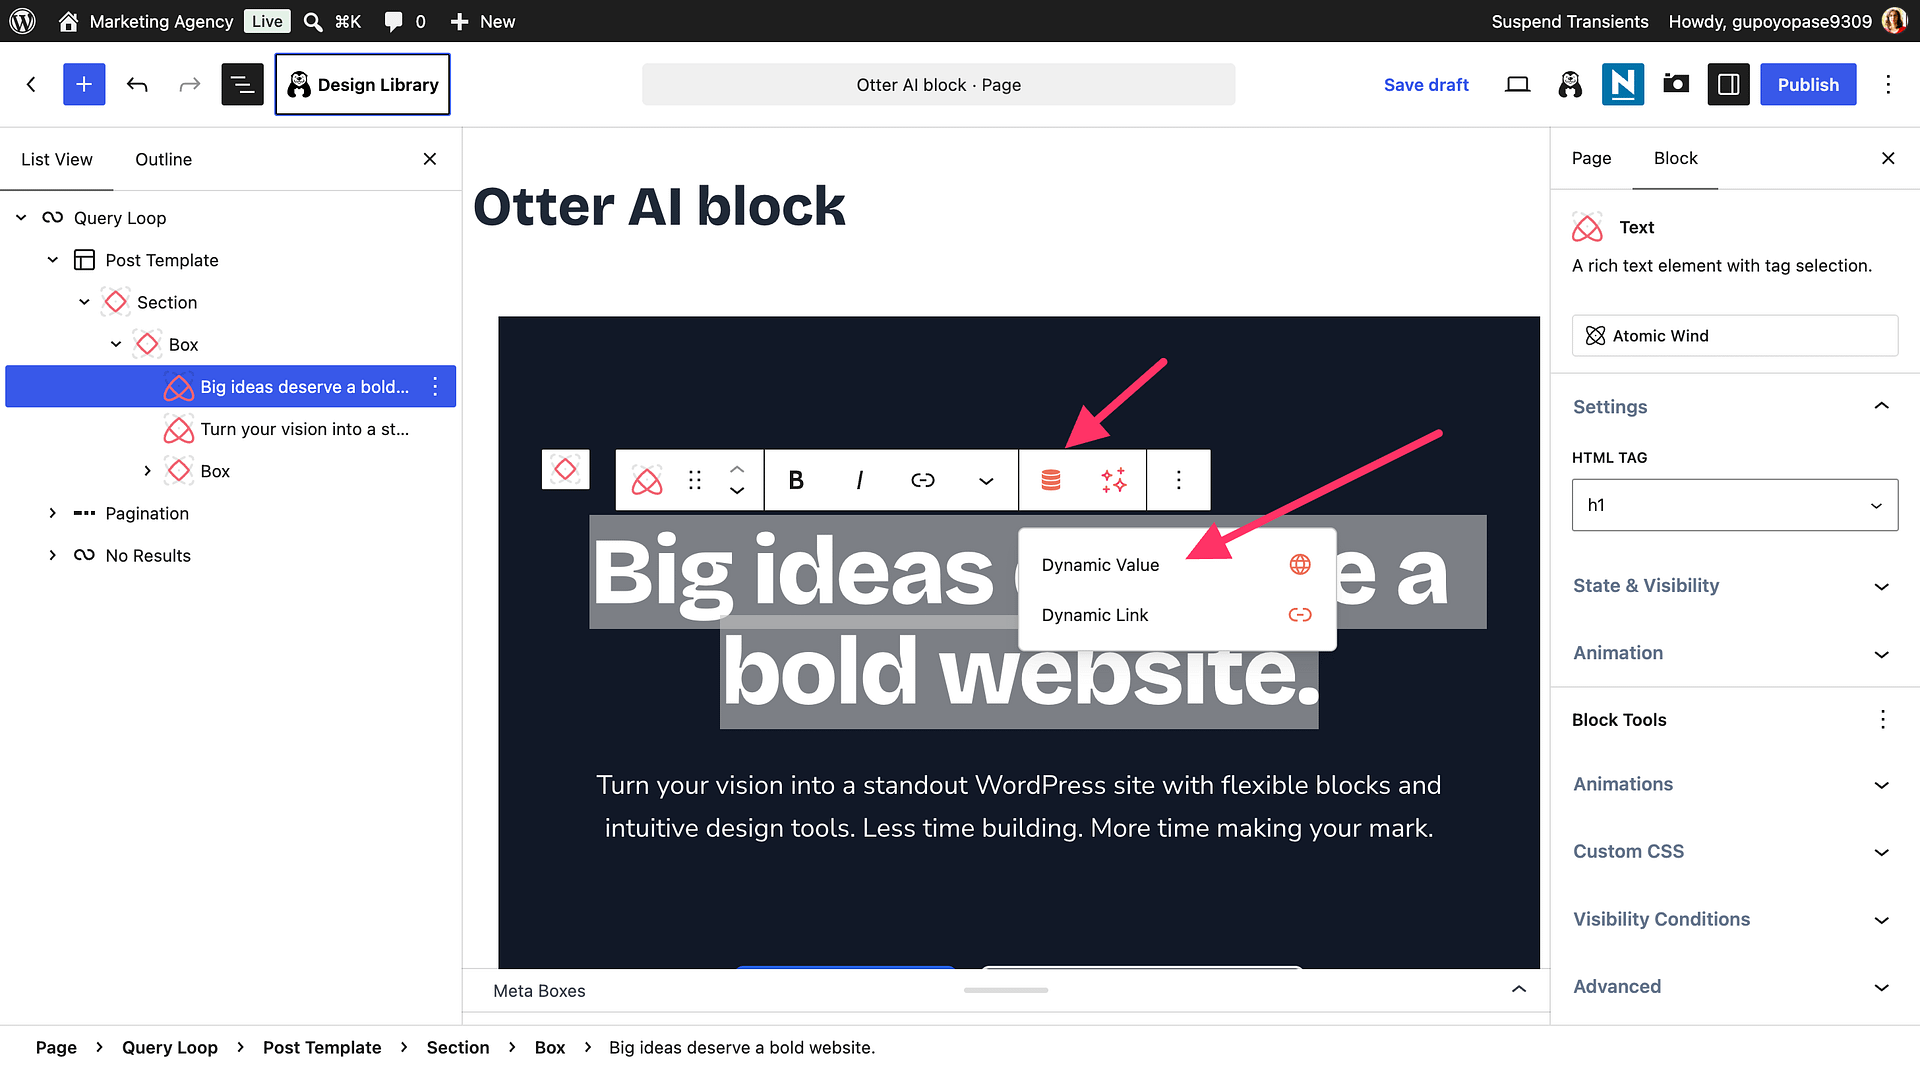
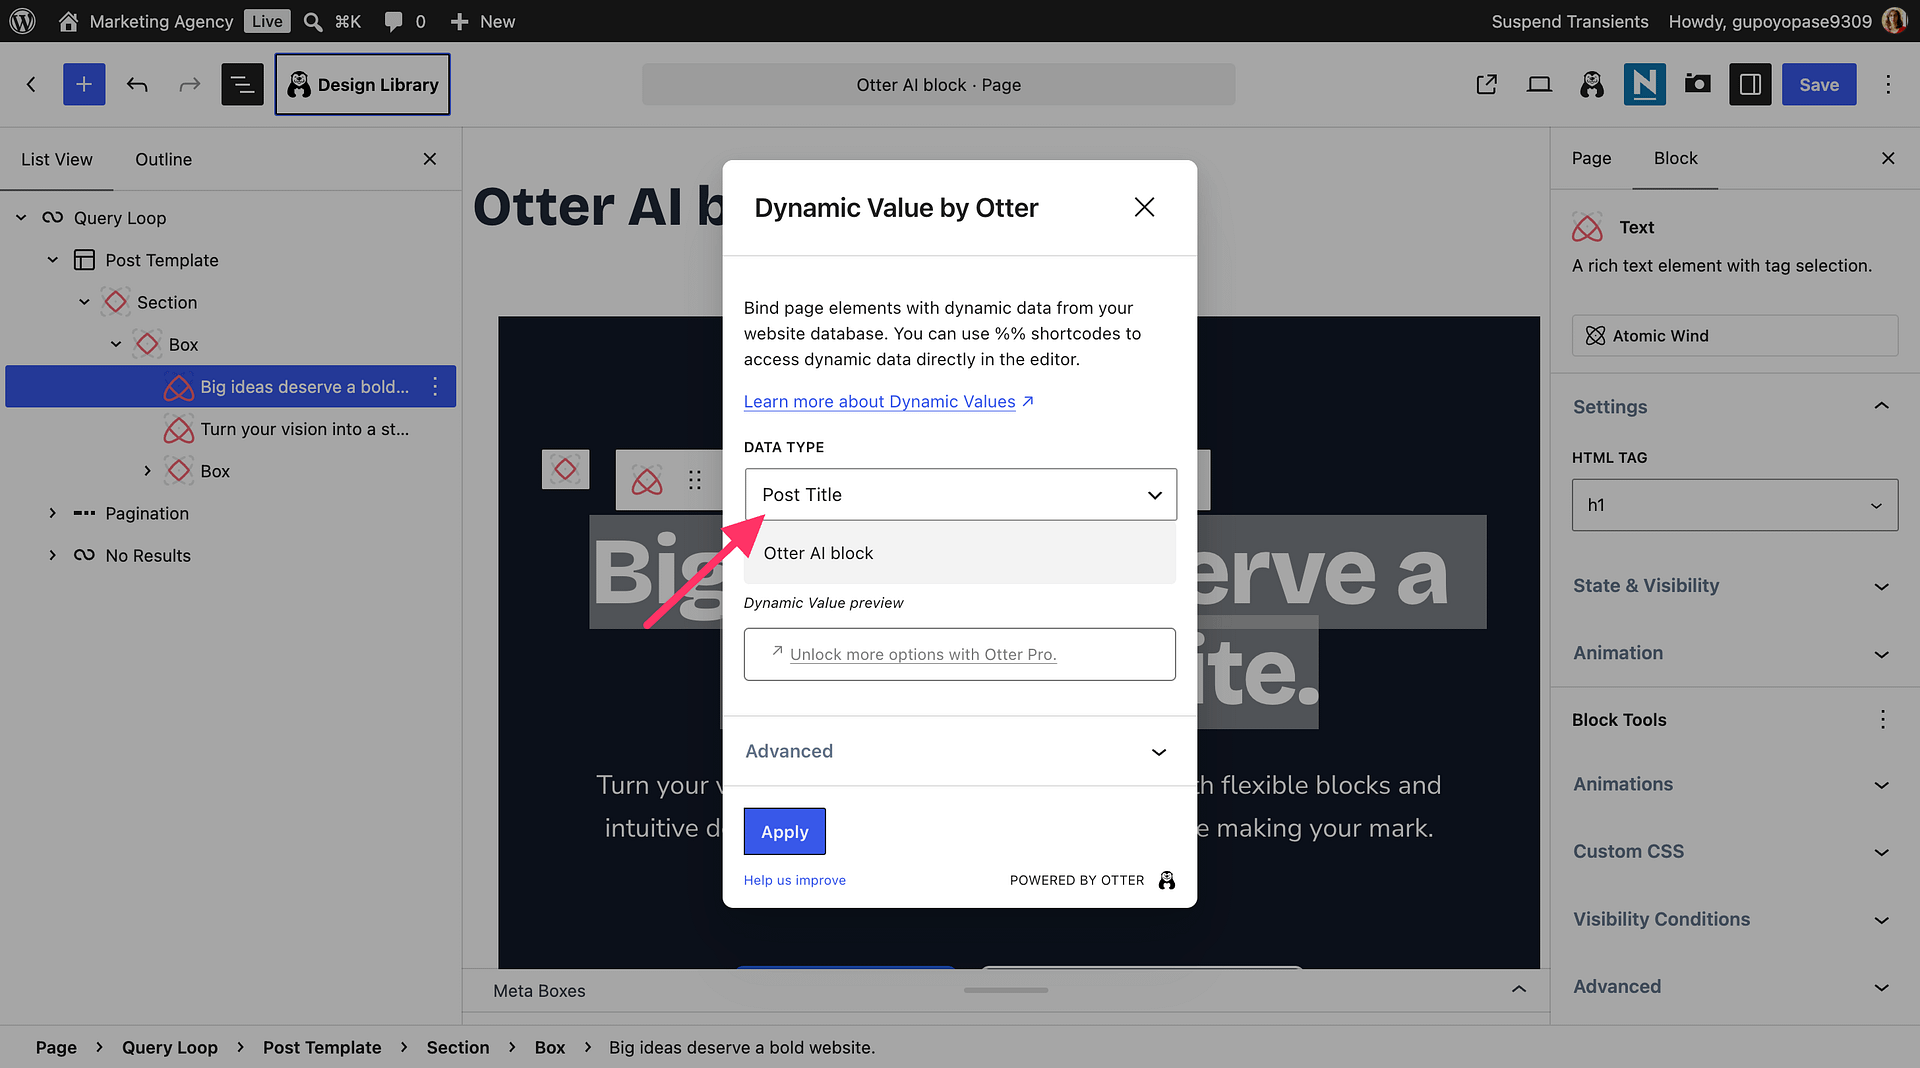
For title and excerpt text, edit the text blocks inside your card and type %% where you want dynamic content.
- Select Post Title for your title block.
- Select Post Excerpt for your excerpt block.
For full details about available text mappings, see The Dynamic Values Feature - Otter Features Library.
Map the image with Dynamic Images
Dynamic image mapping is available on the WordPress Image block.
1. Select the card image block.
2. If your generated visual is not a standard Image block, replace only that visual element with an Image block and keep the rest of the card layout unchanged.
3. Click Upload / Media Library, open Dynamic Images, and choose Featured Image.
For detailed options, see The Dynamic Images Feature - Otter Features Library.
Map links with Dynamic Link
To open the correct post when someone clicks your card content, apply a dynamic link on the clickable element you want to use (such as the title text or a button):
1. Select the text or button link target.
2. Choose Dynamic Link.
3. Set the data type to Post URL.
For more link options, see The Dynamic Link Feature - Otter Features Library.
Preview and verify the result
1. Preview the page and check at least two different cards.
2. Confirm the cards show different post titles, excerpts, and featured images.
3. Click each mapped title or button and verify it opens the matching post page.
If all cards keep the same style but display different post data, your AI-generated layout is connected correctly.