The difference between inline and checkout form layouts
WP Full Pay supports two types of payment form layouts:
- Inline
- Checkout
These layouts come with different visuals, and there are functional differences as well.
You can download WP Full Pay plugin for free, create the forms and test Stripe transactions on your WordPress site.
In this article
Inline forms
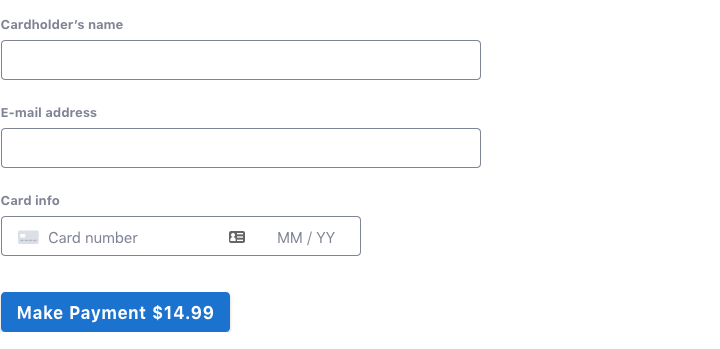
Inline forms are best when you have enough space on the page to display the entire form at once.
- Ideal for scenarios where there is ample screen space to display the entire form on a single page.
- All fields are displayed simultaneously, and when the payment button is pressed, the form is submitted.
- Suited for situations where users can complete the payment process without leaving the current page.
Inline payment forms show all fields together, and when the payment button is clicked, the form is submitted.
Important: Inline forms no longer create an unnecessary PaymentIntent just because the page loads or refreshes. A PaymentIntent can still appear in Stripe when a visitor or bot starts submitting the form but does not complete confirmation.
If minimizing incomplete Stripe transactions is important to you, use reCAPTCHA, monitor suspicious traffic, and consider a Checkout form for high-risk pages because Checkout keeps more of the payment flow on Stripe's hosted page.
⚠️ Known issue: Inline-form payments may appear as Guest in your Stripe dashboard instead of being associated with a Stripe Customer. If your workflow depends on Stripe Customer records — for example, for the customer portal, subscription management, or receipts linked to a customer — use a Checkout form as a workaround until a fix is released.
Checkout forms
Checkout forms are best when space is limited or when you want to embed payment forms in a pricing table. These forms are hosted by Stripe. The plugin sends visitors to the checkout form for payment and ensures they're redirected back to the starting page after payment.
- Suitable when screen space is limited or when embedding payment forms in a pricing table.
- Hosted by Stripe, meaning the actual payment form is on Stripe's platform.
- The plugin redirects visitors to the checkout form for payment and ensures they are redirected back to the starting page after completing the payment.
- Useful when a more compact or embedded form is preferred, and the payment process involves redirection to a dedicated checkout page.
Checkout forms display a button on the page which opens the form on Stripe’s website:

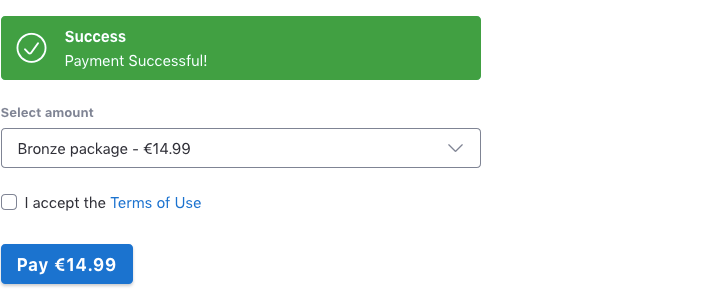
Checkout forms might display additional fields on the page:

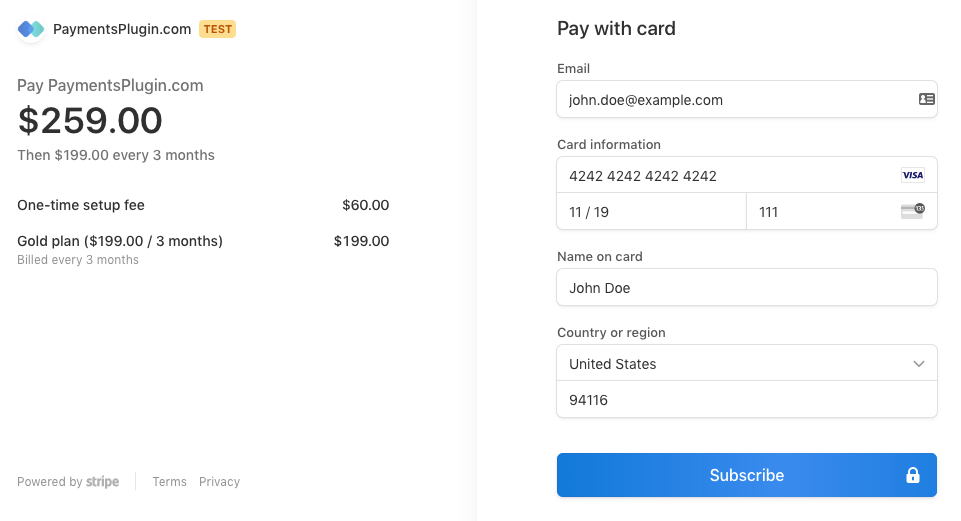
Pressing the button sends the visitor to the checkout form where one can enter name, credit card data, billing address, and submit the form:
Submitting the form redirects back to your website, and the customer gets feedback on the page the checkout form was opened from:
Functional differences of inline and checkout forms
- Inline forms allow users to complete the entire payment process on the current page, while Checkout forms involve redirection to a dedicated Stripe-hosted page.
- Checkout forms are advantageous when space is a constraint or when the desire is to embed payment forms within a specific context, such as a pricing table.
PaymentIntent creation
Inline forms and Checkout forms behave differently with respect to when Stripe payment records are created:
- Inline forms no longer create a Stripe PaymentIntent on page load. A PaymentIntent is created later in the flow when the form is being submitted, so abandoned or failed attempts may still appear as incomplete Stripe records.
- Checkout forms do not create a PaymentIntent (or Checkout Session) until the visitor clicks the payment button and is redirected to Stripe's hosted page. This means entries in Stripe are only created near the time of an actual transaction.
If minimizing the number of incomplete PaymentIntent entries in your Stripe dashboard is important, protect inline forms with reCAPTCHA and consider Checkout layout for high-risk pages.
The choice between Inline and Checkout forms depends on the design preferences, available screen space, and the desired user experience for handling payments on your WordPress site.
The following table compares the two layouts in detail:
| Inline | Checkout | |
|---|---|---|
| Visuals | The entire form is visible on the page | Only the (optional) product selector, and the button to open a form are on the page |
| Payment location | On your website | On stripe.com’s hosted page |
| Stripe customer behavior | Existing customer used on repeat purchase — see the known issue note in the Inline forms section | New customer created on every purchase |
| PaymentIntent creation | Created during form submission, not on page load | Created when the visitor initiates checkout |
| SCA / 3DS compliant | Yes | Yes |
| PCI compliant | Yes | Yes |
| Display languages | Danish, English, French, German, Italian, Japanese, Spanish | 34 languages |
| Currency format | Configurable | Auto-detected |
| Translate/change labels | Yes | No |
| Product images shown | No | Yes |
| Discounts | Coupons and promotional codes | Promotional codes |
| Billing address | Supported | Supported |
| Shipping address | Supported | Supported |
| Custom fields | Supported | Supported (Displayed on the website, not on Stripe’s hosted page) |
| Simple button layout | Not applicable | Yes |
| Billing anchor day | Yes | No |
| Email receipts | Plugin and Stripe | Plugin and Stripe |
| Google reCAPTCHA | Supported | Supported |
| Customer portal | Supported | Support with side effects, due to Stripe customer behavior (see above) |
| Tax behavior | No tax, fixed, and dynamic via Stripe tax rates | No tax, fixed, and dynamic via Stripe tax rates |
| Thank you page | Supported | Supported |
| Stripe dashboard impact | Incomplete PaymentIntents can appear for abandoned or failed submission attempts, but not for simple page loads | No Stripe record created until the visitor actively starts checkout |