
Setting up cloudflare with Super cache
Integrating Cloudflare with Super Page Cache creates a powerful dual-layer caching system that dramatically improves your website's global performance. This guide will walk you through the complete setup process, optimization strategies, and troubleshooting steps.
In this article
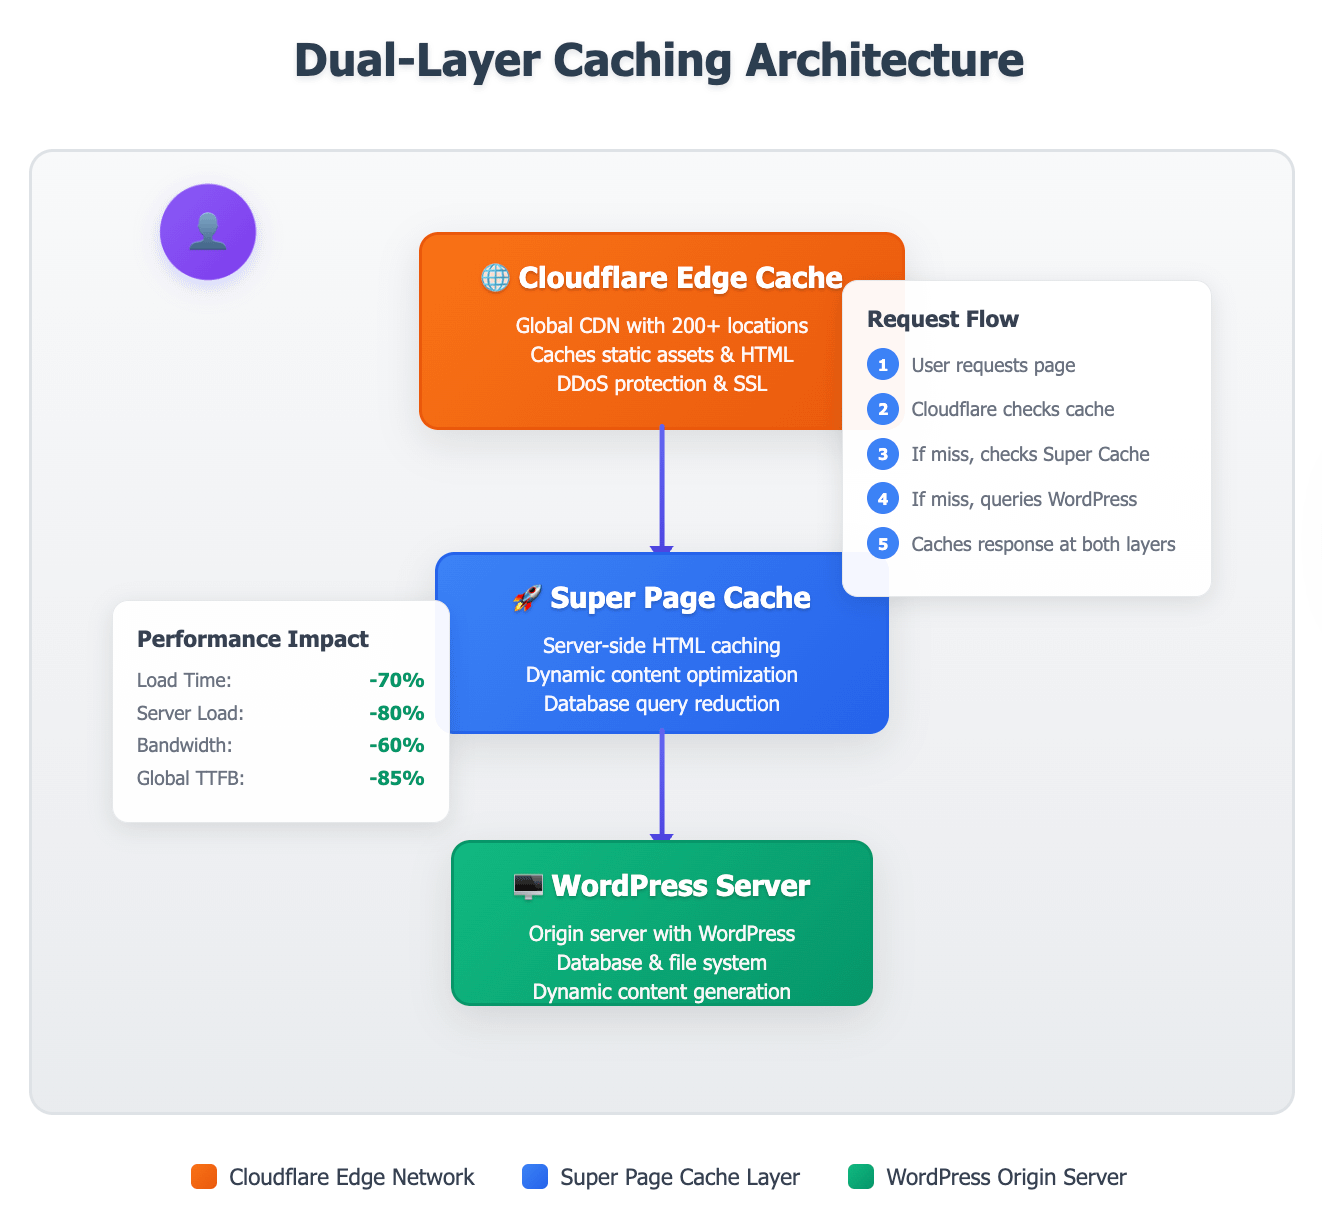
Understanding the Cloudflare + Super Page Cache Stack
How It Works Together
Layer 1: Cloudflare Edge Cache
- Serves cached content from global edge locations
- Reduces server load and improves international performance
- Handles static assets (images, CSS, JS, fonts)
Layer 2: Super Page Cache
- Generates and serves cached HTML from your server
- Handles dynamic content caching
- Provides server-level optimization
Benefits of Integration
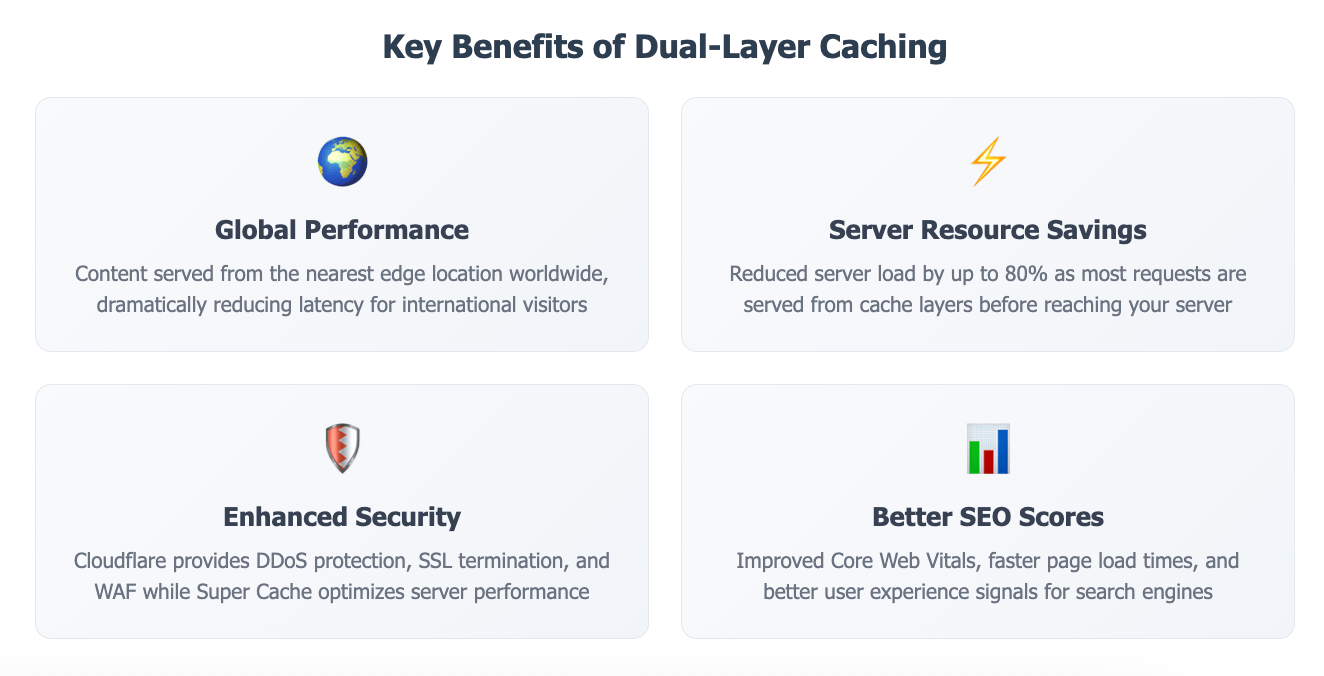
- 60-90% faster load times globally
- Reduced server resource usage by up to 80%
- Enhanced security with Cloudflare's protection
- Better SEO performance with improved Core Web Vitals
Prerequisites
Before starting, ensure you have:
- Active Super Page Cache plugin installed and working
- Cloudflare account (free tier is sufficient to start)
Note: If you don't have a Cloudflare account, then you can create one by following this guide. Also, please ensure you add your site to Cloudflare and all DNS records are configured correctly. You can check this guide for more information.
Step-by-Step Integration Process
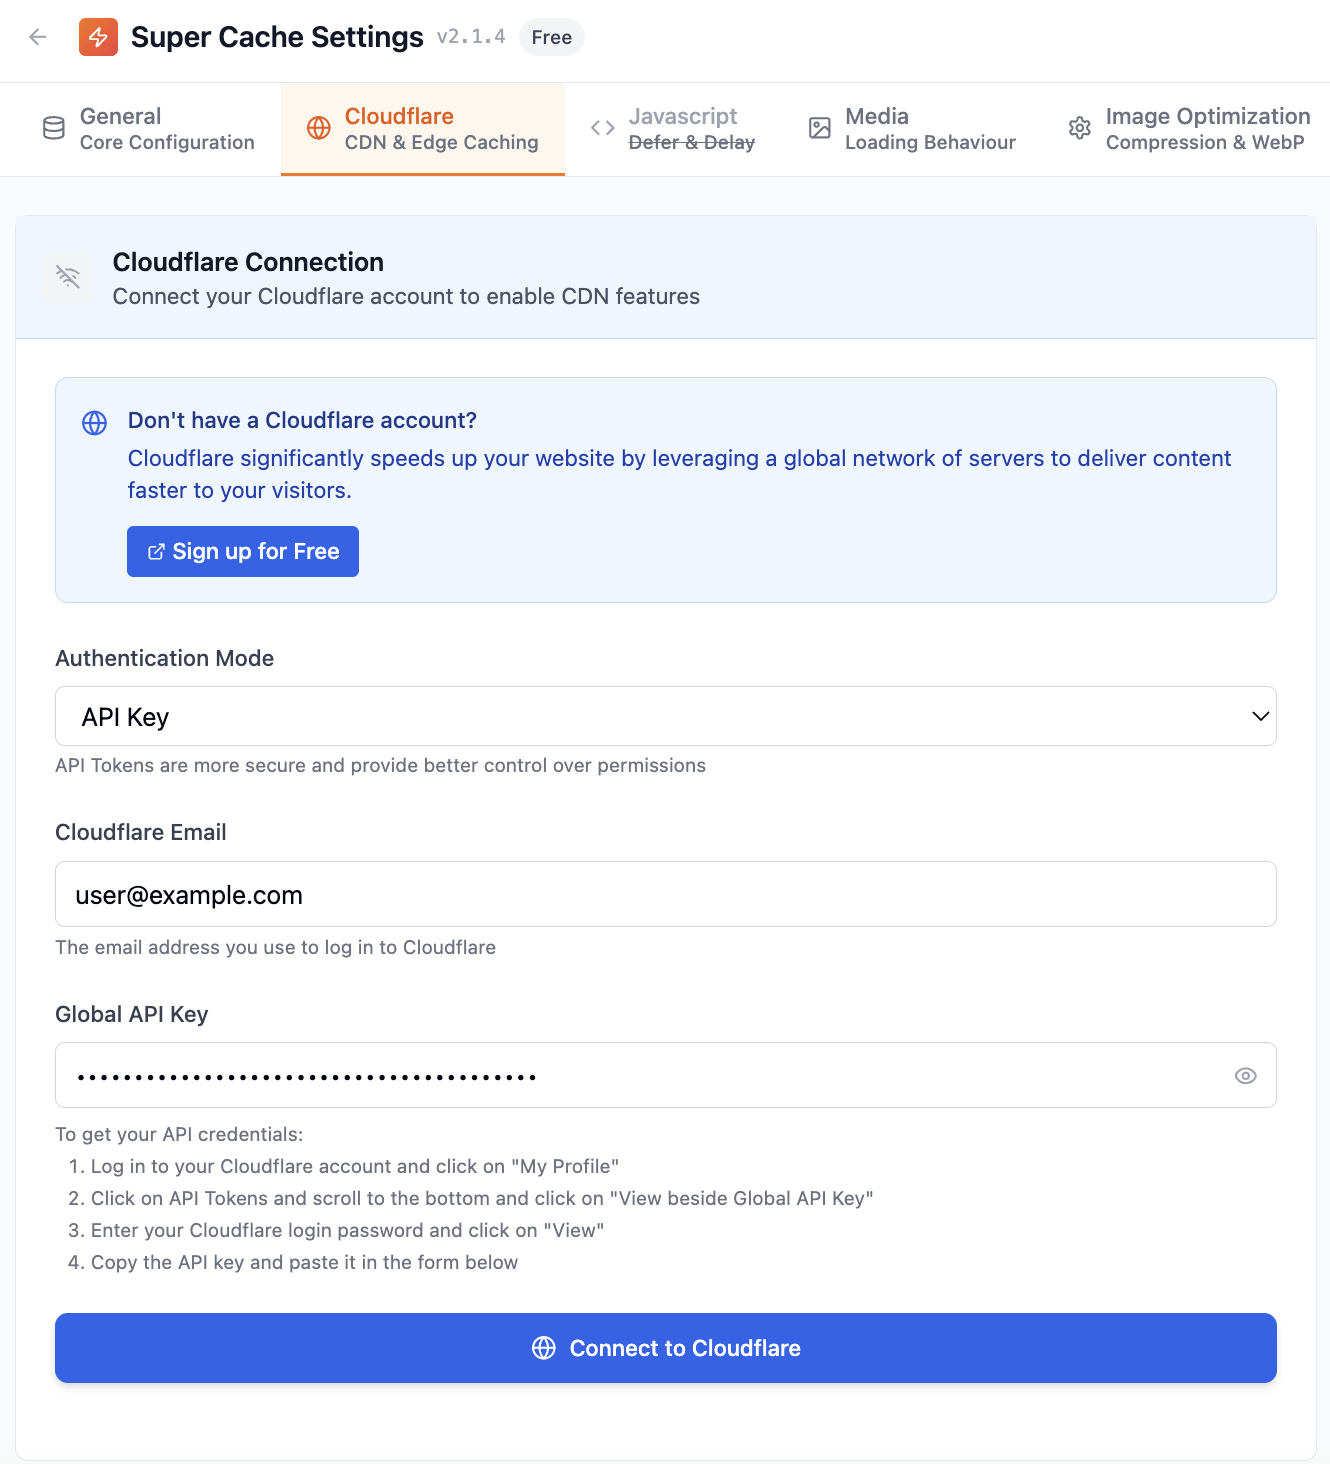
Go to WordPress Admin → Super Page Cache → Settings
Navigate to the Cloudflare tab
Select the API Key or API Token method from the Authentication Mode dropdown.
Enter your Cloudflare credentials.
Click on the Connect to Cloudflare button.
Select your domain from the Select Domain dropdown and click Save Domain. Confirming your domain automatically enables Cloudflare CDN & Caching and creates the managed Cloudflare Cache Rule for you.
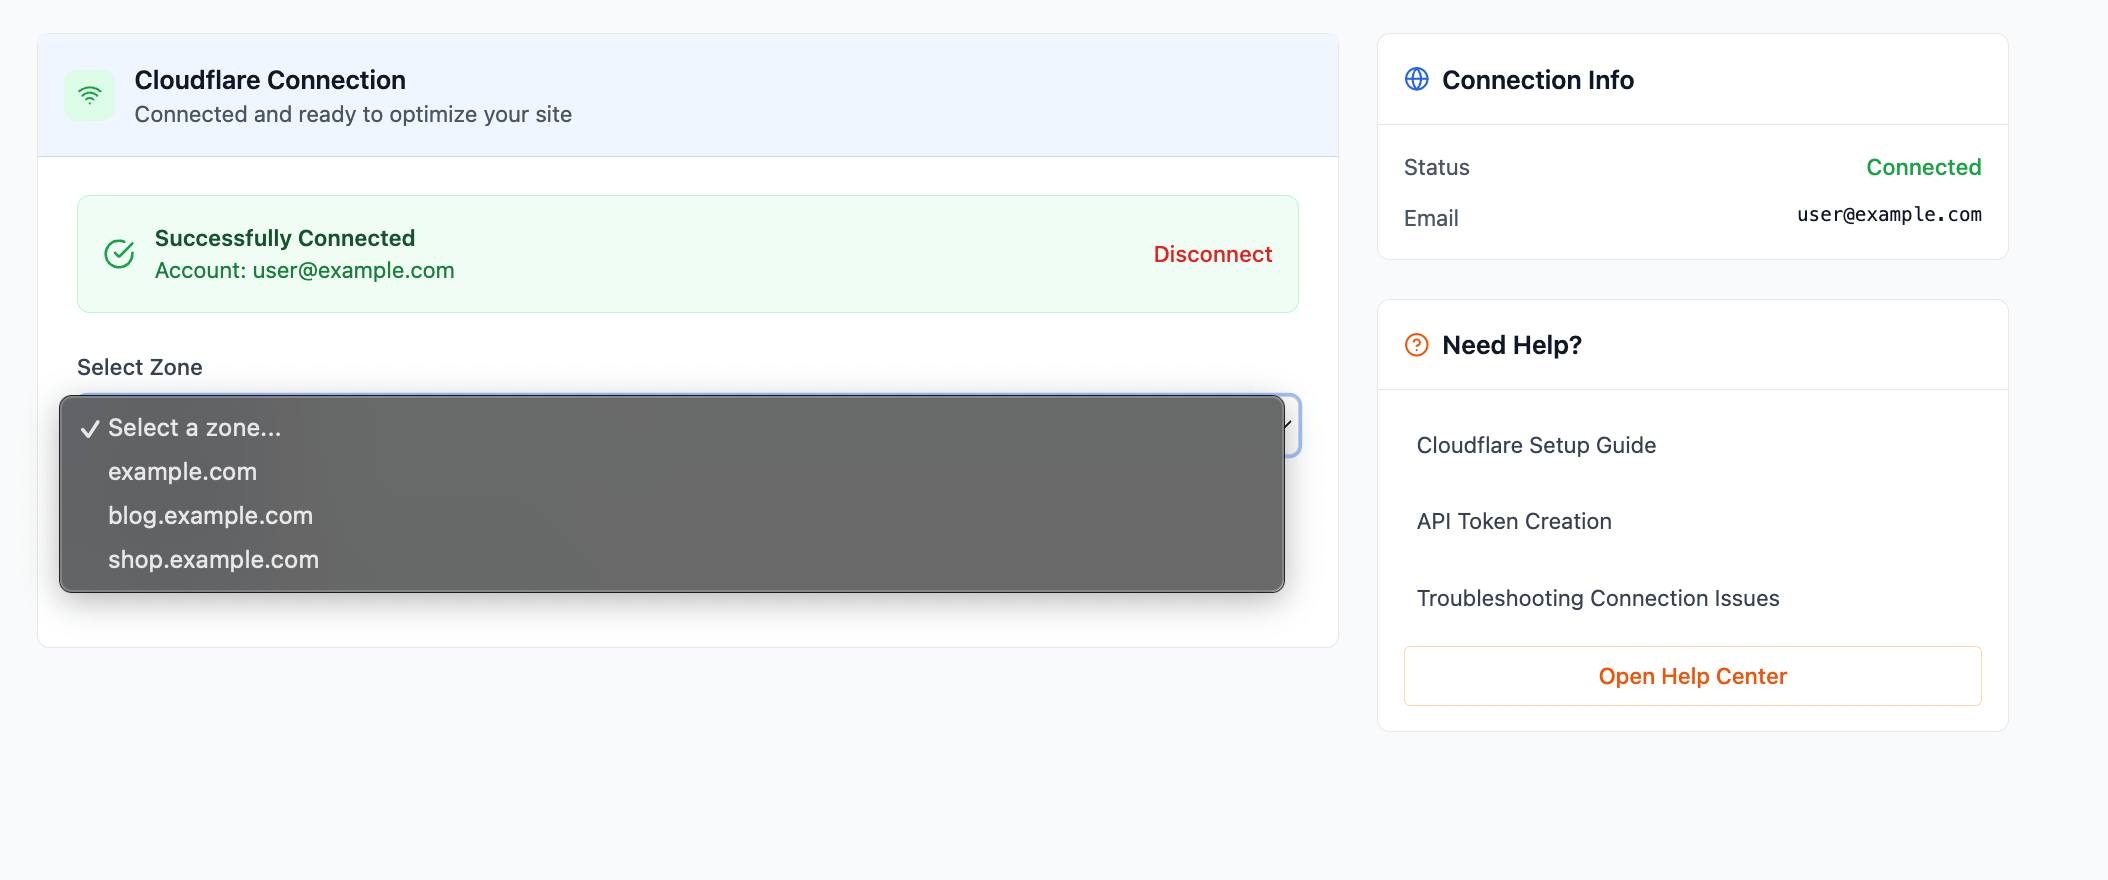
📝 Note: Selecting a Zone after connecting automatically enables Edge Caching and creates the managed Cache Rule. If the rule cannot be created, your Cloudflare connection stays saved, but Edge Caching remains disabled until you correct the reported permissions or Cloudflare error and try again.
If you see API token permission or scope errors while connecting, follow the Super Page Cache Cloudflare Permissions guide.
If the zone dropdown does not load or you see a connection or permission error after connecting, see Troubleshooting: Cloudflare zone dropdown is blank or frozen.
Verification of Cloudflare Integration
Test 1: Check within the Plugin
- Click on the Test Cache button inside the plugin.
- A popup will show with the results.
Test 2: Check Cache Headers
- Open your website in Incognito tab in your browser.
- Press F12 to open Developer Tools
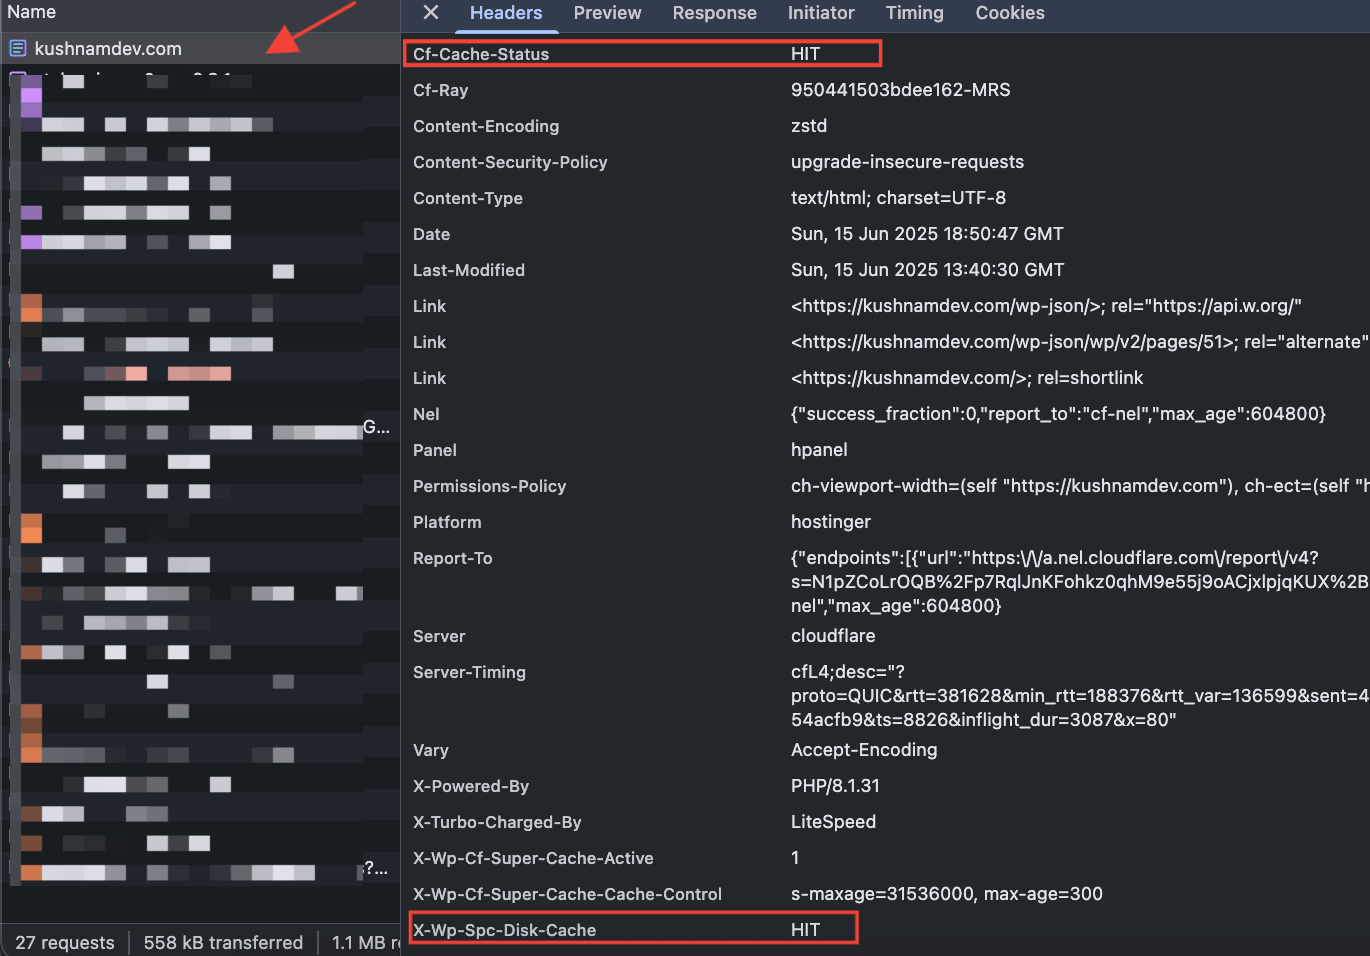
- Go to Network tab and refresh the page and check the first request of your domain( e.g. example.com)
- Look for these headers in the response:
CF-Cache-Status: HIT(Cloudflare cache)x-wp-spc-disk-cache: HIT(Super Page Cache)
If Cloudflare shows connected but inactive
- Confirm your Cloudflare API connection is successful in the Cloudflare tab.
- Make sure you selected the correct domain for this WordPress site.
- Confirm Enable Cloudflare CDN & Caching is turned on.
- Click Update Settings.
- Purge the plugin cache and Cloudflare cache.
- Run the header check again and confirm you can see
CF-Cache-Status: HIT.
If the Cloudflare Cache Rule was not created
After you connect and select the correct domain, Super Page Cache automatically creates a managed Cache Rule in your Cloudflare zone. That rule is what tells Cloudflare how to cache your pages at the edge. Connecting your API credentials alone does not create it — the rule is created once you select the correct domain.
If your Cloudflare cache hit rate is low and you cannot find this rule in Cloudflare, work through the steps below.
Verify the rule exists in Cloudflare
- Log in to your Cloudflare dashboard and select the zone for this site.
- Go to Caching → Cache Rules.
- Look for a rule whose description begins with WP Super Page Cache Plugin rules for followed by your site URL. This is the rule the plugin manages for you.
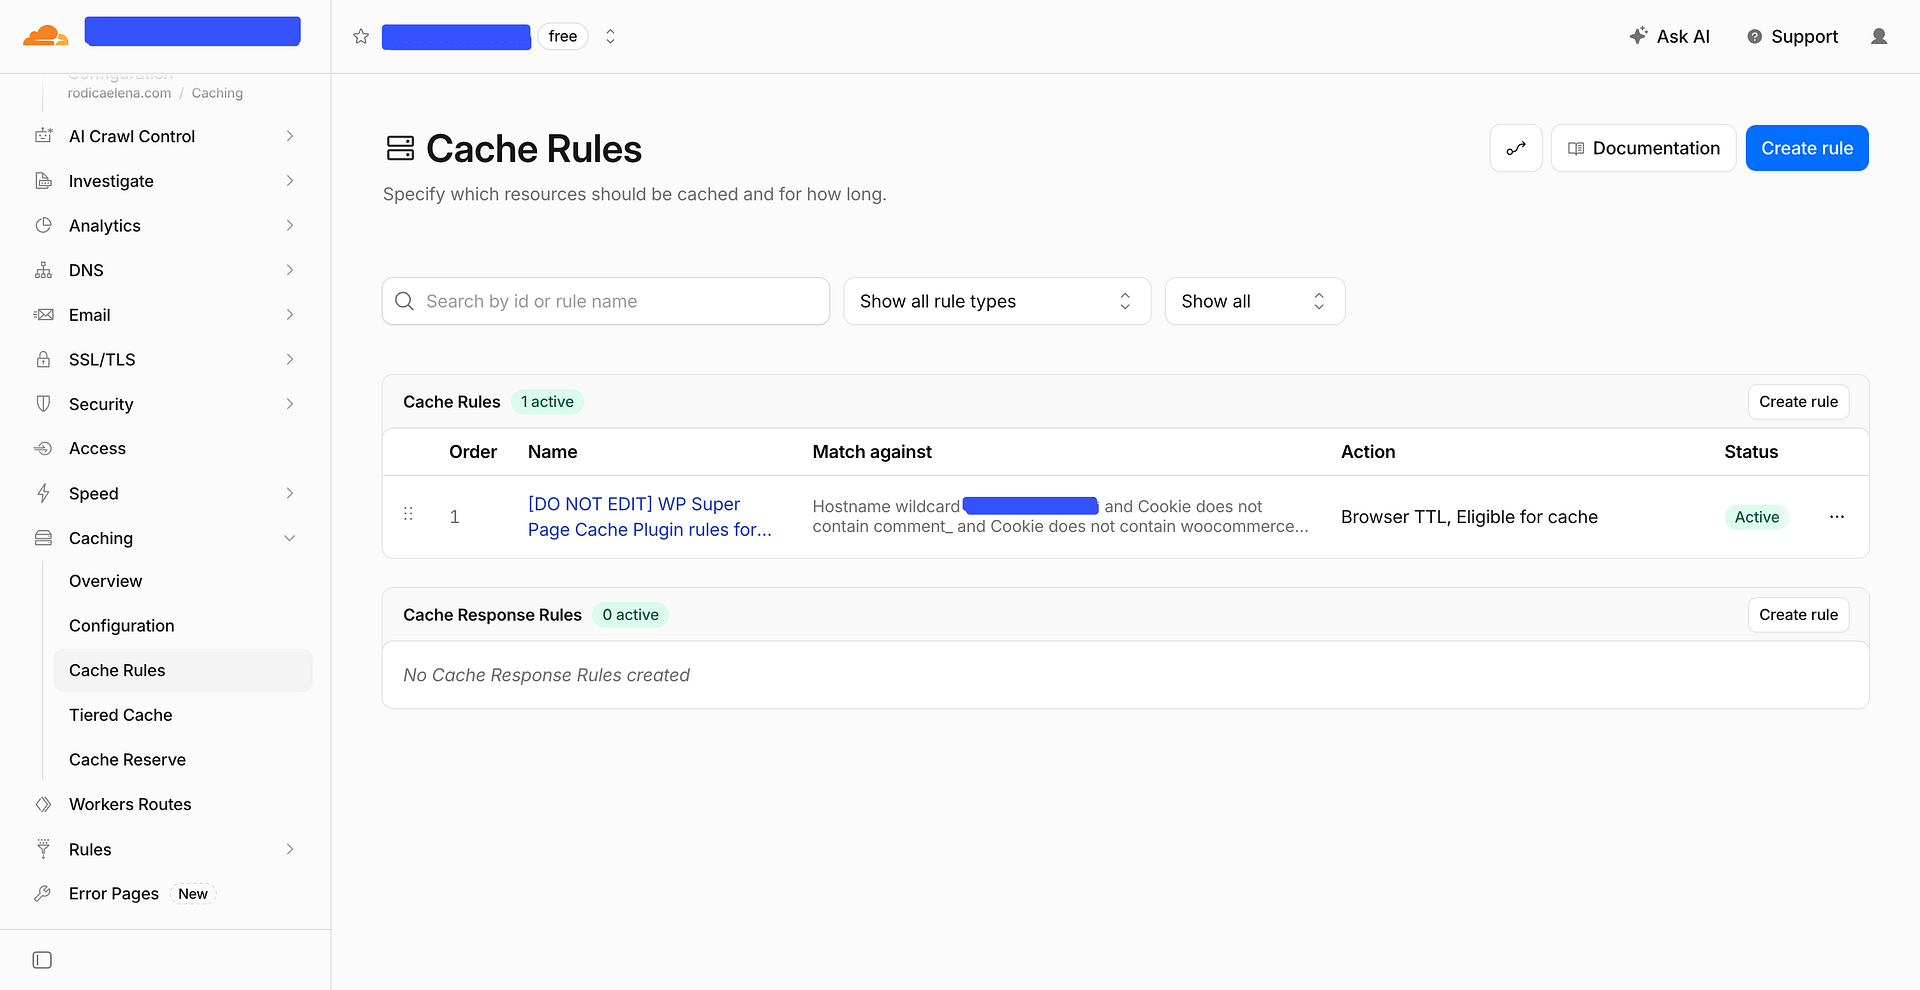
📝 Note: This rule is labeled [DO NOT EDIT] because Super Page Cache manages it automatically and overwrites manual changes the next time you save your settings.
Regenerate the rule if it is missing
- In WordPress Admin → Super Page Cache → Settings → Cloudflare, confirm the correct domain is selected for this site.
- Confirm Enable Cloudflare CDN & Caching is turned on, then click Update Settings.
- If the rule still does not appear, turn Enable Cloudflare CDN & Caching off and click Update Settings, then turn it back on and click Update Settings again. This forces the plugin to recreate the rule.
- Purge the plugin cache and the Cloudflare cache, then re-check your response headers for
CF-Cache-Status: HIT.
If the rule is still missing, the API token most likely lacks the permissions needed to create it. Recreate the token with the Zone / Cache Rules: Edit and Zone / Transform Rules: Edit permissions described in Super Page Cache Cloudflare Permissions, reconnect, and save again. If you have enabled Log mode under Super Page Cache → Advanced → Logs Settings, the plugin log records Cloudflare API write errors that confirm a permission problem.
Last resort: reset Super Page Cache settings
If the zone is correct, the API token has the required permissions, and toggling Enable Cloudflare CDN & Caching off and on still does not create the rule, a full plugin reset clears any inconsistent internal state and causes the rule to be created on the next save.
❗ Important: Resetting Super Page Cache wipes all plugin settings, including your Cloudflare API credentials, zone selection, exclusion rules, and advanced options. Record or screenshot your current settings before continuing.
- Note your current settings — especially your Cloudflare API credentials, selected zone, and any custom exclusion rules or advanced options you have configured.
- In WordPress Admin → Super Page Cache, click Reset All Settings in the Quick Actions sidebar and confirm when prompted.
- Go to Settings → Cloudflare, reconnect your Cloudflare API credentials, and select the correct domain for this site.
- Turn on Enable Cloudflare CDN & Caching and click Update Settings.
- In the Cloudflare dashboard, go to Caching → Cache Rules and confirm the rule labeled [DO NOT EDIT] WP Super Page Cache Plugin rules for... is now present.
- Delete any Cache Rules you created manually while troubleshooting, leaving only the plugin-managed rule.
- Purge the plugin cache and the Cloudflare cache, then open an incognito window and check your response headers for
CF-Cache-Status: HITandx-wp-spc-disk-cache: HIT.
⚠️ Important: You do not need to create a Cloudflare Cache Rule by hand. Let Super Page Cache create and manage its own rule. A rule you add manually is separate from the plugin-managed rule and is not maintained by the plugin. If you created any manual Cache Rules while troubleshooting, remove them once the plugin-managed rule is in place — keep only the [DO NOT EDIT] WP Super Page Cache Plugin rules for... rule. For the specific case where Cloudflare-injected cookies prevent caching, see Troubleshooting "Cloudflare integration has an issue".
Monitoring and Maintenance
Key Metrics to Monitor
Cloudflare Analytics:
- Cache hit ratio (target: >85%)
- Bandwidth savings
- Page load time improvements
- Security threat blocks
Super Page Cache Analytics:
- Server cache hit ratio
- Cache file generation rate
- Storage usage
- Performance improvements
Congratulations! You've successfully integrated Cloudflare with Super Page Cache. Your website should now benefit from global edge caching combined with optimized server-side caching, resulting in significantly improved performance for visitors worldwide.
Monitor your analytics regularly and fine-tune settings based on your specific traffic patterns and performance goals.