Cache Tags in Super Page Cache Pro
Cache Tags is a Pro feature that adds a Cache-Tag response header to every cacheable page. Super Page Cache uses these tags to track which cached pages are associated with a specific post, page type, author, taxonomy term, or URL — so it can purge only the affected entries when content changes, instead of clearing the whole cache.
📝 Note: Cache Tags is available only in Super Page Cache Pro.
In this article
When to enable Cache Tags
Enable Cache Tags if you want more precise cache invalidation than a full cache clear. It is especially useful for:
- Content-heavy sites with large archives, taxonomy pages, or author archives
- High-traffic sites where a full cache purge would cause a temporary spike in uncached requests
- Sites with custom post types that need targeted invalidation
- Developer and automation workflows that need to trigger tag-based purges via REST or WP-CLI
Enable Cache Tags
- Go to WordPress Admin > Super Page Cache > Settings.
- On the General tab, enable Show Advanced Settings and click Save Settings. This makes the Advanced tab visible.
- Open the Advanced tab and scroll to the Cache section.
- Turn on Enable Cache Tags.
- Click Save Settings.
- Purge the full cache once so all pages rebuild with the new
Cache-Tagheaders.
💡 Tip: After enabling Cache Tags, you can verify that the headers are being emitted by opening any frontend page, right-clicking, and choosing Inspect > Network. Reload the page, select the document request, and look for a Cache-Tag response header in the response headers list.
Note: When using Cloudflare, the Cache-Tag headers won't be visible, as Cloudflare strips them.
Cache tag reference
Each cached page receives one or more tags in its Cache-Tag response header. The table below lists the tags Super Page Cache emits.
| Tag format | When it is added |
|---|---|
spc:post:<ID> | Single post or page (e.g. spc:post:42) |
spc:post_type:<slug> | All pages belonging to a post type (e.g. spc:post_type:post) |
spc:author:<ID> | Author archive and any listing page that features that author (e.g. spc:author:7) |
spc:term:<ID> | Term archive and pages tagged with that term (e.g. spc:term:5) |
spc:url:<hash> | A specific URL, identified by a hash of the full URL |
spc:all | Every cached page — used only for a full tag-based purge |
Multiple tags can appear on the same page. For example, a single blog post may carry spc:post:42, spc:post_type:post, spc:author:7, and spc:term:5 simultaneously, allowing any of those tags to trigger a purge of that post's cache entry.
Inspect cache tags from the admin bar
After enabling Cache Tags, you can inspect which tags are attached to any frontend page directly from the WordPress admin bar.
- Open any frontend page on your site while logged in as a user who has permission to purge the cache.
- Look for the Super Page Cache item in the WordPress admin bar.
- Hover over or click it to see the Cache Tags inspection panel, which lists all the tags emitted for the current page.
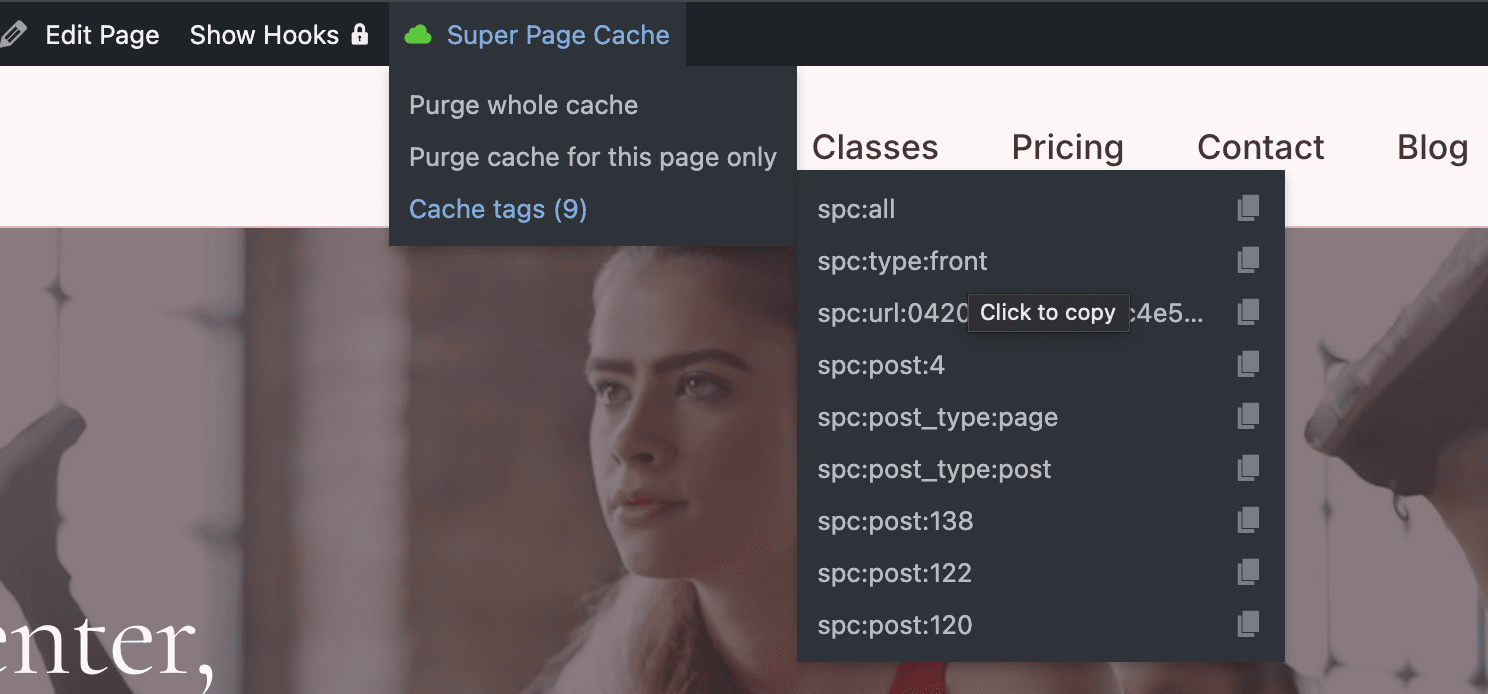
📝 Note: The admin bar inspection panel is only visible to logged-in users who have cache management permissions. It does not appear to regular site visitors.
Purge by tag with WP-CLI
Use the wp spc cache purge-tags command when you need a targeted manual purge from the command line. You can pass one or more space-separated tags.
Basic usage:
wp spc cache purge-tags <tag> [<tag>...] [--dry-run] [--format=<format>] [--force]Examples:
# Purge the cache for a single post
wp spc cache purge-tags spc:post:42

# Purge all cached pages for a post type
wp spc cache purge-tags spc:post_type:post

# Purge an author archive and all listing pages that featured that author
wp spc cache purge-tags spc:author:7

# Purge multiple tags at once
wp spc cache purge-tags spc:post:42 spc:term:5

# Preview which pages would be purged without actually purging
wp spc cache purge-tags spc:post:42 --dry-run

# Output the result as JSON for use in scripts or pipelines
wp spc cache purge-tags spc:post:42 --format=json

# Purge all cached pages (requires --force to prevent accidental full purges)
wp spc cache purge-tags spc:all --force
⚠️ Warning: The spc:all tag purges every cached page. Always pass --force intentionally and only when you need a full tag-based purge — for example, after a theme change or a global settings update.
💡 Tip: Use --dry-run first to review which cache entries will be affected before committing to a purge. This is helpful when testing automation scripts or debugging unexpected stale content.
Purge by tag through the REST API
Developers can purge tags programmatically using the REST endpoint.
Endpoint:
POST /wp-json/spc/v1/cache/purge-tagsAuthentication: The request must be authenticated as a WordPress user who has permission to purge the Super Page Cache.
Request body (JSON):
{
  "tags": ["spc:post:42", "spc:term:5"]
}
Example using curl:
curl -X POST https://example.com/wp-json/spc/v1/cache/purge-tags \
  -H "Content-Type: application/json" \
  -u your-username:your-application-password \
  -d '{"tags": ["spc:post:42"]}'
📝 Note: WordPress application passwords (available under Users > Profile > Application Passwords) are the recommended way to authenticate REST API requests from external scripts or CI pipelines.
Troubleshooting
The WP-CLI command reports that Cache Tags is disabled
This means the feature is not yet enabled in the plugin settings. Go to Super Page Cache > Settings > Advanced > Cache, turn on Enable Cache Tags, save settings, and retry the command.
No Cache-Tag header appears on frontend pages
- Confirm that Enable Cache Tags is saved and active under Advanced > Cache.
- Check that the page is actually being served through Cloudflare's cache (the
CF-Cache-Statusresponse header should showHITorMISS, notBYPASS). If Cloudflare is bypassing the page, it may be excluded from caching by a Cloudflare rule or by the plugin's own bypass conditions. - Try purging the full cache and loading the page again so it rebuilds with the new setting.
A purge by tag does not clear all the expected pages
- Open the page that should have been cleared and use the admin bar inspection panel to verify which tags it carries. Compare those tags to the tag you purged.
- If the page was cached before you enabled Cache Tags, it will not have any tags yet. Purge the full cache once so all pages rebuild with tag headers, then re-test.