
How to install and activate Super Page Cache Pro version
This is the premium version of the Super Page Cache plugin. Compared to Free version, the Pro version Includes more premium features.
In this article
Tools needed
- The Super Page Cache Pro Plugin - choose a plan here.
Download and Install
1. Purchase the Pro version of Super Page Cache from our site.
2. Navigate to Themeisle store and insert your credentials.
3. Scroll down until you see the Super Page Cache plugin and click on download. 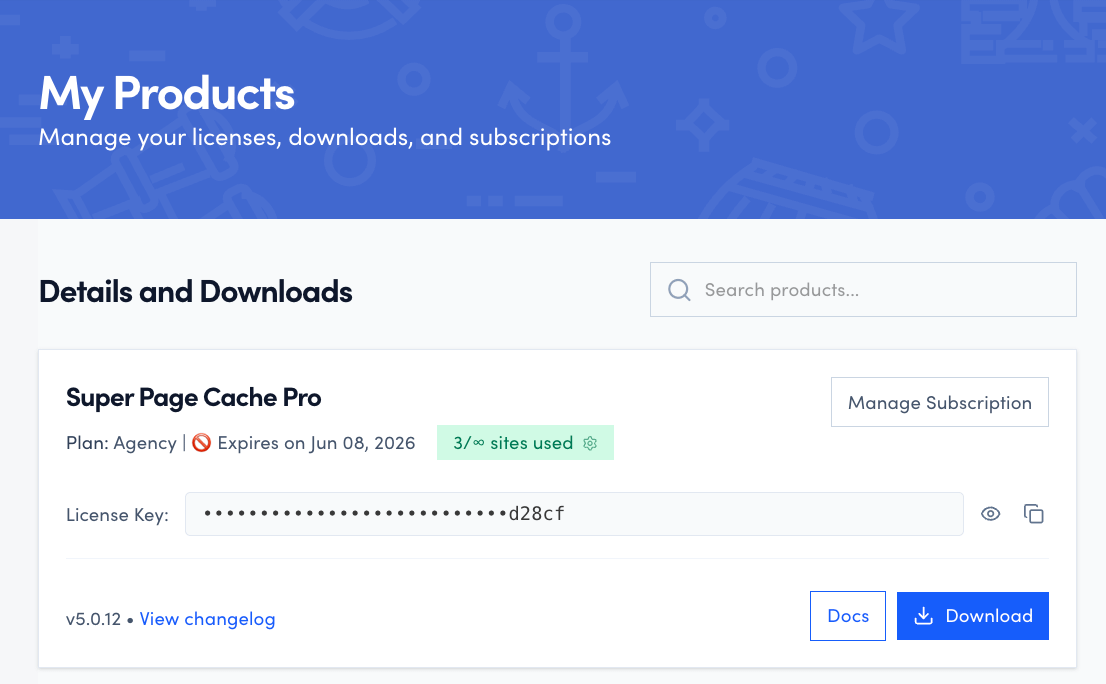
4. Navigate to Dashboard > Plugins > Add New and upload the .zip that you previously downloaded.

📝 Note: Once you activate the Pro version, it automatically deactivates the free Super Page Cache plugin and keeps your existing settings. You do not need to delete the free plugin — leaving it deactivated is enough, and your cache, Cloudflare, preloader, and optimization settings carry over to Pro.
❗ Data loss risk: Do not delete the free plugin to tidy up. Deleting it runs the plugin's uninstaller, which removes the stored Super Page Cache configuration that the Pro version also uses — your settings would be reset. Leave the free plugin deactivated instead. If you prefer to delete it, first export your configuration from Super Page Cache > Import/Export (see How to migrate Super Page Cache settings across WordPress sites).
💡 Tip: If the upload fails with a timeout error, see Fix: Super Page Cache Pro Installation Errors (Timeout, License Field, advanced-cache.php, Fatal Error) for how to fix it or install via FTP instead.
License Activation
It is very easy to activate the Pro version license on your site. Kindly go to Super Page Cache > License and add your license key there.
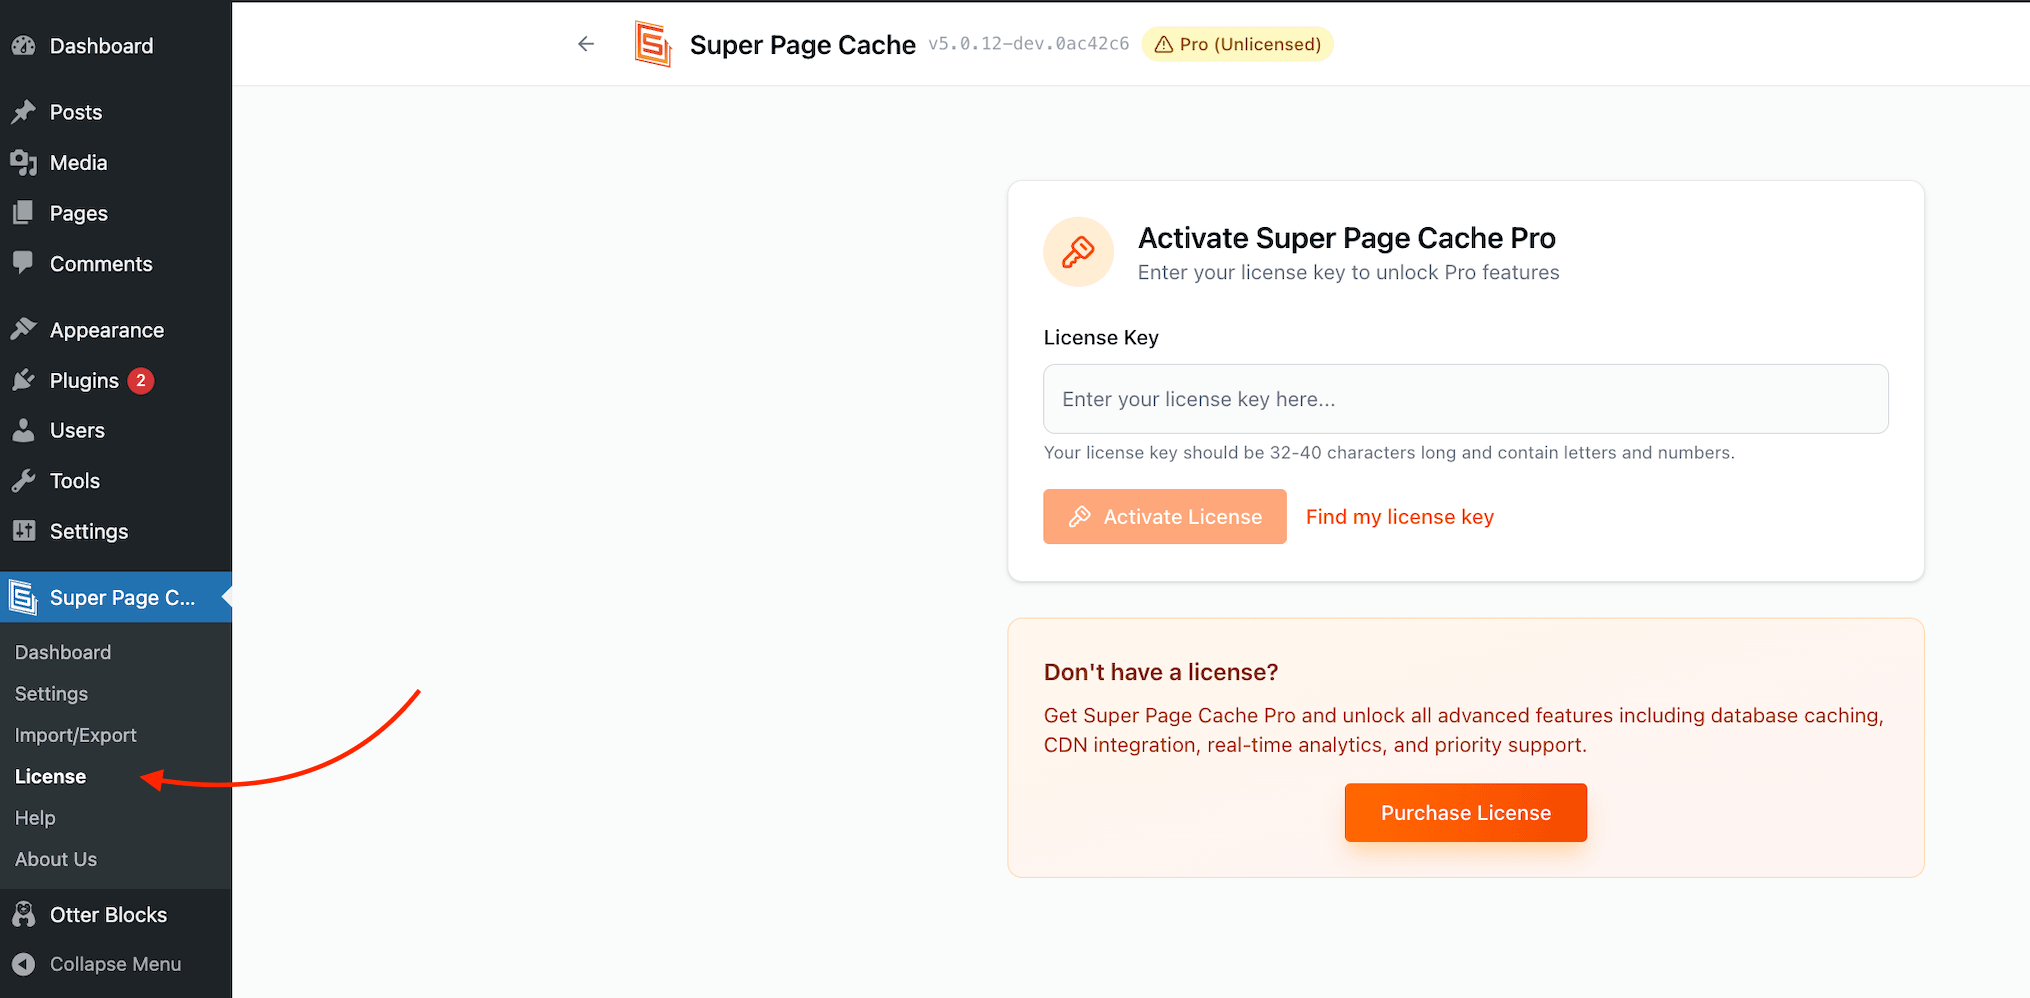
After entering your license key, click Activate License. If any error notices appear in the plugin after activation, dismiss or clear them before continuing with configuration.
⚠️ Important: If you do not see the License tab or the license key field, the free version of Super Page Cache is still active and is conflicting with the Pro version. See Fix: Super Page Cache Pro Installation Errors (Timeout, License Field, advanced-cache.php, Fatal Error) for how to fix this.
Troubleshooting
- For upload timeouts, license visibility issues, advanced-cache.php errors, or PHP fatal errors after installation, see Fix: Super Page Cache Pro Installation Errors (Timeout, License Field, advanced-cache.php, Fatal Error).
Maximizing Performance After Installation
Installing Super Page Cache Pro enables full-page caching, but page caching alone may not produce a dramatic improvement in speed scores (such as Google PageSpeed Insights or GTmetrix). To get the best results, pair the plugin with the following:
- Cloudflare integration — Connecting your site to Cloudflare adds a global CDN layer that serves your cached pages from edge locations closest to each visitor. See Setting up Cloudflare with Super Page Cache for setup instructions.
- Asset Manager — Use the built-in Asset Manager to defer, delay, or remove unnecessary CSS and JavaScript files, which directly improves Core Web Vitals scores.
📝 Note: Full-page caching reduces server load and improves repeat-visit speed, but first-visit load times and performance scores improve most when caching is combined with a CDN and optimized asset delivery.
Features Library
The Super Page Cache Pro plugin has the following features:
- Ignore marketing parameters
- Defer Javascript
- Delay Javascript
- Skip lazy loading for the initial Viewport.