How to Automate Cache Purging and Preloading with Super Page Cache
Automating cache purging and preloading ensures your website always delivers updated and cached content without manual intervention. The Super Page Cache plugin provides a straightforward way to achieve this using cron jobs. Follow the steps below to configure automation for your site.
In this article
Automatic Cache Purge Triggers
The plugin automatically purges the cache for a post and its related URLs (homepage, archives, etc.) in the following scenarios:
- A post is updated.
- A post status changes to Published or Private (from draft, pending, or future).
- A Published post is changed back to Draft, Pending, or Future.
This means you do not need to manually purge the cache after making post changes — the plugin handles it automatically whenever the post status transitions in either direction.
Automating Cache Preloading/Purging with a Cron Job
To automate the preloading/purging process at intervals of your choice, we recommend setting up a URL-based cron event instead of a simple cron job. Follow the steps below to configure it properly.
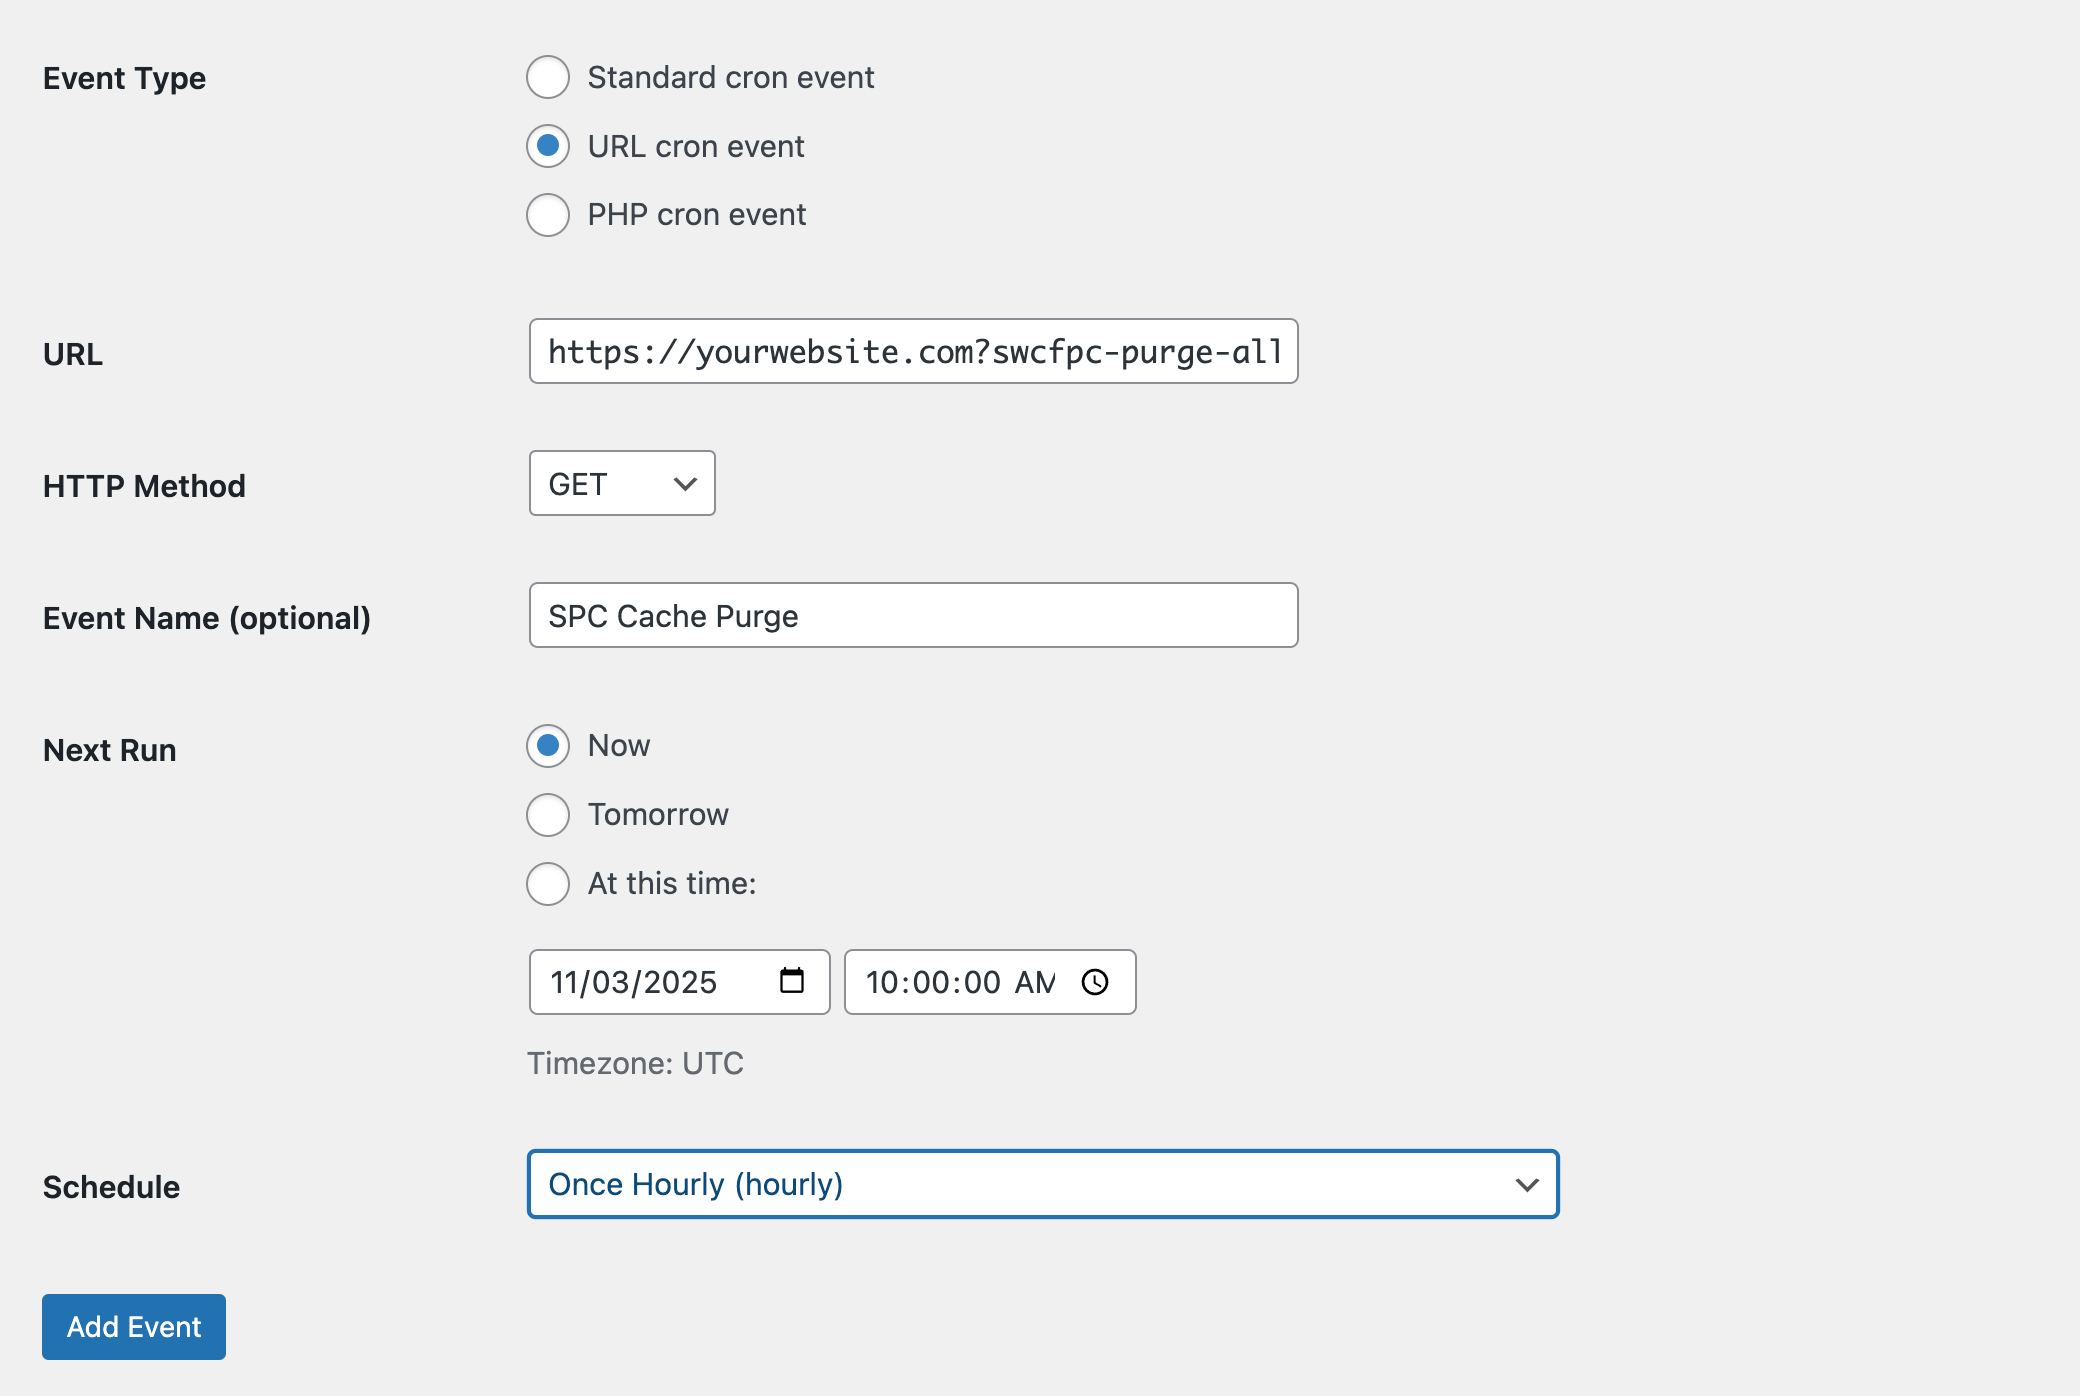
1. Configure the URL-Based Cron Event
1. Install and activate the WP Crontrol plugin to manage cron events easily.
2. Now navigate to Tools > Cron Events in the WordPress dashboard.
3. Add a new URL cron event
4. Under the URL field, add your cache purge or preload URL provided by the plugin in your dashboard. It will look like this https://yourwebsite.com?swcfpc-purge-all=1&swcfpc-sec-key=CronJobSecretKey
5. Save the Cron event. That's it.
2. Manually Trigger WP-Cron
Since WP-Cron depends on site traffic, you may need to trigger it manually:
1. Open your website in an incognito window to simulate user traffic.
2. This should activate WP-Cron and execute the cache purge event.
3. Verify the Cache Purge Status
After running the cron event manually, follow these steps to confirm the cache has been purged:
1. Open your website in an incognito window.
2. Use the Developer Tools in your browser to check the cache status.
3. If the status appears as MISS, EXPIRED, or REVALIDATED, it confirms that the cache has been successfully purged.
If you encounter any issues or need further assistance, feel free to reach out.
Automating Cache Purging via cPanel
Automating cache purging ensures outdated content is promptly removed. If you are using cPanel, you can create a true cron job to achieve this.
📝 Note: HostGator provides a detailed guide on how to create a true cron job. You can view their guide here: How to Create a True Cron for WordPress. The steps may vary slightly depending on your hosting provider.
If you are not comfortable setting up a cron job, contact your web host for assistance. A recommended interval is once every 10 minutes.
Alternative Method: Online Cron Job Services
1. Go to console.cron-job.org/signup and create an account.
2. Log in and open the Cronjobs panel. Click on Create Cronjob.
3. Fill out the details:
- For Title, enter a descriptive name.
- For URL, use https://yourwebsite.com?swcfpc-purge-all=1&swcfpc-sec-key=CronJobSecretKey
4. Set the execution schedule according to your needs (e.g., every 10 minutes).
Automating cache purging and preloading ensures your website remains fast and updated with minimal manual effort.
Troubleshooting: Background Tasks Showing as Overdue
The plugin's System panel shows Background Tasks: Overdue when one or more scheduled background jobs — such as cache preloading or purge queue tasks — have been pending for more than one hour. This warning does not necessarily mean the cache has stopped working, but it does indicate that background tasks are not running on schedule.
The most common cause is that WP-Cron is disabled or not running reliably on your site.
Check whether WP-Cron is disabled
- Open your site's
wp-config.phpfile (located in the WordPress root directory). - Search for the following line:
define('DISABLE_WP_CRON', true);- If this line exists and is not commented out, WP-Cron is disabled. Remove or comment it out, then save
wp-config.php.
📝 Note: WordPress's default cron fires when a visitor loads a page. On low-traffic sites, background tasks may still run late even with WP-Cron enabled. Setting up a real server cron job (see below) gives more reliable scheduling.
Configure a real server cron job (if DISABLE_WP_CRON must remain)
If DISABLE_WP_CRON is required on your site — for example, because your host enforces it — set up a real server cron job to trigger WordPress at a regular interval. A 10-minute interval is recommended:
*/10 * * * * wget -q -O - https://yoursite.com/wp-cron.php?doing_wp_cron >/dev/null 2>&1Replace https://yoursite.com with your actual site URL. For full setup instructions, see How to set up a real cron job in WordPress.
Inspect pending or stuck background tasks
Super Page Cache uses Action Scheduler to manage background jobs. To review task status:
- In the WordPress admin, go to Tools → Scheduled Actions.
- In the search field, type
spcto filter Super Page Cache tasks. - Tasks listed as Pending with a scheduled time in the past confirm that cron is not executing.
- Tasks listed as Failed include an error log — click the action to view it and investigate the underlying cause.
Verify the fix
After updating your cron configuration, wait up to 10 minutes for the next scheduled run, then reload the Super Page Cache dashboard. The Background Tasks indicator should change from Overdue to Running.
To trigger WP-Cron immediately without waiting, open the following URL in your browser (replacing https://yoursite.com with your actual site URL):
https://yoursite.com/wp-cron.php?doing_wp_cron