Integrate Contact Form 7 with Zapier Using Webhooks
The Webhook Integration feature in Redirection for Contact Form 7 (available from the Marketer plan) lets you connect your Contact Form 7 forms to thousands of apps through Zapier. Every time a visitor submits a form, the data is instantly sent to Zapier, where you can route it to your CRM, email tool, spreadsheet, or any other app in Zapier's library.
In this article
Prerequisites
- Redirection for Contact Form 7 on the Marketer plan or higher
- A Zapier account (premium plan is required for webhook trigger)
How to Install the Webhook Addon
- Download the Redirection For Contact Form 7 Extension - RESTful Web services plugin from your purchase history.
- Install and activate the plugin on your WordPress site.
Need help installing a plugin? Check this doc for step-by-step details.
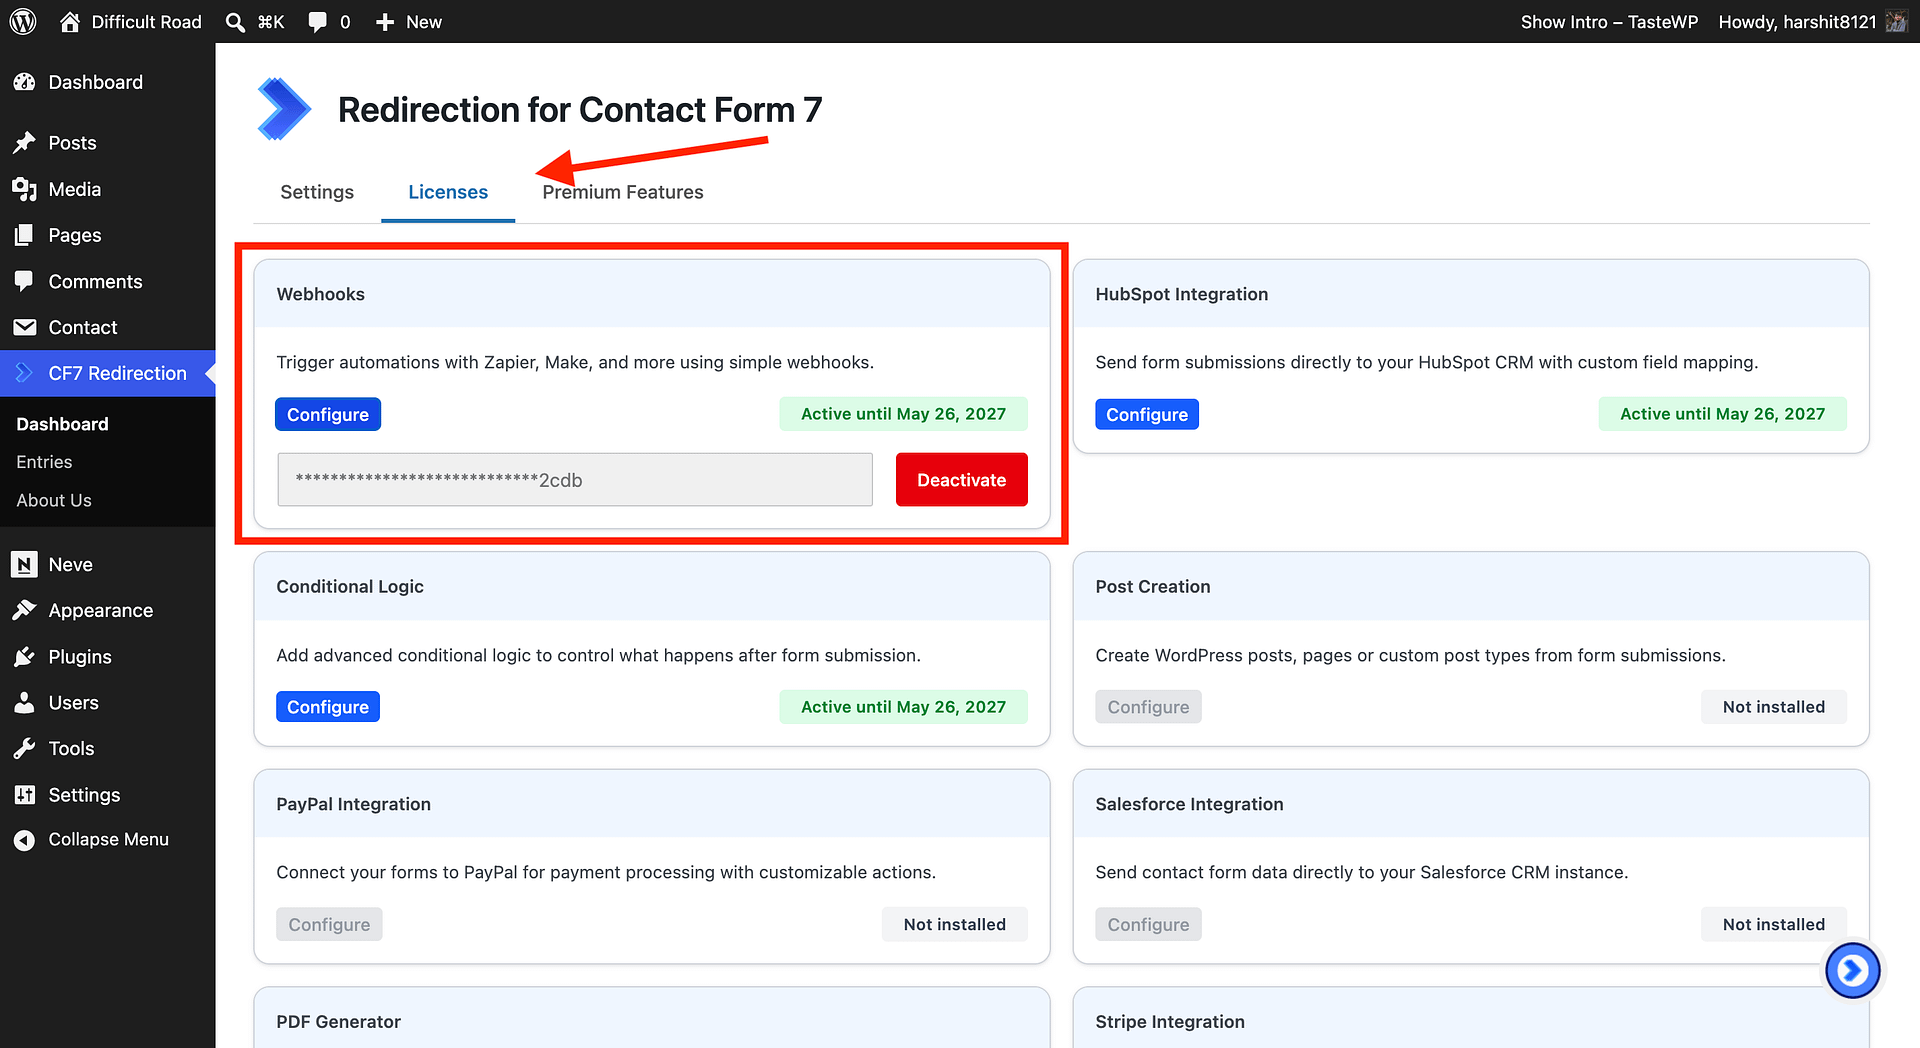
- In your WordPress dashboard, go to CF7 Redirection -> Dashboard -> Licenses and activate the license for Webhooks.
Step 1 - Create a Zap in Zapier
- Log in to your Zapier account and click + Create -> Zaps.
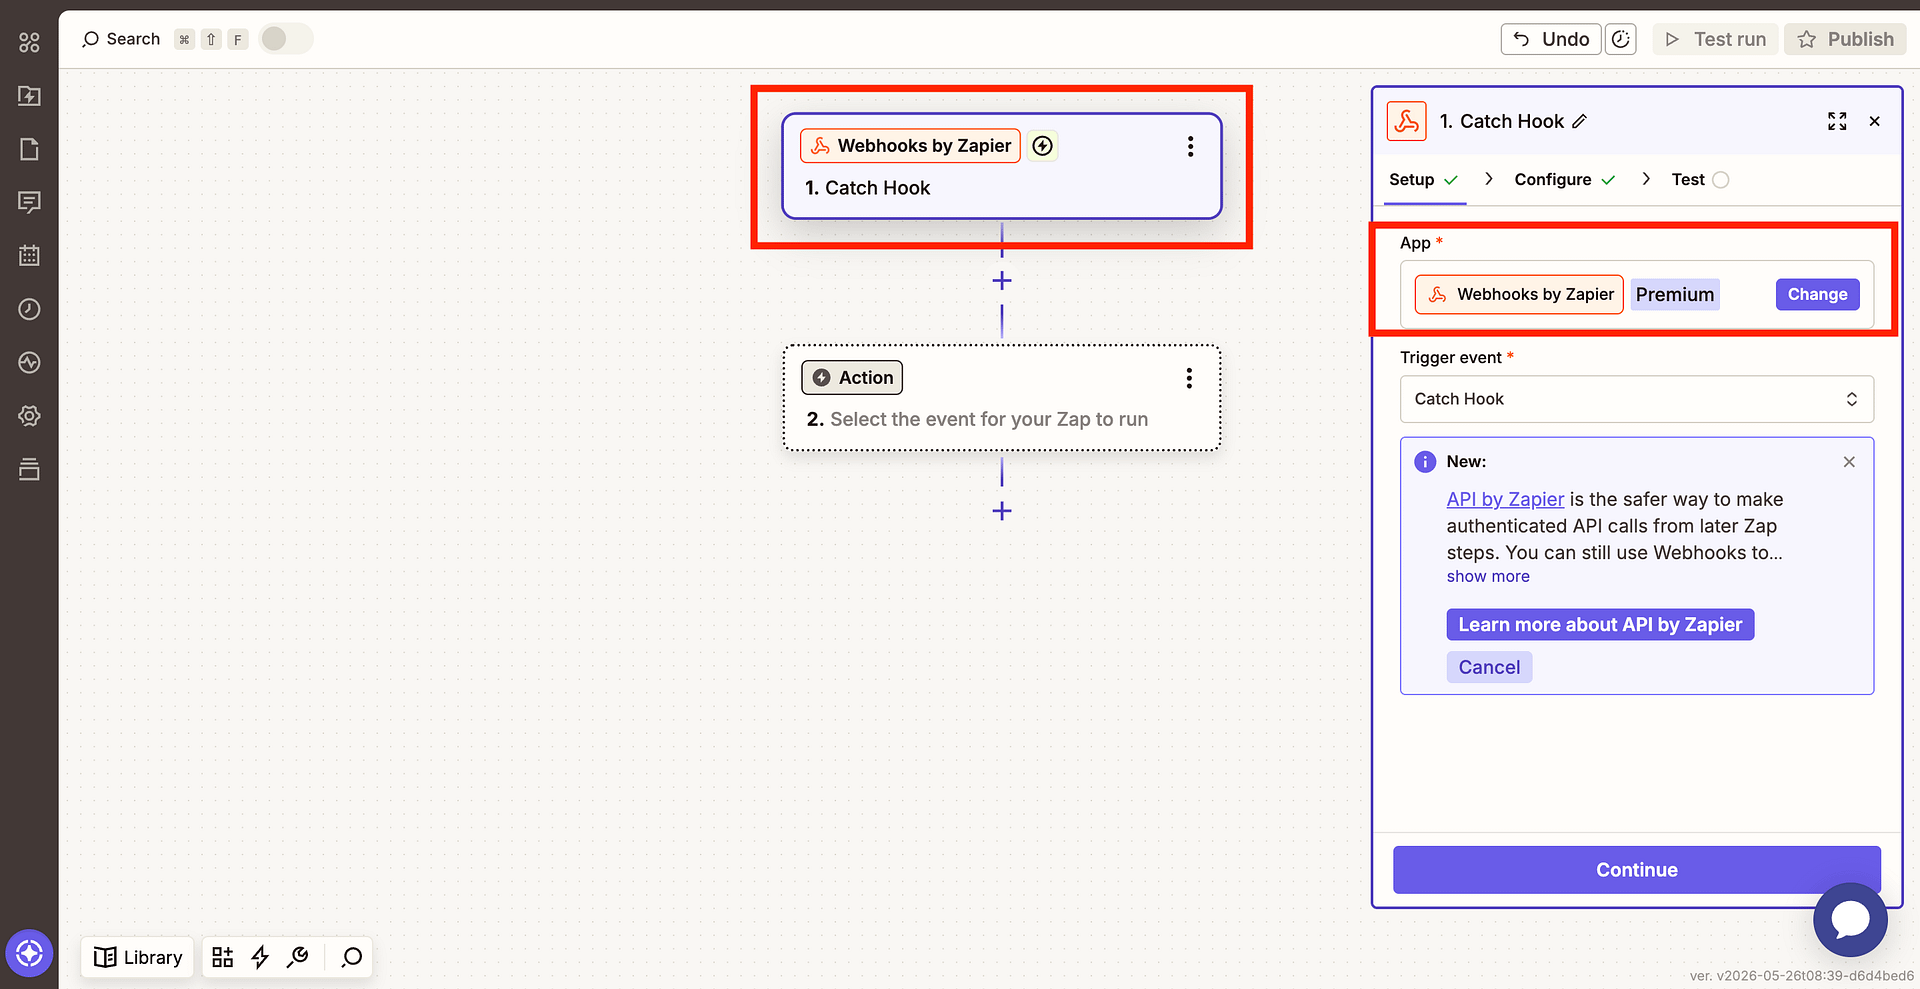
- In the Trigger step, search for and select Webhooks by Zapier.
- Choose Catch Hook as the trigger event, then click Continue.
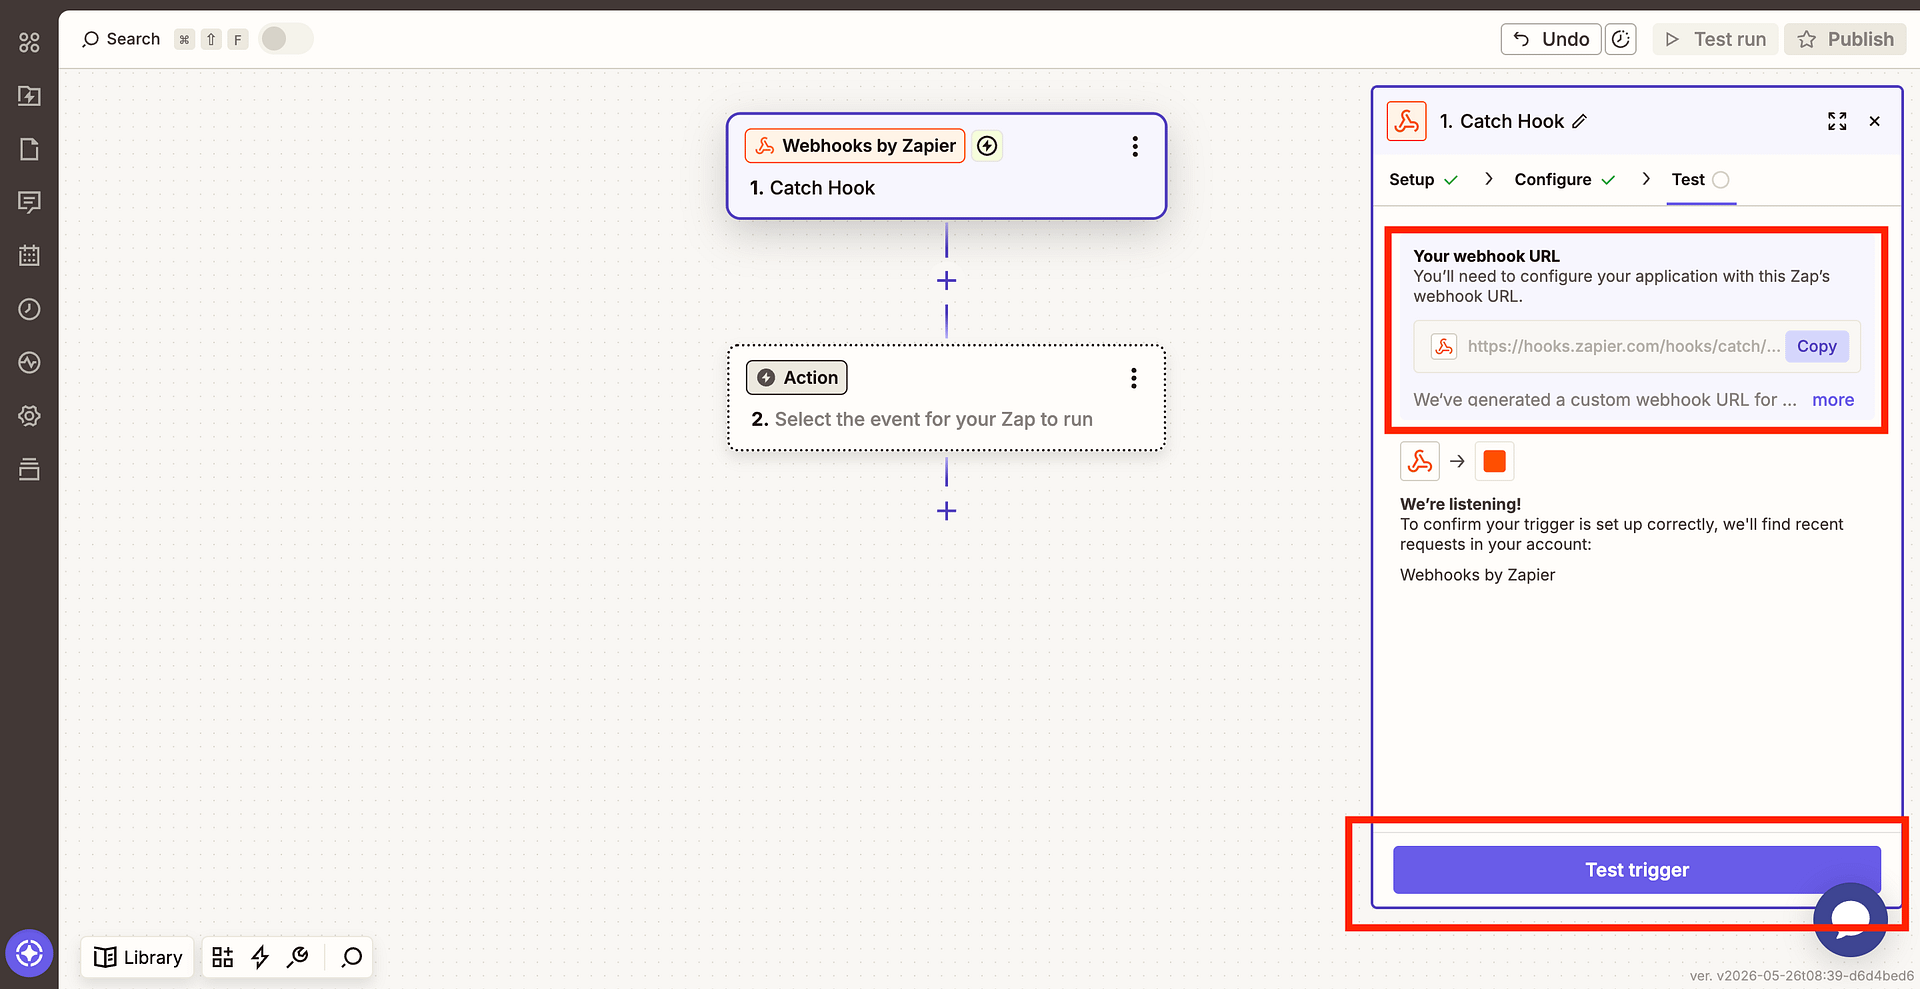
- Zapier will generate a unique webhook URL.
- Copy this URL - you will paste it into RCF7 in the next step.
Step 2 - Configure the Webhook Action in RCF7
- In your WordPress dashboard, go to Contact -> Contact Forms and edit the form you want to connect.
- Click the Actions tab.
- Click Add Action and select Webhook - XML/JSON.
- In the action settings:
- Base API Url: Paste the Zapier webhook URL you copied in Step 1
- HTTP Method: Set to POST
- Record type: Set to JSON
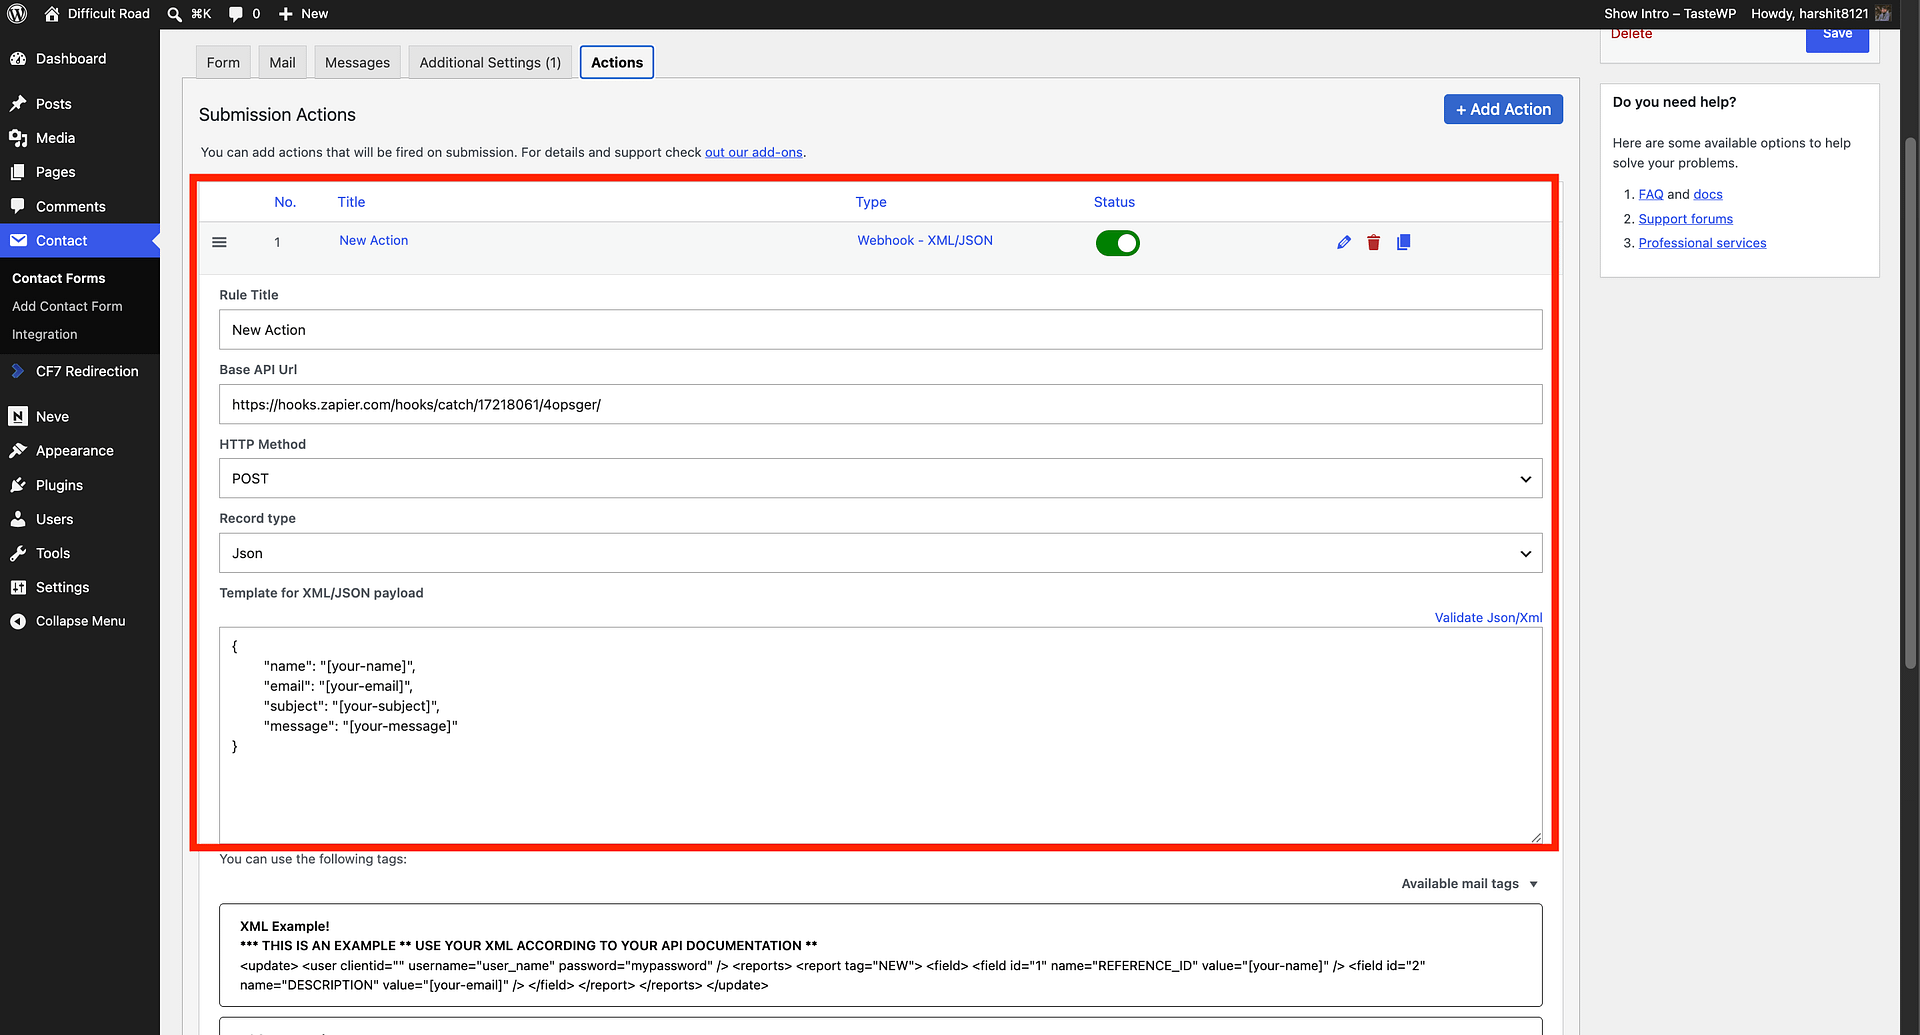
- In the Template for XML/JSON payload field, write a JSON object that maps your field names to the CF7 form tags. For example:
{
  "name": "[your-name]",
  "email": "[your-email]",
  "subject": "[your-subject]",
  "message": "[your-message]"
}
The values in square brackets (for example,
[your-name]) are the CF7 field tags from your form. You can find them by clicking Available mail tags in the same settings panel, or by checking the field shortcodes in your form's Form tab.
- (Optional) Expand Tags mapping if you need to rename or transform field values before they are sent.
- (Optional) Expand HTTP Headers to add any custom headers. For standard Zapier webhooks, no headers are needed.
- (Optional) Use Payload Test to send a test request directly from the settings panel. Make sure the JSON template is filled in and the form is saved first.
- Click Save on the contact form.
Step 3 - Test the Connection
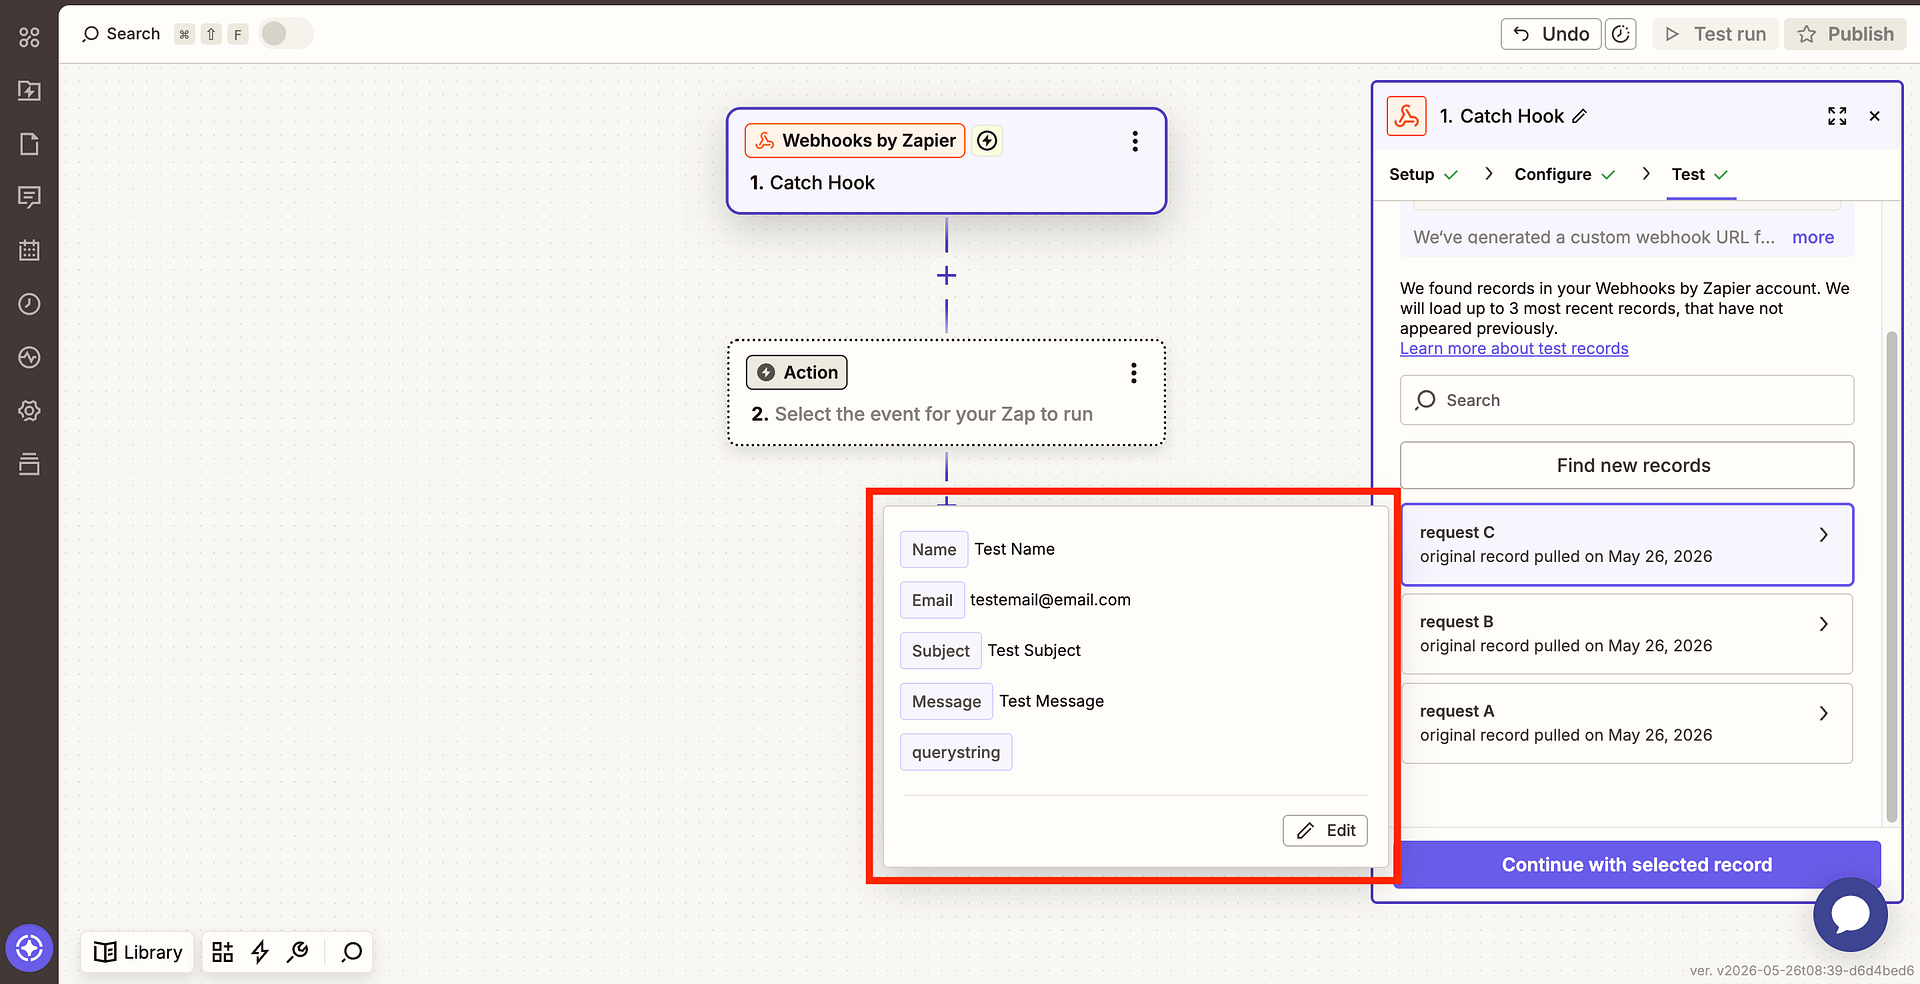
- Back in Zapier, click Test Trigger. Zapier will wait for a sample submission.
- Submit your Contact Form 7 form with test data.
- Zapier should receive the data and display the fields. Click Continue with selected record.
- Configure your Action step to choose what Zapier does with the form data (for example, add a row to Google Sheets, create a contact in a CRM, or send a Slack message).
- Once your Zap is configured, click Publish to activate it.
What You Can Do With Zapier
Once connected, you can route form submissions to 6,000+ apps, including:
- CRMs: Salesforce, HubSpot, Zoho, Pipedrive
- Email marketing: Mailchimp, ActiveCampaign, Constant Contact
- Spreadsheets: Google Sheets, Airtable
- Project management: Trello, Asana, Notion
- Messaging: Slack, Gmail, SMS via Twilio
Zapier is just one option. If you prefer a different automation platform, the RCF7 webhook works equally well with Make, n8n, Pabbly Connect, or IFTTT.
Troubleshooting
The form shows "There was an error trying to send your message" but Zapier still receives data
This error comes from CF7's built-in email notification failing and is not related to the webhook. Fix it by installing an SMTP plugin such as WP Mail SMTP or Fluent SMTP. Alternatively, add skip_mail: on to your form's Additional Settings tab to bypass email sending entirely while you test.
Zapier is not receiving data
Make sure the form was saved after adding the Webhook action, and that the Base API Url matches exactly what Zapier provided (no trailing spaces). You can also use the Payload Test section in the webhook action settings to fire a test request without submitting the form.
Fields are missing in Zapier
Check that the CF7 tags in your JSON payload template match the field shortcodes in your form exactly (for example, [your-name] not [name]). Use the Available mail tags dropdown in the webhook settings to confirm the correct tag names.
The Zap runs but the action fails
This is usually an issue with the destination app's configuration in Zapier. Check the Zap history in your Zapier dashboard for error details.