Integrate Contact Form 7 with Make (Formerly Integromat)
The Webhook Integration feature in Redirection for Contact Form 7 (available from the Marketer plan) lets you connect your Contact Form 7 forms to Make, one of the most powerful visual automation platforms available. Once connected, every form submission triggers a Make scenario, letting you route data to hundreds of apps including Google Sheets, Slack, Notion, Airtable, and any CRM.
In this article
Prerequisites
- Redirection for Contact Form 7 on the Marketer plan or higher
- A Make account (free plan is sufficient to get started)
How to Install the Webhook Addon
- Download the Redirection For Contact Form 7 Extension - RESTful Web Services plugin from your purchase history.
- Install and activate the plugin on your WordPress site.
Need help installing a plugin? Check this doc for step-by-step details.
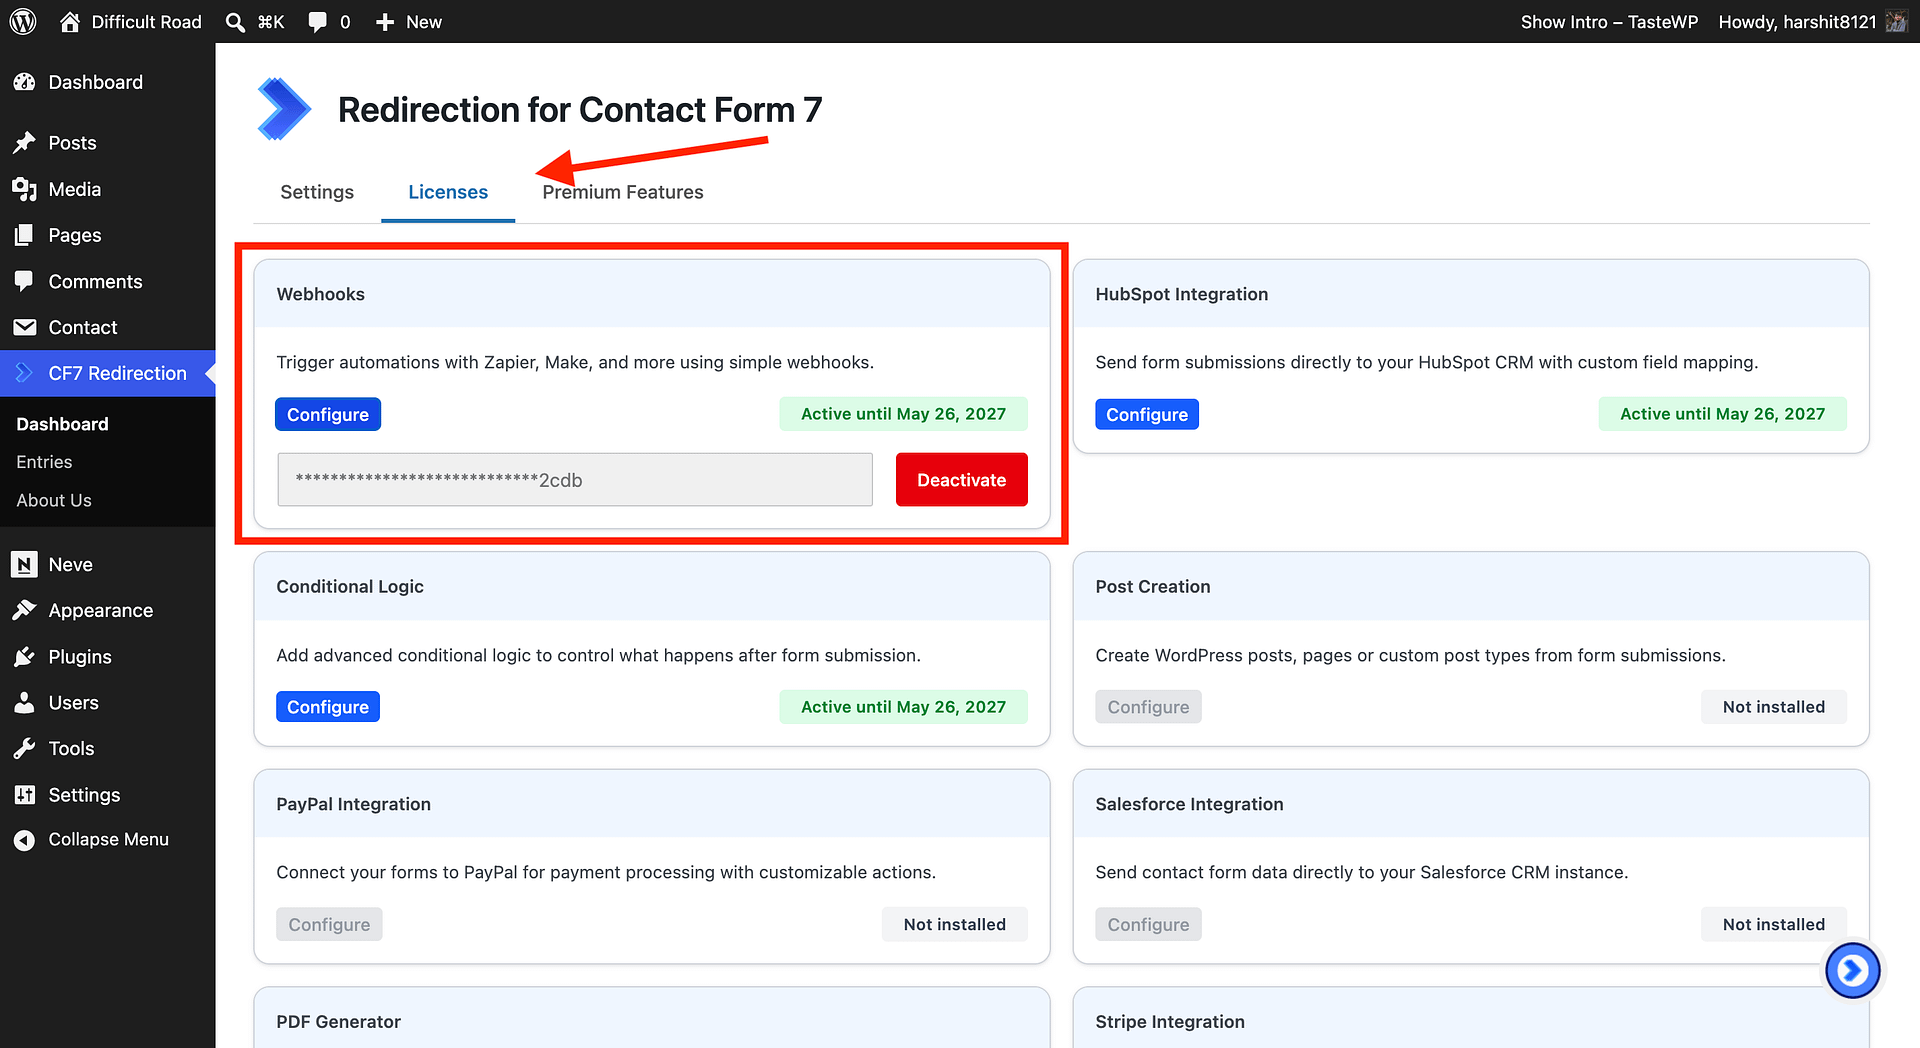
- In your WordPress dashboard, go to CF7 Redirection -> Dashboard -> Licenses and activate the license for Webhooks.
Step 1 - Create a Scenario in Make
- Log in to your Make account and click Create a new scenario.
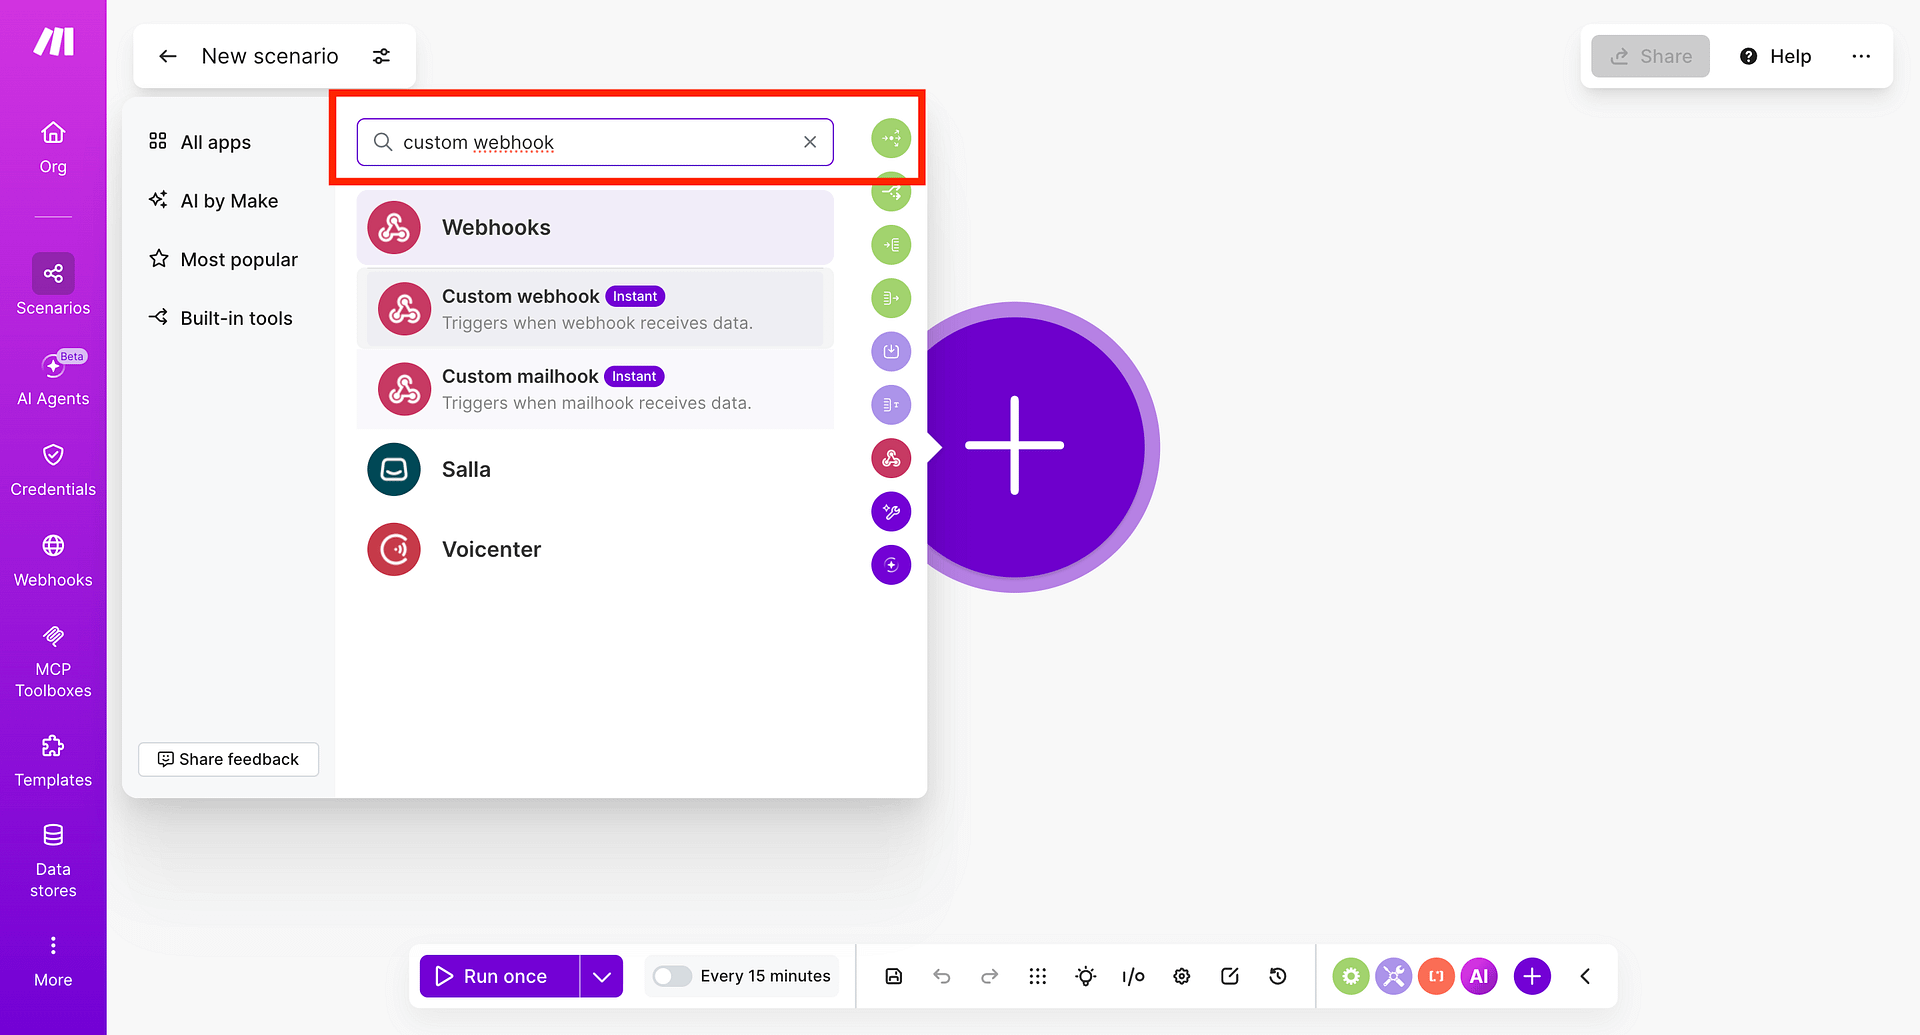
- Click the + icon to add your first module and search for Webhooks.
- Select Custom Webhook as the trigger module.
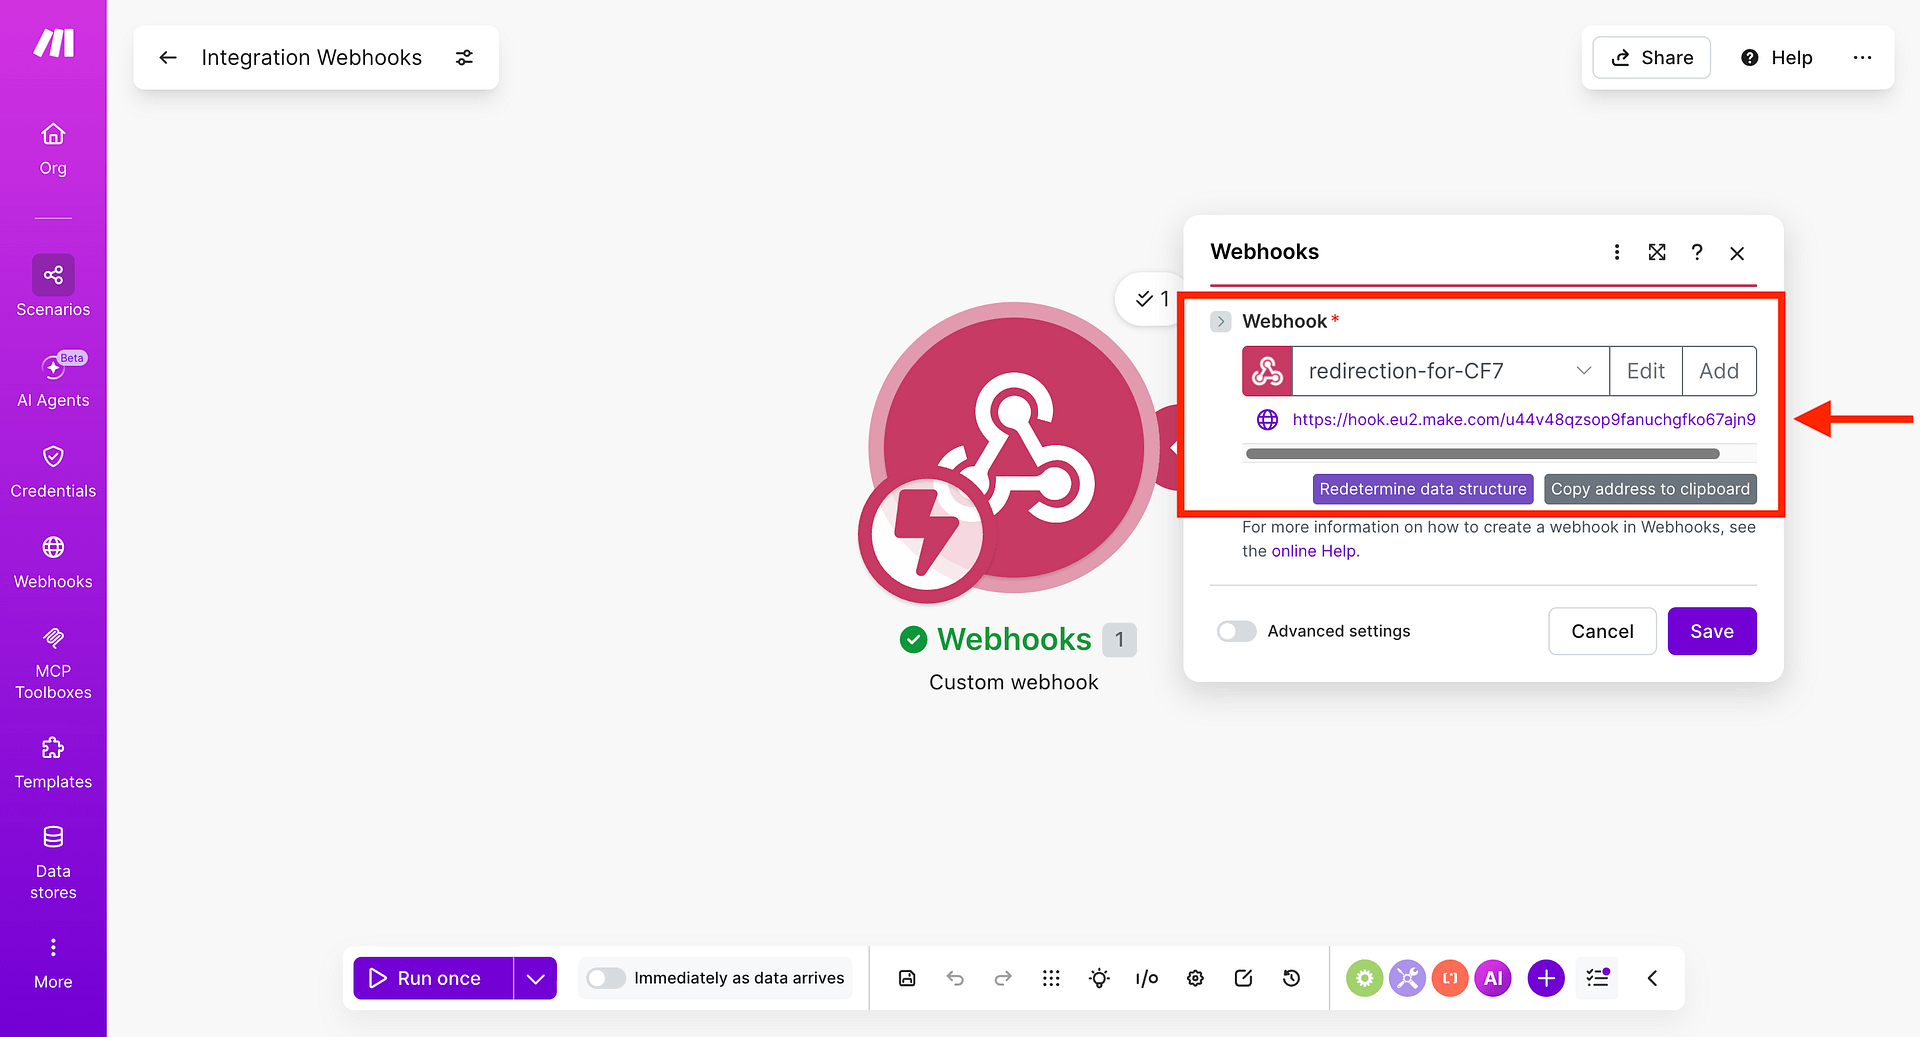
- Click Add to create a new webhook, give it a name (for example, CF7 Form Submissions), and click Save.
- Make will generate a unique webhook URL.
- Copy this URL - you will paste it into RCF7 in the next step.
Tip: Keep this Make tab open - you will need it to run the first test.
Step 2 - Configure the Webhook Action in RCF7
- In your WordPress dashboard, go to Contact -> Contact Forms and edit the form you want to connect.
- Click the Actions tab.
- Click Add Action and select Webhook - XML/JSON.
- In the action settings:
- Base API Url: Paste the Make webhook URL you copied in Step 1
- HTTP Method: Set to POST
- Record type: Set to JSON

- In the Template for XML/JSON payload field, write a JSON object mapping your field names to the CF7 form tags. For example:
{
  "name": "[your-name]",
  "email": "[your-email]",
  "subject": "[your-subject]",
  "message": "[your-message]"
}
The values in square brackets (for example,
[your-name]) are the CF7 field tags from your form. You can confirm the correct tag names using the Available mail tags dropdown in the same settings panel.
- (Optional) Expand Tags mapping to rename or transform field values before they are sent.
- (Optional) Expand HTTP Headers to add custom headers. Make custom webhooks do not require additional headers by default.
- (Optional) Use Payload Test to fire a test request directly from the settings panel. Make sure your JSON payload template is filled in and the form is saved first.
- Click Save on the contact form.
Step 3 - Test the Connection
- Back in Make, click Run once to put the scenario in listening mode.
- Submit your Contact Form 7 form with test data.
- Make will receive the data and display a bubble above the Webhooks module showing the number of records received. Click it to inspect the data.
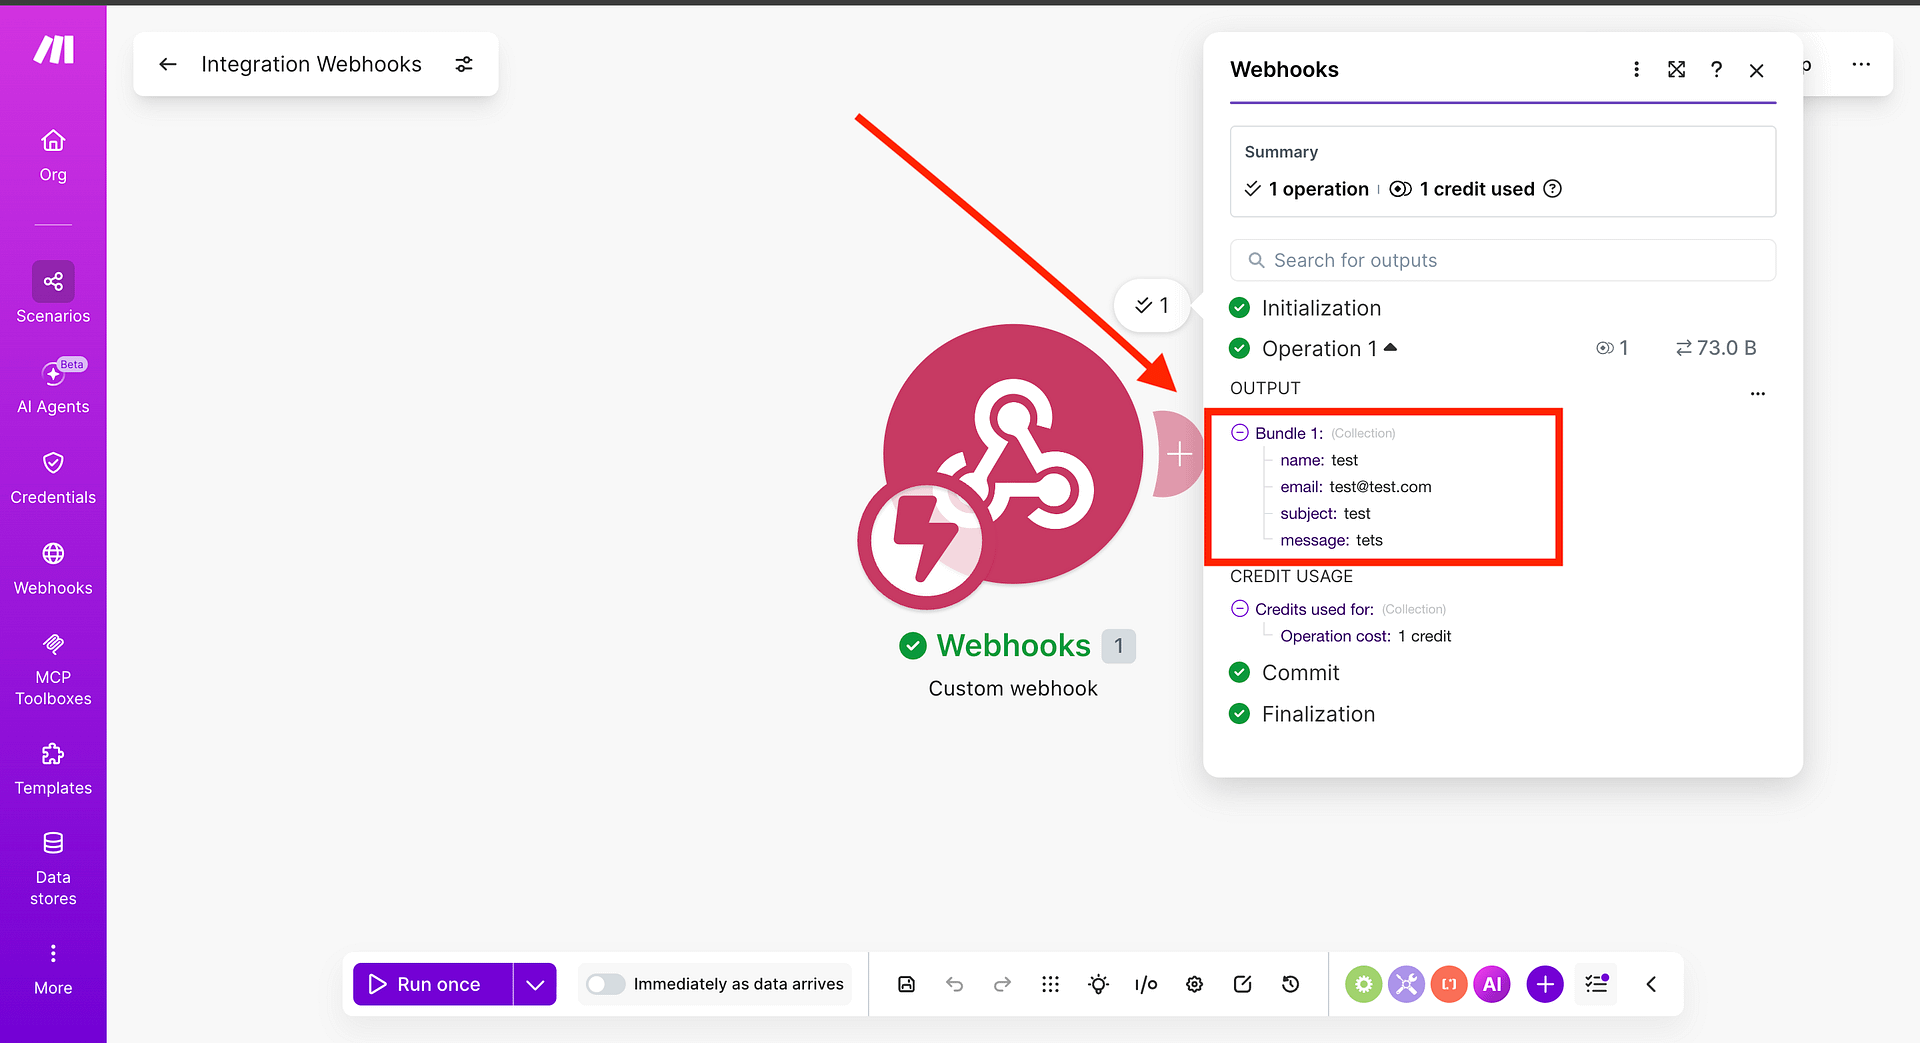
- If everything looks correct, proceed to add your next module.
Step 4 - Add Your Action Module
Click + after the Webhooks module to add what Make should do with the submission data. Some popular options:
- Google Sheets -> Add a Row - log every submission to a spreadsheet
- Slack -> Create a Message - get notified in a channel on every submission
- Gmail -> Send an Email - forward submissions to your inbox
- HubSpot / Zoho / Pipedrive -> Create a Contact - send leads straight to your CRM
- Airtable / Notion -> Create a Record - build a searchable submissions database
Map the form fields from your webhook data to the fields in the destination app, then click OK.
Step 5 - Activate Your Scenario
- Click Save to save the scenario.
- Toggle the scenario ON using the switch in the bottom left corner.
Your scenario is now live. Every new CF7 form submission will automatically trigger Make and run your configured actions.
What You Can Do With Make
Make's visual builder lets you create multi-step automations with filters, routers, and error handling, going well beyond simple one-to-one connections. Some ideas:
- Route submissions by department - send sales enquiries to your CRM and support requests to your helpdesk
- Filter out test submissions - only process entries where the email does not contain
@test.com - Enrich data before saving - use a Make HTTP module to look up additional info before storing a lead
- Send notifications to multiple places - fan out one submission to Slack, email, and a spreadsheet simultaneously
Troubleshooting
The form shows "There was an error trying to send your message" but Make still receives data (or does not)
This error comes from CF7's built-in email notification failing and is not related to the webhook. Fix it by installing an SMTP plugin such as WP Mail SMTP or Fluent SMTP. Alternatively, add skip_mail: on to your form's Additional Settings tab to bypass email sending entirely while you test.
Make is not receiving data
Make sure you clicked Run once in Make before submitting the test form. The scenario must be in listening mode to catch the first request. You can also use the Payload Test section in the RCF7 webhook action settings to fire a test request without submitting the form.
Fields are missing in Make
Check that the field names in the RCF7 Body section match the CF7 shortcode tags in your form exactly.
The scenario runs but the action fails
Check the scenario run history in Make (the clock icon). It shows detailed error messages for each module. Most issues relate to missing permissions or incorrect field mapping in the destination app.