Integrate Contact Form 7 with n8n
The Webhook Integration feature in Redirection for Contact Form 7 (available from the Marketer plan) lets you connect your Contact Form 7 forms to n8n, the open-source workflow automation platform. Whether you are running n8n in the cloud or self-hosting it, every form submission can trigger a workflow and push data to any tool in your stack.
In this article
Prerequisites
- Redirection for Contact Form 7 on the Marketer plan or higher
- An n8n account (cloud) or a self-hosted n8n instance
How to Install the Webhook Addon
- Download the Redirection For Contact Form 7 Extension - RESTful Web Services plugin from your purchase history.
- Install and activate the plugin on your WordPress site.
Need help installing a plugin? Check this doc for step-by-step details.
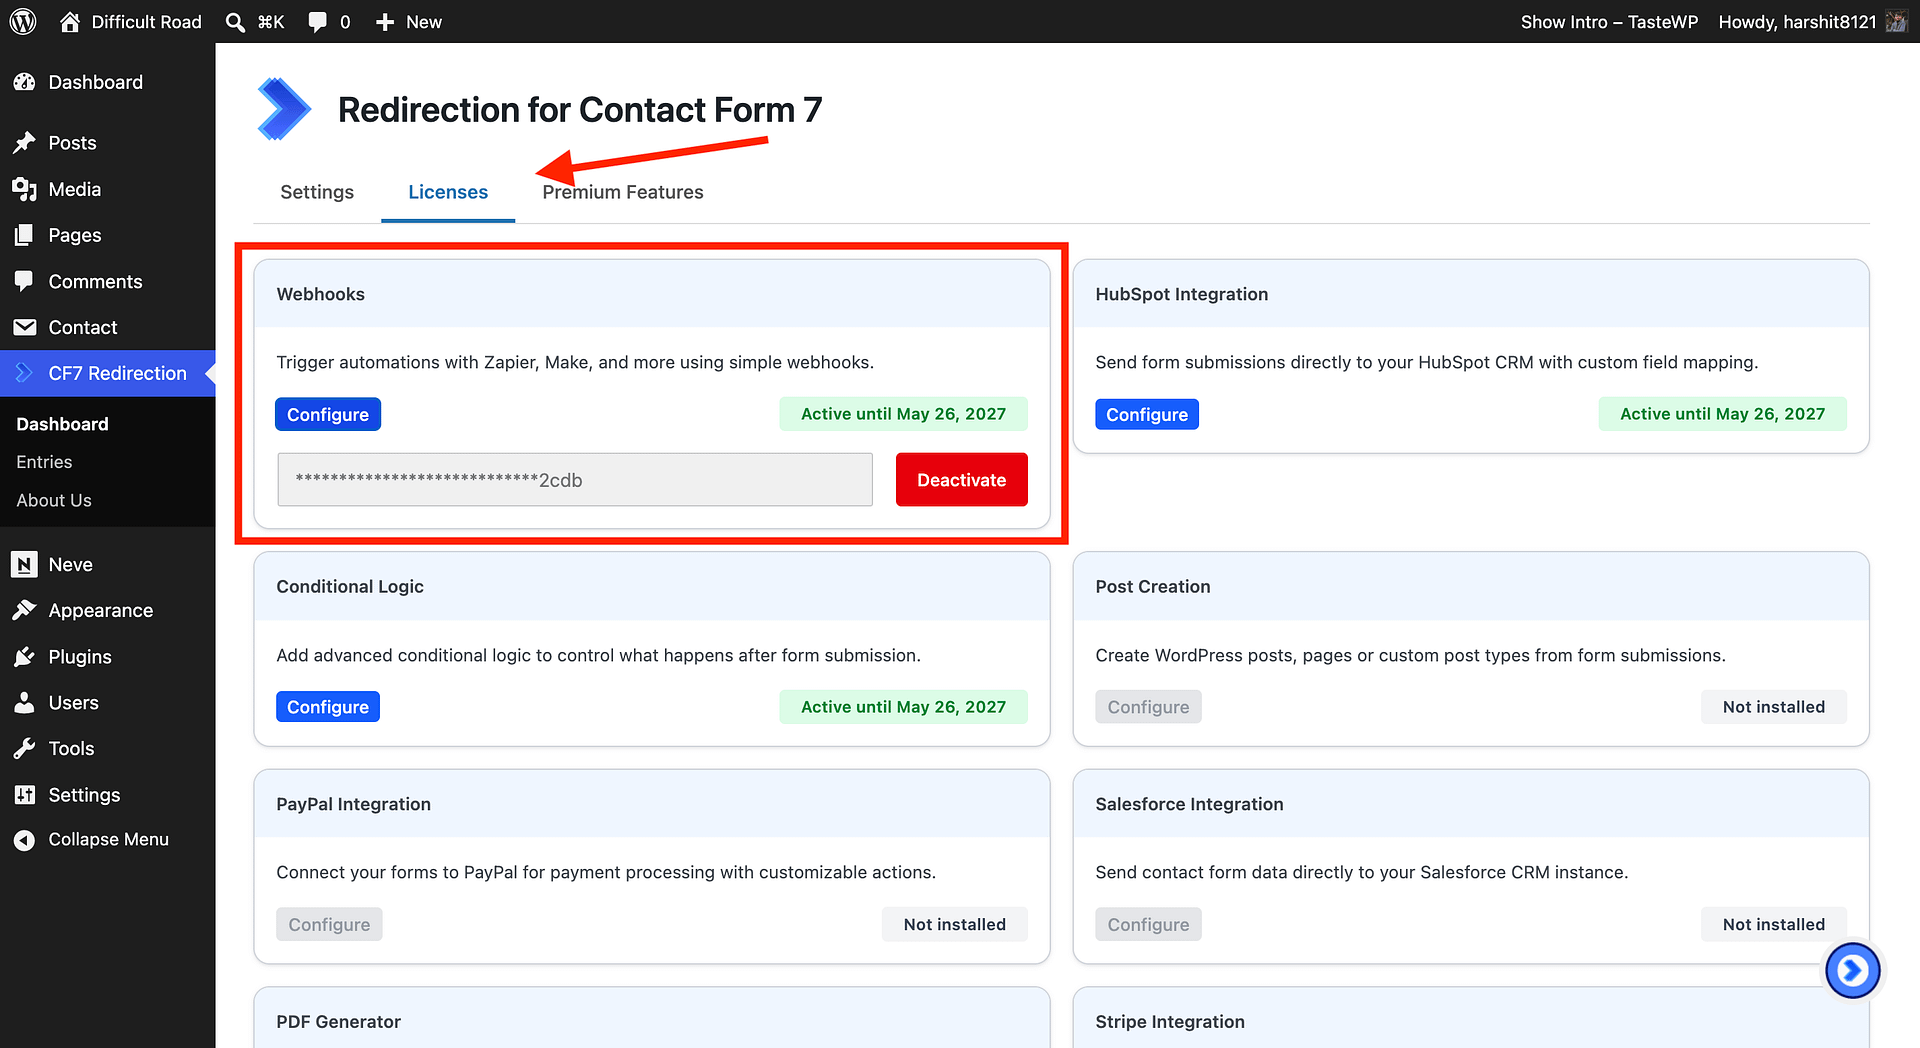
- In your WordPress dashboard, go to CF7 Redirection -> Dashboard -> Licenses and activate the license for Webhooks.
Step 1 - Create a Workflow in n8n
- Log in to your n8n instance and click + New Workflow.
- Click Add first step and search for Webhook.
- Select the Webhook node as your trigger.
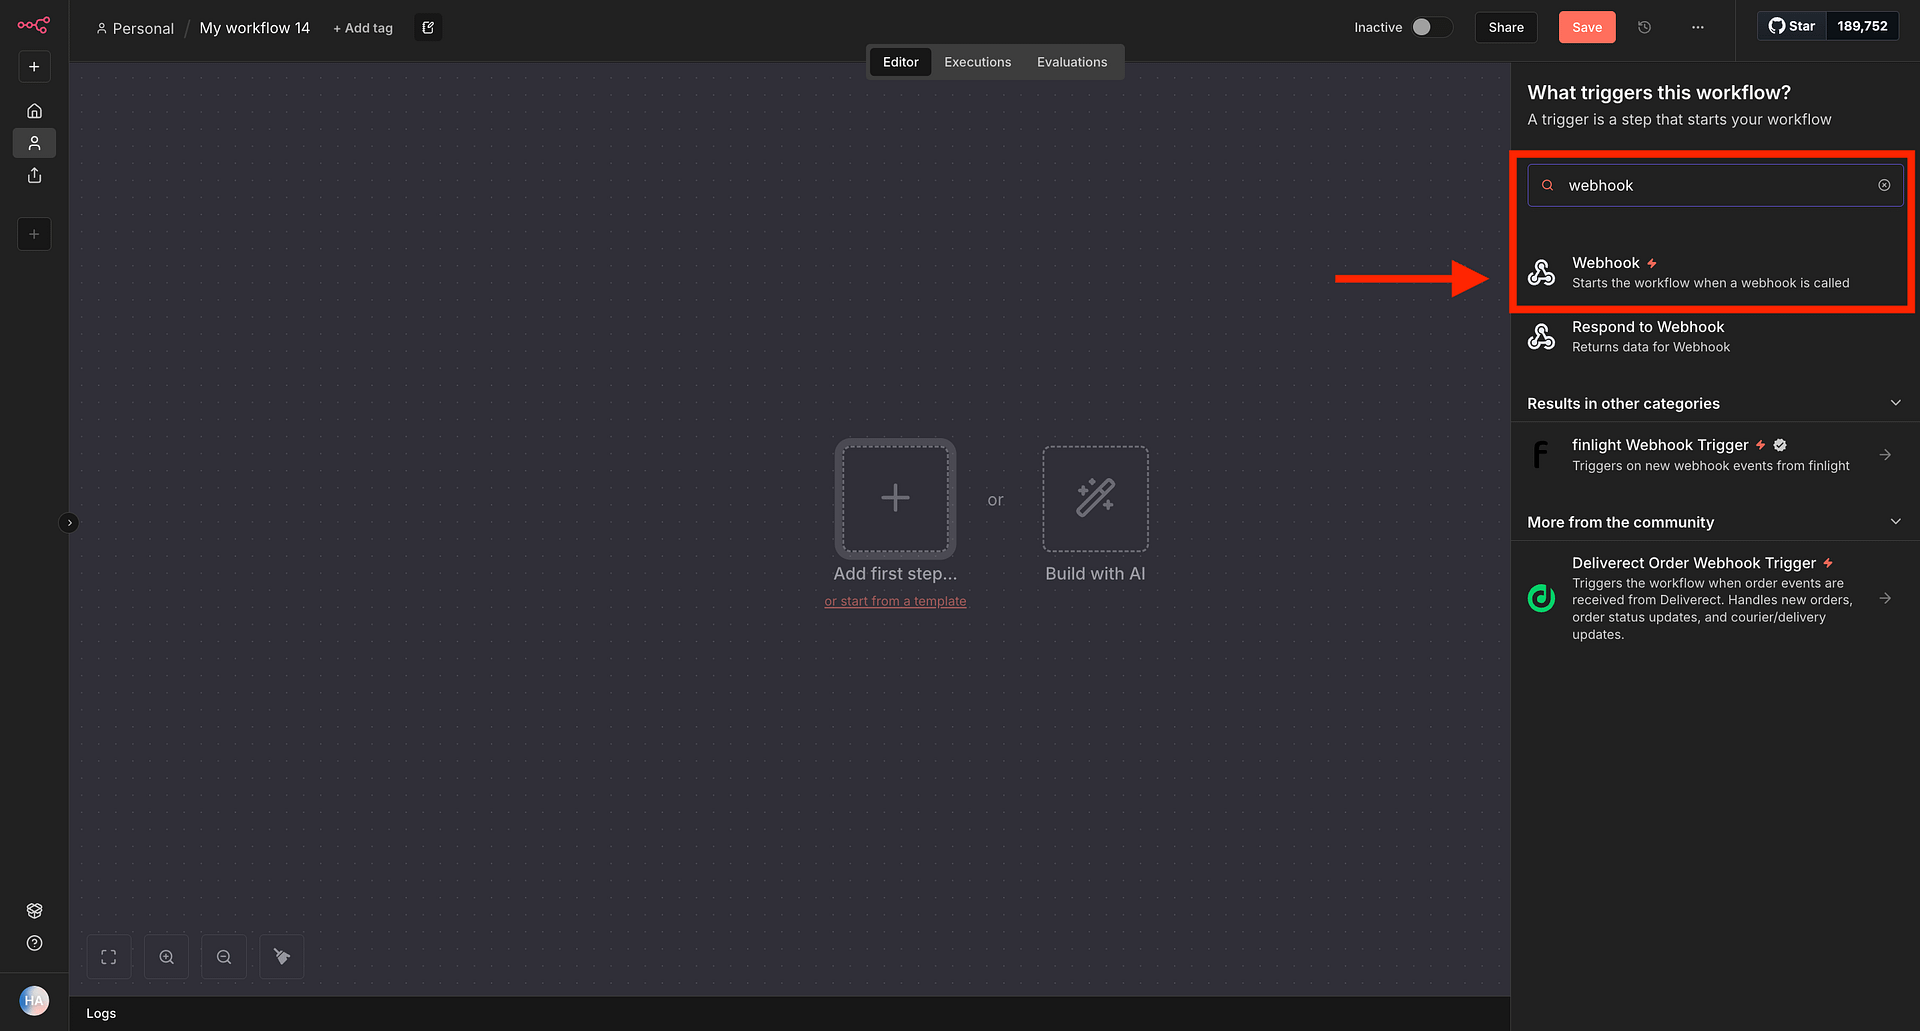
- In the Webhook node settings:
- HTTP Method: Set to POST
- Path: Leave as the auto-generated value or set a custom one (for example,
cf7-submissions) - Response Mode: Set to Immediately
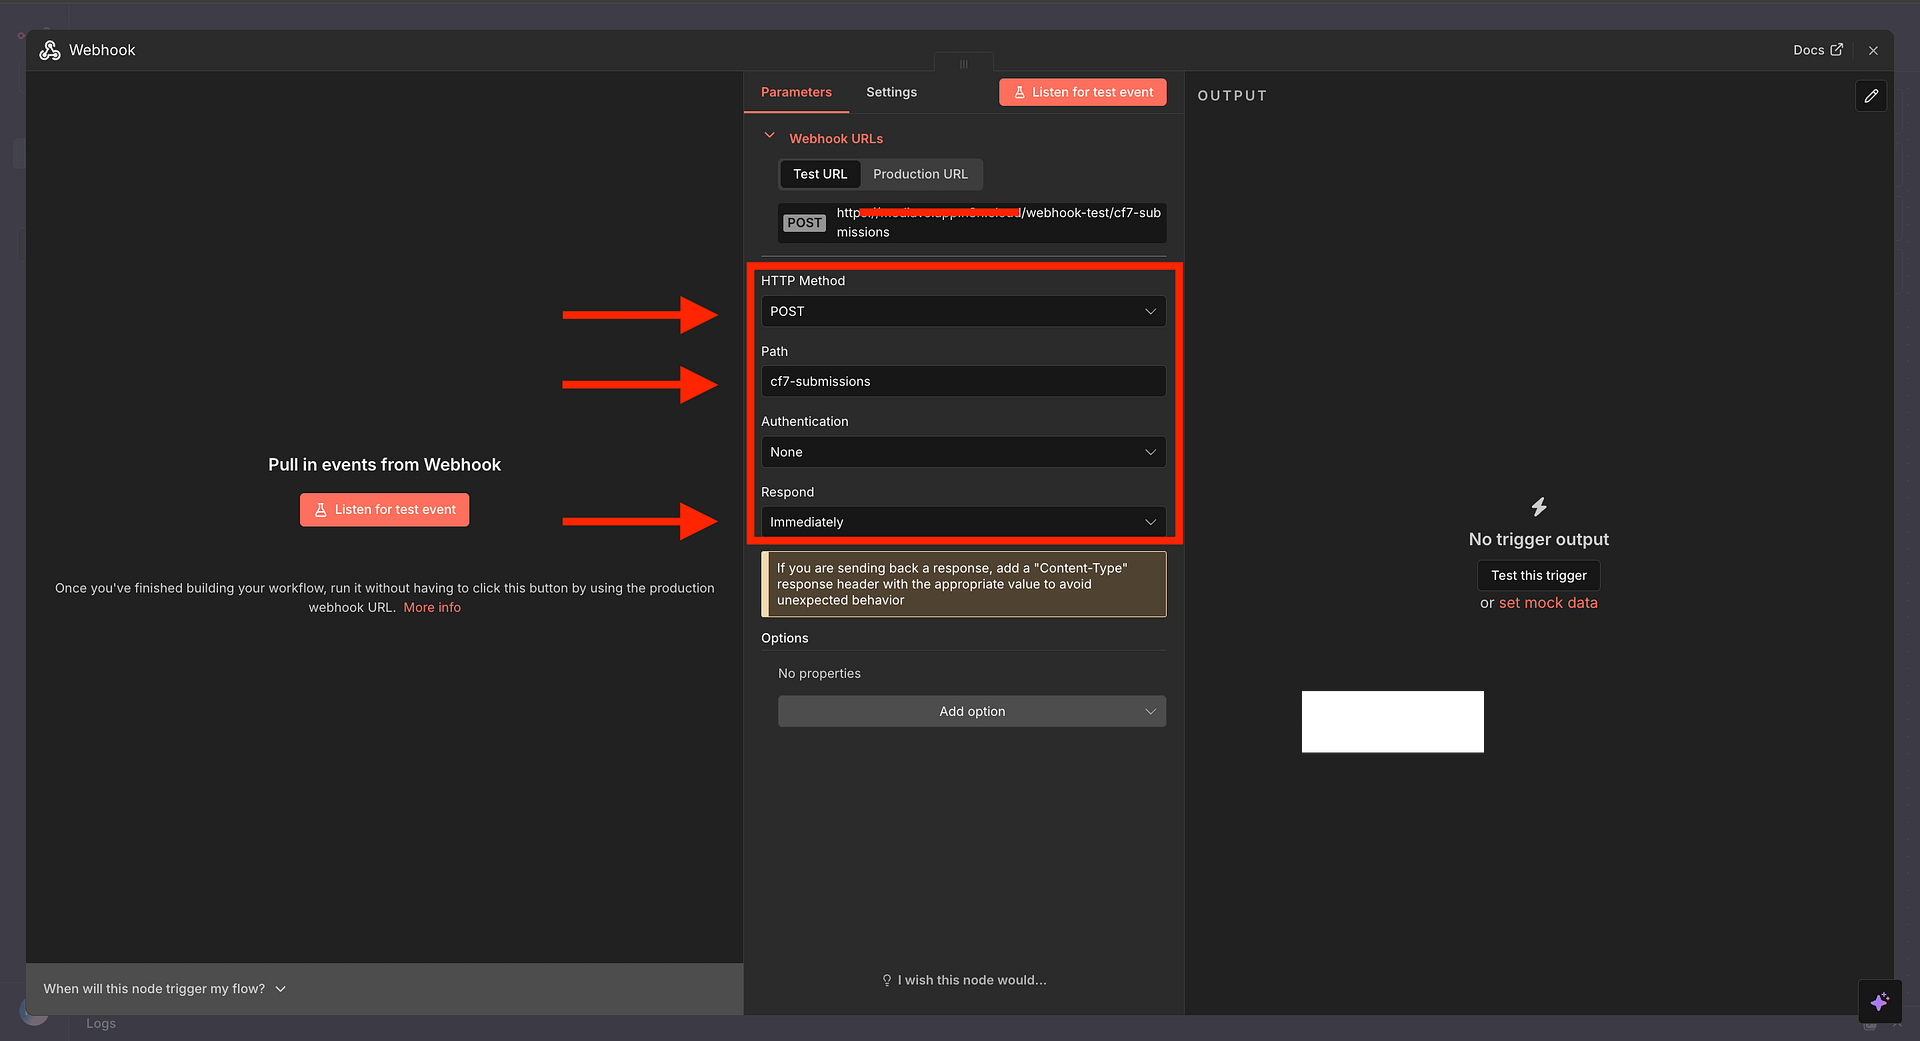
- n8n provides two URLs. Use the right one depending on your phase:
- Test URL: Use this while setting up and testing. Only works when the workflow is in test/listening mode (click Test step or Test workflow).
- Production URL: Use this once everything is working and the workflow is activated.
For initial setup, copy the Test URL. You will switch to the Production URL when you go live.
- Copy the Test URL.
Step 2 - Configure the Webhook Action in RCF7
- In your WordPress dashboard, go to Contact -> Contact Forms and edit the form you want to connect.
- Click the Actions tab.
- Click Add Action and select Webhook - XML/JSON.
- In the action settings:
- Base API Url: Paste the n8n Test URL you copied in Step 1
- HTTP Method: Set to POST
- Record type: Set to JSON
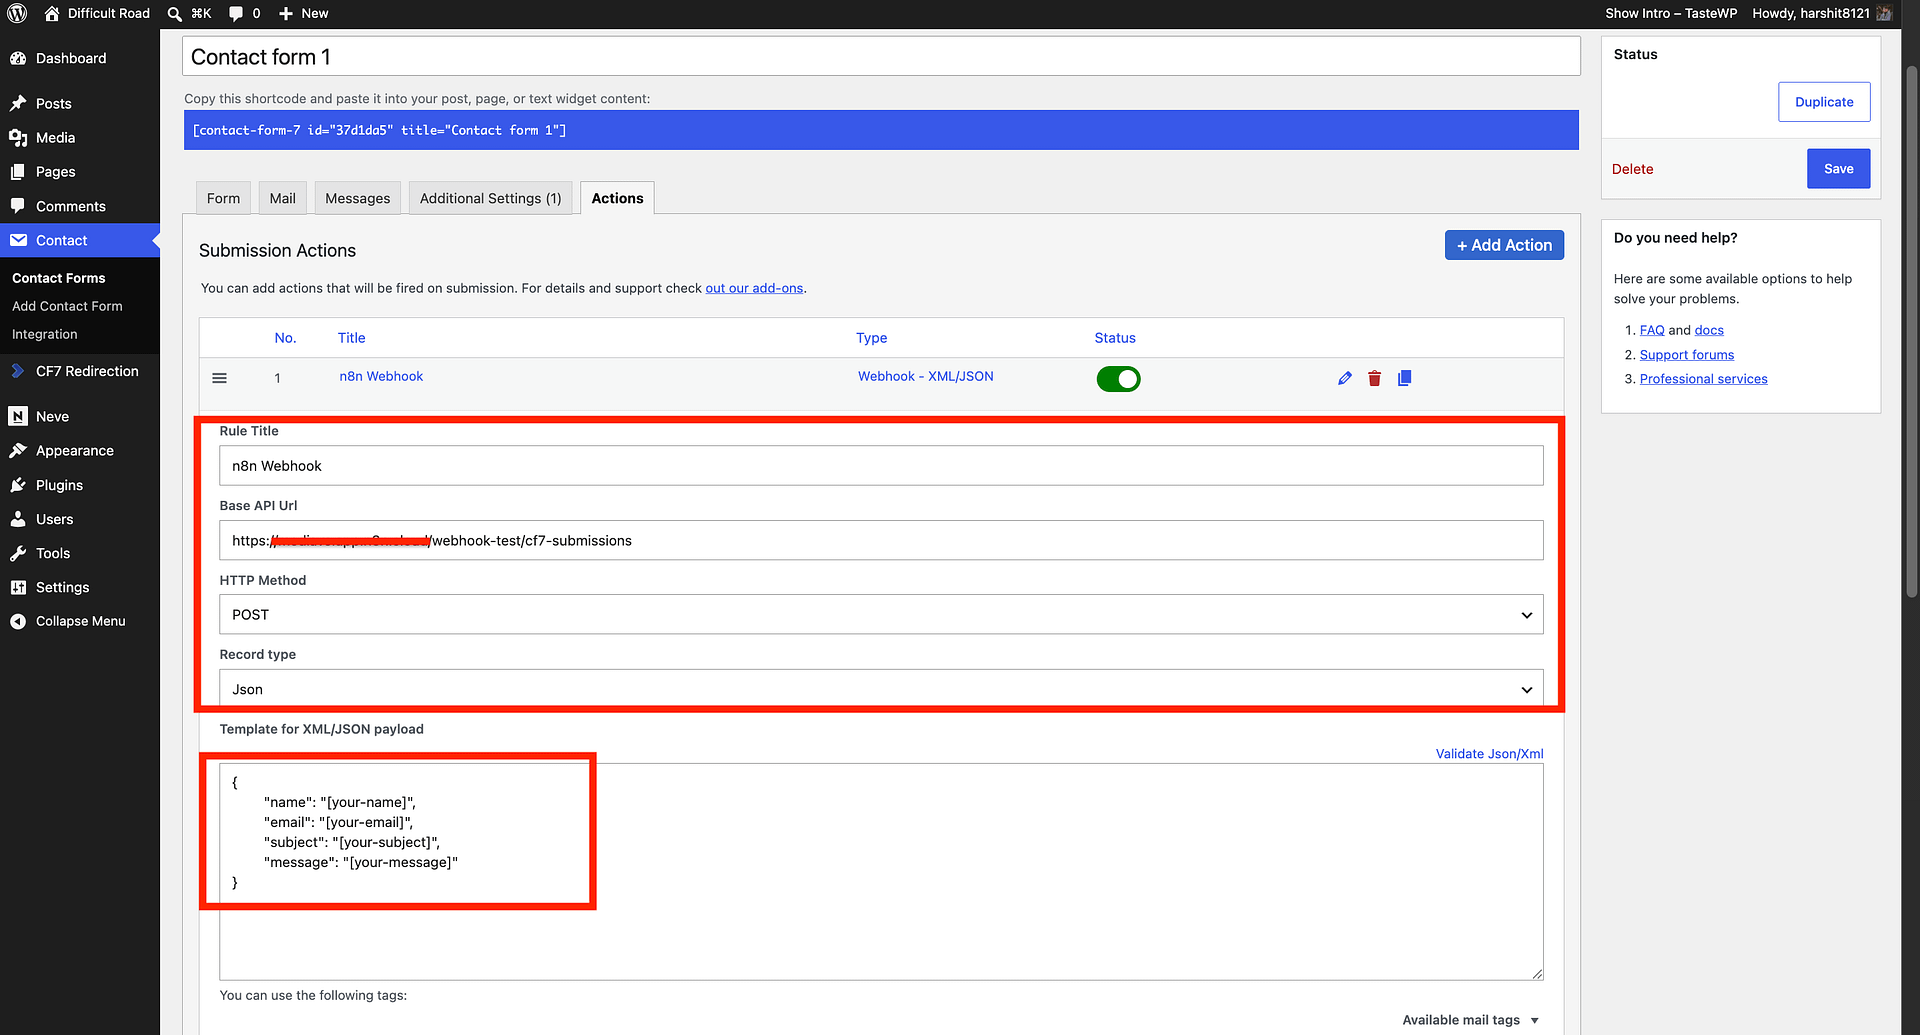
- In the Template for XML/JSON payload field, write a JSON object mapping your field names to the CF7 form tags. For example:
{
  "name": "[your-name]",
  "email": "[your-email]",
  "subject": "[your-subject]",
  "message": "[your-message]"
}
The values in square brackets (for example,
[your-name]) are the CF7 field tags from your form. Use the Available mail tags dropdown in the same settings panel to find the exact tag names for your form fields.
- (Optional) Expand Tags mapping to rename or transform field values before they are sent.
- (Optional) Expand HTTP Headers to add custom headers. n8n Webhook nodes do not require additional headers by default.
- (Optional) Use Payload Test to fire a test request directly from the settings panel. Make sure your JSON template is filled in and the form is saved first.
- Click Save on the contact form.
Step 3 - Test the Connection
- Back in n8n, click Test step (or Test workflow) on the Webhook node to put it into listening mode. You will see a "Waiting for test event" message.
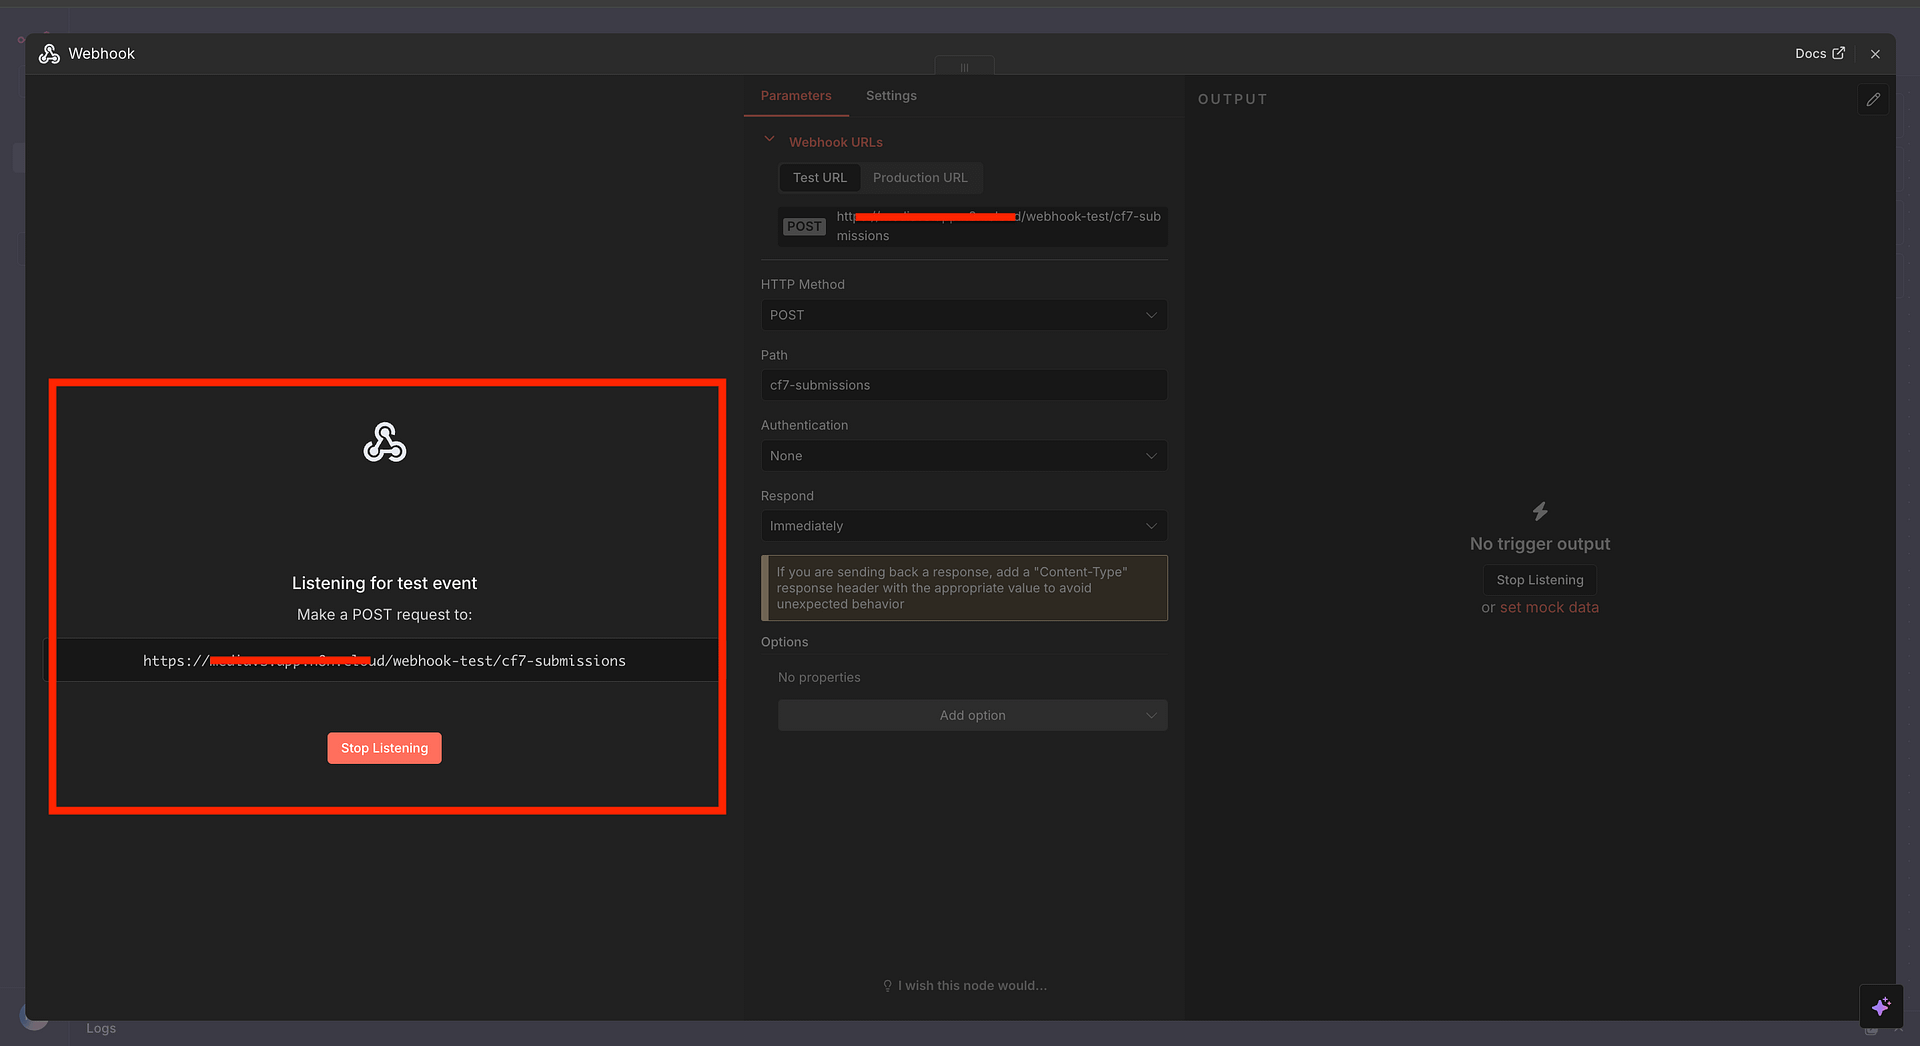
- Submit your Contact Form 7 form with test data.
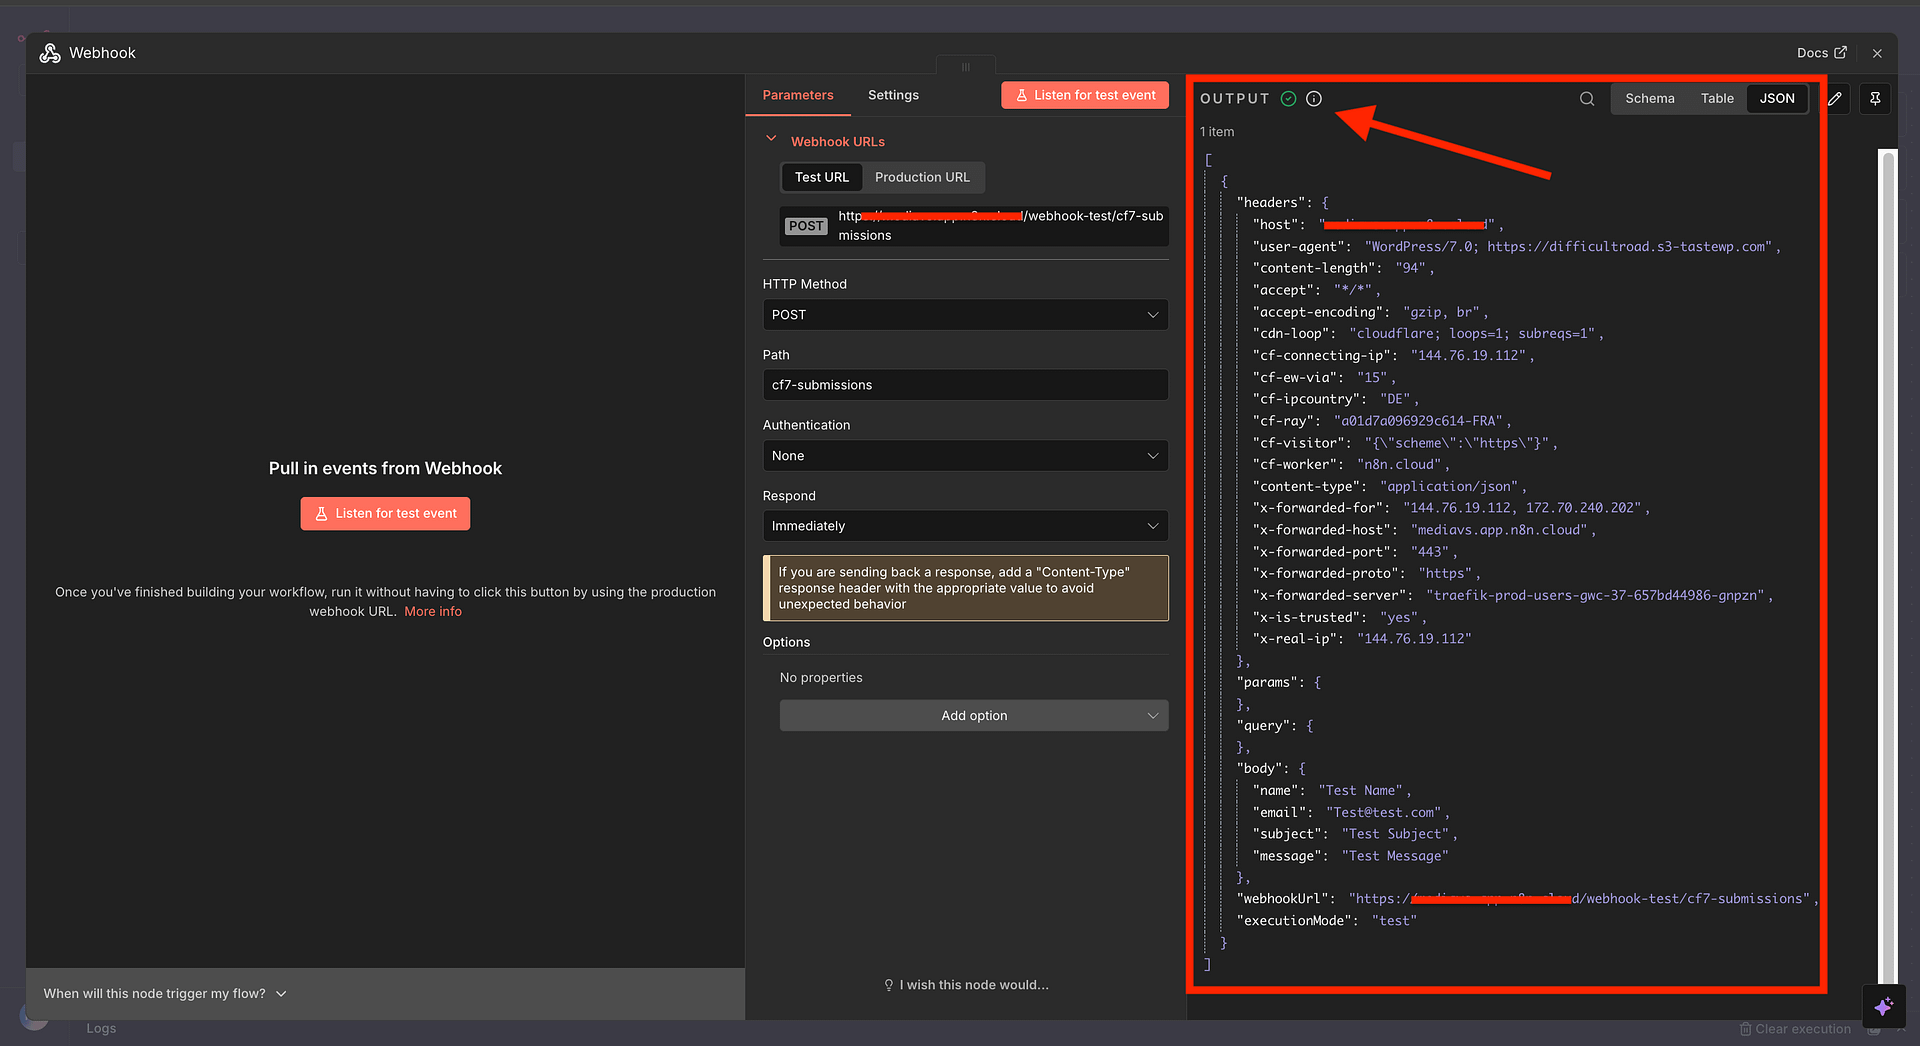
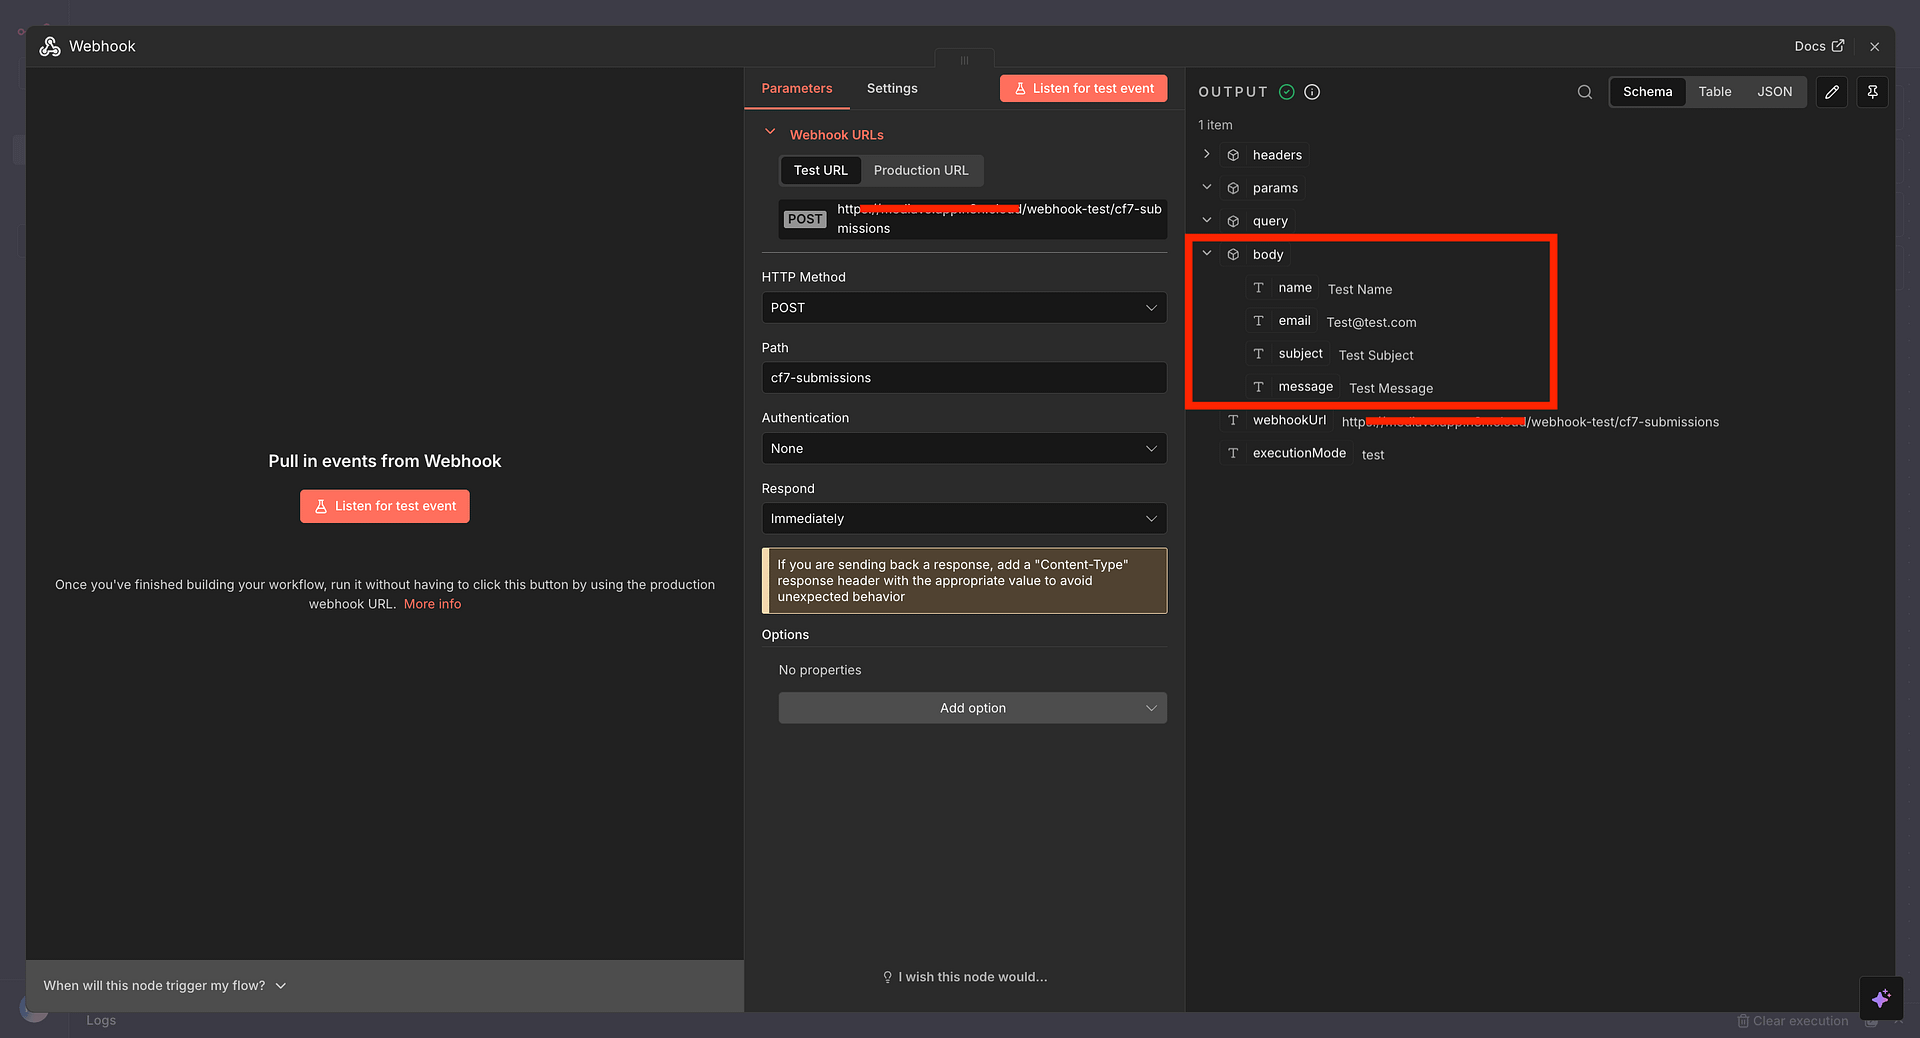
- n8n will receive the data and display it in the node output panel. You should see all the fields you mapped.
- If the data looks correct, click Continue to add the next node in your workflow.
Step 4 - Add Your Next Node
Click + after the Webhook node to add what n8n should do with the form data. Some popular options:
- Google Sheets -> Append Row - log submissions to a spreadsheet
- Slack -> Send a Message - get notified in a channel for each submission
- HubSpot / Zoho / Pipedrive -> Create Contact - send leads directly to your CRM
- Gmail / SendGrid -> Send Email - forward submissions or trigger a follow-up email
- Airtable / Notion -> Create Record - build a structured submissions database
- HTTP Request -> call any custom API or internal tool
Map the form fields from the Webhook output to the fields required by your destination node.
Step 5 - Activate Your Workflow
- Once testing is complete, click Save to save the workflow.
- In the RCF7 Webhook action, replace the Test URL with the Production URL from the n8n Webhook node, then save the contact form again.
- Back in n8n, toggle the workflow Active using the switch in the top right.
Your workflow is now live. Every CF7 form submission will automatically trigger n8n and run your configured actions.
Self-Hosted n8n
If you are running n8n on your own server, make sure your n8n instance is publicly accessible over HTTPS. WordPress needs to be able to reach the webhook URL from the internet. A local or private network URL will not work.
Troubleshooting
The form shows "There was an error trying to send your message" but n8n still receives data (or does not)
This error comes from CF7's built-in email notification failing and is not related to the webhook. Fix it by installing an SMTP plugin such as WP Mail SMTP or Fluent SMTP. Alternatively, add skip_mail: on to your form's Additional Settings tab to bypass email sending entirely while you test.
n8n is not receiving the test submission
Make sure the Webhook node is in Test mode (listening) before you submit the form. If the form was submitted before listening started, submit it again. You can also use the Payload Test section in the RCF7 webhook action settings to fire a test request directly.
"Test URL" works but "Production URL" does not
The workflow must be activated for the Production URL to respond. Toggle the Active switch in the top right of the n8n editor.
Self-hosted: webhook times out
Check that your n8n instance is reachable over HTTPS from the public internet, and that no firewall is blocking incoming POST requests on the n8n port.
Fields are missing in n8n
Verify the field names in the RCF7 Body section match the shortcode tags in your CF7 form exactly.