Skip to content
redirection-for-contact-form-7

Contact Form 7, now with brains – run actions after submission: trigger scripts, webhooks, CRM sync, and conditional logic.

See Pro Plans →

How to install and activate premium addons of Redirection for Contact Form 7

In order to use any premium addon of Redirection for Contact Form 7, you need to install the free version of Redirection for Contact Form 7 along with the Contact Form 7 plugin.

Prerequisites

Download and Install

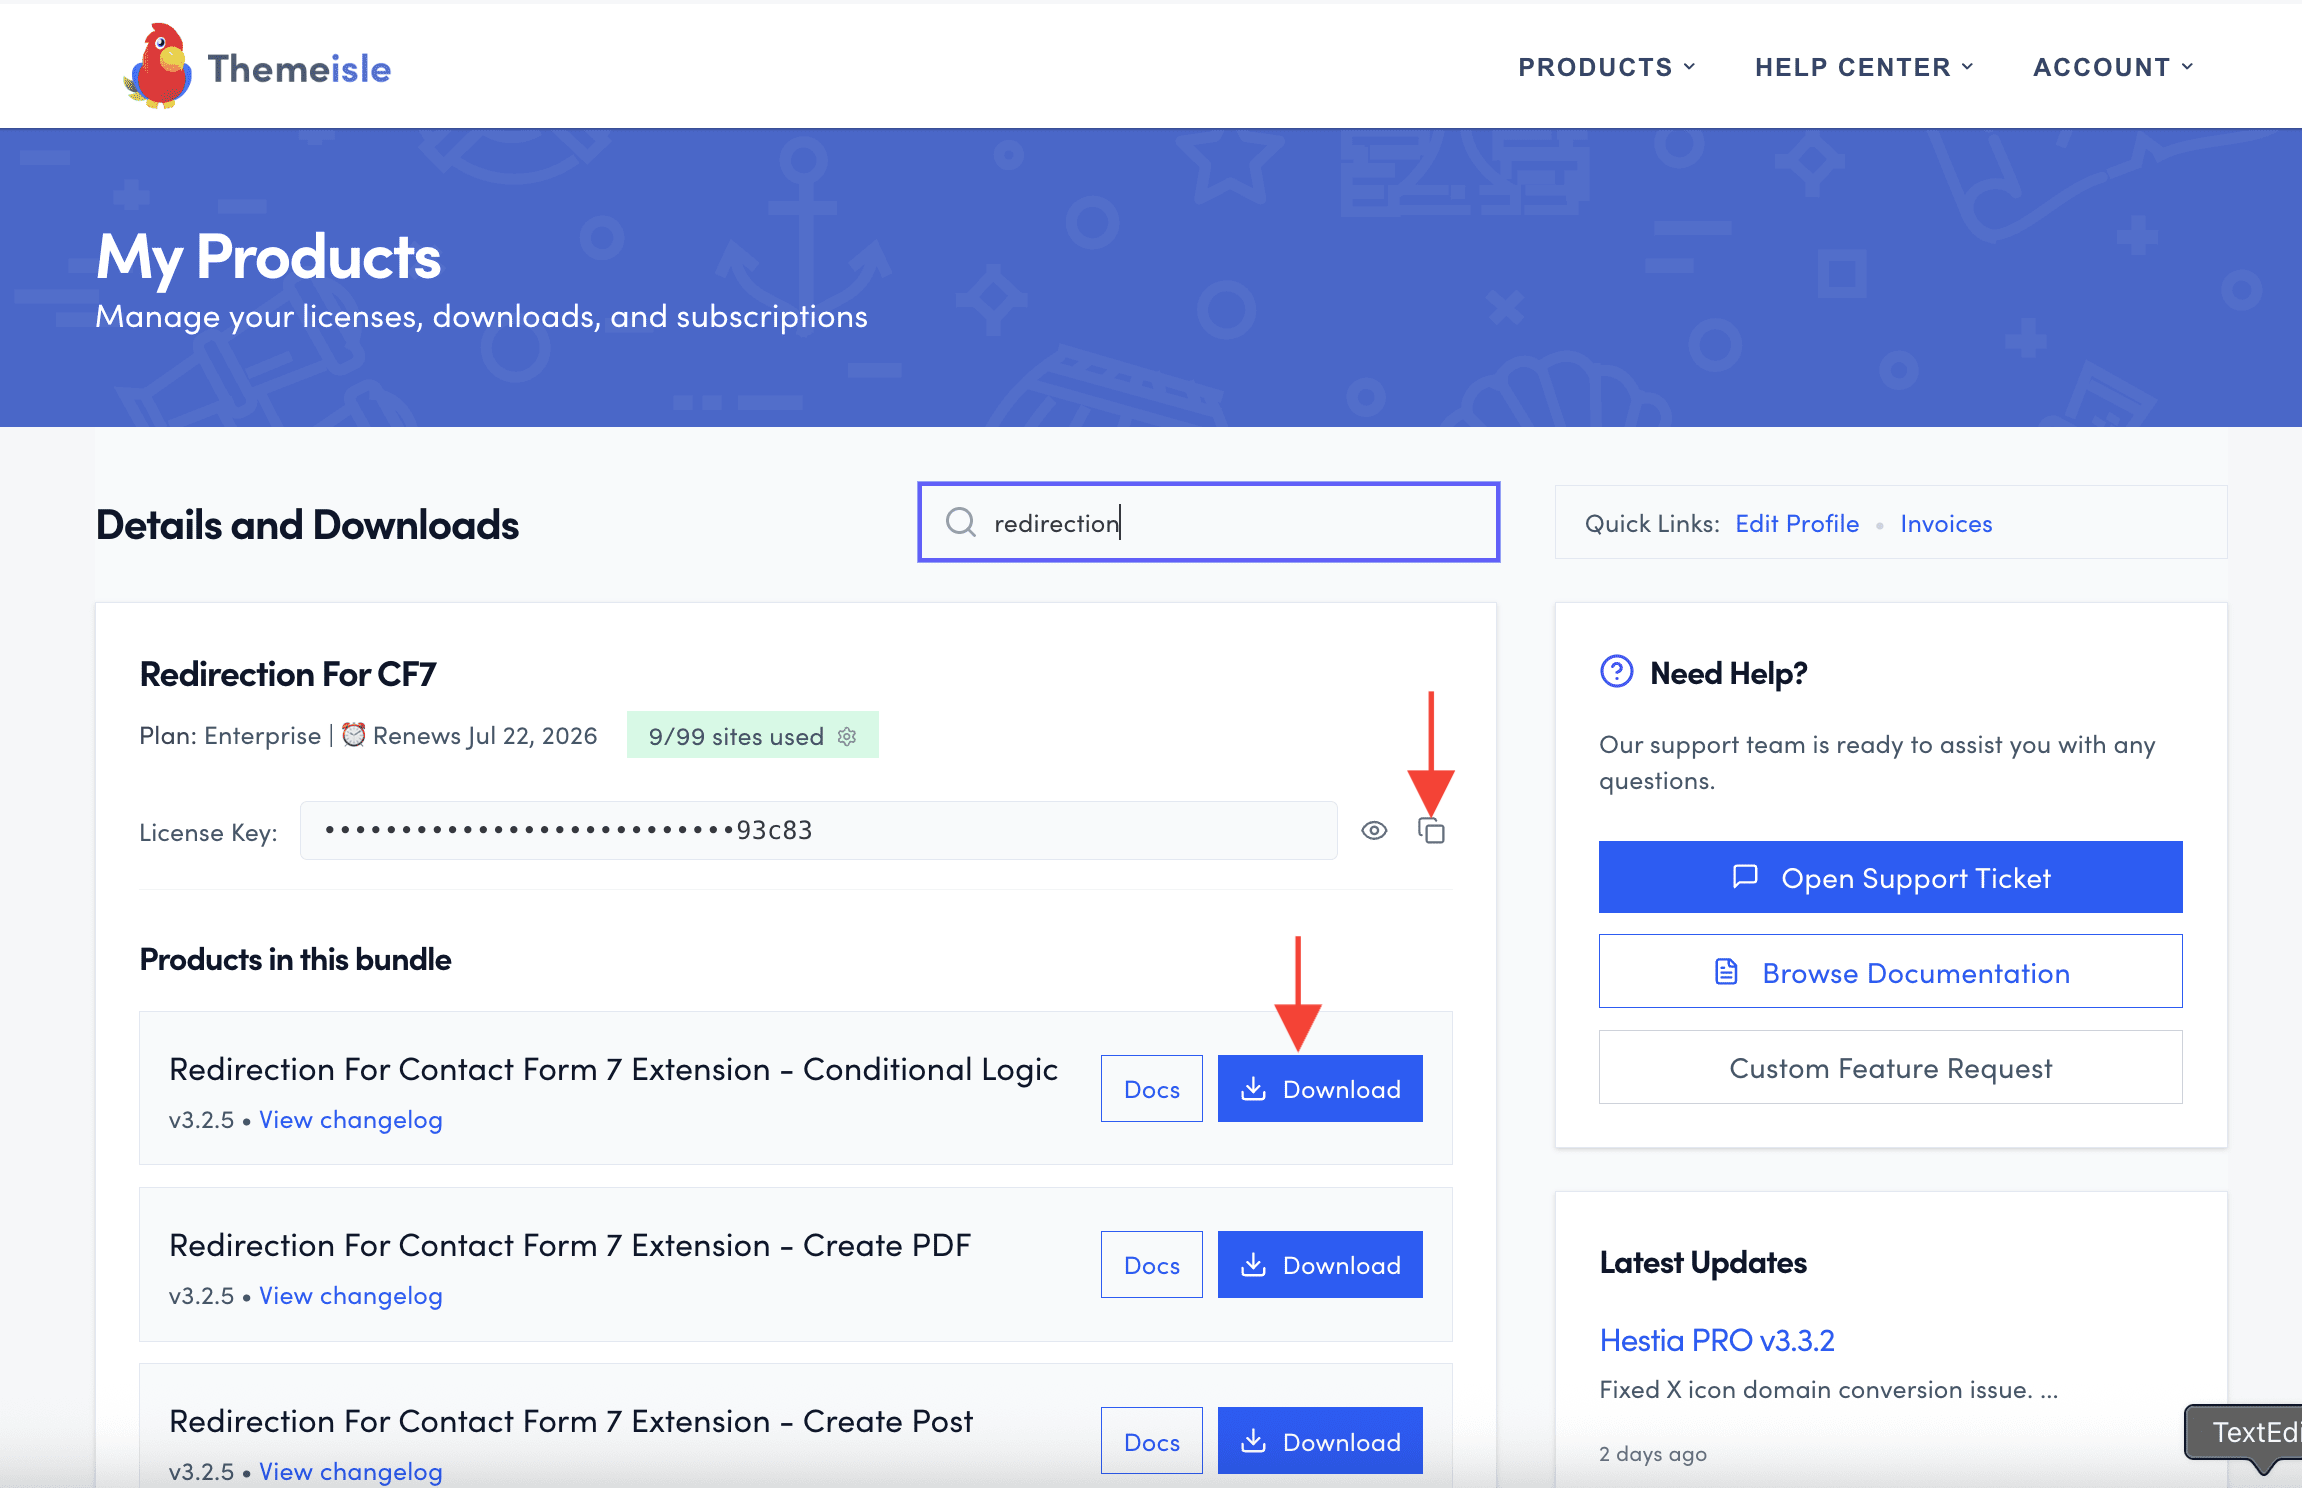
1. Navigate to Themeisle store and download the premium add-on you purchased.

2. Click on the license key and copy it.

3. Navigate to Plugins > Add new in your WordPress dashboard and install the downloaded zip file.

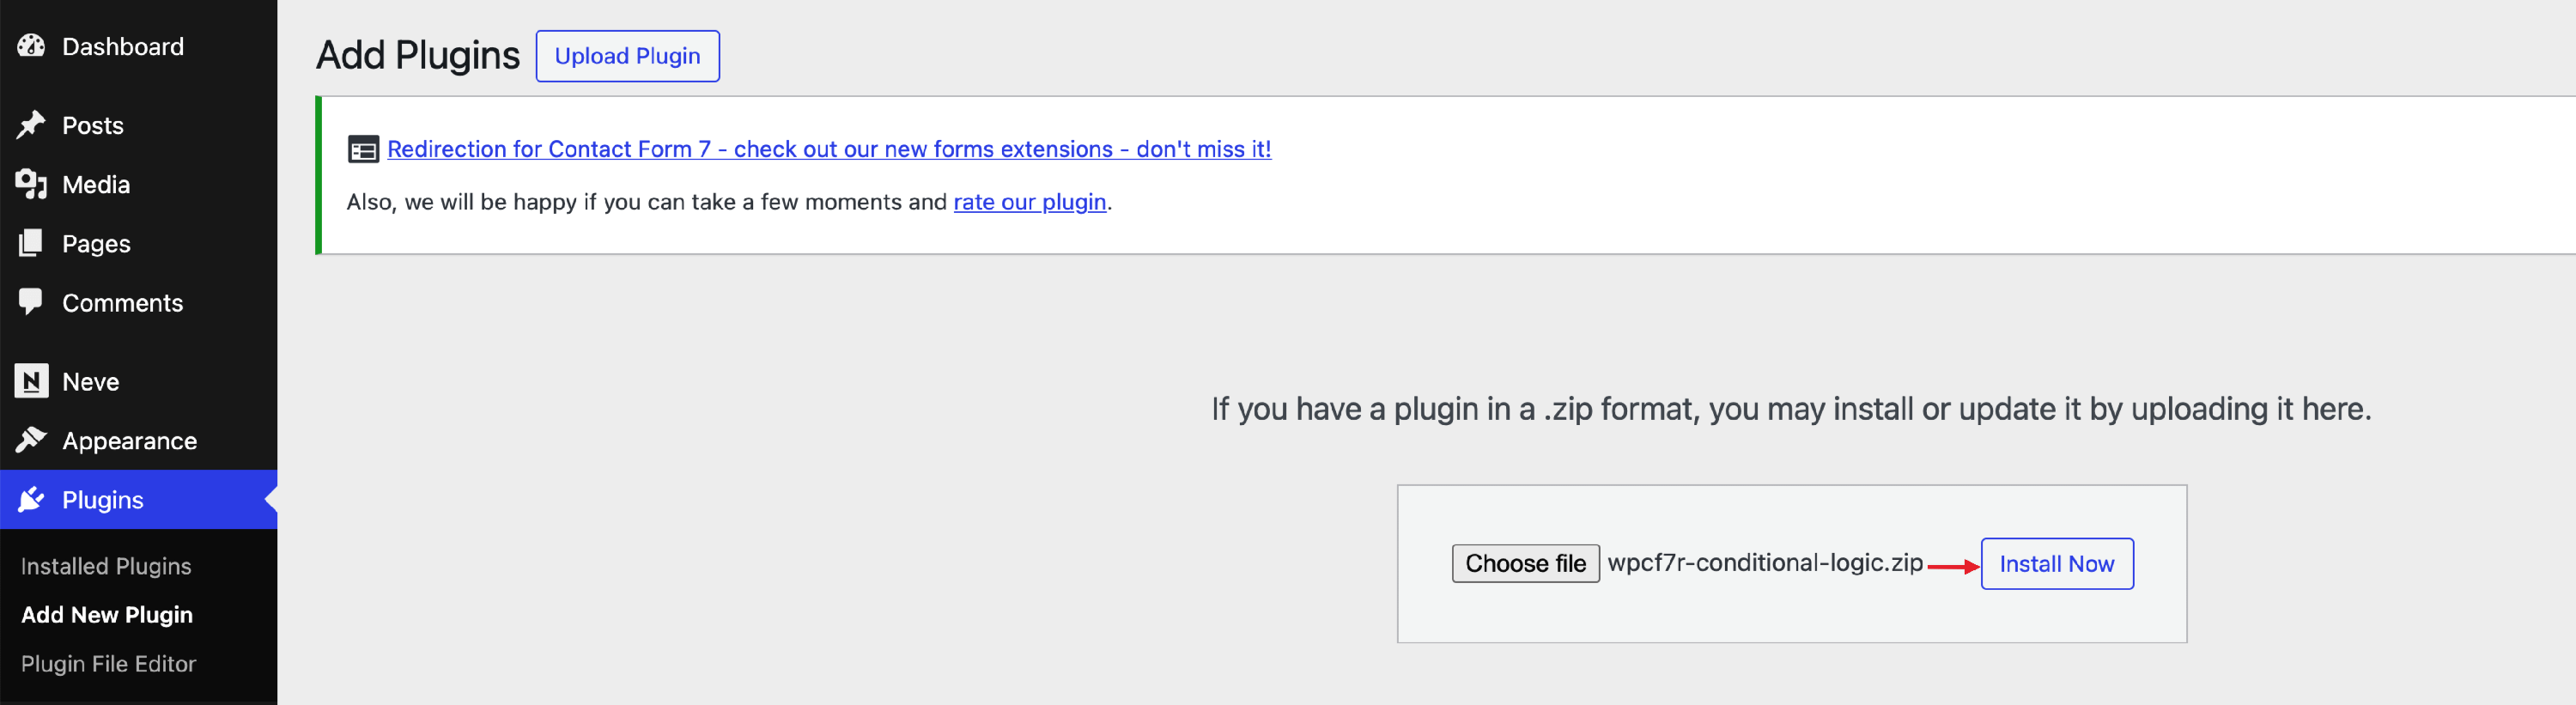
4. Navigate to CF7 Redirection > Dashboard > Licenses and add the copied license key to activate it.

Troubleshooting ZIP Upload Errors

If you receive an error when uploading the add-on ZIP file via Plugins > Add New, the most common cause is a security plugin or hosting firewall blocking the request.

403 Forbidden error

A 403 Forbidden error during ZIP upload is typically caused by:

  • A security plugin such as Wordfence, iThemes Security, or Sucuri blocking the upload request.
  • A hosting-level Web Application Firewall (WAF) or firewall rule that restricts file uploads.
  • A server-side restriction on your hosting plan.

To resolve a 403 error, try the following steps in order:

1. Temporarily deactivate security plugins and retry the upload.

Go to Plugins > Installed Plugins, deactivate any active security plugins, and then attempt the ZIP upload again via Plugins > Add New > Upload Plugin. Once the add-on is installed and active, you can reactivate your security plugins.

2. Install the add-on manually via FTP or SFTP.

If disabling security plugins does not resolve the issue, upload the plugin files directly to your server:

  1. Unzip the downloaded add-on ZIP file on your computer.
  2. Connect to your site using an FTP or SFTP client (such as FileZilla).
  3. Navigate to /wp-content/plugins/ on your server.
  4. Upload the unzipped plugin folder into that directory.
  5. Go to Plugins > Installed Plugins in your WordPress dashboard and activate the add-on.

3. Check your PHP upload size limit.

If you see an error about the file being too large, your server's PHP configuration may have a low file size limit. Ask your hosting provider to increase the upload_max_filesize and post_max_size values in php.ini, or update them yourself if your host provides a php.ini editor in cPanel or a similar control panel.

4. Contact your hosting provider.

If none of the above steps resolve the issue, contact your hosting provider and ask them to check their server logs for the blocked request. You can ask them to whitelist ZIP file uploads from the WordPress admin area or to identify which firewall rule is triggering the 403 error.

Troubleshooting: Licenses tab not appearing in the dashboard

If the Licenses tab is missing from CF7 Redirection > Dashboard, it means one or more required plugins are not installed or active.

The Licenses tab only appears when all three of the following plugins are installed and active:

To fix this, go to Plugins > Installed Plugins in your WordPress dashboard and confirm that all three plugins show as Active. If any of them are missing, install and activate them, then return to CF7 Redirection > Dashboard — the Licenses tab should now be visible.