
PPOM - Personalized Product Option Manager
Personalized Product Option Manager adds a custom field on the product page with many different input types. Nice and simple UI and a bunch of options against each field allow admin and users to personalize any product before checkout. The following details are provided for each input field.
To manage PPOM field groups and product assignments with an AI assistant, see Use PPOM with AI Assistants.
📝 Note: Exciting news! We do offer a demo for PPOM PRO, allowing you to explore its features firsthand before making a decision. Take your time to test it out and see if it fits your needs perfectly here.
In this article
Download and Install
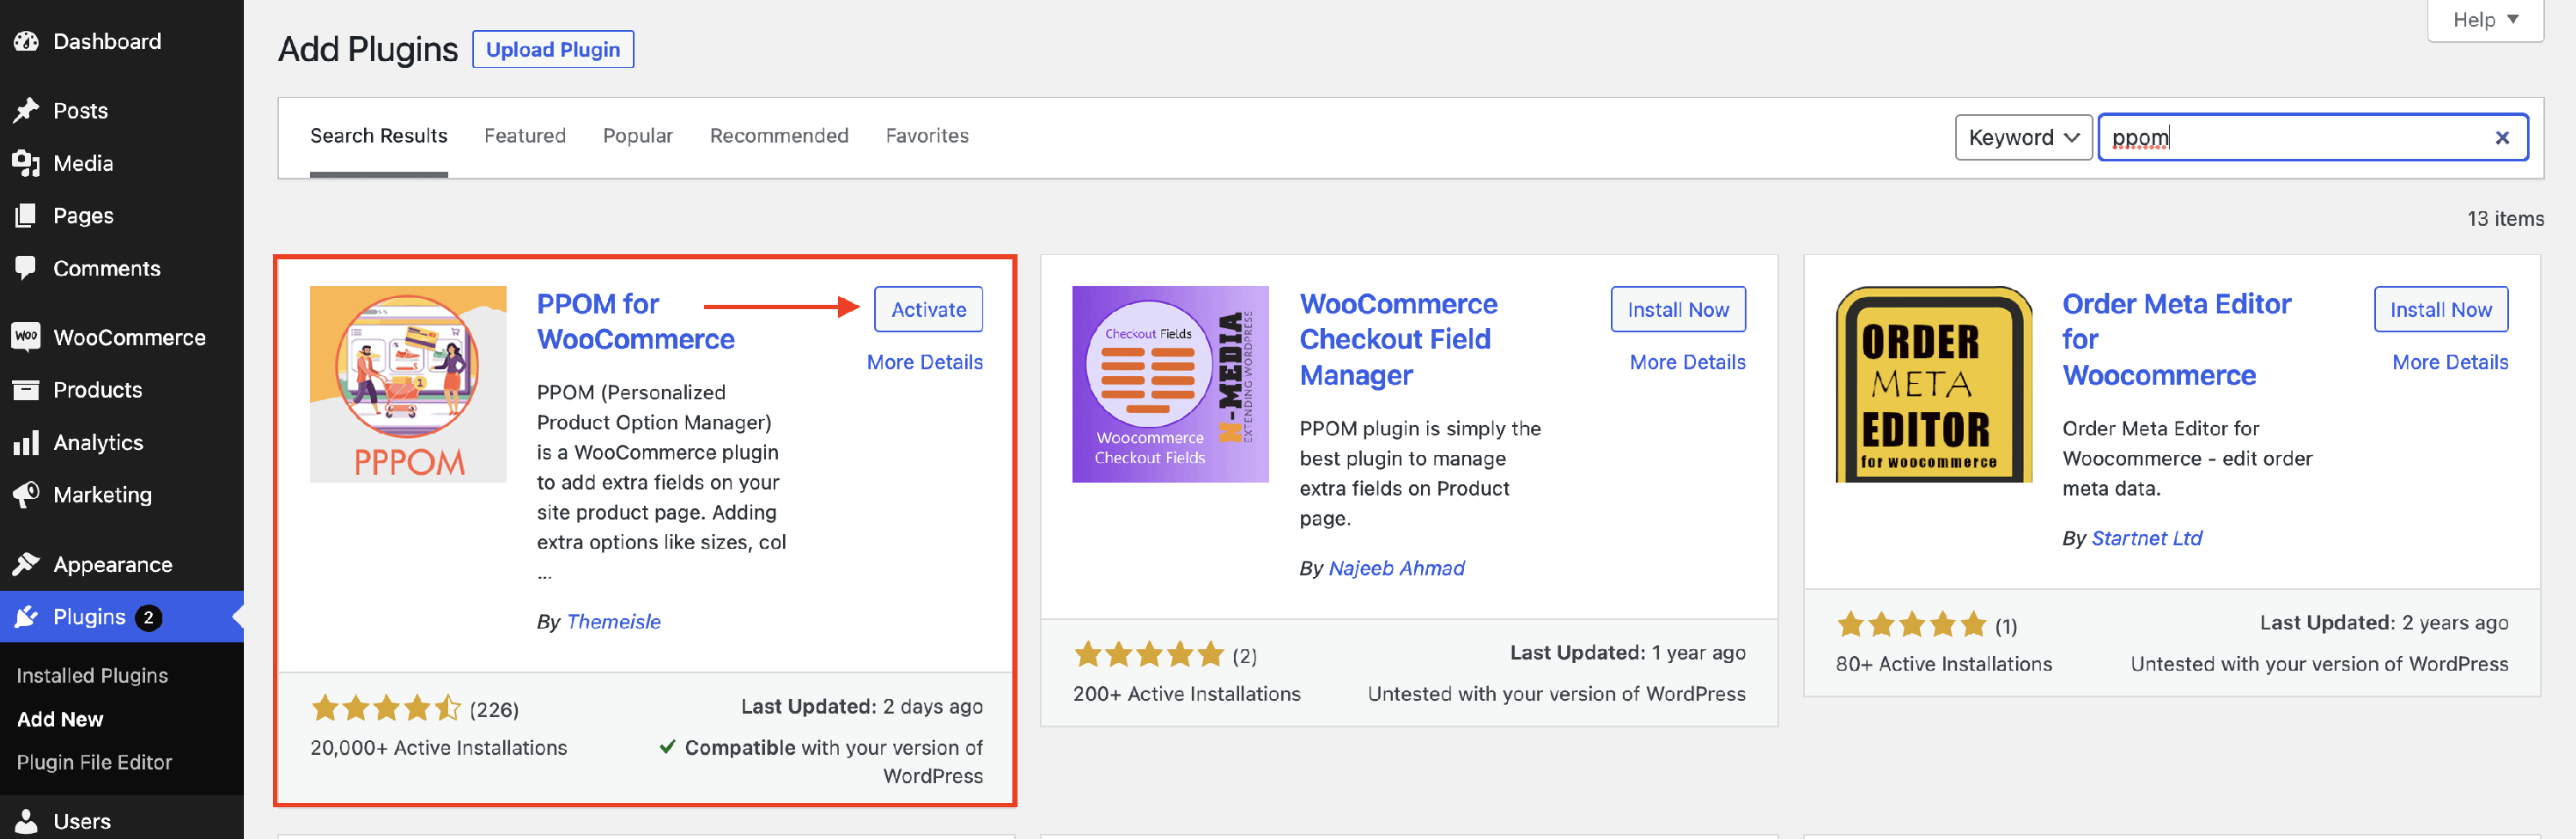
1. Navigate to the WordPress Dashboard > Plugins.
2. Click the Add New button and type in the Search Bar " PPOM".
3. When the plugin appears, click on the Install button and then on Activate.
Using the plugin
1. Navigate to the Dashboard > WooCommerce > PPOM Fields.
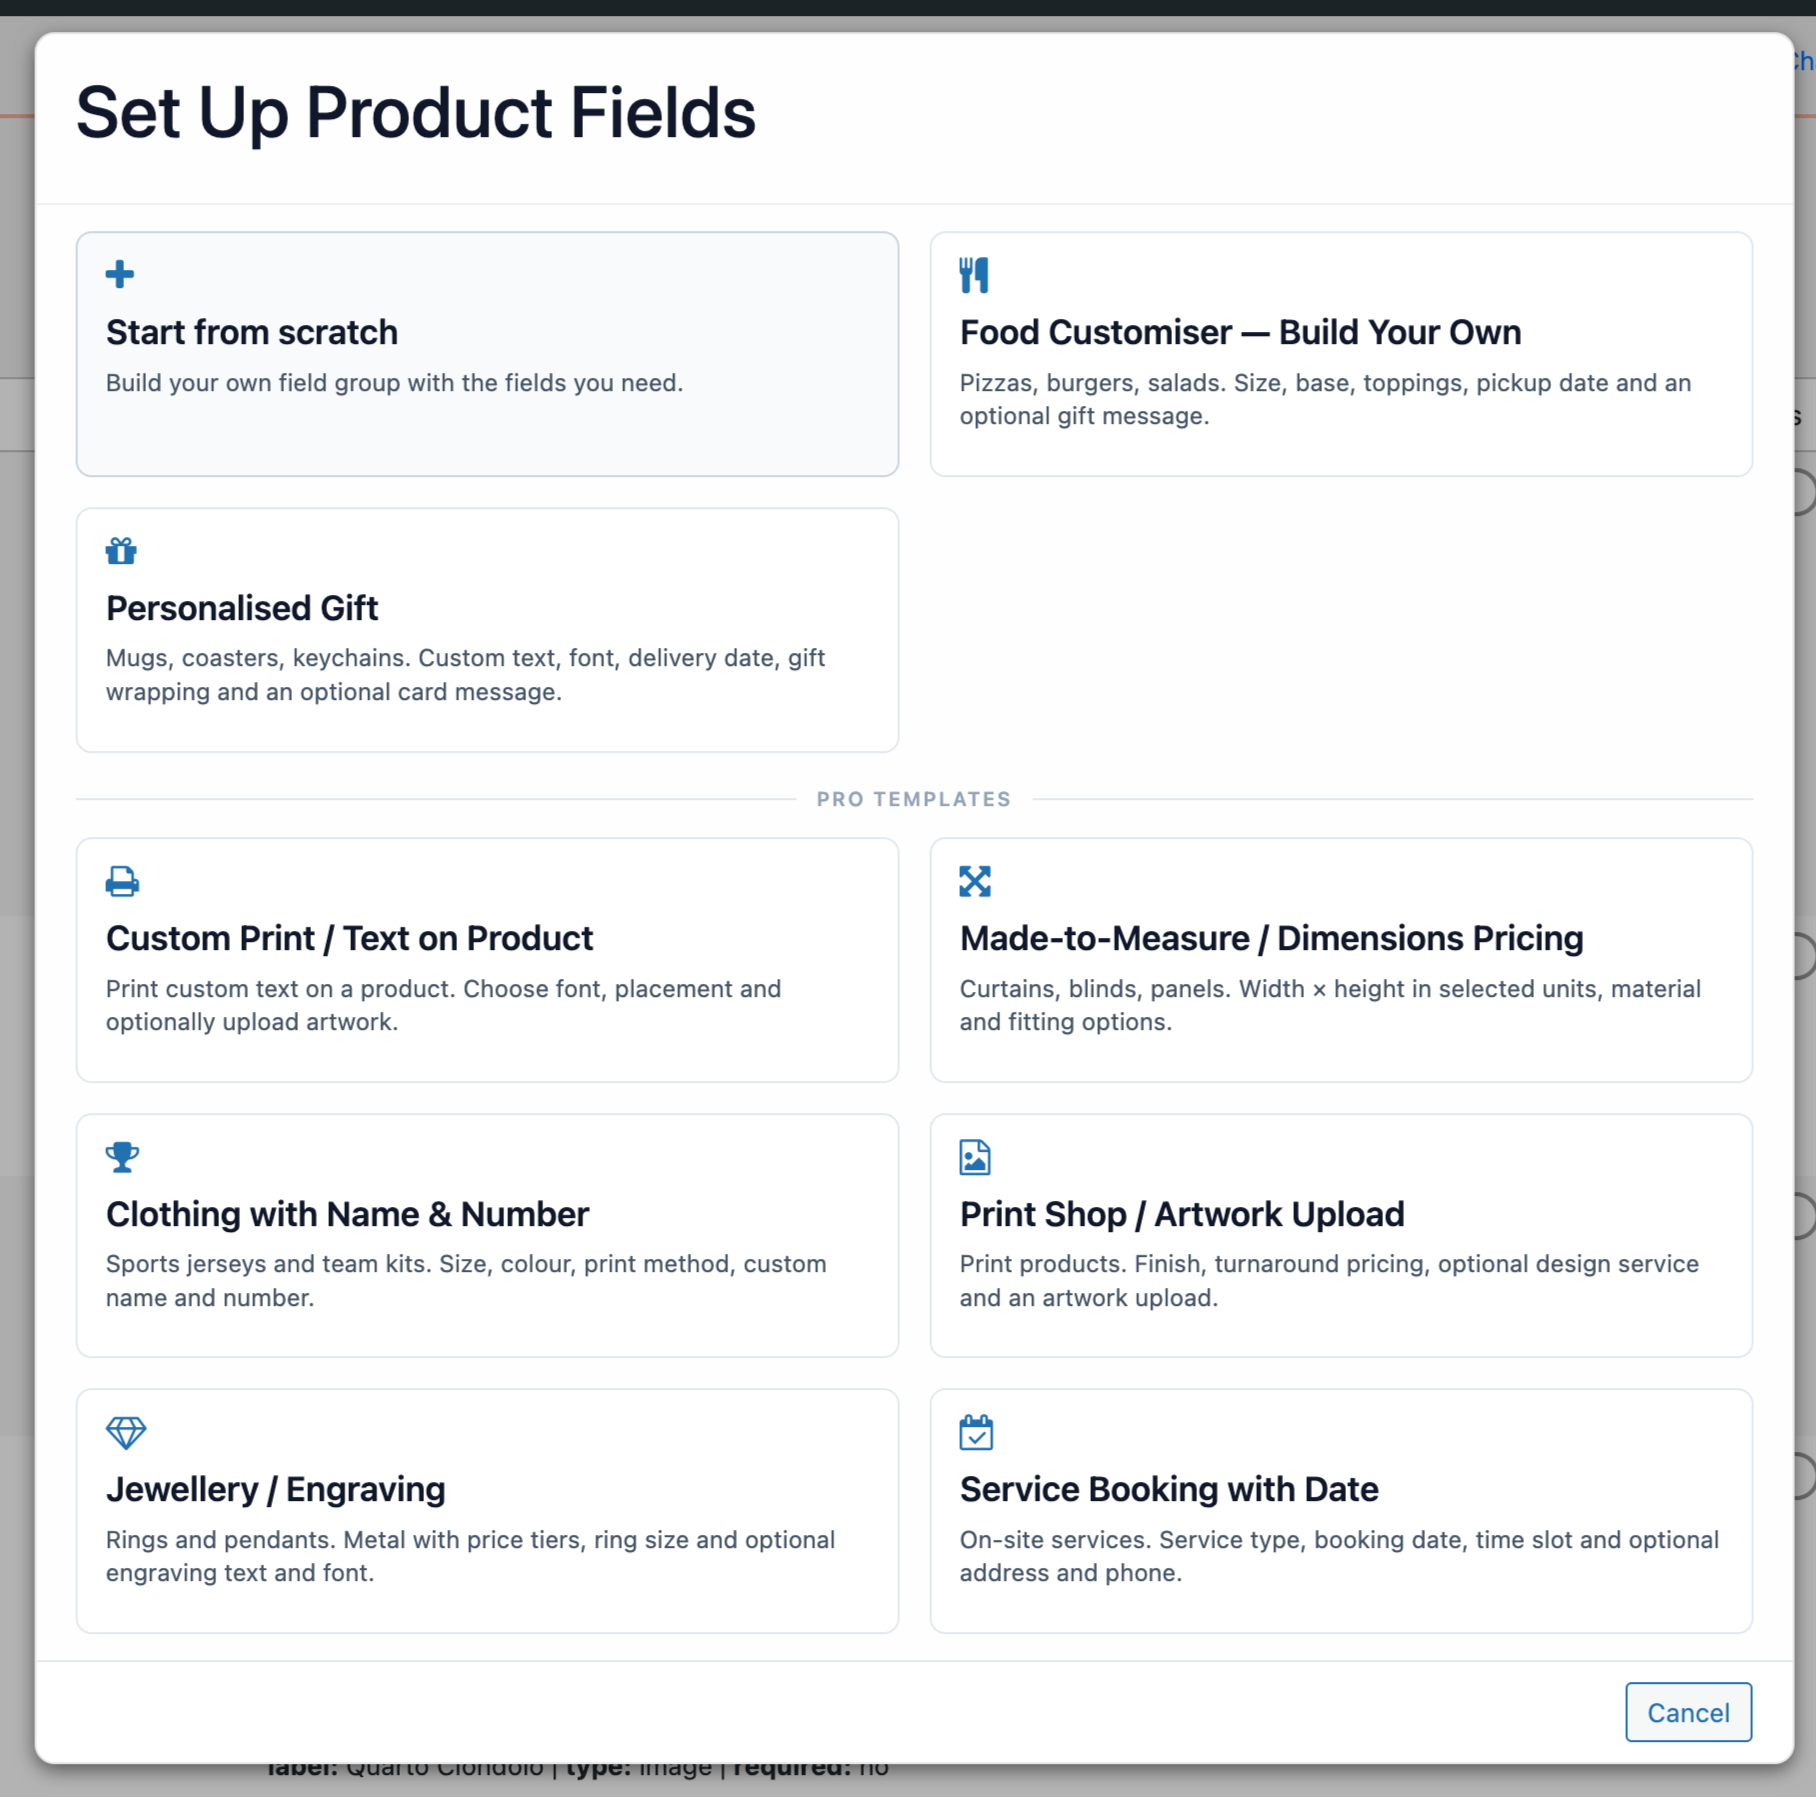
2. Click Add New Group. You can either Start from scratch or choose a curated template preset, such as Food Customiser, personalized gifts, custom print, made-to-measure, clothing name/number, print shop, jewelry engraving, or service booking/date, to pre-fill the group with ready-made fields.
3. Configure the field group in the field editor. Add fields, use the field-type descriptions to choose the right input, and save the group before previewing or attaching it to any product.
4. Use Save & Preview to open a live product-page preview for an assigned product. If the group is not yet assigned, attach it to a product, category, tag, or variation first using the inline attachment selectors (see Attach meta groups to products).
5. If you need to temporarily hide a field group from the storefront without removing its product assignments, use the field-group Enable/Disable toggle at the top of the editor.
💡 Tip: The editor warns you before leaving with unsaved changes, helping prevent accidental loss while editing larger field groups.
Example
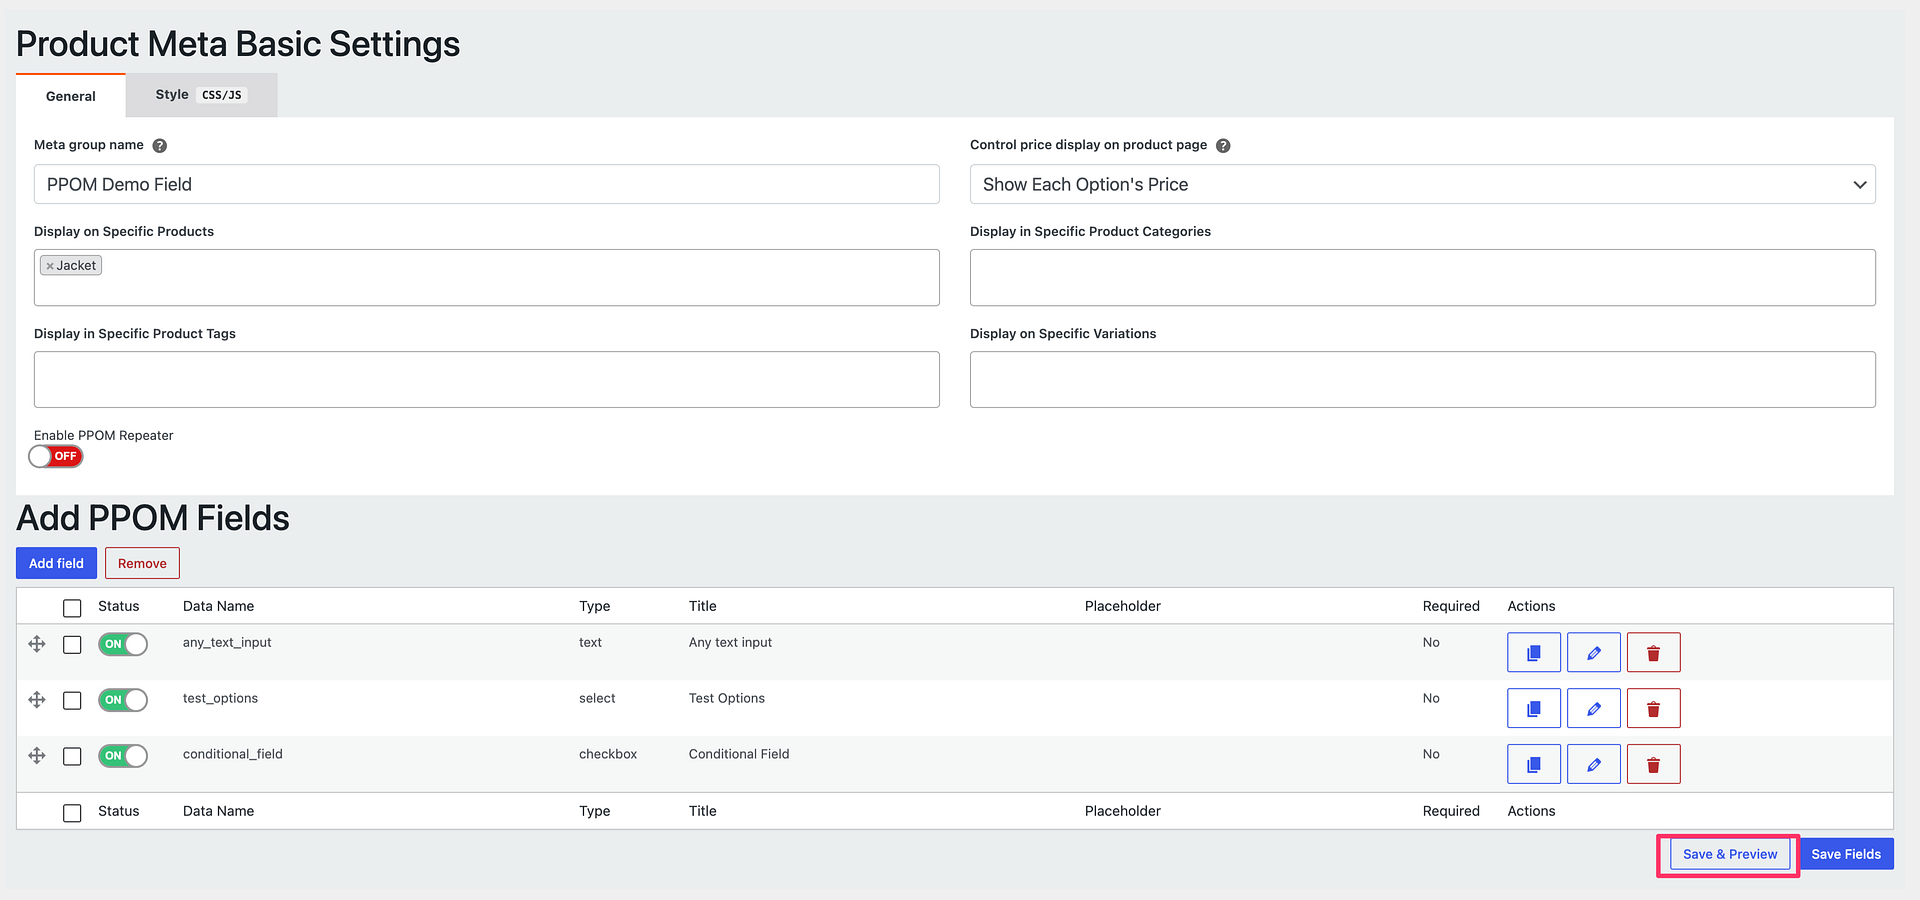
The input fields of the meta group
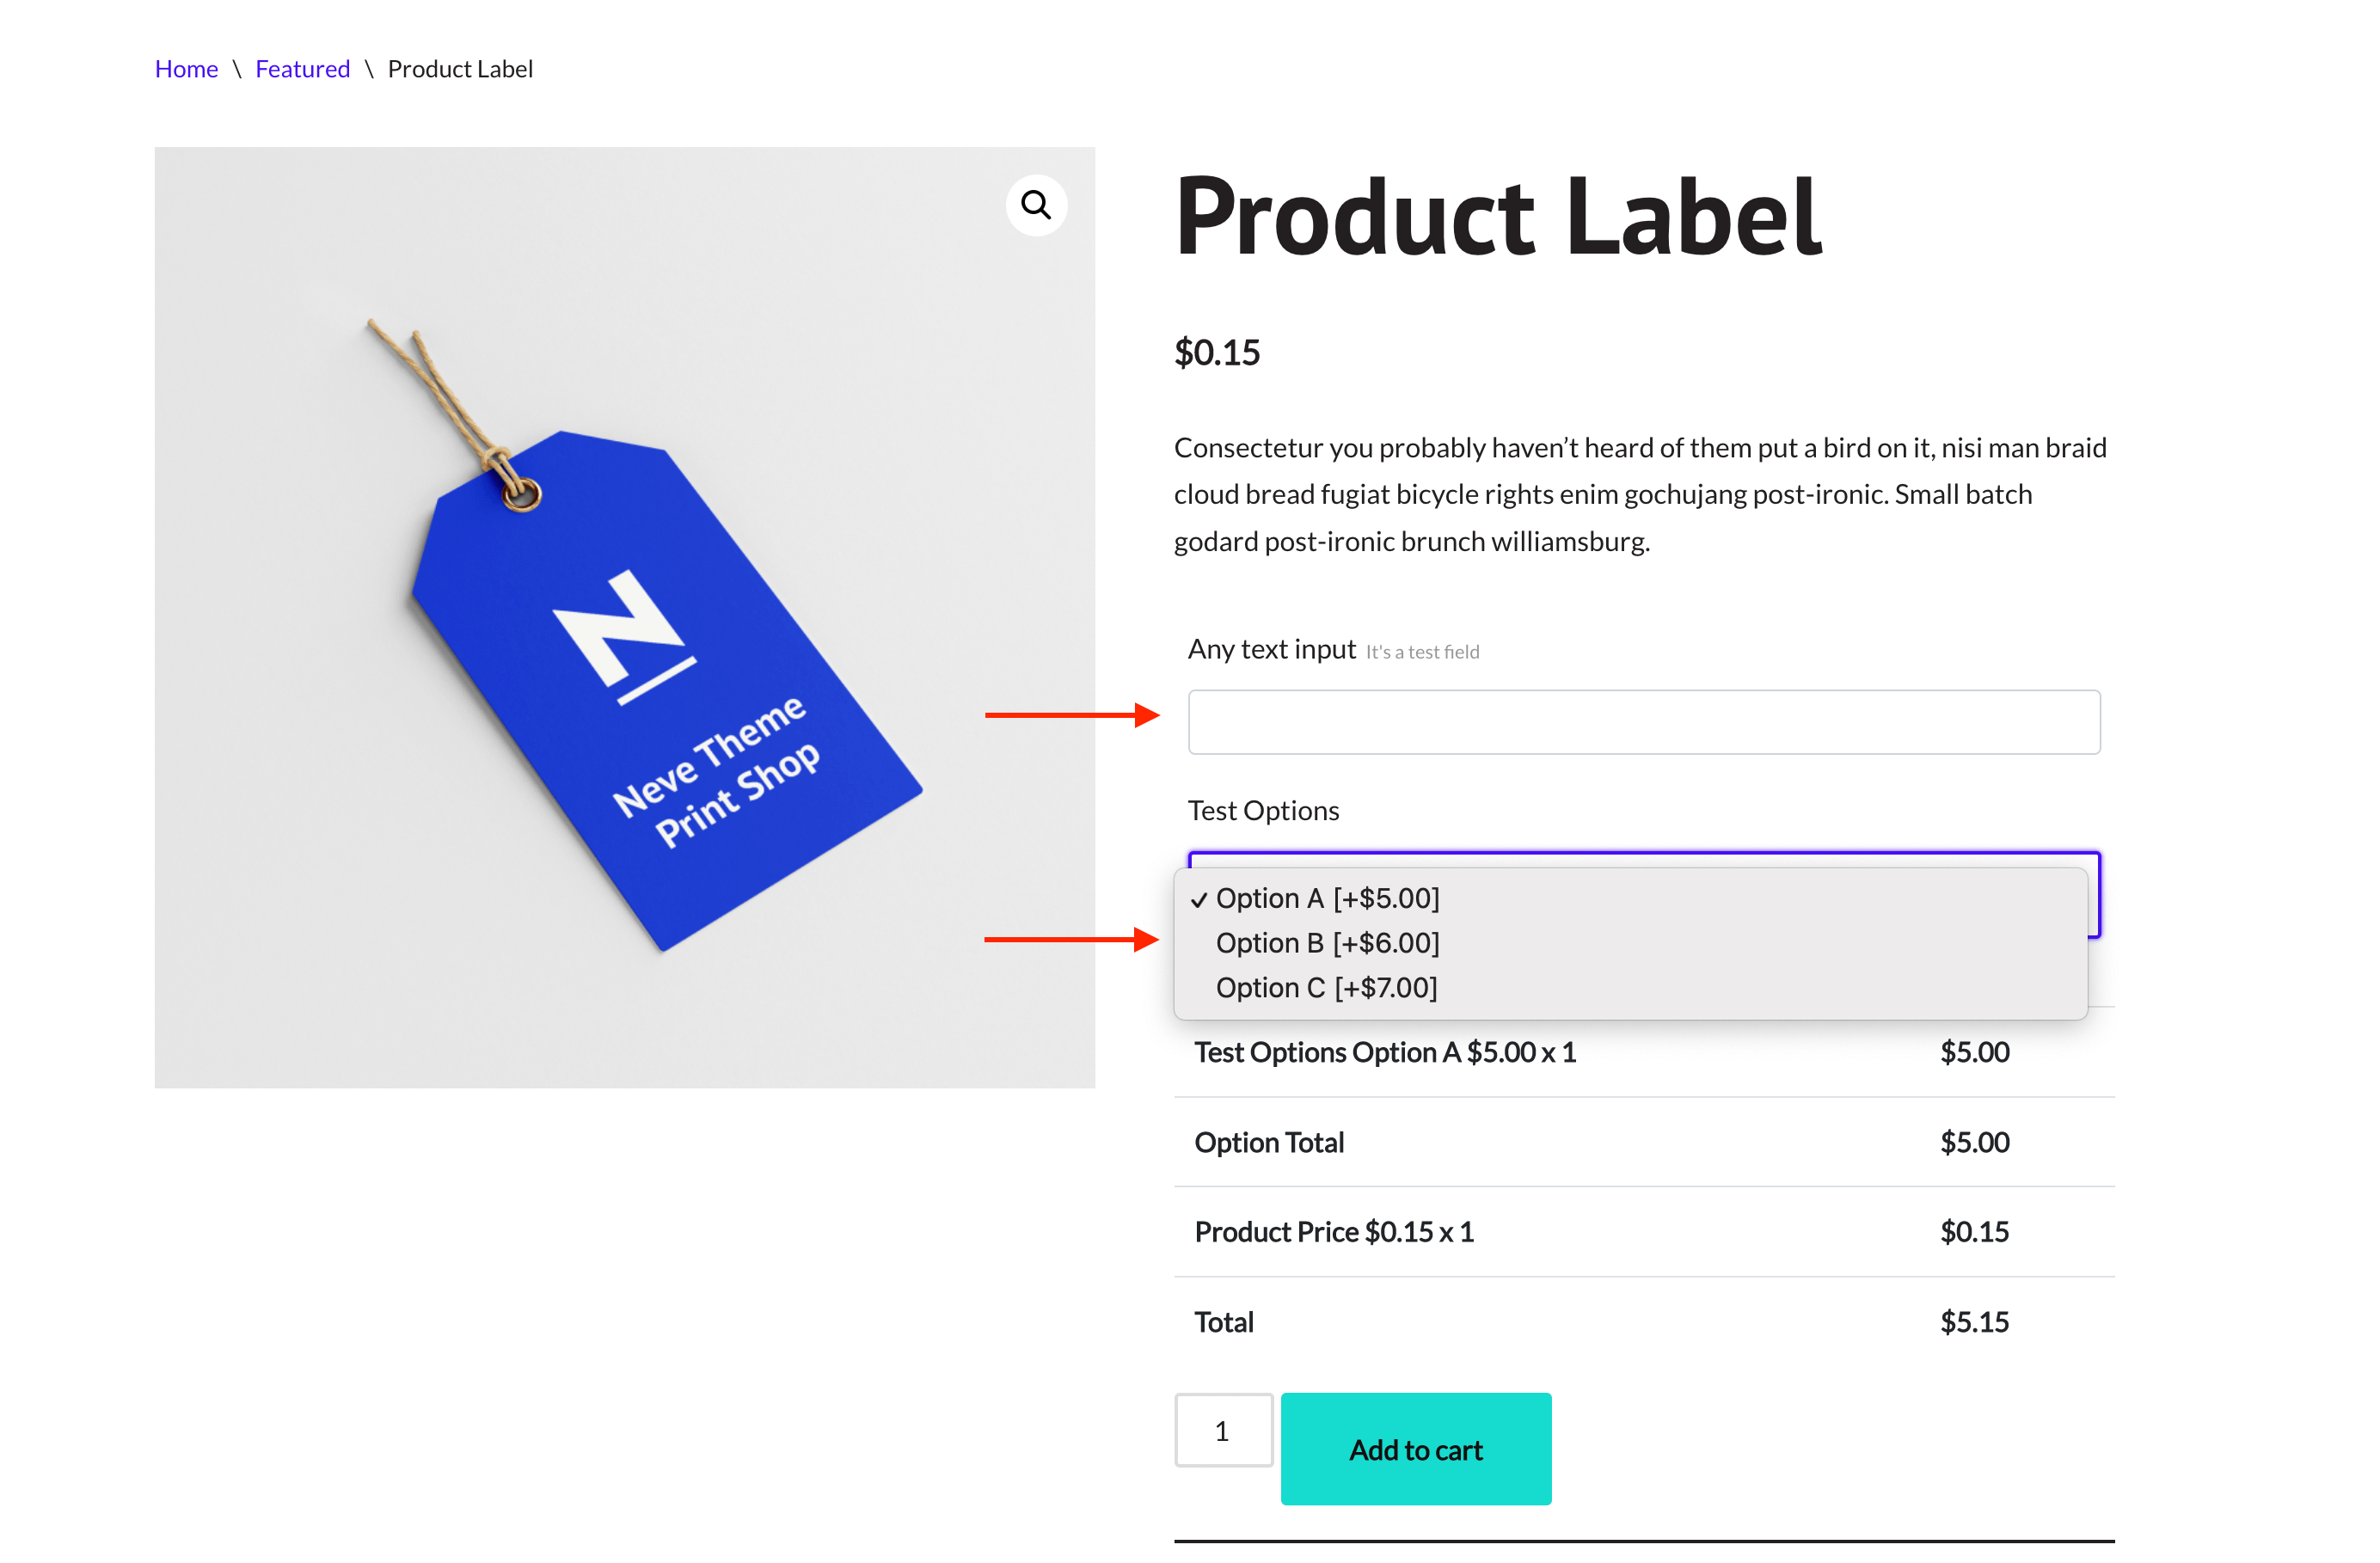
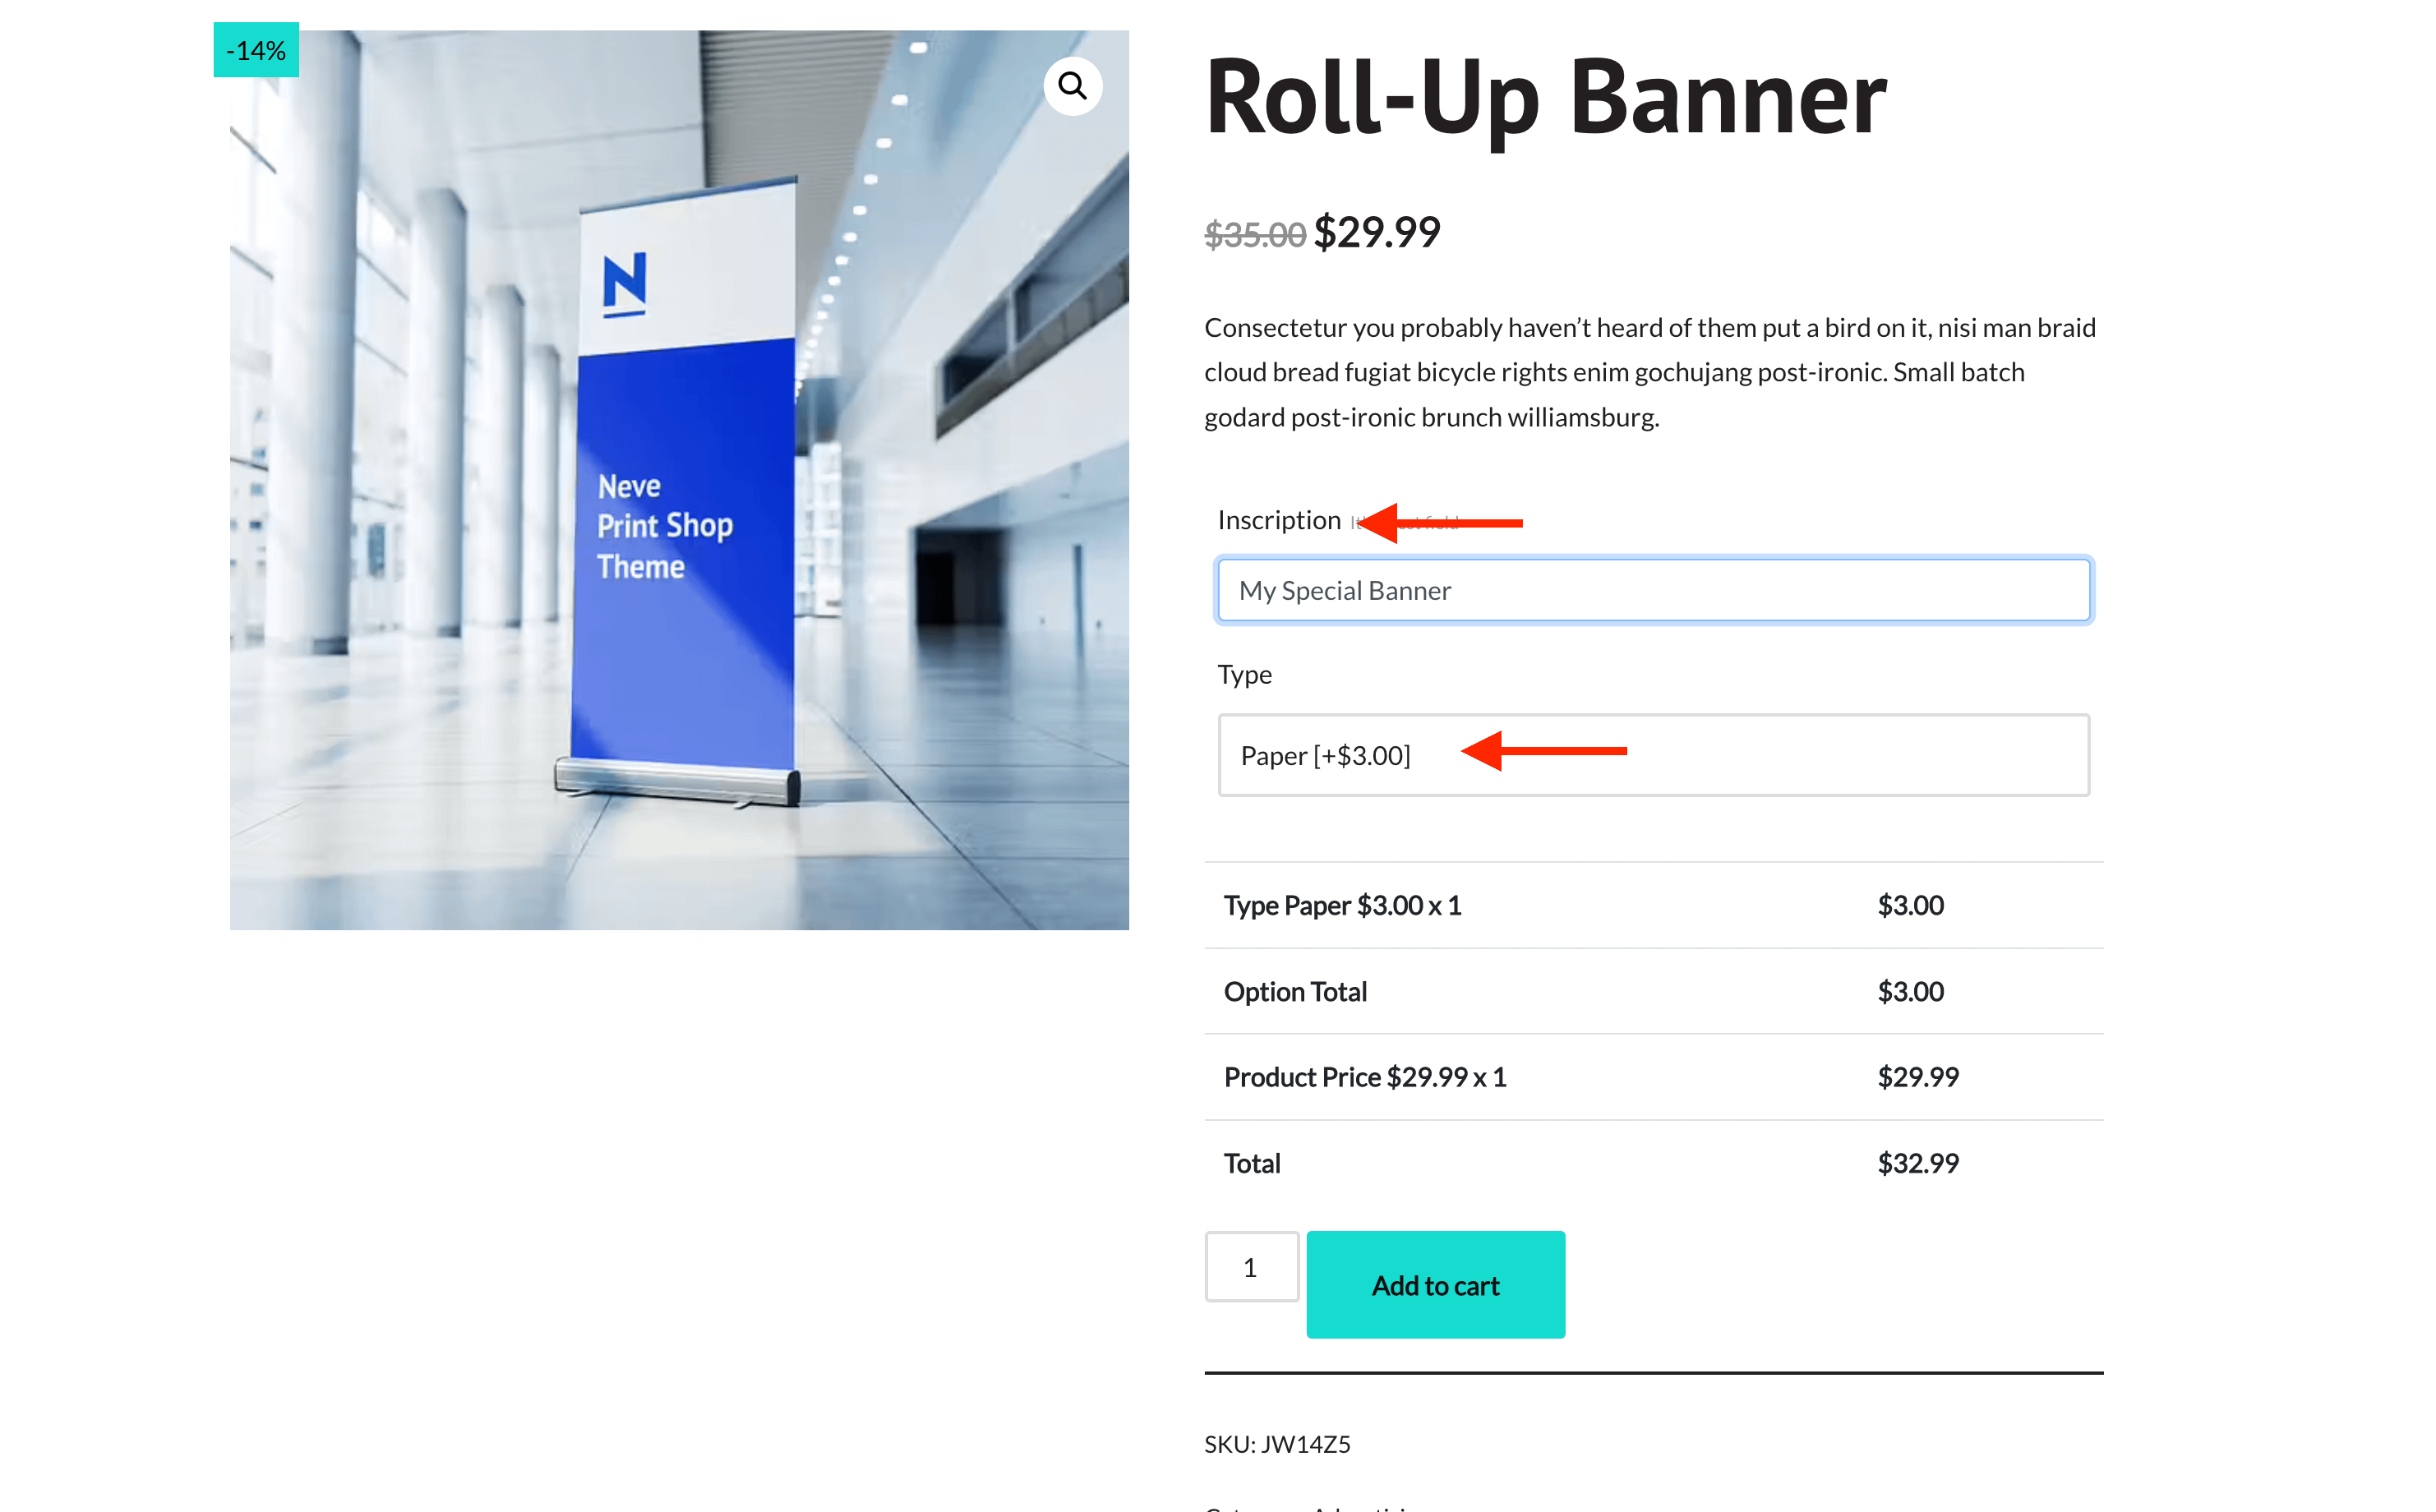
The input fields on the product page
To show a product's PPOM fields on an Elementor page, see How to Display PPOM Fields in Elementor.
An interesting fact is that both the free and pro versions allow for variations in certain input fields. For instance, if you have a product with different weights for each size, you can use input types like
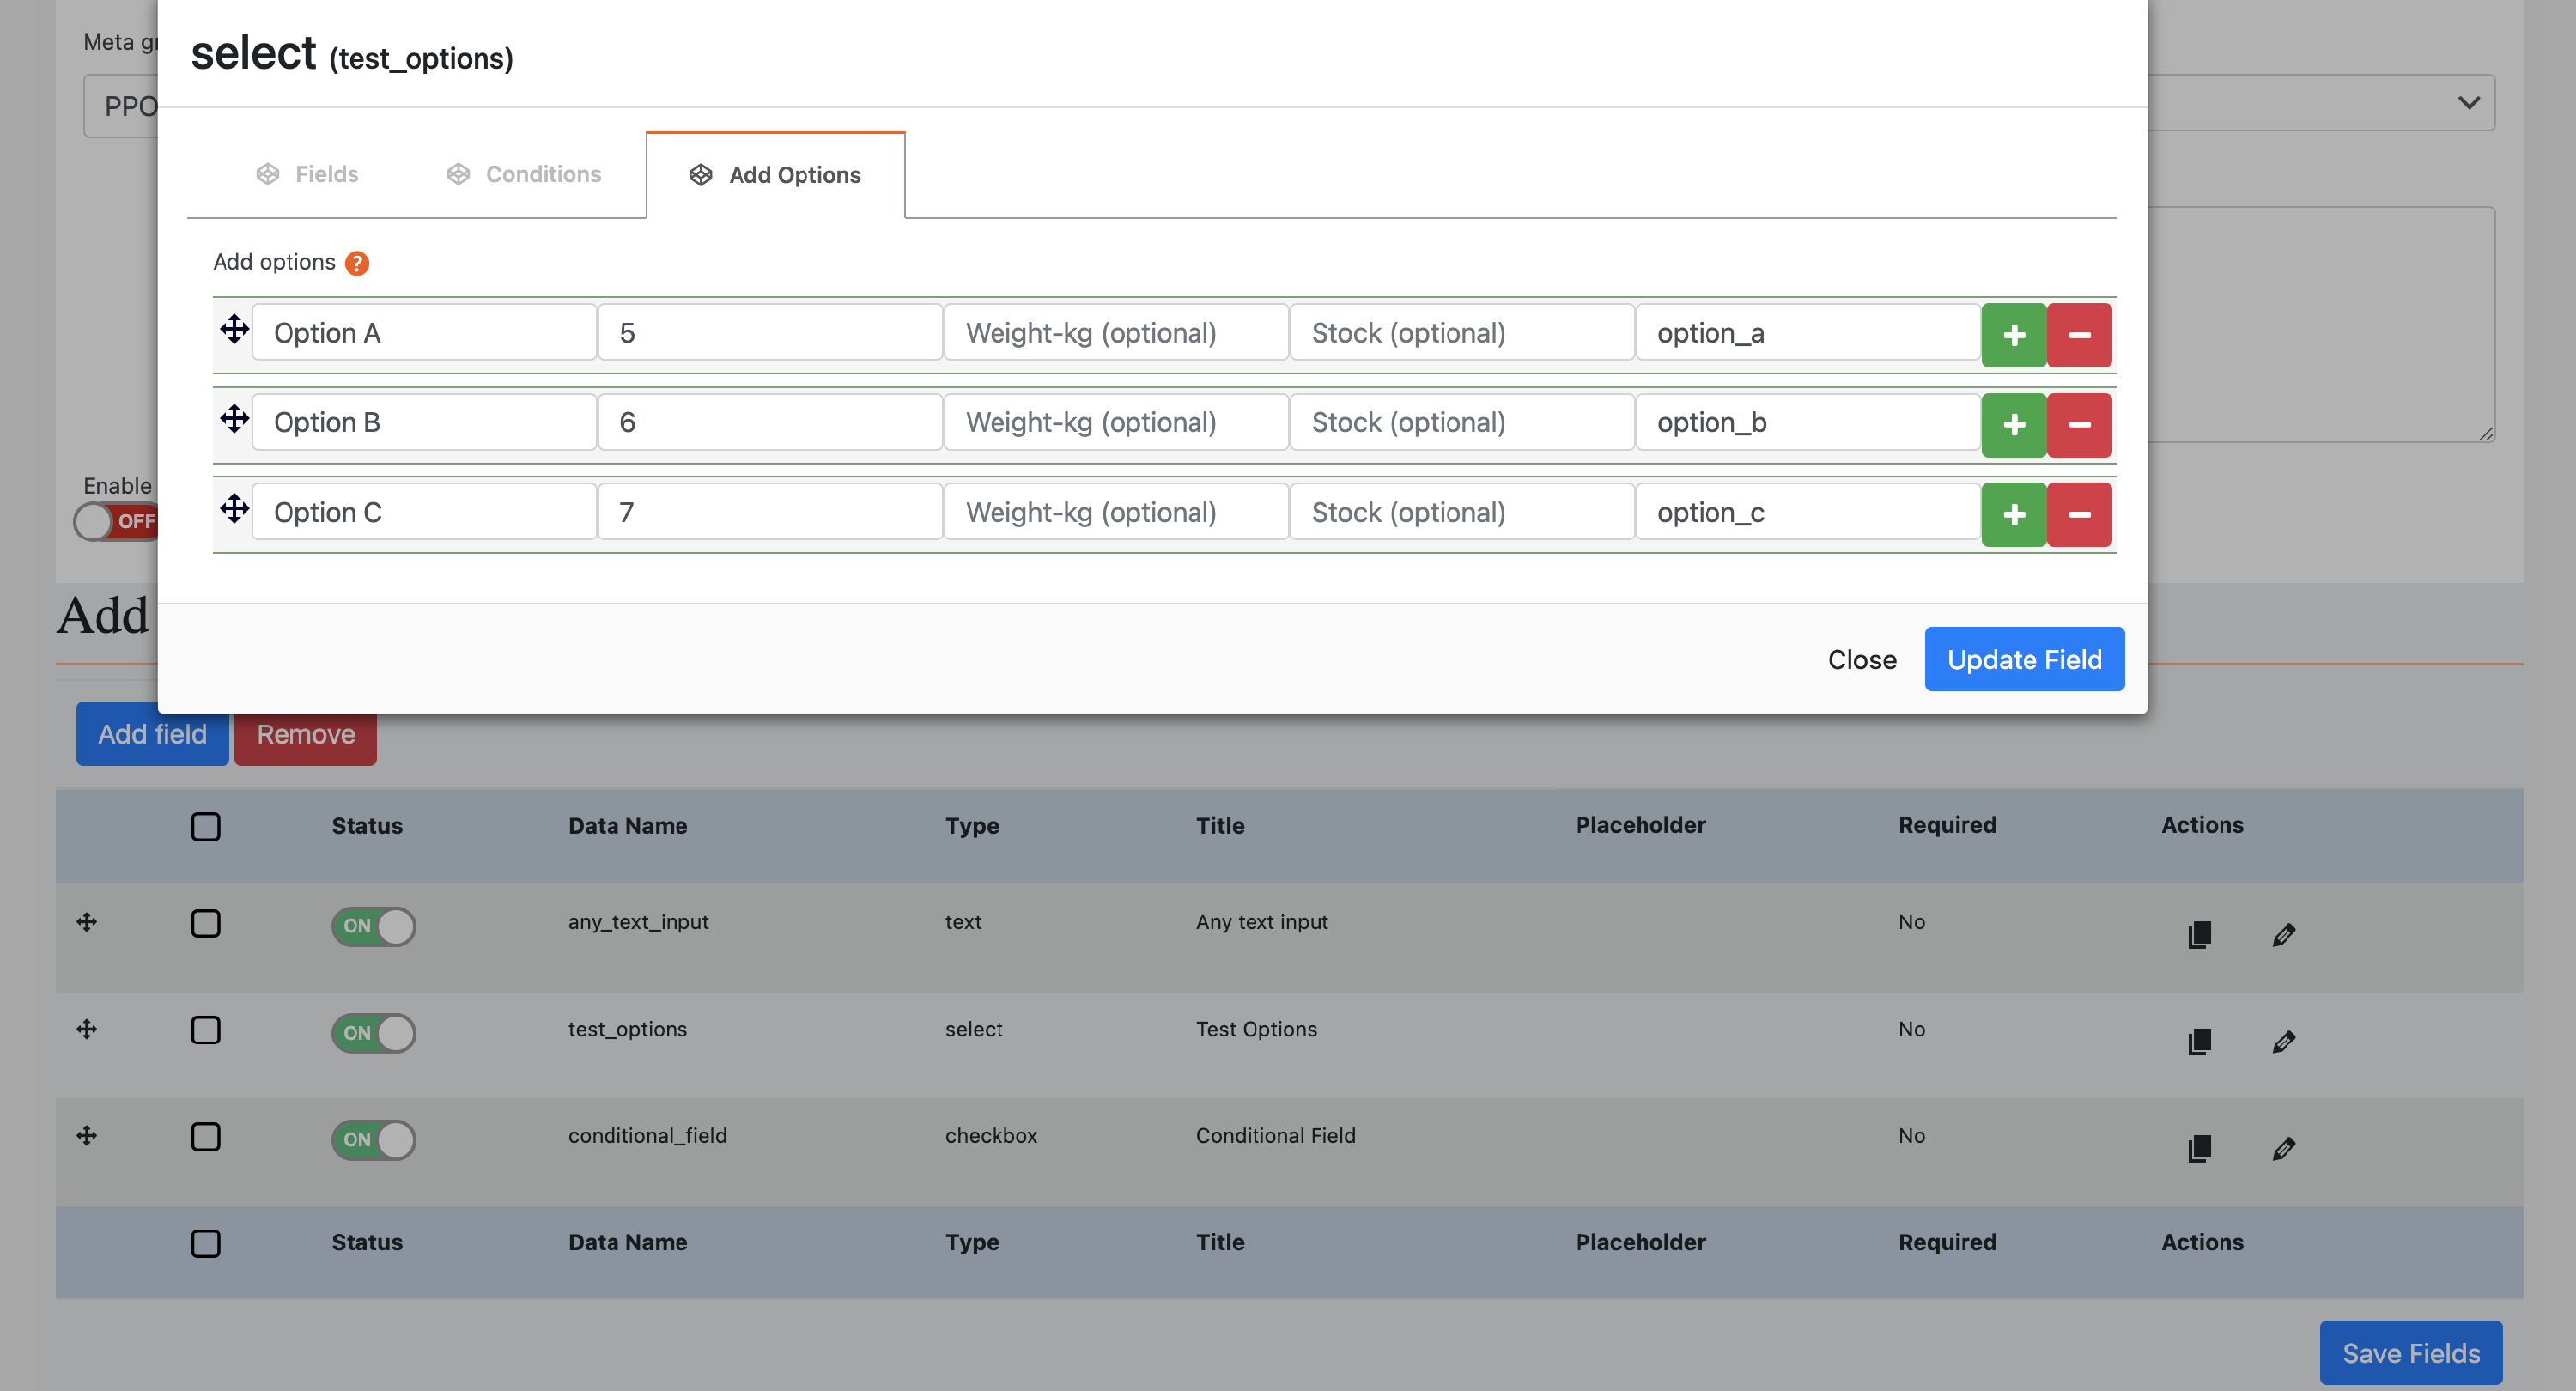
The Add Options tab for Select Input
Basic Settings Description
After creating the meta group, the corresponding panel will appear, and you will have access to customize it directly using the available settings:
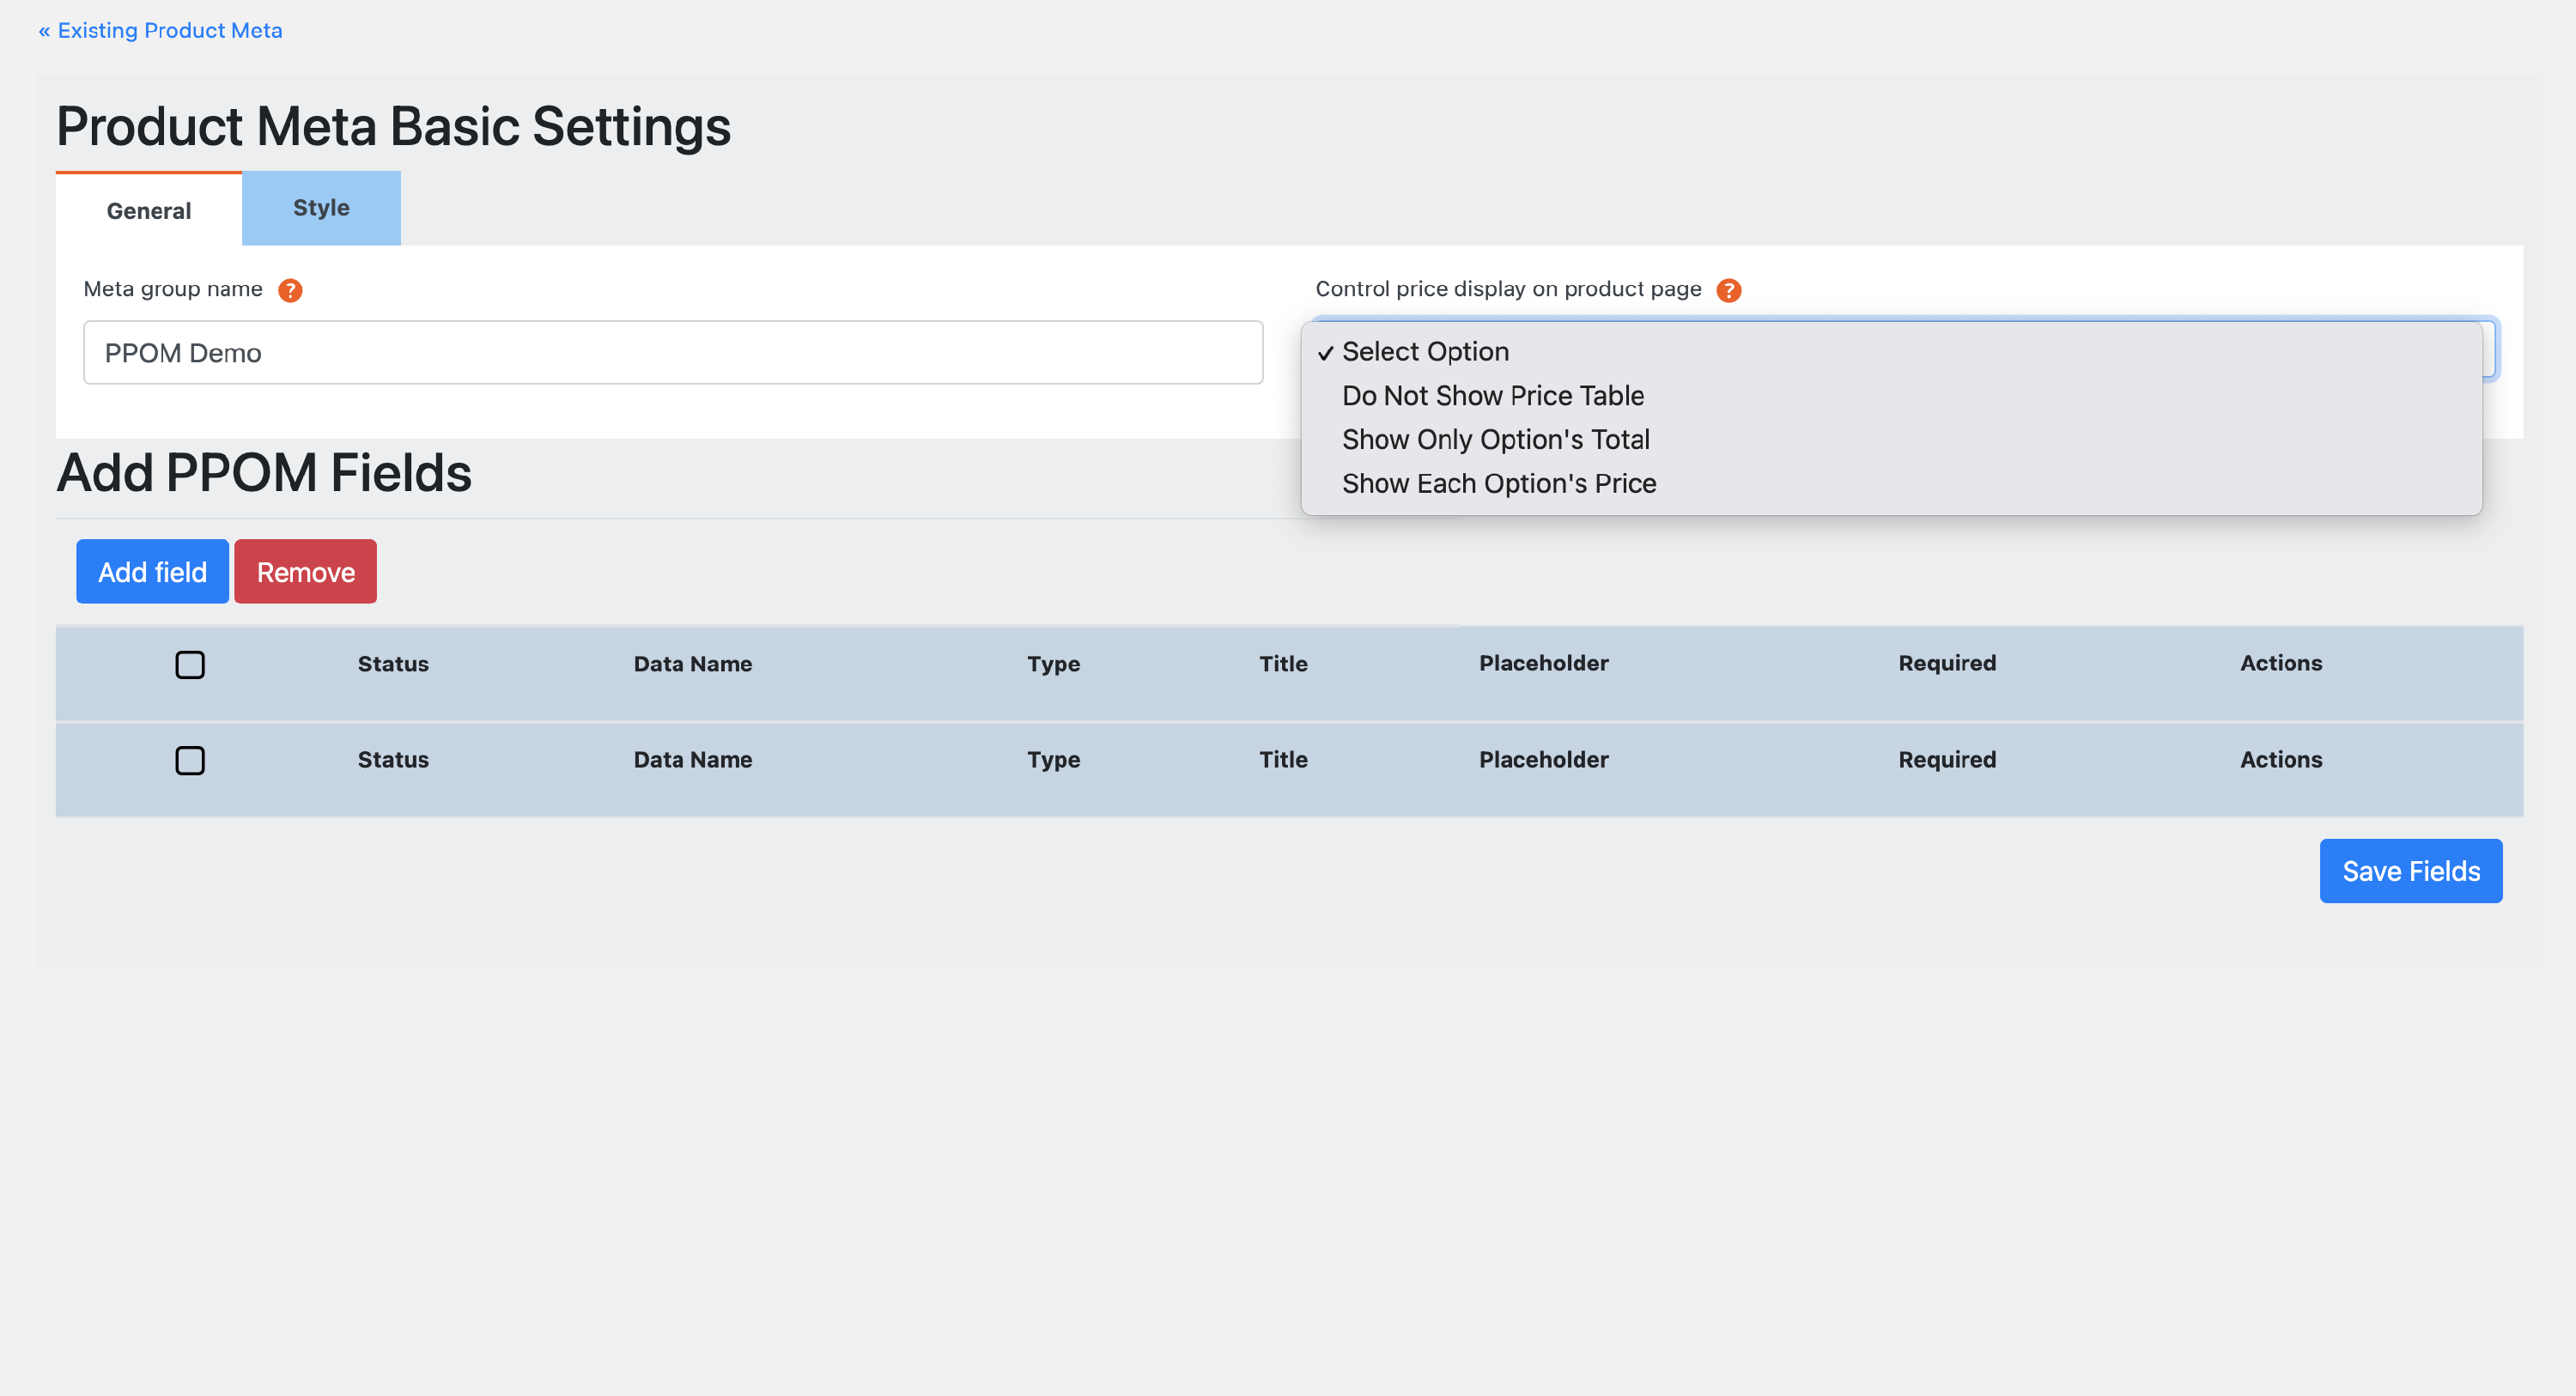
Meta group name - helps you label your field group.
Control price display on the product page
- Do not show price table - prices can be shown under the extra fields just before the Add to Cart button. If you don’t want to show this table and only display the total price, use this option.
We recommend using the following two options when you use options with price. The client will love to see the actual price of the product after adding options.
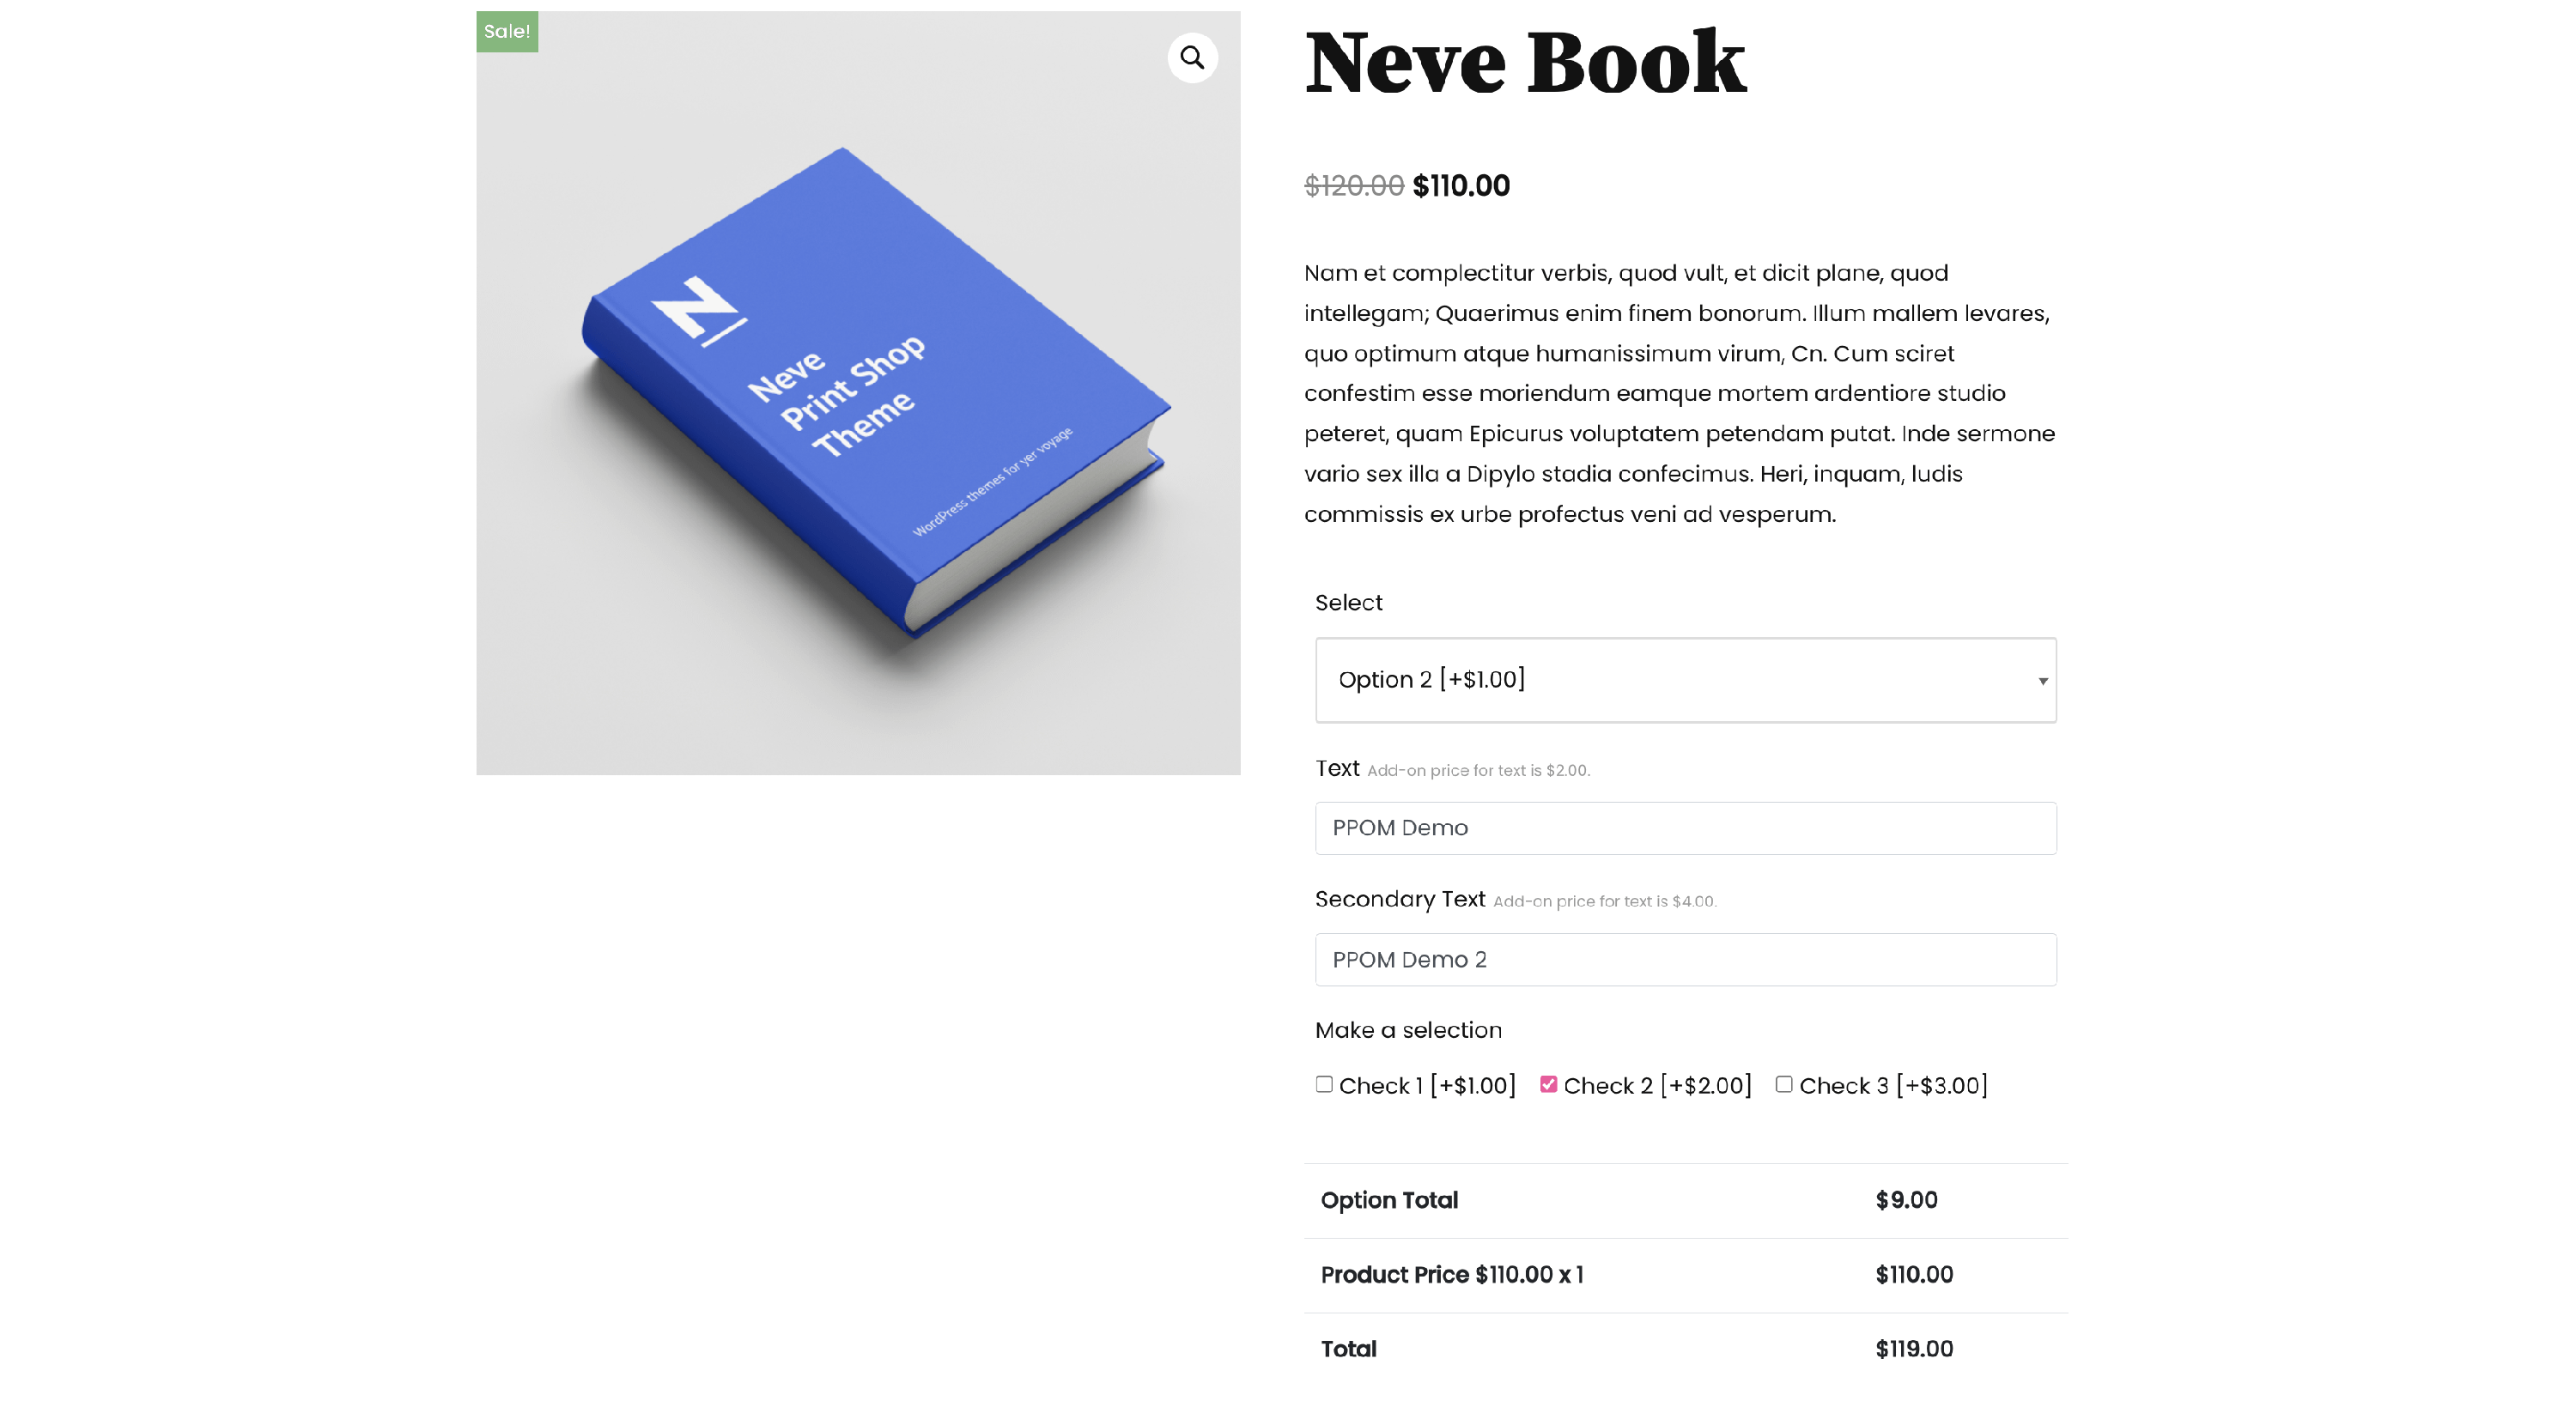
- Show only Option’s Total - as the name suggests, the client will see only the options' total; this is best if you have a long list of options and you want them to see the options' total and the product price separately.
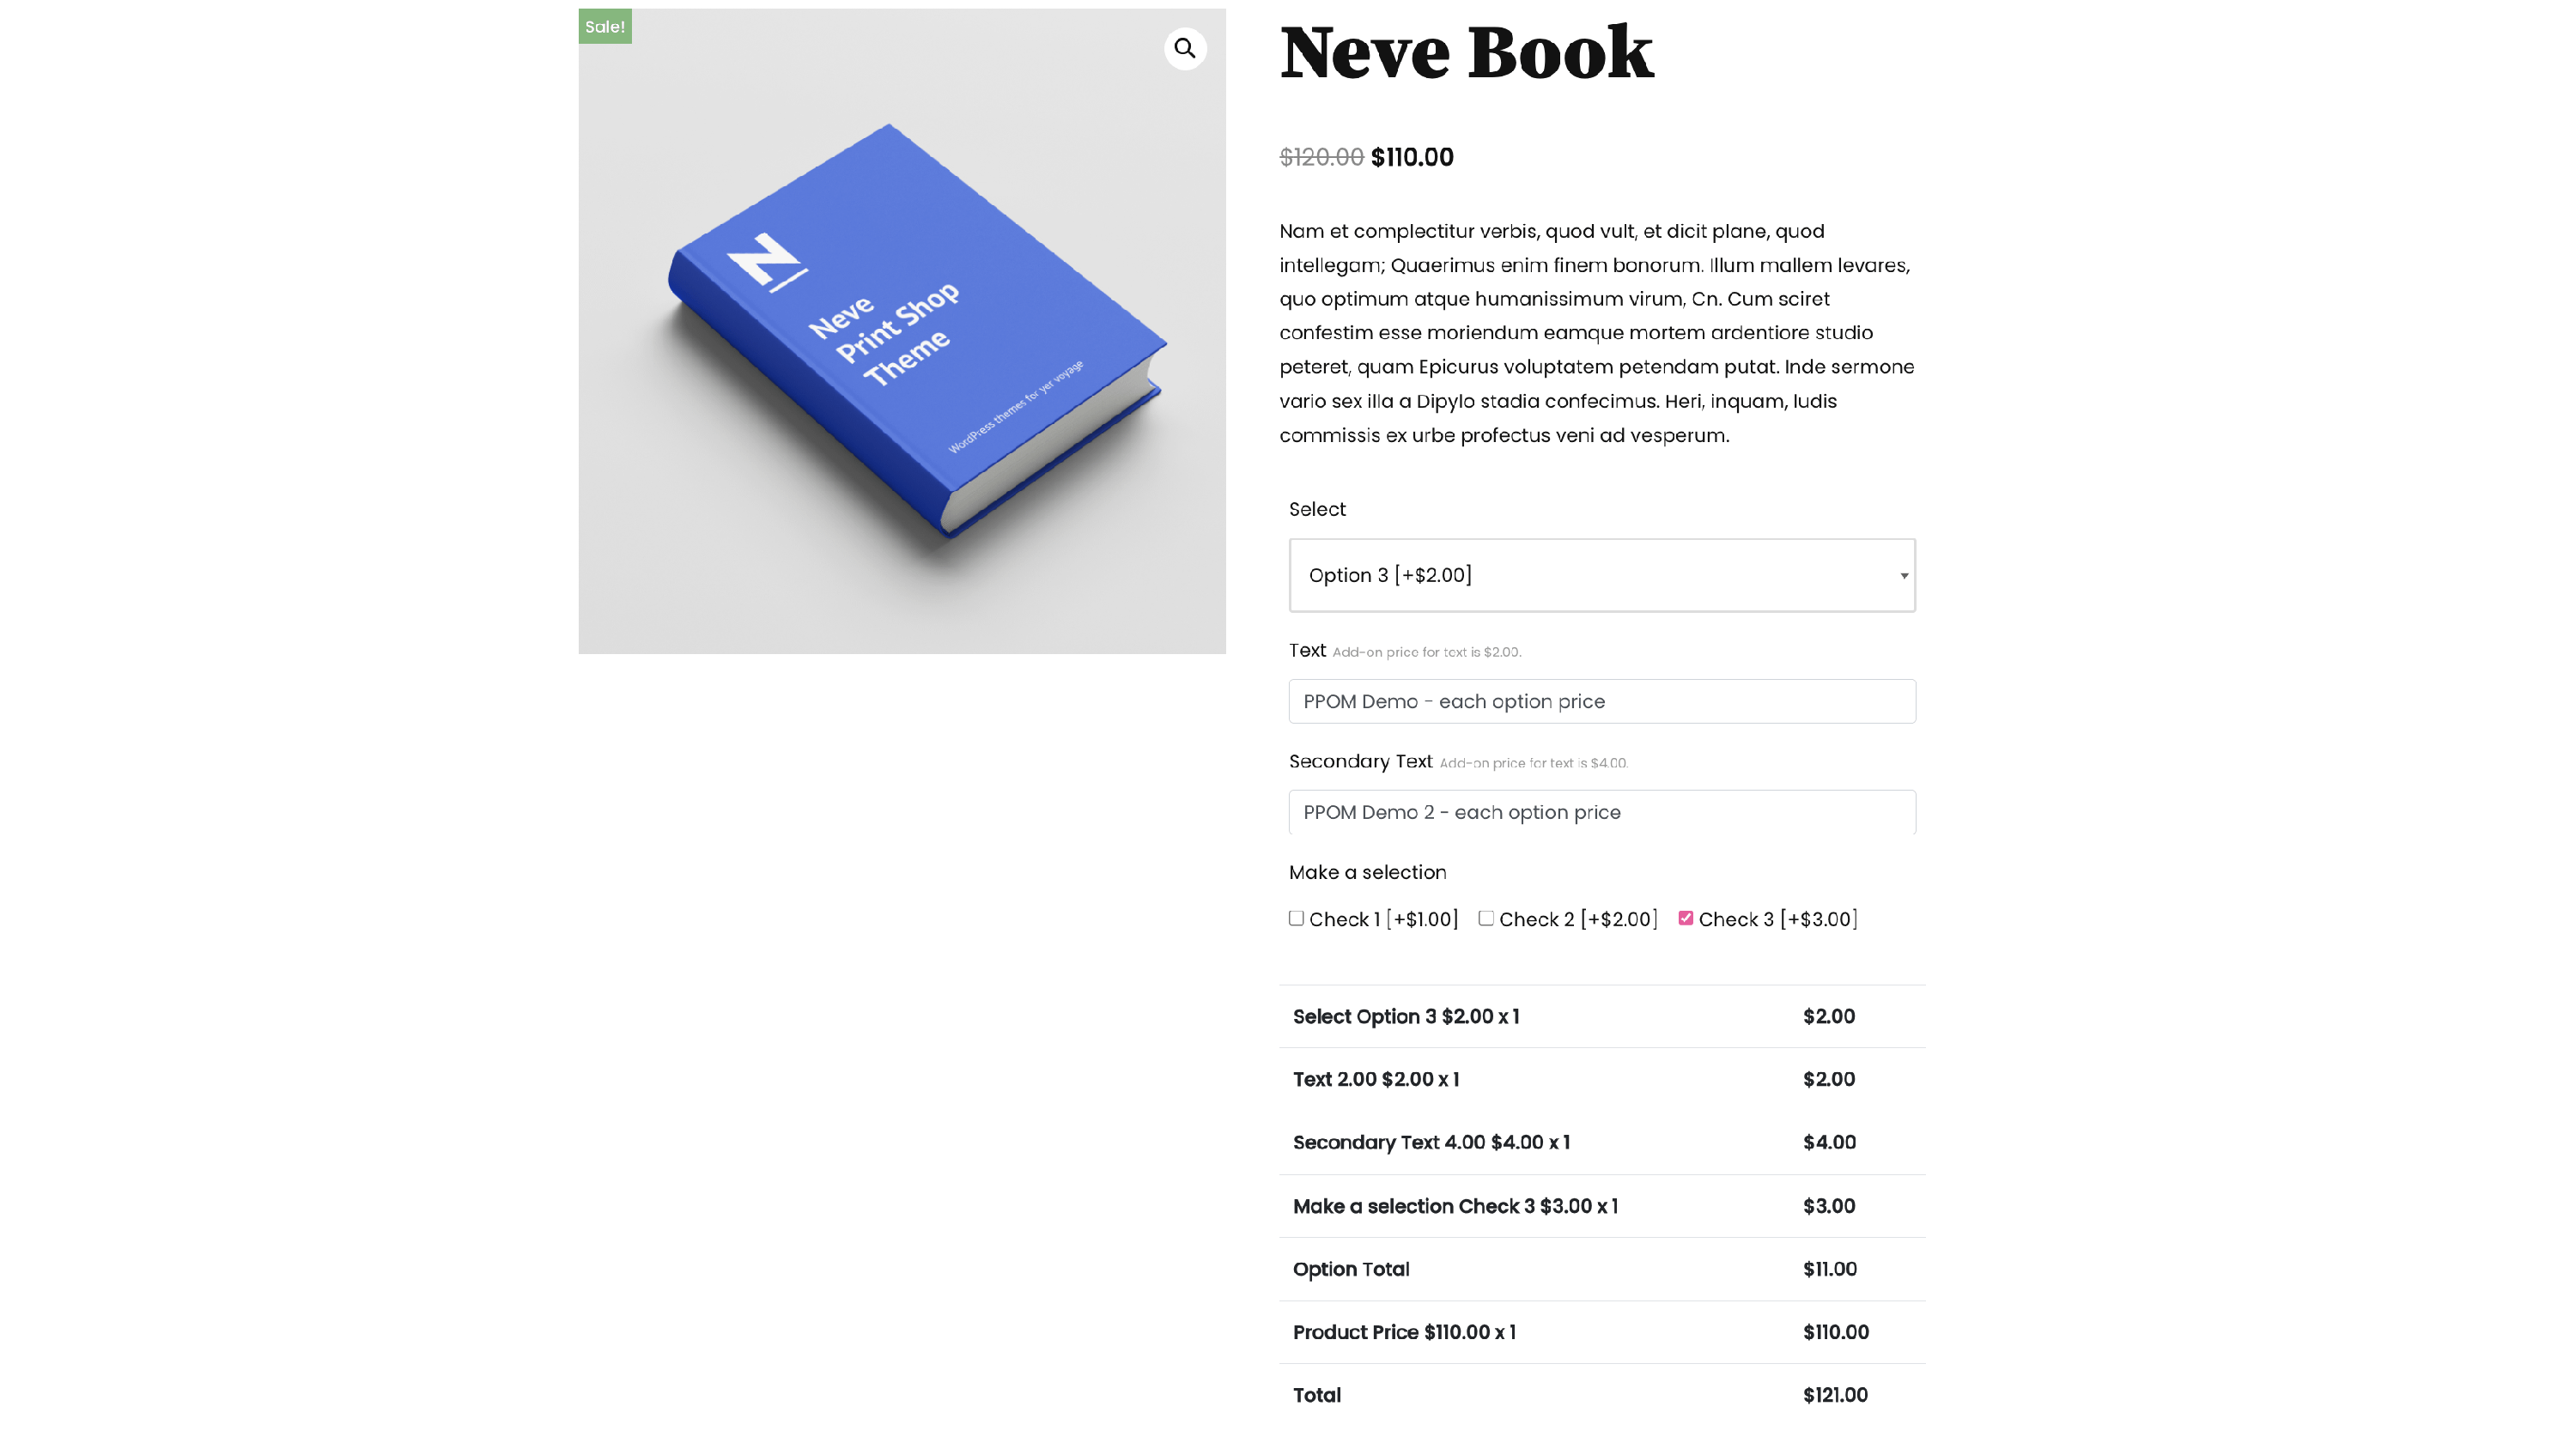
- Show Each Option’s Price - it will show the price against each option recommended when you have fewer options.
Attach to products - this area will be visible only after you save the fields. More details about it are available here.
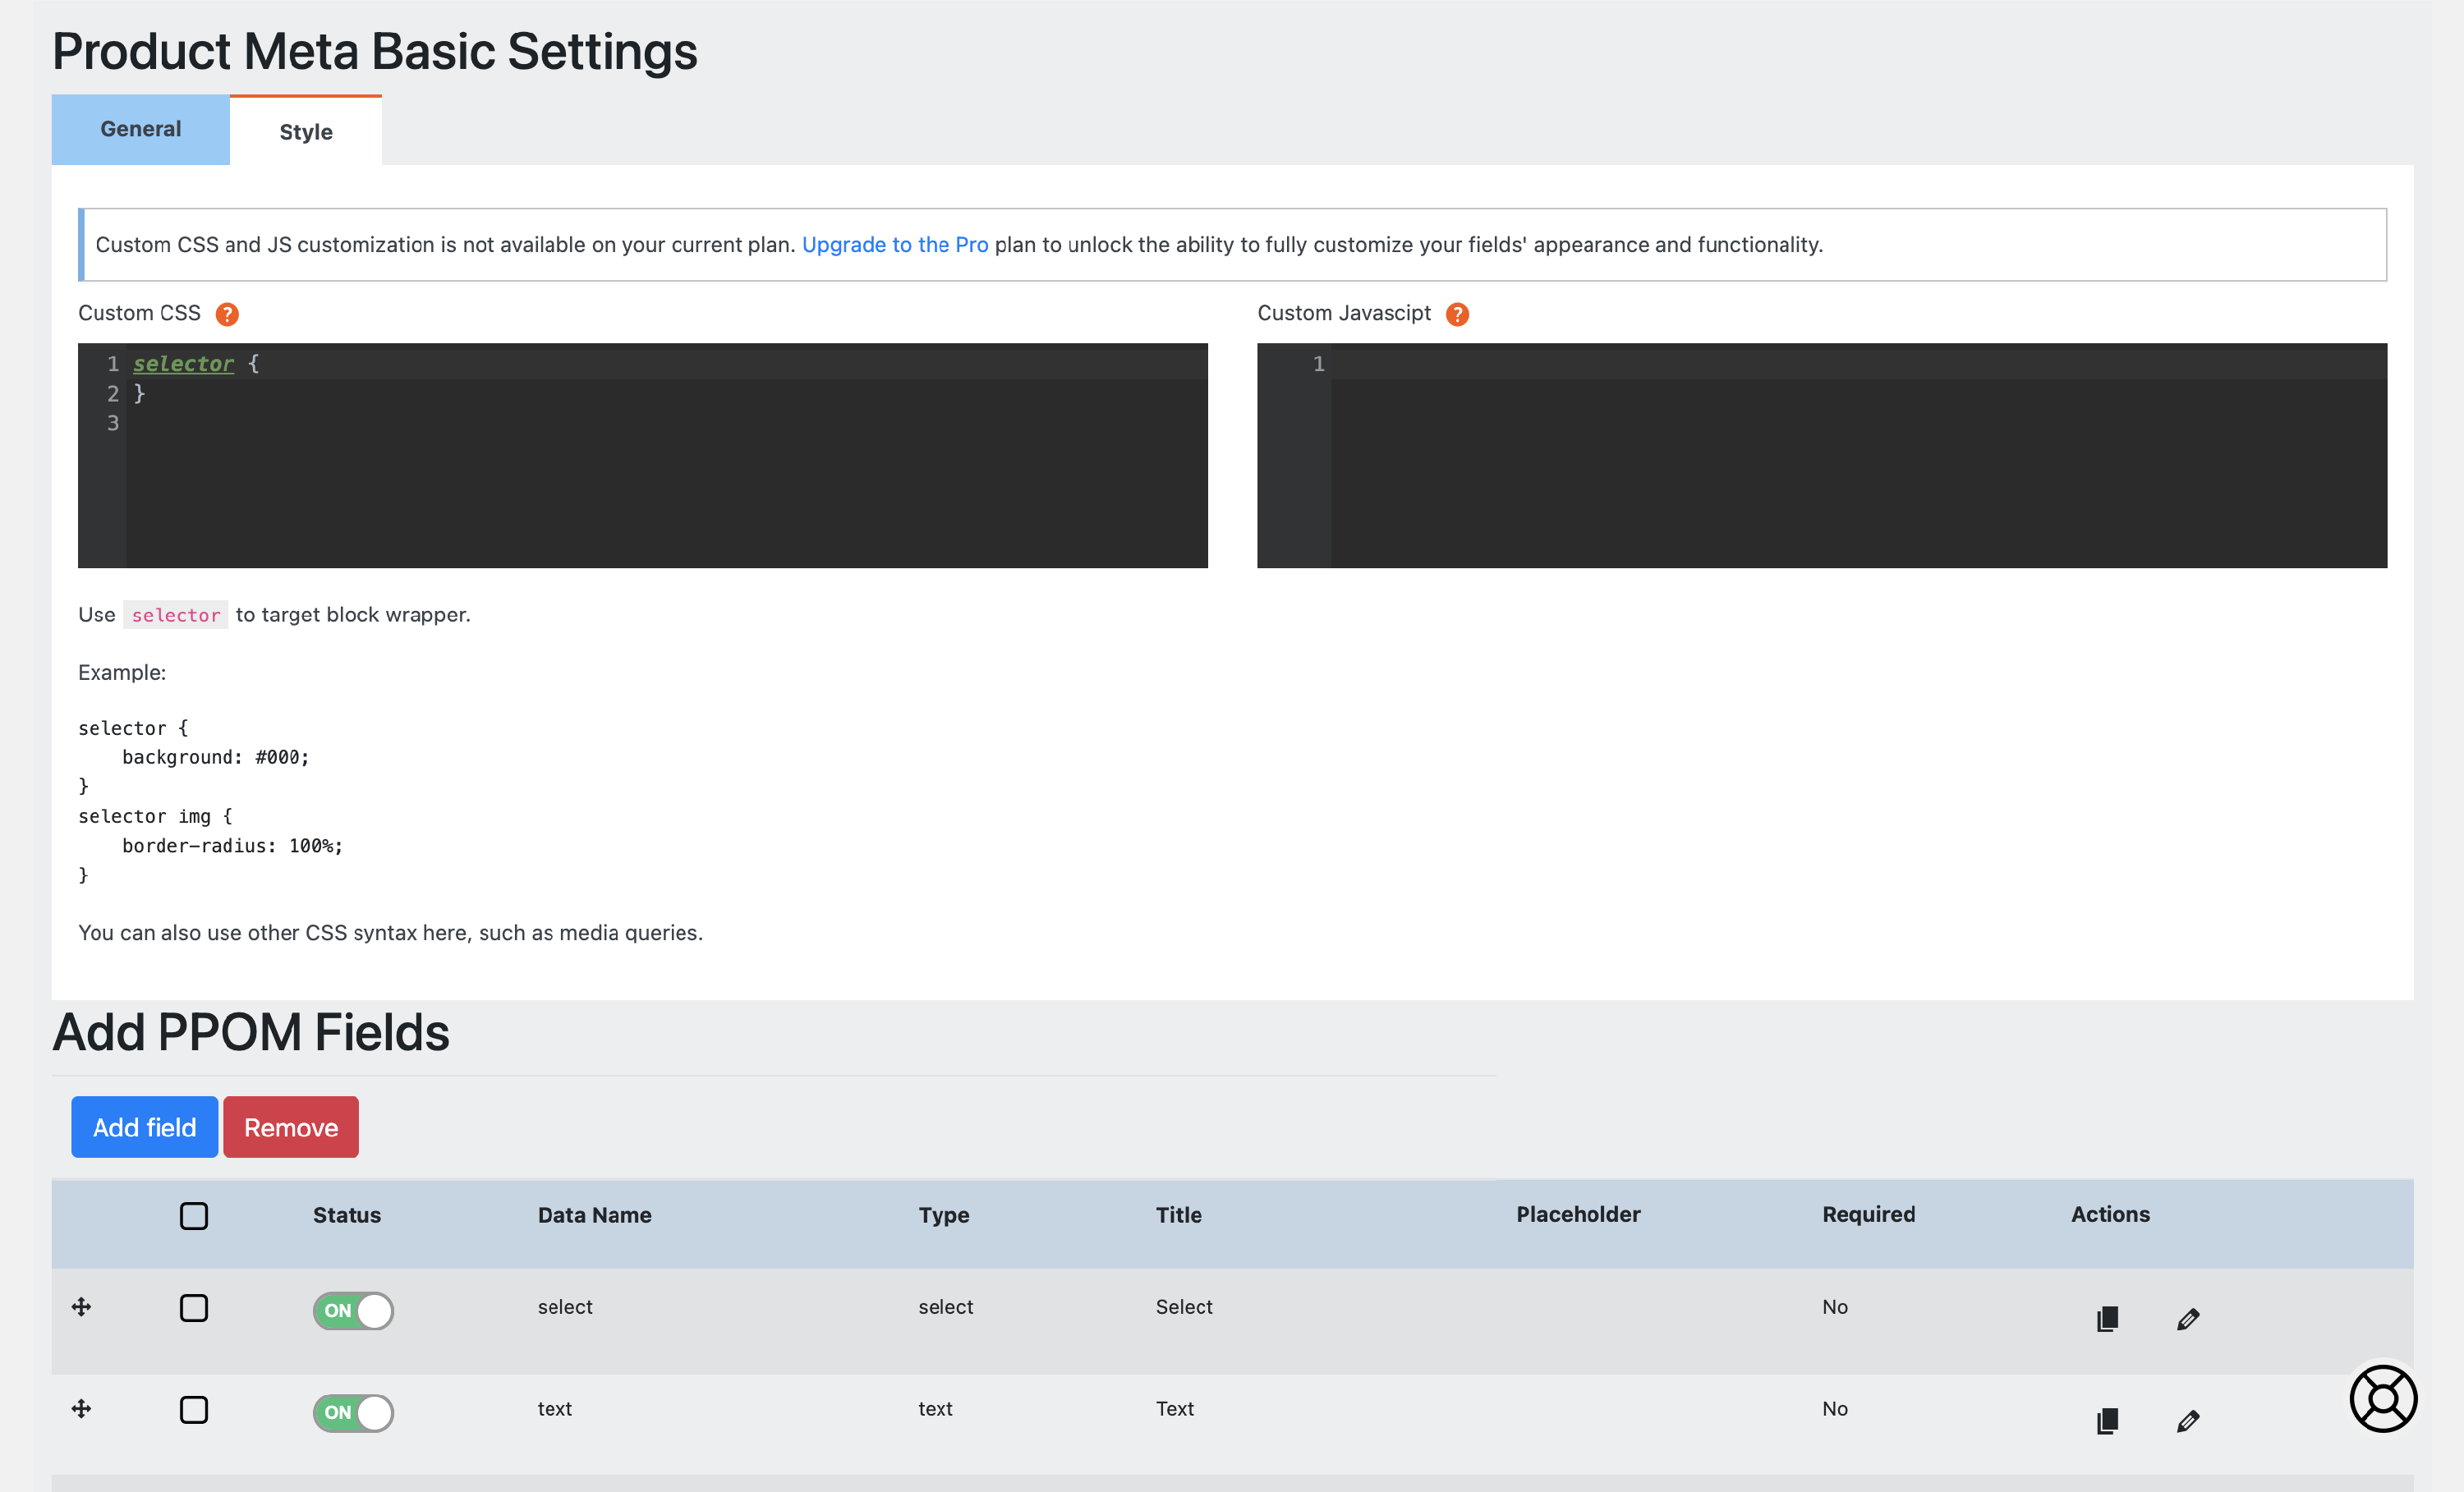
[Pro] Input CSS / Javascript - if you are a designer, you can add your own CSS. See the following for some help with classes.
- input wrapper class: Each input is wrapped inside a div with class ppom-input-_{field_data_name}, w_here {field_data_name} is the field’s data name property
Input Types
The inputs are easily accessible and configurable. They are divided according to the license key you own: 9 input types are available in the free version, and 31 additional input types are available in PPOM Pro.
Input types you cannot use yet appear locked in the field picker, with a badge showing the minimum plan that unlocks them: Essential, Plus, or VIP. Most Pro input types are included in Essential, and a few require Plus or VIP. For the full breakdown, see What is the Difference between PPOM Free and PPOM PRO?.
| Free Input Fields | Pro Input Fields |
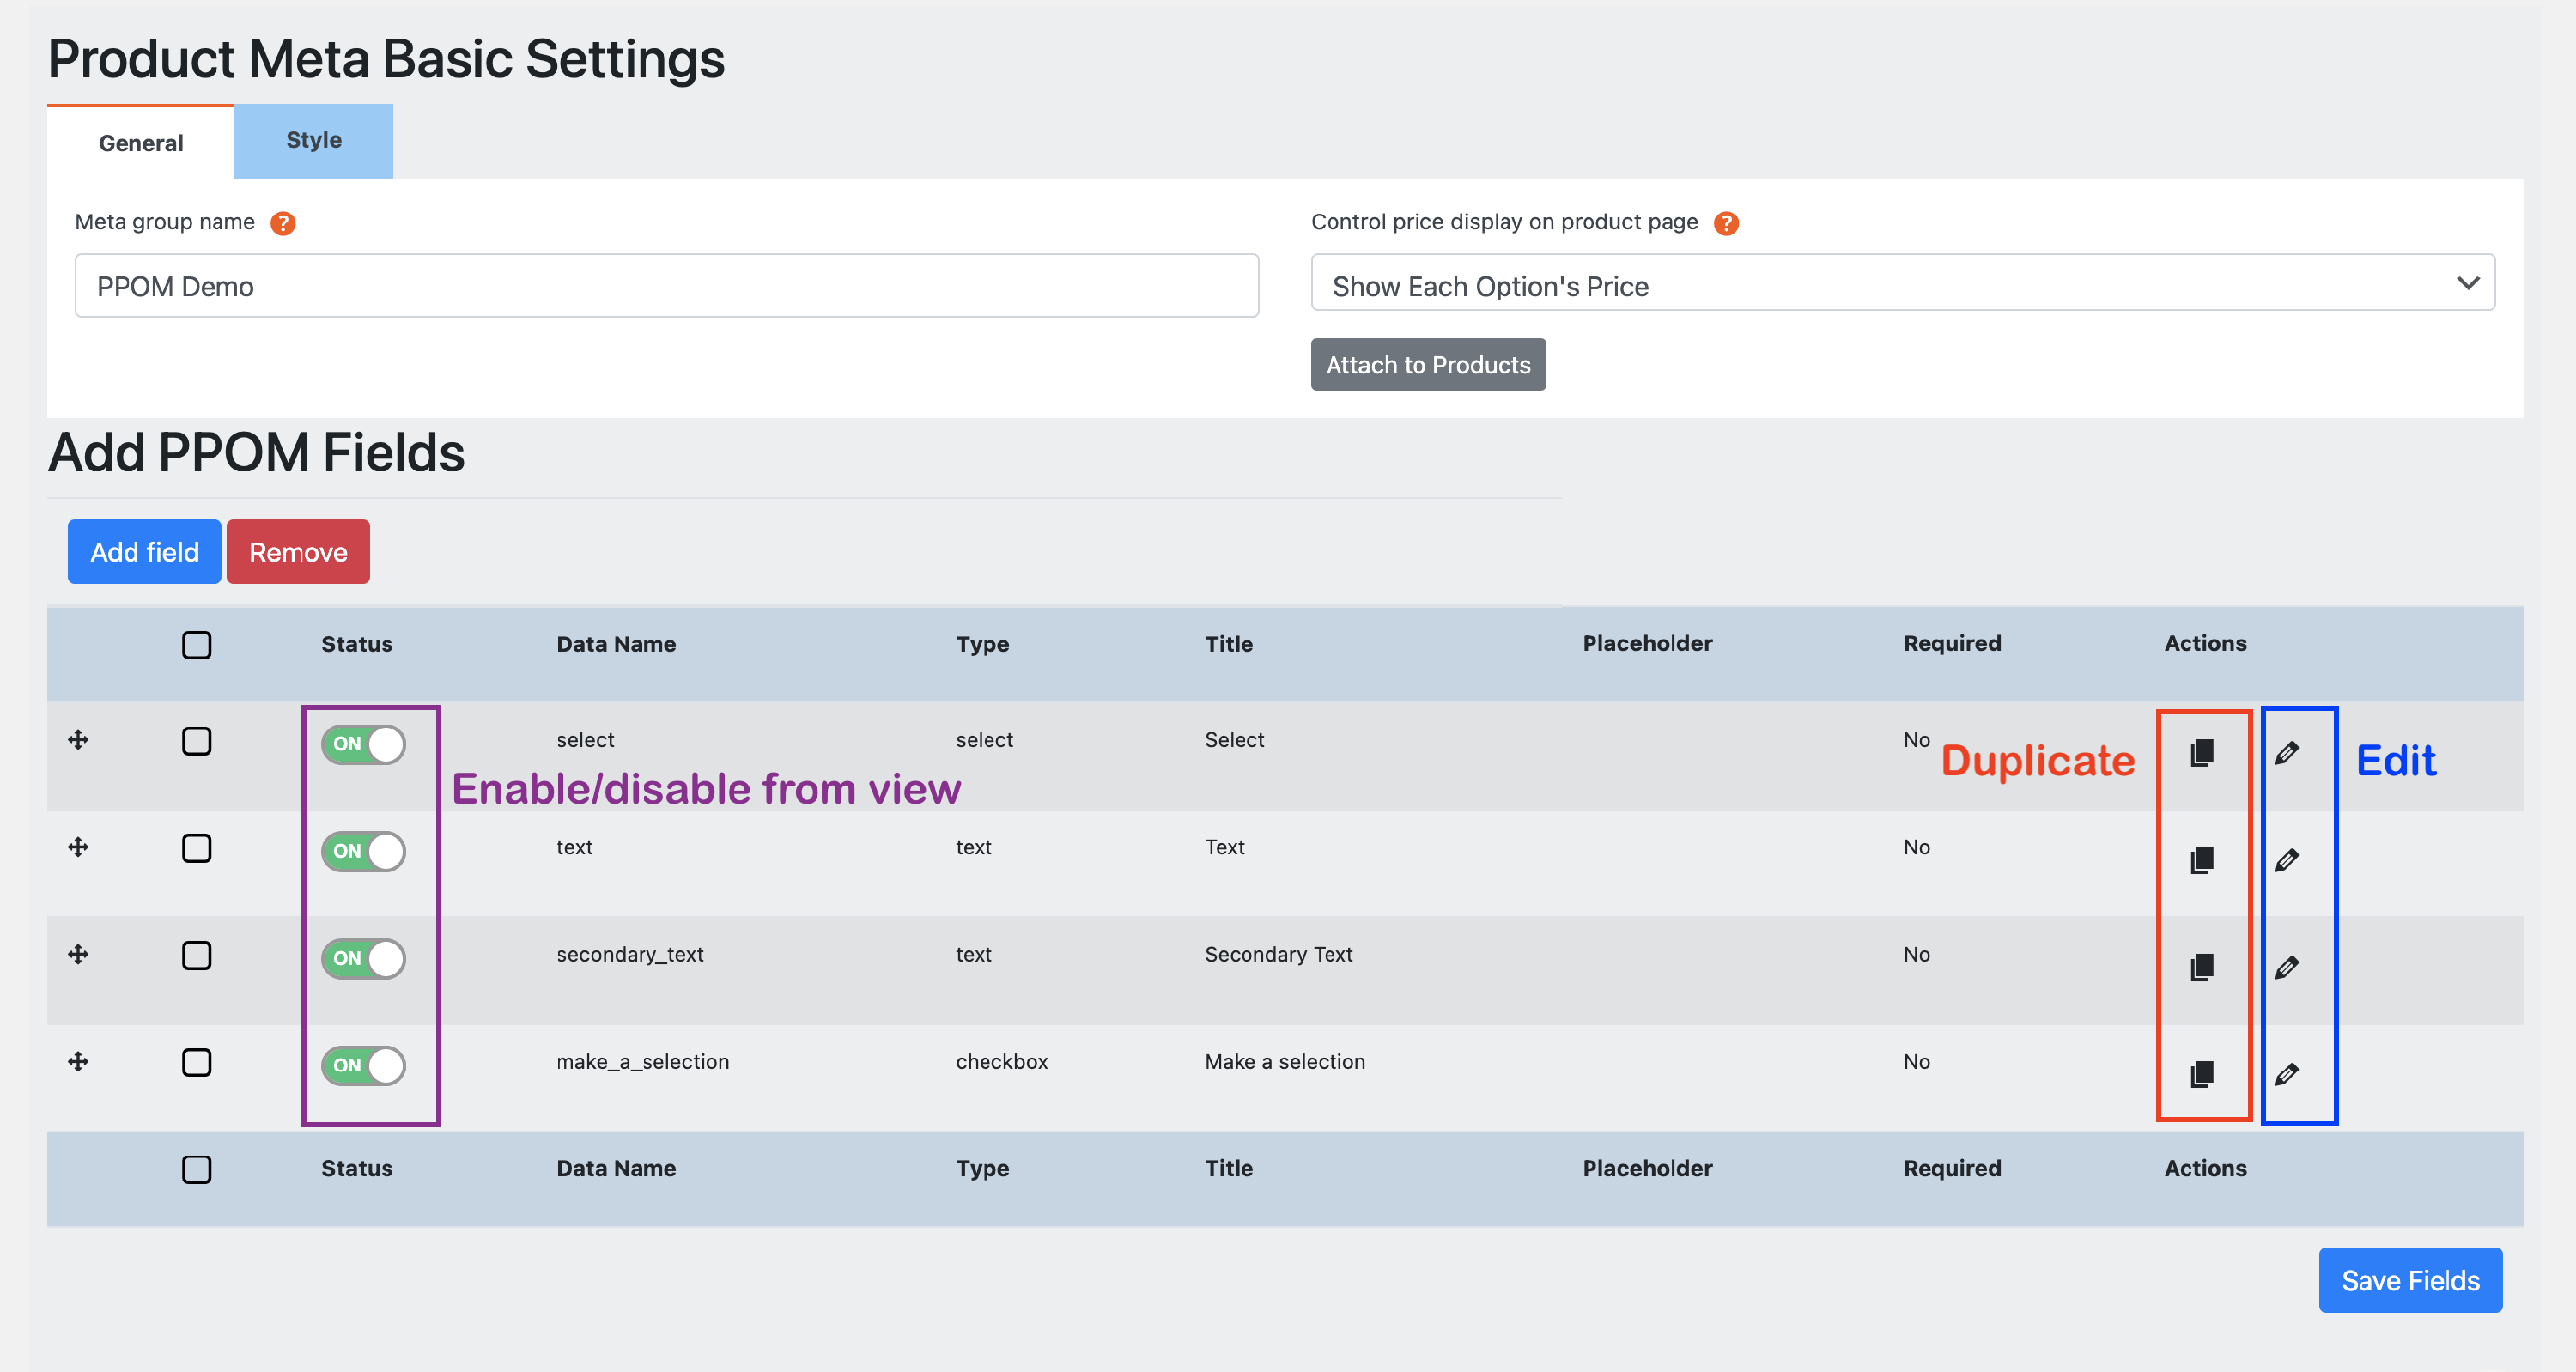
Fields can be added with the Add field button, duplicated, edited, and enabled or disabled individually from the field list.
The PPOM Field Groups page also includes a group-level status toggle next to each group, plus bulk Enable / Disable actions in the Bulk Actions menu. Disabling a field group stops it from rendering on product pages, but keeps all group settings and product assignments so you can re-enable it later without losing any configuration.
PPOM Addons
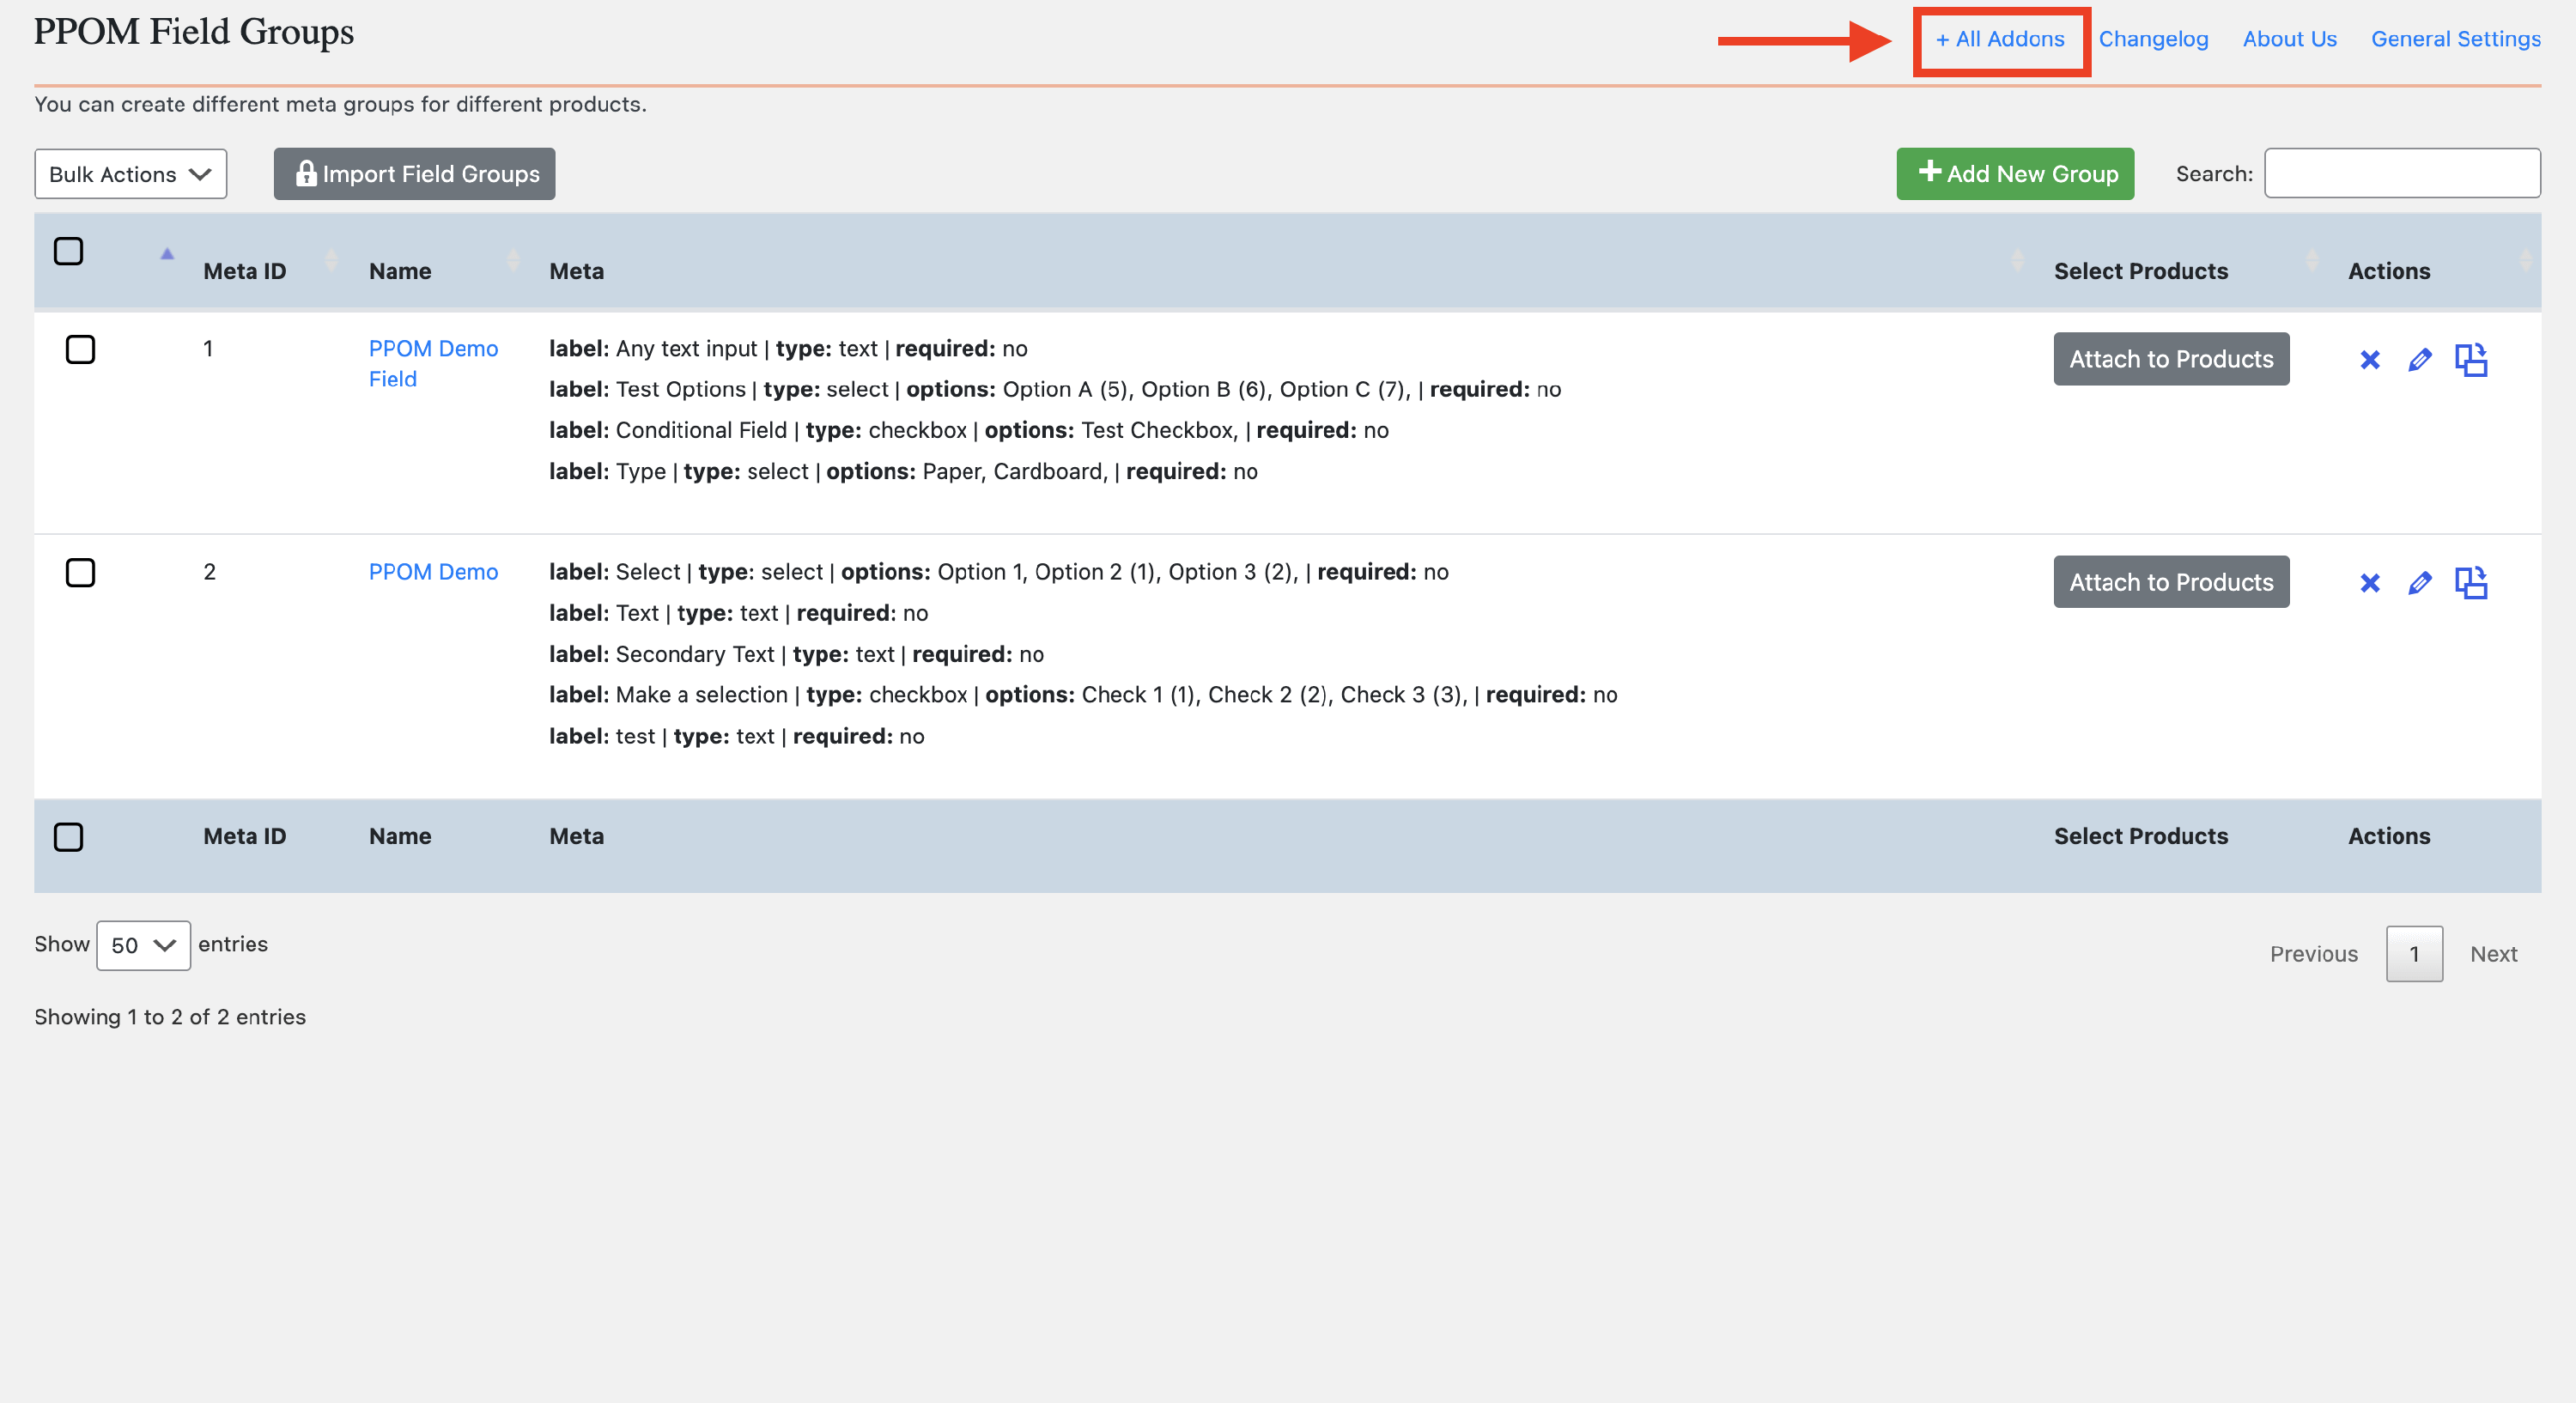
Additionally, if you're interested in finding out more about all the available add-ons, click on the All Addons link, and you will be redirected to the dedicated page:
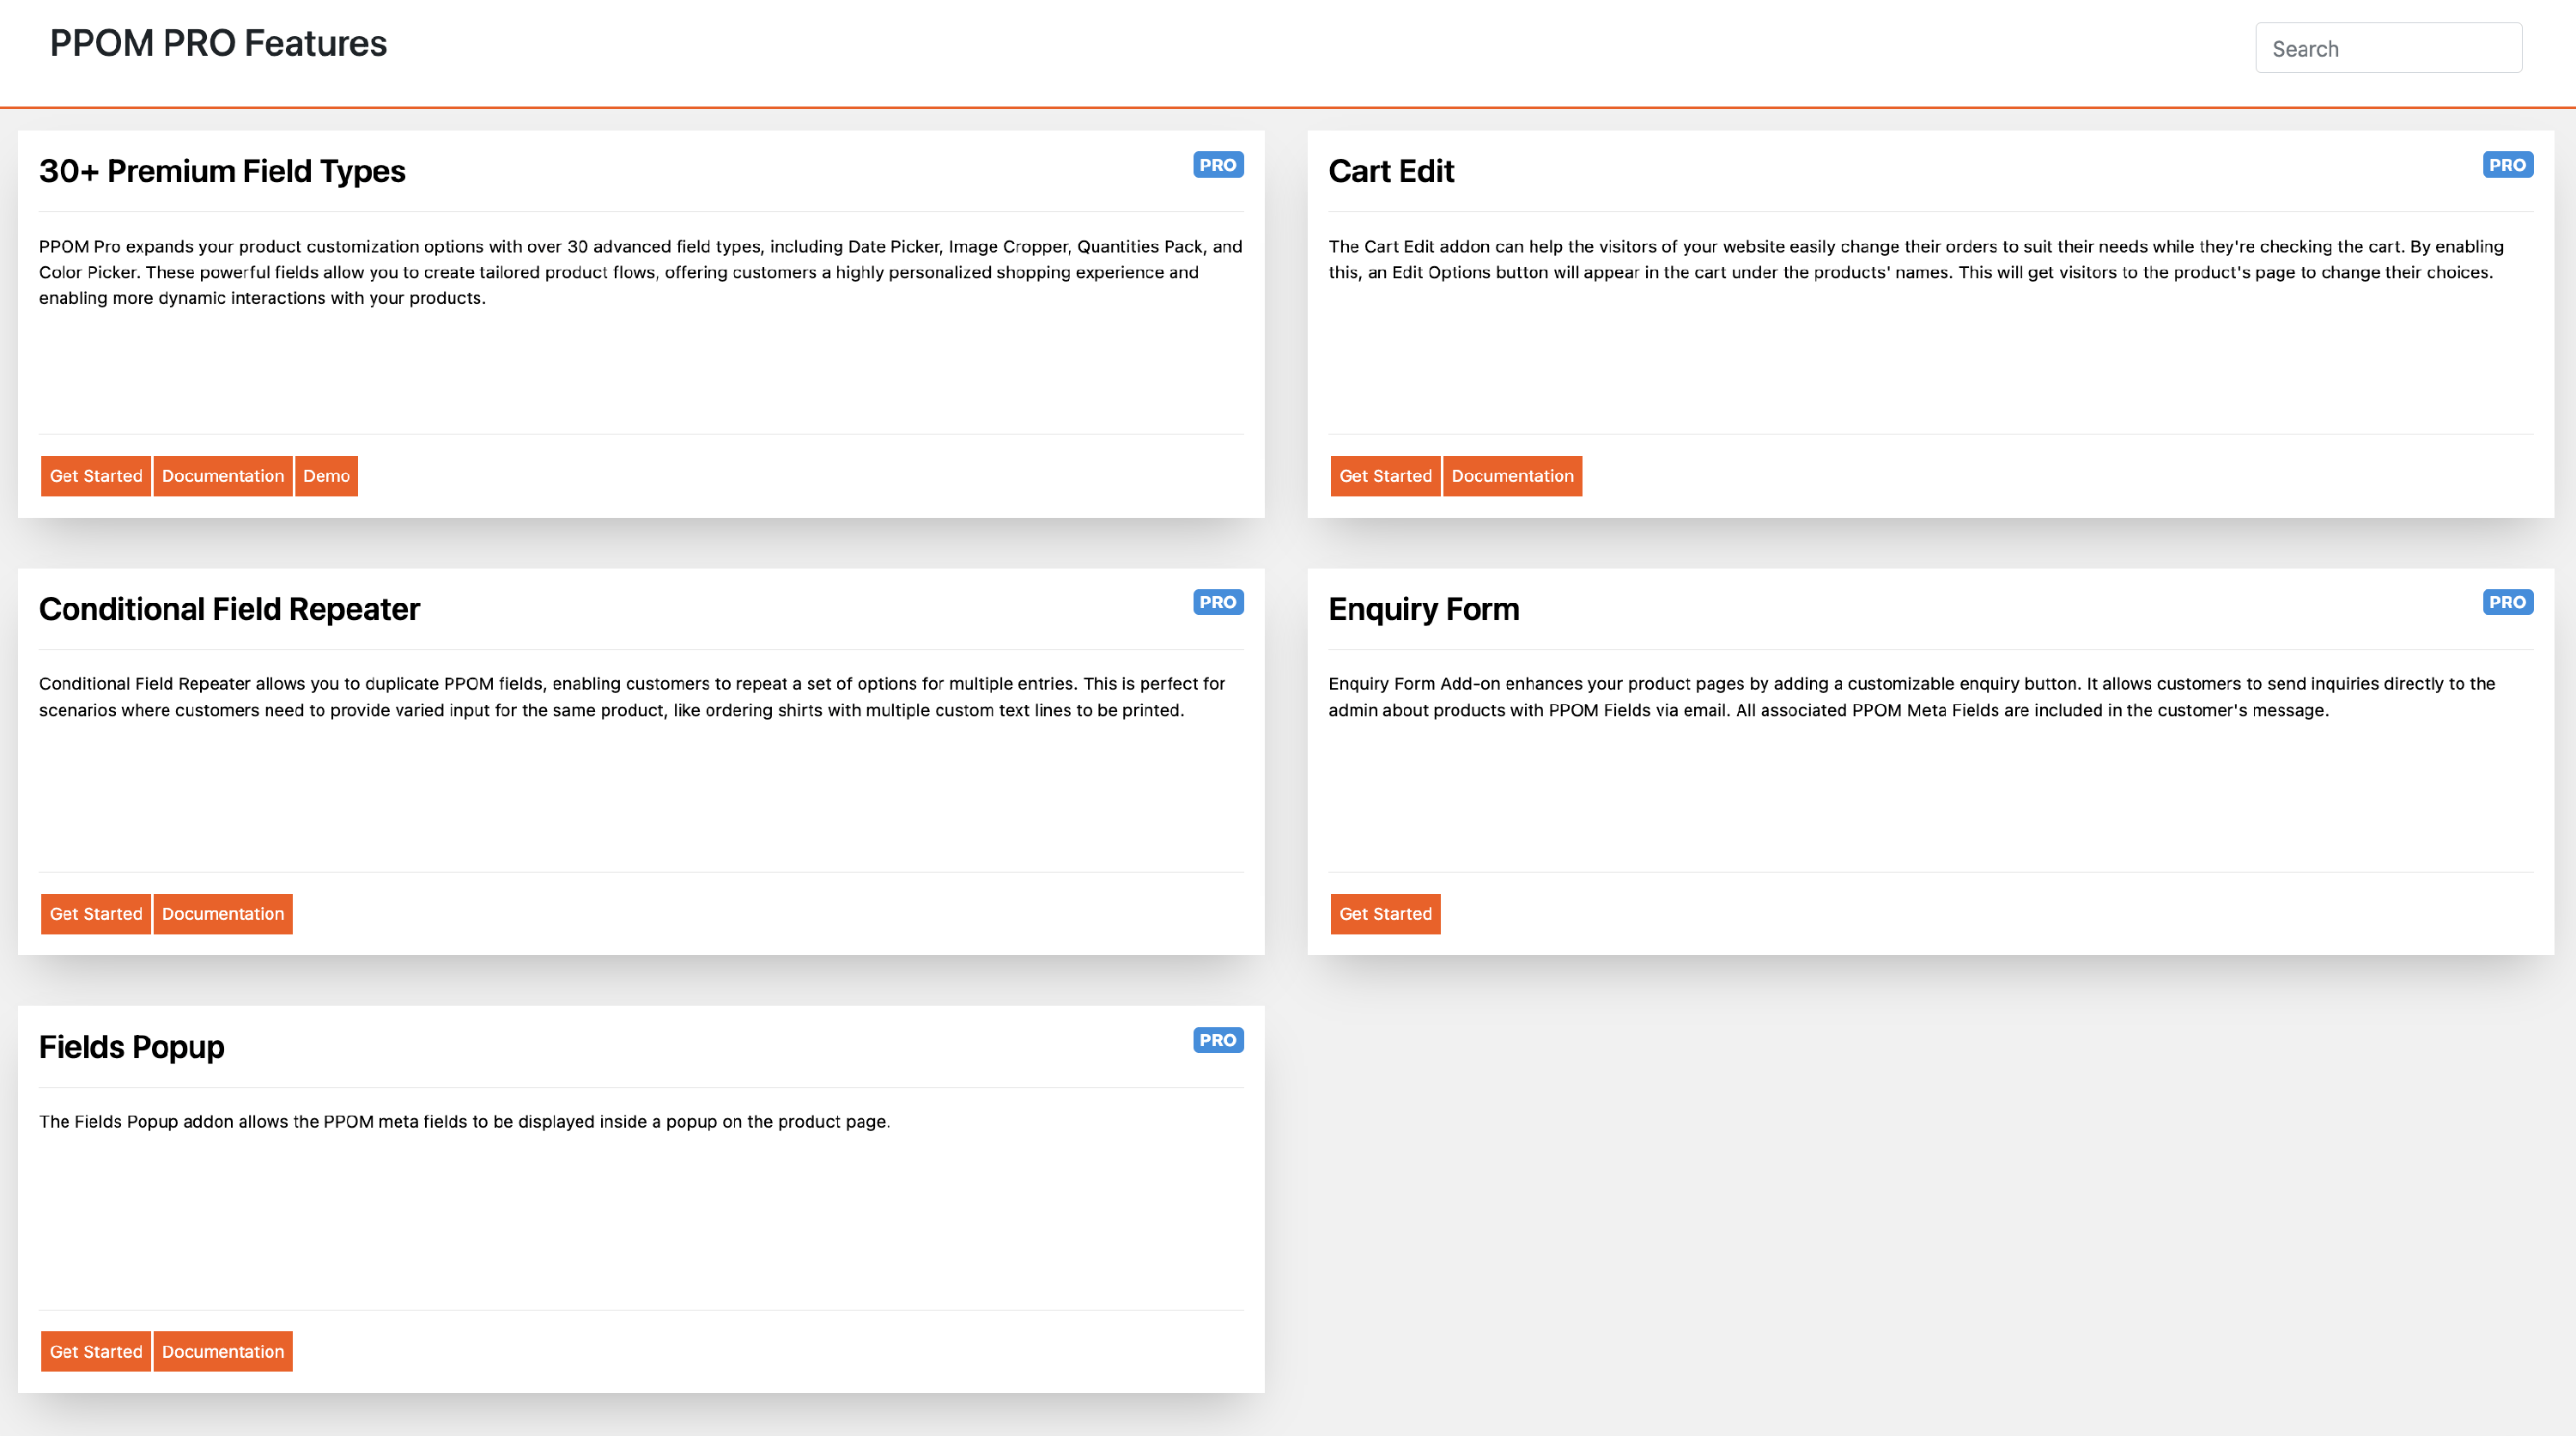
- Cart Edit - allows editing of PPOM fields in the cart through a link to the product page or directly on the cart page, using a popup - details here.
- Enquiry Form - allows users to request more information through a form on the product page.
- Fields Popup - this popup displays PPOM meta fields and is accessible by clicking a button on the product page - details here.
Attach meta groups to products
Attaching meta groups to products can be done from various panels, depending on how you want to assign the meta group. To attach meta groups to products, categories, tags, or specific product variations (Pro), you can do it directly from the meta group page or from the PPOM field groups' main page. You can also attach meta groups to specific products from the products listing screen and even from the individual product editor screen.
📝 Note: Once you attach the meta group to a product, those changes are reflected across all panels.
Multiple Meta Groups
The premium version of the plugin allows you to set multiple meta groups for a single product, personalizing your store's products.
Can I reorder multiple field groups?
PPOM does not currently support manual reordering of separate field groups on a product page (for example, moving a newer group ID above an older one).
You can reorder fields inside one meta group while editing that group, but you cannot drag-and-drop or manually set the order of multiple groups attached to the same product.
If you are using Meta Group Priority (WooCommerce > Settings > PPOM Settings), keep in mind it only controls whether category-level or product-level groups appear first. It does not let you set a custom order for individual field groups.
If you need a strict custom order, place those fields in a single meta group and then arrange the fields inside that group.
From the meta group page
Once you have created and saved fields, use the inline attachment selectors in the field-group editor. A field group can be assigned to products, product categories, product tags, and — in PPOM Pro — specific WooCommerce variations. This can be done for a meta group, not for individual fields, so all fields in the group follow the same assignment.
Search in the inline dropdowns, select the products, variations, categories, or tags where the group should appear, then save the field group.
📝 Note: In the premium version, you can attach the field group to multiple products. For more details, check out the PPOM Pricing page.
From the PPOM Field Groups page
From the field groups list, you can open any group and use the same inline product, variation, category, and tag selectors to assign or update its attachments.
From the products listing screen
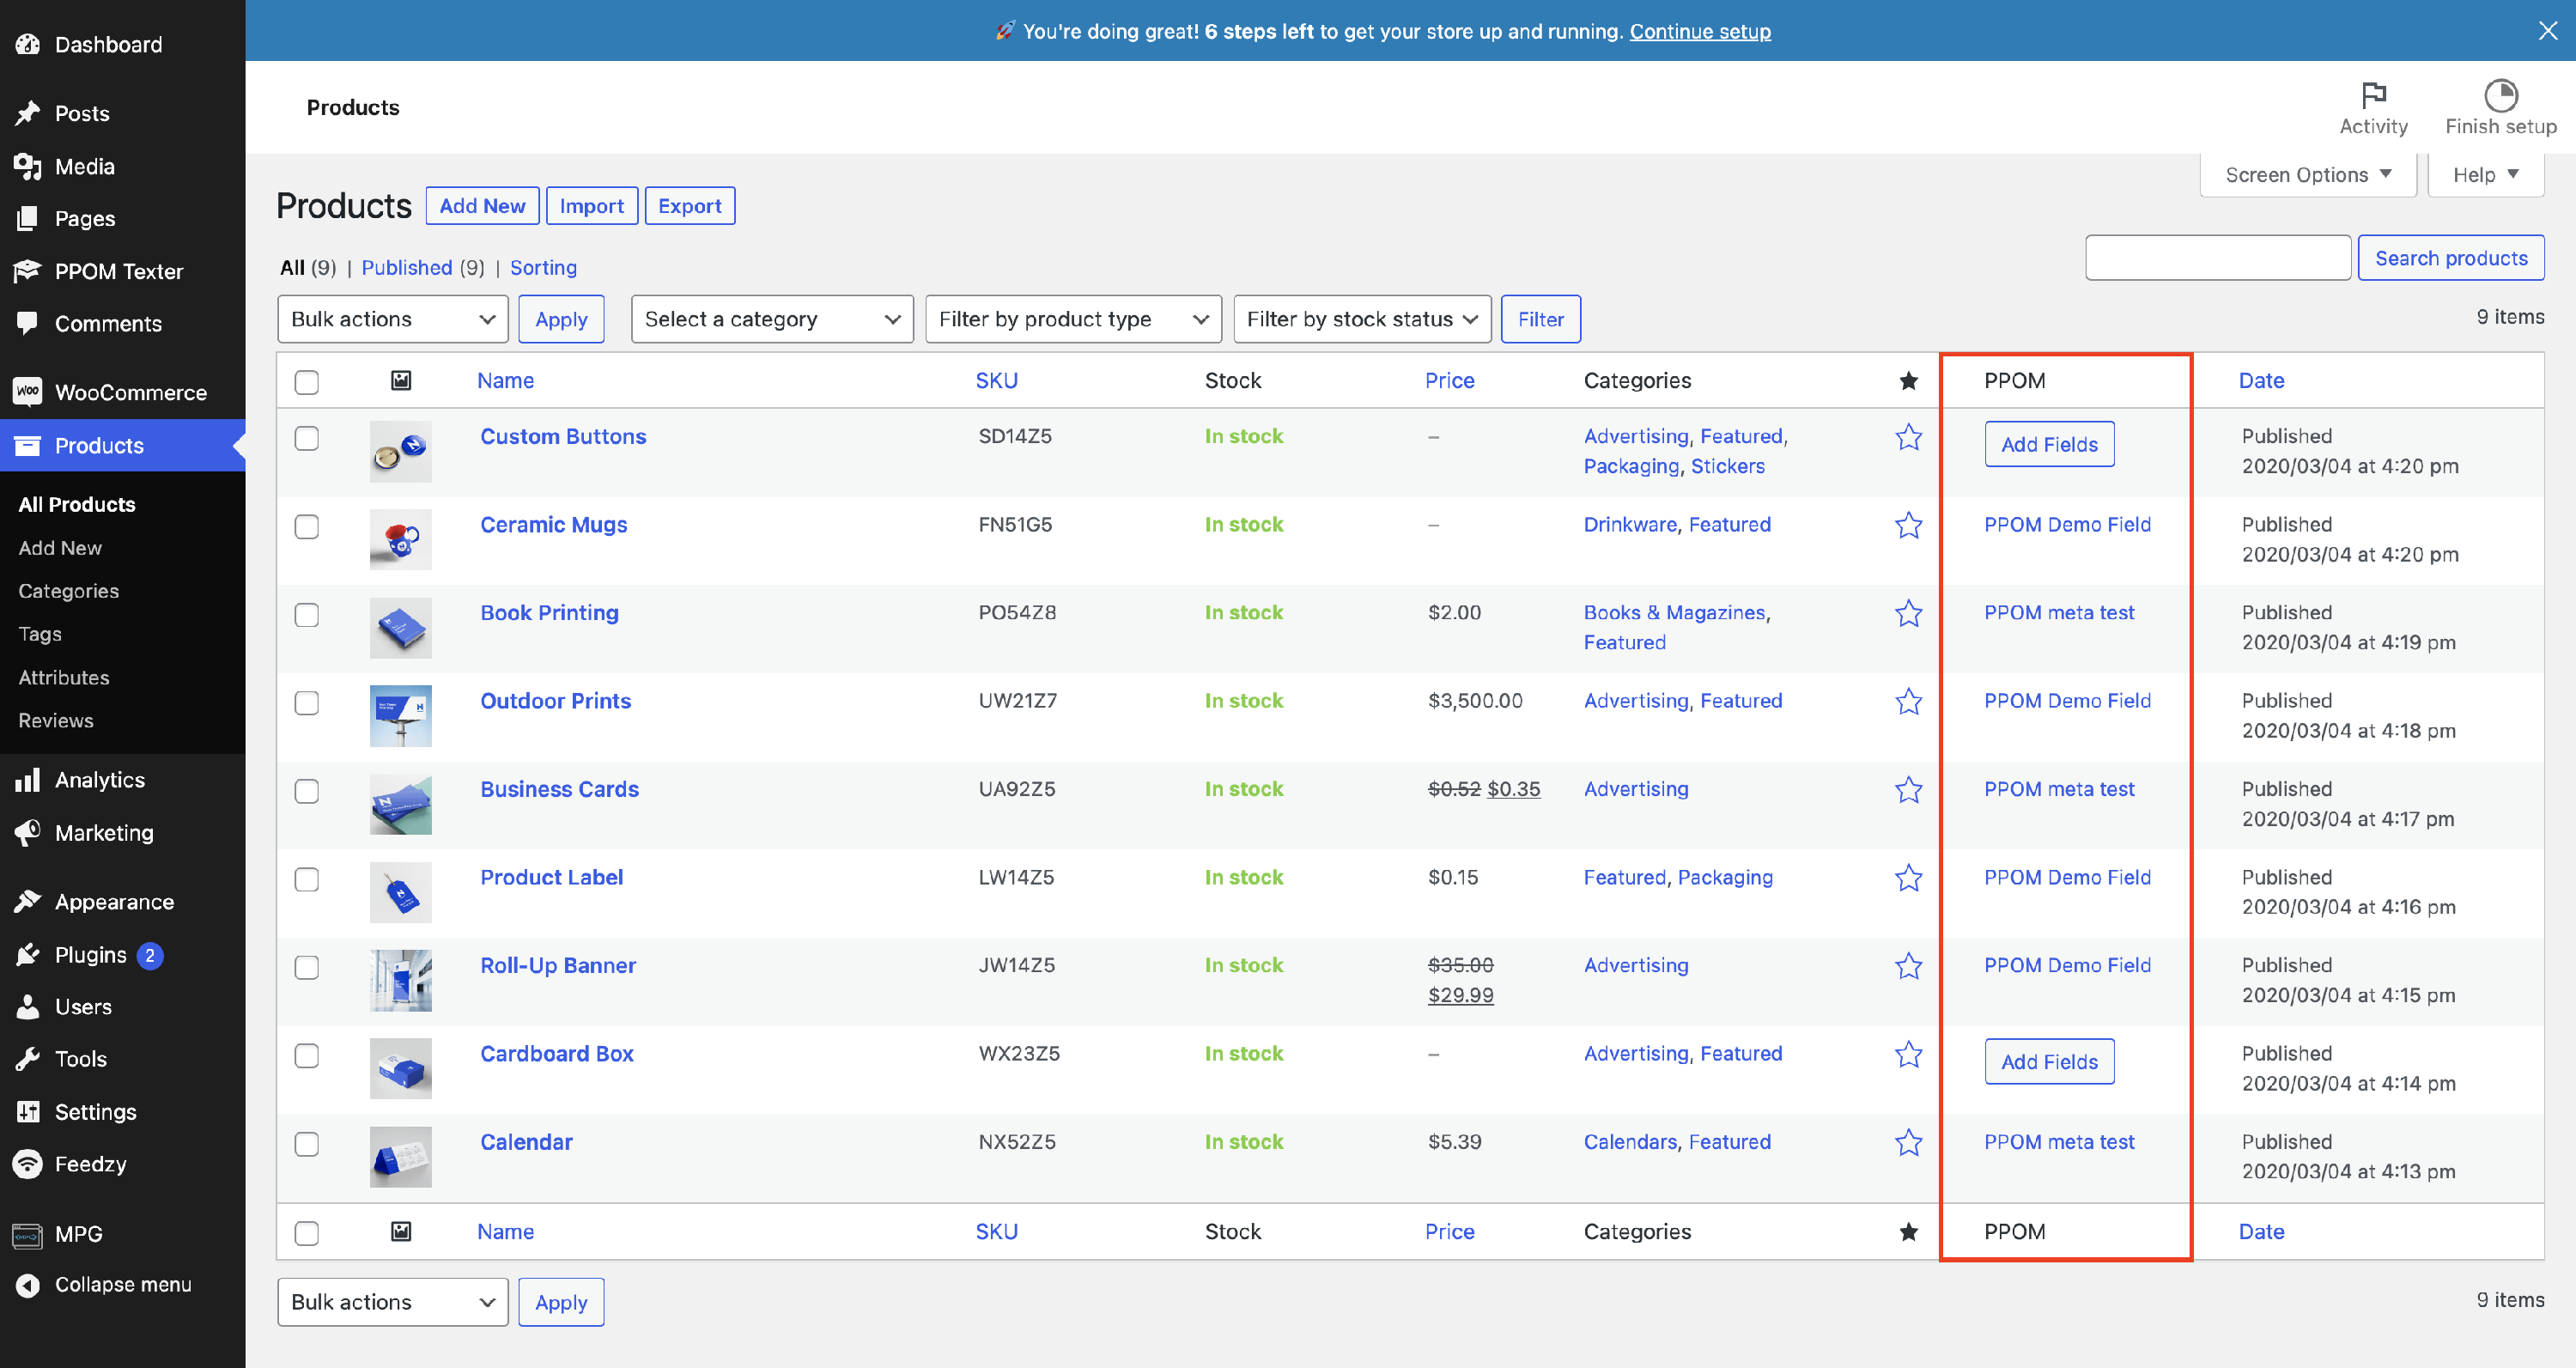
Navigate to Products, and you will observe the PPOM column. After clicking on the Add Fields button, you will be redirected to the PPOM Field Groups panel, where you can use the buttons to assign meta groups to specific products.
From the product editor screen
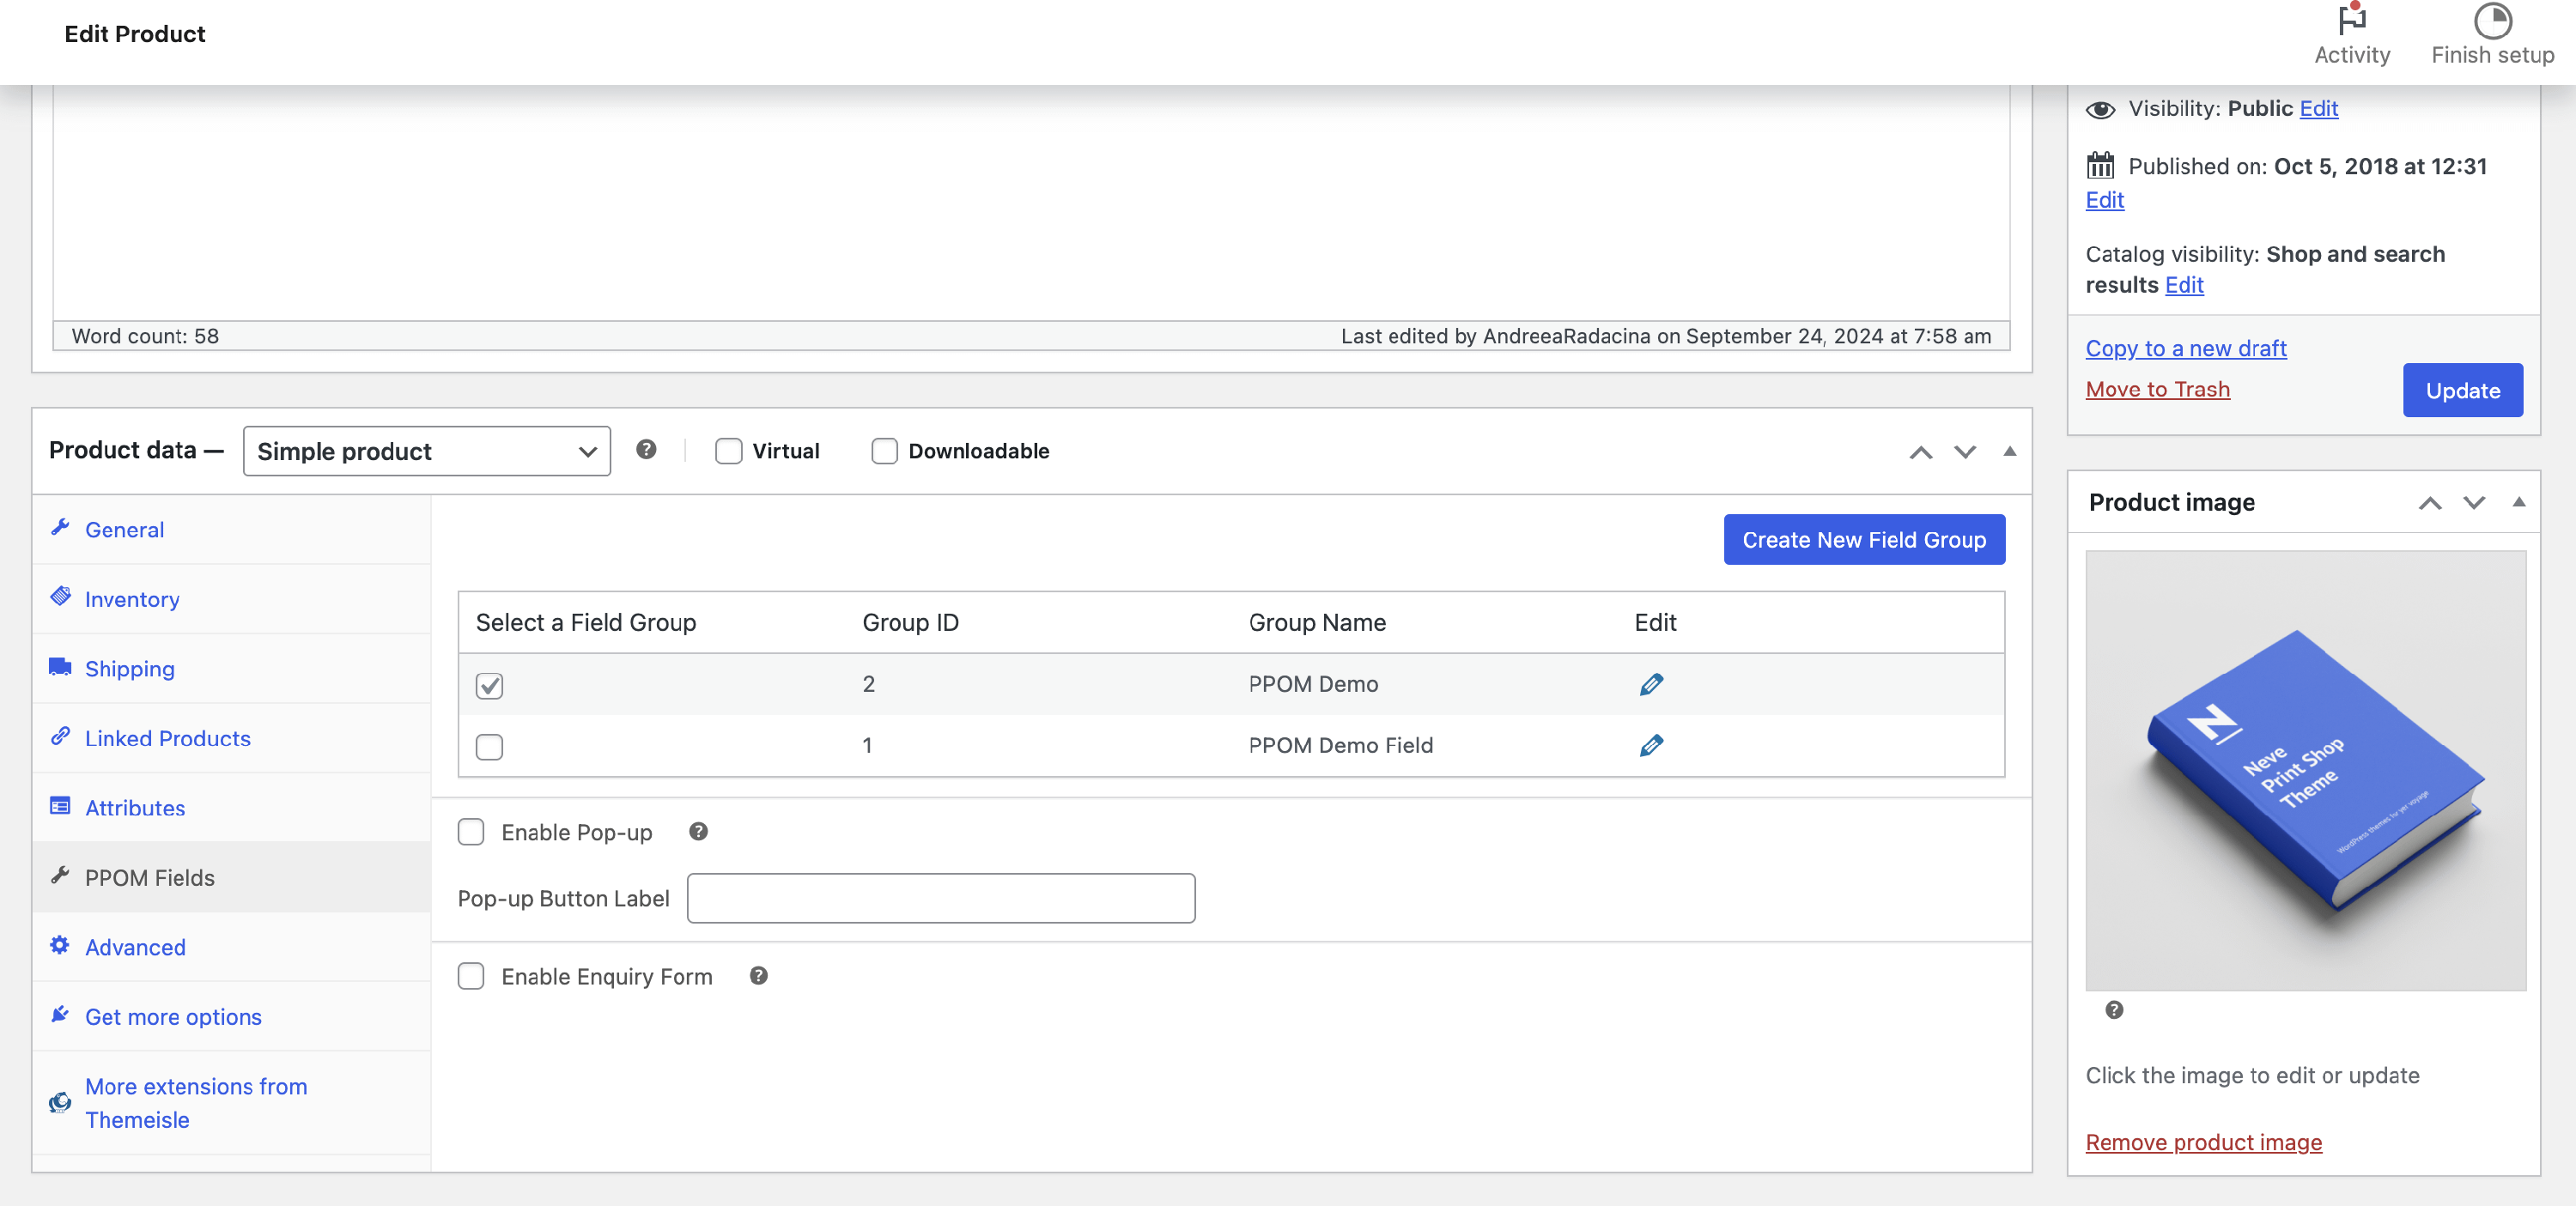
You can directly edit the meta groups assigned to a products by going to the Products menu, and selecting a product to edit. Then, click on PPOM Fields > Select Meta:
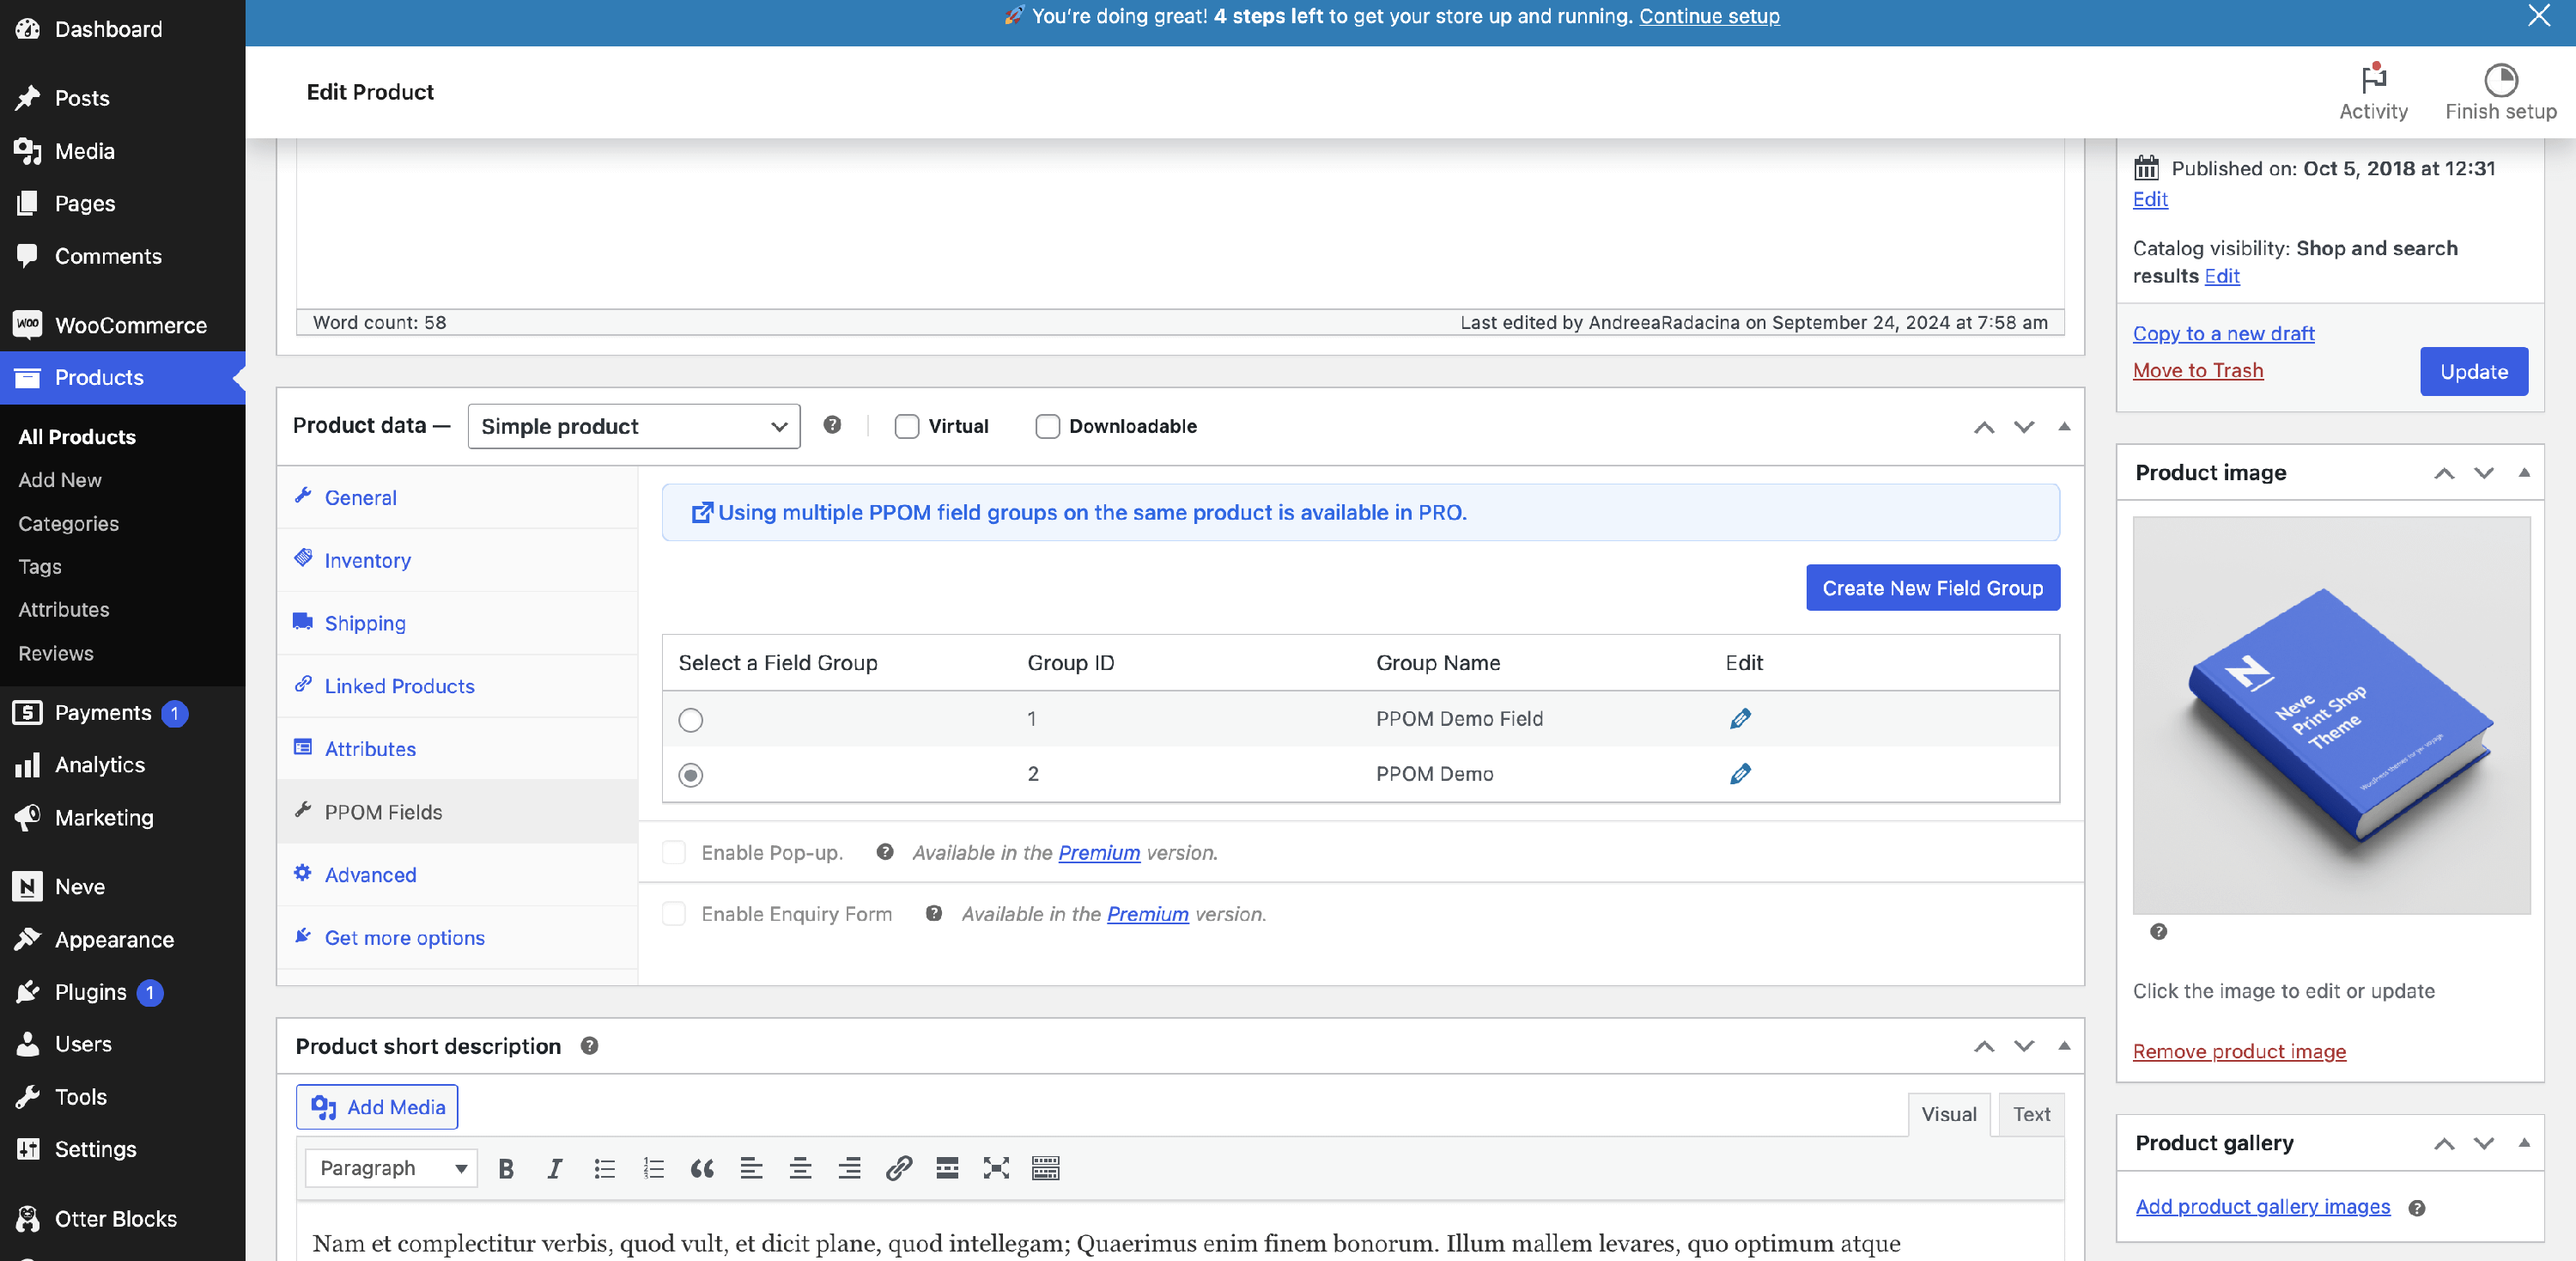
If you are using the premium version, you will be able to attach multiple meta groups to the same product:
Import & Export Meta Fields
You can use PPOM to import or export your meta fields directly from PPOM settings.
📝 Note: These options require the PPOM plugin's pro version, which you can get from here.
| Import | Export |
Import
1. Navigate to WooCommerce > PPOM Fields.
2. Click on the Import Field Groups button.
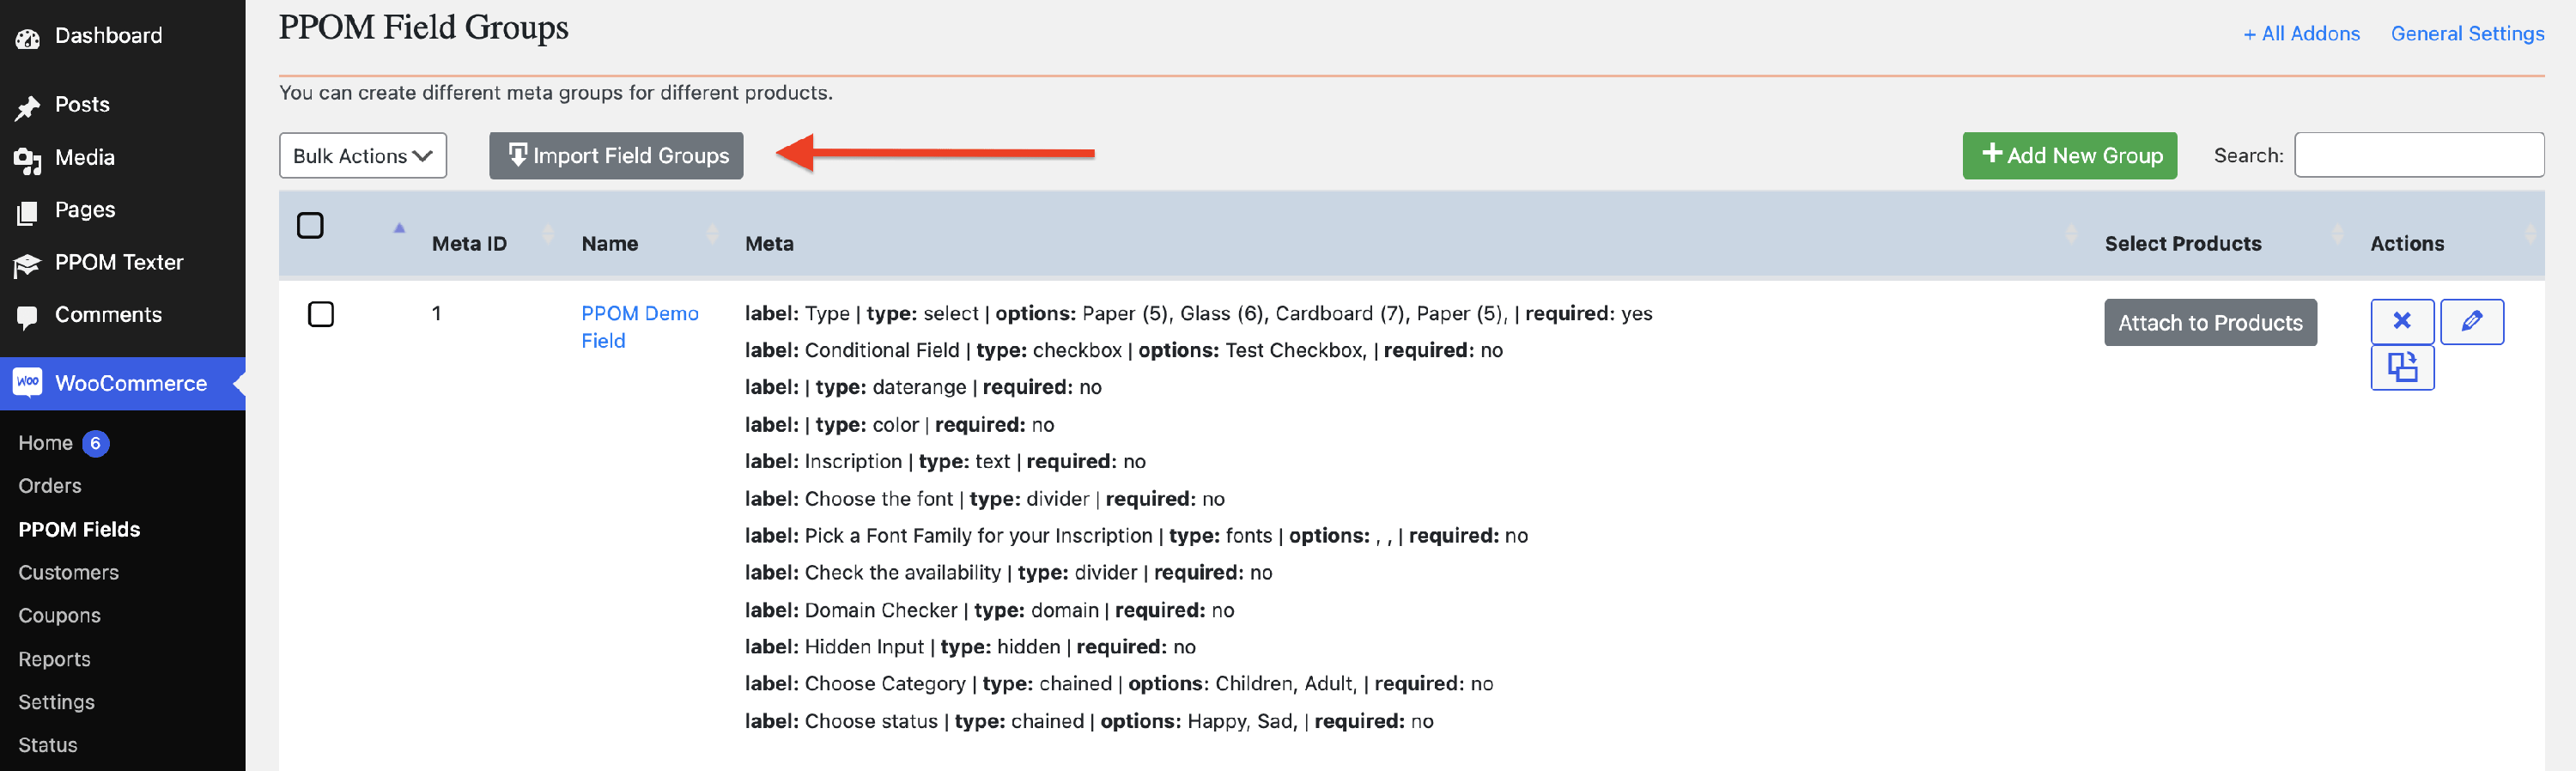
3. Once you have done that, you can choose a file from your computer and click on Import Meta.
Export
1. Navigate to WooCommerce > PPOM Fields.
2. Select the PPOM Groups that you want to export.
3. Click on the Bulk Actions dropdown > Export.
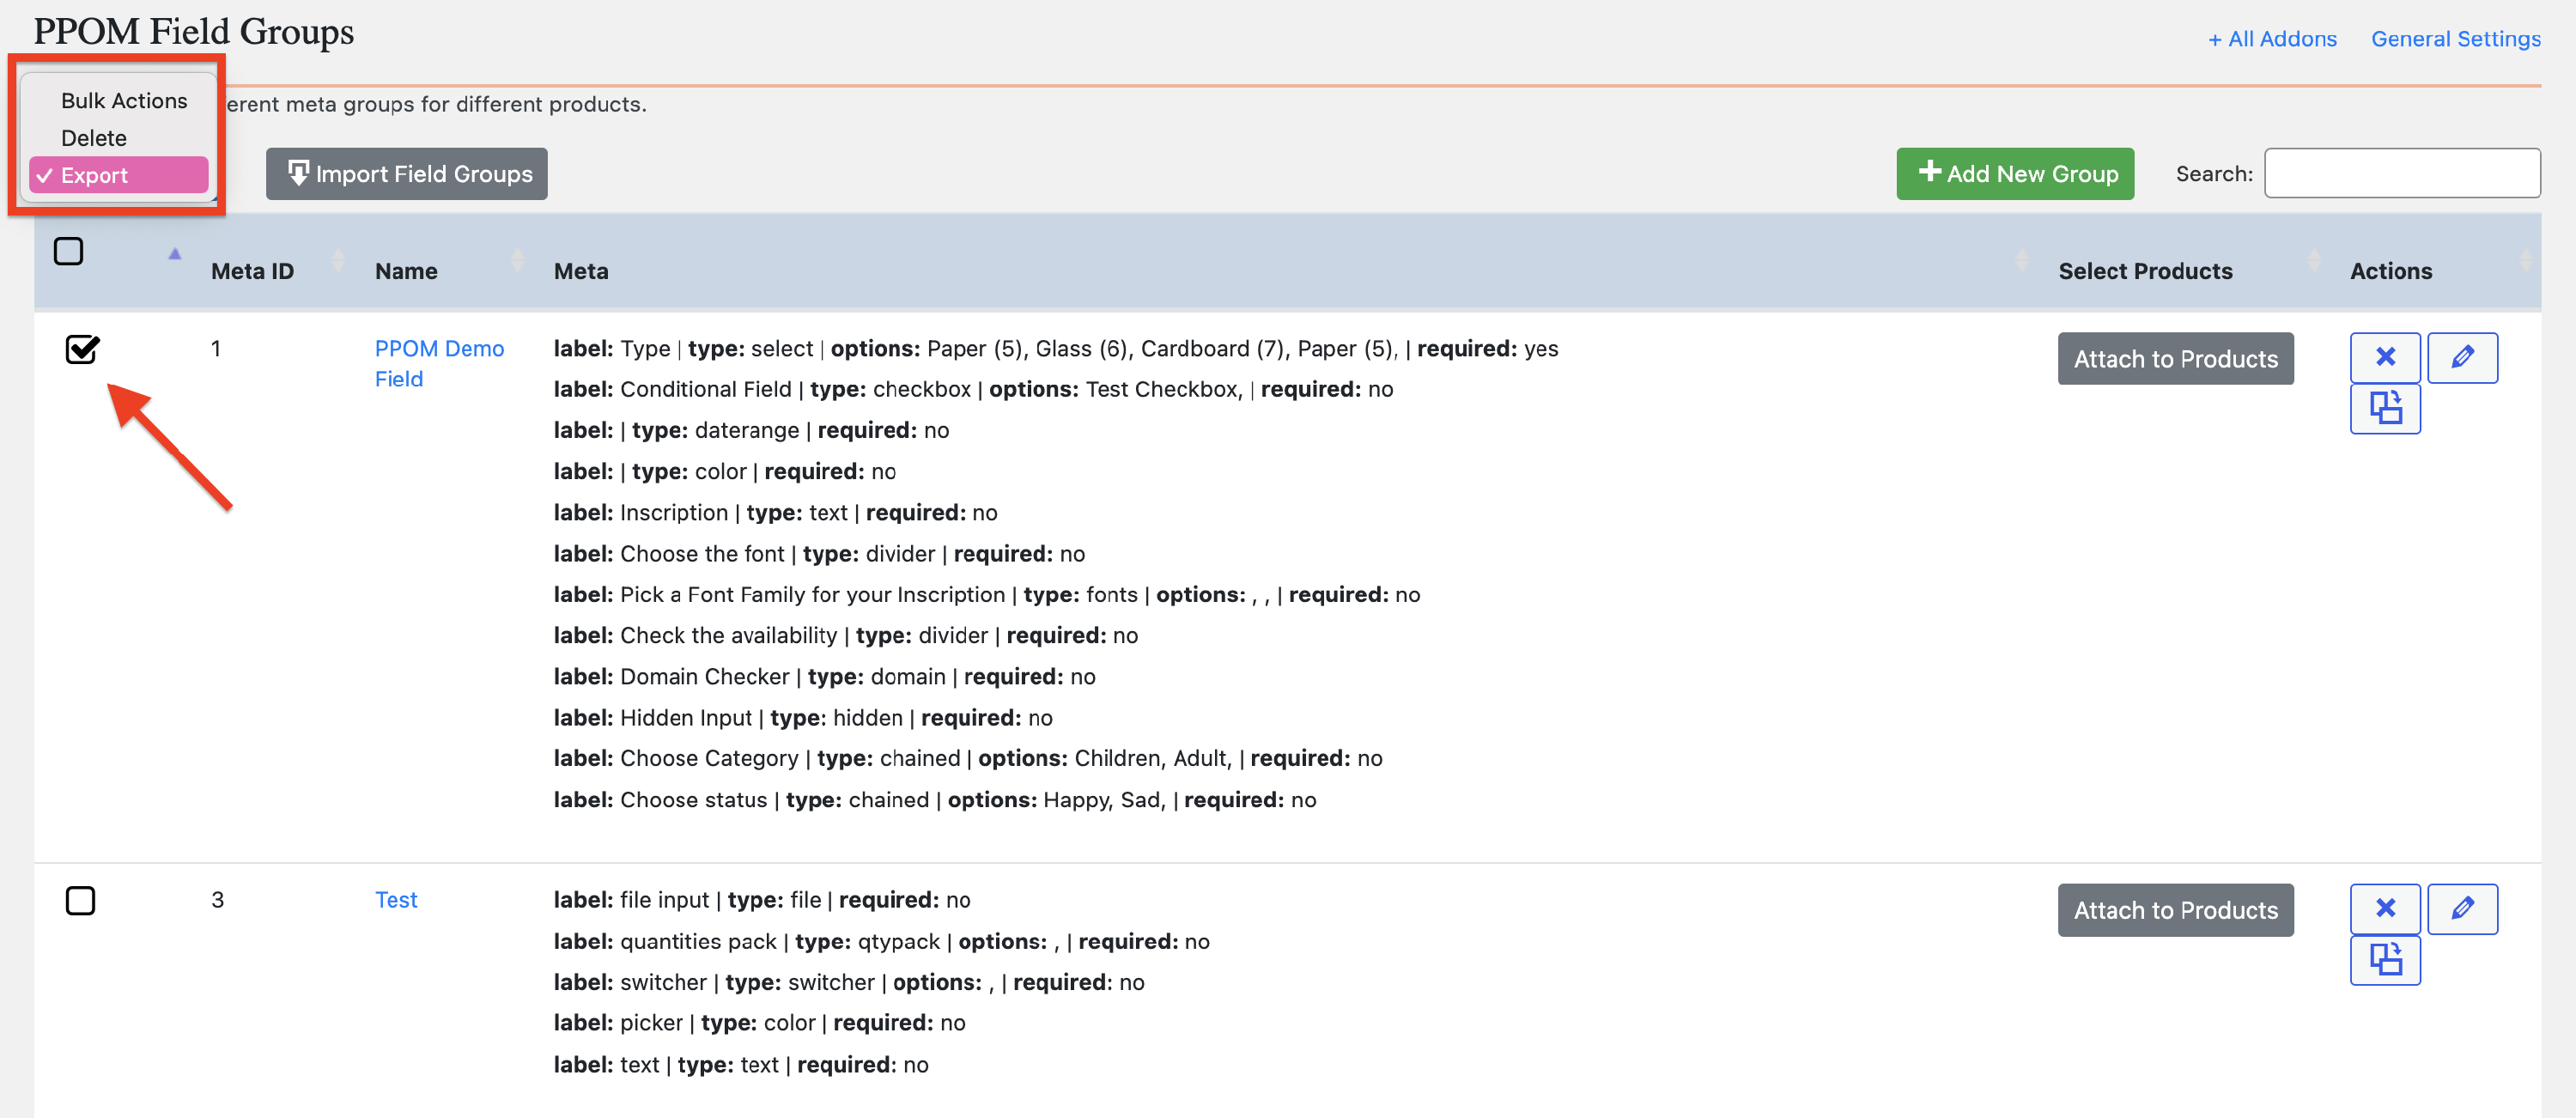
You will receive a notification that the file has been downloaded.
PPOM Settings
To access PPOM's global settings, go to Dashboard > WooCommerce > Settings > PPOM Settings or click the General Settings button on the PPOM Field Groups page.
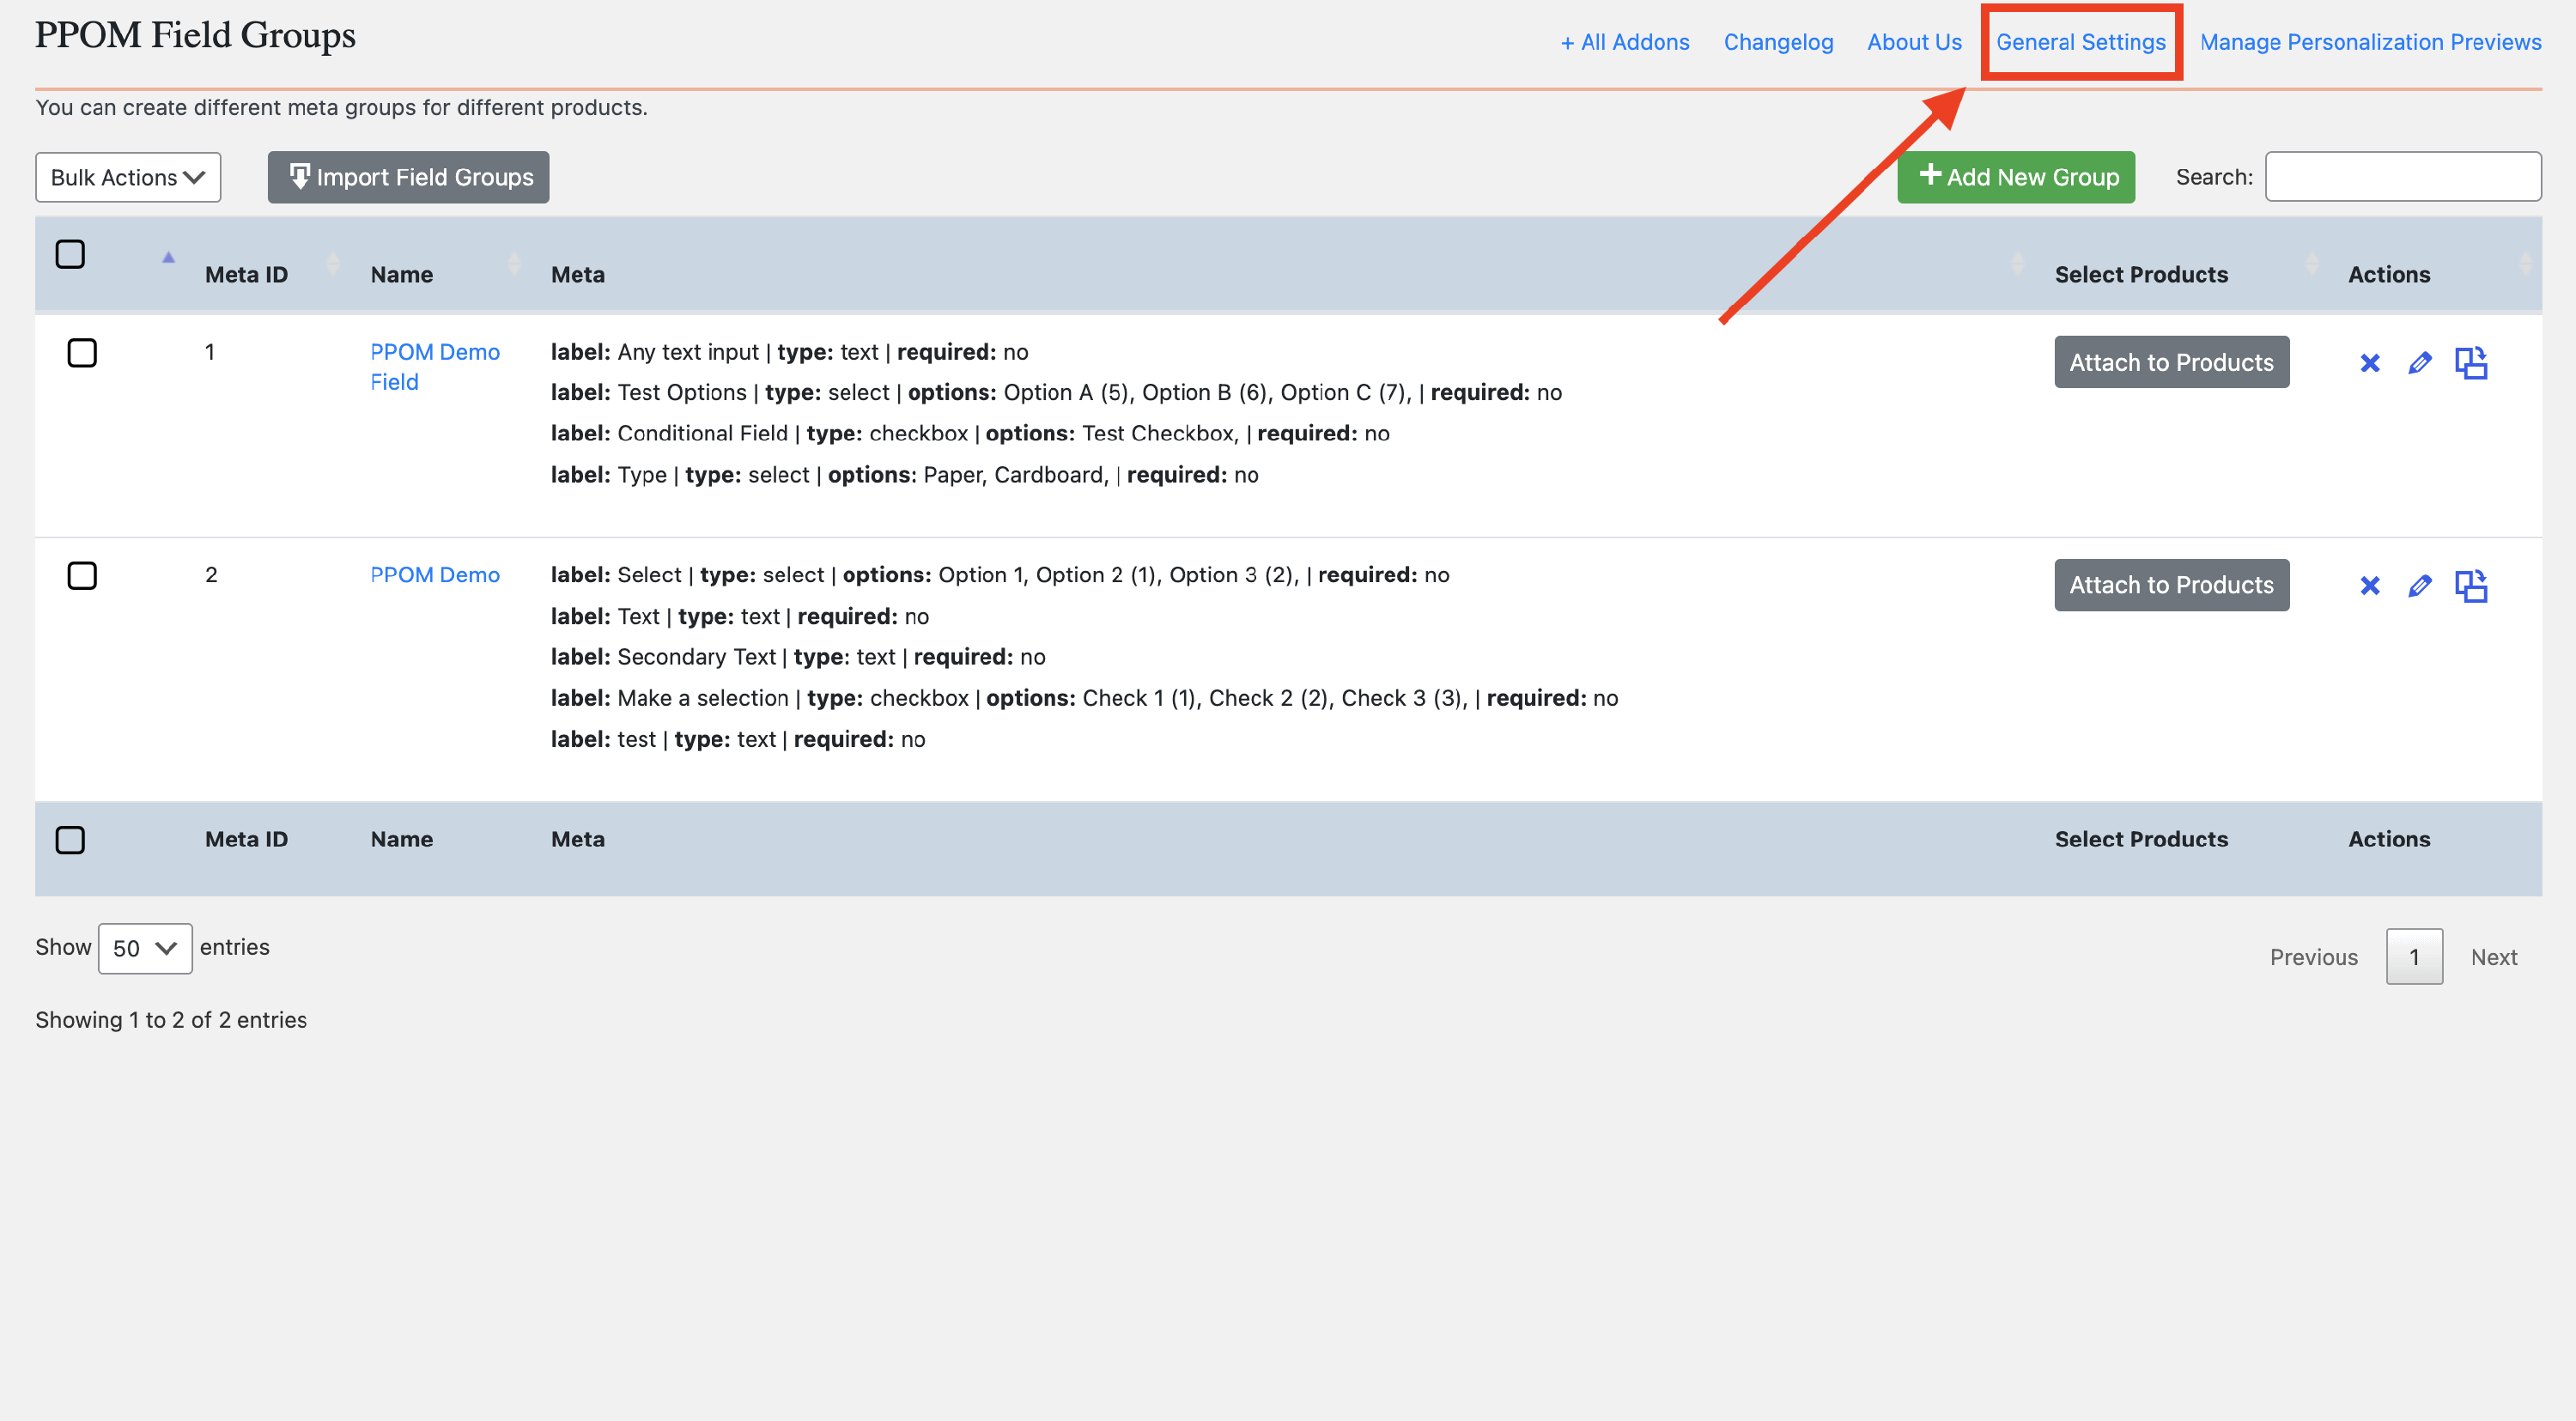
Depending on the tab you're in, you'll find settings for labels, images, price, and style for various input types. Available tabs may vary based on your license tier.
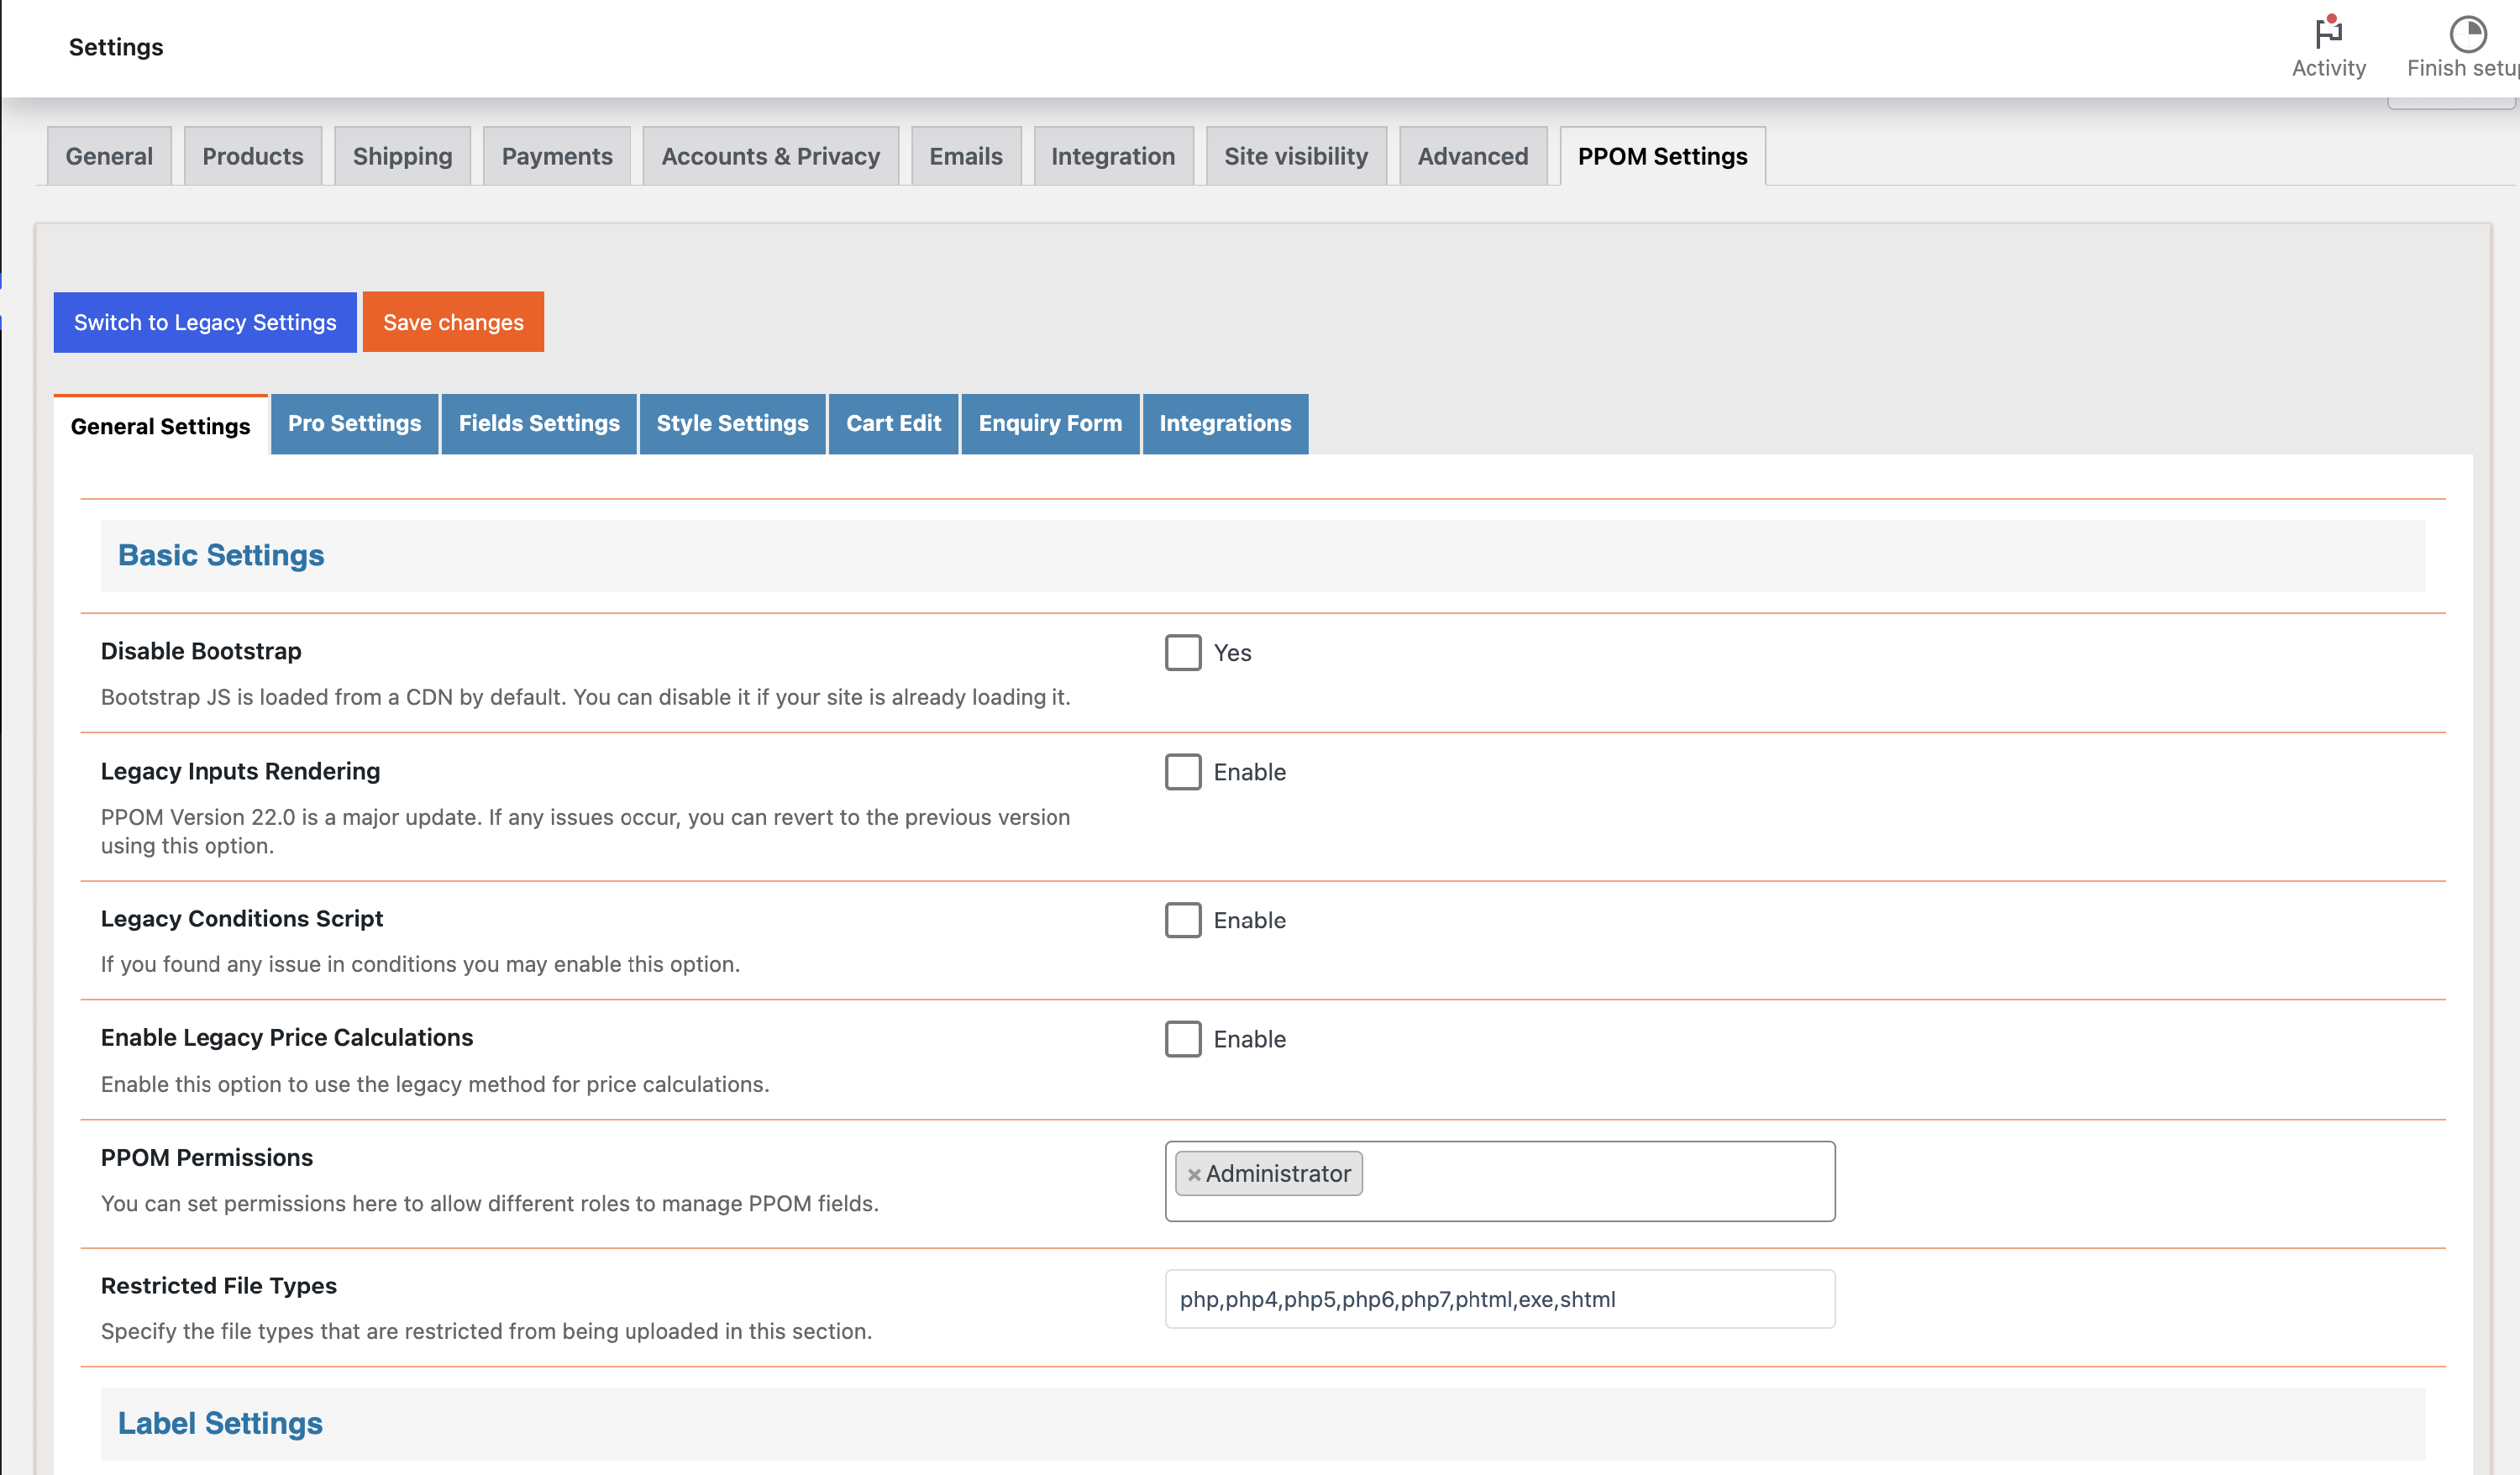
In the free version, you'll have access to the General Settings tab, where you can disable Bootstrap, adjust legacy settings, set permissions for managing PPOM fields, restrict certain file types from upload, and modify label settings for the pricing table.
In the premium version of PPOM, you gain access to additional settings based on your tier:
- Pro Settings - manage image behavior, client actions, PayPal invoicing, price settings, and meta group priority.
- Fields Settings - configure specific pro fields, such as collapse and bulk quantity, as well as pro features like field popup and field repeater.
- Style Settings - adjust typography, colors, borders, pricing table, and tooltip settings for input fields - details here.
- Cart Edit - enable editing of PPOM fields in the cart through a link to the product page or directly on the cart page, using a popup; also customize the button.
- Enquiry Form - allow users to request more information through a form on the product page. In this tab, you can customize the form content.
- Integrations - this tab contains details on integrating PPOM through REST API and WCFM Vendors.
📝 Note: More details about the pricing tiers and the available options can be found here.
Display Conditions
The PPOM fields are very practical for using conditional logic to display specific fields based on other options. To use this, while editing a meta field, click on the Conditions tab. Then, make sure you tick the Enable Conditions box and start preparing the rules:
⚠️ Important: Display Conditions only control PPOM field visibility on the product page. They cannot hide WooCommerce Add to Cart for specific option values (for example, only certain sizes), and they cannot switch enquiry behavior for one selected value.
When you use the enquiry workflow together with Hide Add to Cart Button, the Add to Cart button is hidden for the entire product, across all PPOM choices on that product.
If you need both direct purchase and quote-only flows without custom code, use two products: keep purchasable options on one regular product, and place quote-only options on a separate enquiry-only product. Configure the enquiry form in WooCommerce > Settings > PPOM Settings > Enquiry Form, then enable Hide Add to Cart Button on that enquiry-only product.
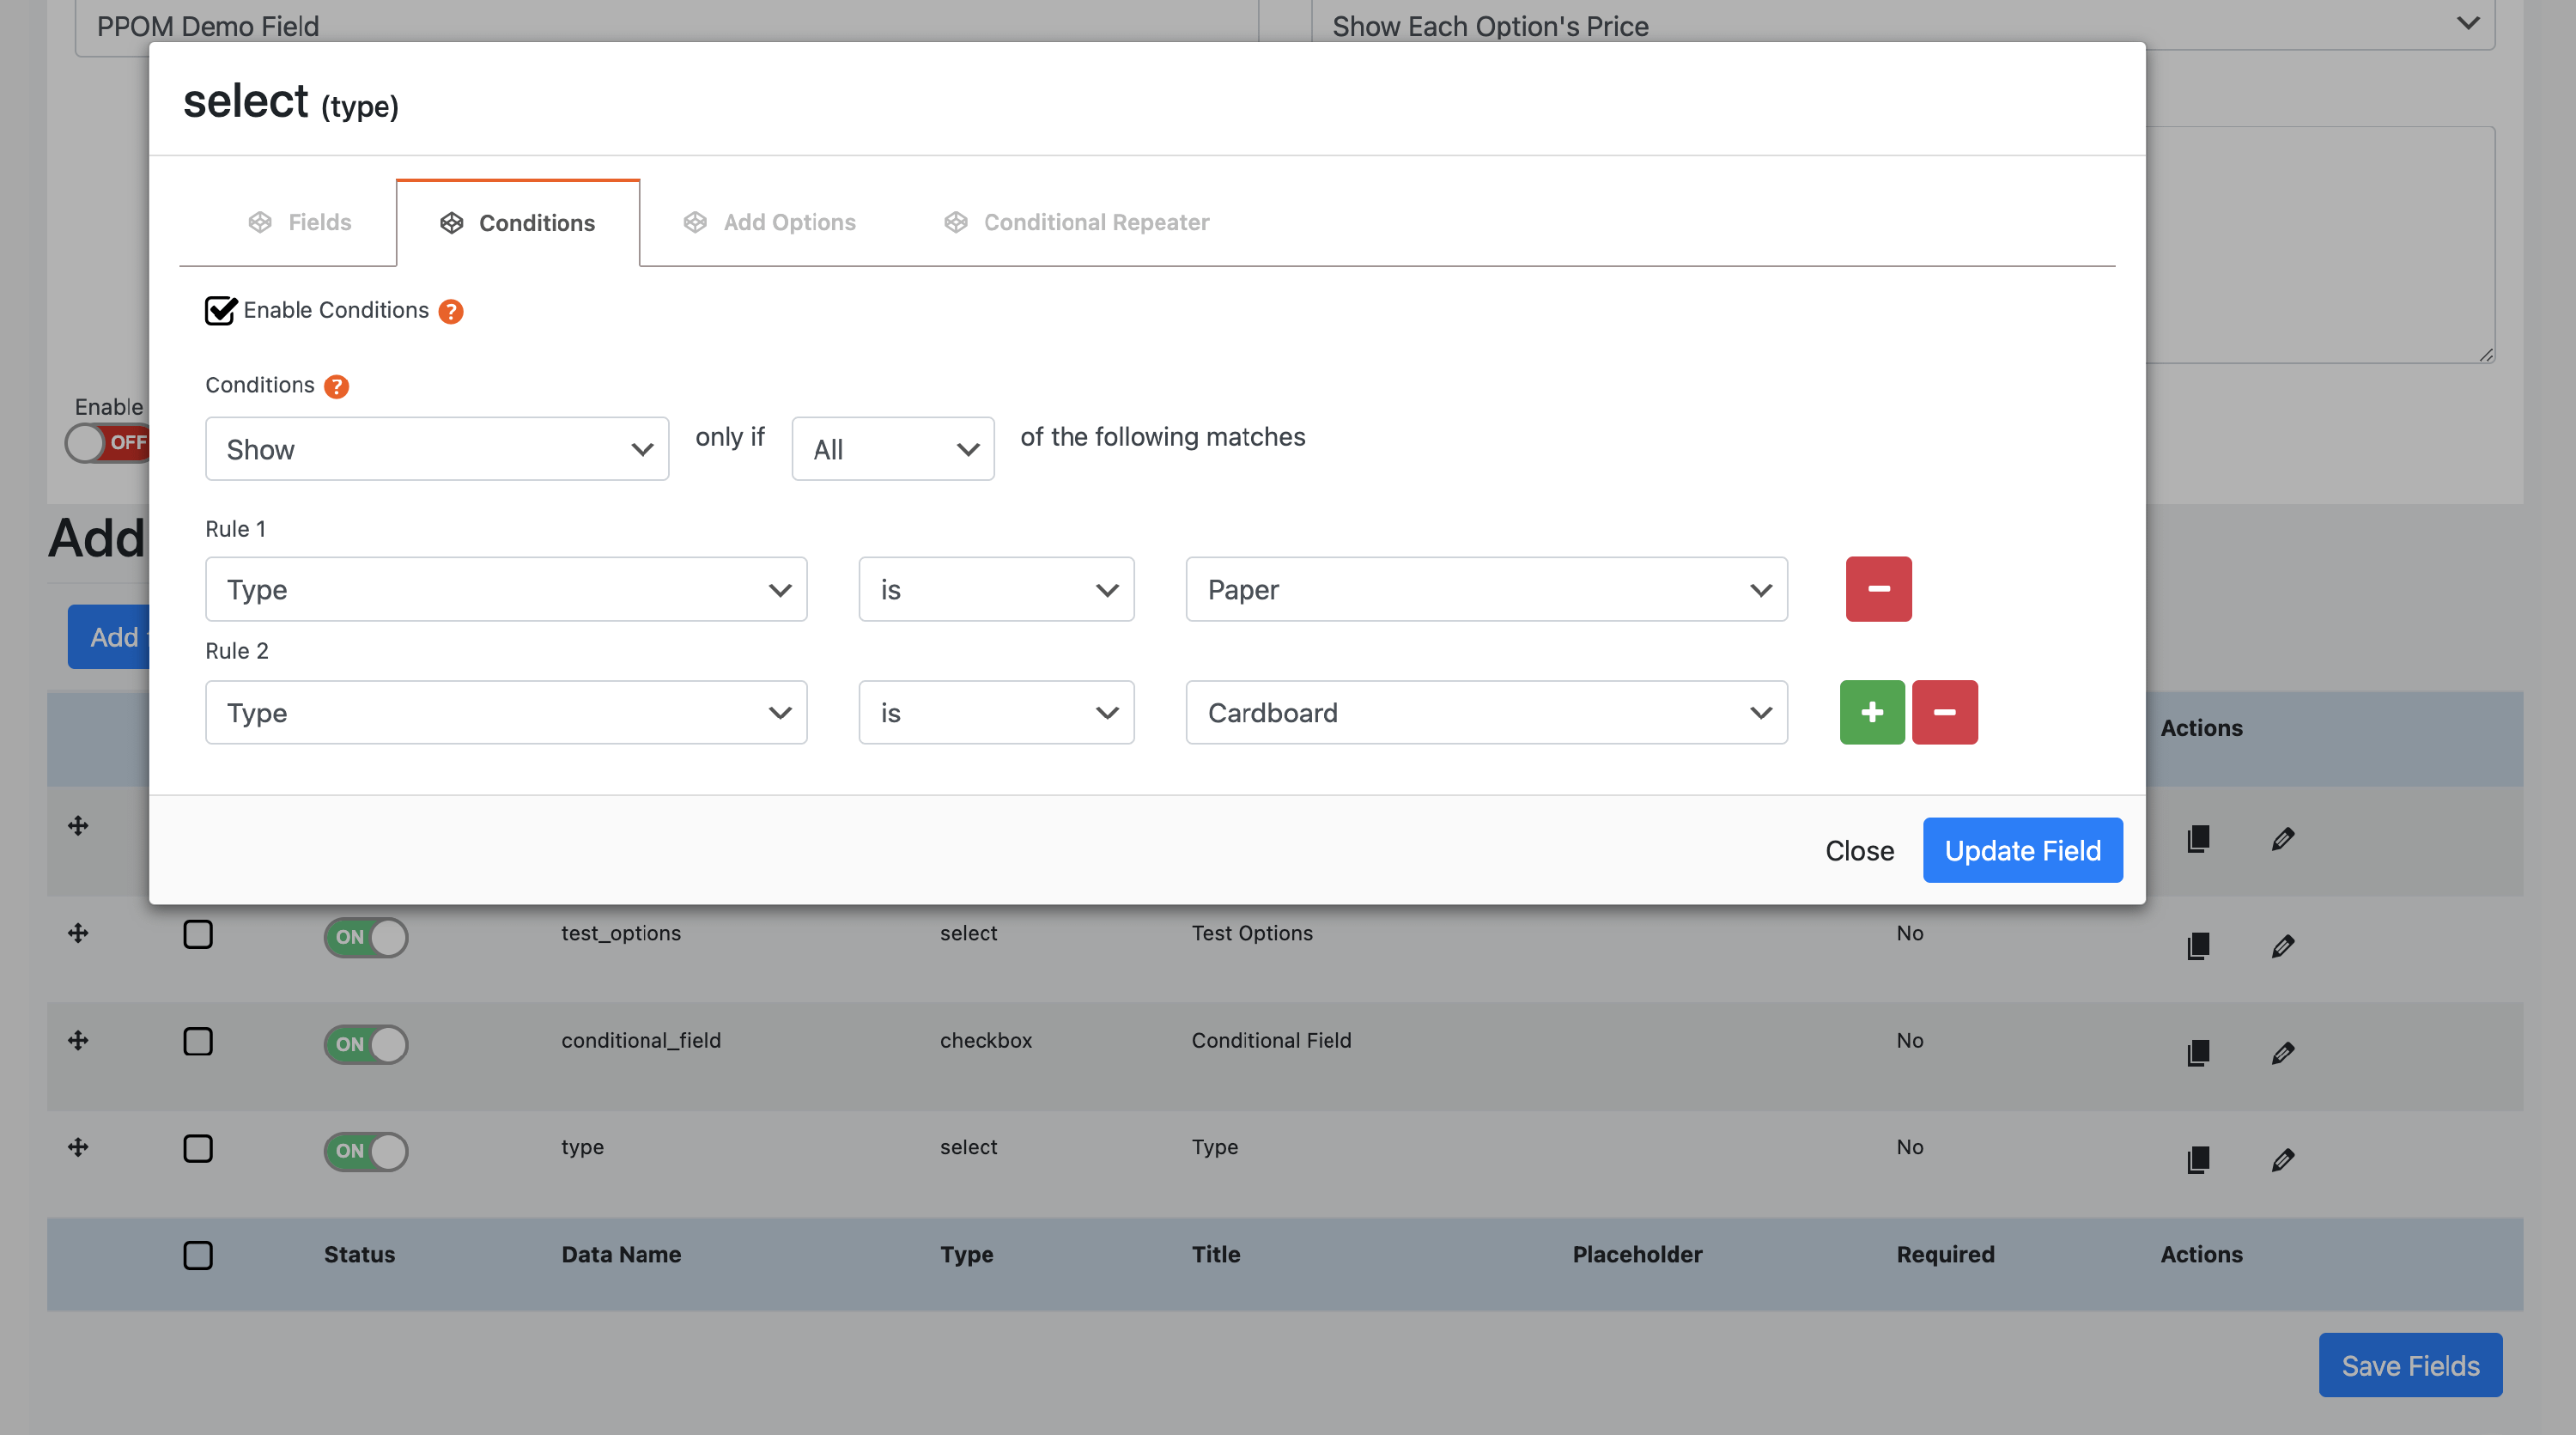
You can choose to show or hide fields if all or any of the restrictions are applied. In the example above, we have chosen to provide inscription services only for paper and cardboard, so we have added conditions on the text meta field and mentioned the rules.
It's important to note that display conditions function for multiple input types, but only choice and text input types (select, checkbox, number, text, etc.) can trigger the visibility of other fields. While fields like File Input and Image inputs can still be displayed or hidden, they cannot influence the visibility of other fields.
Give the triggering field a value if the rule must match on page load
Conditions are checked against the values your fields actually hold. A triggering field that holds no value yet cannot match a rule, so every field that depends on it keeps the visibility it was loaded with until the customer makes a choice.
This is most noticeable with Radio fields. A radio group starts with nothing selected unless you choose a default, so a rule based on that field only matches once the customer clicks an option. A Select field behaves differently, because a dropdown starts on its first option and therefore always has a value.
To make the rule match as soon as the product page loads, set a default on the triggering radio field:
- Go to WooCommerce > PPOM Fields and edit the field group attached to the product.
- Open the Radio field that your condition rule refers to.
- In Selected option, type the option that should be active when the page loads.
- Save the field group.
- Reload the product page and check that the dependent field is visible right away.
The value you type in Selected option has to match the option exactly as it appears in the Add options tab. If it does not match, no option is selected and the rule still will not match on load.
📝 Note: If a dependent field only appears after you click a radio option, an empty Selected option on the triggering field is the first thing to check. For more on setting up radio fields, see PPOM Free Input Types.
Can a coupon or promo code trigger PPOM fields?
PPOM display conditions are evaluated on the product page and react to PPOM field values. A standard WooCommerce coupon code entered later in the cart or checkout does not directly trigger PPOM field visibility.
Workaround: use a PPOM text field as the code trigger
If you want to show a field only when a customer enters a specific code, you can use a PPOM Text field as the trigger:
- Edit your PPOM meta group and add a Text field for the code.
- Add (or edit) the field that should appear only for that code.
- Open that field's Conditions tab and enable Enable Conditions.
- Set the rule to Show the field when the code text field value matches your target code.
- Save the field group, clear any site/server cache, and test the product page.
⚠️ Warning: This PPOM code field does not apply a WooCommerce discount by itself. If you need an actual discount, configure a WooCommerce coupon or a separate pricing setup.
Free vs Pro note for Display Conditions
Basic Display Conditions are available in both the free and Pro versions. Condition options vary by plan, so check the full feature matrix in What is the Difference between PPOM Free and PPOM PRO?.
The available conditions are different in the free version vs Pro version, as follows:
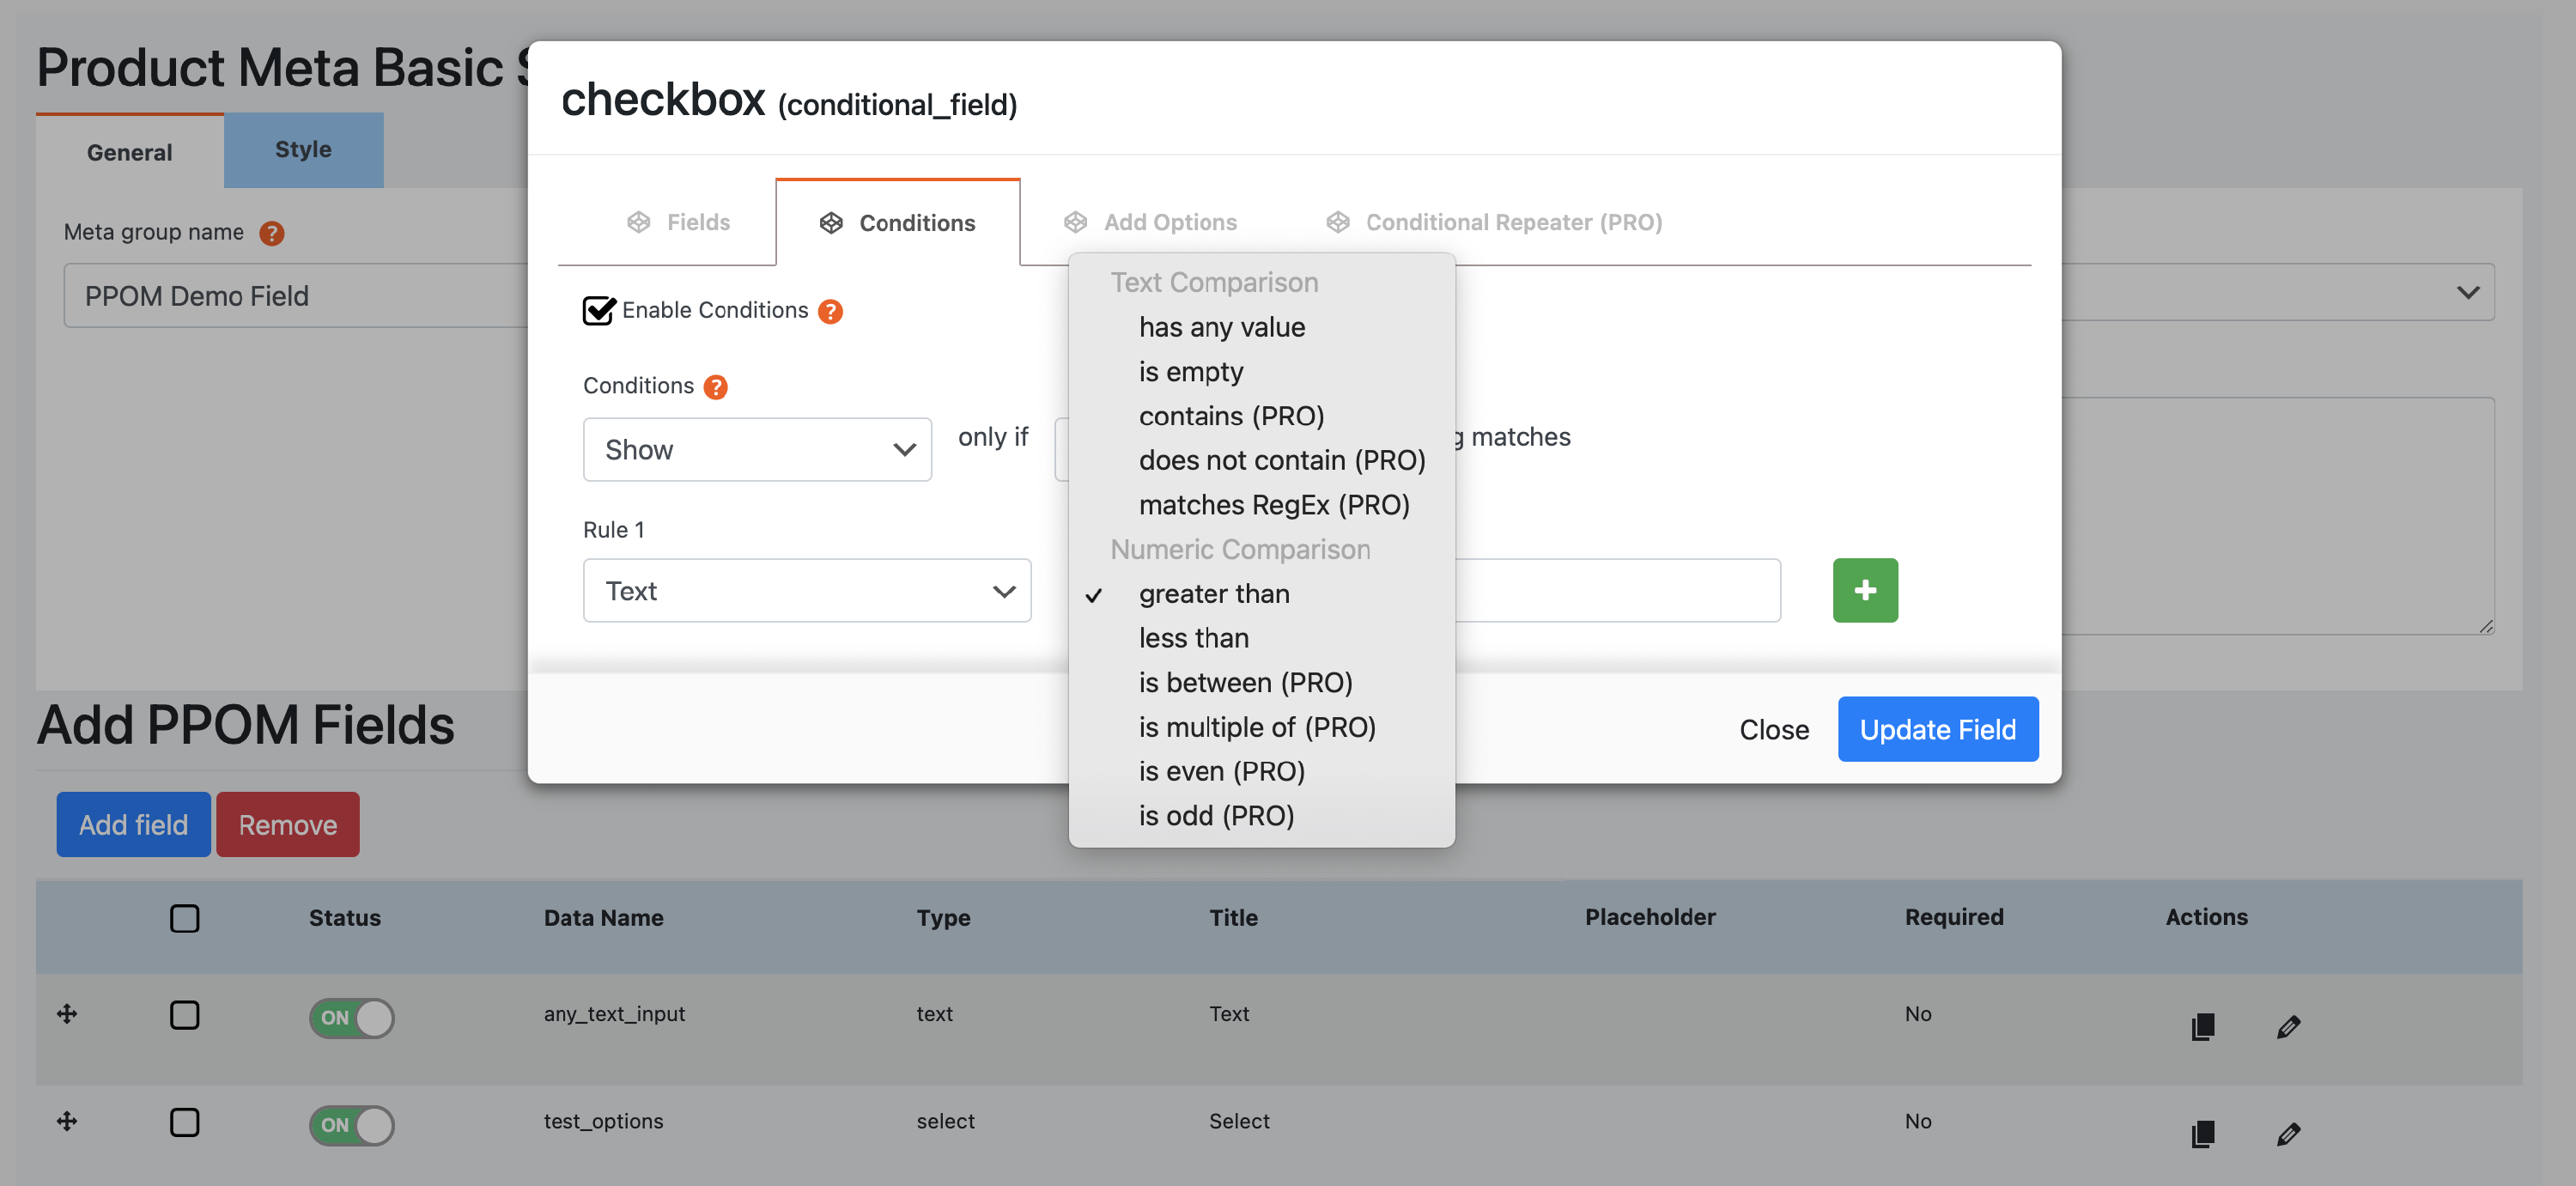
Pro users can also scope a field group to specific WooCommerce variations from the field-group attachment controls. On variable products, PPOM shows or hides those fields based on the customer's selected variation.
Conditional Repeater
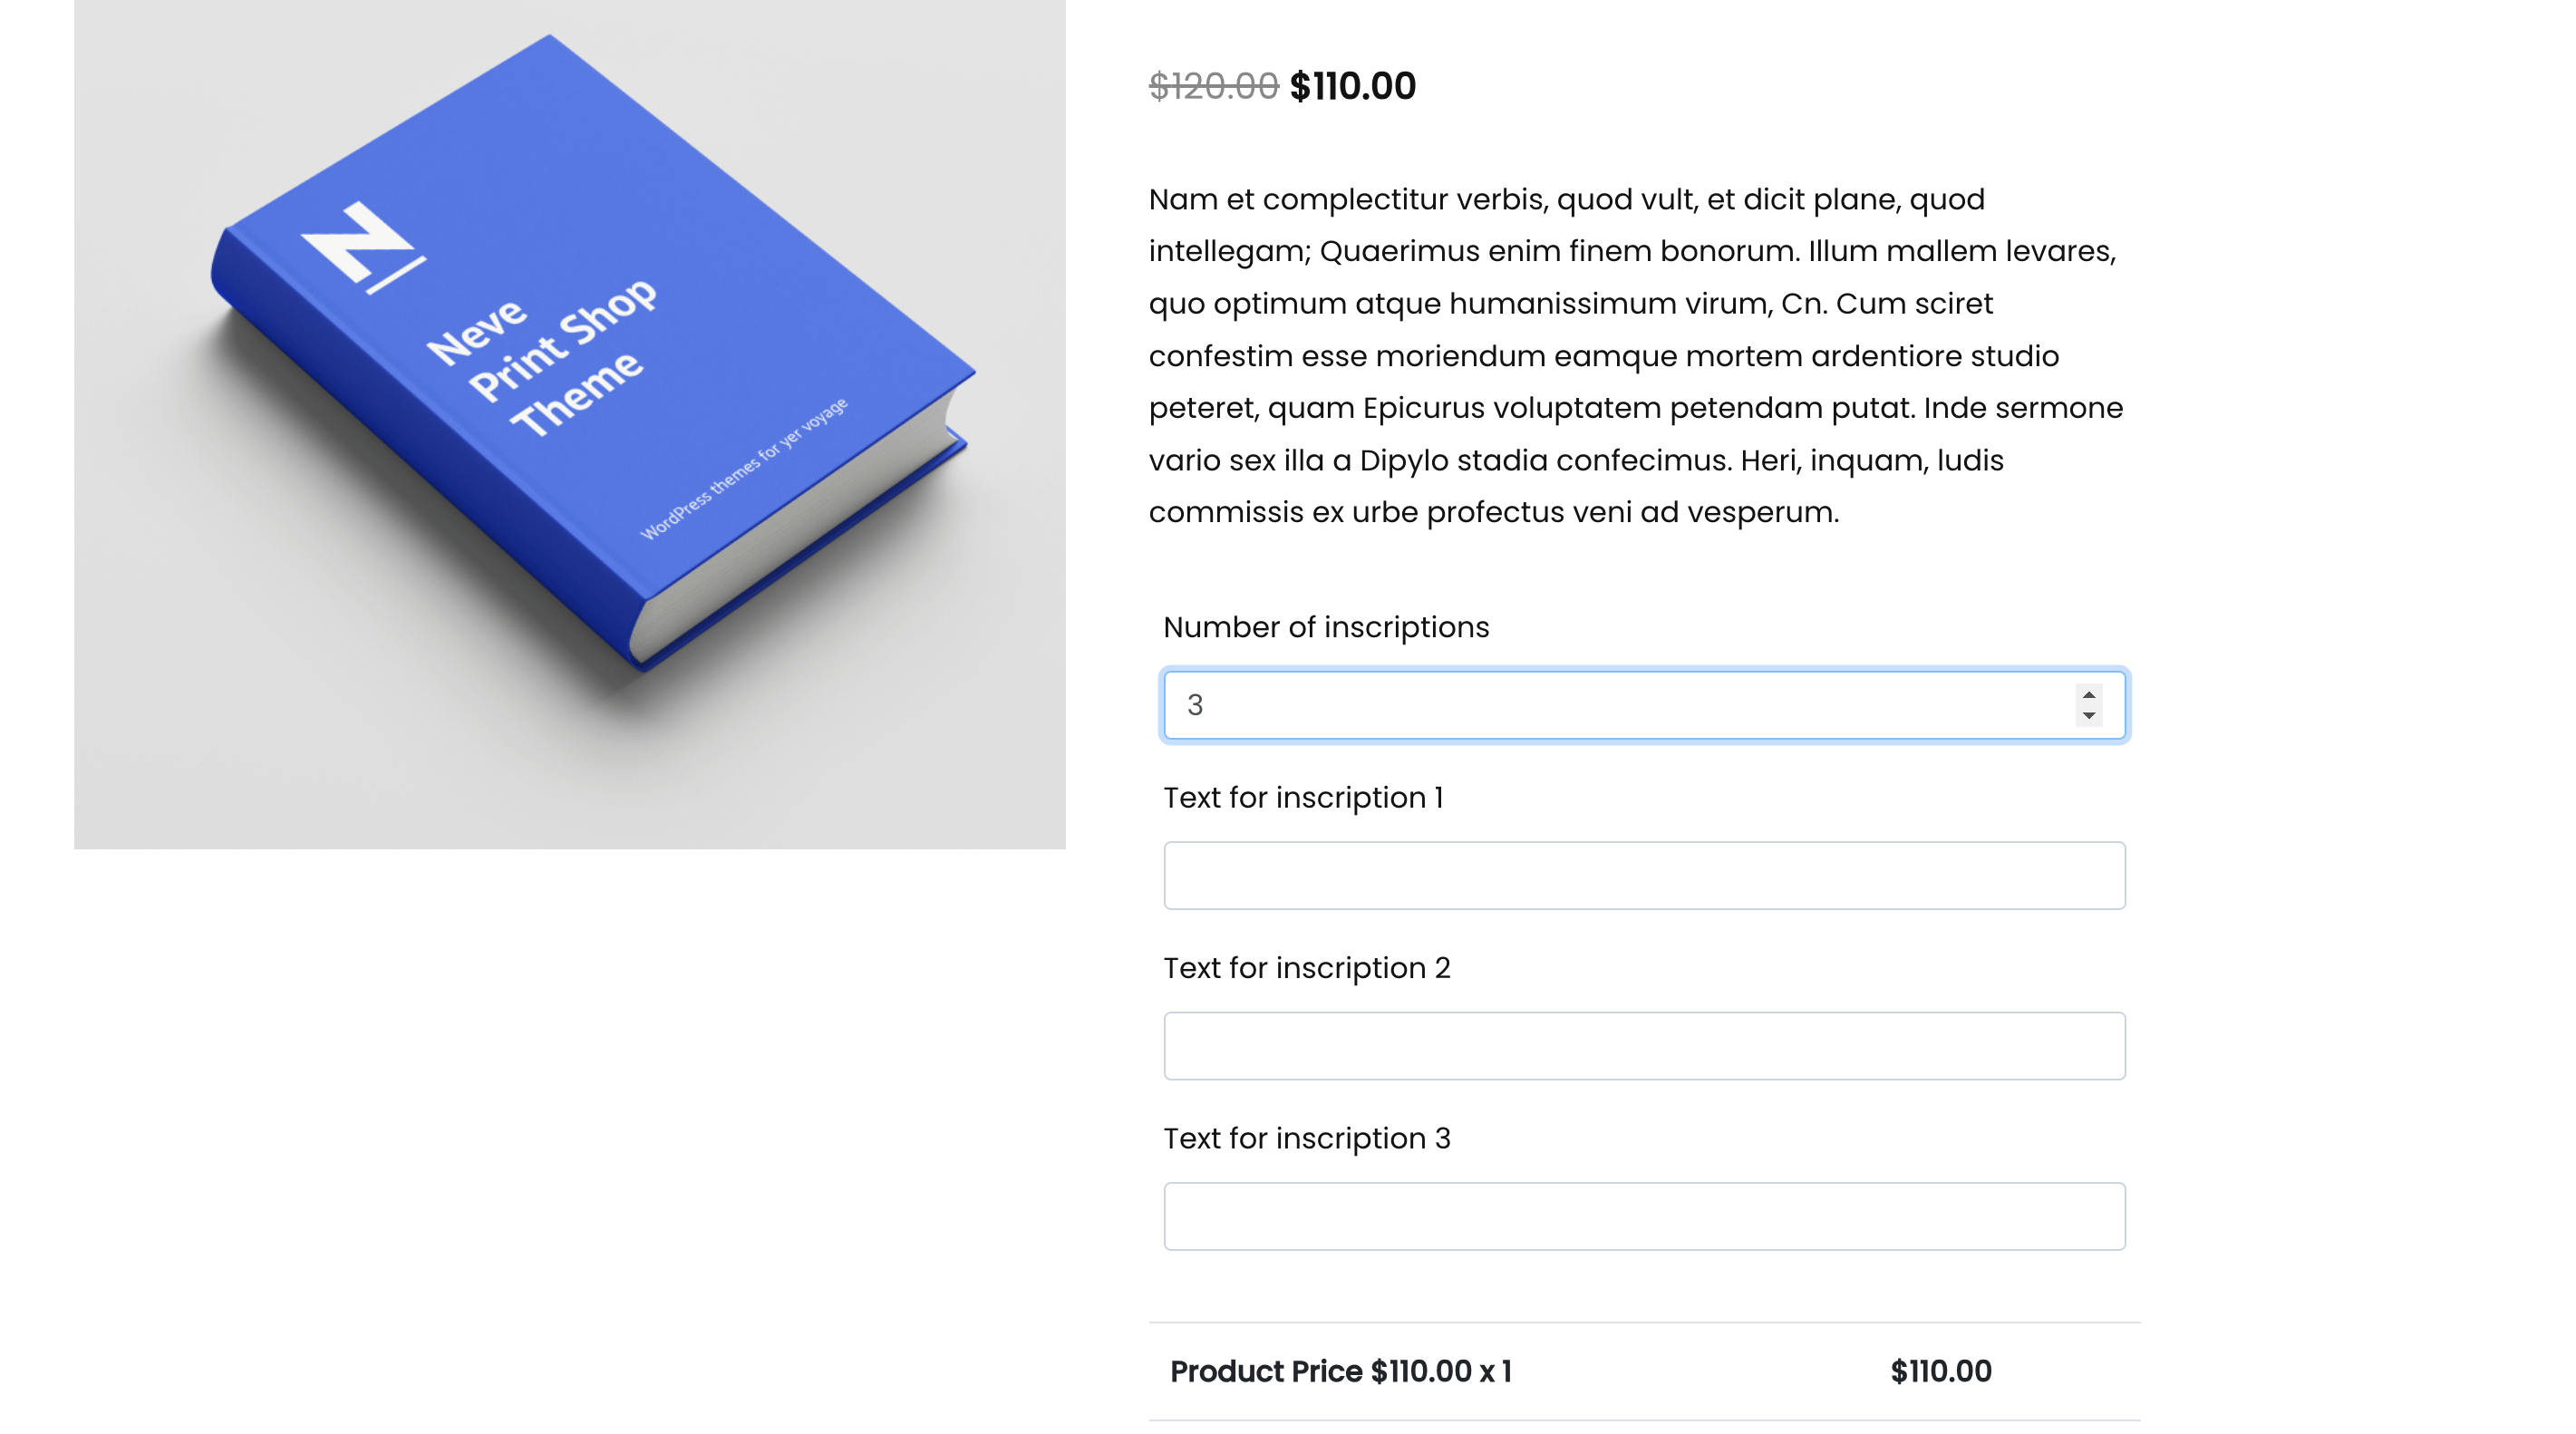
The Conditional Repeater allows you to repeat specific fields based on the input give in one of these fields: Number, Variation Quantity, or Quantity Pack. More exactly, if a user enters "2" in one of those fields, two corresponding fields will appear.
The repeat count always comes from one of those PPOM fields. The WooCommerce quantity selector on the product page cannot be used as the repeat count, so changing the product quantity does not add or remove repeated fields.
Repeated fields are copies of the original fields, not independent blocks. Conditional logic is not evaluated separately inside each copy, so a choice made in one copy (for example, the first attendee's meal choice) cannot show or hide a field only within that same copy.
Priced options inside repeated fields follow the normal PPOM pricing rules: the price is multiplied by the product quantity unless One Time Fee/Charge is enabled on the field.
📝 Note: The Conditional Repeater requires the Plus or VIP plan. It is not included in the Essential plan. Compare the plans on the PPOM Pro pricing page.
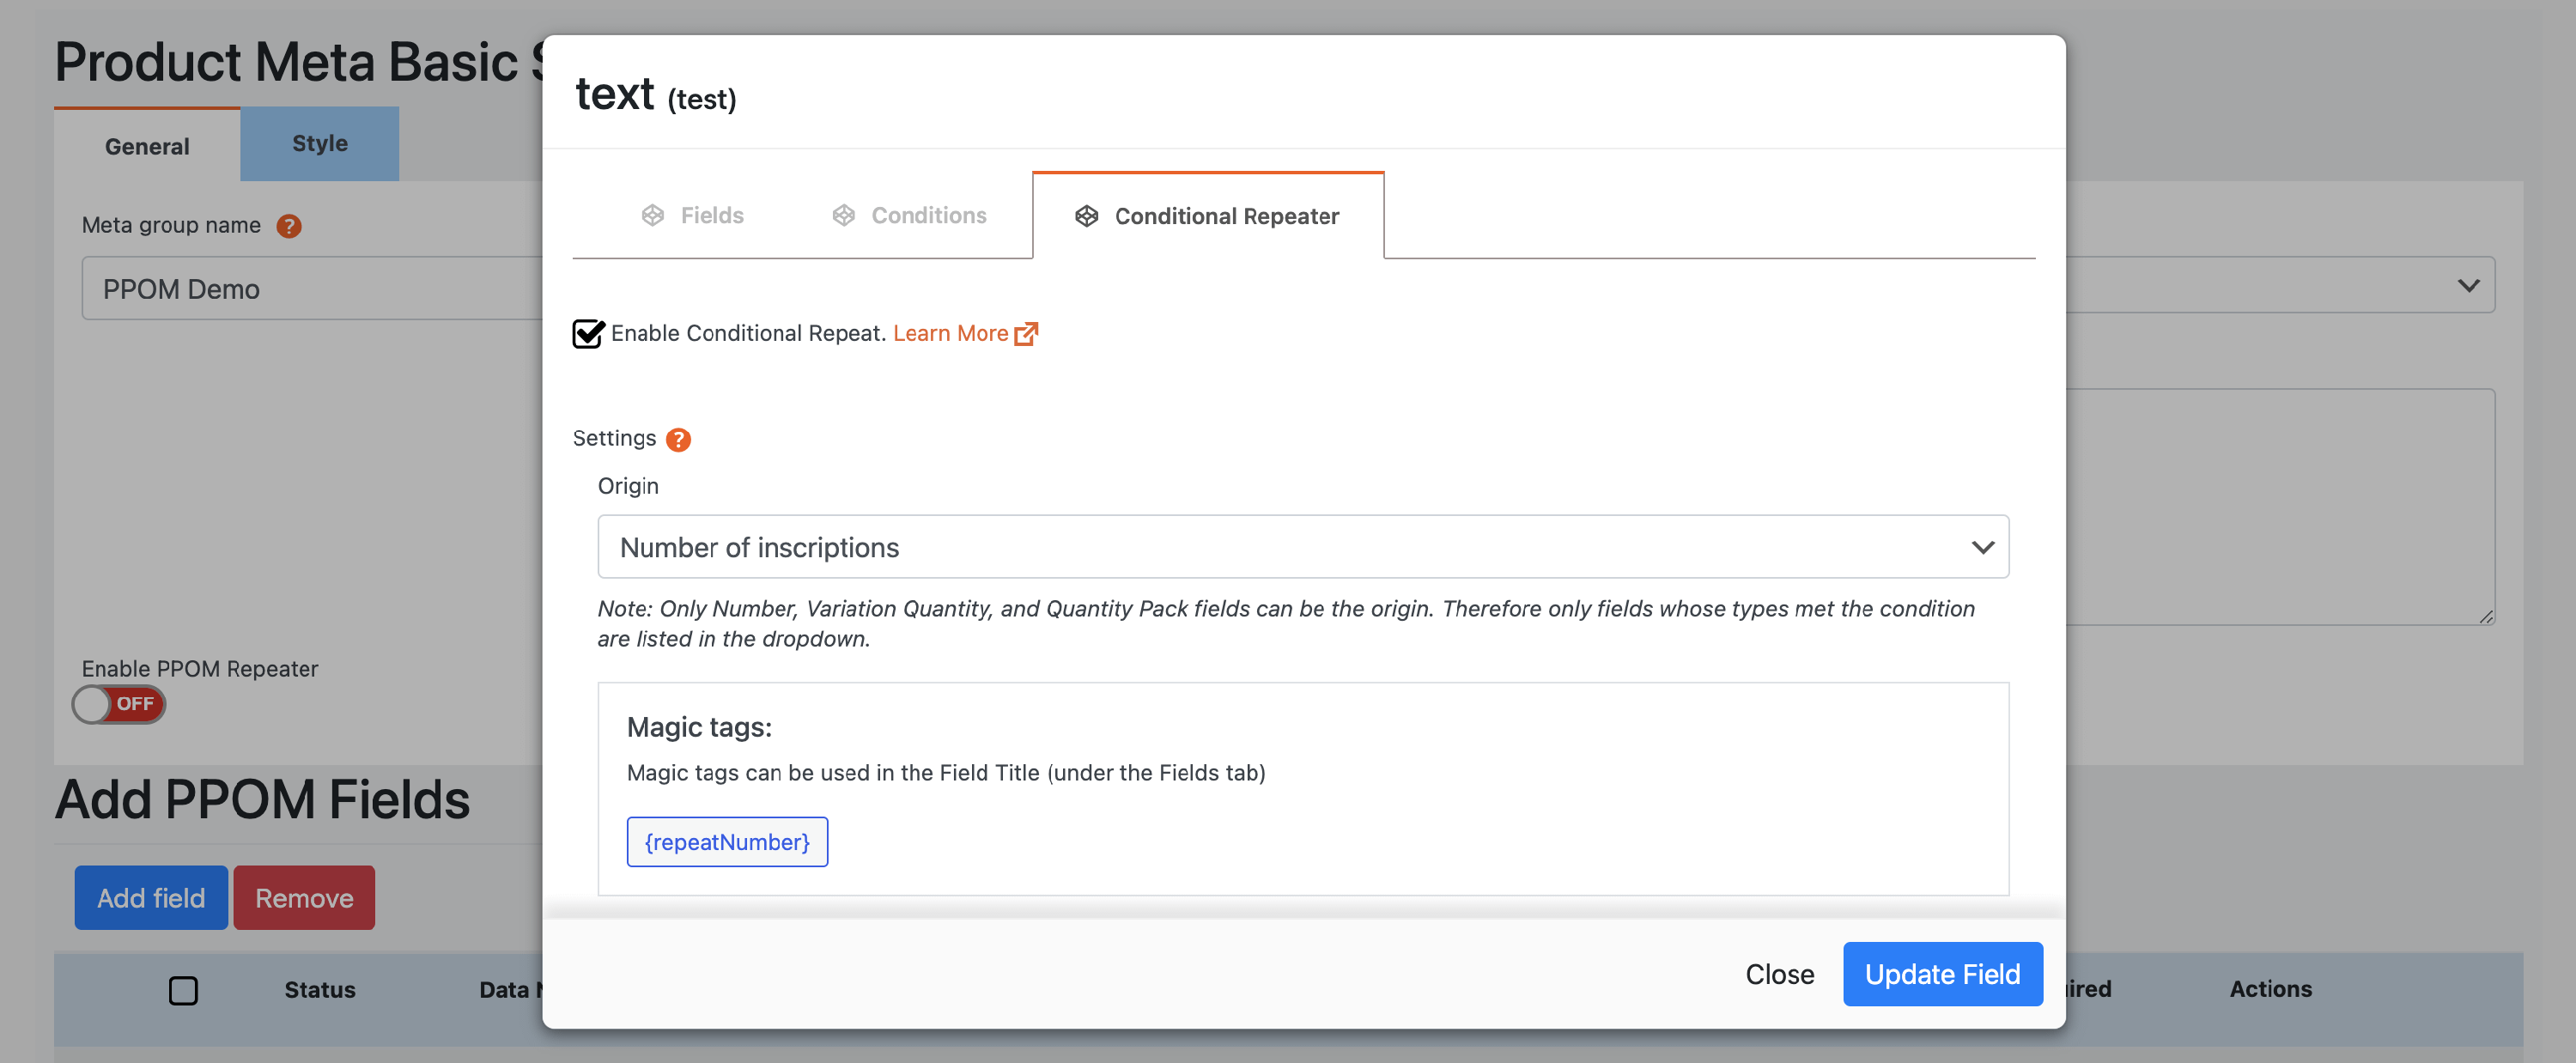
More than that, to make things even clearer, you can use the available magic tags in the field title:
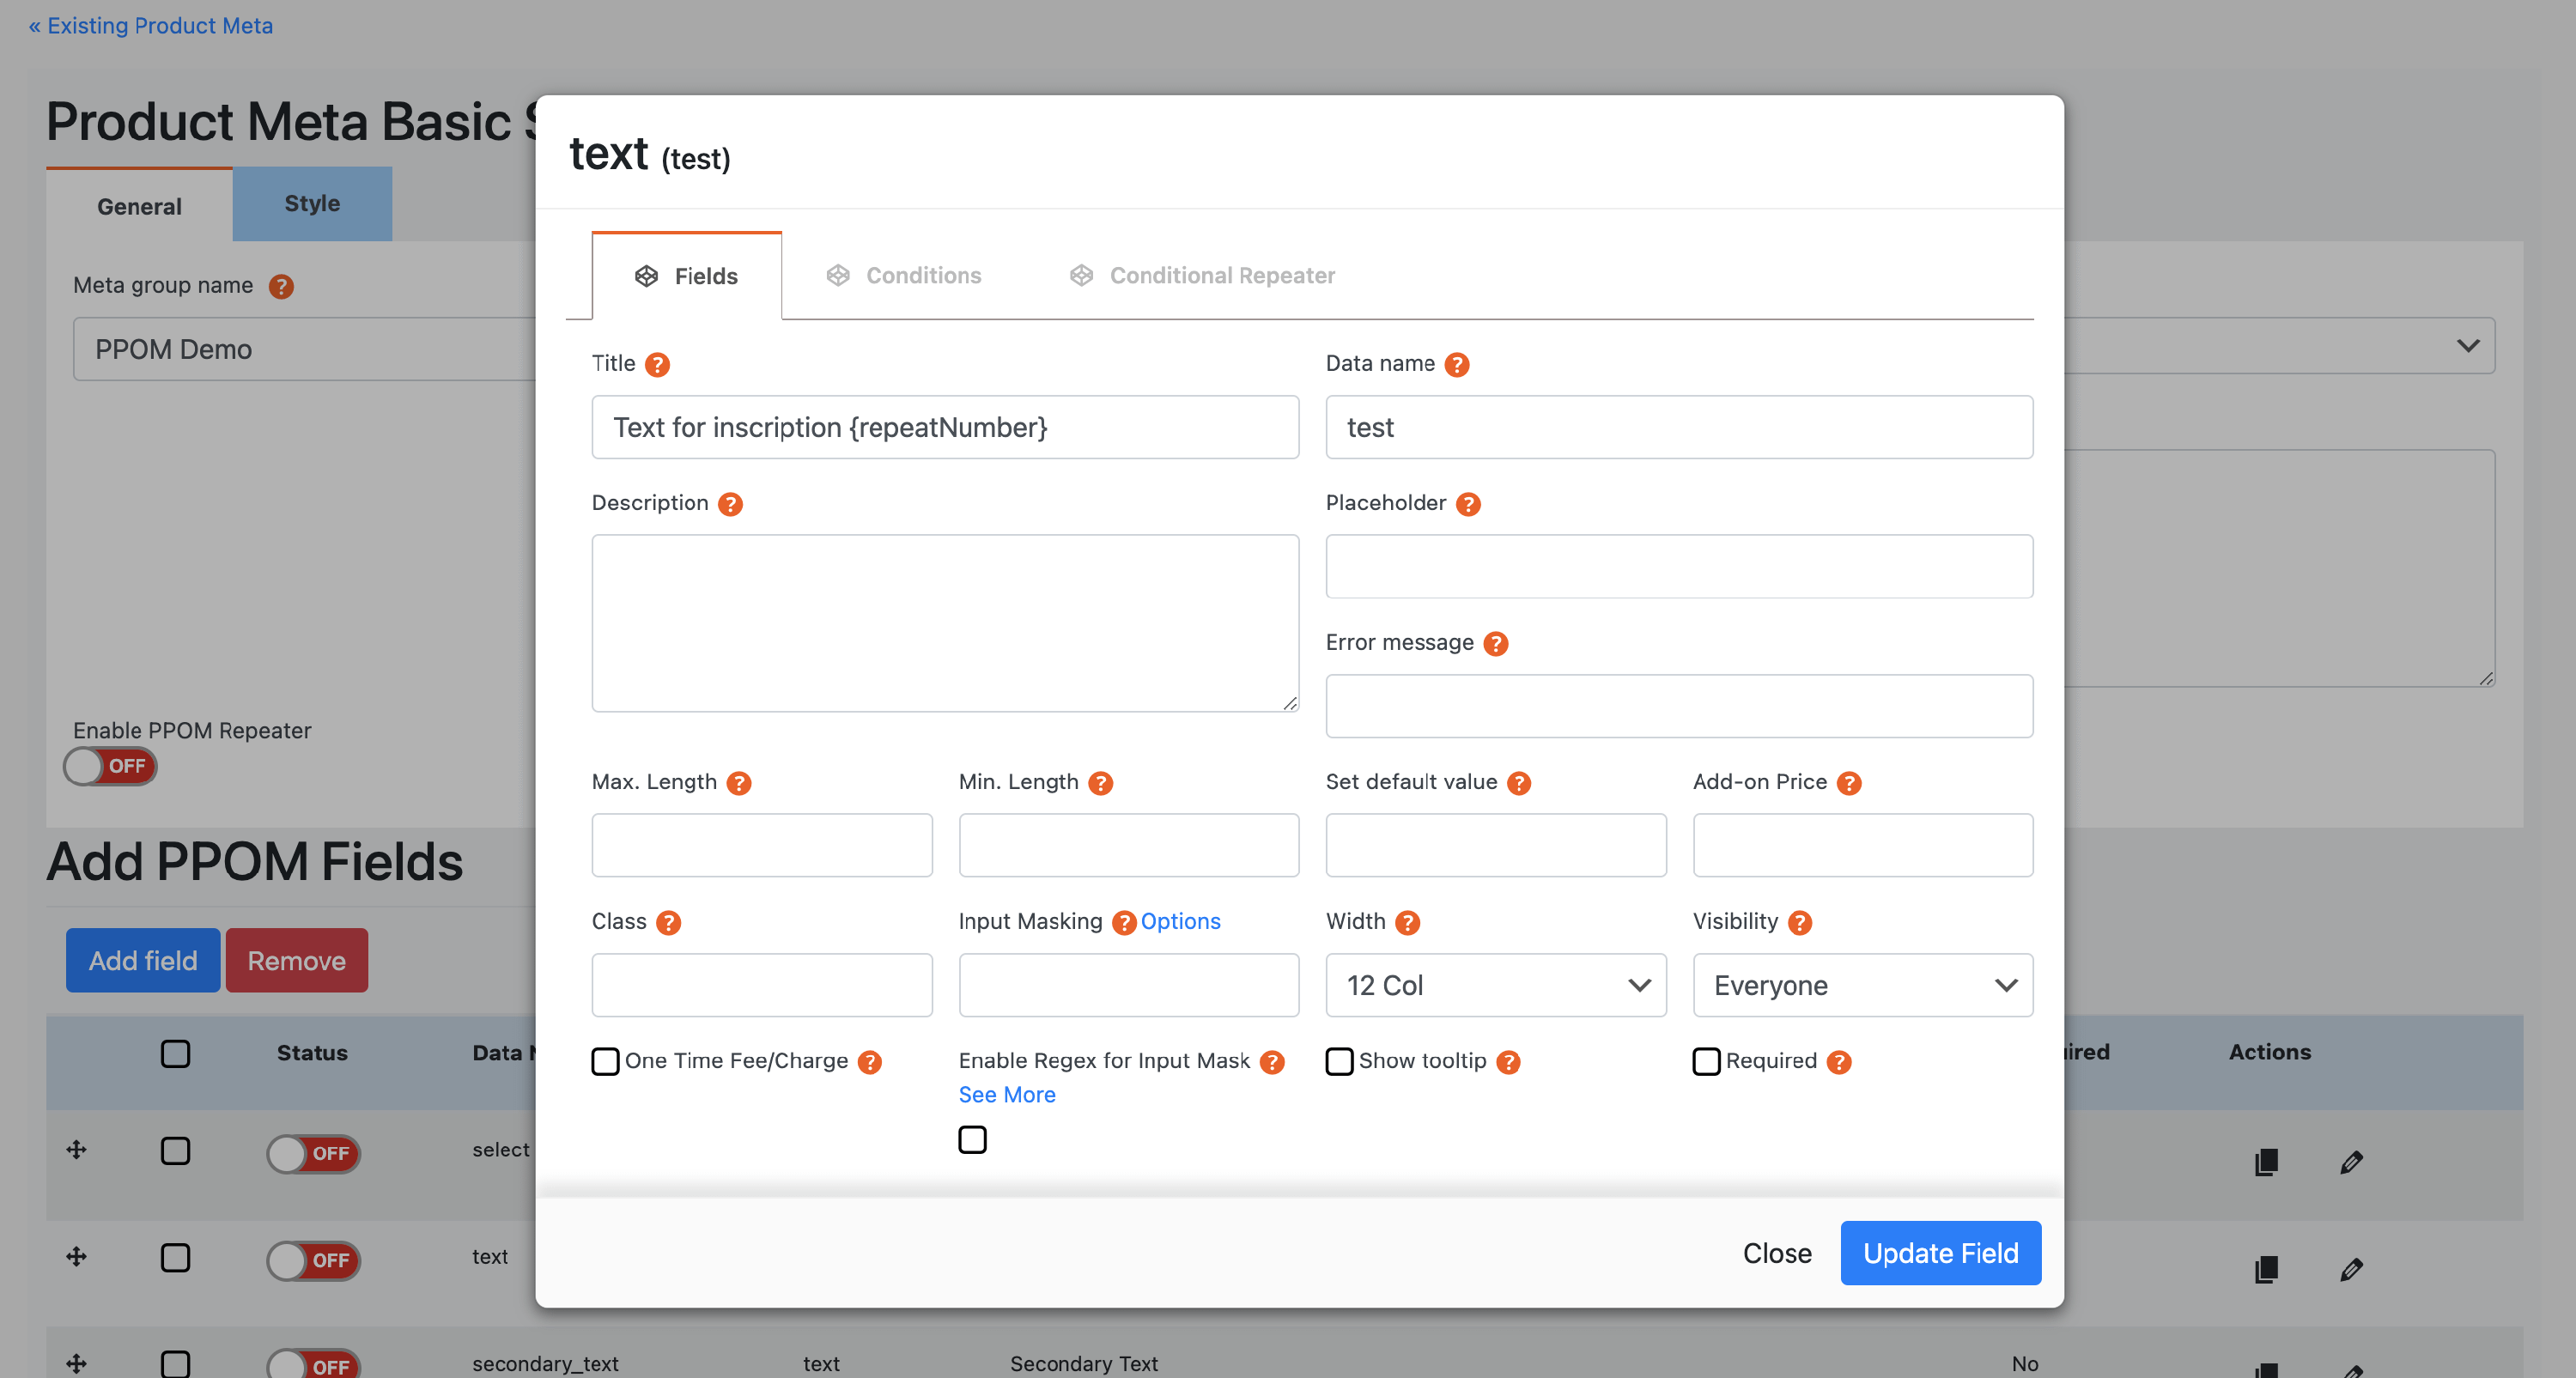
As a result, the text field label will also show the corresponding number based on the order.
Example
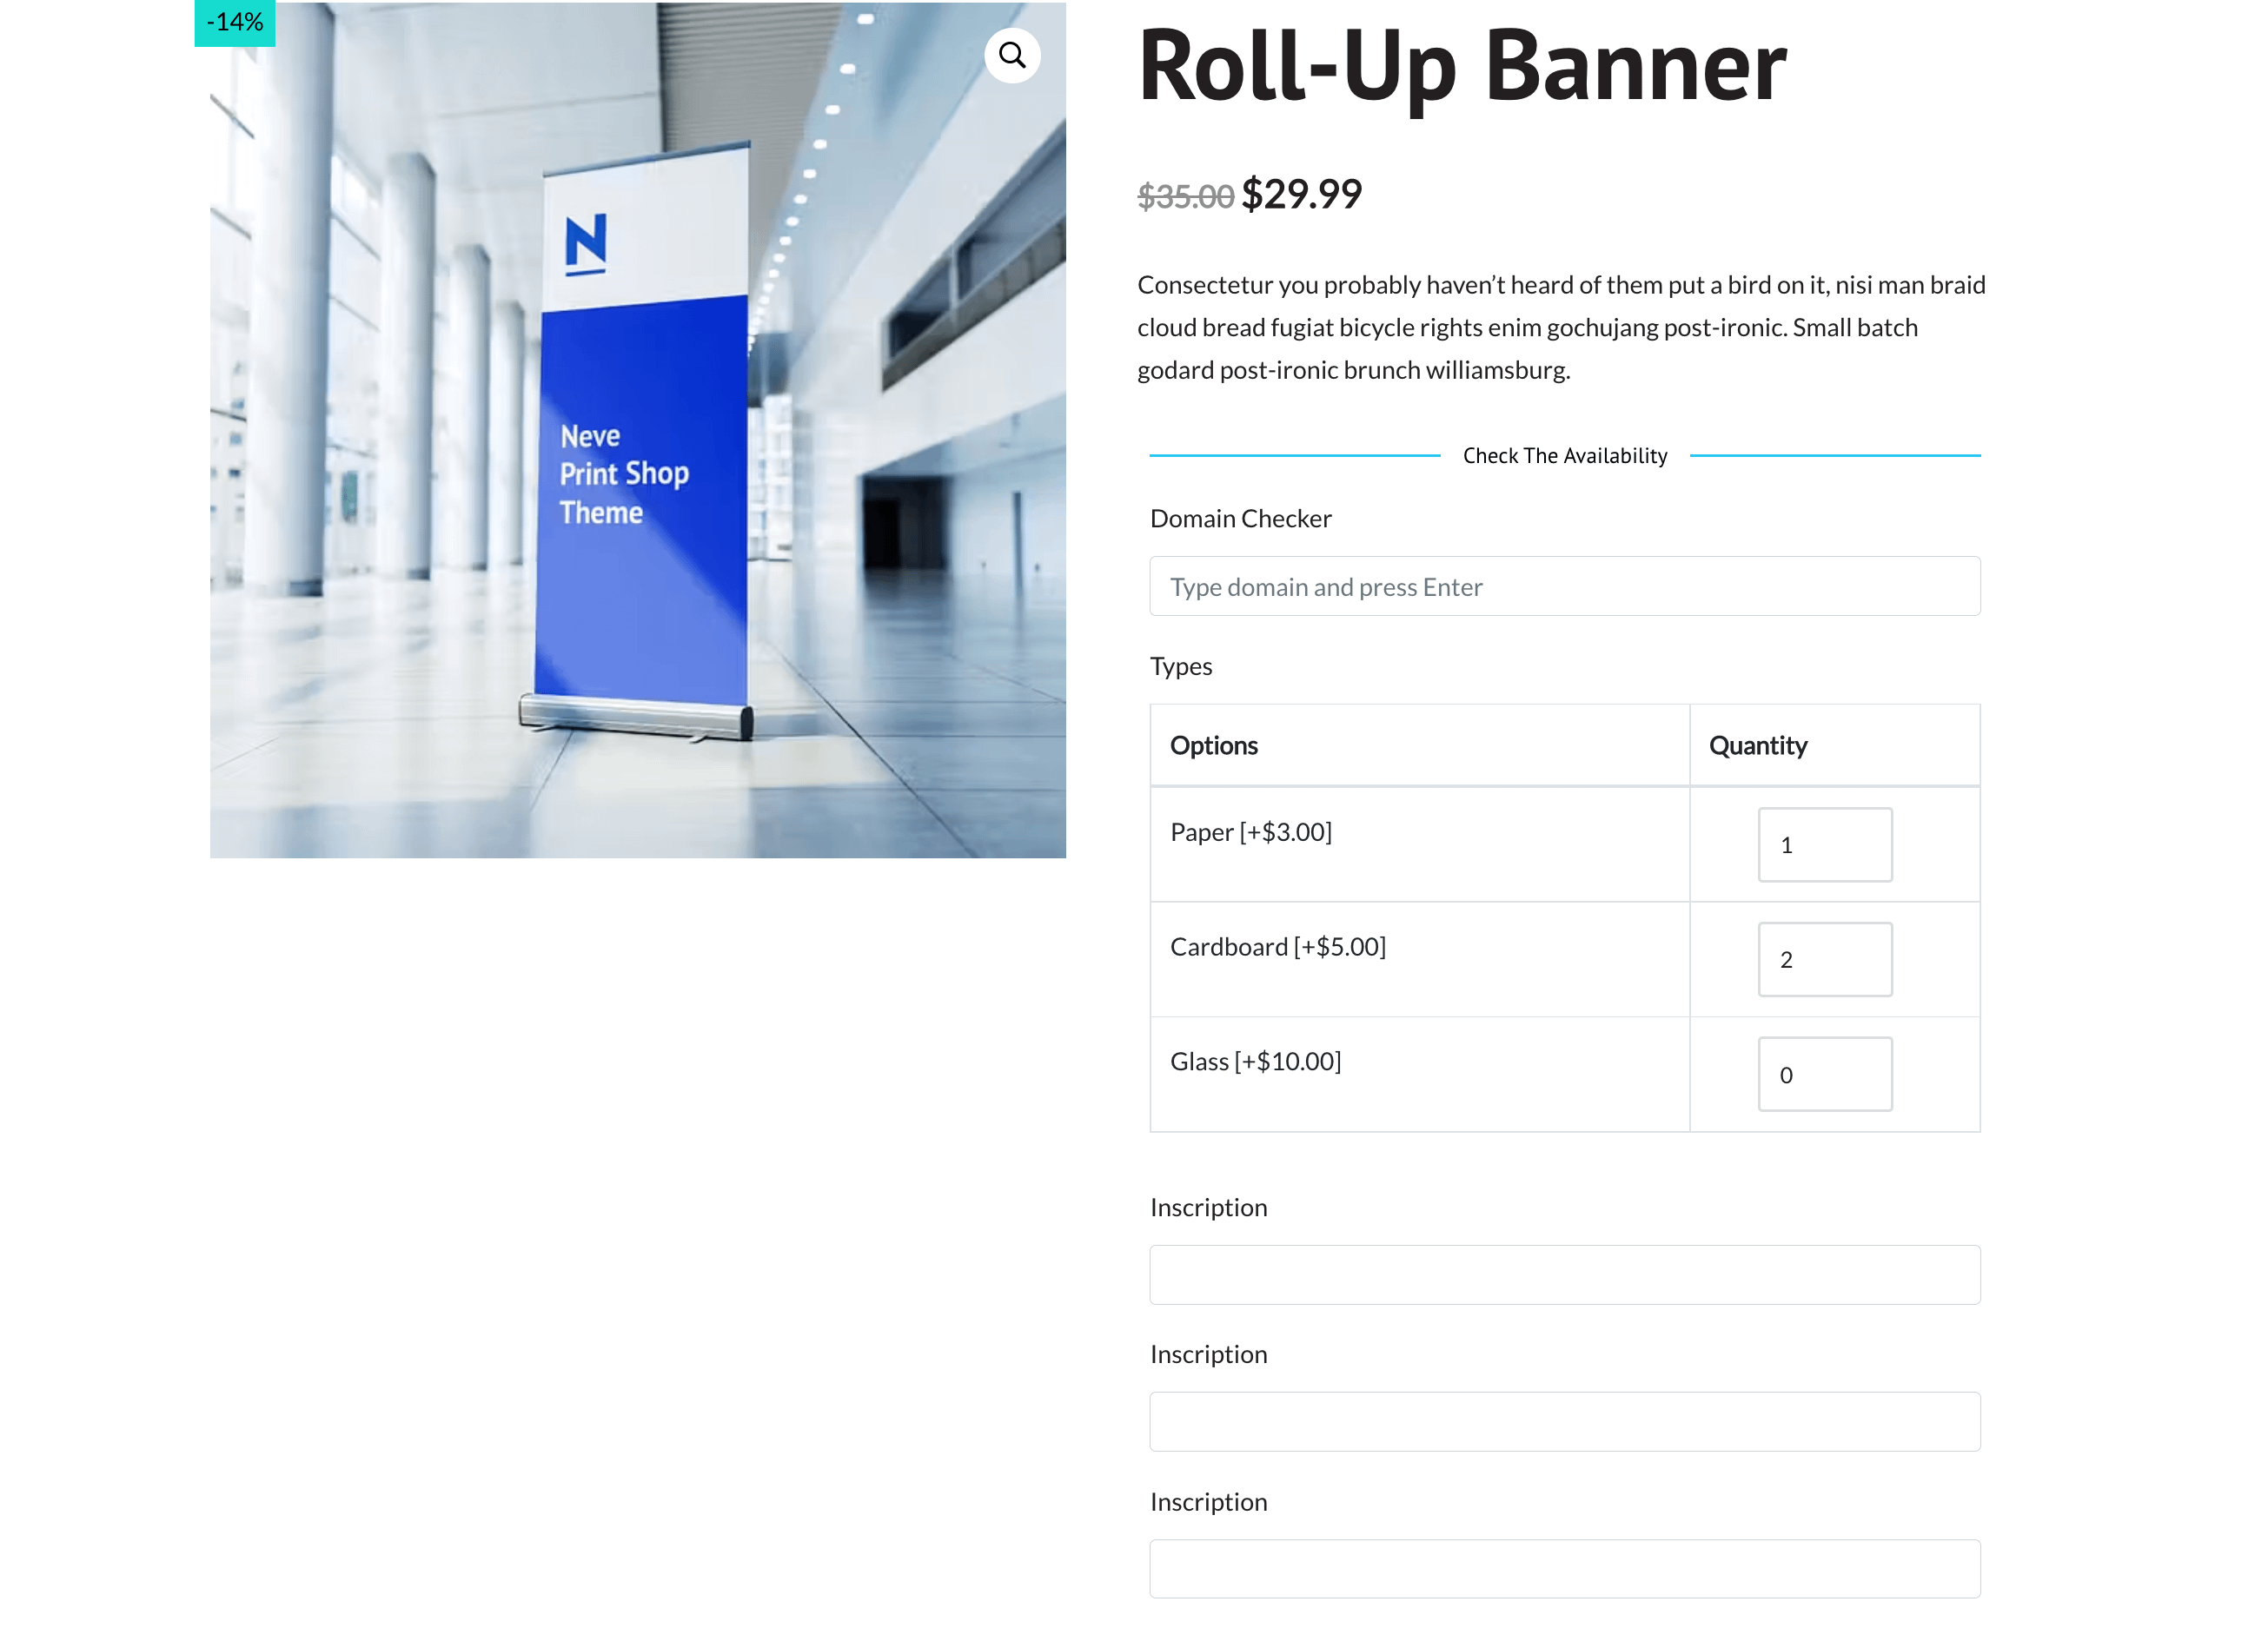
We have used a Variation Quantity (called Types) meta field that holds the 3 types of material and allows the user to insert the number of products of each type he wants.
We also provide the Inscriptioning service using the Text meta field, which means that if you need an inscription for each product, you should be able to insert them accordingly.
We have acquired 1 Paper type and 2 Cardboard type, so 3 inscription fields appeared, so that each product can have its own inscription:
PPOM Repeater
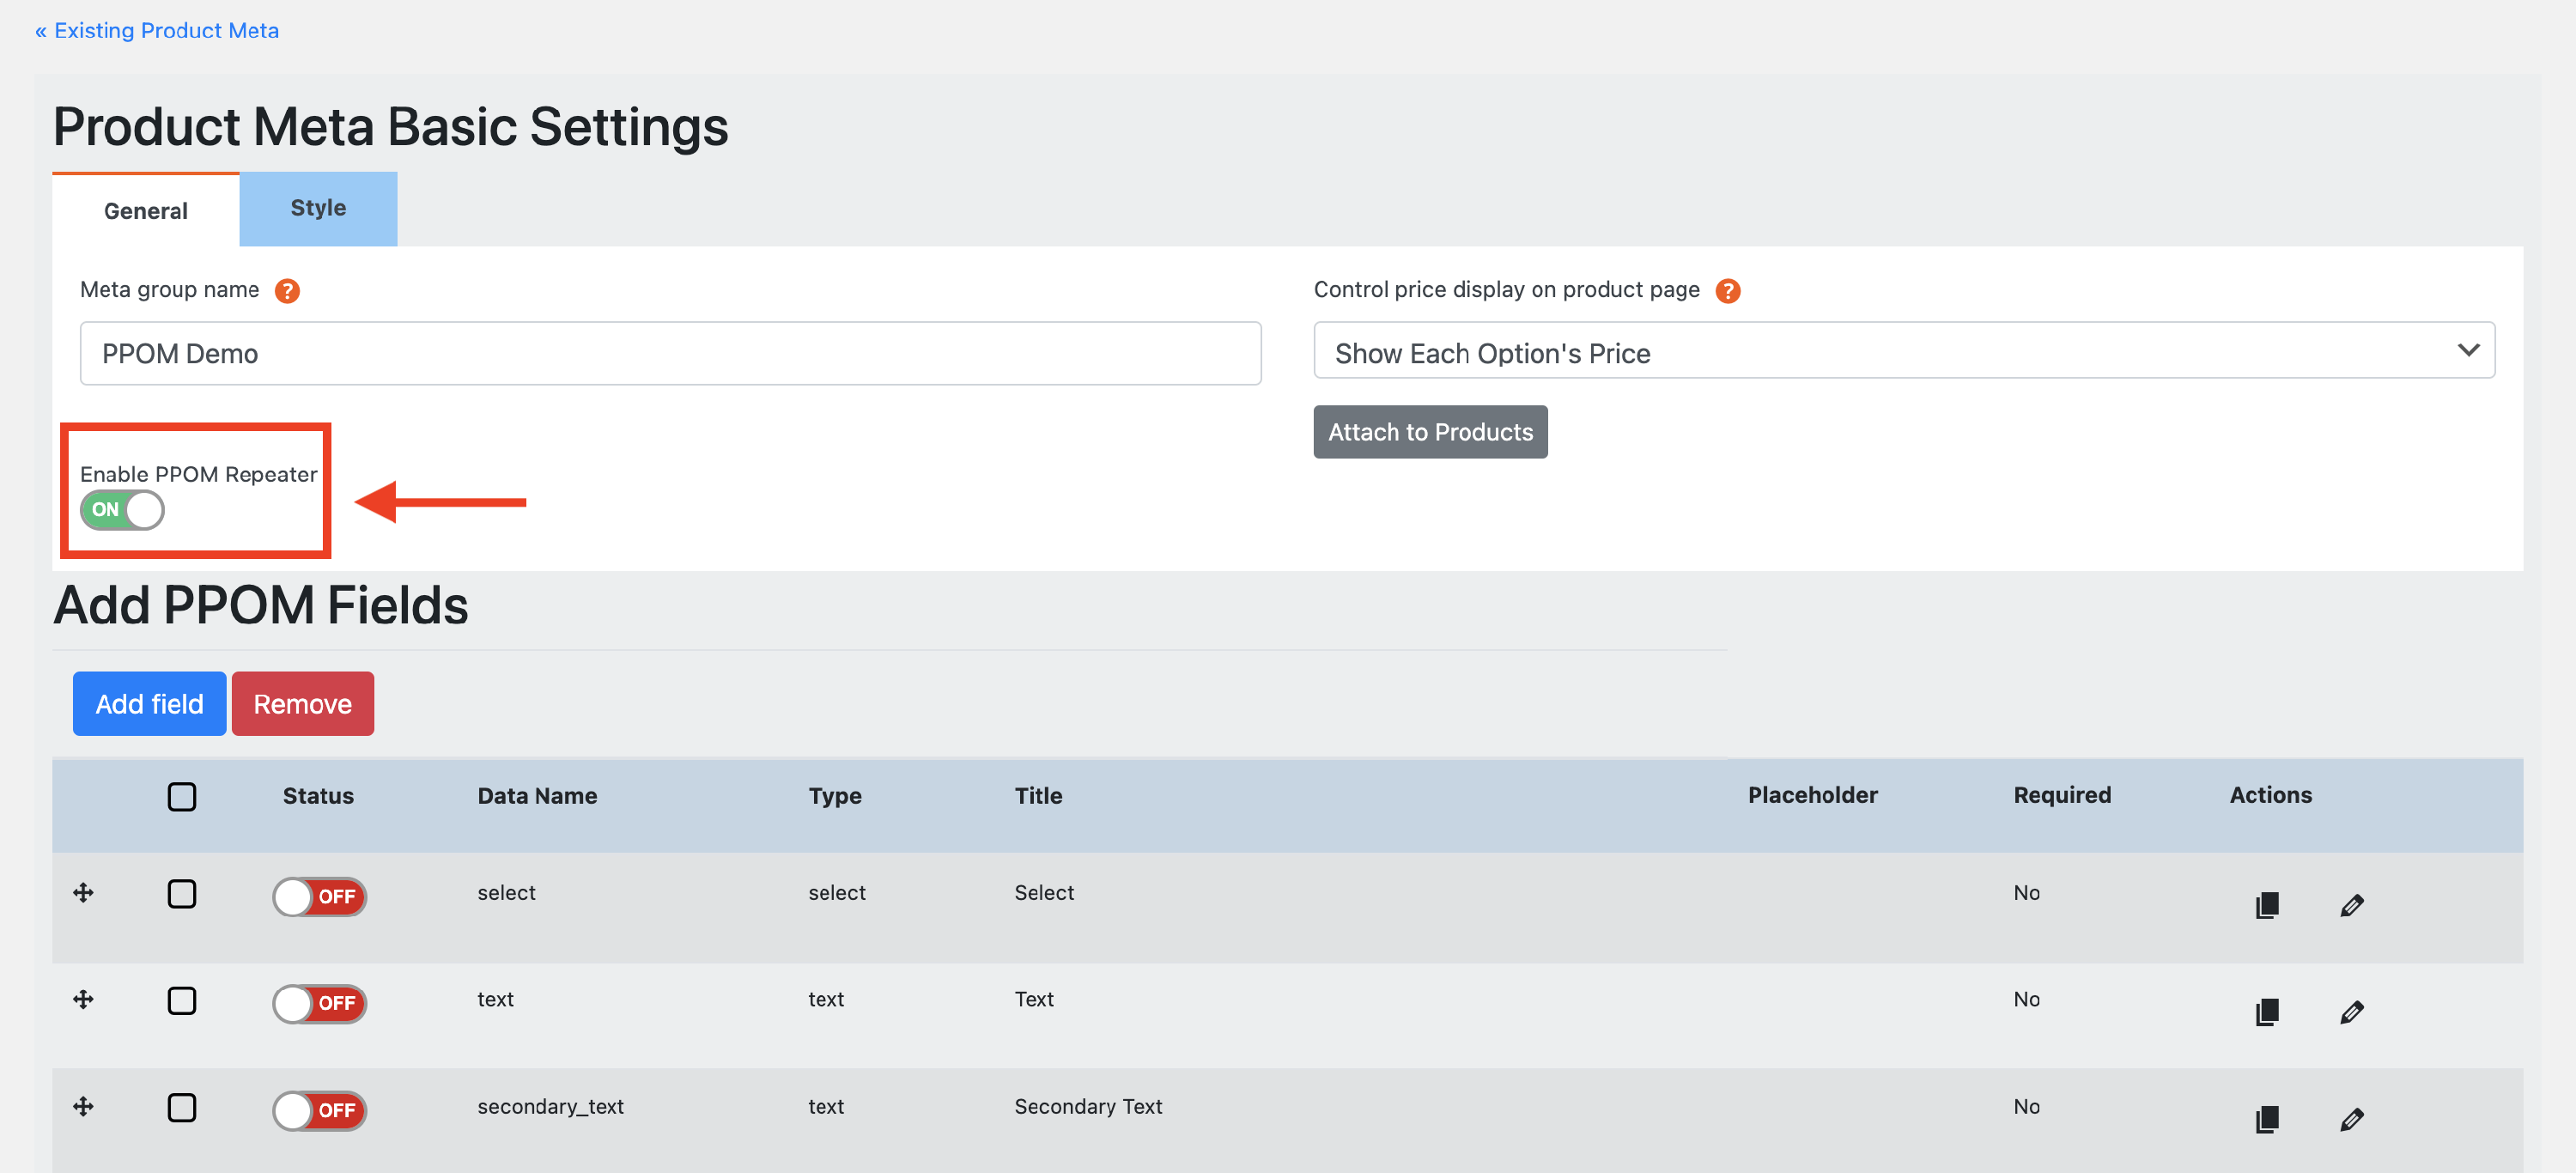
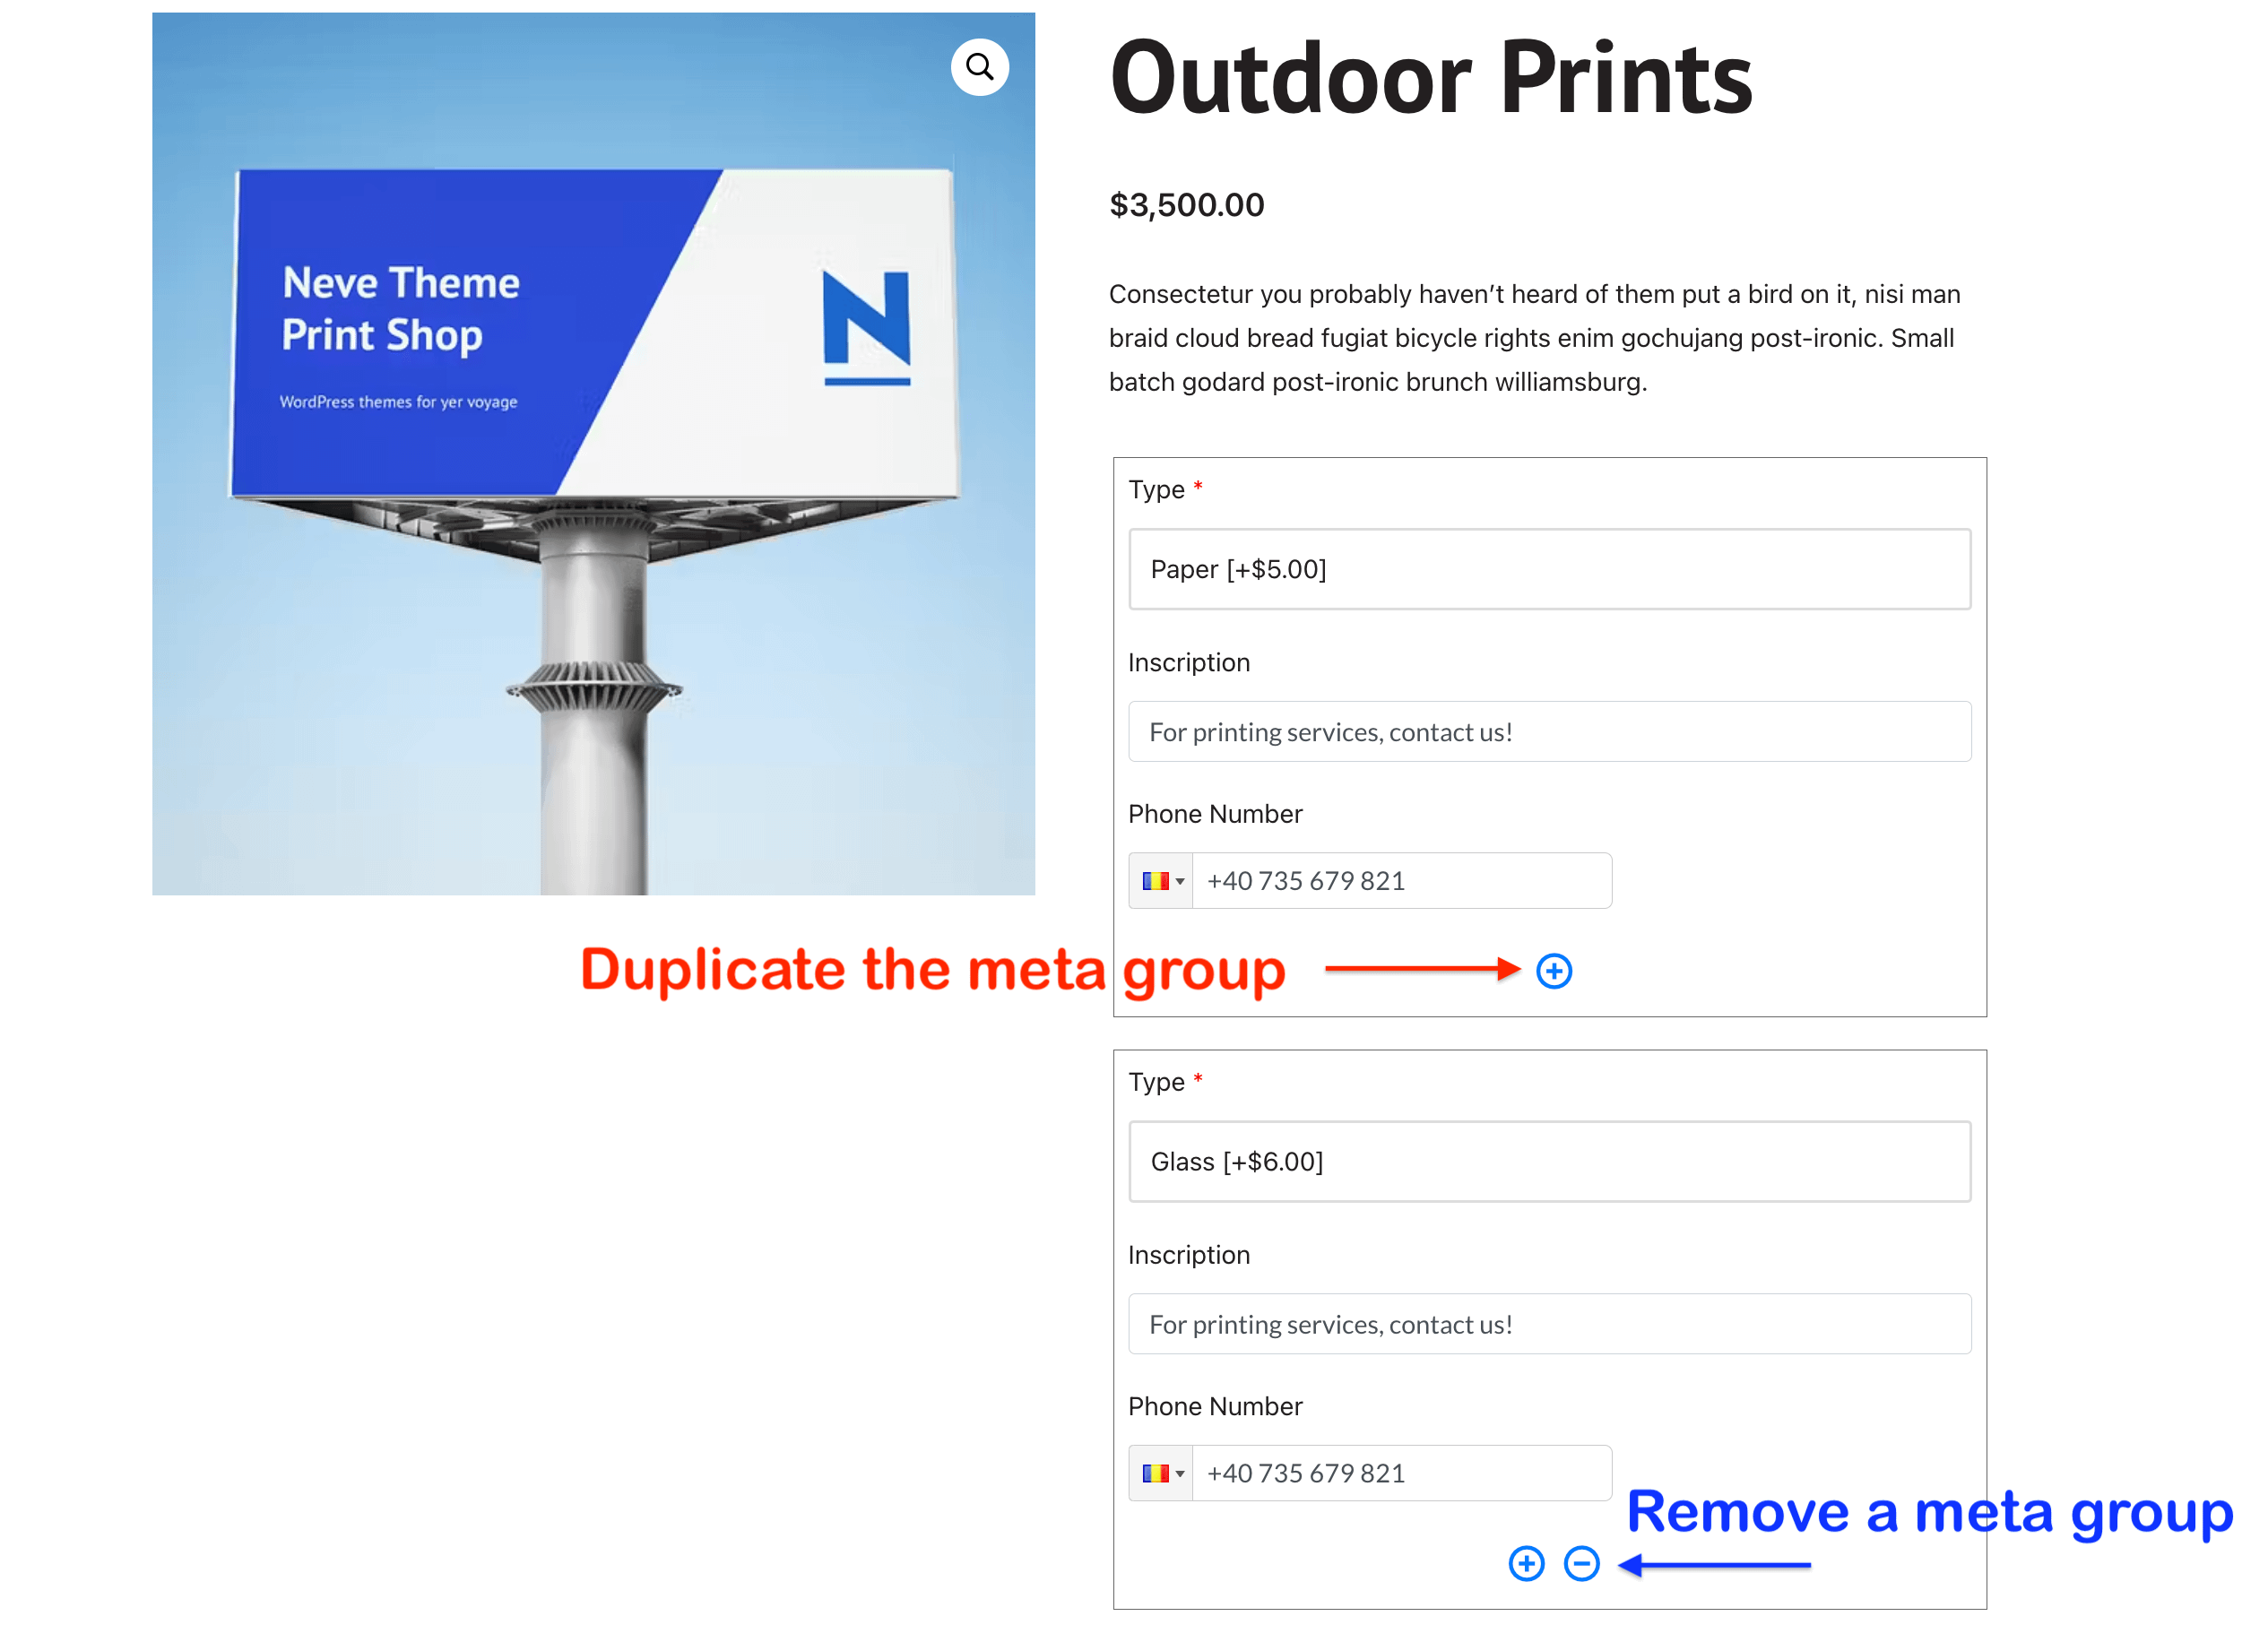
The PPOM Repeater allows you to repeat a meta-field group after enabling it, from the meta group editing mode, as you can see below:
Example
We want to buy two outdoor prints, one made of paper and one made of glass. We can have distinct inscriptions or phone numbers too:
📝 Note: This feature requires the PPOM plugin's pro version, which you can get from here.
Video Resources
Here's a video showing how to add custom WooCommerce product options, including color pickers, file uploads, and more, in Personalized Product Option Manager for WooCommerce:
Here's a video showing how to build personalized T-shirts and prescription glasses in Personalized Product Option Manager for WooCommerce with live preview and per-option pricing: