
Bulk Generation Processing Existing Posts
Learn how to automatically add featured images to hundreds or thousands of existing posts at once. Perfect for migrating legacy content.
In this article
Overview
The Bulk Generation tool processes multiple posts simultaneously, adding featured images to posts that don't have them. Essential for sites with existing content libraries.
When to Use Bulk Generation
Common Scenarios
✓ New Plugin Installation - Adding featured images to existing blog - Hundreds or thousands of old posts - Retroactive optimization
✓ Content Migration - Moving from another platform - Importing content without featured images - Rebuilding site
✓ Theme Change - New theme requires featured images - Improving visual consistency - SEO optimization
✓ Periodic Maintenance - Finding posts with missing images - Quality assurance checks - Regular content audits
Accessing the Bulk Generation Tool
Location
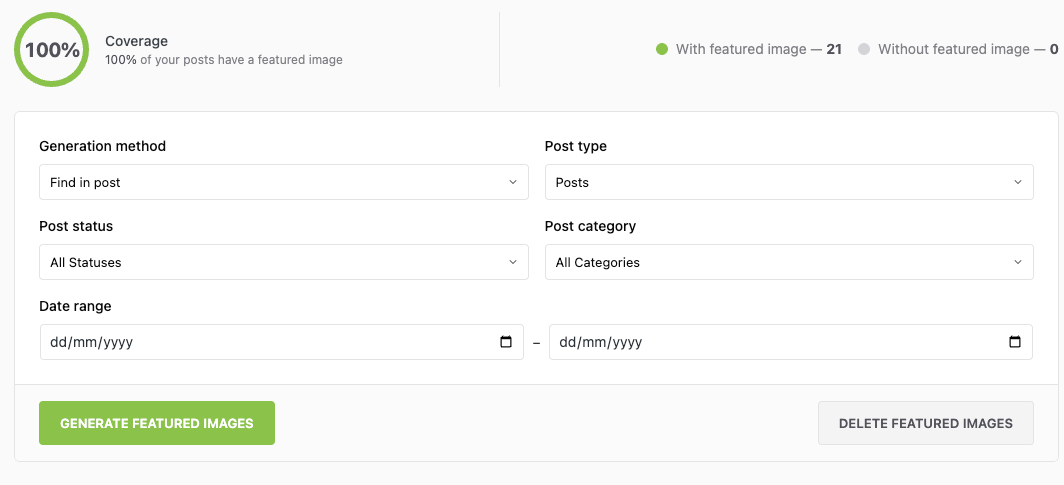
Method 1: Plugin Settings
1. Go to Auto Featured Image
2. Open the Generate Images page
3. Access full-featured interface
Method 2: Posts Screen
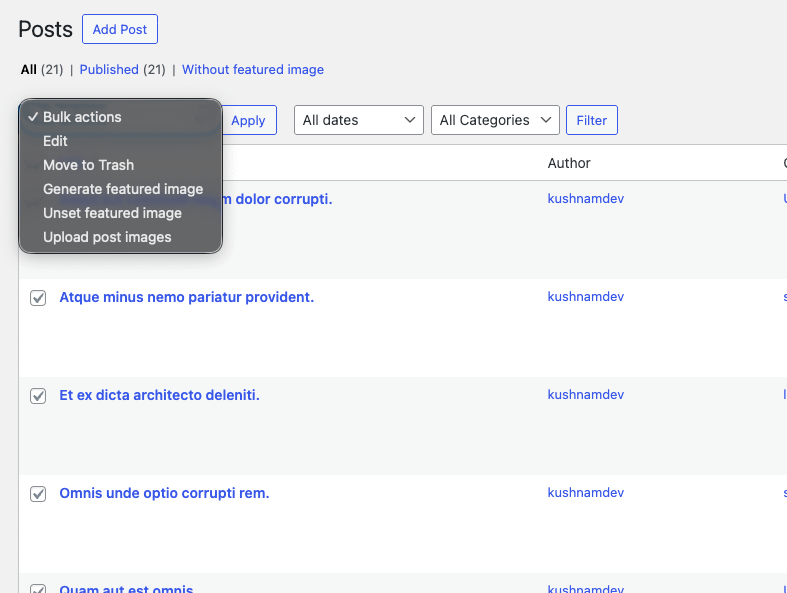
1. Go to Posts > All Posts
2. Select multiple posts (checkboxes)
3. Choose "Generate featured image" from Bulk Actions dropdown
4. Click Apply
Using the Bulk Generation Tool
Step 1: Filter Your Posts
Select Criteria:
Post Type
☑ Posts ☐ Pages ☐ Products (WooCommerce) ☐ Custom Post Types
Post Status
☑ Published ☐ Draft ☐ Pending ☐ Scheduled ☐ Private
Date Range
Custom Range:
From: [MM/DD/YYYY] To: [MM/DD/YYYY]
Post Categories
☐ All Categories ☑ Technology ☑ Travel ☐ Food
Step 2: Choose Generation Method
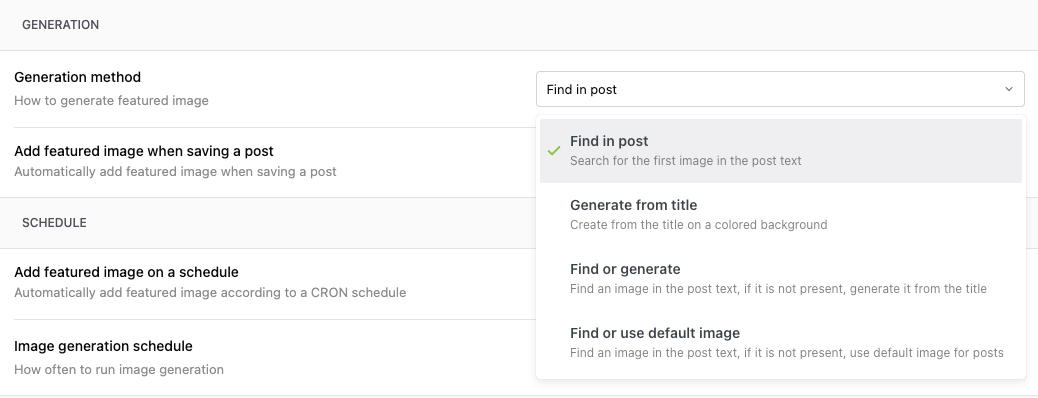
Click "Generation Method" to see what options are provided.
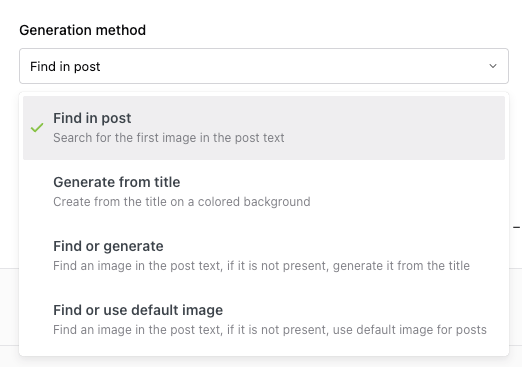
Find in post - It searches for the first image found in the post content.
Generate from title - It generate the images from the title on colored background (background and text customization can be done via settings)
Find or generate - It tries to find images in content, if it is not present then it generates from Title
Find or use default image - It tries to find images in content, if it is not present then it uses the default images configured in settings
Step 3: Start Bulk Generation
Click "Generate featured images" button.
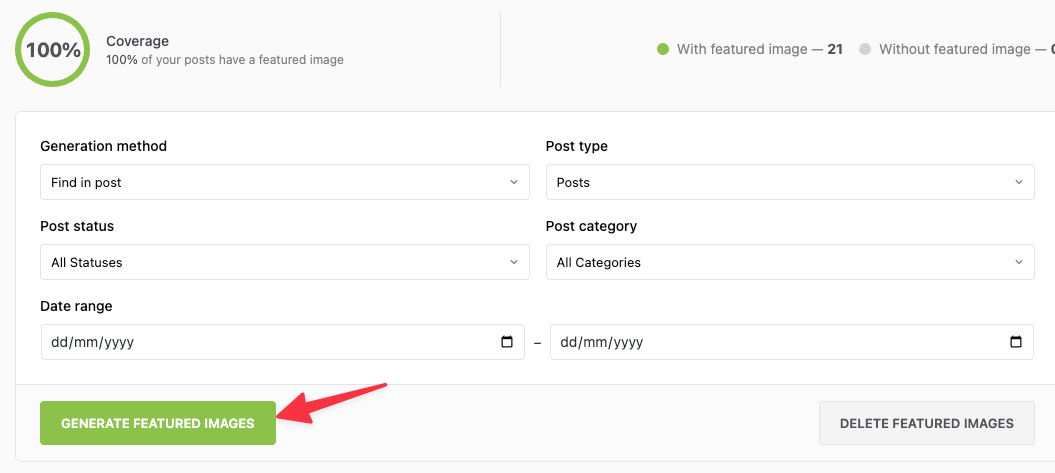
Progress Display:
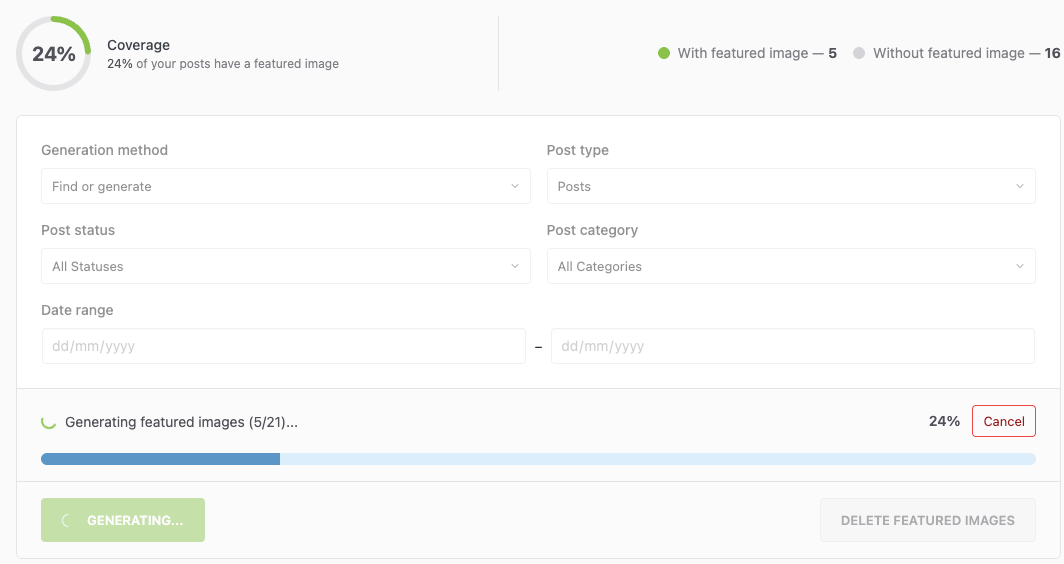
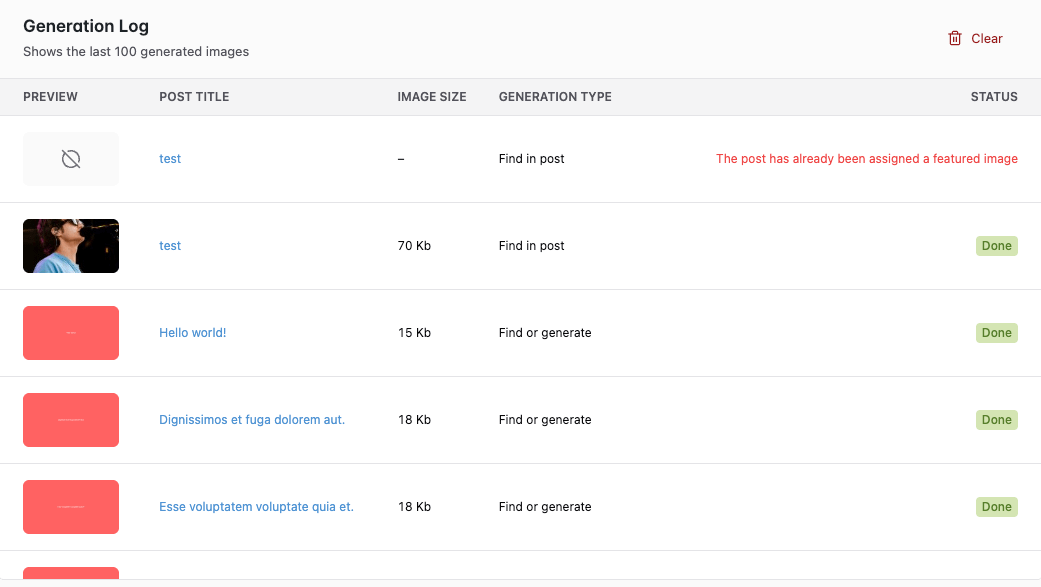
Progress Details: - You can also view the logs present below this section to know the status of this operation.
Success count (green) - Warning count (yellow) - e.g., no images found - Error count (red) - e.g., timeout, permissions
Replacing Existing Featured Images in Bulk
Bulk generation only processes posts that have no featured image, and there is no setting that makes it overwrite one. To give a set of posts different featured images, remove their current featured images first, then run bulk generation over the same set.
❗ Data loss risk: Removing featured images is destructive and cannot be undone from the plugin. Take a full backup and test the process on a staging site with a small filtered set before running it on live content.
Step 1: Filter the Posts You Want to Change
On the Generate Images page, set the Post Type, Post Status, Post Categories, and date range filters so they match only the posts you want to change. For example, to change posts published before a certain year, set the date range to end on the last day of the previous year.
Check the number of matching posts before continuing. Anything caught by these filters will lose its current featured image.
Step 2: Remove the Current Featured Images
- Click Delete featured images.
- Select All thumbnails.
- Leave Delete attachments & media files unchecked. This keeps the image files in your Media Library and removes only the featured image assignment from each post.
- Confirm the deletion.
⚠️ Warning: Selecting Delete attachments & media files permanently deletes the image files themselves, not just the featured image assignment. Leave it unchecked unless you intend to remove those images from your Media Library entirely.
Step 3: Generate the Replacement Images
With the same filters still applied, choose a Generation Method and click Generate featured images. The posts now count as having no featured image, so they are included in the run.
Choosing the Replacement Source
The generation method decides where the new images come from:
- Generate from title — Creates a new image from each post title. Use this when you want consistent title-based images regardless of what is inside the posts.
- Find or use default image — Searches the post content first and only falls back to your default image when no usable image is found in the content. It does not force the default image onto every post.
📝 Note: If your posts contain inline images, Find or use default image will pick those inline images rather than your default image. To apply the default image to posts that contain inline images, remove those images from the post content first, or use Generate from title instead.
Handling Large Sites (1000+ Posts)
Challenges
- PHP timeout limits
- Memory exhaustion
- Server load
- Database locks
Solutions
1. Process in Smaller Batches
Strategy:
Total posts: 5,000 Batch 1: Posts from 2024 (1,200 posts) Batch 2: Posts from 2023 (1,800 posts) Batch 3: Posts from 2022 (1,000 posts) etc.
Break down by: - Date ranges - Categories - Authors - Post types
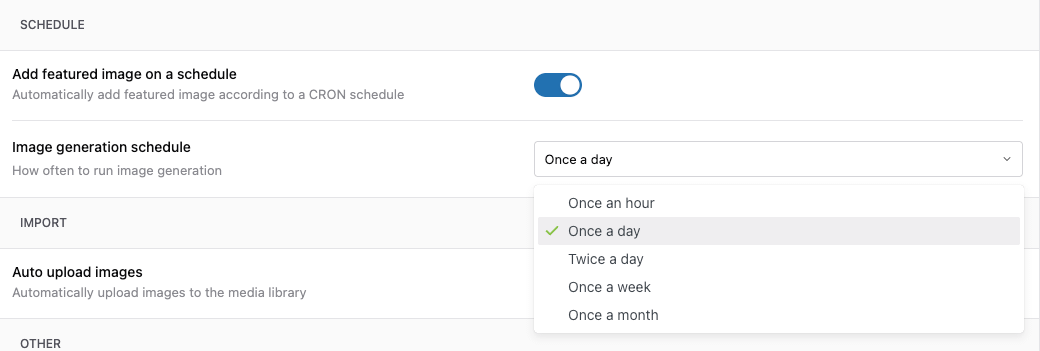
- Use CRON Processing (Pro)
Setup:
- Select a Generation Method from the settings.
- Enable Add featured image on a schedule in plugin settings.
- Configure Image generation schedule
- Save the changes.
- Close browser - processing continues
Related Articles
- Quick Start Guide
- Understanding How Auto Featured Image Works
- Settings Explained: Complete Reference
- Generating Featured Images from Post Content
- Automating Featured Images with CRON