How to Install Auto Featured Image Free and Pro
This guide walks you through installing Auto Featured Image on your WordPress site, both the free version from WordPress.org and the Pro version from the Themeisle store, and how to activate your license key.
In this article
How to install the free version
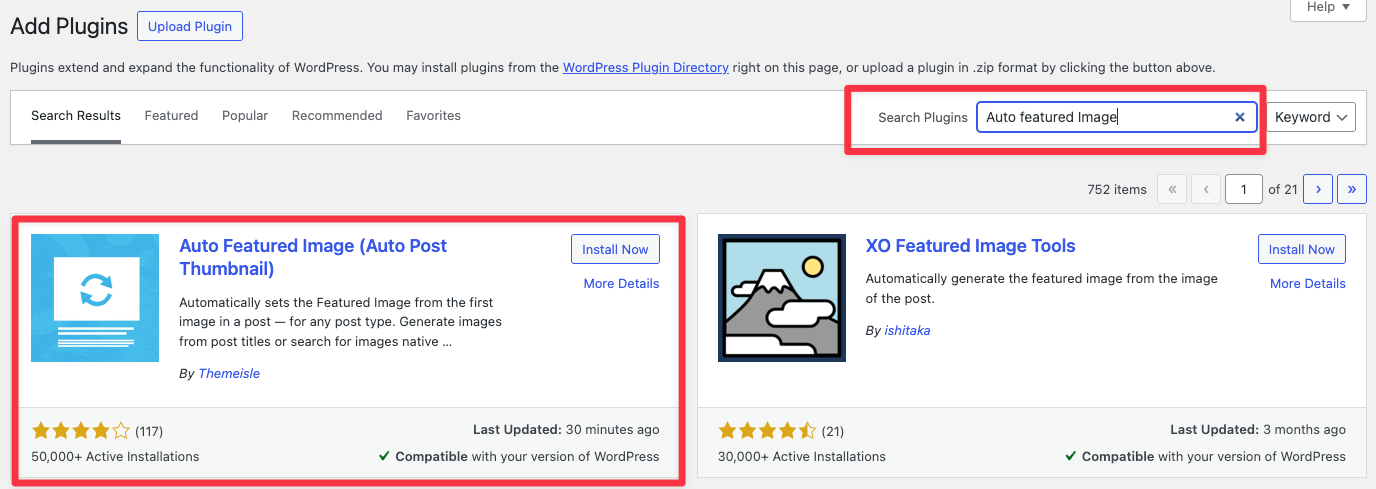
In your WordPress Dashboard, navigate to Plugins > Add New Plugin. Enter the plugin name Auto Featured Image in the search bar.
Click Install now next to the corresponding plugin name. Once the installation is completed, activate Auto Featured Image.
How to install the premium version
- Download Auto Featured Image Pro from your Purchase History. The file should be a .zip
- In your WordPress Dashboard, navigate to Plugins.
- Click on Add New Plugin, upload the .zip file, and click on the Install Now button.
- After the install is done, click on Activate.
Note: The free version will be automatically deactivated once you activate the pro version.
How to activate the license key
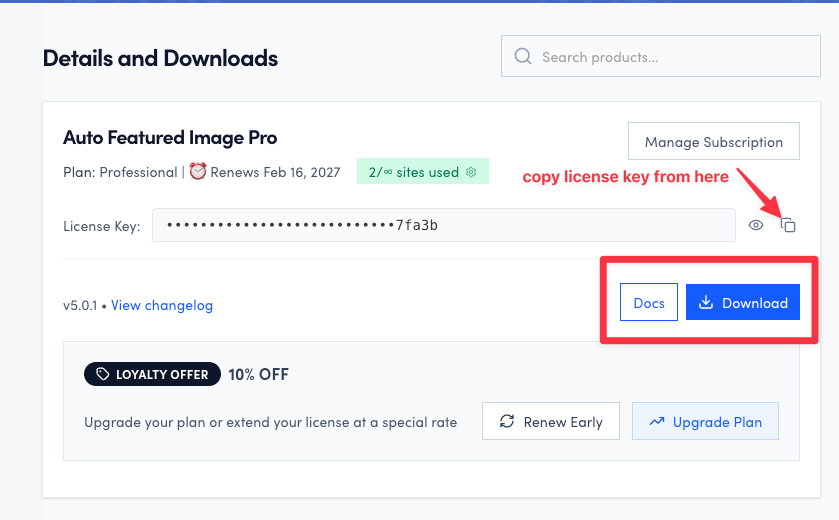
Navigate to your account on https://store.themeisle.com/, and copy the license key.
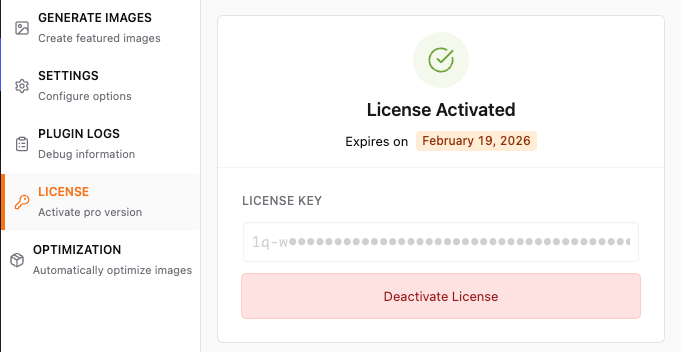
Copy your license key, then open the Auto Featured Image page and select the License tab. Paste the key there and click Activate License.
⚠️ Using a license from before the Themeisle acquisition? If your Pro license key stopped working after updating the plugin, your old key is no longer valid. You need to migrate to a Themeisle license — see Migrating Legacy Licenses below.
Migrating Legacy Licenses (Post-Acquisition)
Auto Featured Image Pro was acquired by Themeisle. As part of this transition, license keys issued by the previous vendor are no longer valid. If your existing license stopped working after a plugin update, you need to migrate to a Themeisle license.
Steps to migrate your license
If you purchased Auto Featured Image Pro before the acquisition, contact Themeisle support with your original order details (order number, purchase email, or old license key) so the team can identify it and create an account for you on the Themeisle store.