Quick Start Guide
Get started with Auto Featured Image in just 5 minutes. This guide will help you install, configure, and generate your first featured image.
In this article
Installation
Step 1: Install the Plugin
- Log in to your WordPress admin dashboard
- Navigate to Plugins > Add New
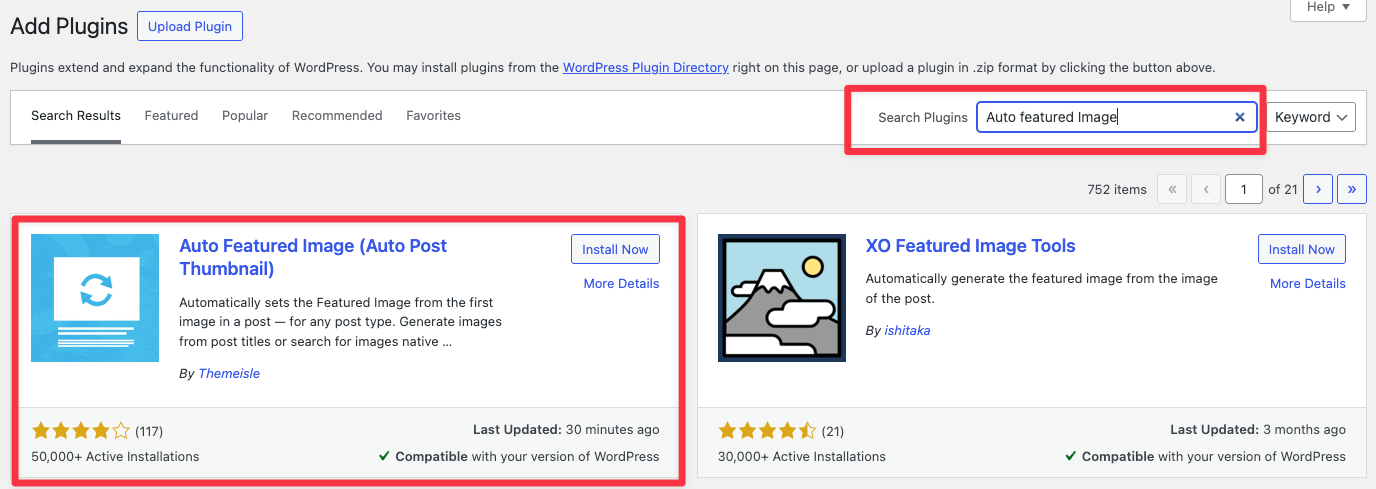
- Search for "Auto Featured Image"
- Click Install Now on the Auto Featured Image plugin
- Click Activate once installation is complete
Alternative Method: You can also download the plugin from WordPress.org and upload it via Plugins > Add New > Upload Plugin.
Basic Settings Overview
Step 2: Access Plugin Settings
- Go to Auto Featured Image in the left sidebar of your WordPress dashboard
- Click SETTINGS in the sidebar. Inside it you'll see three tabs: General, Image Settings, and External APIs
Step 3: Configure Essential Settings
Select Post Types
- Check the post types where you want auto-generated featured images
- By default, both Posts and Pages are enabled
- You can add Custom Post Types or adjust the selection as needed
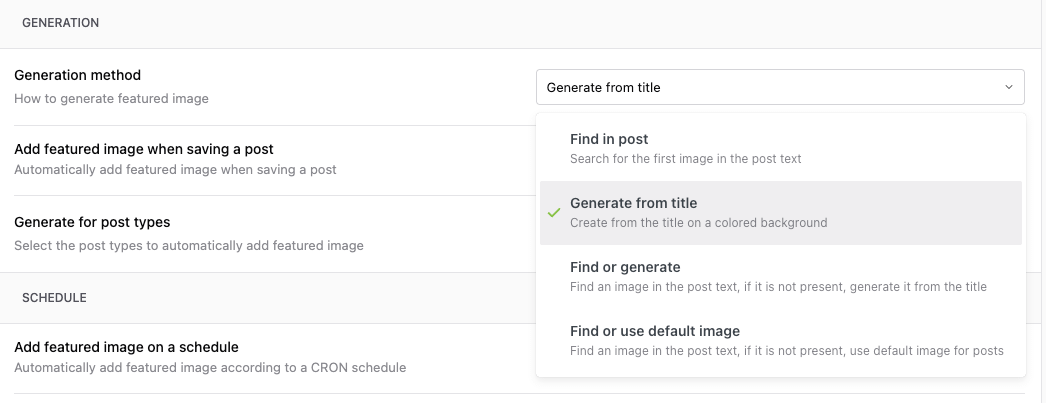
Choose Generation Method
Select how you want featured images to be created from the Generation method dropdown:
- Find in post - Searches for the first image in the post text
- Generate from title - Creates from the title on a colored background
- Find or generate - Finds an image in the post text; if not present, generates it from the title
- Find or use default image - Finds an image in the post text; if not present, uses the default image
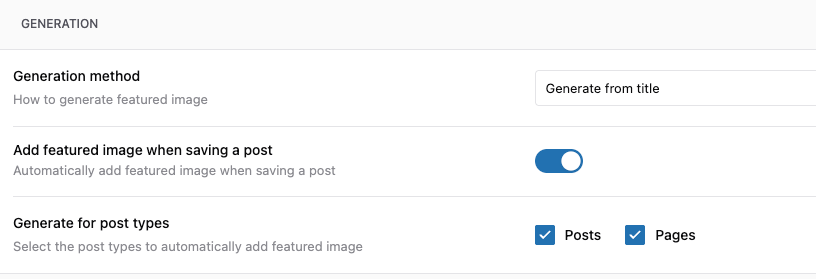
Enable Auto-Generation
- Toggle on Add featured image when saving a post to enable automatic generation
- This will automatically add a featured image whenever you save (publish or update) a post
Step 4: Save Settings
Click SAVE SETTINGS at the bottom of the page, or click the SAVE button in the top-right corner.
Generate Your First Featured Image
Method 1: Create a New Post
- Go to Posts > Add New
- Add your content and include at least one image in the post body
- Click Publish
- Check the featured image section - it should now display your first image
Method 2: Update an Existing Post
- Go to Posts > All Posts
- Edit a post that has images but no featured image
- Click Update
- Verify the featured image was set automatically
Verify It's Working
Check Individual Posts
- Open any post that should have an auto-generated featured image
- Look at the Featured Image section in the right sidebar
- You should see an image displayed
View on Your Site
- Visit your blog homepage or the published post
- Check if the featured image displays correctly in your theme
- Images should appear in post listings and single post views
Quick Troubleshooting
Featured Image Not Generated?
✓ Check these items:
- [ ] Plugin is activated
- [ ] Post type is selected in settings
- [ ] Auto-generation is enabled
- [ ] Post contains at least one image (if using the "Find in post" method)
- [ ] You clicked Publish or Update after enabling the plugin
Still Having Issues?
- Check your theme supports featured images
- Verify image formats are supported (JPG, PNG, GIF, WebP)
What's Next?
Now that you have basic setup working, explore these features:
- Bulk Generate - Process all existing posts at once
- Custom Settings - Fine-tune image selection and generation
- Title-Based Images - Create custom text overlays
- Stock Images - Integrate external image sources