
Full walkthrough of the dashboard and all configuration options.
This guide walks you through the Robin Image Optimizer dashboard, bulk image processing, and the available configuration options. It explains what the settings do and how they affect optimization and image delivery.
In this article
Dashboard overview
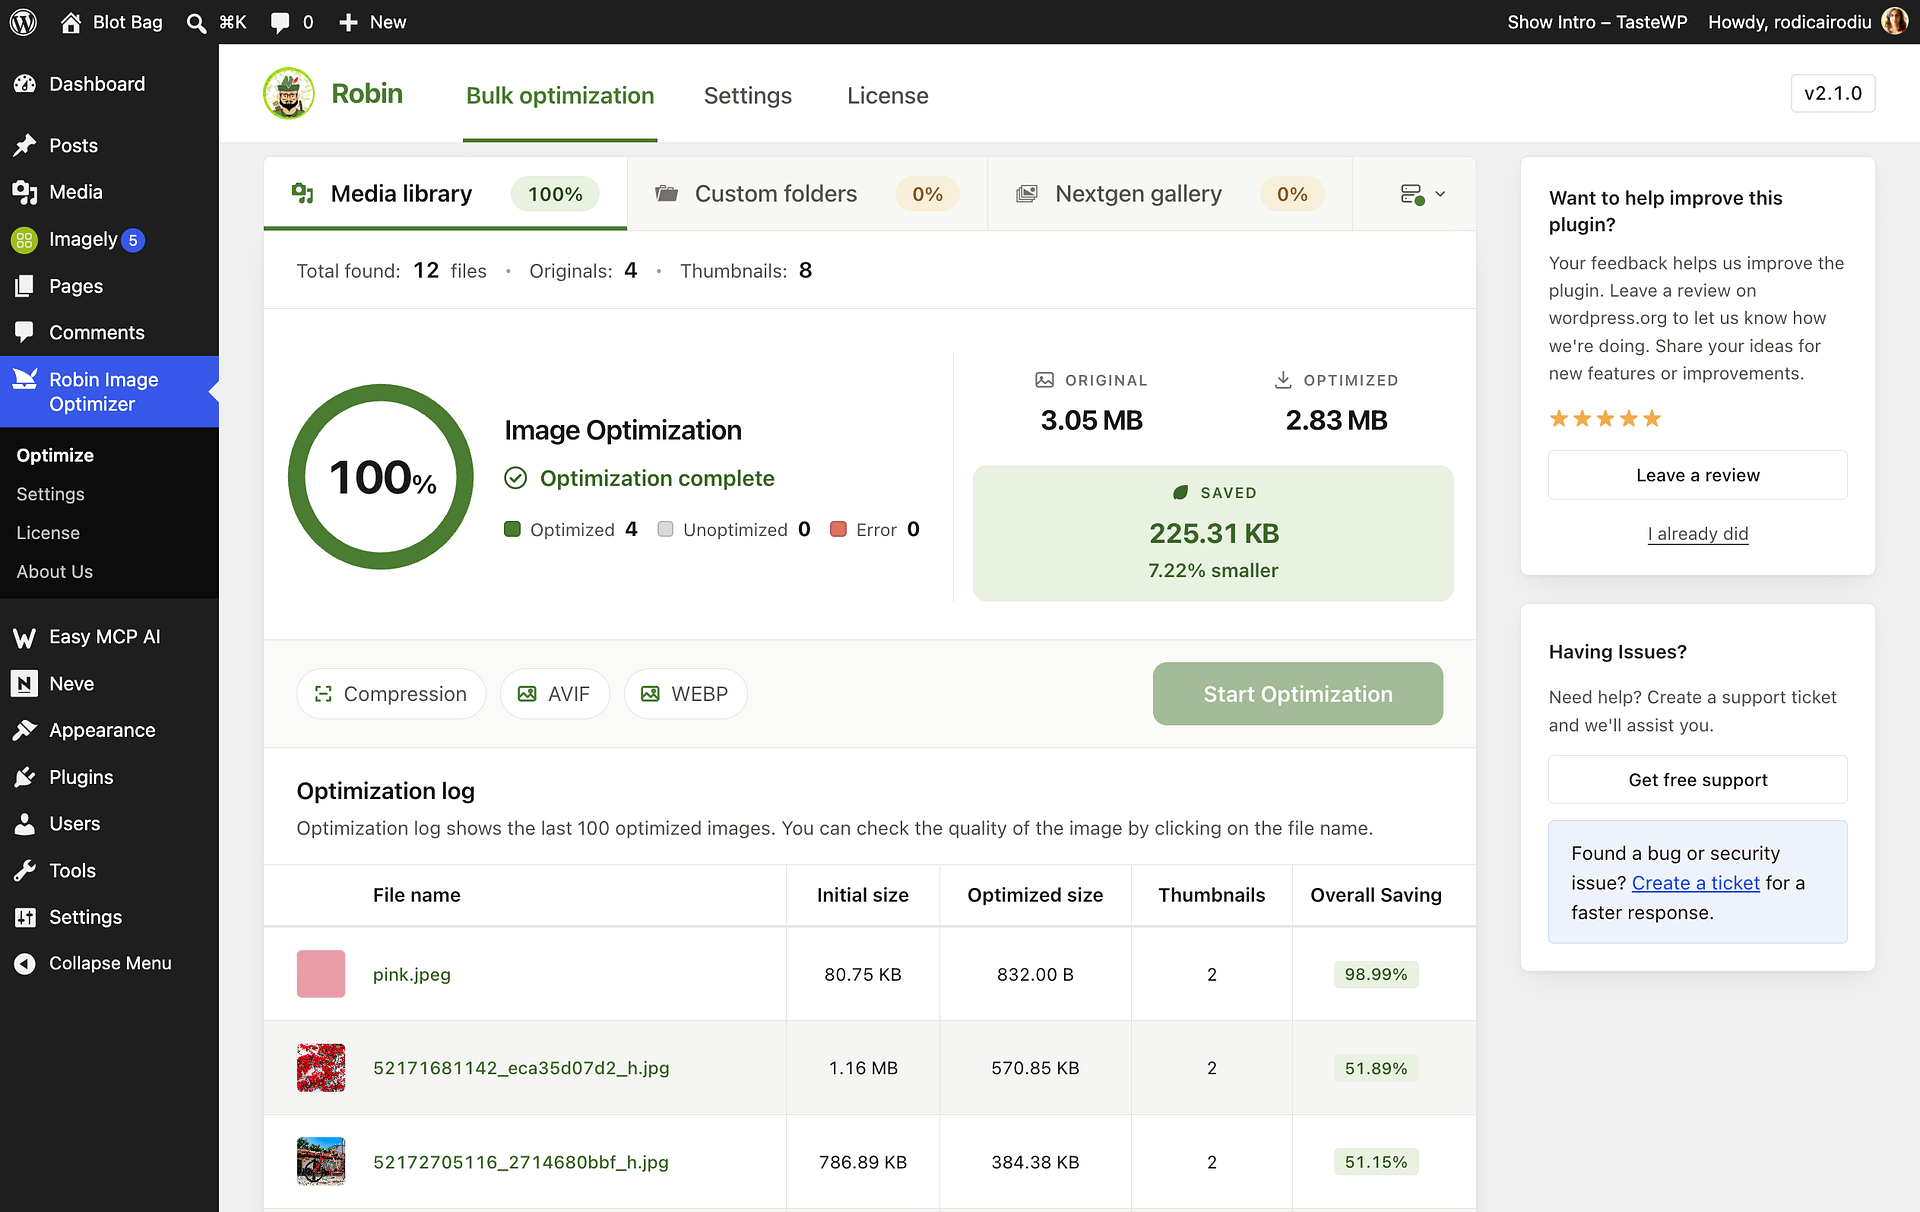
Open Robin Image Optimizer > Optimize to see your image optimization status. The dashboard shows the total number of images detected in the Media Library, originals and thumbnails, optimization status for originals and converted formats, pending and converted counts, errors, and overall size savings. Pending format-copy counts show how many enabled WebP or AVIF copies still need to be created, including for images that have already been optimized.
One bulk optimization run can compress images and create the enabled WebP and AVIF copies together. If an image is already optimized but needs an enabled format copy, Robin can create that copy without restoring the original first. AVIF conversion requires a Pro license. For more AVIF-specific details, see how to convert images to AVIF.
To run bulk optimization:
- Open Robin Image Optimizer > Optimize, select the Media Library tab, and click Start Optimization.
- Review the run summary, including the images, thumbnails, and enabled format copies that Robin will process. To limit the run to images uploaded during a date range, enter the start date in From and the end date in To.
- Choose Optimize now to start immediately and keep the page open, or choose Scheduled optimization to process images using the schedule in your saved settings. If Background optimization type is set to Background, you can choose Background optimization instead.
- While an immediate run is in progress, click Pause to suspend it. Click Resume optimization to continue the run without starting over.
To optimize selected images instead of starting a dashboard run, open Media > Library in list view, select the images, choose Optimize with Robin from Bulk actions, and click Apply. Robin queues the selected images using your saved settings.
Main settings
Open Robin Image Optimizer > Settings to configure image optimization and delivery.
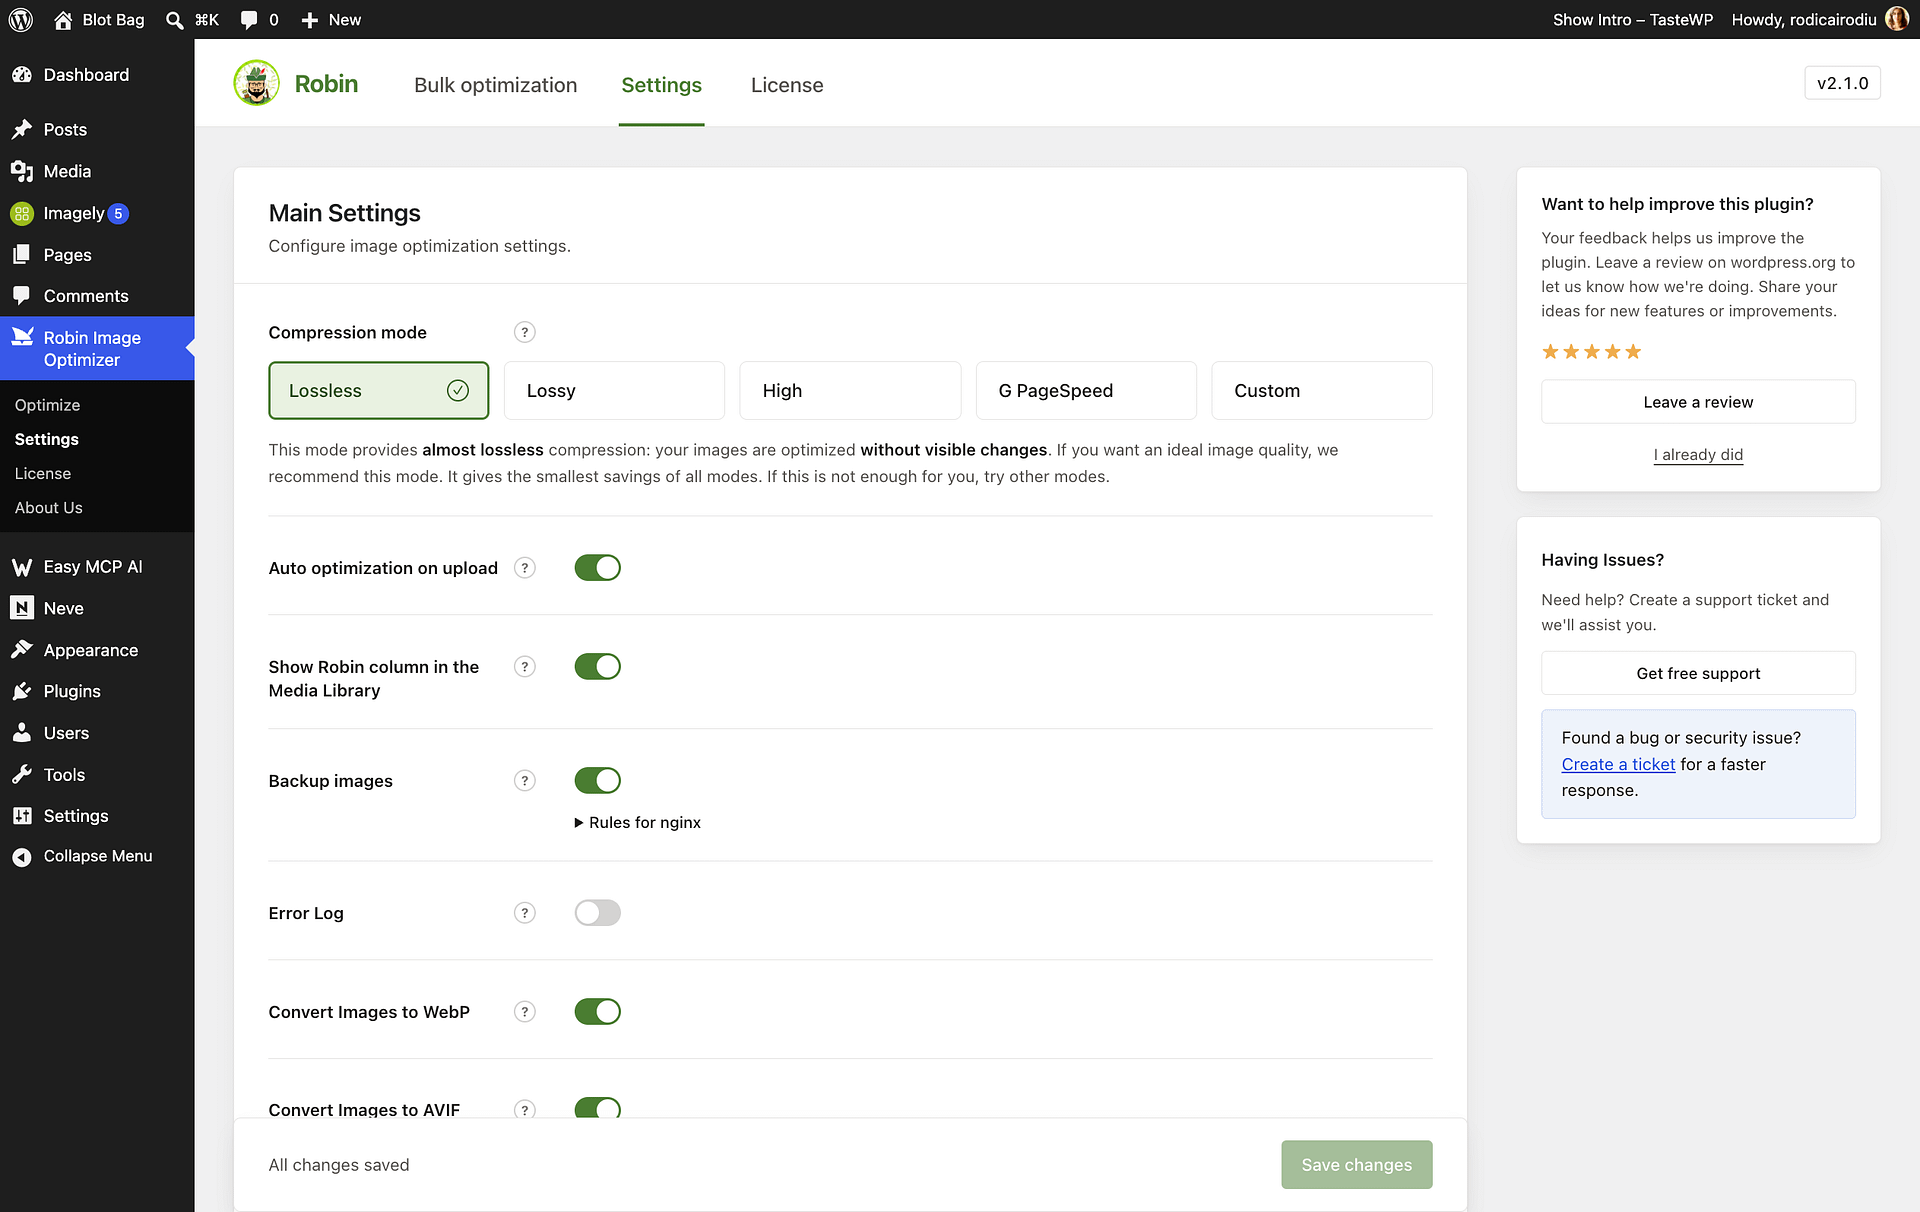
Compression mode
Choose how strongly Robin compresses images:
- Lossless optimizes images without visible quality changes and is recommended when image quality is your priority.
- Lossy uses stronger compression with minor quality loss.
- High applies aggressive compression for a greater file-size reduction.
- G PageSpeed uses settings aimed at Google PageSpeed recommendations and requires a Pro license.
- Custom displays an Enter custom quality field, where you set a quality value from 1 to 100.
Auto optimization on upload
When enabled, Robin optimizes images as they are uploaded to the Media Library.
This option is useful if you want new uploads optimized automatically.
Backup images
When enabled, Robin saves a copy of each original image before optimization so you can restore it later. This setting is enabled by default.
Error Log
When enabled, Error Log records optimization and conversion errors. You can review these errors in the Error Log dashboard tab. Enable Keep an error log on frontend to record frontend errors; do so only when support asks you to, because continuous logging can slow down your site.
Show Robin column in the Media Library
Turn this setting off to hide Robin's status column from the Media Library list view. Hiding the column does not stop image optimization.
Delete converted files on uninstall
When enabled, Robin deletes the WebP and AVIF files it generated when you uninstall the plugin. Deactivating the plugin does not delete these files.
Load the first content image first
When enabled, Robin gives high loading priority to the first eligible image in the main post content. It applies only when that image is not lazy-loaded and does not already have a priority set; it does not change the image's lazy-loading setting.
Image format conversion
Use Convert Images to WebP and Convert Images to AVIF to choose which additional image formats Robin creates. You can enable either or both. AVIF requires a Pro license. When a format is enabled, bulk optimization can create that format copy along with image compression. If an image is already optimized but its enabled format copy is pending, Robin can process the missing copy without restoring the original.
Choose which formats to create based on browser support and your server's capabilities.
Delivery mode for converted images
Choose how Robin serves converted images to visitors. The available modes appear after you enable WebP or AVIF.
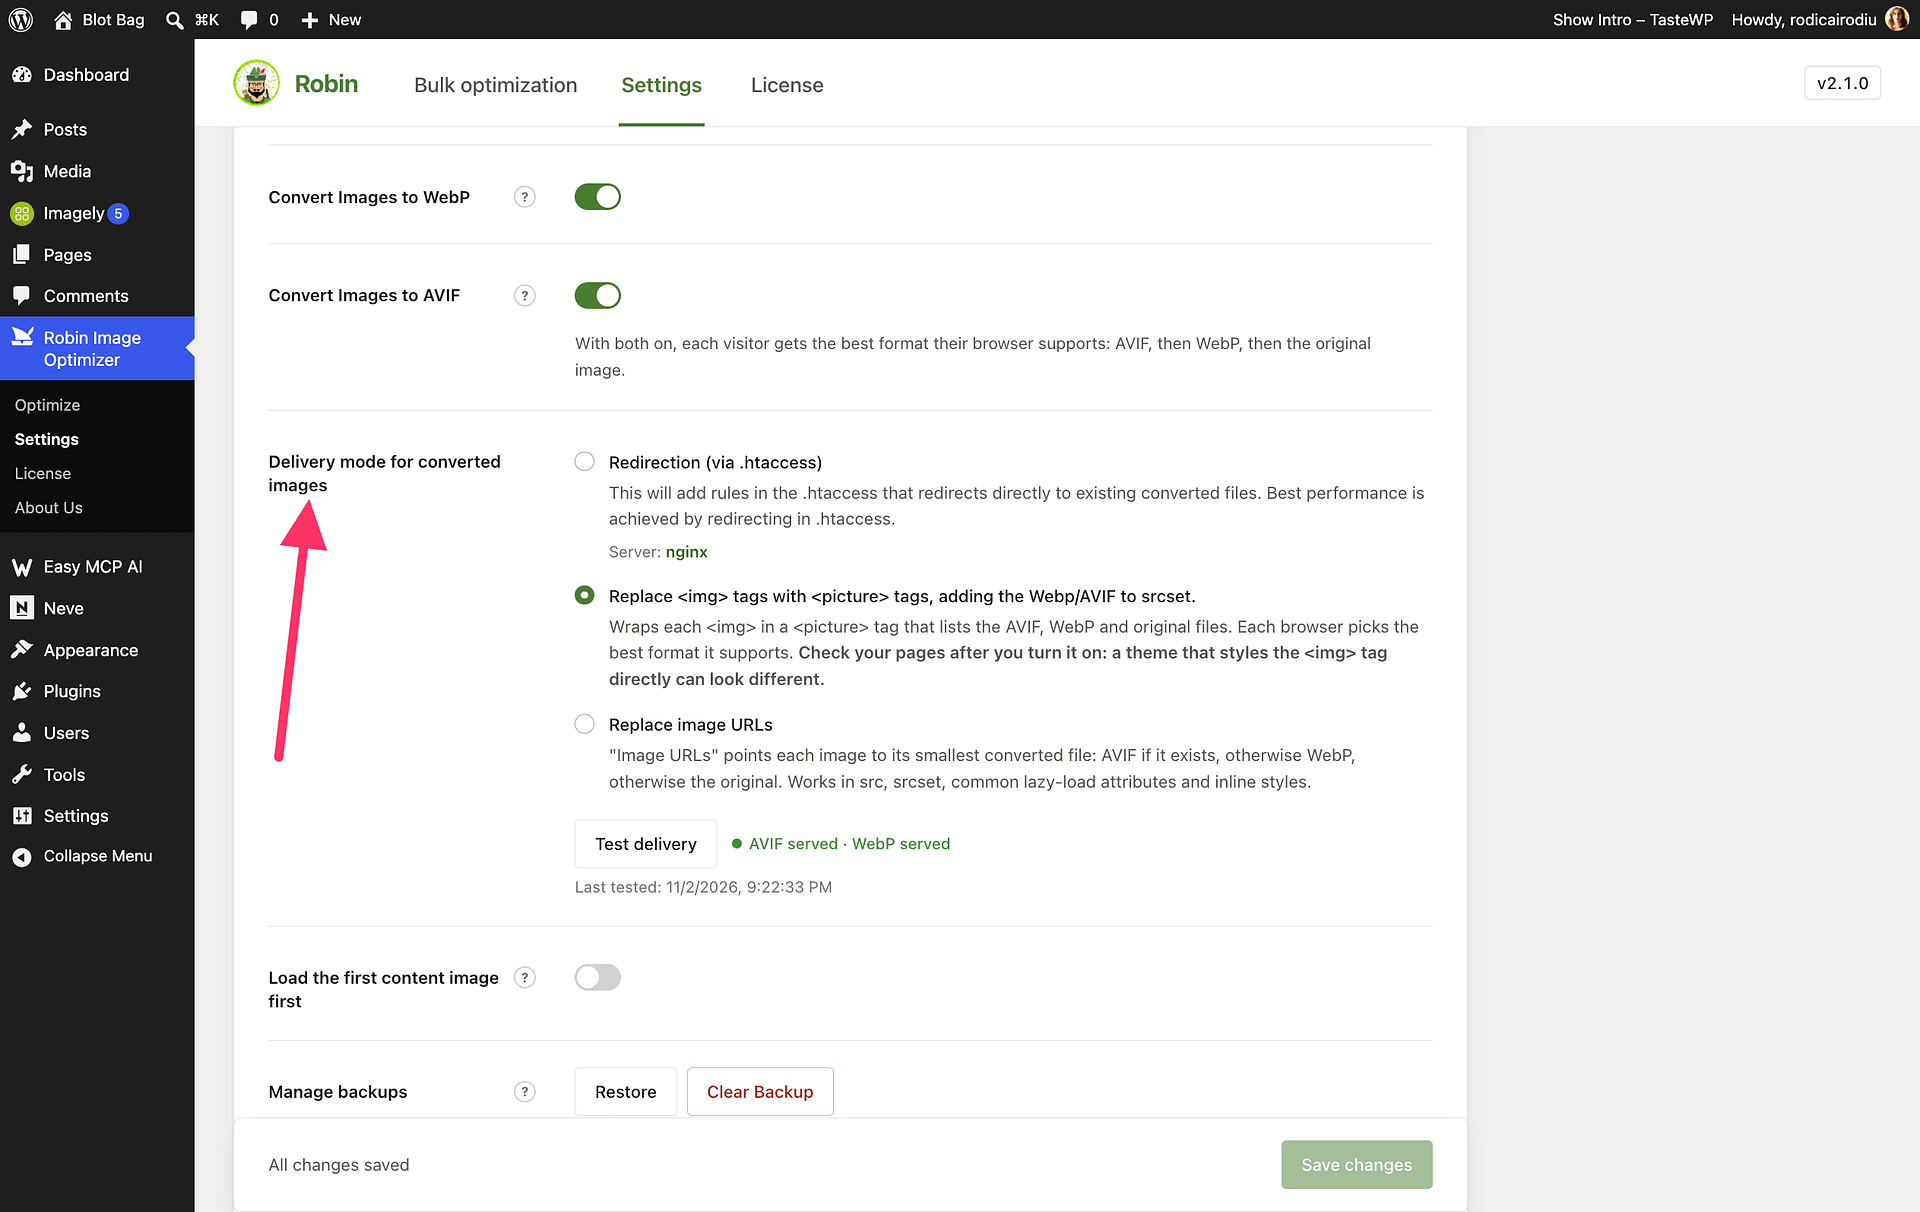
Redirection (via .htaccess)
This mode uses server rules to serve converted images directly and is the best-performance option for servers that support .htaccess rules, such as Apache. Nginx does not read .htaccess files. If your site uses Nginx, ask your host to add the supplied Rules for nginx to the site's server block and reload Nginx, or choose the Picture delivery mode instead.
If Robin warns that Cloudflare may serve an unsupported format with Redirection, use Picture delivery unless your image cache varies by the Accept header.
Replace <img> tags with <picture> tags, adding the Webp/AVIF to srcset
This mode wraps images in a <picture> element so the browser can select a format it supports. It works with any server type. Test your site after enabling it, because a theme that applies styles based on <img> positioning may display images differently.
Replace image URLs
This mode rewrites image URLs to point directly to the converted files. It handles src, srcset, common lazy-load attributes, and inline background-image styles. When an enabled AVIF copy is available, Robin uses AVIF; otherwise, it uses WebP if available, then the original image. It uses the same URL for every browser rather than selecting a format based on browser support.
Test delivery
Save your delivery settings, then click Test delivery. Robin displays diagnostic results for the selected mode. Also check an image on a visitor-facing page, especially if your site uses a CDN, because the server-side test may not include the CDN.
Manage backups
The Manage backups area shows how many images have backups and how much disk space the backup folder uses. Click Restore to replace optimized images with their available original backups. Click Clear Backup to permanently remove the stored backups and free disk space. Robin asks you to confirm either action. When no backups are available, the area says There are no backups. and disables both buttons.
Strip EXIF data
When enabled (the default), this setting removes EXIF metadata from images during optimization. EXIF metadata can include camera details and location information. Removing it can slightly reduce file size. Turn the setting off if you need to preserve that information. The setting applies to images optimized after you change it.
Optimization settings
These settings control which images Robin processes and how it processes them.
Optimization order
Choose which images Robin processes first during bulk optimization:
- Ascending starts with the oldest images.
- Descending starts with the newest images.
- Largest first starts with the largest images.
Resizing large images
When enabled, Robin resizes images that exceed Enter the maximum width (px) or Enter the maximum height (px).
For an individual image, enable Keep original dimensions in its upload options or attachment details to skip resizing while still allowing compression.
Exclude paths
Enter one pattern per line to skip matching image paths inside the uploads folder during bulk and automatic optimization. The path is relative to the uploads folder. Use * to match any text and ? to match one character. For example, 2019/* matches a path in the 2019 folder, and banner-?.jpg matches a filename with one character in place of ?.
To exclude just one image, use Exclude from optimization in that image's upload options or attachment details. Robin skips an excluded image during bulk and automatic optimization.
Optimize formats
Choose which image formats Robin optimizes: JPG, PNG, and GIF.
Optimize thumbnails
Choose which registered WordPress image sizes Robin optimizes. WordPress, your theme, and plugins can create additional sizes for each uploaded image.
Scheduled and background optimization
Choose whether Robin processes images on a schedule or continuously in the background.
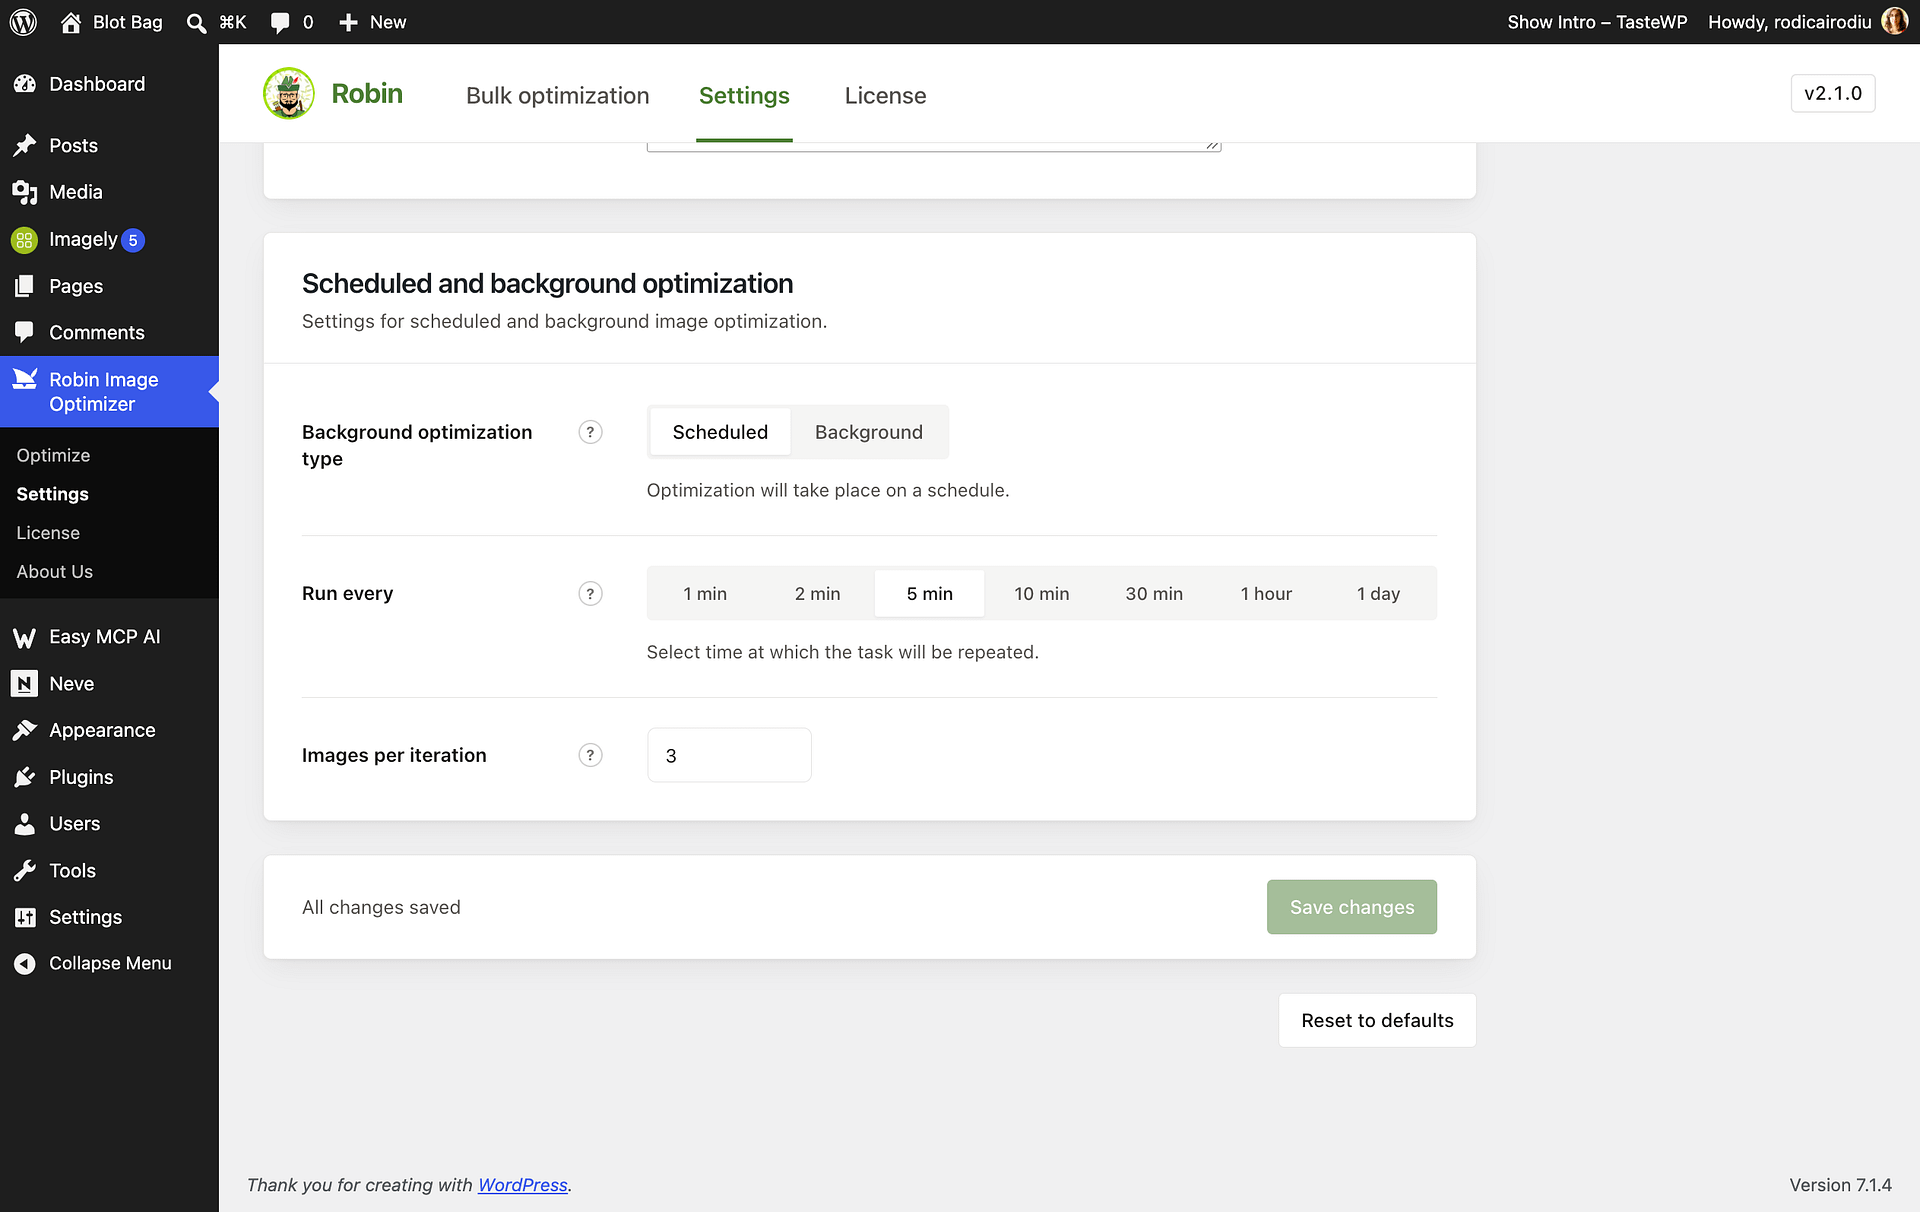
Background optimization type
- Scheduled runs optimization at the intervals selected under Run every.
- Background processes images continuously while your site is active. This option requires a Pro license.
Run every
When Scheduled is selected, choose how often Robin starts a scheduled batch. Select a shorter interval if you upload images frequently and want them processed sooner, or a longer interval to reduce server load.
Available intervals are 1, 2, 5, 10, or 30 minutes, one hour, or one day.
Images per iteration
This setting controls how many images Robin processes in each scheduled batch. Lower values reduce server load; higher values can process a backlog faster.
Best practices
- Use Lossless compression when you want to avoid visible quality changes.
- Enable Backup images before bulk optimization if you may want to restore the originals.
- Use scheduled processing on shared hosting if you want to limit the work Robin performs at one time.
- Increase Images per iteration only if your server can handle the additional processing.