Getting Started with Woody snippets
Woody snippets help you to execute PHP code, insert ad units, or other external widget code anywhere in your WordPress website. Brief documentation gives an overview of all plugin features.
In this article
Installation
Brief description of different snippet types.
General Settings
For a full description of every available setting, see the Woody Code Snippets – Settings Reference.
Base Options
| Auto-activate New Snippets | If "ON" then all newly created snippets are active by default. When disabled, new snippets start inactive and must be manually activated before they take effect. |
| Preserve Special Characters | When enabled, the plugin preserves HTML entities in snippet content without converting them. Turn this on if your snippets contain special characters (such as & or ©) that are being incorrectly decoded on the front end. |
| Execute Shortcodes in Snippets | When enabled, shortcodes embedded inside your snippets are processed. Turn this on if you use shortcodes from other plugins inside text or ad snippets. |
| Enable Error Email Notifications | When enabled, the plugin sends an email notification when a snippet causes a fatal error on your site. Useful for catching PHP snippet failures that may otherwise go unnoticed. Enabling this reveals the Error Notification Email field. |
| Error Notification Email | The email address that receives snippet error notifications. Defaults to the site admin email. This field only appears when Enable Error Email Notifications is turned on. |
| Delete All Data on Uninstall | If "ON" then all data (snippets, settings) associated with the plugin will be removed after the plugin is uninstalled. Leave this off if you plan to reinstall the plugin later and want to keep your snippets. |
Code Editor
| Code Style | Choose a color theme for the code editor. The "Default" style is applied by default. Change this if you prefer a dark theme or a specific color scheme for readability. |
| Indent With Tabs | When enabled, pressing Tab inserts a tab character instead of spaces. Disabled by default (spaces are used). |
| Tab Size | Controls how many spaces a single Tab key press inserts. Accepts a value between 1 and 12. The default is 4. |
| Indent Unit | Controls the number of spaces used for each level of indentation when the editor auto-indents. Accepts a value between 1 and 12. The default is 4. |
| Wrap Lines | If "ON" the editor will wrap long lines instead of creating a horizontal scrollbar. Enabled by default. |
| Line Numbers | If "ON" all lines in the editor will be numbered. Enabled by default. |
| Auto Close Brackets | If "ON" the editor will automatically insert closing brackets, parentheses, and quotes. Enabled by default. |
| Highlight Selection Matches | If "ON" it highlights all other occurrences of the selected word or token in the editor. Useful for quickly seeing where a variable or function is used. Disabled by default. |
Exporting and Cloning Snippets
Both Export and Clone are available in the Free version of Woody Code Snippets.
Exporting snippets lets you download your snippets as a JSON or ZIP file. This is useful for backing up your snippets or migrating them to another WordPress site. You can filter the export by snippet status, type, or tags before downloading. For full details on the available export filters, see the Woody Code Snippets – Settings Reference.
Cloning a snippet lets you duplicate an existing snippet into a new one. This is helpful when you want to create a variation of a snippet without modifying the original — simply clone it, rename it, and adjust the code as needed.
Creating Snippets
Snippets are short pieces of code or text that can be easily stored in WordPress admin bar and added to the page content. If you haven’t tried snippets yet, check out the benefits now:
- No code duplication (you no longer need to copy the code or text to several pages);
- Safety (no one except the admin can edit snippet’s content);
- Flexibility (you can place the code or text automatically using a special logic or entering shortcodes to the areas where the snippet is expected);
- Simple migration and website cleanup when you remove the plugin (you don’t need to go through all pages to remove code or a text snippet).
Let’s talk about snippet types, so you could choose the one you need.
Creating a PHP snippet
This is the easiest snippet type. It is used to execute PHP code only. If you want to execute any PHP code leaving your theme or the WordPress source code untouched then this is the type you need. Most users (perhaps, you are too!) still use function.php to place PHP code templates. That’s a bad idea with plenty of side effects. In fact, you get a messy function.php file and lose all changes with a regular theme update.
PHP snippets is a simple tool to modify, save and organize your PHP code in WordPress admin bar directly.
Setup
Let’s try to create your first PHP snippet.
Start with searching for a Woody snippets menu in the side menu.
Press +Add Snippet.
You should see the following:
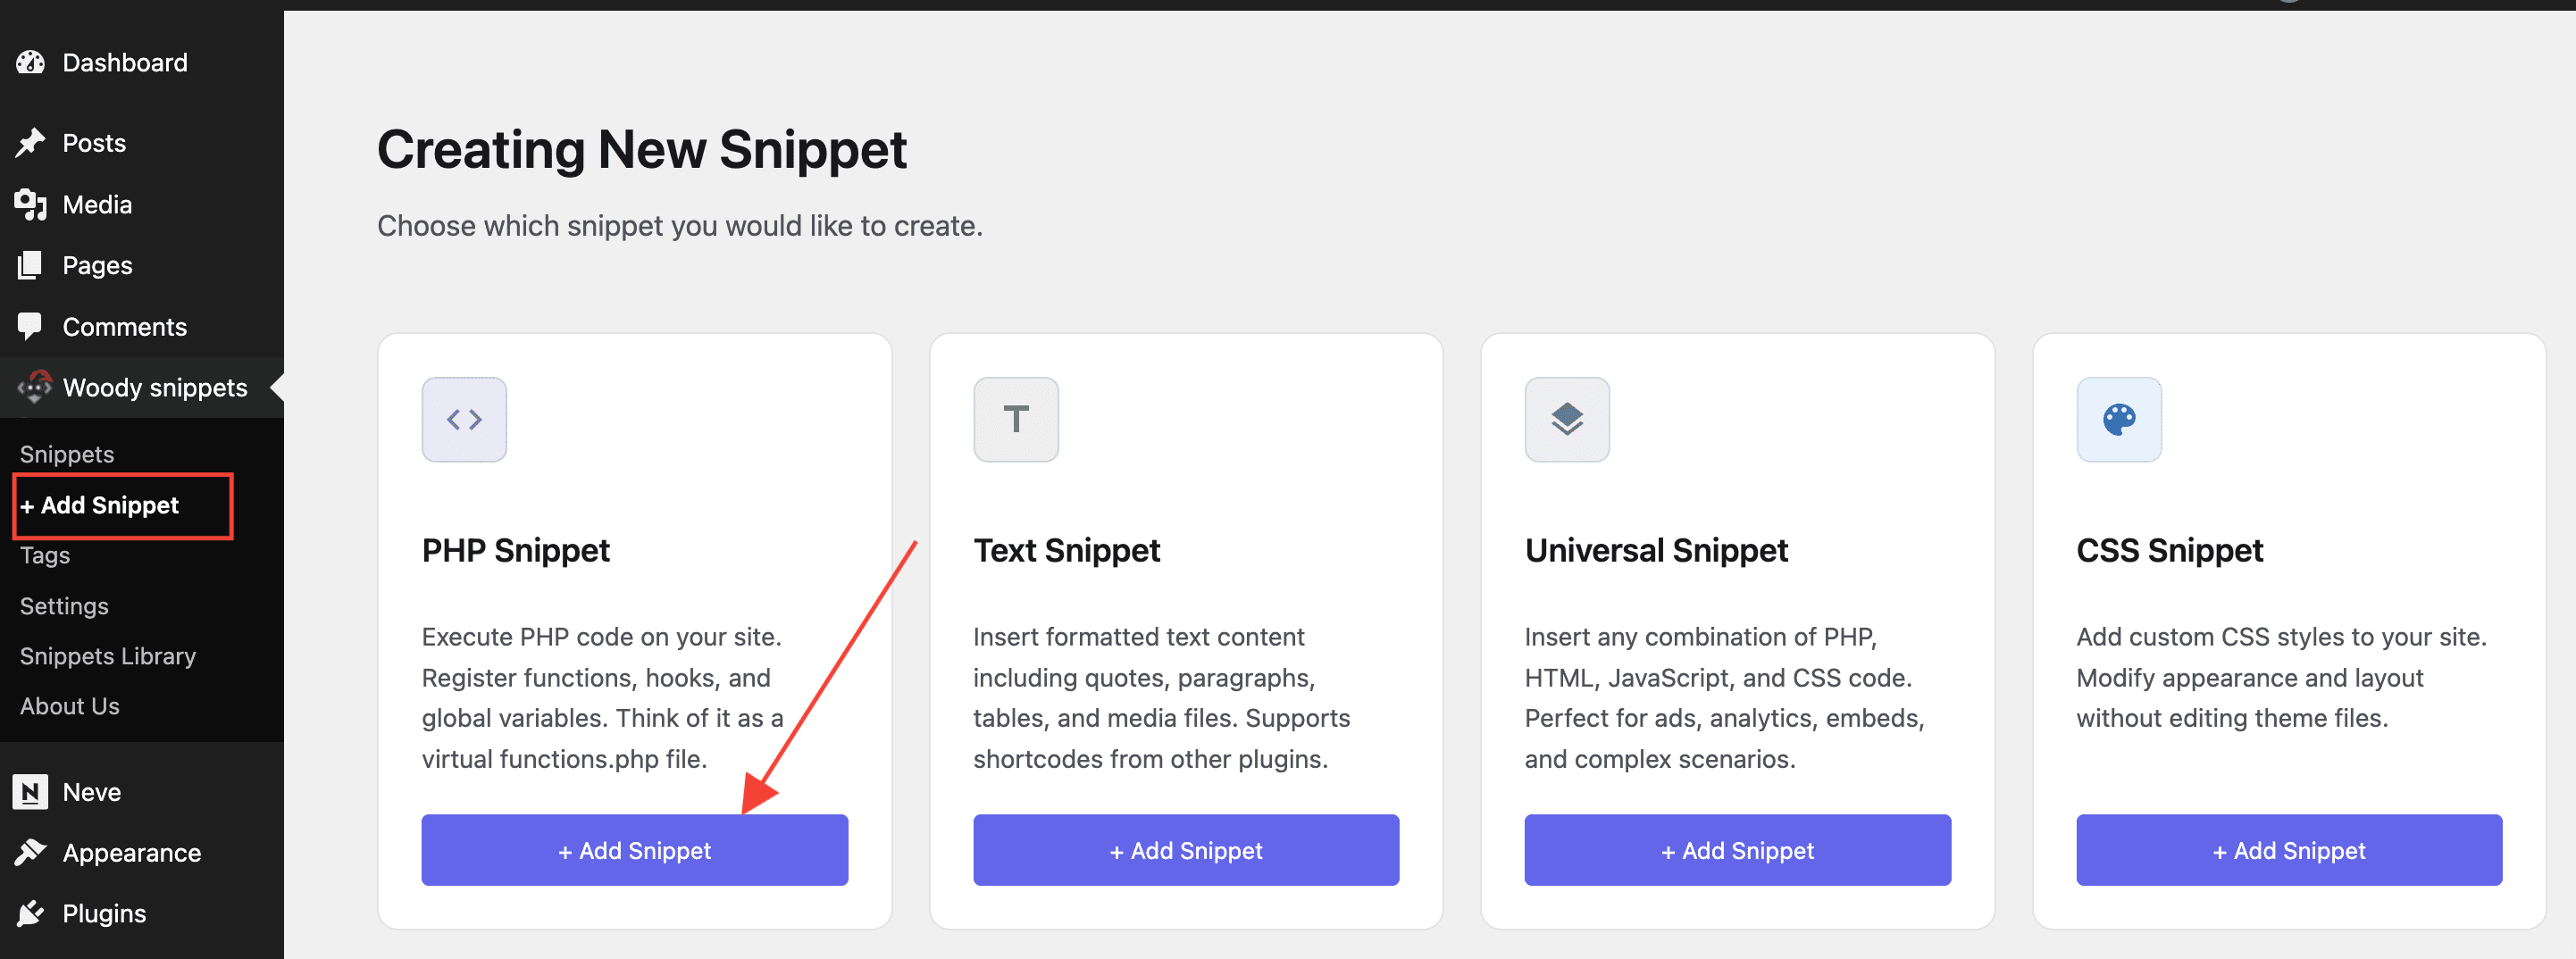
Select PHP Snippet as a snippet type and click Add Snippet. The snippet settings will be opened.
Add a snippet title. Think of a logical name – this way it’ll be easier to find this snippet among others in the list.
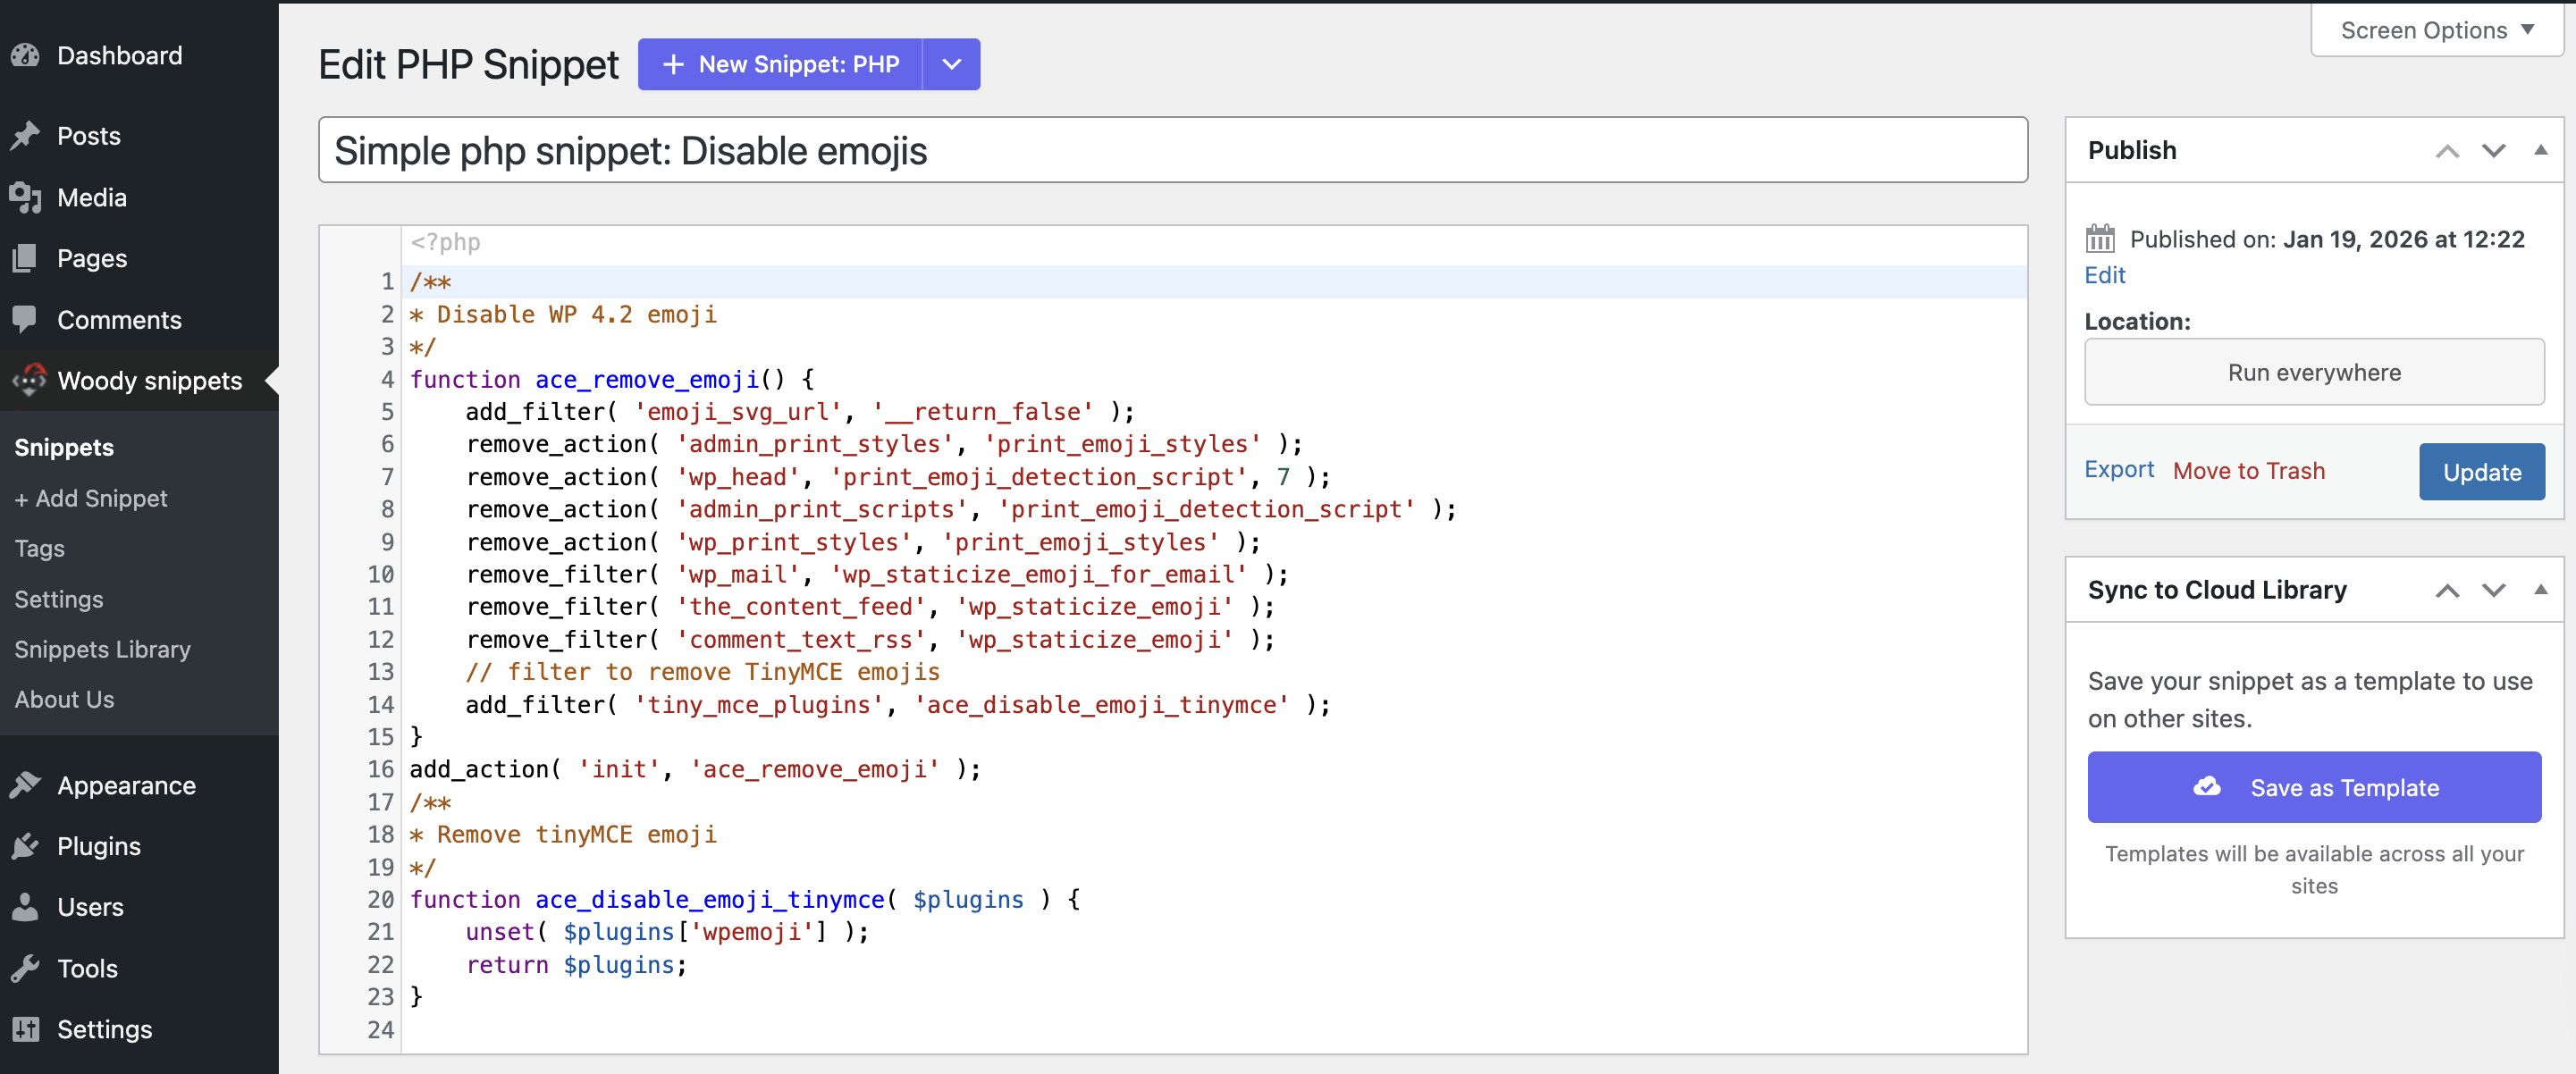
Most of the screen is occupied by the code editor with syntax highlighter. This is a multifunctional editor suitable for the HTML code as well. However, it’s better to use it for the PHP code.
Attention! The editor is used for a PHP code. This means you should add a PHP code without opening or closing PHP tags. You add a PHP code only. And the editor calculates what code to expect.
Use Cases for “everywhere”
Example #1: Registration of the ‘init‘ hook
add_action('init', 'cng_author_base');
function cng_author_base() {
global $wp_rewrite;
$author_slug = 'profile'; // change slug name
$wp_rewrite->author_base = $author_slug;
}
Use Cases for Shortcodes
Example #1: Show content to registered users only.
We’d like to hide a particular content from guests. This way we are motivating guests to sign up to our website. Let’s write a code that is going to solve this problem. The logic is pretty simple: if the is_user_logged_in” function exists & the user has signed in & any text has been sent to the $content variable, then we print the text from the $content variable (we’ll discuss how to add this text to a variable later).
if ( function_exists( 'is_user_logged_in' ) && is_user_logged_in() && ! empty( $content ) ) {
echo $content;
}
Now we need to wrap this special content in special shortcodes. Default attributes are: snippet id and snippet title.
[wbcr_php_snippet id="4034" title="Show content if a user has signed in"]Shortcodes can be used inside text widgets, in classic WordPress editor, Gutenberg editor, plugins and themes with shortcode support.
[/wbcr_php_snippet]Shortcodes can be used inside text widgets, in classic WordPress editor, Gutenberg editor, plugins and themes with shortcode support.
Attention! The content you wrap between shortcodes will always be available in the snippet via the $content variable. You should modify this variable. Otherwise, the content between shortcodes will be cut from the page content.
Example #2: Different Contact Form 7 layouts depend on the need_support parameter in the URL.
It’s a very popular question on our tech support forum: how to use another plugin shortcode in the PHP snippet? Let’s write a simple code that is going to display a contact form depends on the URL parameter. If a user follows the link https://site.loc/support?need\_support=premium we’d like to show a contact form for the premium support. If a user clicks https://site.loc/support?need\_support=freewe display a free support contact form. We create a condition: if the need_support request variable exists and it is not empty, we show the form type from the variable value. Otherwise, show the default form.
if(isset($_GET['need_support']) && !empty($_GET['need_support'])) {
switch($_GET['need_support']) {
case 'premium':
echo do_shortcode('[contact-form-7 id="12" title="Need premium support"]');
break;
case 'free':
echo do_shortcode('[contact-form-7 id="11" title="Need free support"]');
break;
case 'other':
echo do_shortcode('[contact-form-7 id="10" title="Need other support"]');
break;
default:
echo do_shortcode('[contact-form-7 id="9" title="Default contact form"]');
break;
}
}
The do_shortcode feature helps to use shortcodes from other WordPress plugins.
Example #3: Calculate a number of days before the football game
We’ll show you a great example of how to avoid snippet duplication. We have a football website. Several games are expected soon. And we want to show how many days are left until each game begins. We only know dates of games. Some users would create individual snippets per each game. However, the only change here is the start date of the game. So no code duplication is necessary. We will need only one snippet. And we will add it using a shortcode. The shortcode’s start_date attribute sends the date of the game. Let’s write a simple code. It is going to calculate the number of days before the football game. This value is sent from the $start_date variable (see example below).
if ( isset( $start_date ) && ! empty( $start_date ) ) {
$check_time = strtotime( $start_date ) - time();
if ( $check_time <= 0 ) {
return false;
}
$days = floor( $check_time / 86400 );
if ( $days > 0 ) {
echo $days . ' days';
}
}
We print 3 games with countdowns of days. Each shortcode has a start_date attribute with the date of the game. And our PHP code handles the rest.
Days until Barcelona vs Madrid game:
[wbcr_php_snippet id="4034" title="X days left till game #1" start_date="2019/01/25"]Days until Manchester United vs Bavaria game:
[wbcr_php_snippet id="4034" title="X days left til game #2" start_date="2019/01/15"]Days until Chelsea vs Juventus game:
[wbcr_php_snippet id="4034" title="X days left til game #3" start_date="2019/01/29"]Troubleshooting
- If activating a PHP snippet crashes your site, see Fix: Site Crash or HTTP 500 After Activating a PHP Snippet in Woody.
- If you see a "not passed the snippet ID" warning on the front end, see Fix: "not passed the snippet ID" Error in Woody Snippets.