
5-Minute Setup to First Analysis
Get FreshRank AI up and running in just a few minutes. This quick guide walks you through the essential setup and your first content analysis. You can start without any API key by using the built-in FreshRank Agent, or connect your own OpenAI key if you prefer.
In this article
What You'll Need
- WordPress 6.5 or newer
- Administrator access to your WordPress site
- About 5 minutes
- Optional: an OpenAI account and API key, if you prefer to use your own OpenAI billing instead of the hosted FreshRank Agent
Step 1: Choose Your AI Provider
FreshRank works out of the box with FreshRank Agent, a hosted provider that does not require an API key. It comes with a monthly allowance of free analyses, so it is the recommended option for running your first analysis.
If you prefer to use your own OpenAI account instead, switch the provider to OpenAI and complete the optional setup steps below.
- In your WordPress dashboard, go to FreshRank AI → Settings
- Find the AI Configuration card
- Under AI Provider, keep FreshRank Agent selected to start with no API key, or select OpenAI to use your own key
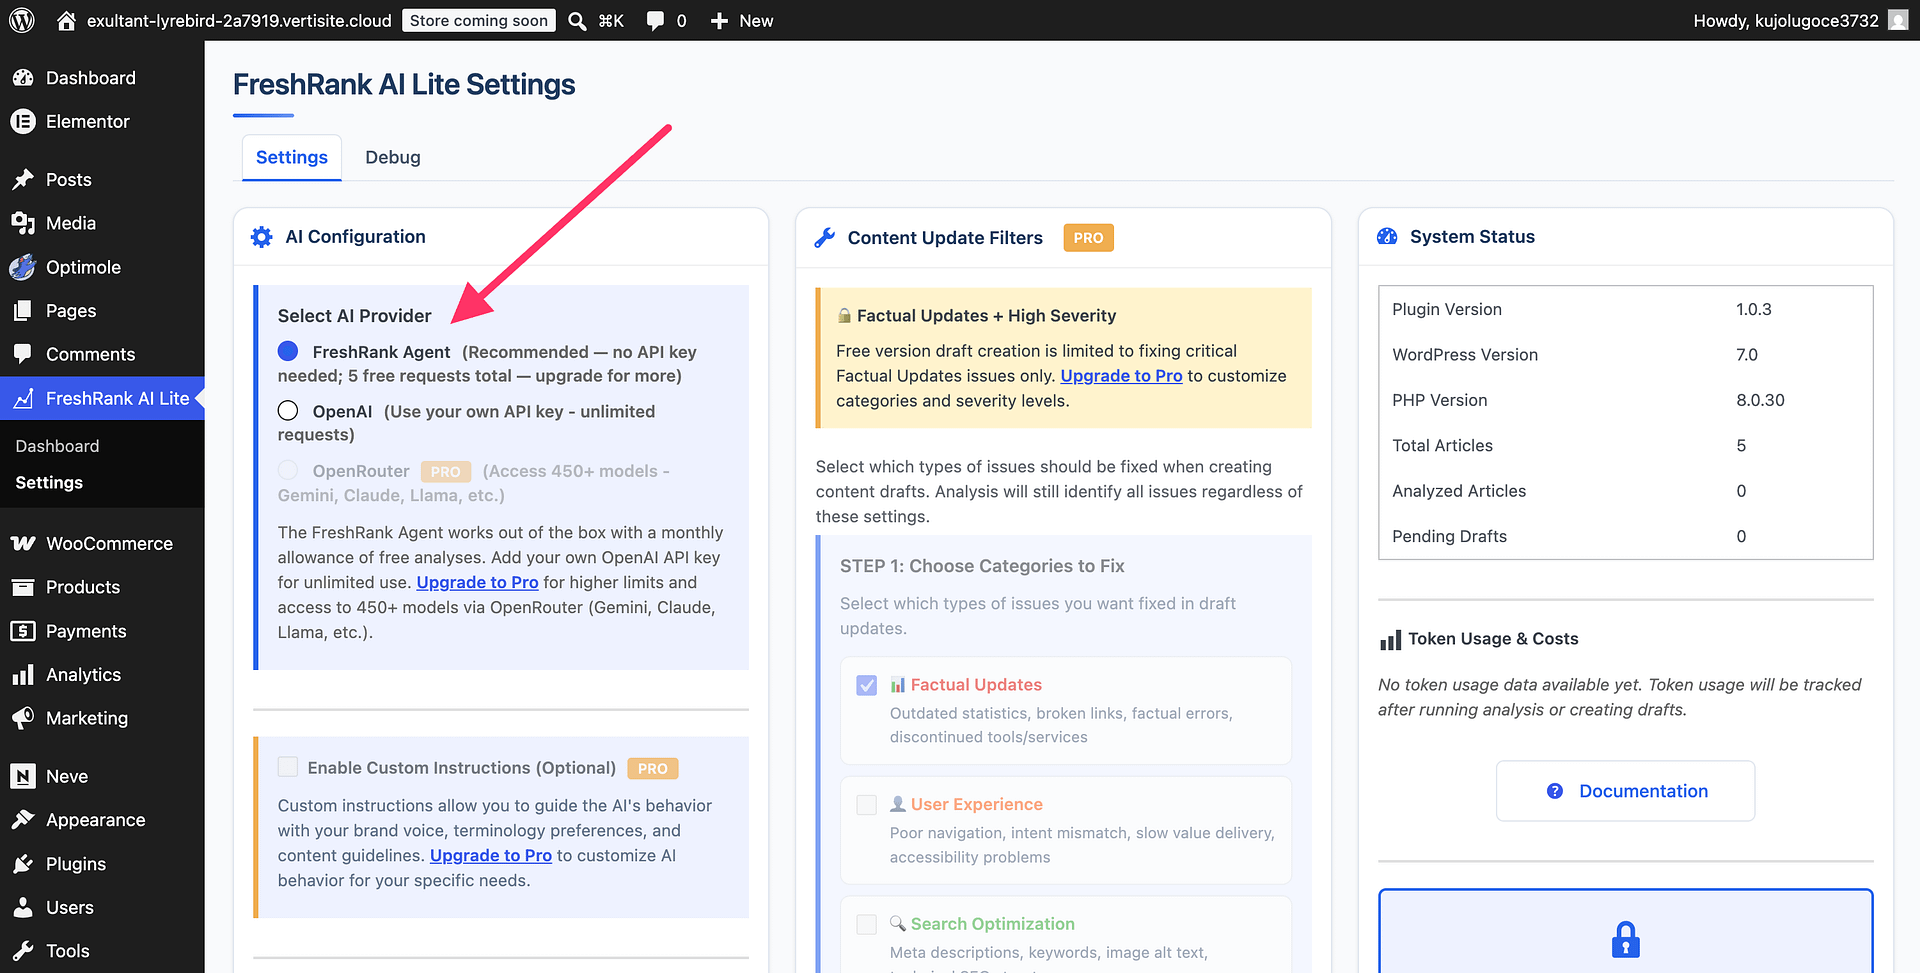
💡 Tip: If you keep FreshRank Agent selected, you can skip Step 2 entirely and go straight to running your first analysis.
Step 2: Optional — Use Your Own OpenAI Key
Complete this step only if you selected OpenAI in Step 1. If you are using FreshRank Agent, skip ahead to Step 3.
Create your OpenAI account and enable billing
- Go to platform.openai.com and create an account or log in
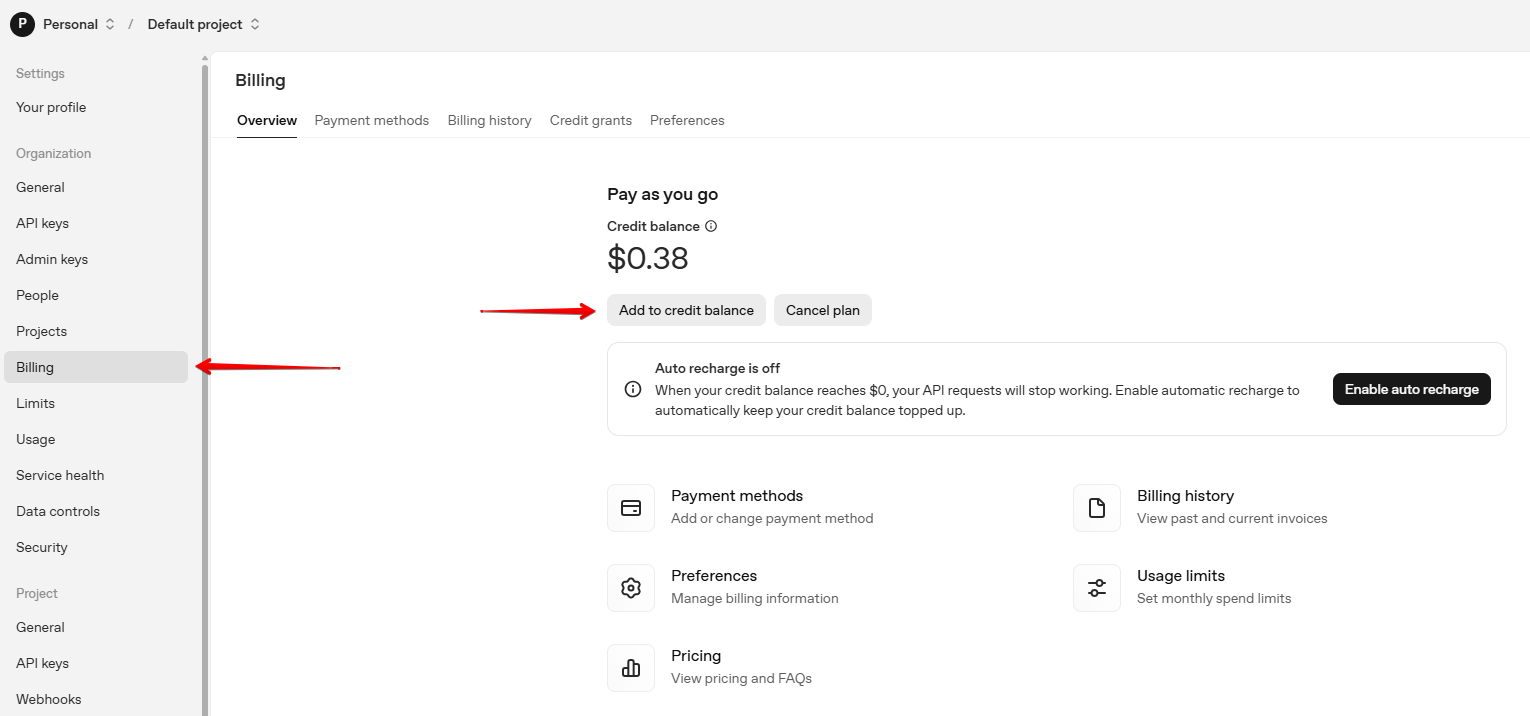
- Click the settings/gear icon (top-right corner)
- Open the Billing section in the left sidebar
- Add a credit card or purchase prepaid credits
- Confirm your payment method is active
Once billing is enabled, you can create your API key.
Get your OpenAI API key
- Go to platform.openai.com and log in or register a new account
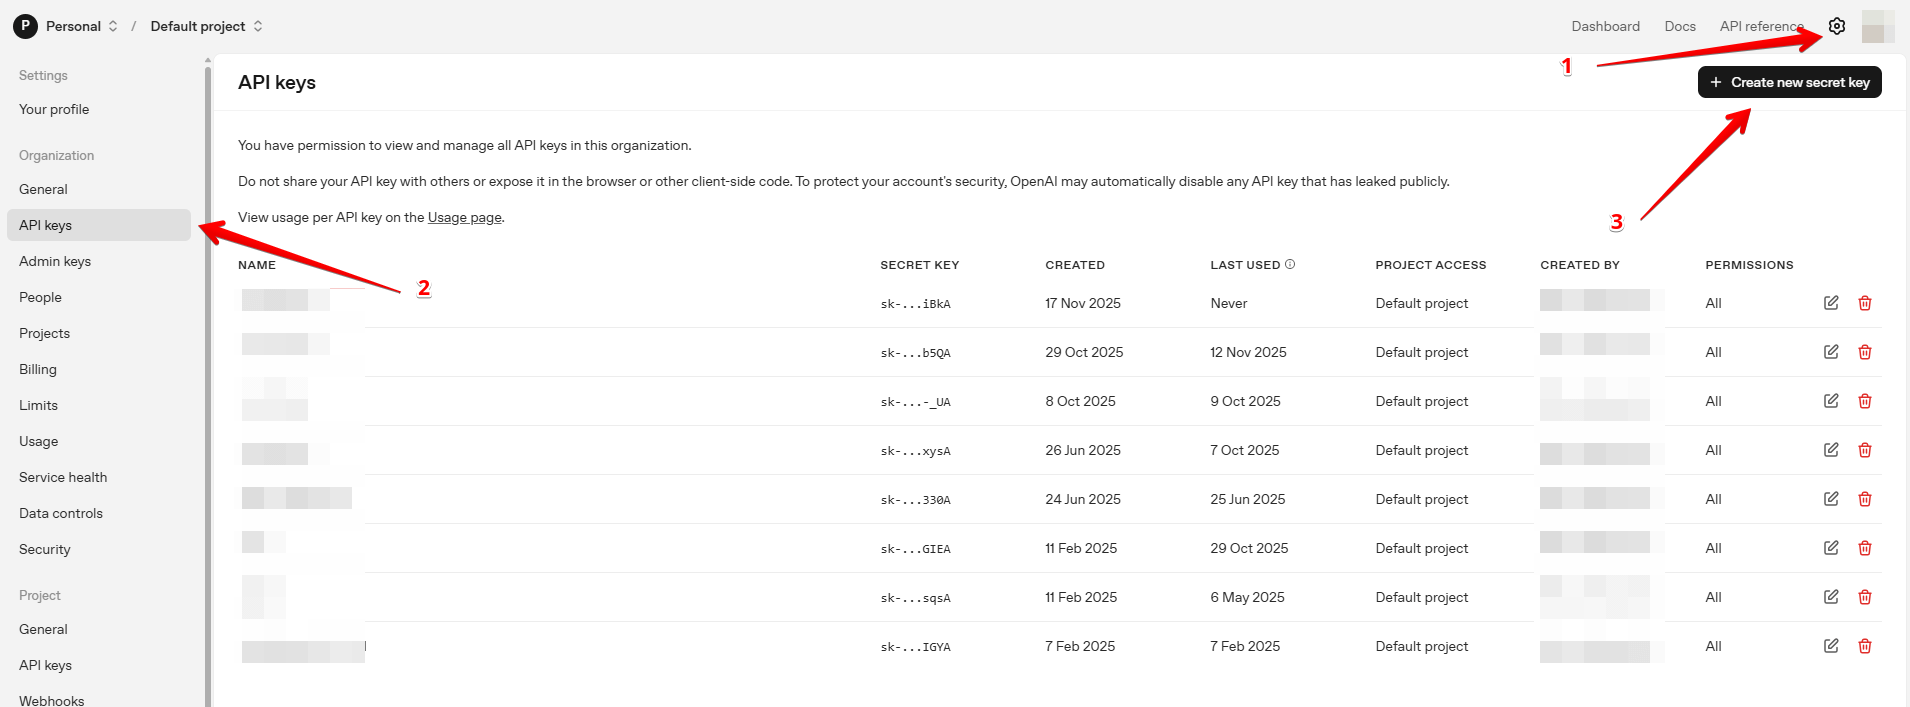
- Click the settings/gear icon (top-right corner)
- Select API keys from the left sidebar
- Click Create new secret key
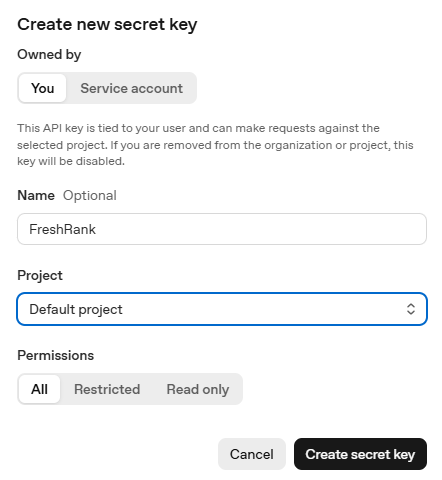
- Give your key a name (example: "FreshRank Plugin")
- Click Create secret key
- Copy the key immediately (you won't be able to see it again)
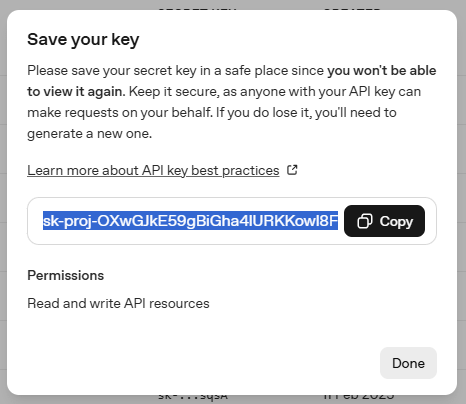
Important: Keep this key private. Don't share it with anyone or post it publicly. Save the key in a safe place. You won't be able to view it again!
Add your key to FreshRank
- In your WordPress dashboard, go to FreshRank AI → Settings
- Find the AI Configuration card and make sure OpenAI is selected as the provider
- Paste your OpenAI API key into the OpenAI API Key field
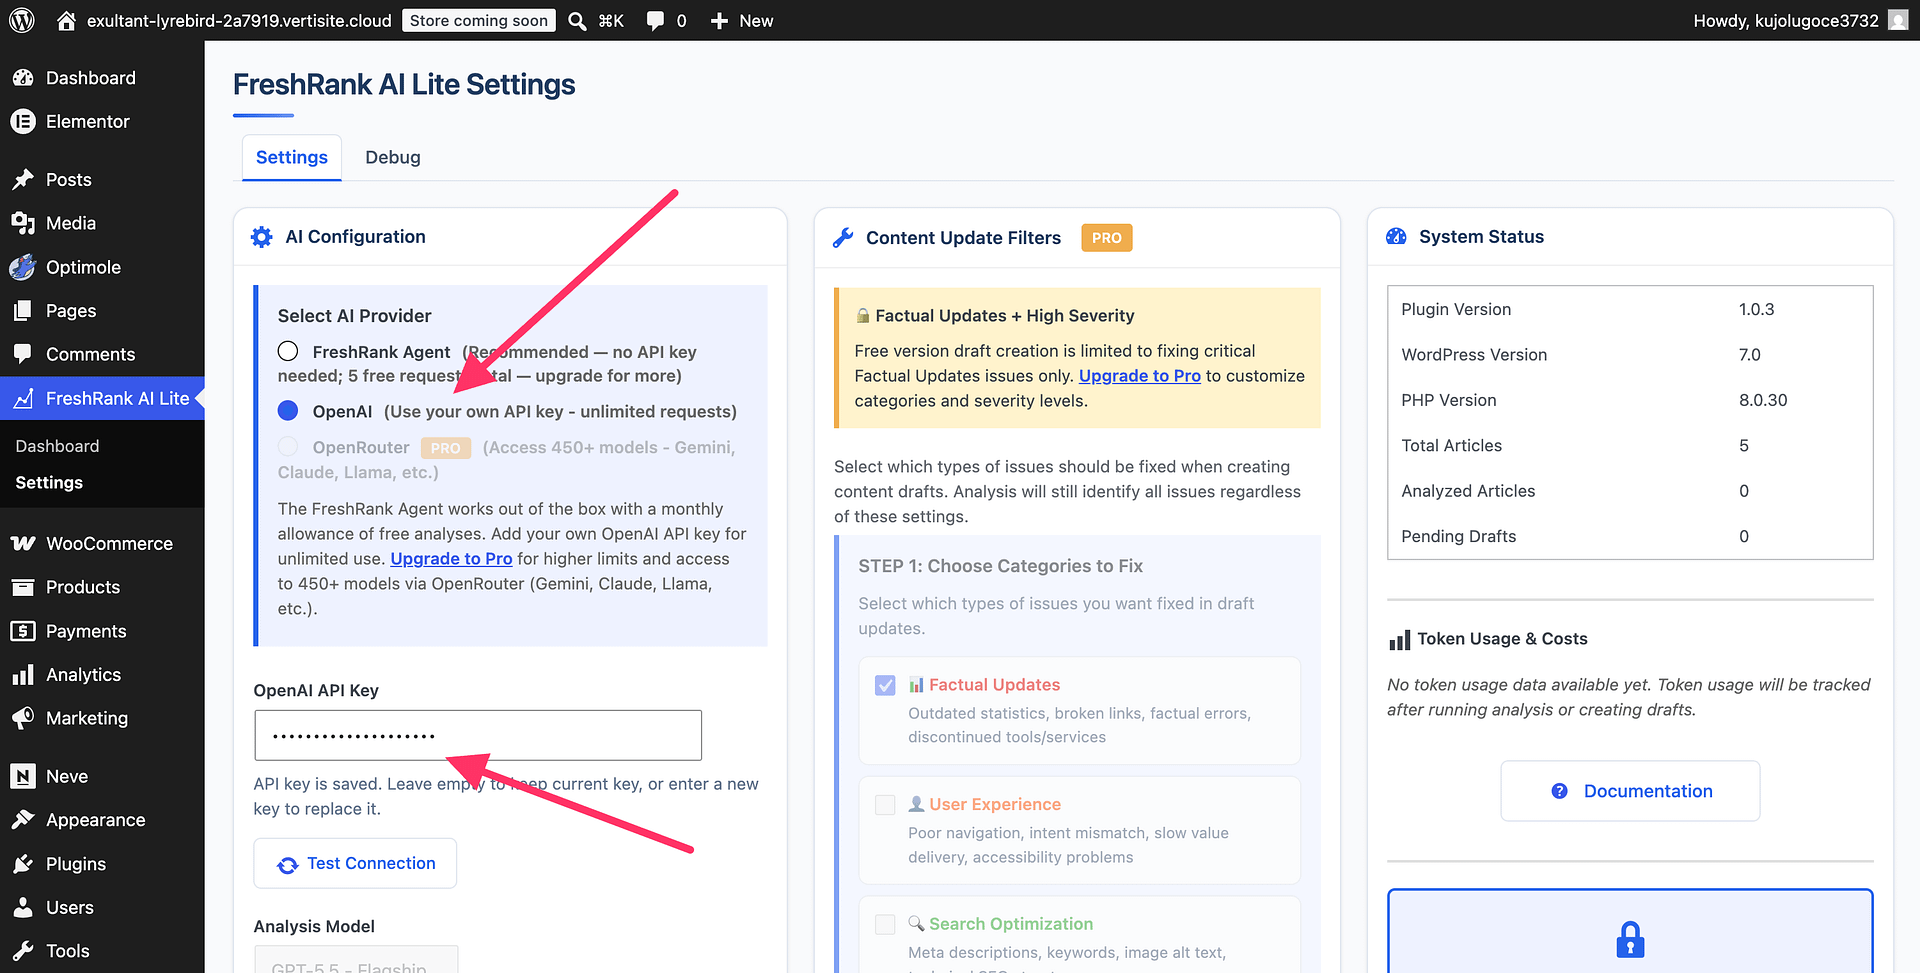
- Click the "Save Changes" button at the bottom of the page
- Click Test Connection to verify it works
- You should see a green success message: "OpenAI API connection successful" at the top of the dashboard
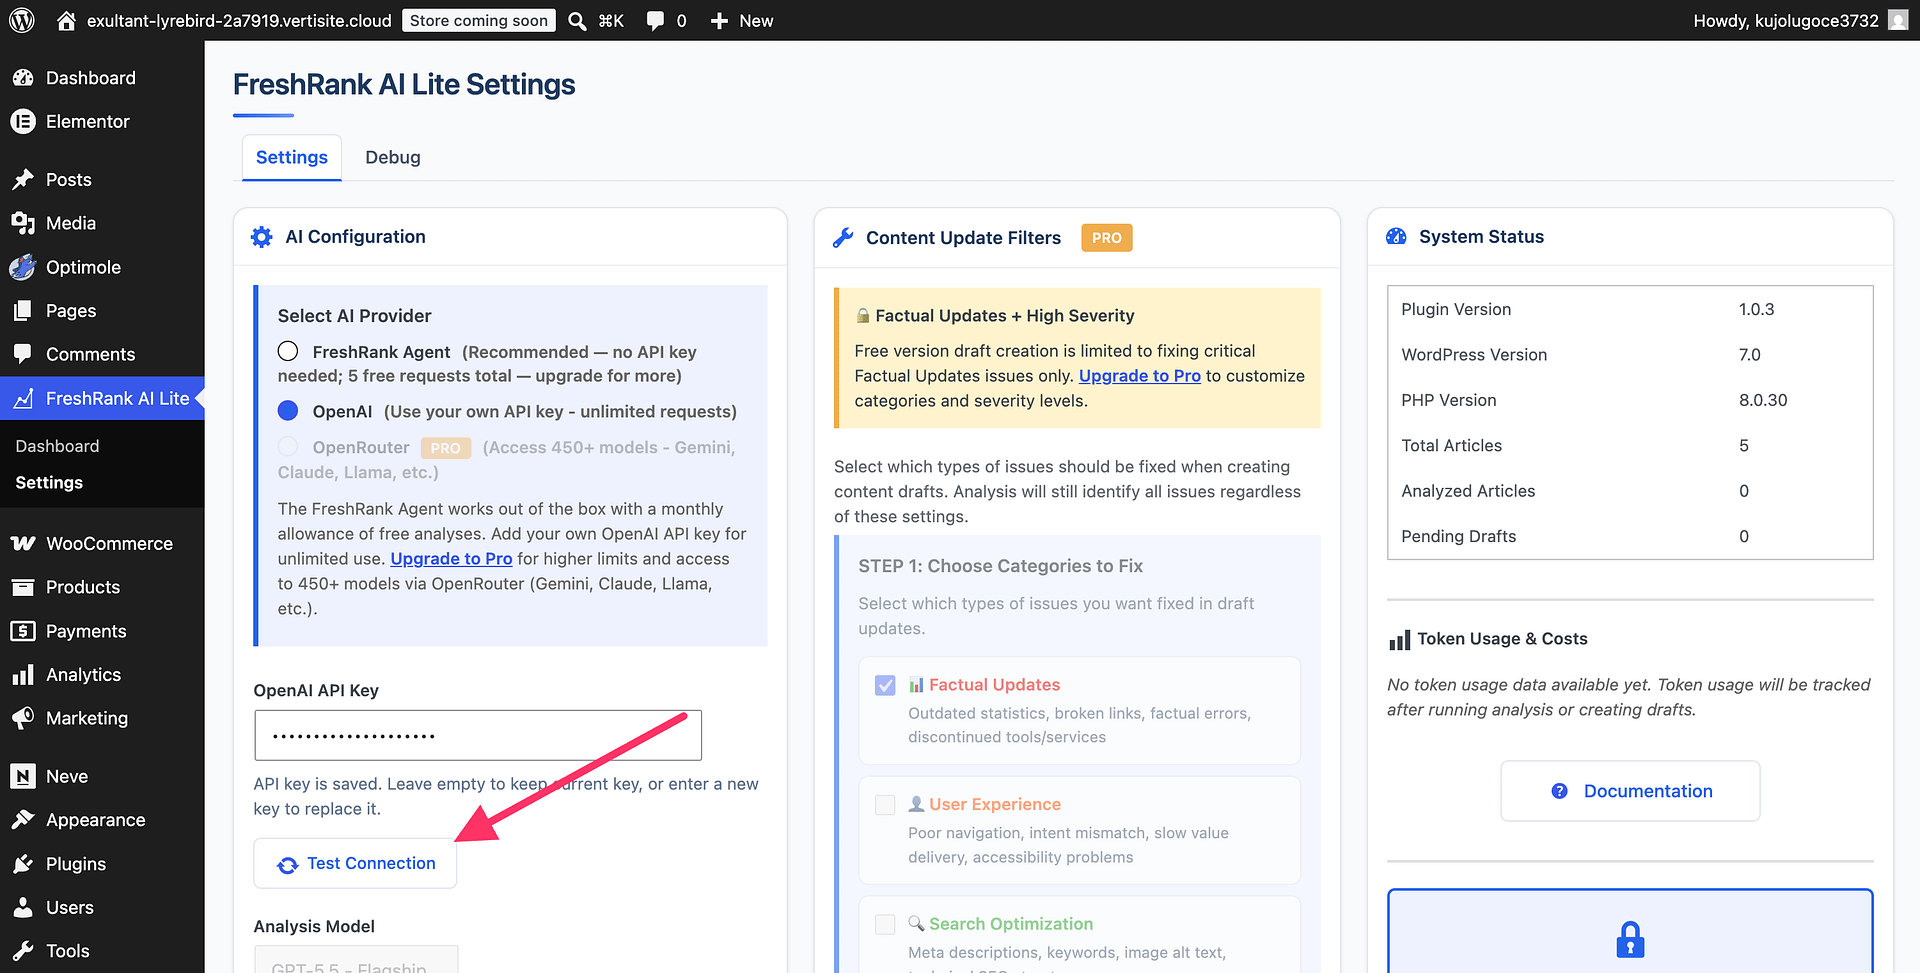
If you see an error, double-check that you copied the entire API key correctly.
Note: If you just opened a new account on platform.openai.com, the ‘Test Connection’ button might show an error even when the key is configured correctly. To test if this is the case, run any AI-powered action in FreshRank (like analysis) and see if it works. If you don’t get an error there, then the connection has been successfully established.
Step 3: Use the Default Settings (Recommended)
FreshRank comes with settings that work great for most websites. You don't need to change anything yet.
Default settings include:
- AI Provider: FreshRank Agent by default, with OpenAI and OpenRouter available as options
- OpenAI model when using your own key: GPT-5.5 by default
- Content Update Filters: Factual Updates, User Experience, SEO and GEO + High and Moderate Severity enabled
- Other categories: Disabled (you can enable these later)
These defaults focus on fixing the issues that matter most to your readers and search rankings.
Want to customize? You can adjust these settings anytime in Settings → Content Update Filters.
Pro Features: Model selection and content update filters are not available in the free version. Upgrade to FreshRank Pro to unlock all OpenAI models and enable content filters.
Step 4: Run Your First Analysis
- Go to Dashboard → FreshRank AI
- You'll see all your published posts listed automatically
- Find a post you want to analyze (older posts work great for testing)
- Click the Analyze button next to that post
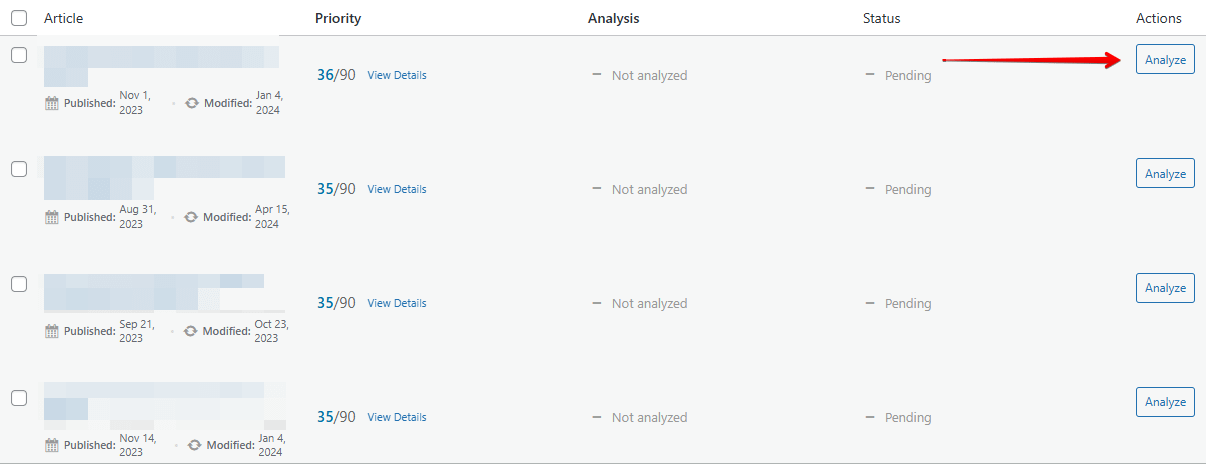
The post status will change to "Analyzing". Now wait while the AI examines your content.
Step 5: Wait for Results
Analysis typically takes 1-5 minutes depending on your post length.
You'll know it's done when:
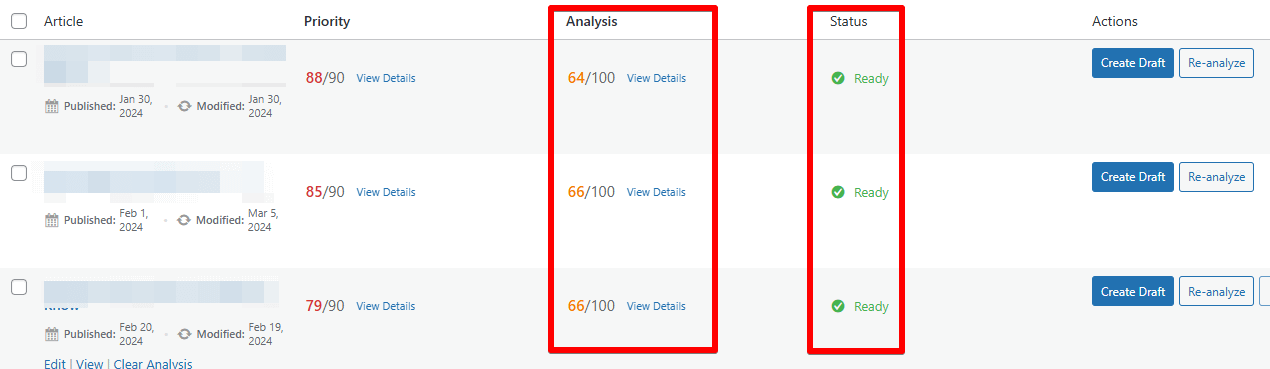
- The status badge turns green and says "Ready"
- The Analysis column shows a score (example: "66/100")
- The Analysis column now shows "View Details"
Pro tip: You can analyze multiple posts at once using bulk actions. Just check the boxes next to several posts and select Analyze Selected from the bulk actions dropdown.
What's Next?
Now that your first analysis is complete:
- Click "View Details" to see what issues were found
- Review the report containing detailed breakdown of problems in your content
- Decide if you want to adjust your content update filters or dismiss any issues found
- Click "Create Draft" to generate AI-powered fixes
Troubleshooting
"OpenAI API error (HTTP 401): Invalid API key"
- Your API key may be incorrect. Copy it again from OpenAI and paste it in Settings.
"OpenAI API error (HTTP 429): Rate limit exceeded"
- You're making too many requests. Wait a few minutes or upgrade your OpenAI plan.
Analysis is stuck on "Analyzing" for over 10 minutes
- Refresh the page. If still stuck, check the debug log to see what happened.
"OpenAI API key is not configured"
- This only applies when OpenAI is selected as the provider. Add your key in Settings → AI Configuration, or switch back to FreshRank Agent for no-key setup.