The Custom Thank You Pages Module - Sparks
📝 Note: The Custom Thank You Pages module is part of the Sparks plugin, which you can get from here.
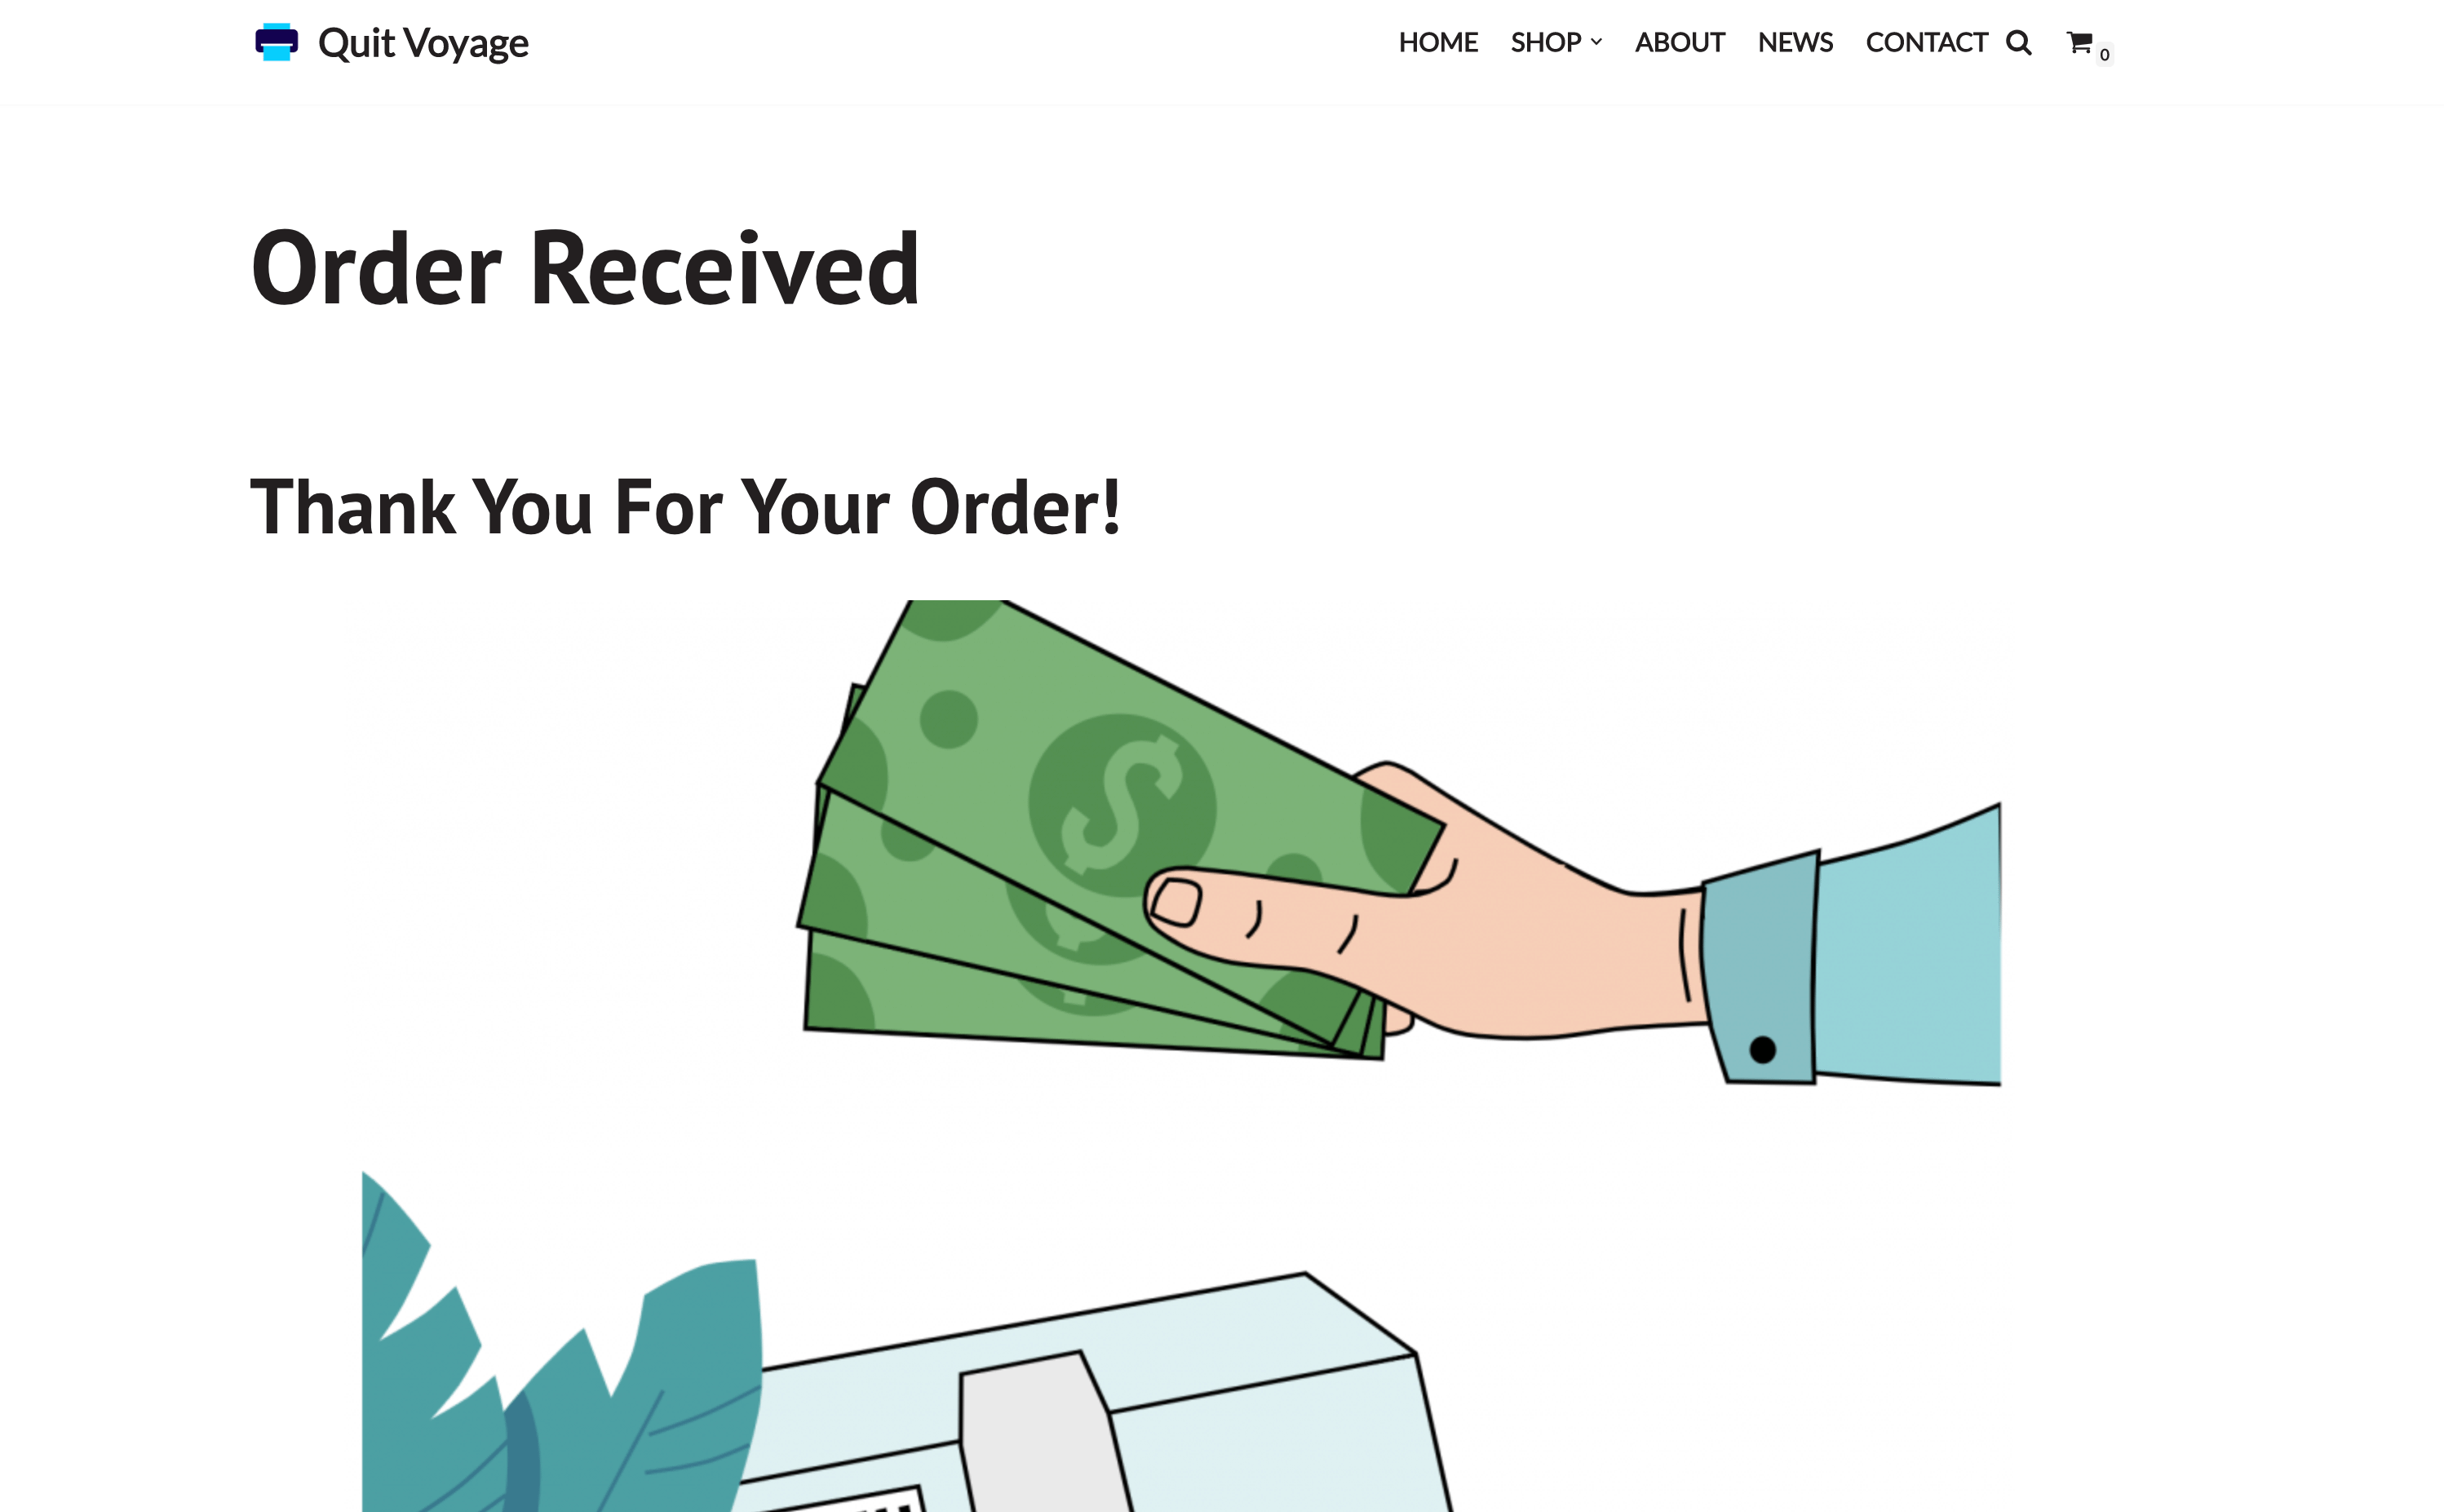
The Custom Thank You Pages module creates a friendlier experience for your online shop by displaying a customized thank you message after a customer completes an order.
In this article
Activating the Module
1. Install the Sparks plugin, using these instructions.
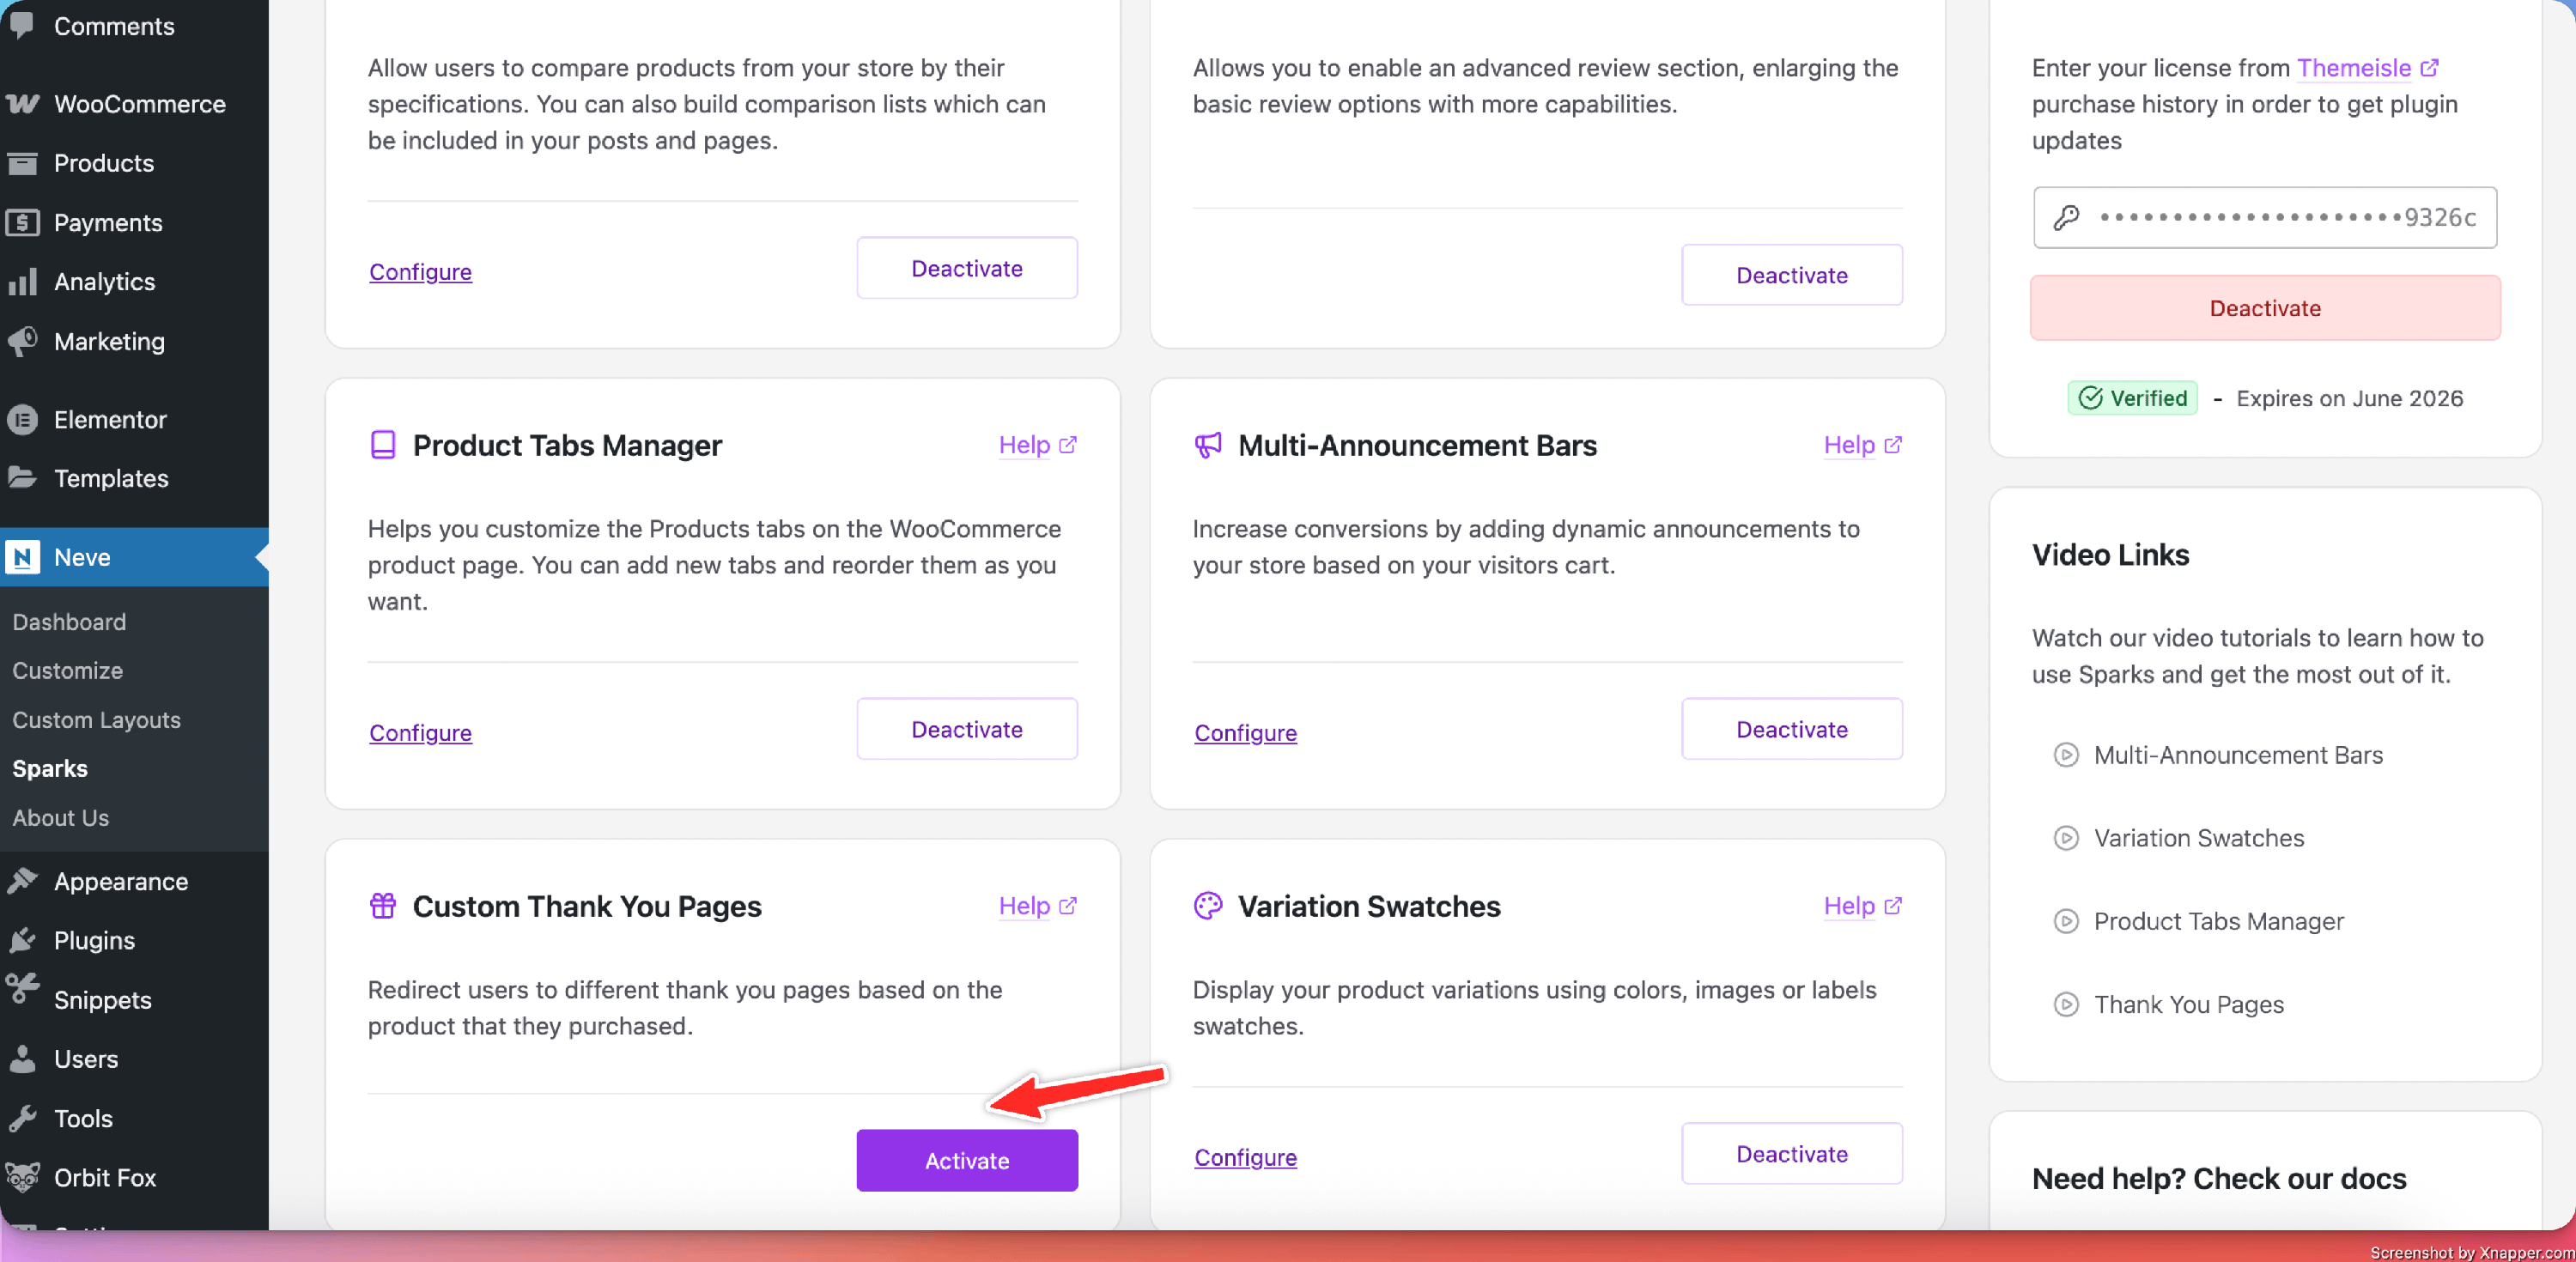
2. Navigate to Settings > Sparks and activate the module.
📝 Note: If you are using Neve, navigate to Neve > Sparks to access Sparks’s options.
Using the Custom Thank You Pages
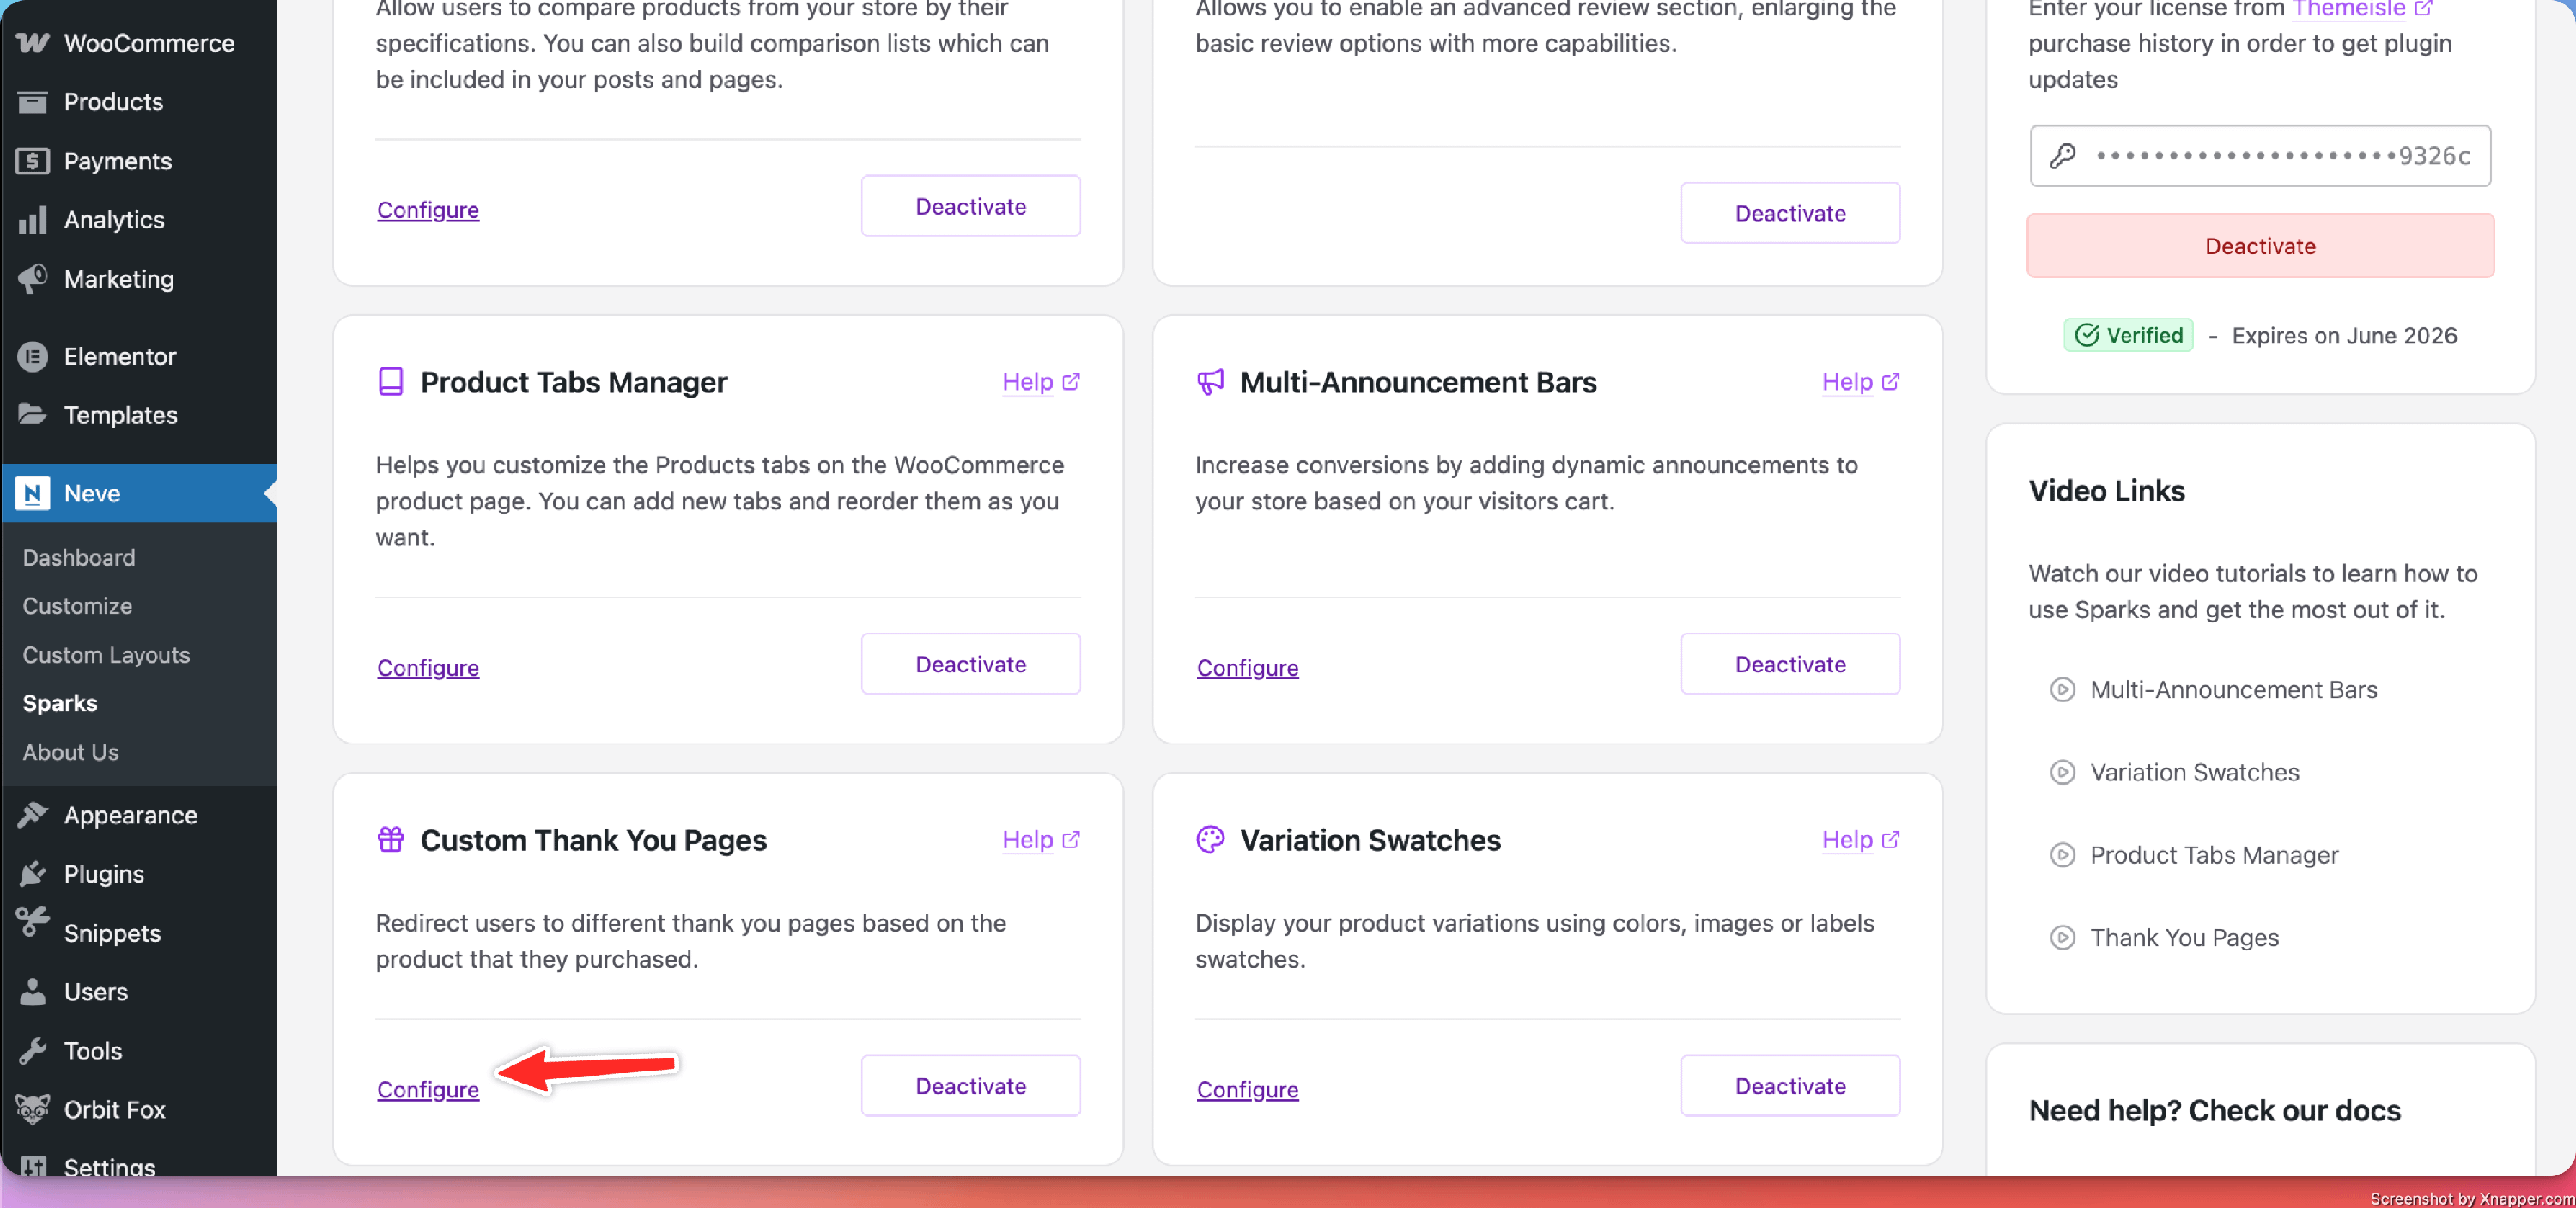
Once the module has been enabled, it will generate a new section under the Marketing menu.
Navigate to Dashboard > Marketing > Thank You Pages to discover the new option ( or click on the Configure button to go straight there ).
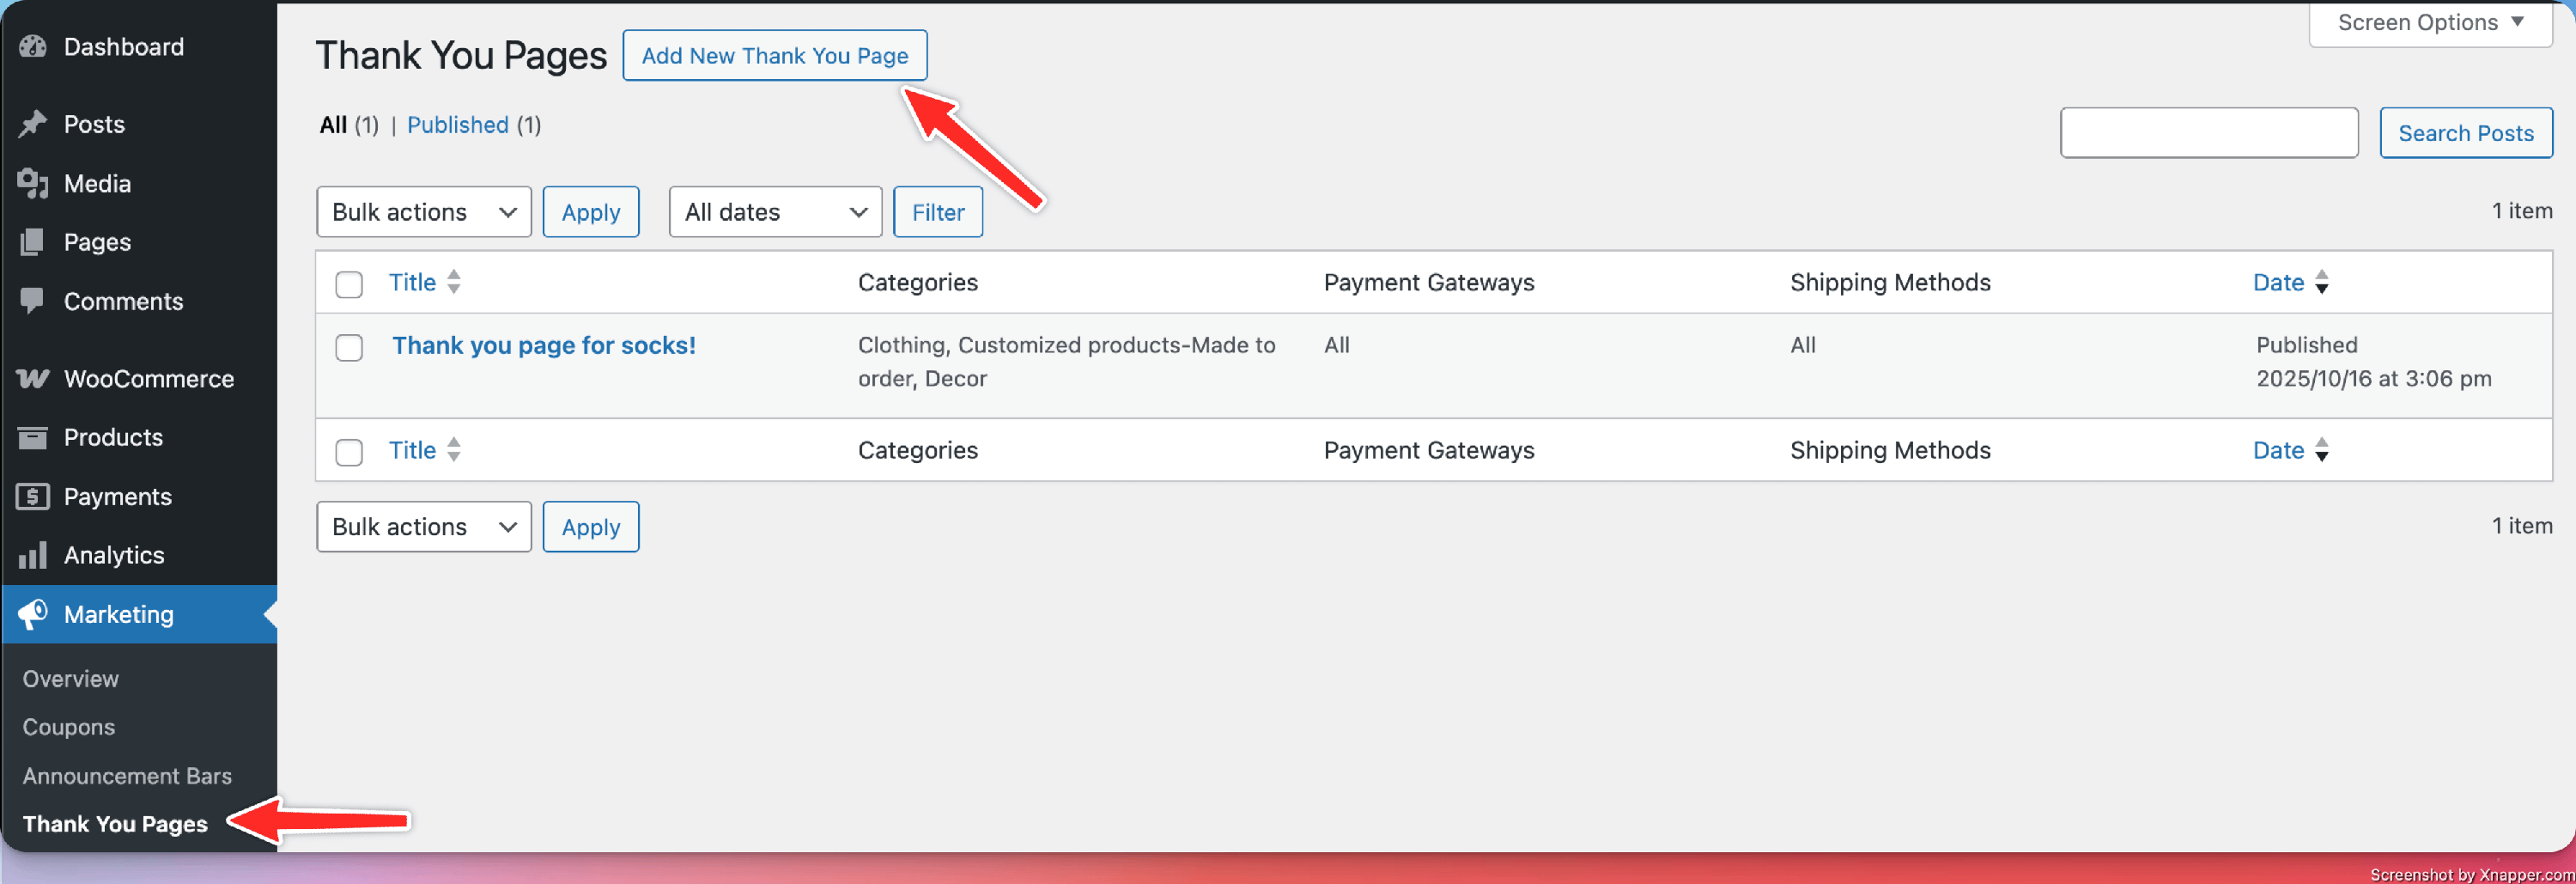
Click the Add New Thank You Page button to start building your customized page.
Restrictions
The Gutenberg and Elementor editors are enabled for editing the Thank You Page, with all their options. Additionally, the page comes with specific settings:
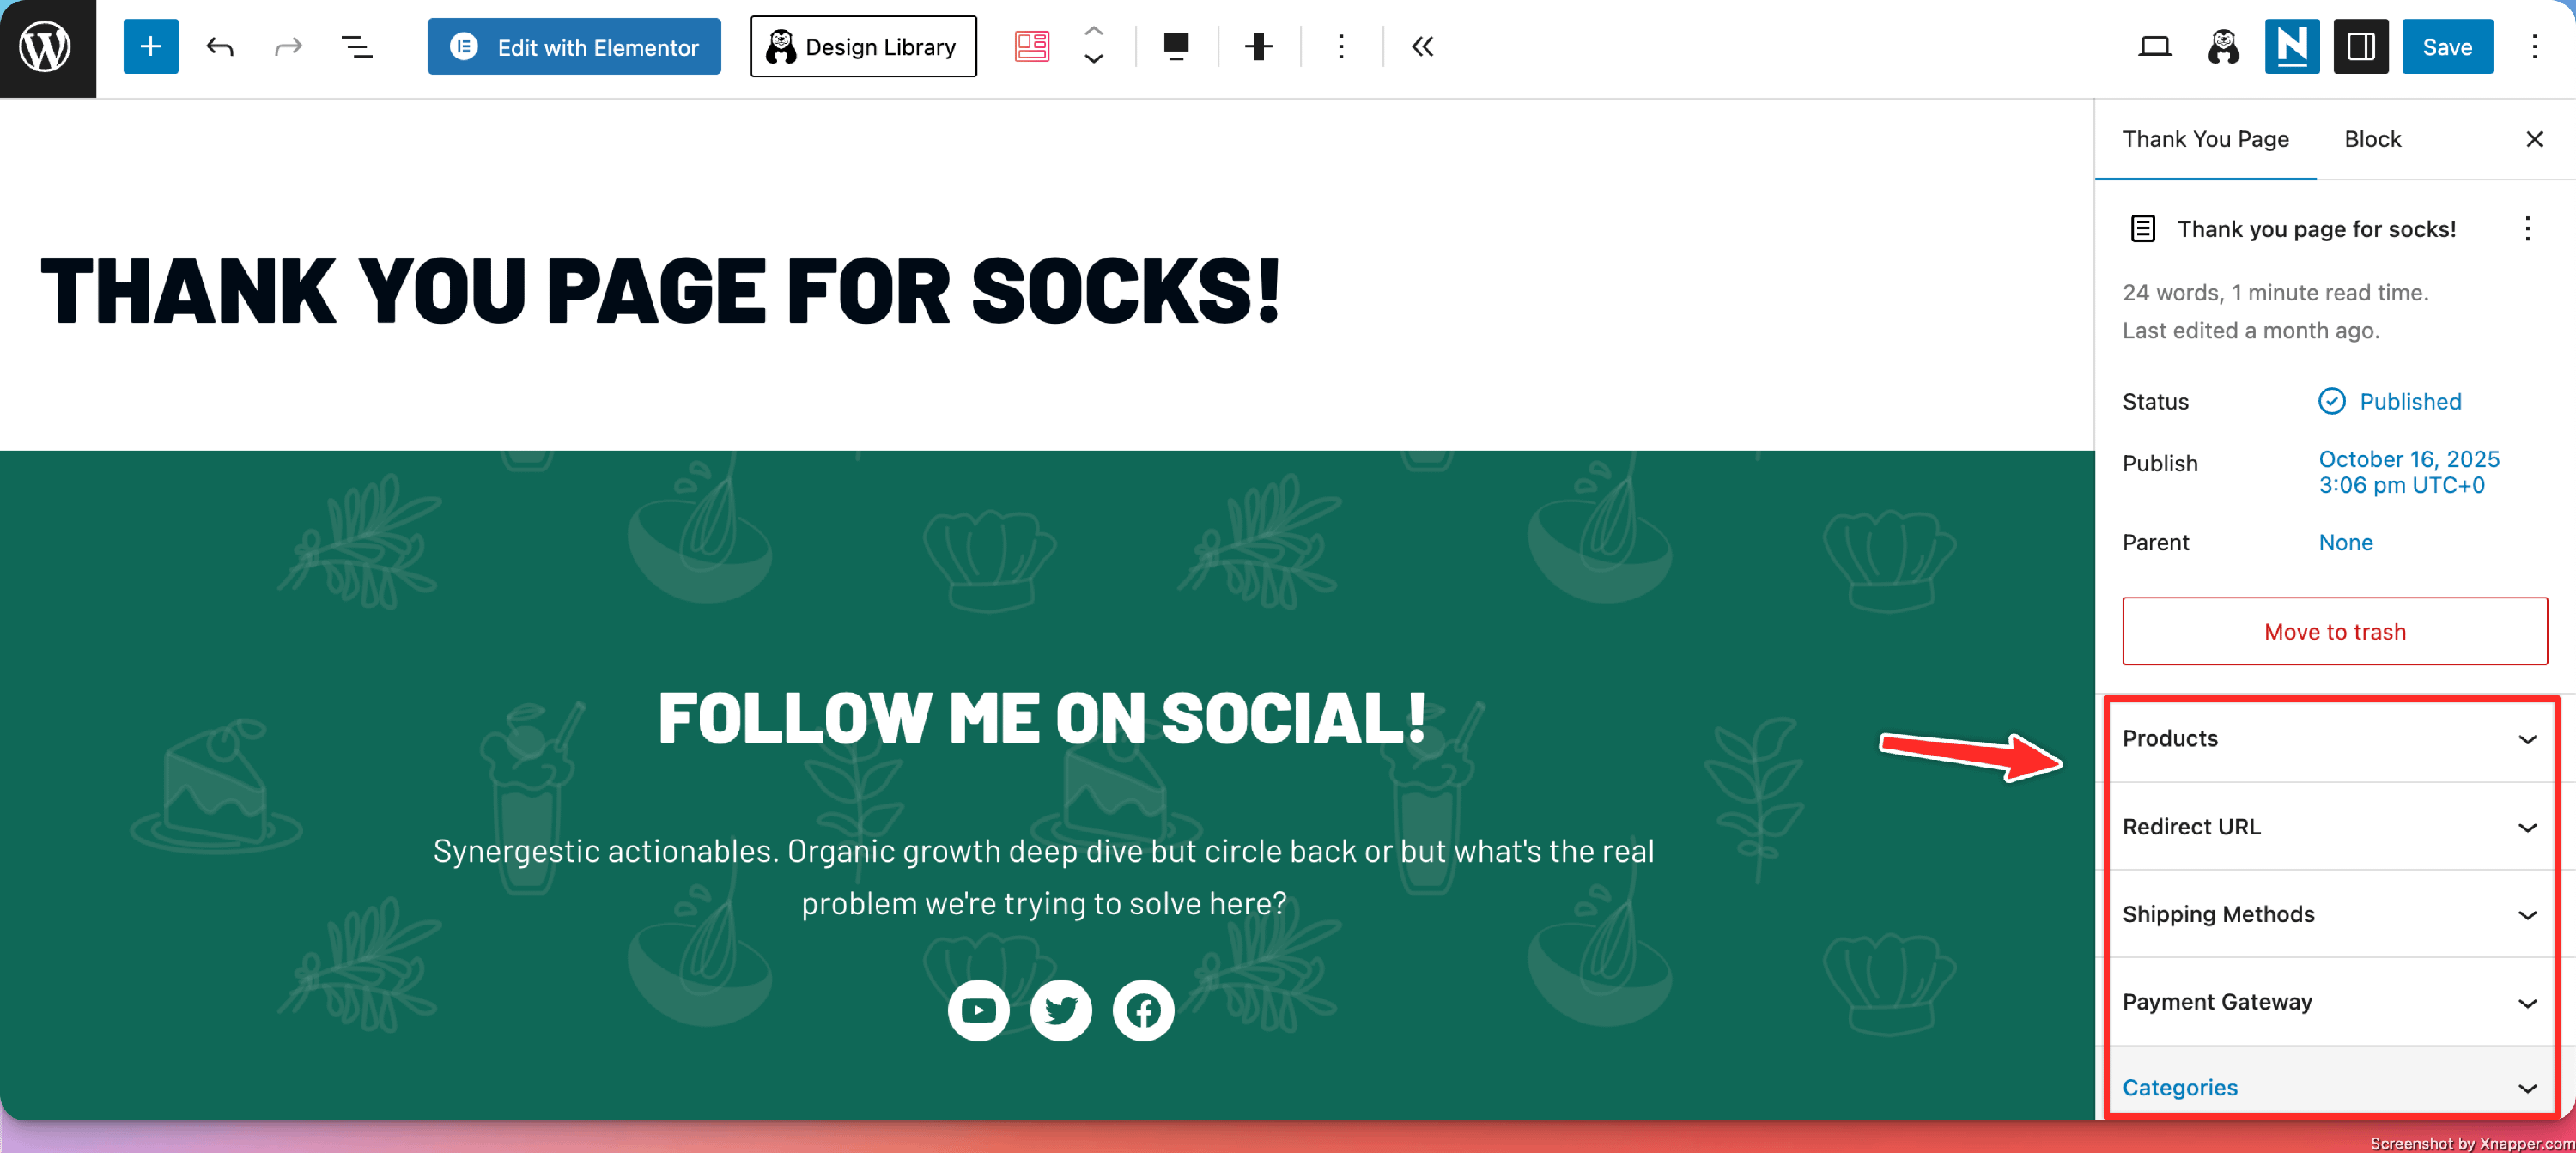
You can create multiple Thank You Pages and restrict them so they are displayed only for certain products.
The restrictions cover the following areas:
- Shipping Methods - select the shipping methods that will generate the thank you page.
- Payment Gateway - select the payment methods to generate the thank you page.
- Categories - pick the categories that will make the thank you page appear.
- Products - select multiple products to which the Thank you page will apply.
- Redirect URL - instead of an internal page, you can select an external URL to which the user will be redirected once the purchase is completed.
📝 Note: The priority order is: Products > Product Categories > Payment Gateway > Shipping Methods > General (no restriction added).
Order
When two or more Thank You Pages share the same type of restriction, they are displayed according to the order value set in Post Attributes.

📝 Note: Order equal to 0 means that it is the most important page and it will be displayed, rather than pages with order equal to 1, 2, 3.
Custom Thank You Pages for products
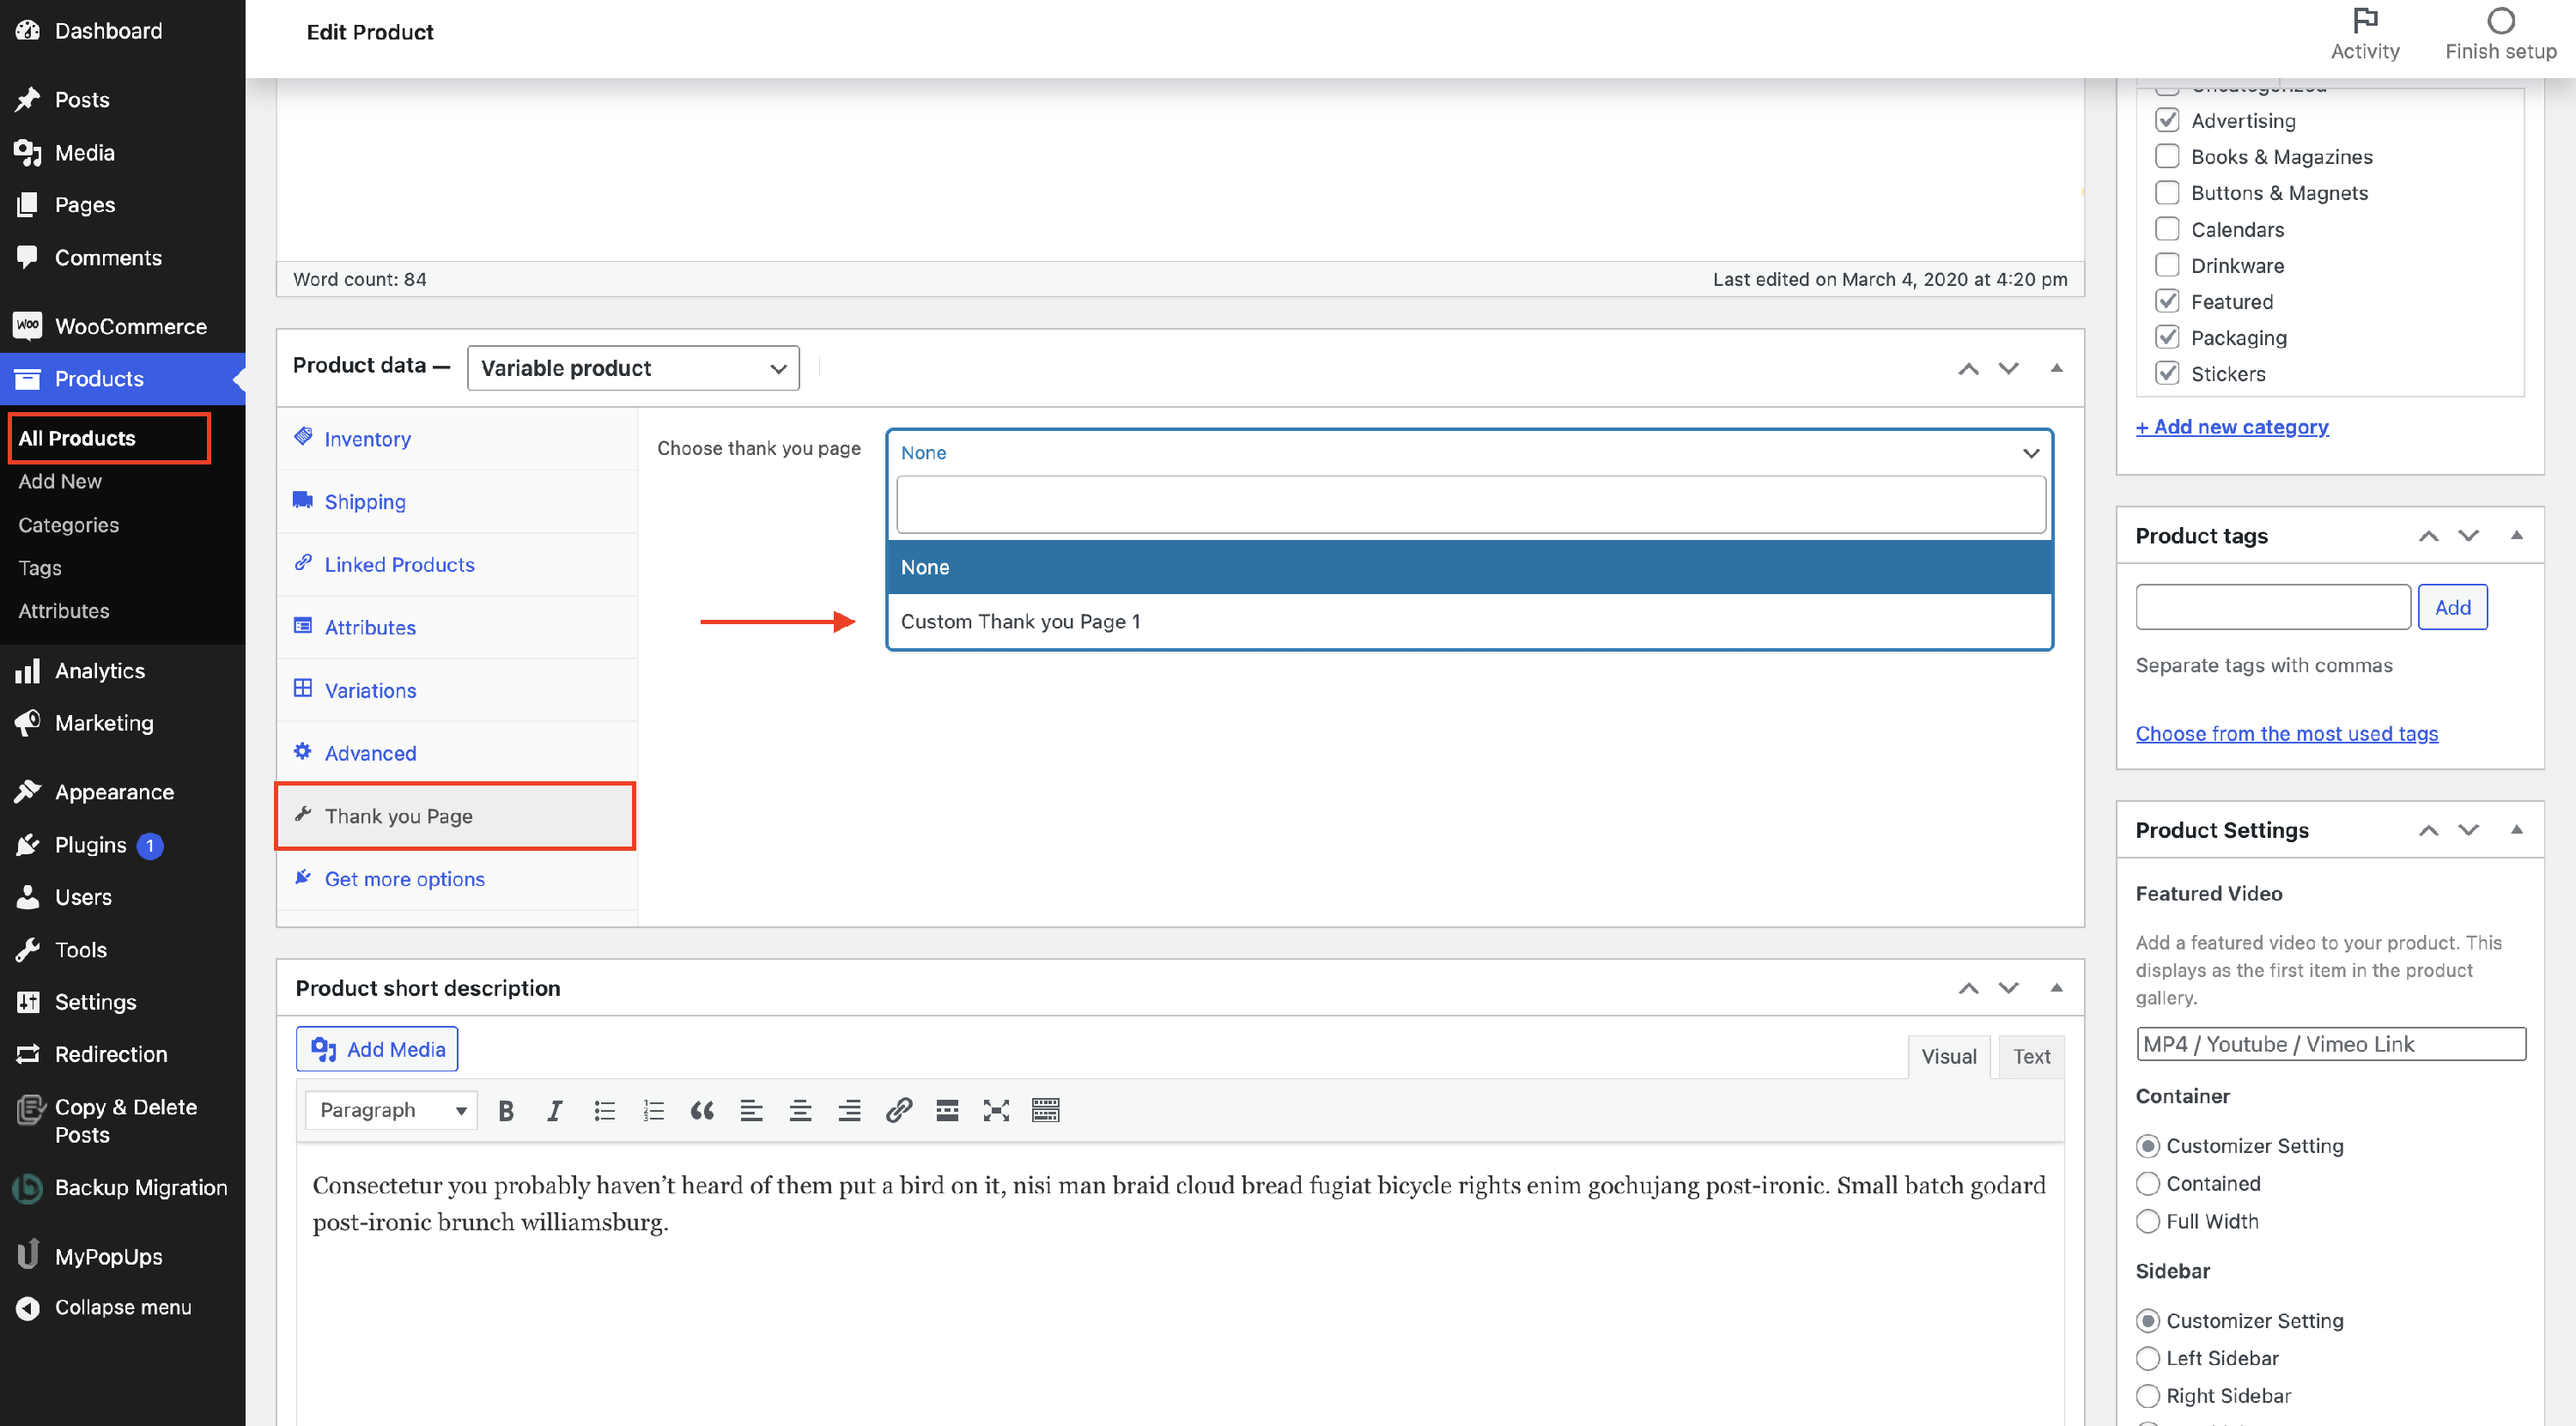
You can assign a specific Thank You Page to each product by following these steps:
Step 1: Navigate to Products > All Products and pick the desired one.
Step 2: Click on the Edit button and scroll until the Product data.
Step 3: Go to the Thank You Page tab and select the desired page from the dropdown list (it will include all Thank You Pages you created earlier).
Step 4: Click on Update and visit the site to check the changes.
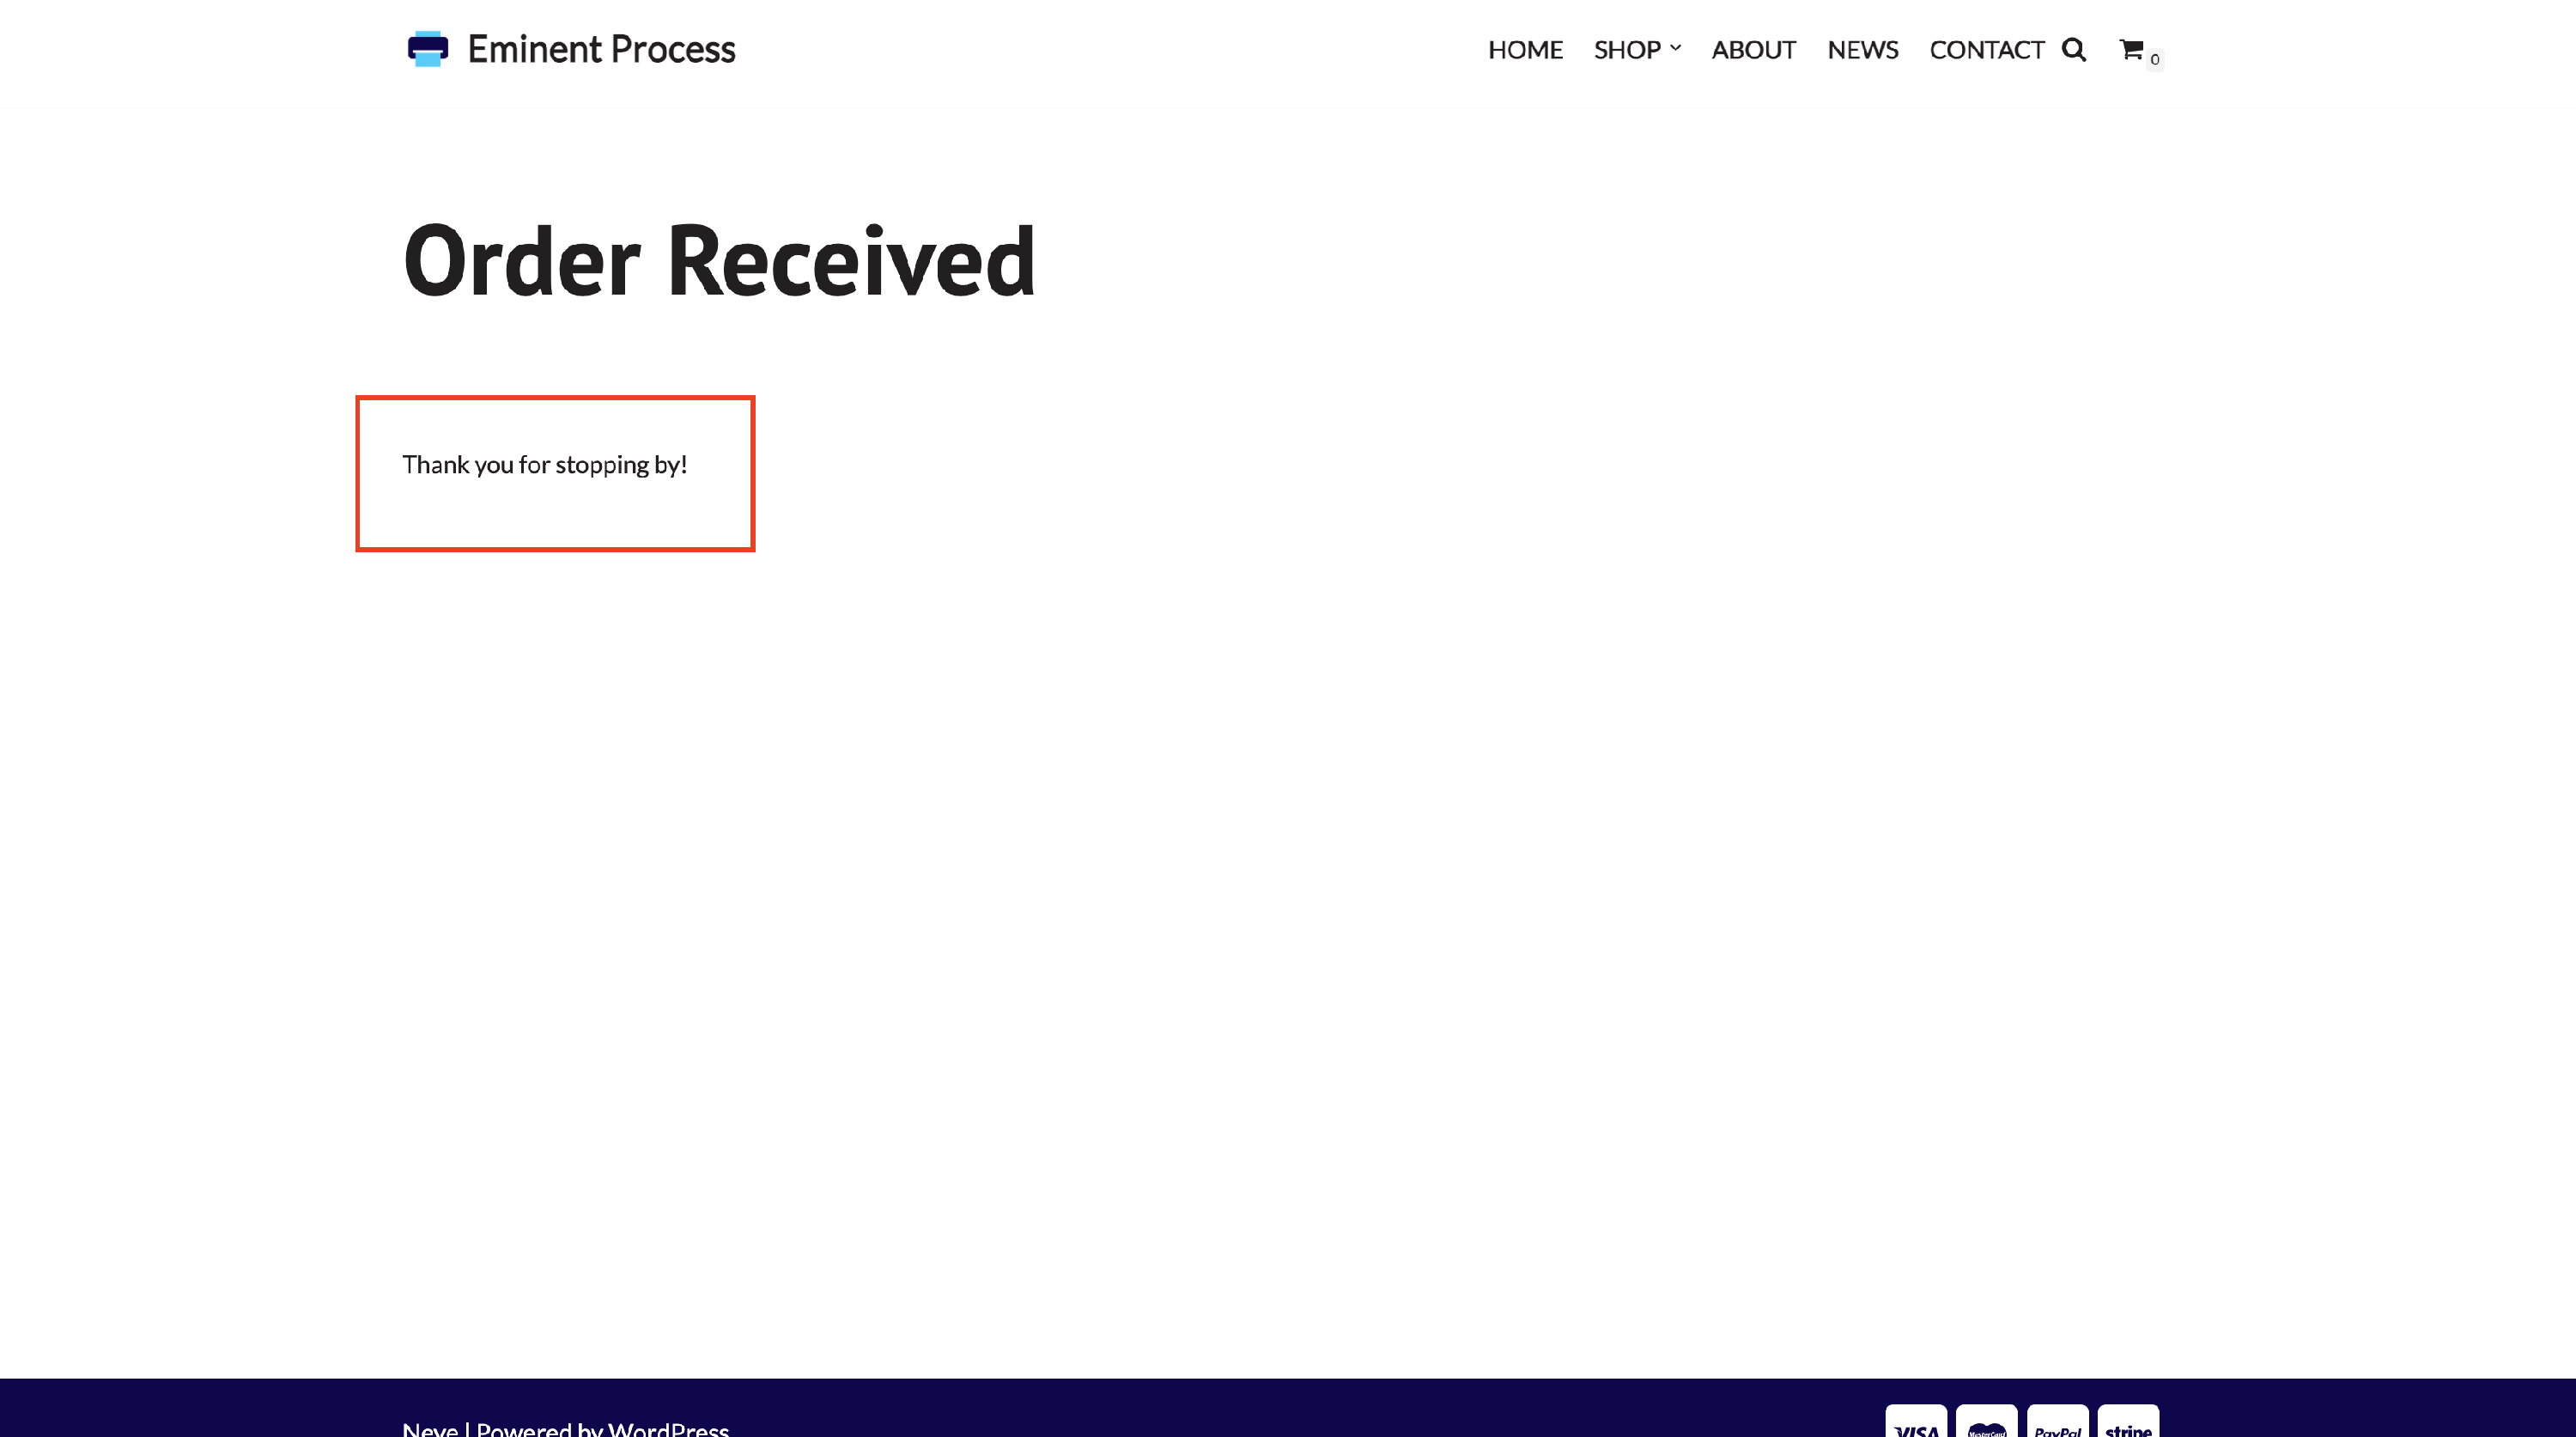
Result
Useful Resources
The Custom Thank You Page supports restrictions based on shipping methods and payment options. This section explains how to configure those features.
How to configure the shipping methods?
1. To use the shipping methods, you have to first configure them. Navigate to WooCommerce > Settings > Shipping.
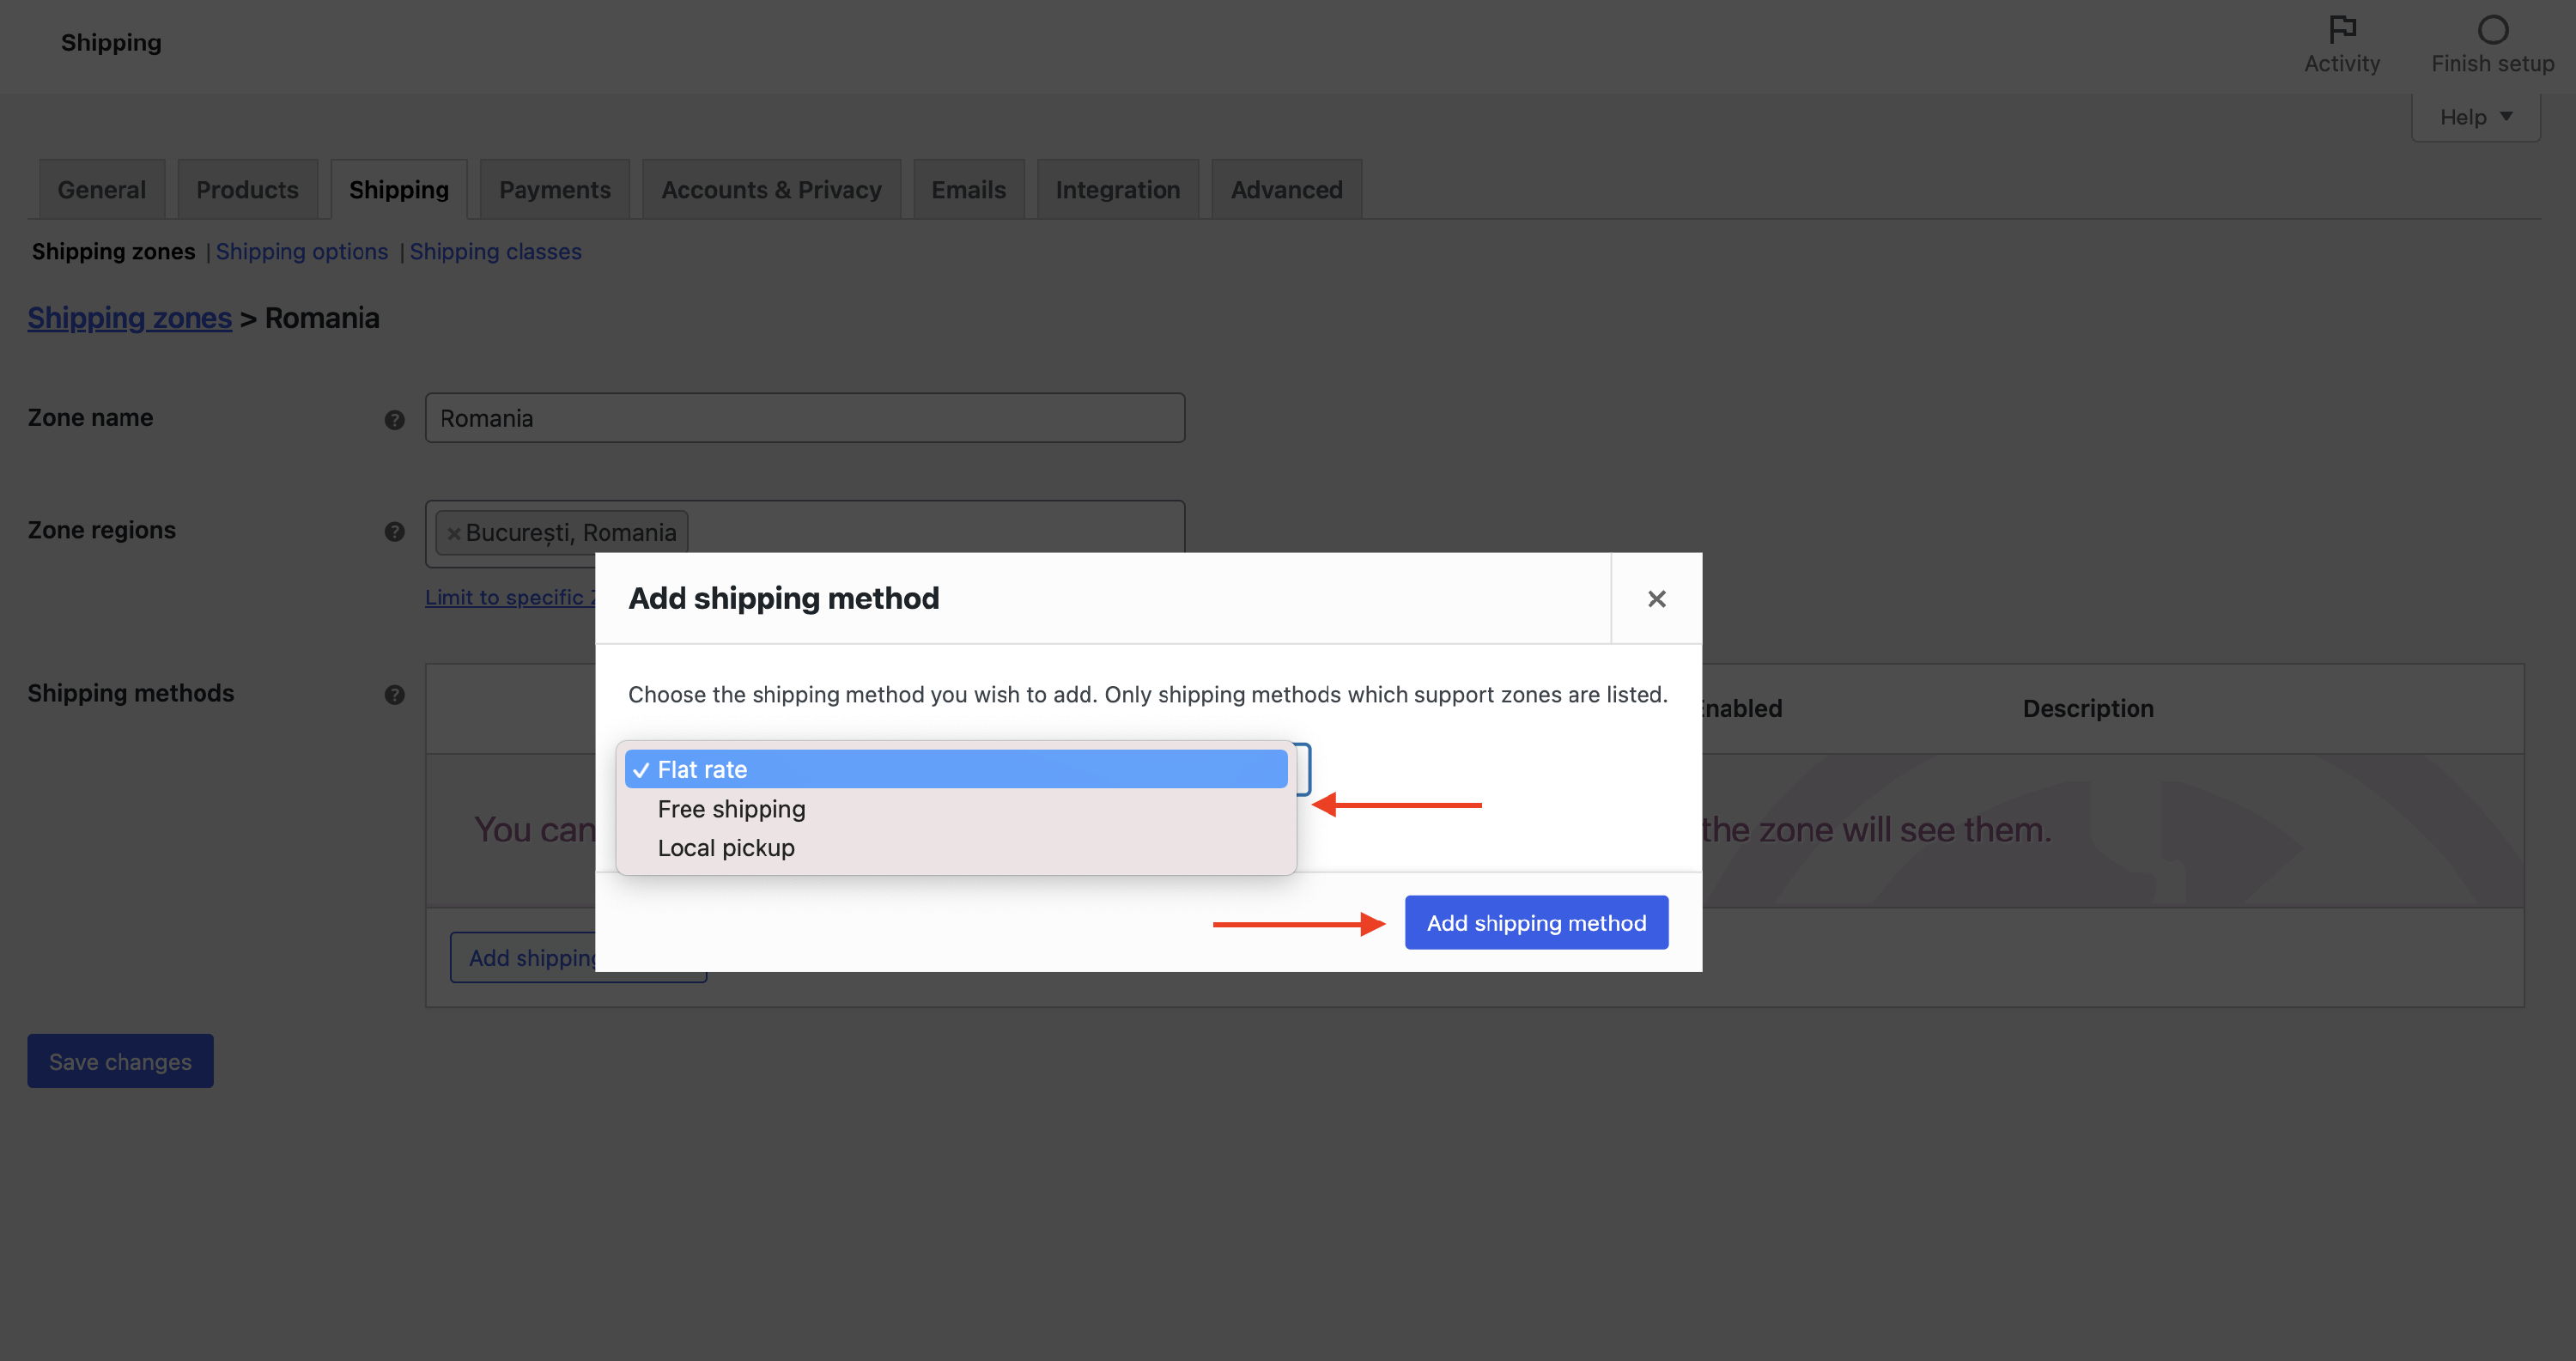
2. From there, click to add a shipping zone. You will be redirected to a new page where you will have to fill in the details. After finishing, click on Add shipping method.
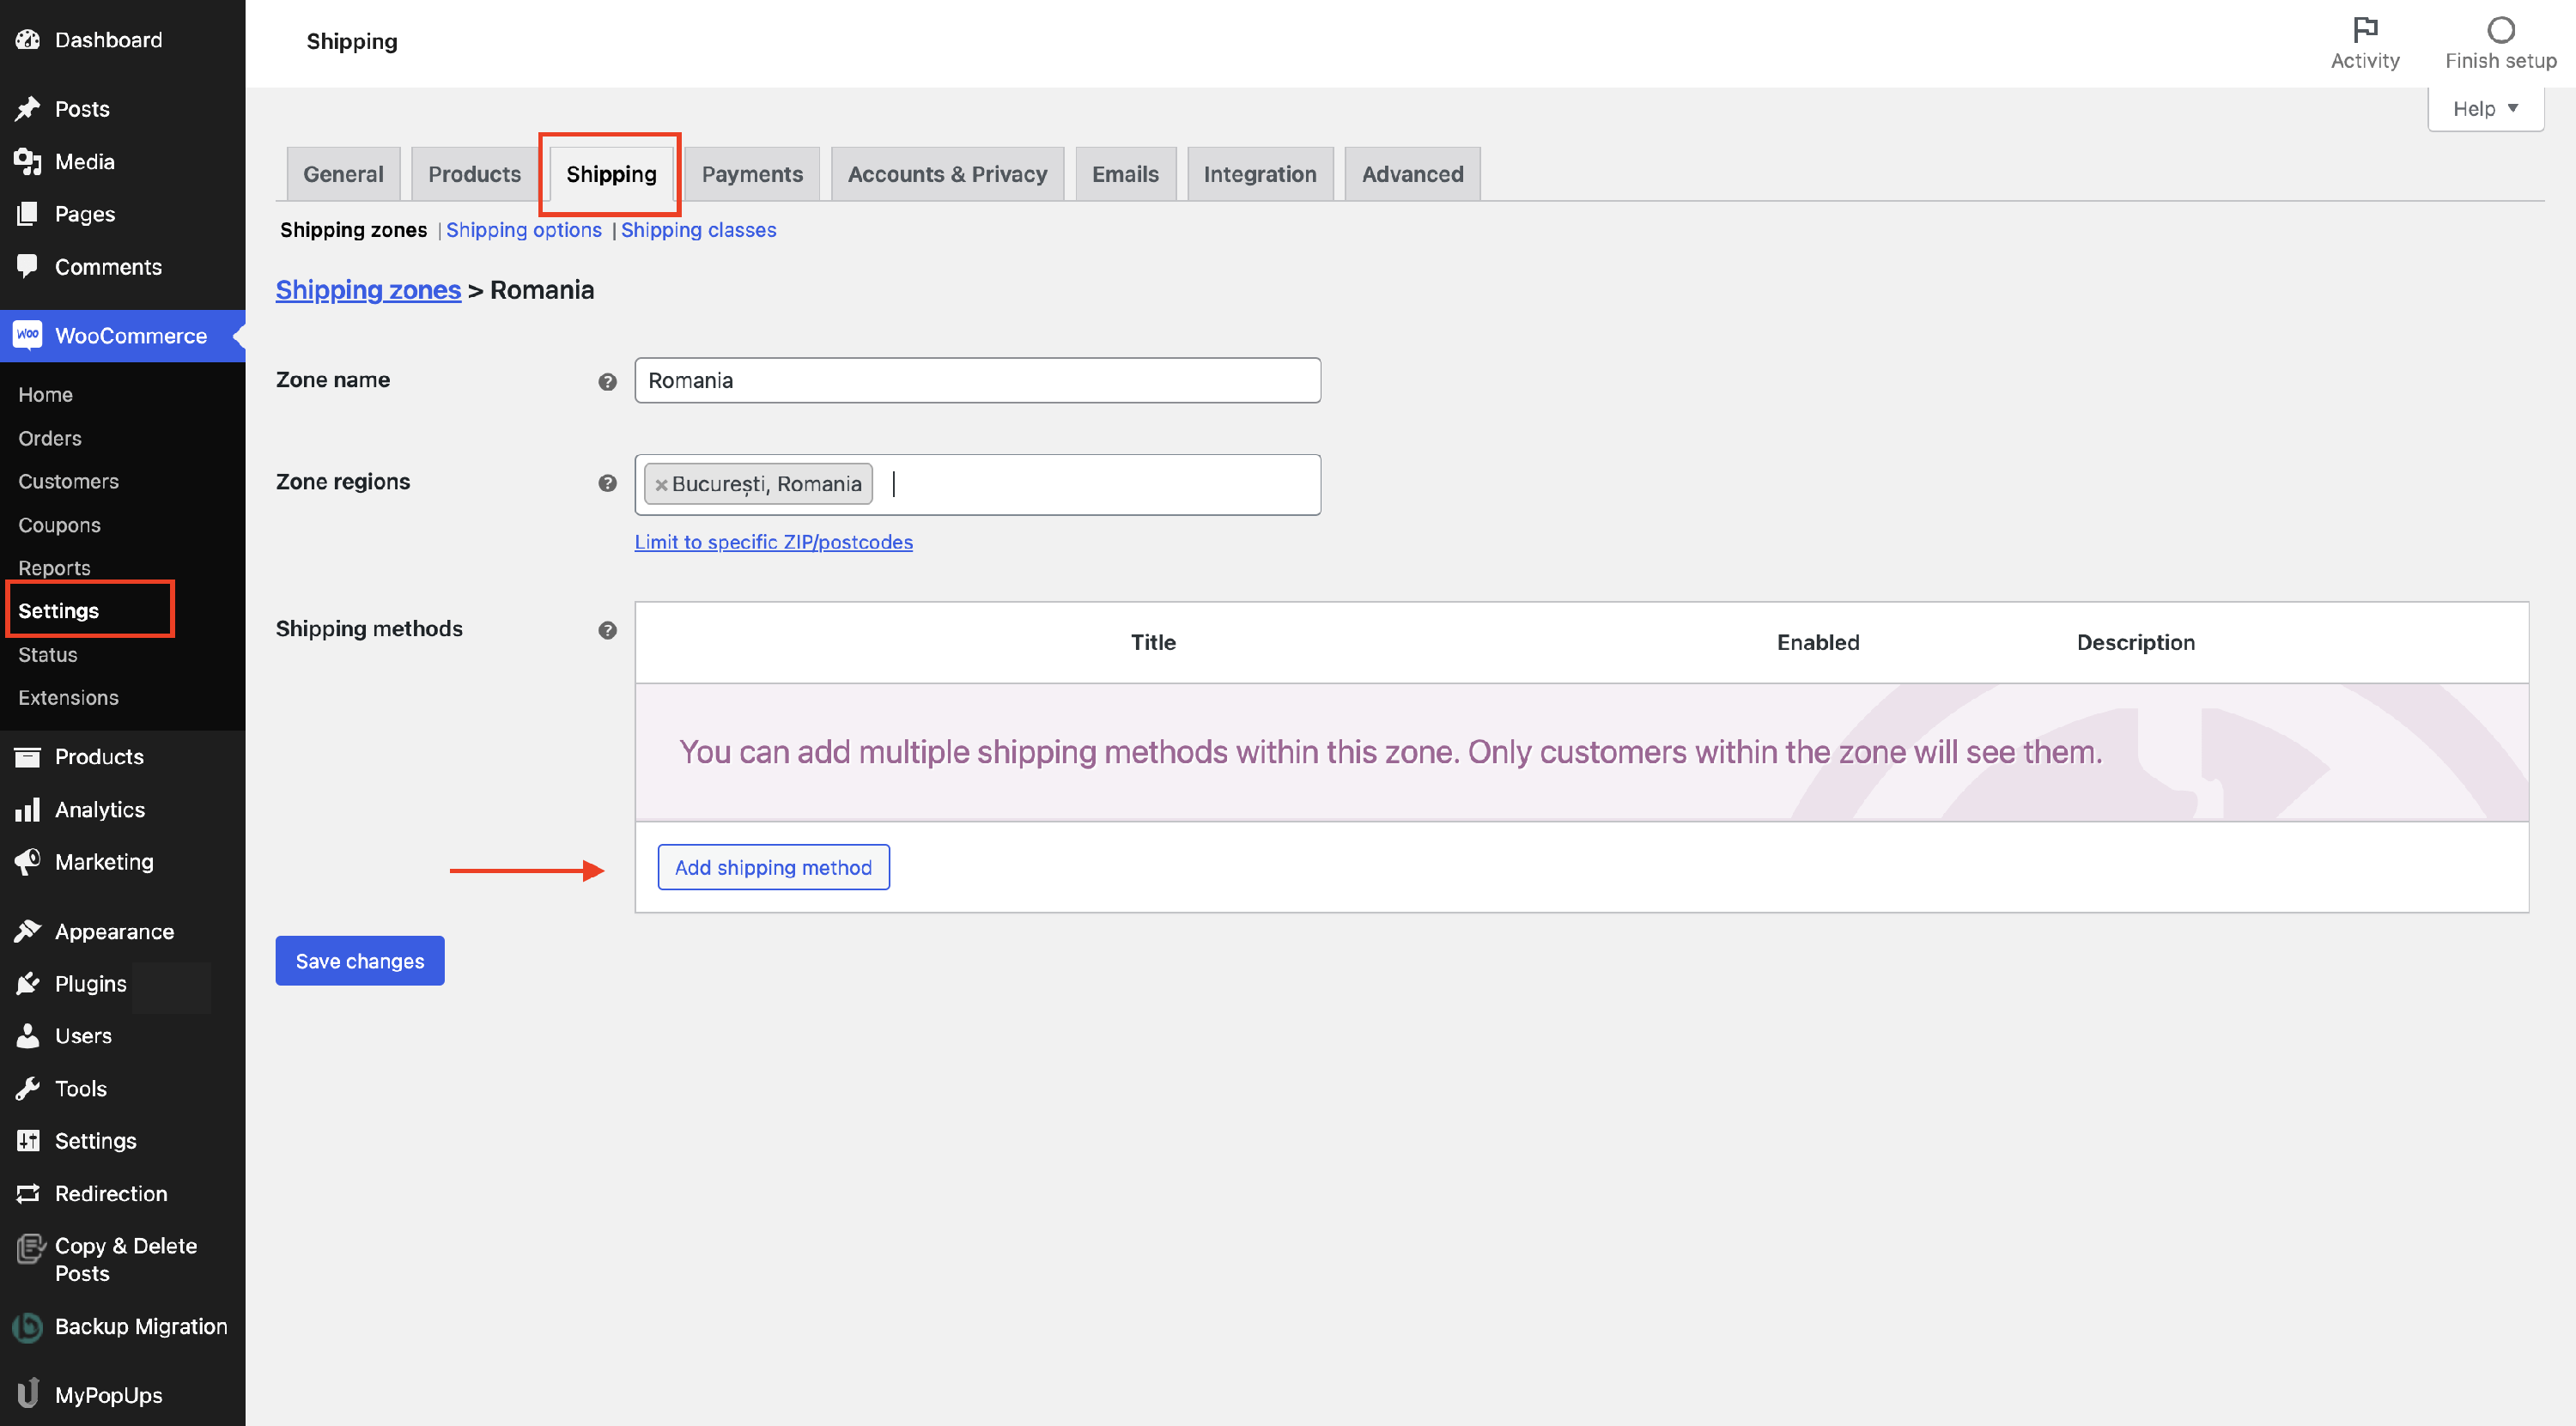
3. A popup will open, containing the available shipping methods. Make sure you pick the desired ones.
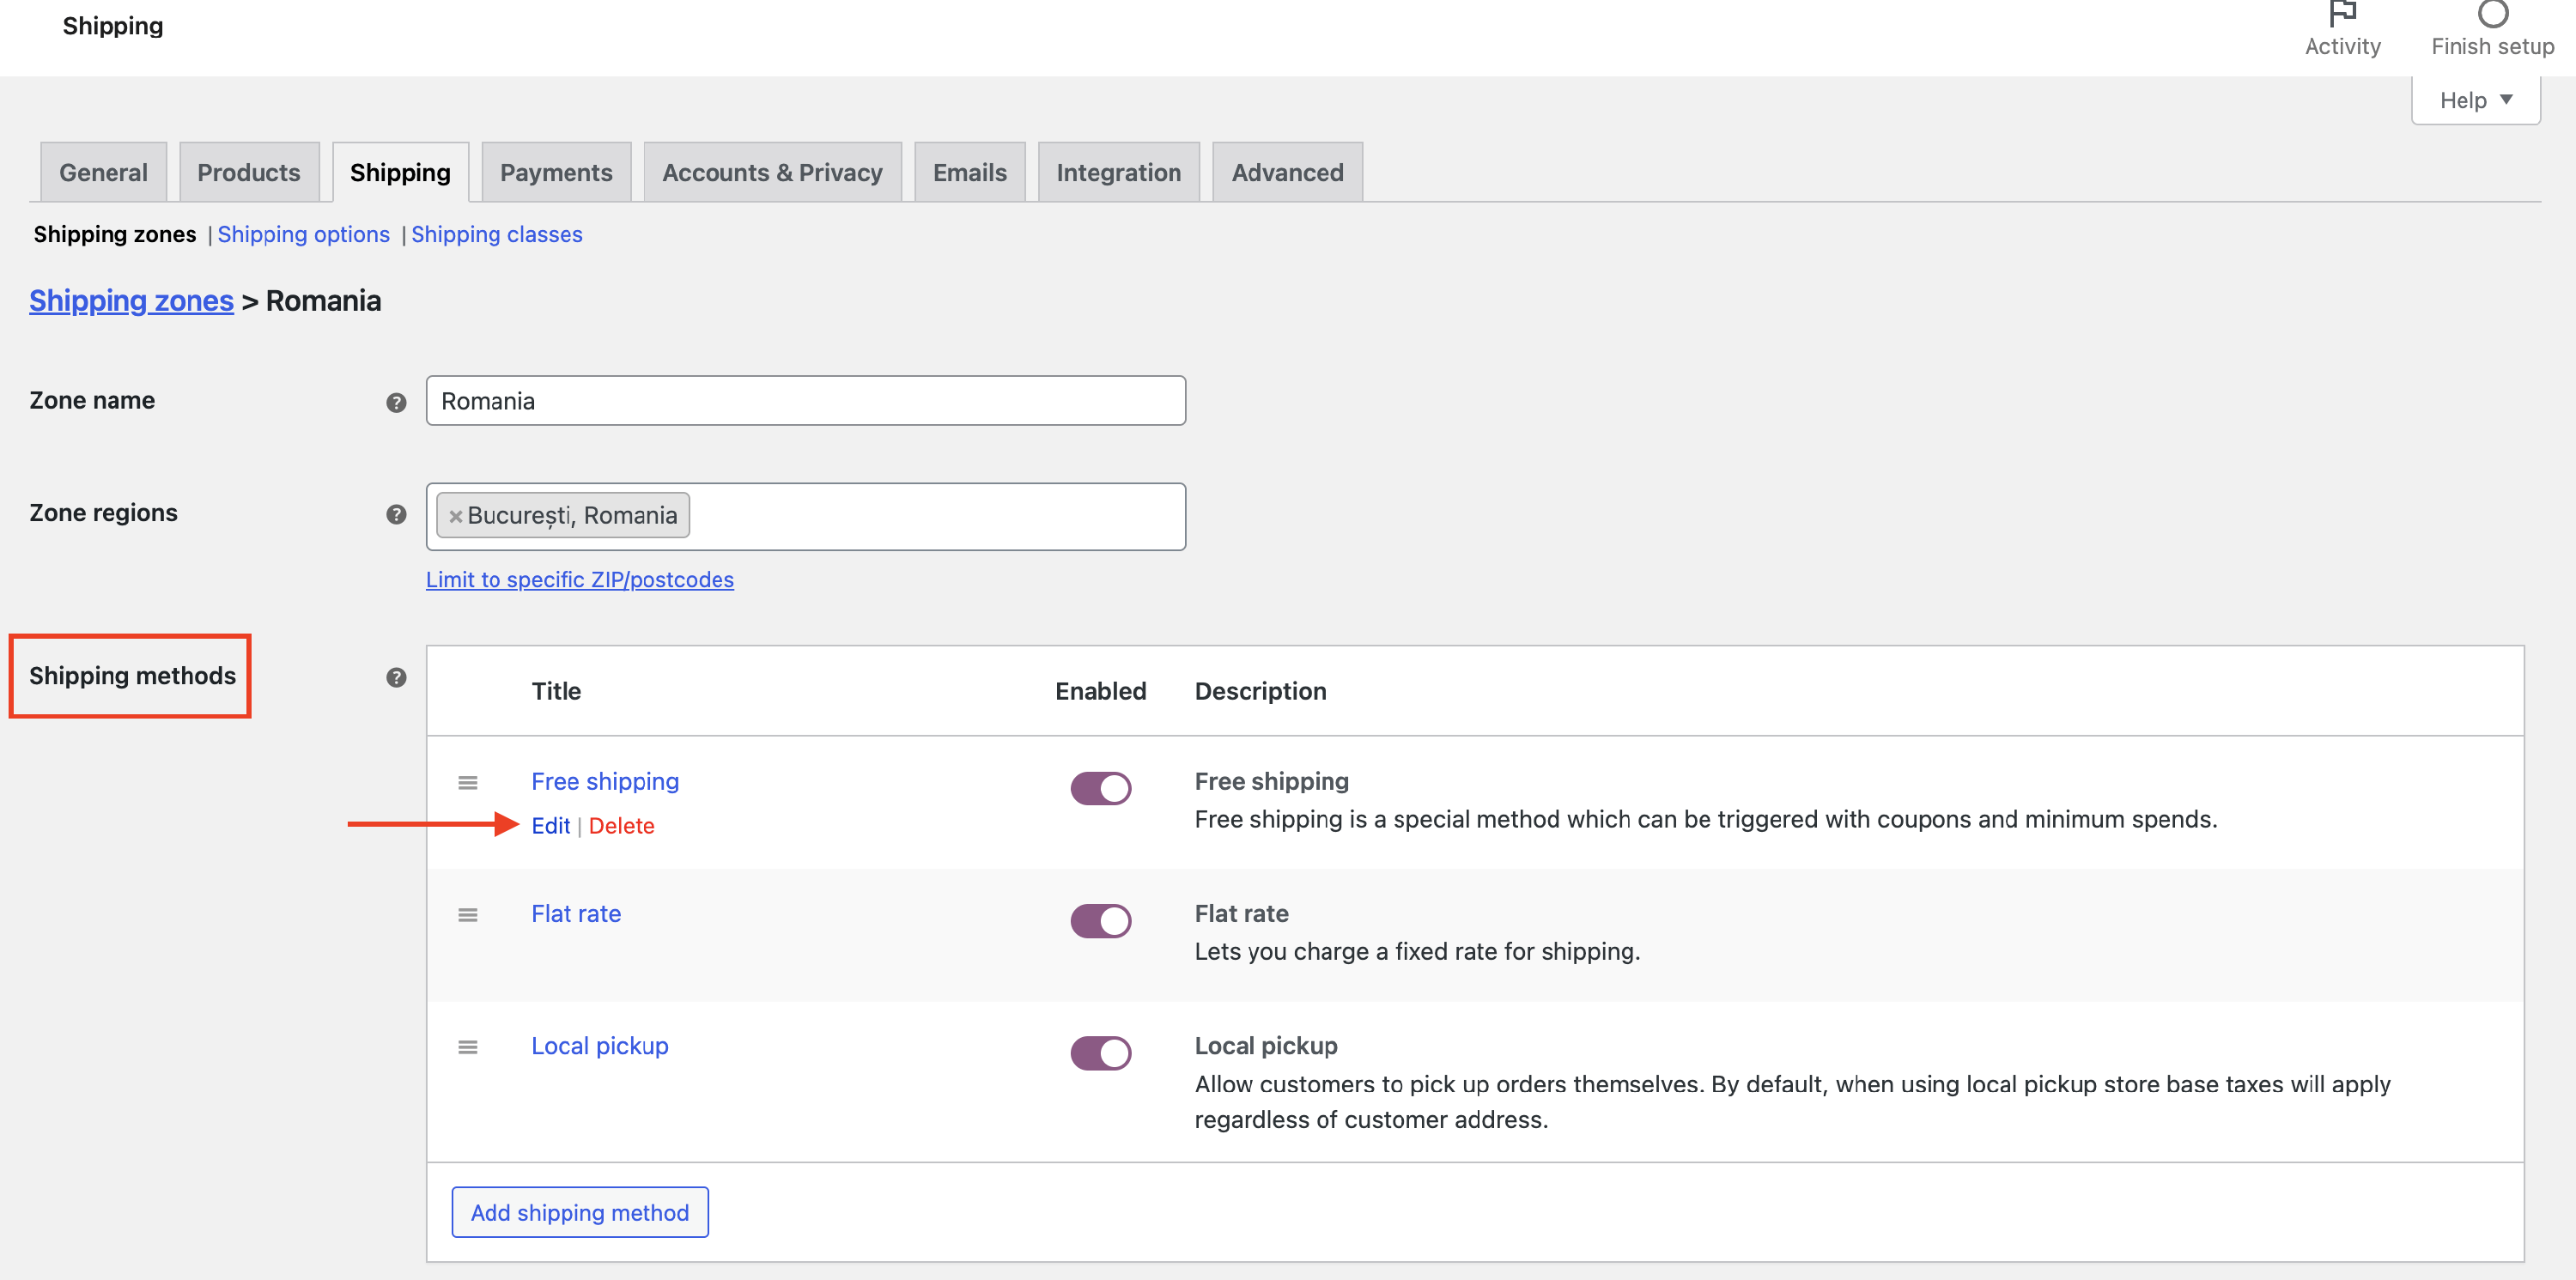
4. Now, you will be able to see them in the Shipping methods area. You can customize their order, enable or disable them, and also access their specific options by clicking on the Edit button.
How to configure the payment options?
1. To use the payment options, you have to first configure them. Navigate to WooCommerce > Settings > Payments.
2. There are two ways to do this: install WooCommerce Payments, which will walk you through a guided setup, or configure the standard payment options manually.
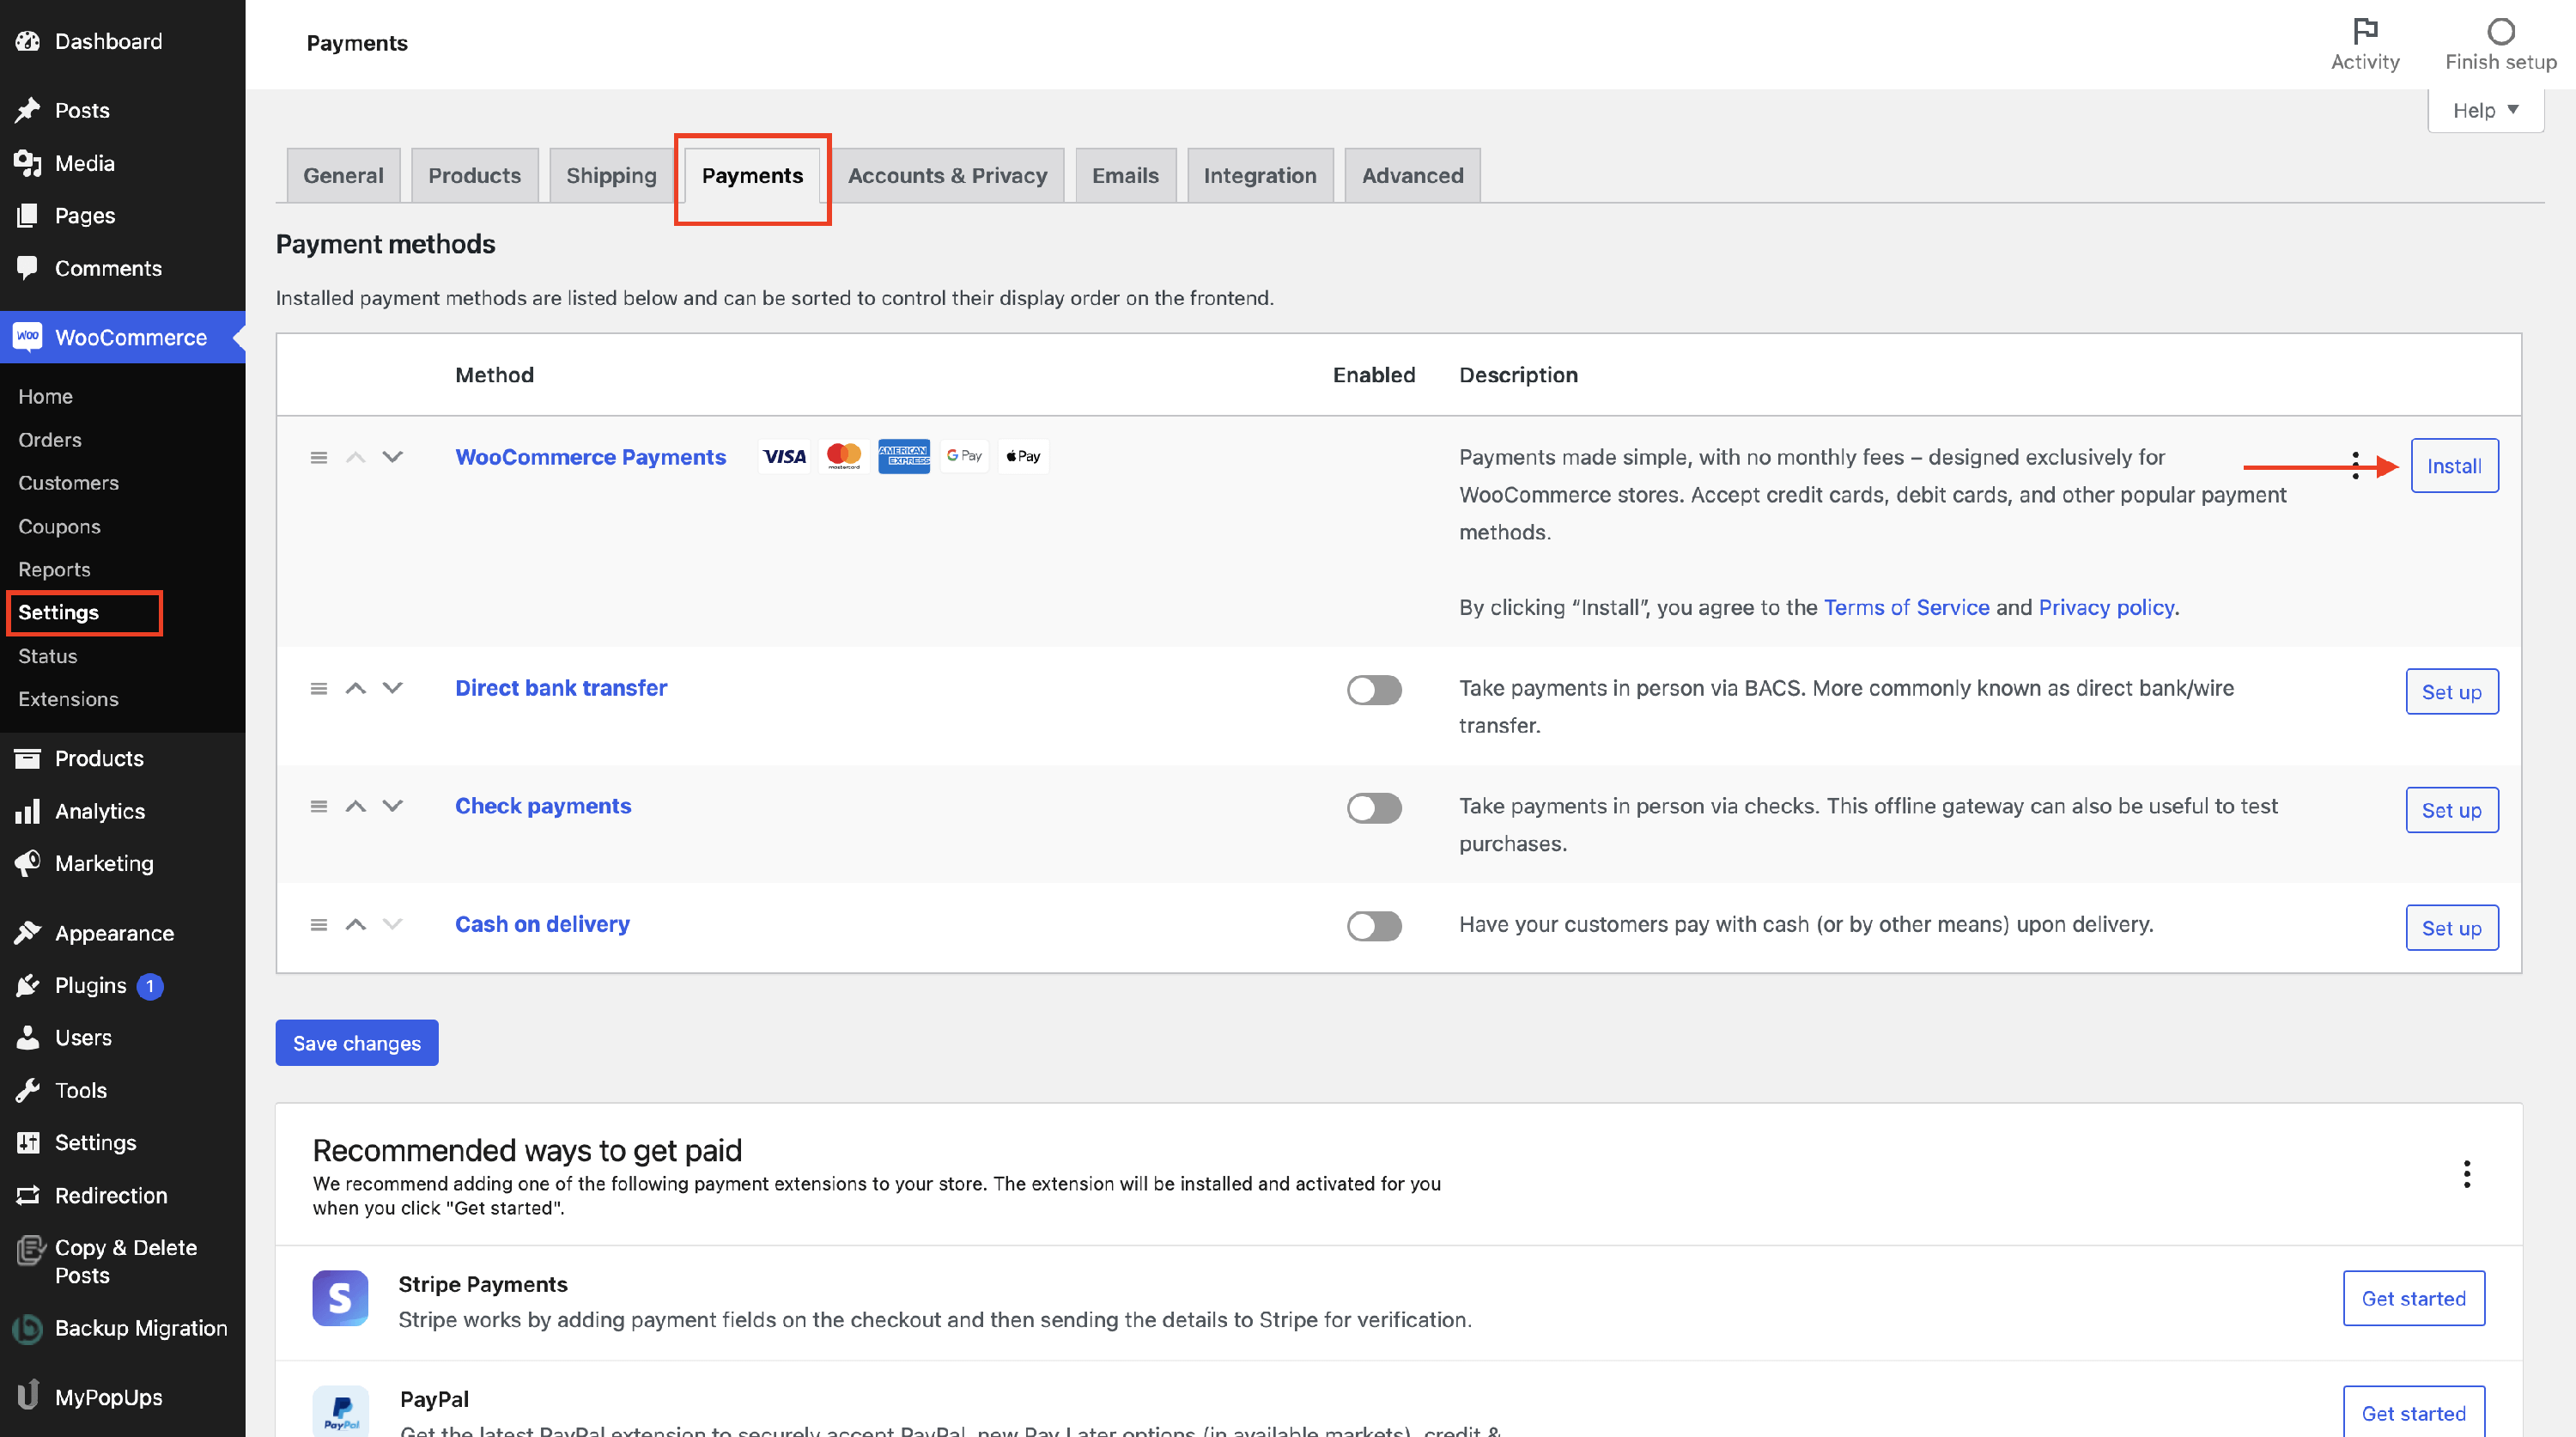
3. To use a specific payment method, enable it and then configure it by clicking the Set up button.
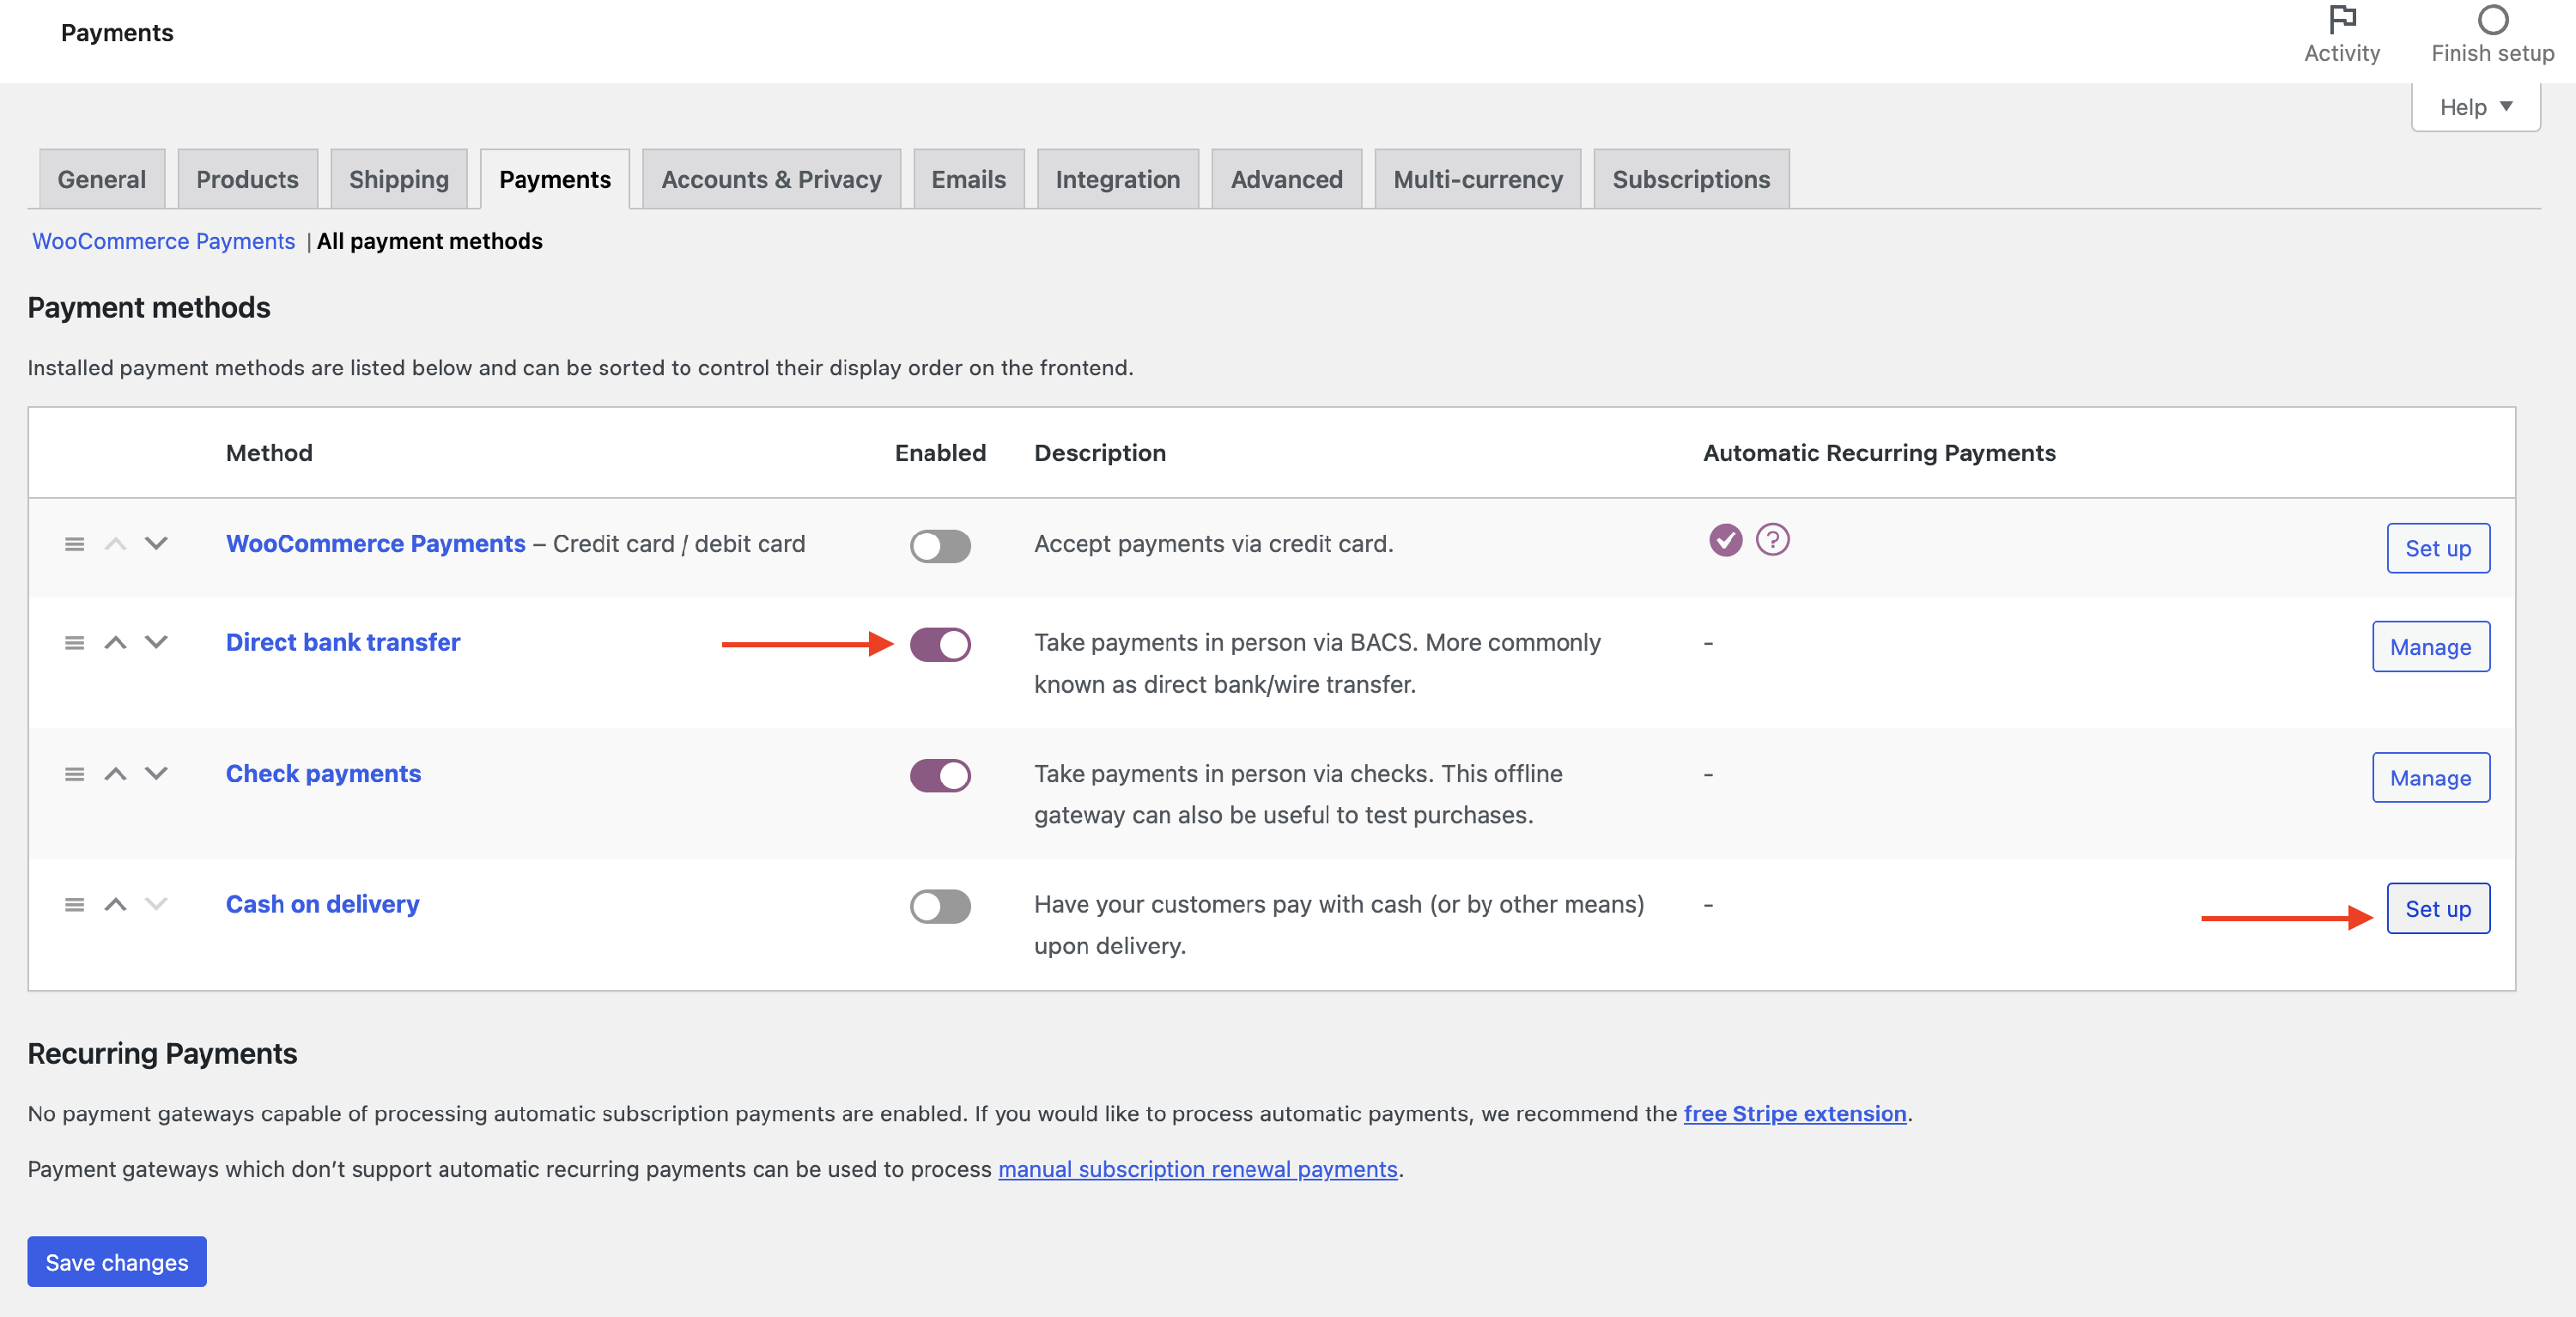
4. You can also adjust their order on the frontend and enable or disable individual methods.