Redirection for Contact Form 7 Documentation
Redirection for Contact Form 7 allows you to redirect users to any desired page after a successful email submission, execute scripts post-submission, and store submissions in the database. The plugin also lets you include Honeypot to help minimize spam.
🧰 Minimum Requirements
Before installing or updating the plugin, make sure your server meets the following requirements:
- PHP 7.4 or higher — Version 3.2.9 and later use modern PHP syntax that is not compatible with PHP 7.2 or earlier. Running the plugin on PHP 7.2 will cause fatal parse errors (for example,
syntax error, unexpected ')'inclass-wpcf7r-leads-manager.php). - WordPress 5.0 or higher
- Contact Form 7
- WP Mail SMTP — Check this guide to understand how you can set up the SMTP server.
📝 Note: If you are unsure which PHP version your server is running, you can check it from your hosting control panel or ask your host. Most hosts allow you to switch PHP versions directly from your account dashboard.
📤 Download and install the free plugin
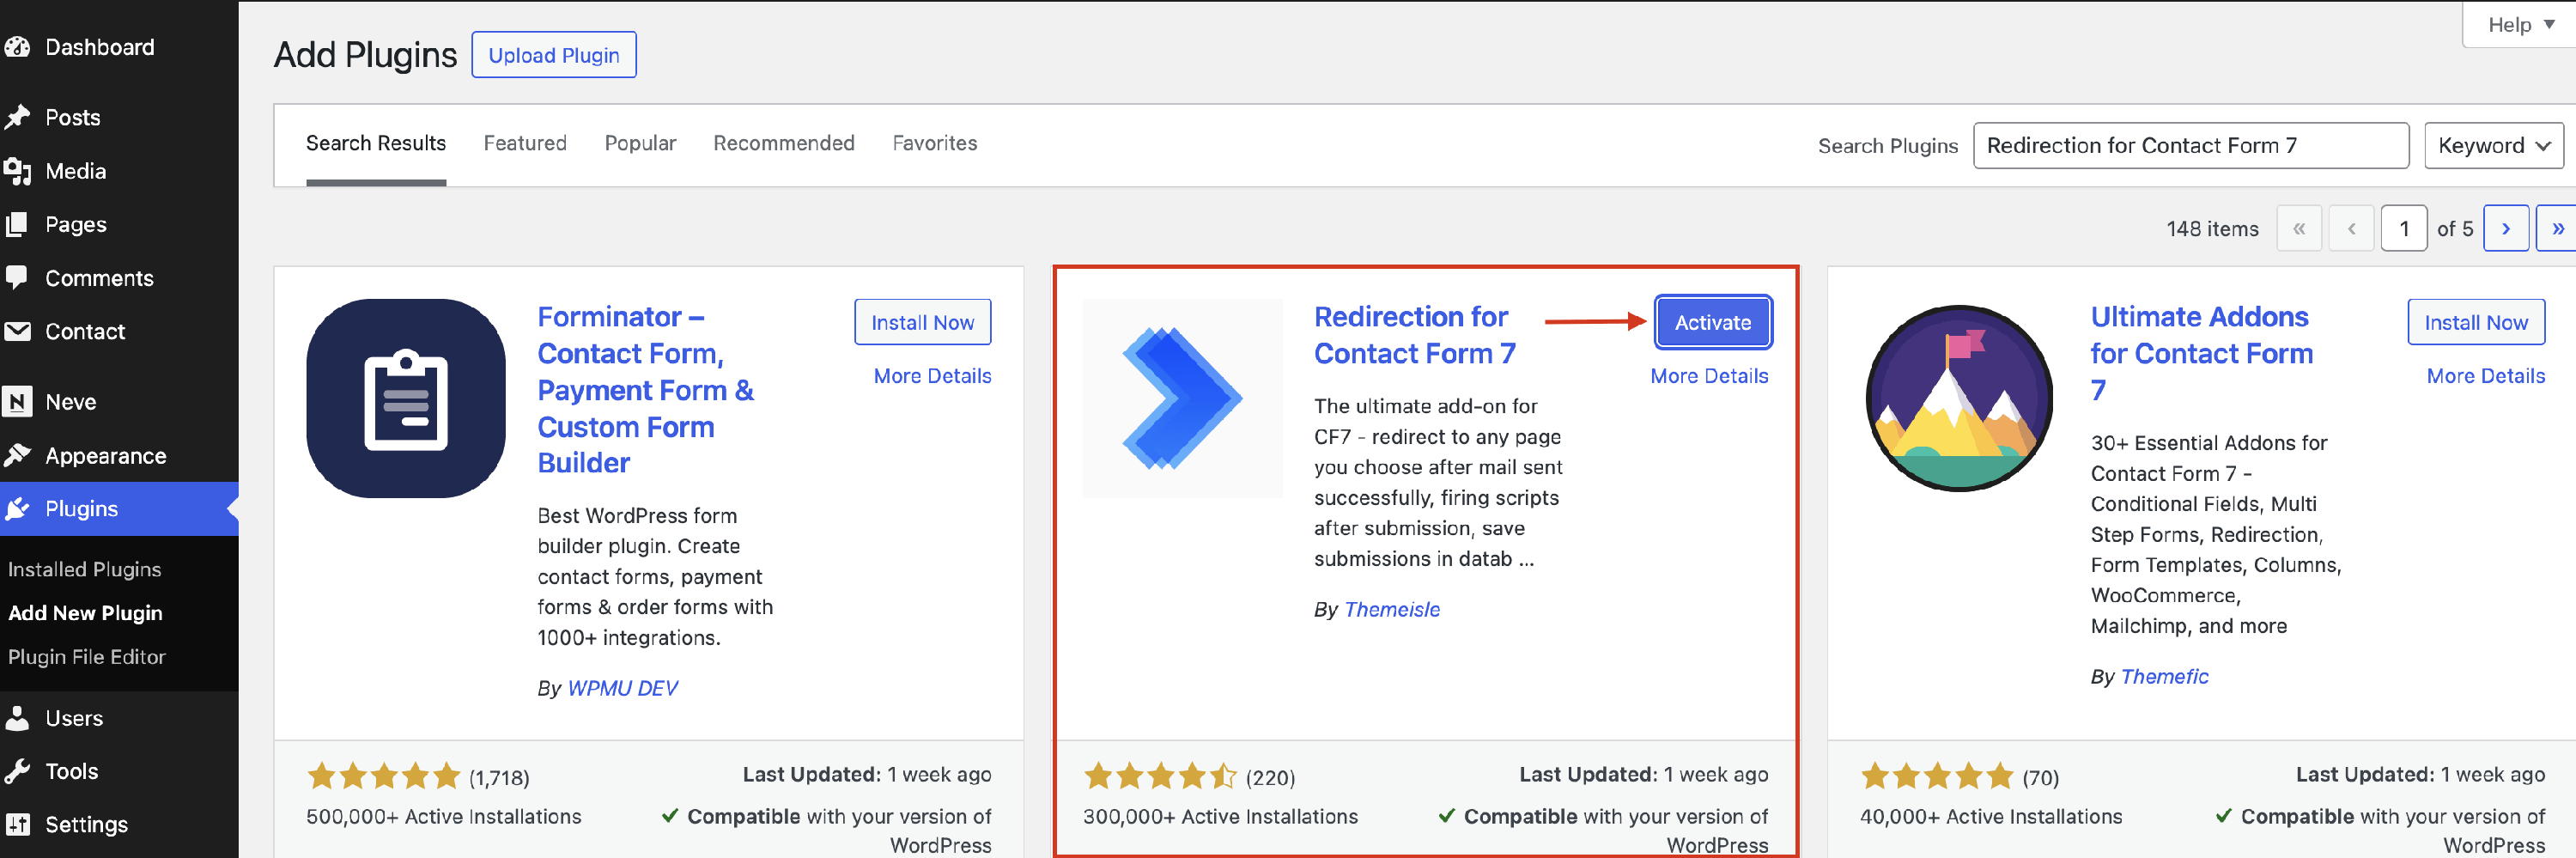
- Navigate to the WordPress Dashboard > Plugins.
- Click the Add New button and type “Redirection for Contact Form 7” in the Search Bar.
- When the plugin appears, click on the Install button and then on Activate.
⚠️ PHP Parse Error after update? If you see an error like PHP Parse error: syntax error, unexpected ')' after updating to v3.2.9 or later, your server is running PHP 7.2 or an earlier version. To fix this, upgrade your PHP version to 7.4 or higher. Contact your hosting provider or follow your host’s documentation on how to change the PHP version from your control panel.
📤 Download and install the premium plugins
Step-by-step details on how to install the premium plugins can be found here.
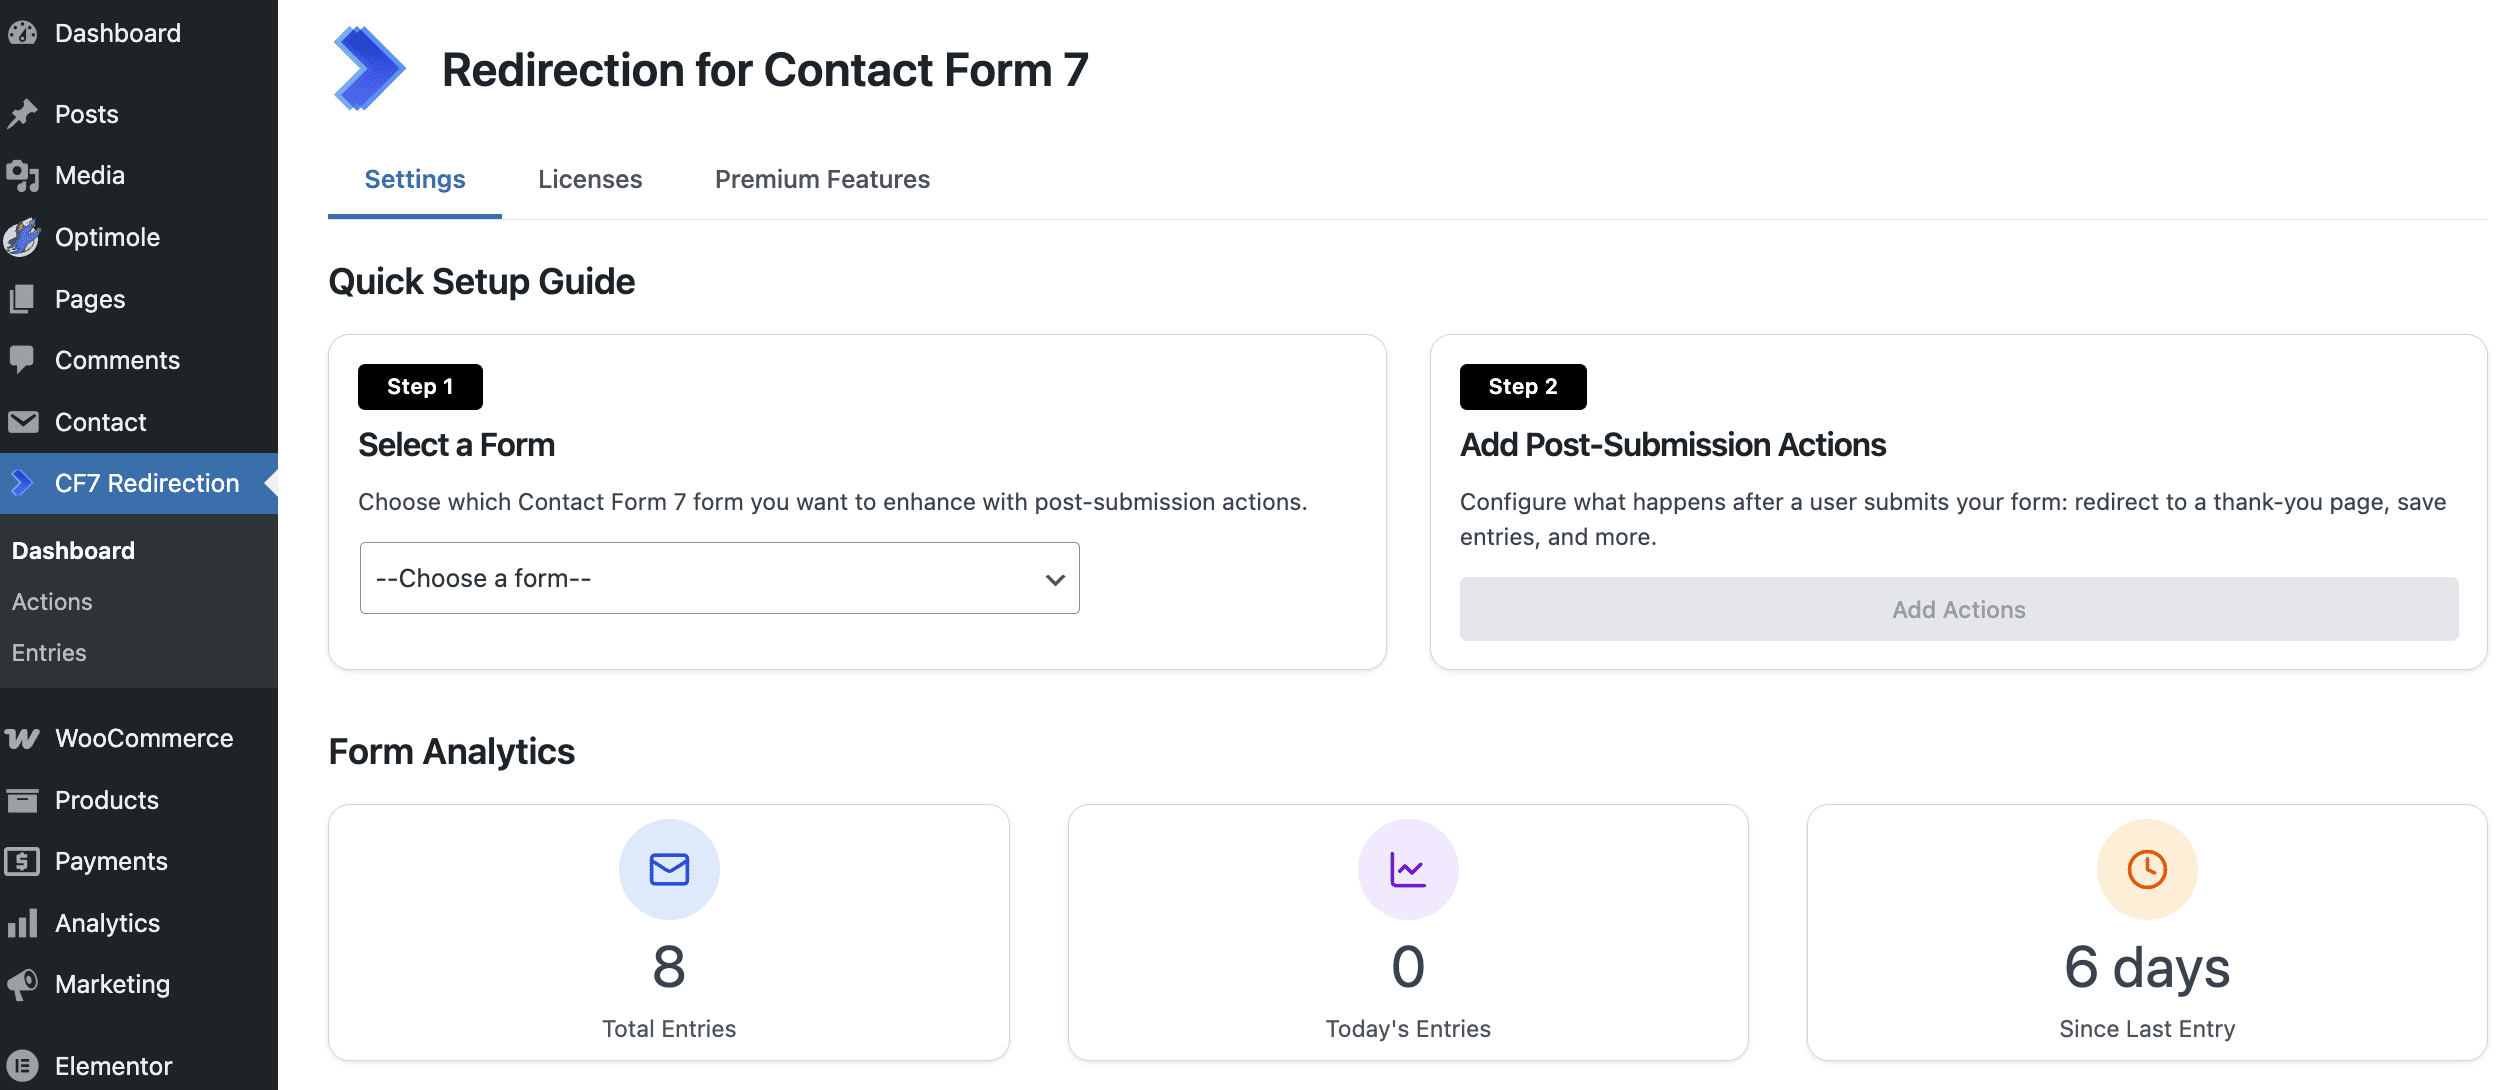
The dashboard
Once the Redirection for Contact Form 7 plugin is installed, you will have access to its dashboard from CF7 Redirection > Dashboard.
How to use it
- Edit the C7 contact form of your choice.
- Navigate to the Actions tab.
- Click on the Add Action button to add any action of your choice.
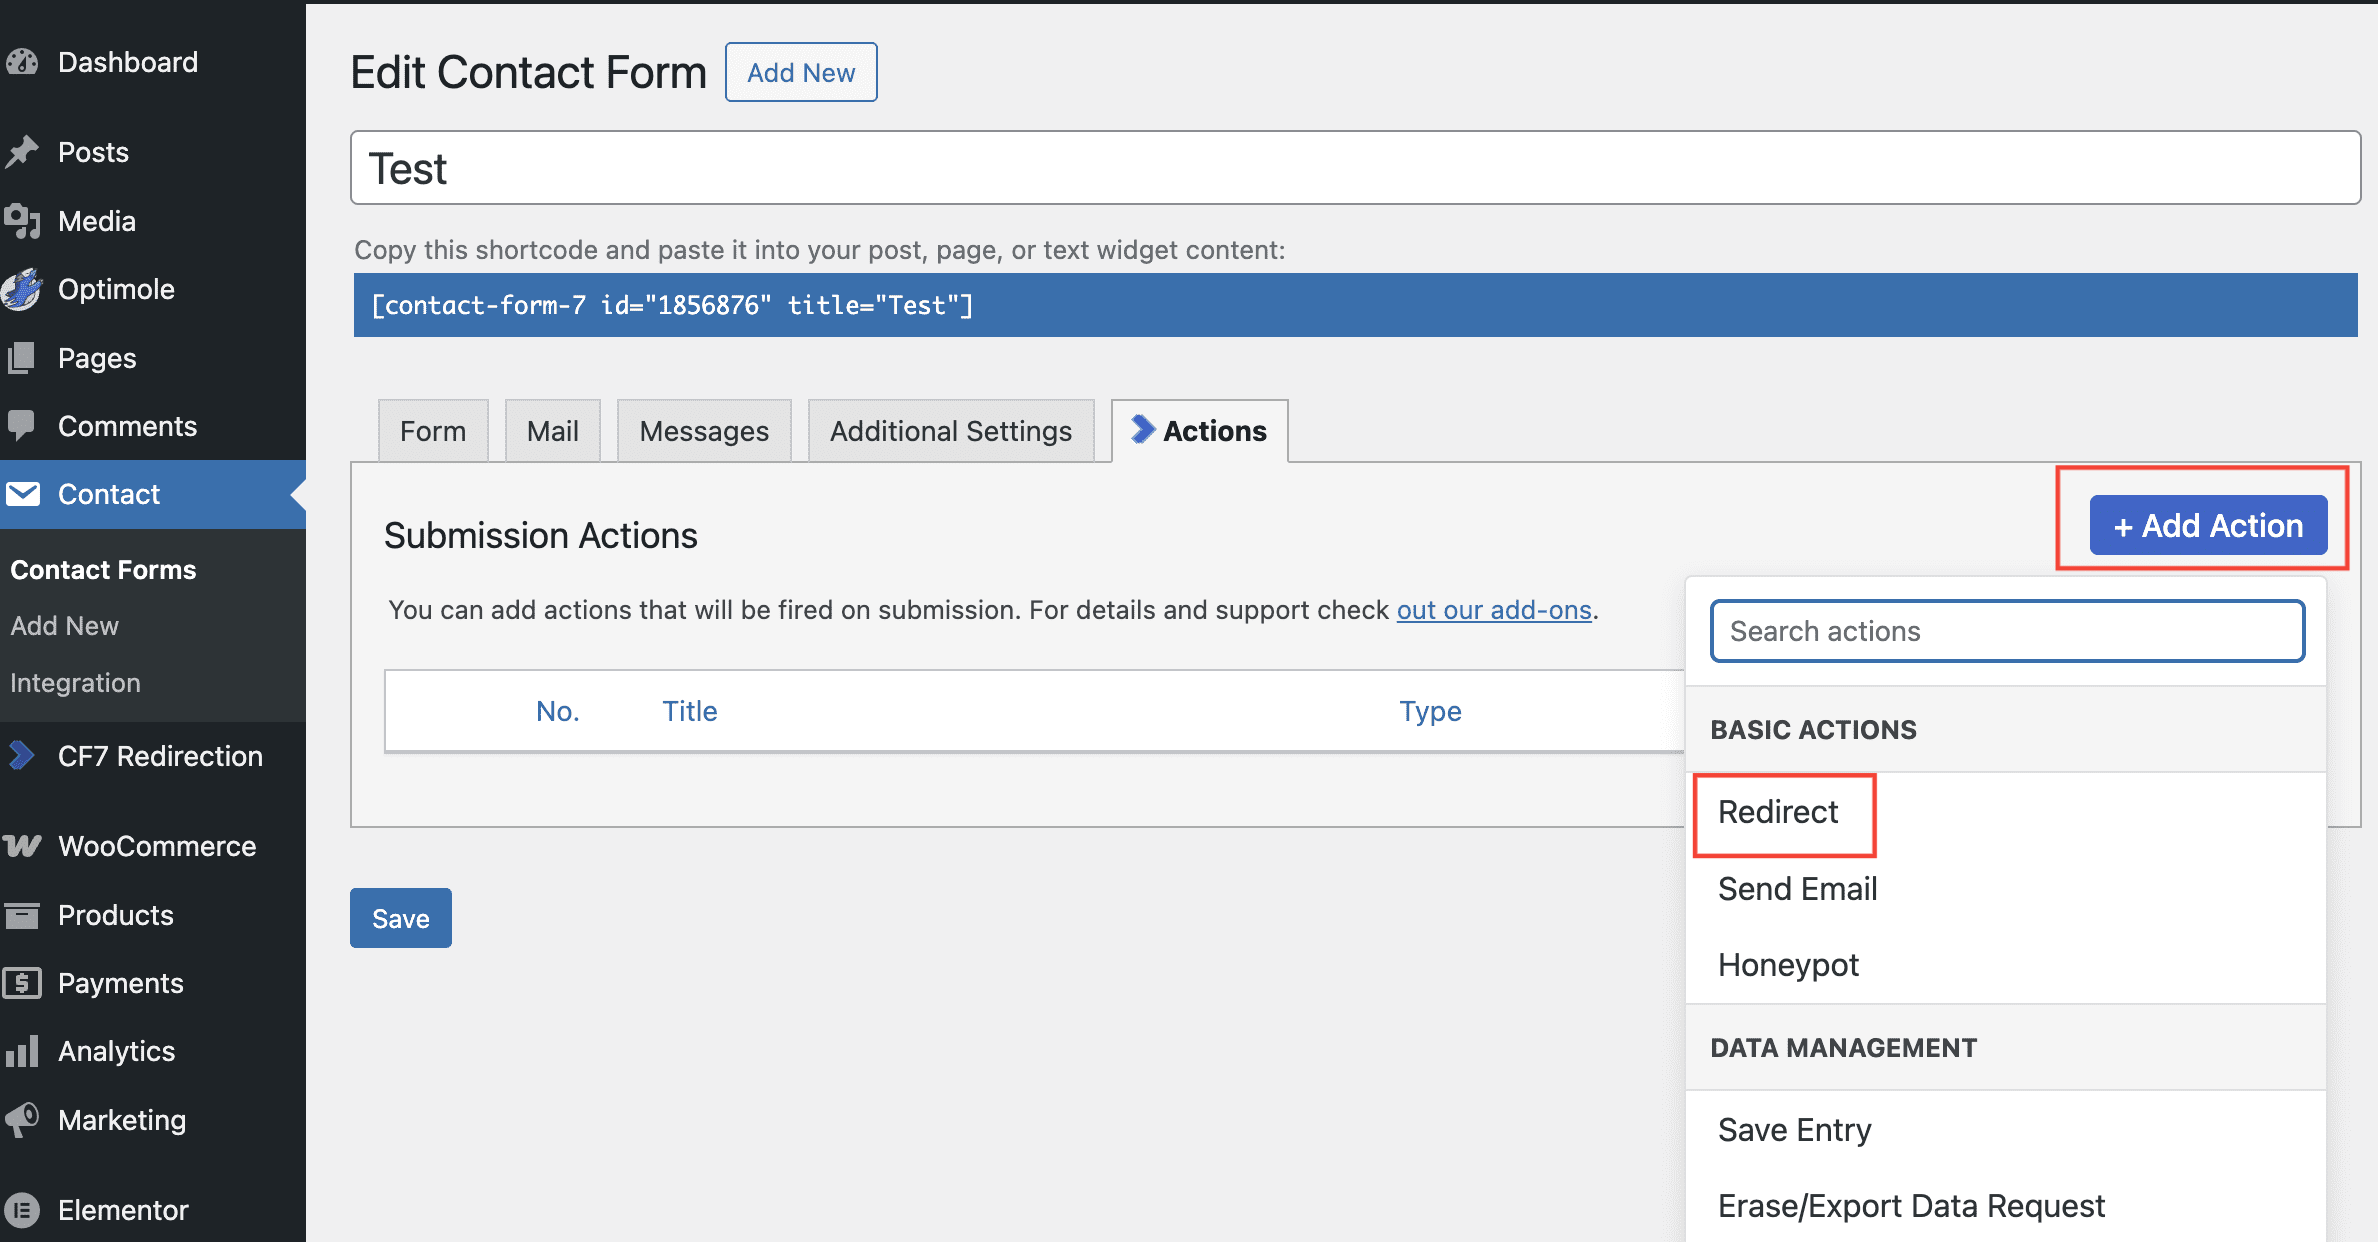
🚀 Actions (available in the free version)
1. Redirect
Direct users to a specific page or external URL after form submission.
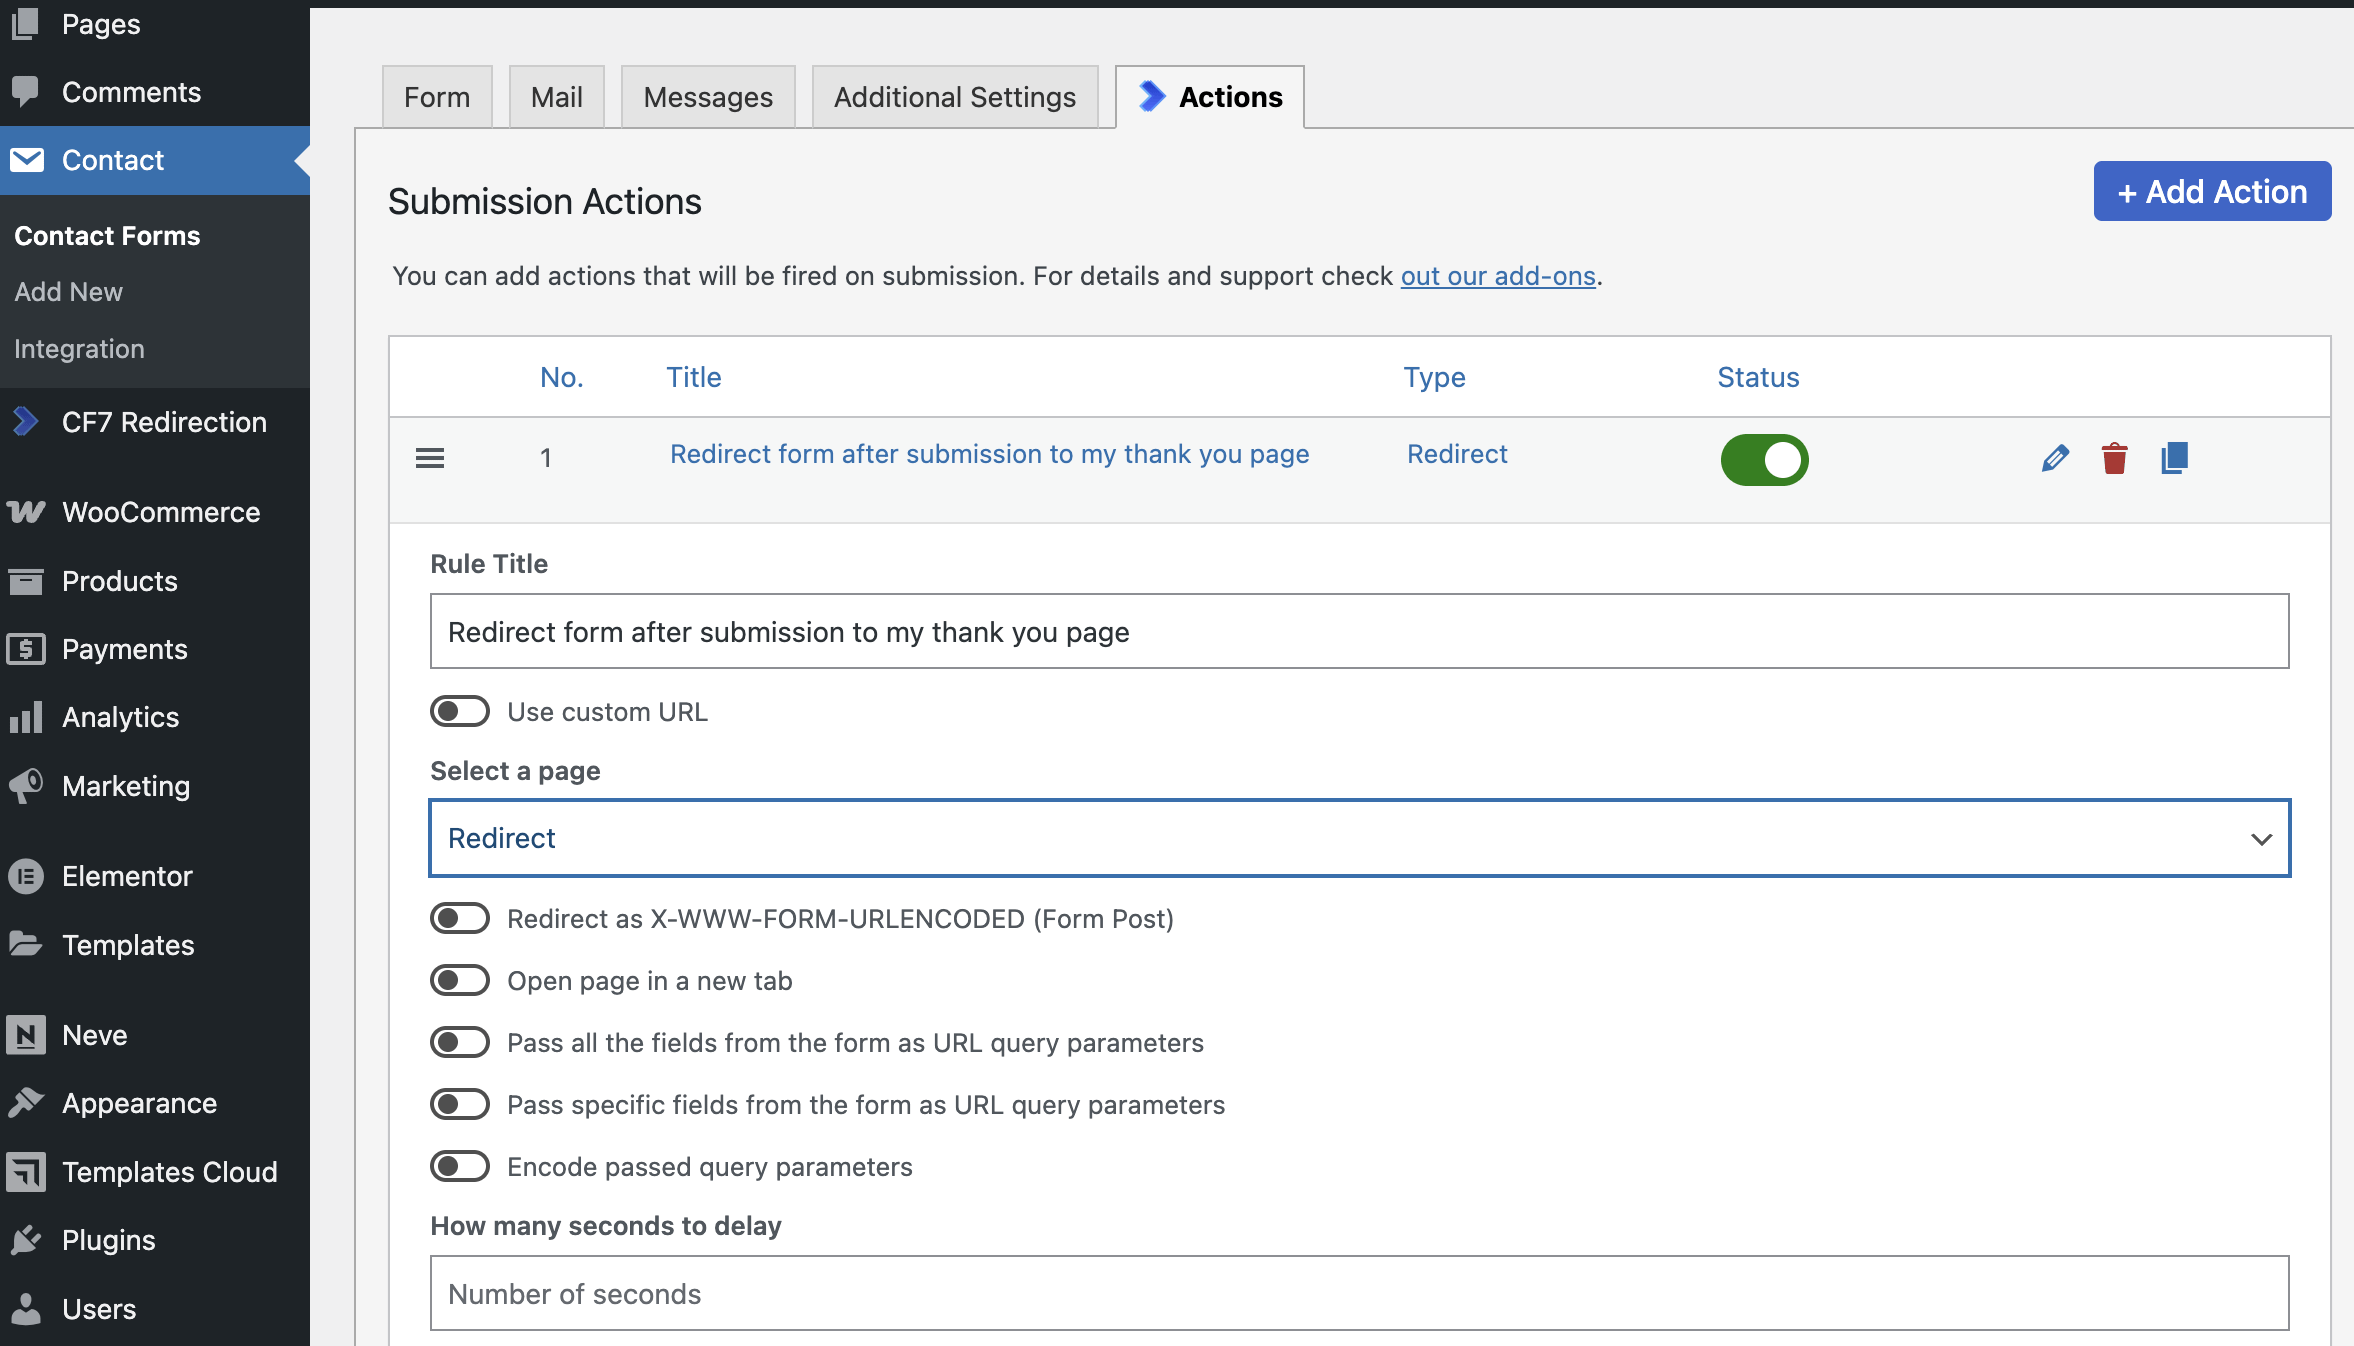
You can customize the redirect action with these options:
- Redirect as X-WWW-FORM-URLENCODED (Form Post): Sends the form data using the standard form submission format, which is useful for integrating with other systems that require data in this format.
- Open page in a new tab: Opens the redirection page in a new browser tab, which can be useful for keeping the user on the original site while still directing them to another page.
- Pass all the fields from the form as URL query parameters: This option sends all form data as part of the URL.
- Pass specific fields from the form as URL query parameters: This option is similar to the previous one but allows you to choose which fields to include, offering more control over the data shared.
- Encode passed query parameters: Encodes the data in the URL, making it more secure and less prone to errors when processed by the destination page.
- How many seconds to delay: Sets a delay before the redirection happens.
These options allow for flexible customization of the redirect action, providing a tailored experience for your users.
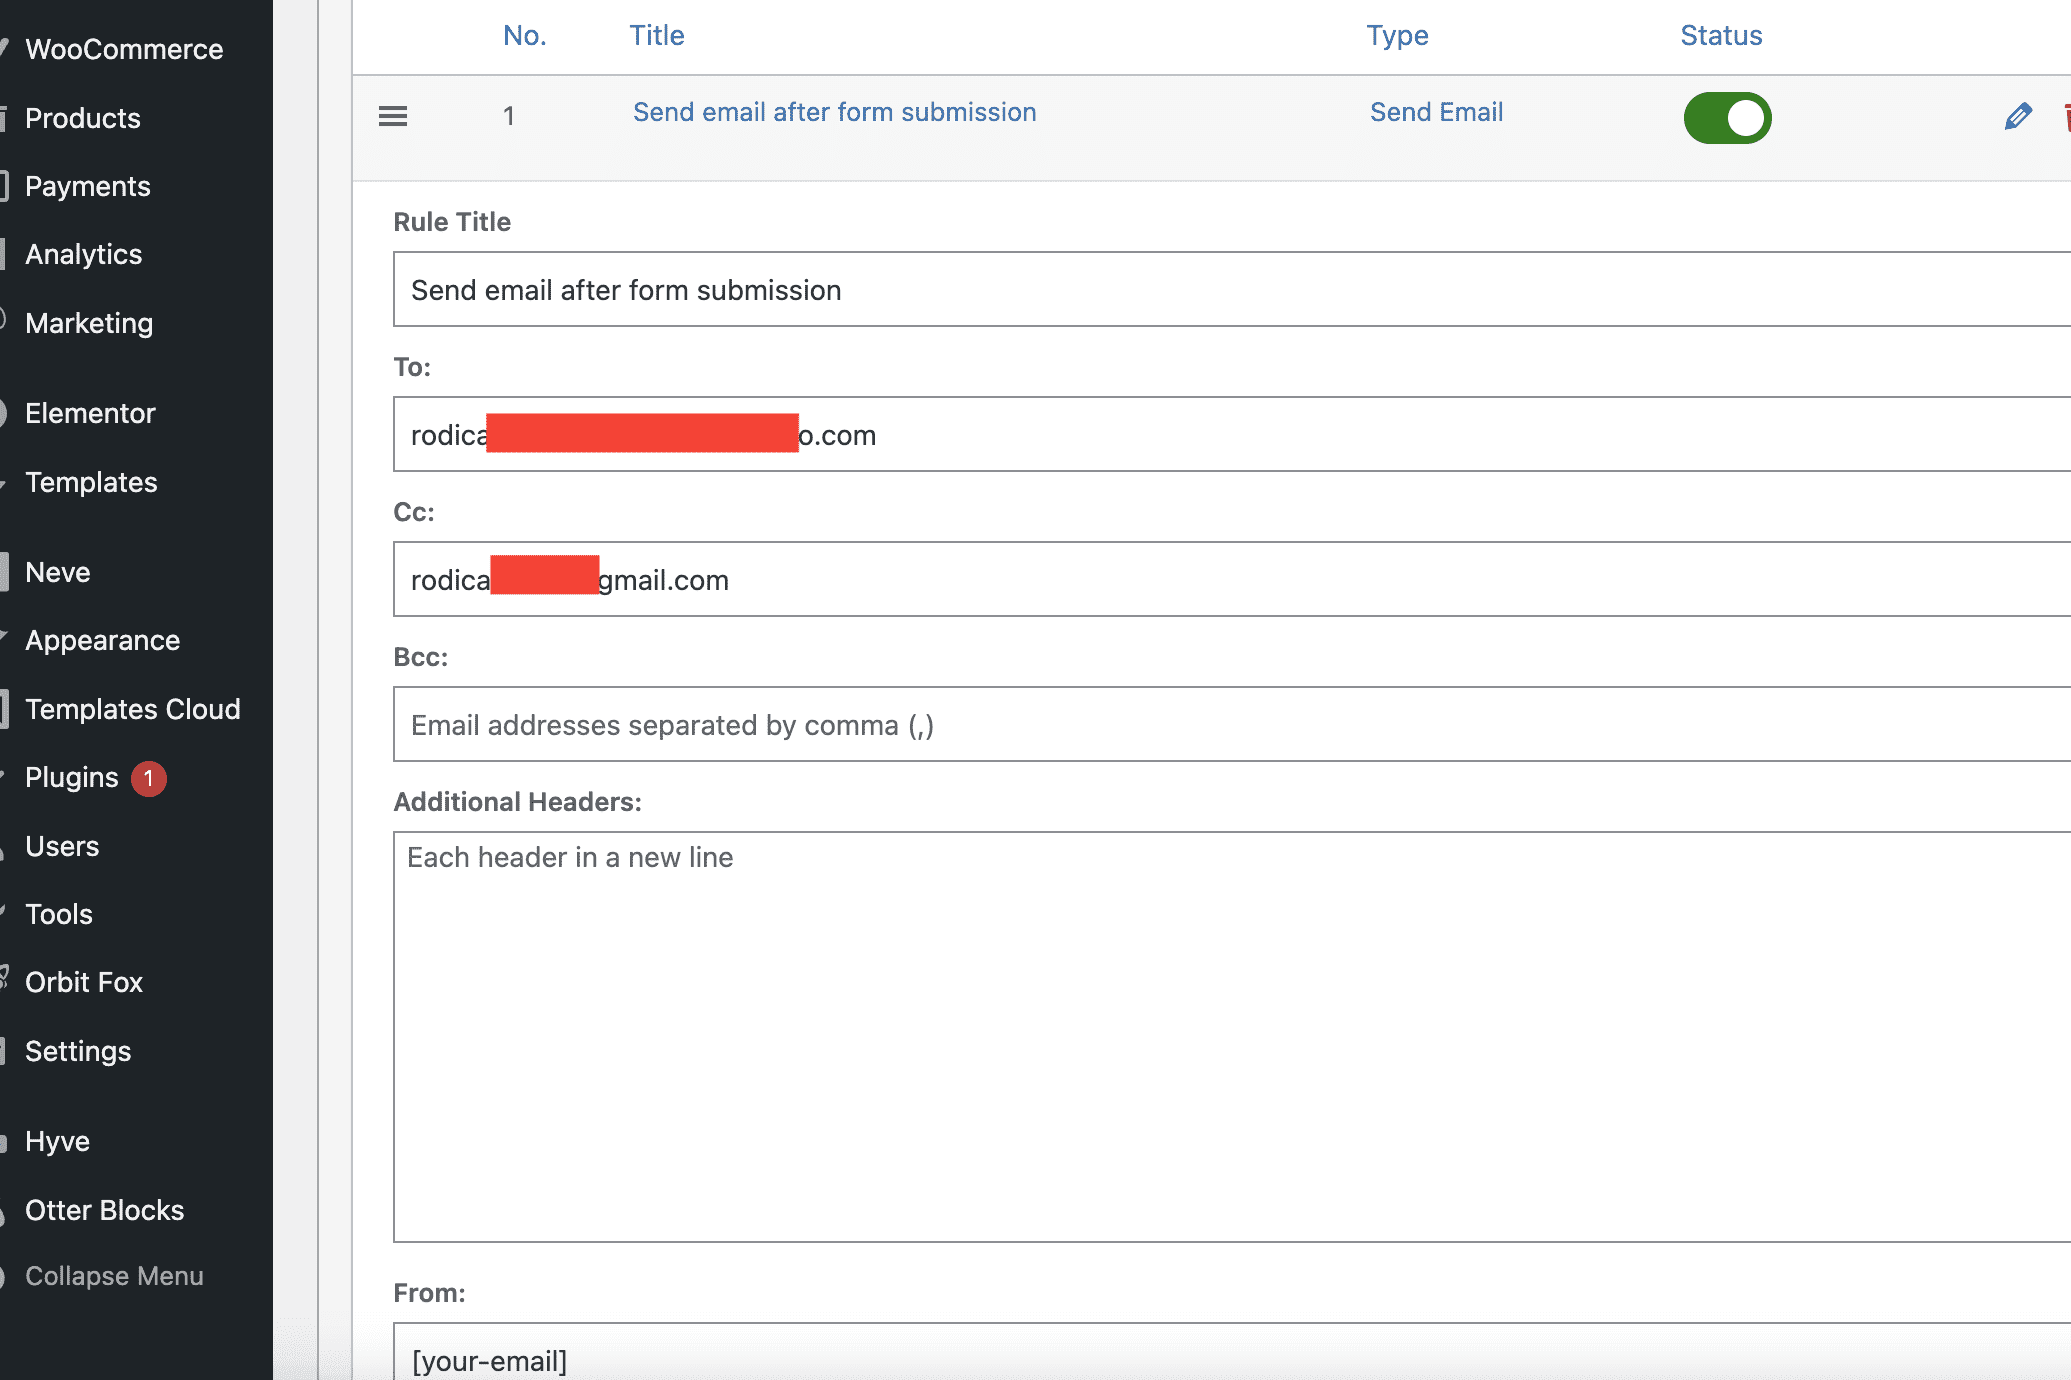
2.Send Email
Send a customized email after the form submission. The Send Email option lets you customize the email sent upon form submission. Specify the recipient, add addresses in CC and BCC, include additional headers, and set the sender’s information and email subject. This option ensures your emails are sent exactly as you need them.
3.Honeypot
Prevent spam submissions. Enable Honeypot to activate anti-spam filters and reduce unwanted submissions. Select Honeypot, and let the plugin handle spam prevention for you.

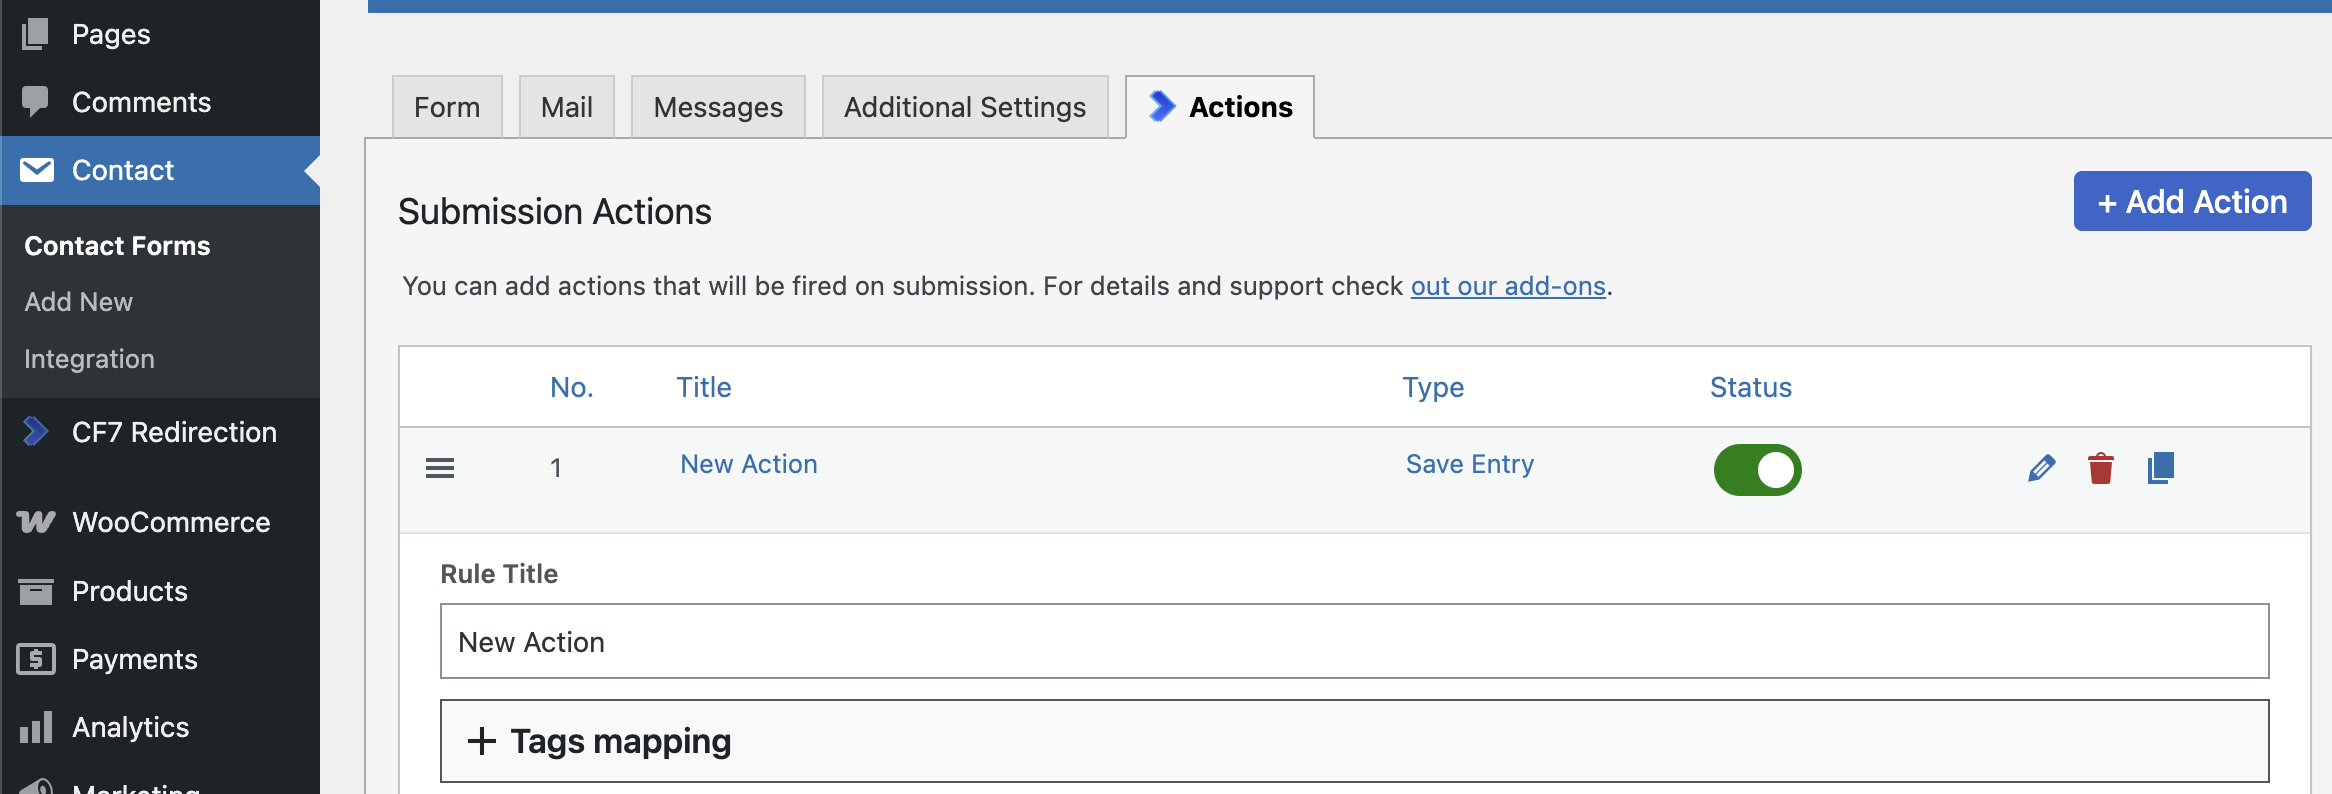
4.Save Entry
This action offers you the possibility to store form submission data for later use. Configure field mappings to determine how each form field is saved:
- Form fields: The fields from the form.
- Field Label: The label associated with each field.
- Display on Entries list: Choose whether each field should appear in the entries list.
Customize which fields are displayed and how they are labeled to tailor the information to your needs.
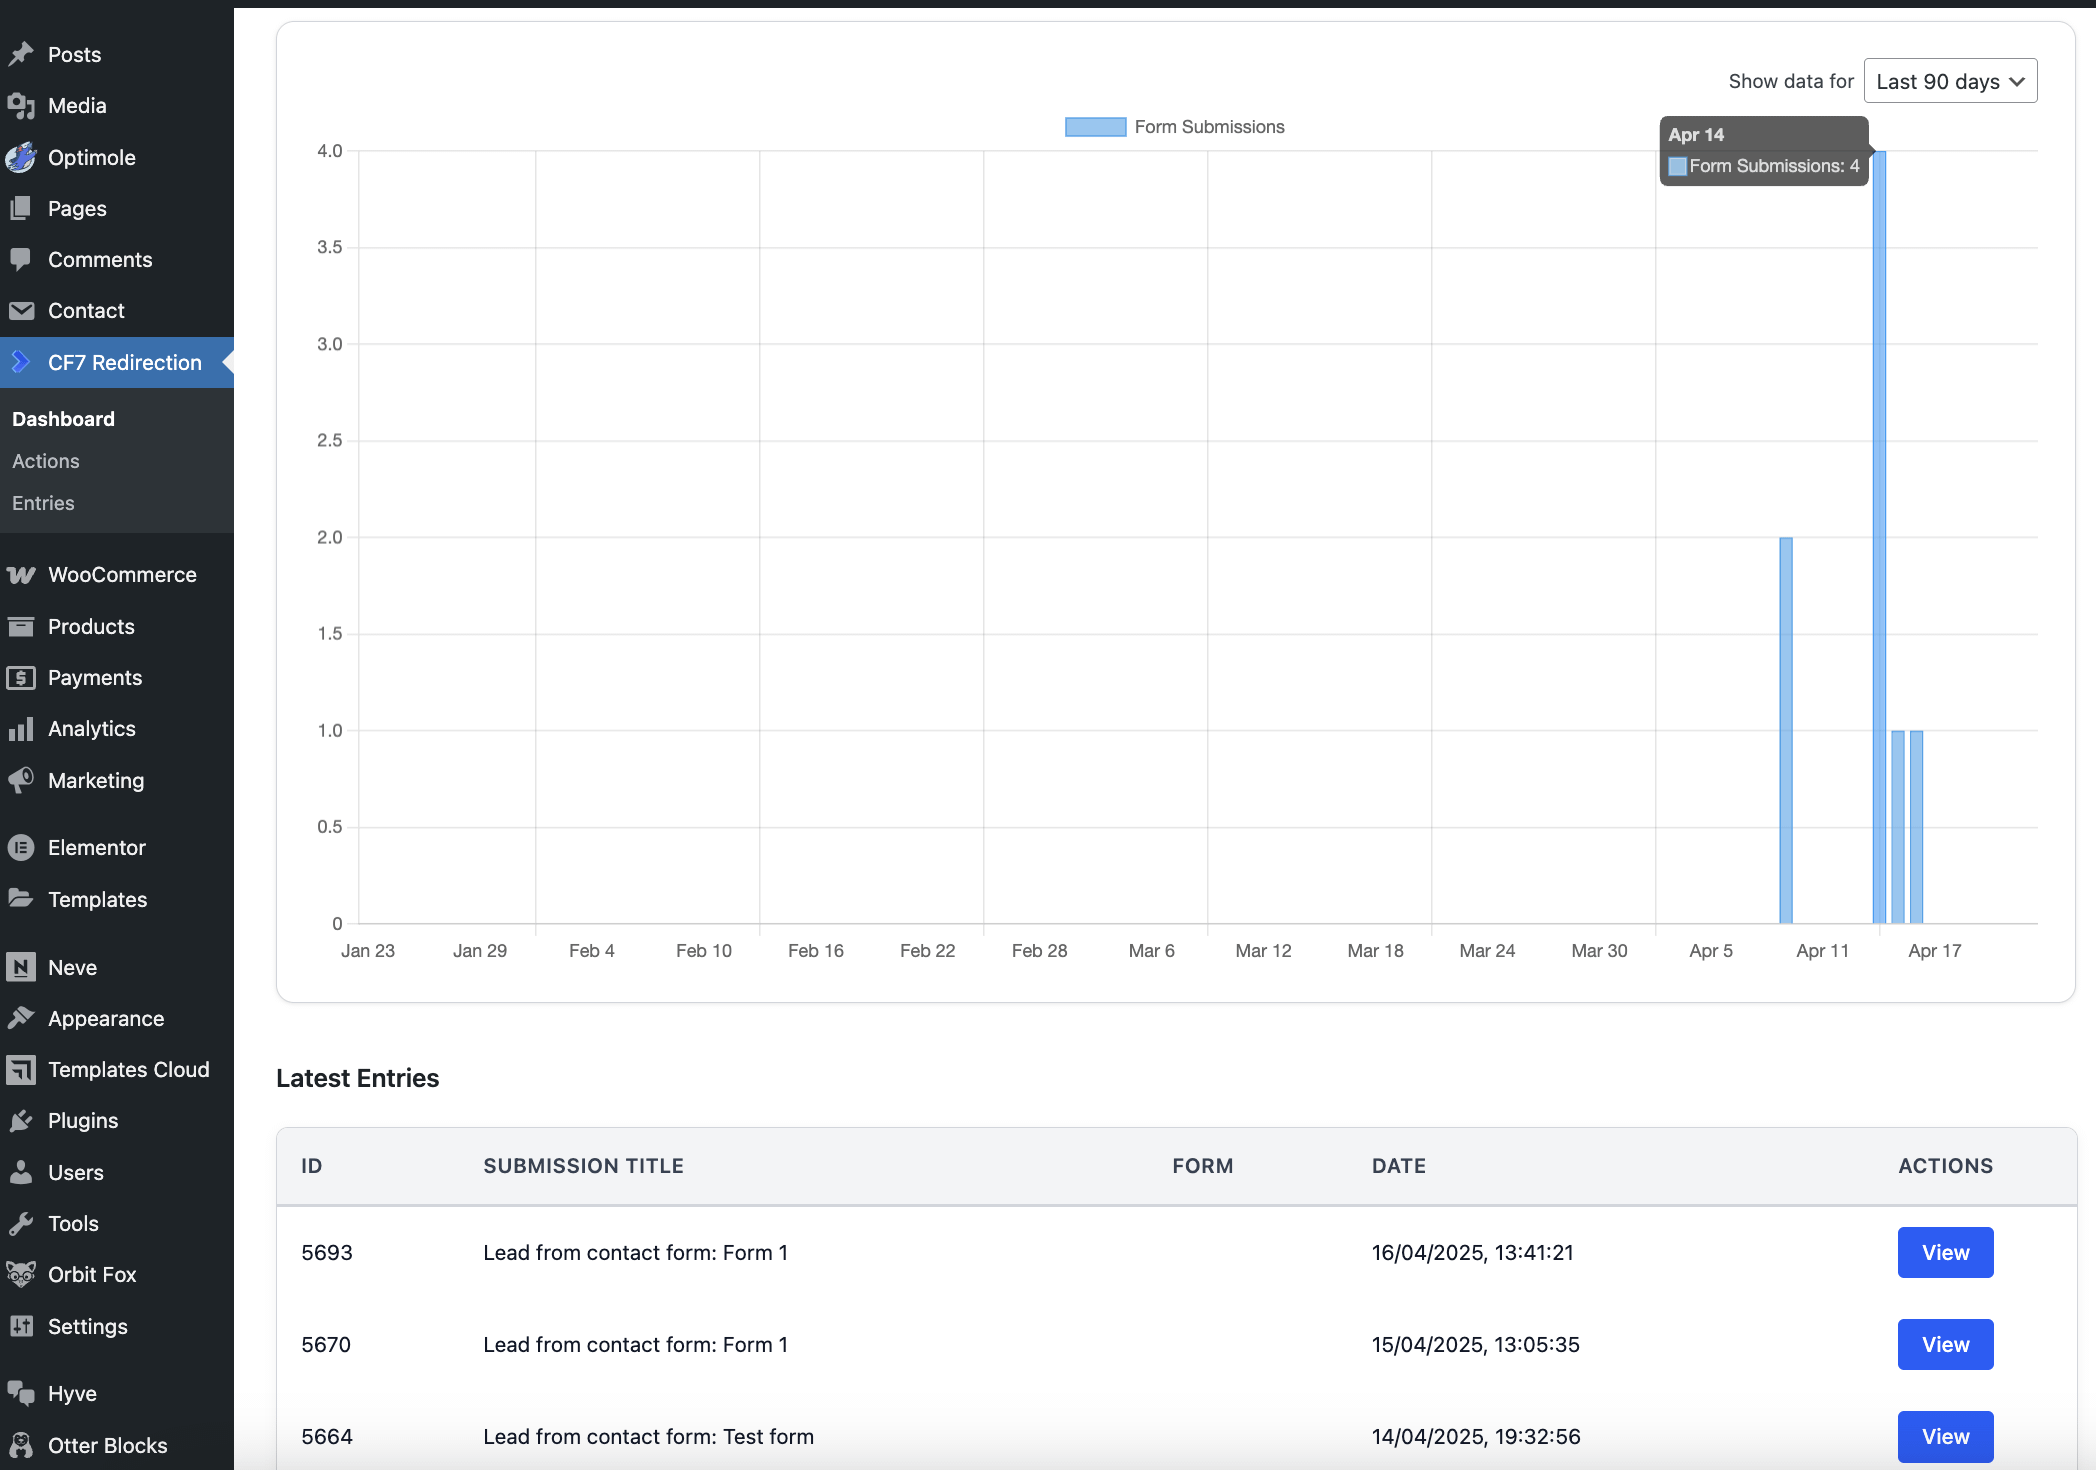
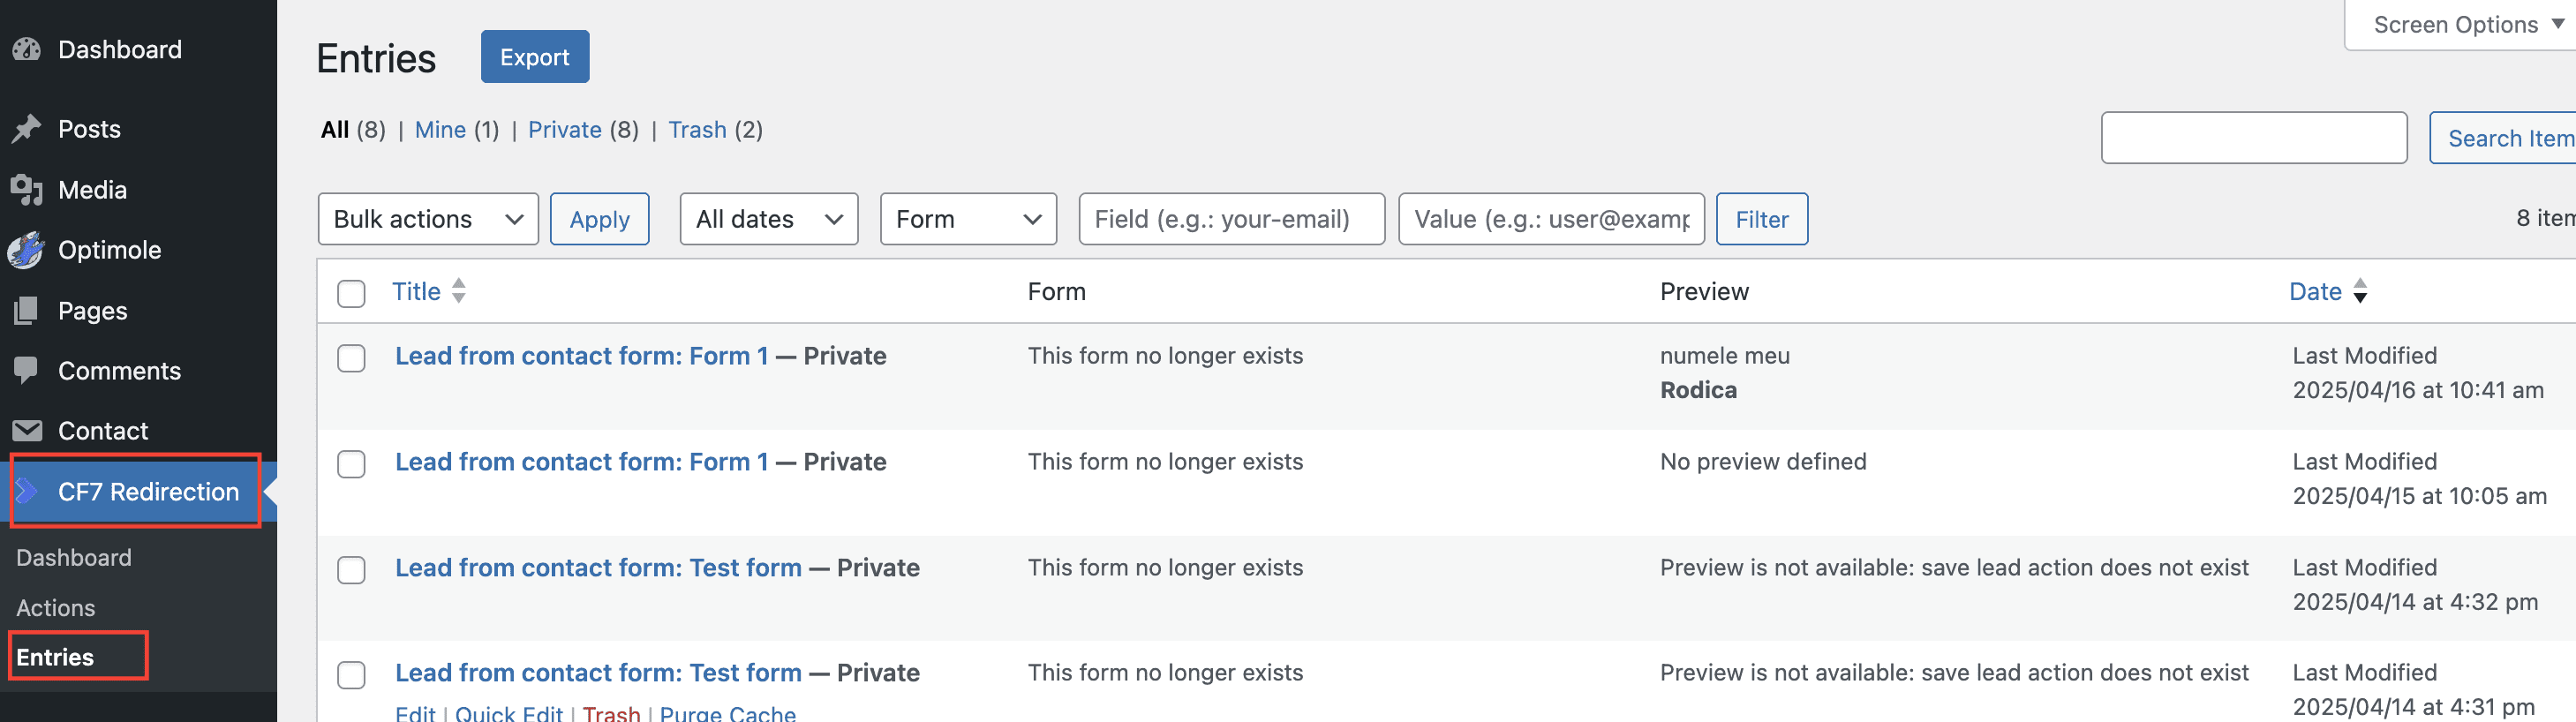
The form submission can be found in CF7 Redirection > Entries. They can be filtered and exported.
5.Erase/Export Data Requests
Manage data privacy requests by choosing to erase or export data. Select the appropriate option from the dropdown menu, specify the username field, and set an error message for non-existent usernames or emails. You can also toggle the option to send a confirmation email, ensuring smooth and compliant data handling.
🚀 Premium Actions
Fire JavaScript
Add custom JavaScript to run when the form is submitted. Simply name your rule, insert your JavaScript code, and save your changes. This allows you to execute custom scripts and enhance form functionality.
Webhook
Contact Form 7 to API - Pardot Integration: Seamlessly connect Contact Form 7 with Pardot to enhance your lead management and marketing automation. You can check out the detailed documentation here.
Webhook - XML/JSON
Contact Form 7 to API - ActiveCampaign: Integrate Contact Form 7 with ActiveCampaign to streamline your email marketing and CRM processes. Explore the integration details here.
Conditional Logic
Set up advanced conditional logic to customize form behavior based on user input. Explore how to configure conditional logic in the official documentation here.
Thank You Popup
Display a customizable thank you popup after form submission to enhance user experience. Find out how to set up a thank you popup in our guide here.
Mailchimp Integration
Connect your form submissions directly with Mailchimp to manage your email marketing campaigns. Read more about Mailchimp integration here.
Salesforce Integration
Sync form data with Salesforce to seamlessly integrate with your CRM system. Check out the guide on Salesforce integration here.
Publish Posts
Automatically publish form submissions as posts on your website, streamlining content management. Explore how to configure this addon in the official documentation here.
Created PDF
Generate PDF documents from form submissions to easily share or archive information. Explore how to configure this addon in the official documentation here.
Stripe Integration
Integrate Stripe with your forms to process payments securely and efficiently.
HubSpot Integration
Connect Contact Form 7 with HubSpot to enhance your CRM and marketing efforts.
PayPal Integration
Link your forms to PayPal for smooth and secure payment processing.
Send SMS with Twilio
Send SMS notifications from form submissions using Twilio for real-time communication. Explore how to configure this addon in the official documentation here.