
How to Connect Claude Code to WordPress
Connecting Claude Code to your WordPress site brings your content into the terminal: the coding agent can read and update posts and pages, manage media, or inspect site configuration while you work on your theme or plugin. Easy MCP AI runs the MCP server inside WordPress, and Claude Code connects to it with a single CLI command.
In this article
Prerequisites
- A WordPress site served over HTTPS with Easy MCP AI installed and activated (see the installation guide).
- Pretty permalinks enabled (Settings > Permalinks set to anything other than "Plain").
- Claude Code installed and signed in.
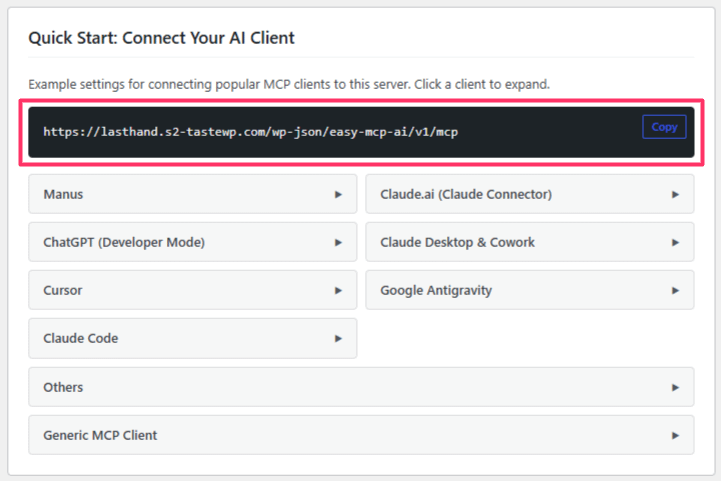
You'll need your site's MCP endpoint URL, which is always your domain followed by /wp-json/easy-mcp-ai/v1/mcp:
https://yoursite.com/wp-json/easy-mcp-ai/v1/mcpYou can copy it from Easy MCP AI > Dashboard in your WordPress admin, in the Quick Start: Connect Your AI Client section.
Connect via OAuth (Recommended)
- In your terminal, add the server (replace the URL with your endpoint):
claude mcp add --transport http wordpress https://yoursite.com/wp-json/easy-mcp-ai/v1/mcpNo token is needed for this step.
- Start Claude Code and run
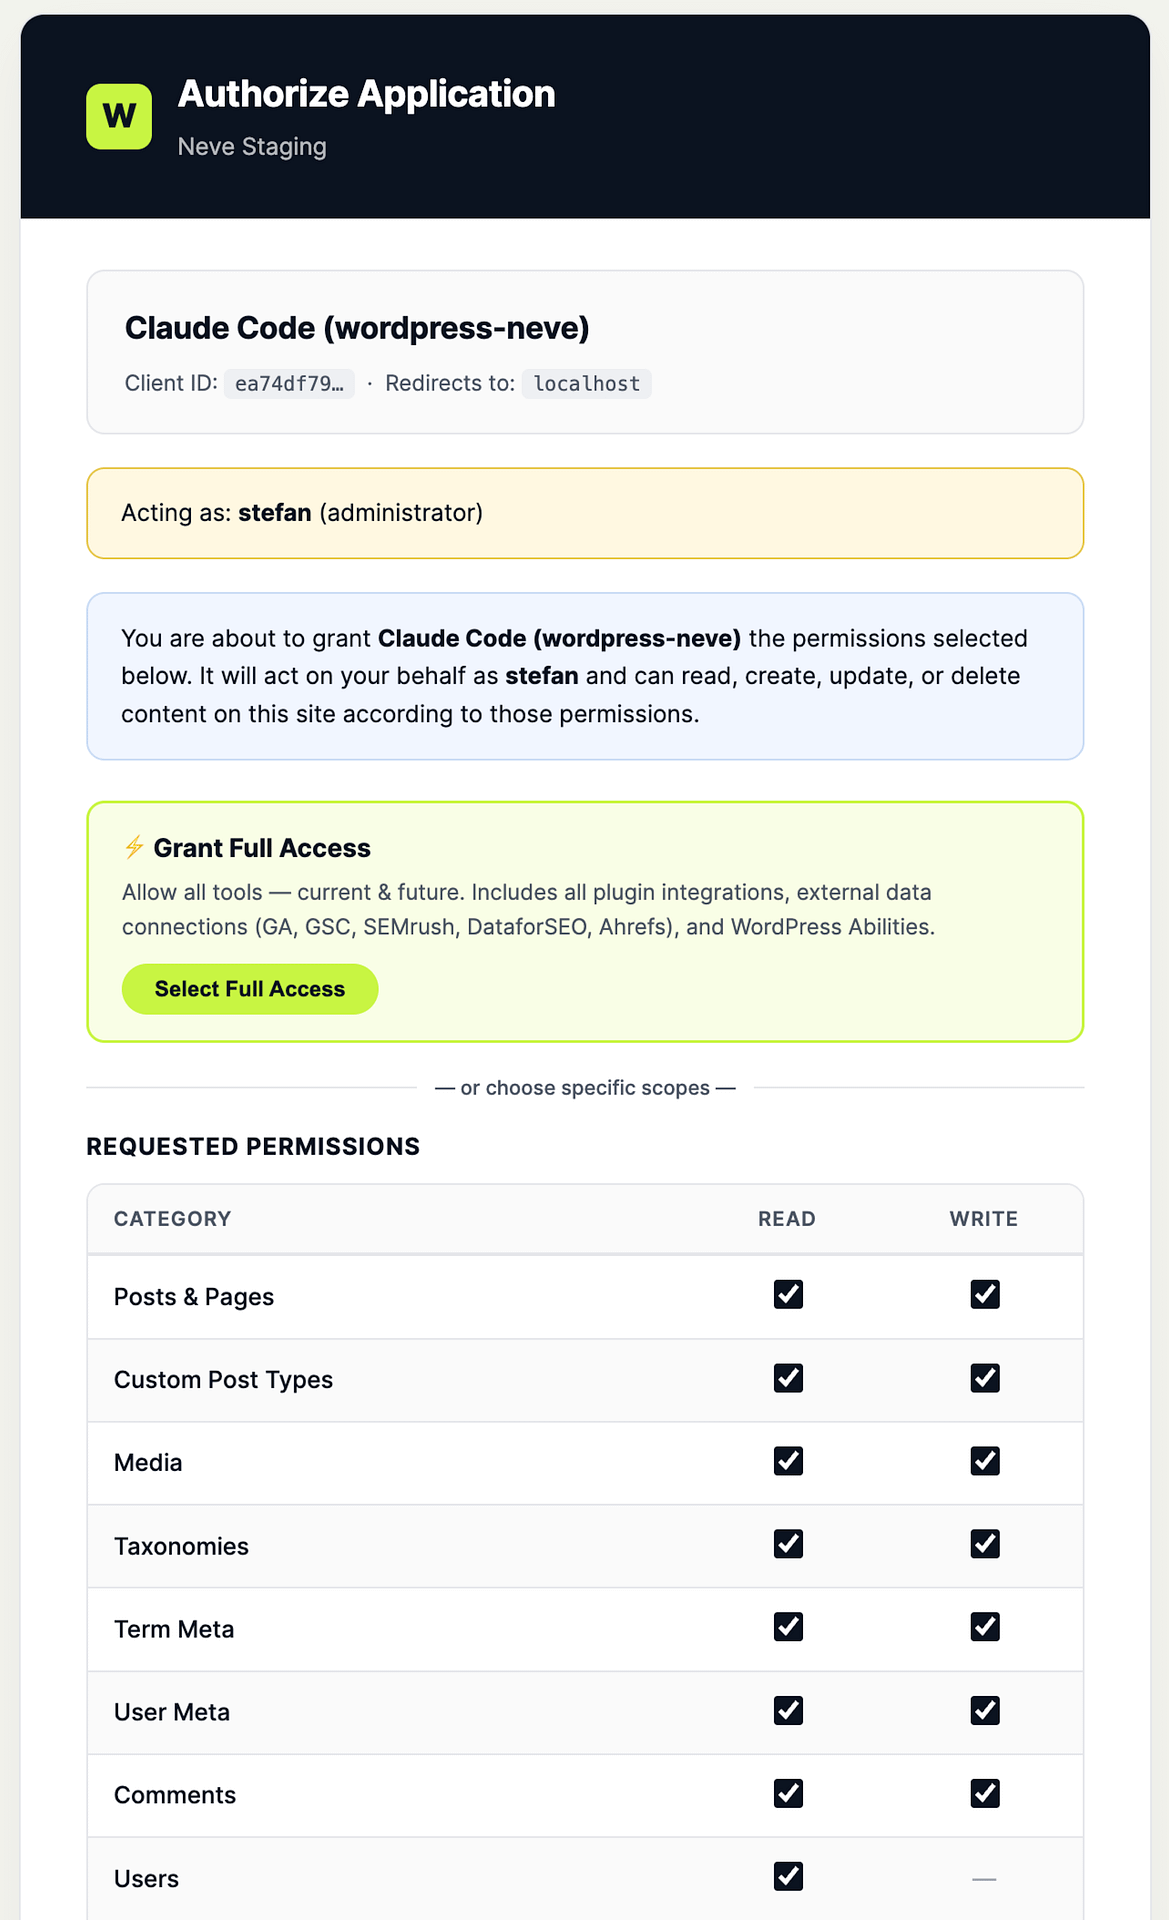
/mcp. Select wordpress, then choose Authenticate. - Your browser opens the WordPress authorization page. Log in if prompted and approve the access request. Claude Code stores the credentials automatically.
Alternative: Connect with an API Token
For scripted or headless environments where the OAuth browser flow is impractical, use a token instead:
- Create an API token in Easy MCP AI > API Token & OAuth and copy it.
- Add the server with the token as a header:
claude mcp add --transport http wordpress https://yoursite.com/wp-json/easy-mcp-ai/v1/mcp --header "Authorization: Bearer YOUR_API_TOKEN"You can also commit a tokenless variant for your team in the project's .mcp.json:
{
  "mcpServers": {
    "wordpress": {
      "type": "http",
      "url": "https://yoursite.com/wp-json/easy-mcp-ai/v1/mcp",
      "headers": {
        "Authorization": "Bearer YOUR_API_TOKEN"
      }
    }
  }
}
Never commit a real token; keep it in an environment reference or per-developer config.
Verify the Connection
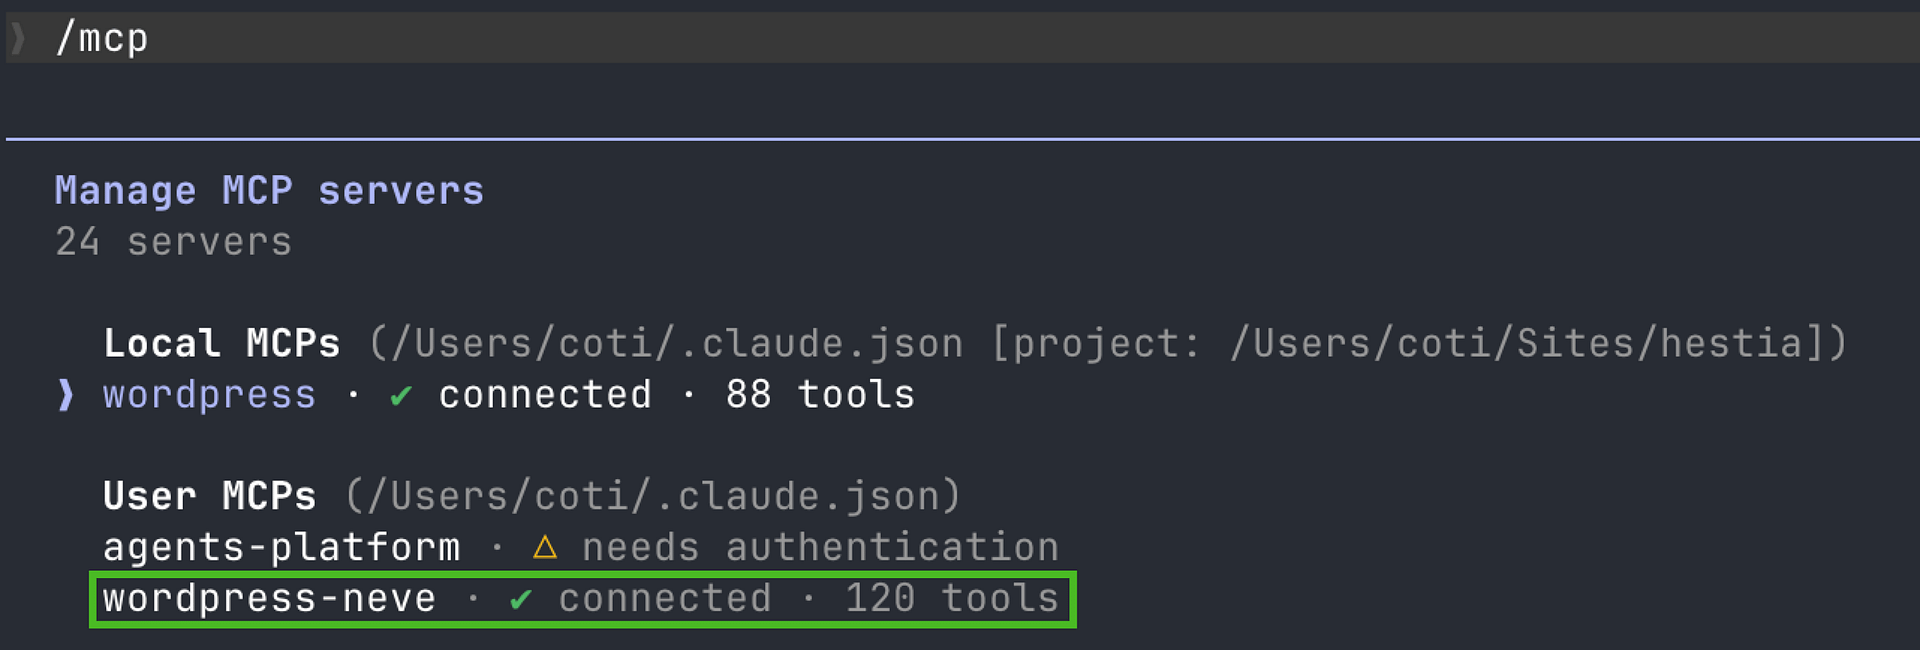
Run /mcp again. The wordpress server shows as connected with its tool count.
Then ask something that touches your site:
Which are the five most recent posts on my WordPress site, and which of them are still drafts?
Claude Code asks for approval the first time it runs a WordPress tool.
What You Can Do Once Connected
Easy MCP AI exposes your site's capabilities as MCP tools, organized by area: posts, pages, media, comments, categories and tags, menus, custom post types, blocks, revisions, users, plugins, themes, site settings, and search. Integrations such as WooCommerce and SEO data sources are included when available. In the terminal, that pairs naturally with development work:
Create a draft page called "Pricing" using the block markup from the template file in this repo.
List the active plugins on my site and flag any that are outdated compared to wordpress.org.
Pull the content of the "About" page so I can refactor it into the new layout.
Control What Claude Code Can Access
The connection acts as the WordPress user who approved it (or the token's assigned user), so WordPress roles apply as usual. For CI or shared environments, use a dedicated token limited to the tools the job needs. Site-wide guardrails (globally disabled tools, rate limits, forced drafts, audit log) apply on top. See Creating and Managing API Tokens for details.
Security
If you identify a potential security vulnerability in this plugin, please disclose it responsibly. Follow the protocols on the Themeisle Security Page.