
How to Connect ChatGPT to WordPress
Connecting ChatGPT to your WordPress site lets you manage content from a ChatGPT conversation: draft and edit posts, update pages, organize media, or review comments. Easy MCP AI runs the MCP server inside WordPress, and ChatGPT connects to it as a custom connector over OAuth.
Custom MCP connectors require ChatGPT's Developer Mode, which is available on paid plans. The Free and Go plans cannot add custom connectors.
In this article
Prerequisites
- A WordPress site served over HTTPS with Easy MCP AI installed and activated (see the installation guide).
- Pretty permalinks enabled (Settings > Permalinks set to anything other than "Plain").
- A paid ChatGPT plan with Developer Mode enabled in the settings.
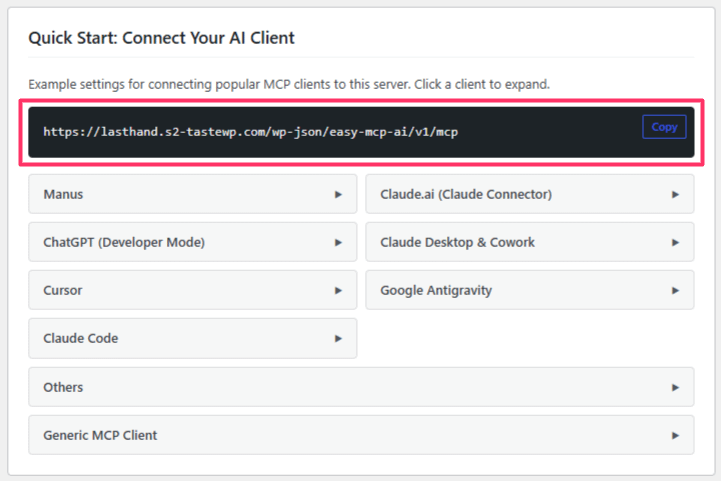
You'll need your site's MCP endpoint URL, which is always your domain followed by /wp-json/easy-mcp-ai/v1/mcp:
https://yoursite.com/wp-json/easy-mcp-ai/v1/mcpYou can copy it from Easy MCP AI > Dashboard in your WordPress admin, in the Quick Start: Connect Your AI Client section.
Enable Developer Mode
Custom MCP connectors count as unverified apps, so ChatGPT keeps them behind a Developer Mode setting:
- In ChatGPT, open Settings > Security and login.
- Scroll to the Developer mode section and turn on the Developer mode toggle.
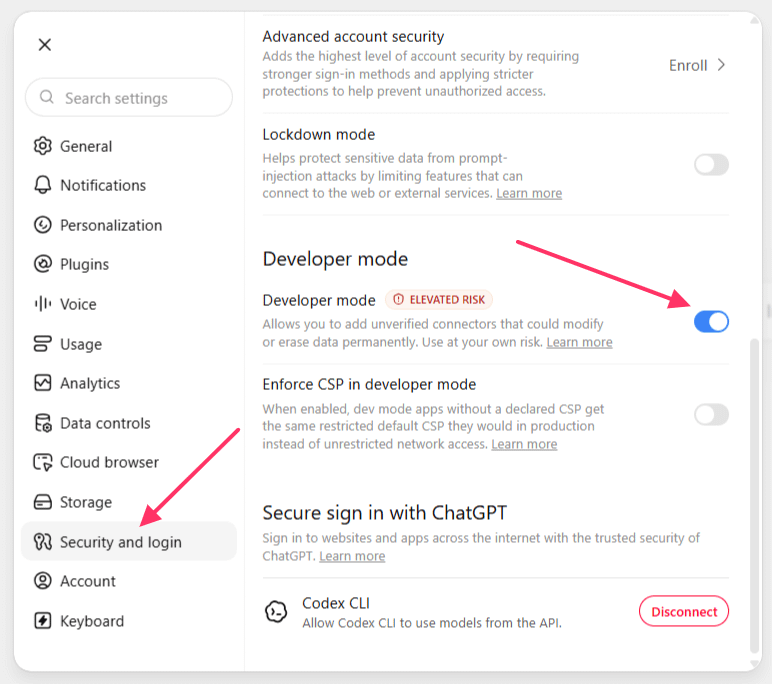
The "Elevated risk" label next to the toggle is ChatGPT's standard warning for any unverified connector; it is not specific to Easy MCP AI.
Connect ChatGPT to Your Site
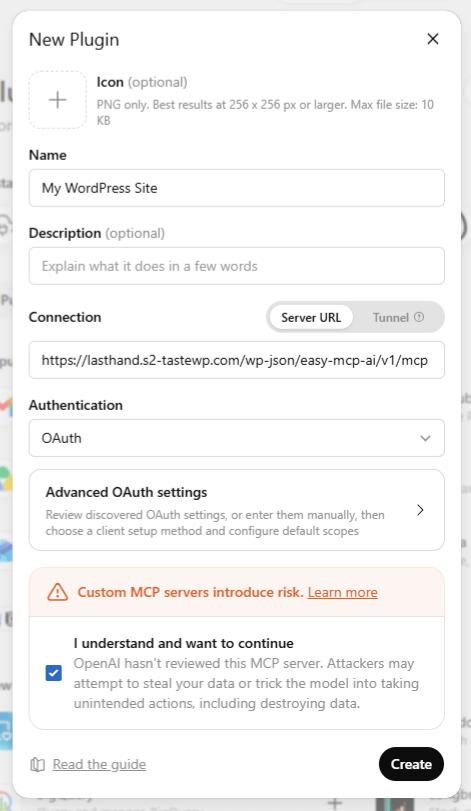
- Go to Easy MCP AI > Dashboard, expand ChatGPT (Developer Mode) in the Quick Start section, and click Connect to ChatGPT. This opens the New Plugin form. Unlike some other clients, ChatGPT does not accept a pre-filled server, so you enter the details yourself. You can also reach the same form in ChatGPT by opening Plugins in the sidebar and clicking the + icon.
- Enter a name, for example "WordPress", and paste your MCP endpoint URL in the Connection field, with Server URL selected.
- Leave Authentication set to OAuth.
- Tick "I understand and want to continue", then click Create.
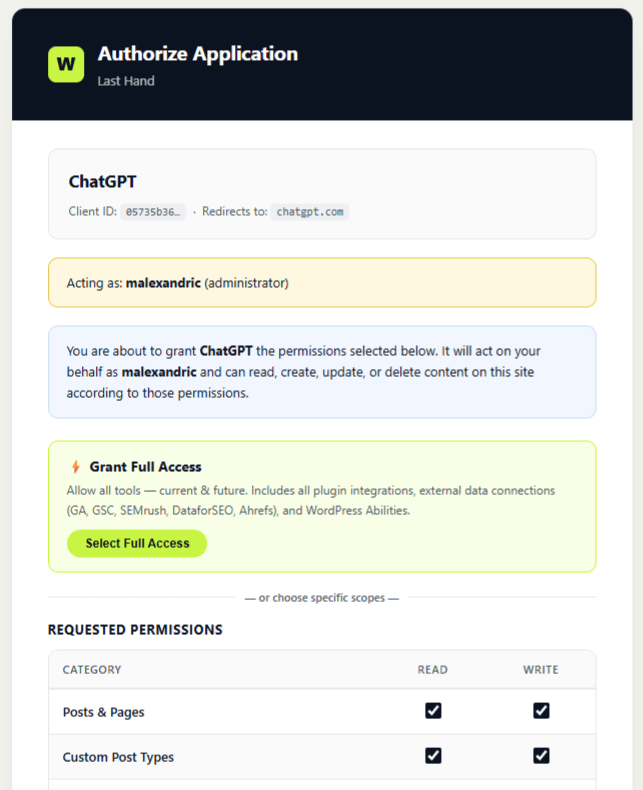
- The WordPress authorization page opens. Click Approve, and you are returned to ChatGPT. No token is needed.
- If the tools are not listed yet, click Refresh next to Information on the connector page.
ChatGPT may show a warning notice after connecting. That is expected for any custom MCP server and does not indicate a problem with your site.
Verify the Connection
Open Plugins in the ChatGPT sidebar and select the WordPress connector. Its page lists the available tools under Actions.
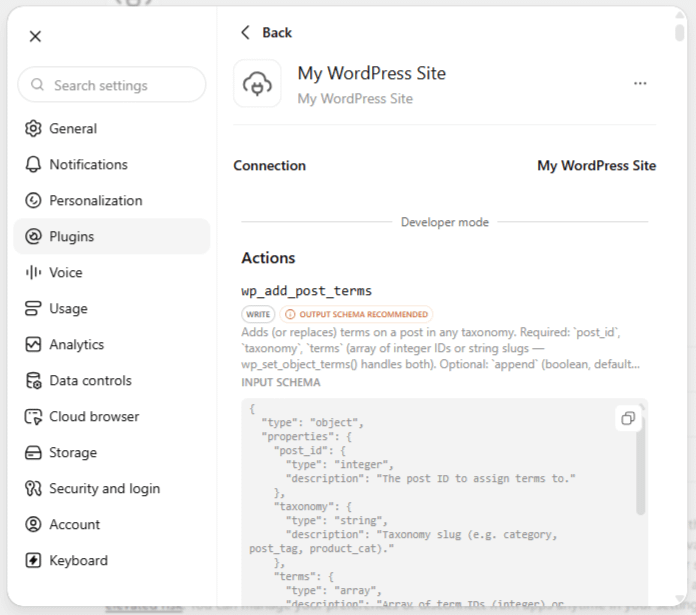
Then start a chat, enable the connector, and try a first prompt:
Which are the five most recent posts on my site, and which of them are still drafts?
Alternative: Connect with an API Token
If OAuth does not work in your setup, you can create a connector whose URL carries an API token instead:
- Create an API token in Easy MCP AI > API Token & OAuth and copy it.
- Create the connector as above, but use your endpoint URL with the token appended:
https://yoursite.com/wp-json/easy-mcp-ai/v1/mcp/YOUR_API_TOKENReplace YOUR_API_TOKEN with your actual token (it starts with wpmcp_). Treat this as a fallback: tokens in URLs can end up in server logs and browser history, so prefer OAuth when available.
What You Can Do Once Connected
Easy MCP AI exposes your site's capabilities as MCP tools, organized by area: posts, pages, media, comments, categories and tags, menus, custom post types, blocks, revisions, users, plugins, themes, site settings, and search. Integrations such as WooCommerce and SEO data sources are included when available. What ChatGPT can actually touch is always bounded by the WordPress user's role and your plugin settings.
Some things to try:
Draft a 600-word post about our new spring collection and save it as a draft.
Find every page that still mentions our old phone number and update it.
Show me the comments awaiting moderation and summarize what they're about.
Control What ChatGPT Can Access
The connection acts as the WordPress user who approved it (or the token's assigned user), so WordPress roles apply as usual. On top of that, you can globally disable sensitive tools such as deletions, user management, and site settings. You can also set rate limits, force AI-created posts to stay drafts, and review every action in the audit log. See Creating and Managing API Tokens for all the guardrails.
Security
If you identify a potential security vulnerability in this plugin, please disclose it responsibly. Follow the protocols on the Themeisle Security Page.