How to create a Page Header for Blog using the Custom Layouts Module
📝 Note: The Custom Layouts are part of the Neve PRO Addon's modules. If you would like to learn more about the Neve Pro Addon, take a look at Neve Pro Addon's full documentation.
This article will present step-by-step how to create a page header for the Blog page using Custom Layouts in Neve. Here is a dedicated doc about the Custom Layouts Module.
🧰Tools needed
- Neve theme - here is a doc that will help with the installation.
- Neve PRO Addon - here is a doc that contains instructions regarding purchasing it.
🛠 Creating the Page Header
Before creating the hero section, make sure you have activated the Custom Layouts module. For this, navigate to Neve > Dashboard > Settings > Manage Modules and scroll down until you will find the Custom Layout module ( it is activated by default ).
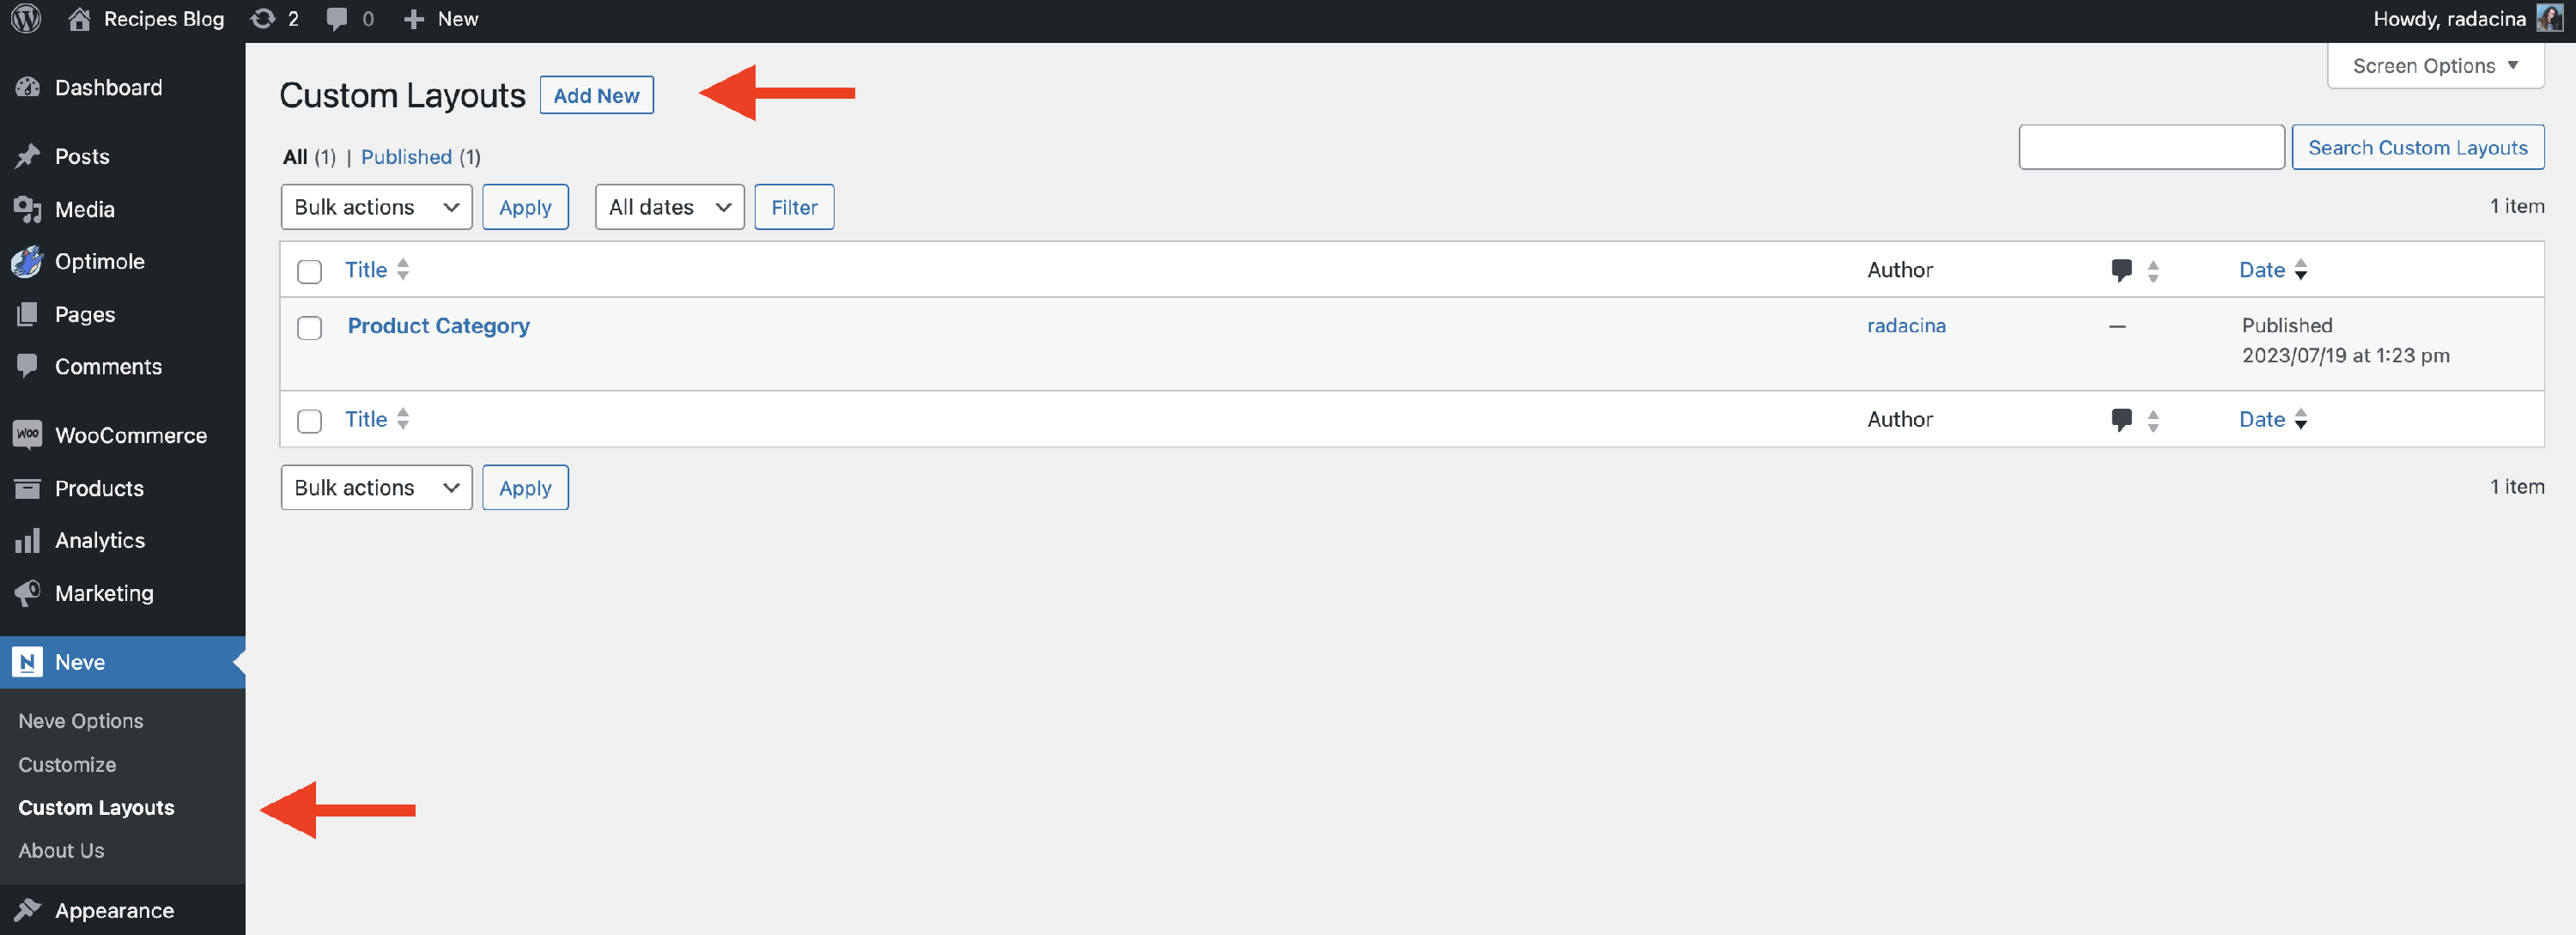
1. To manage the layouts, navigate to Neve > Custom Layouts.
2. Click on the Add New button to create one from scratch.
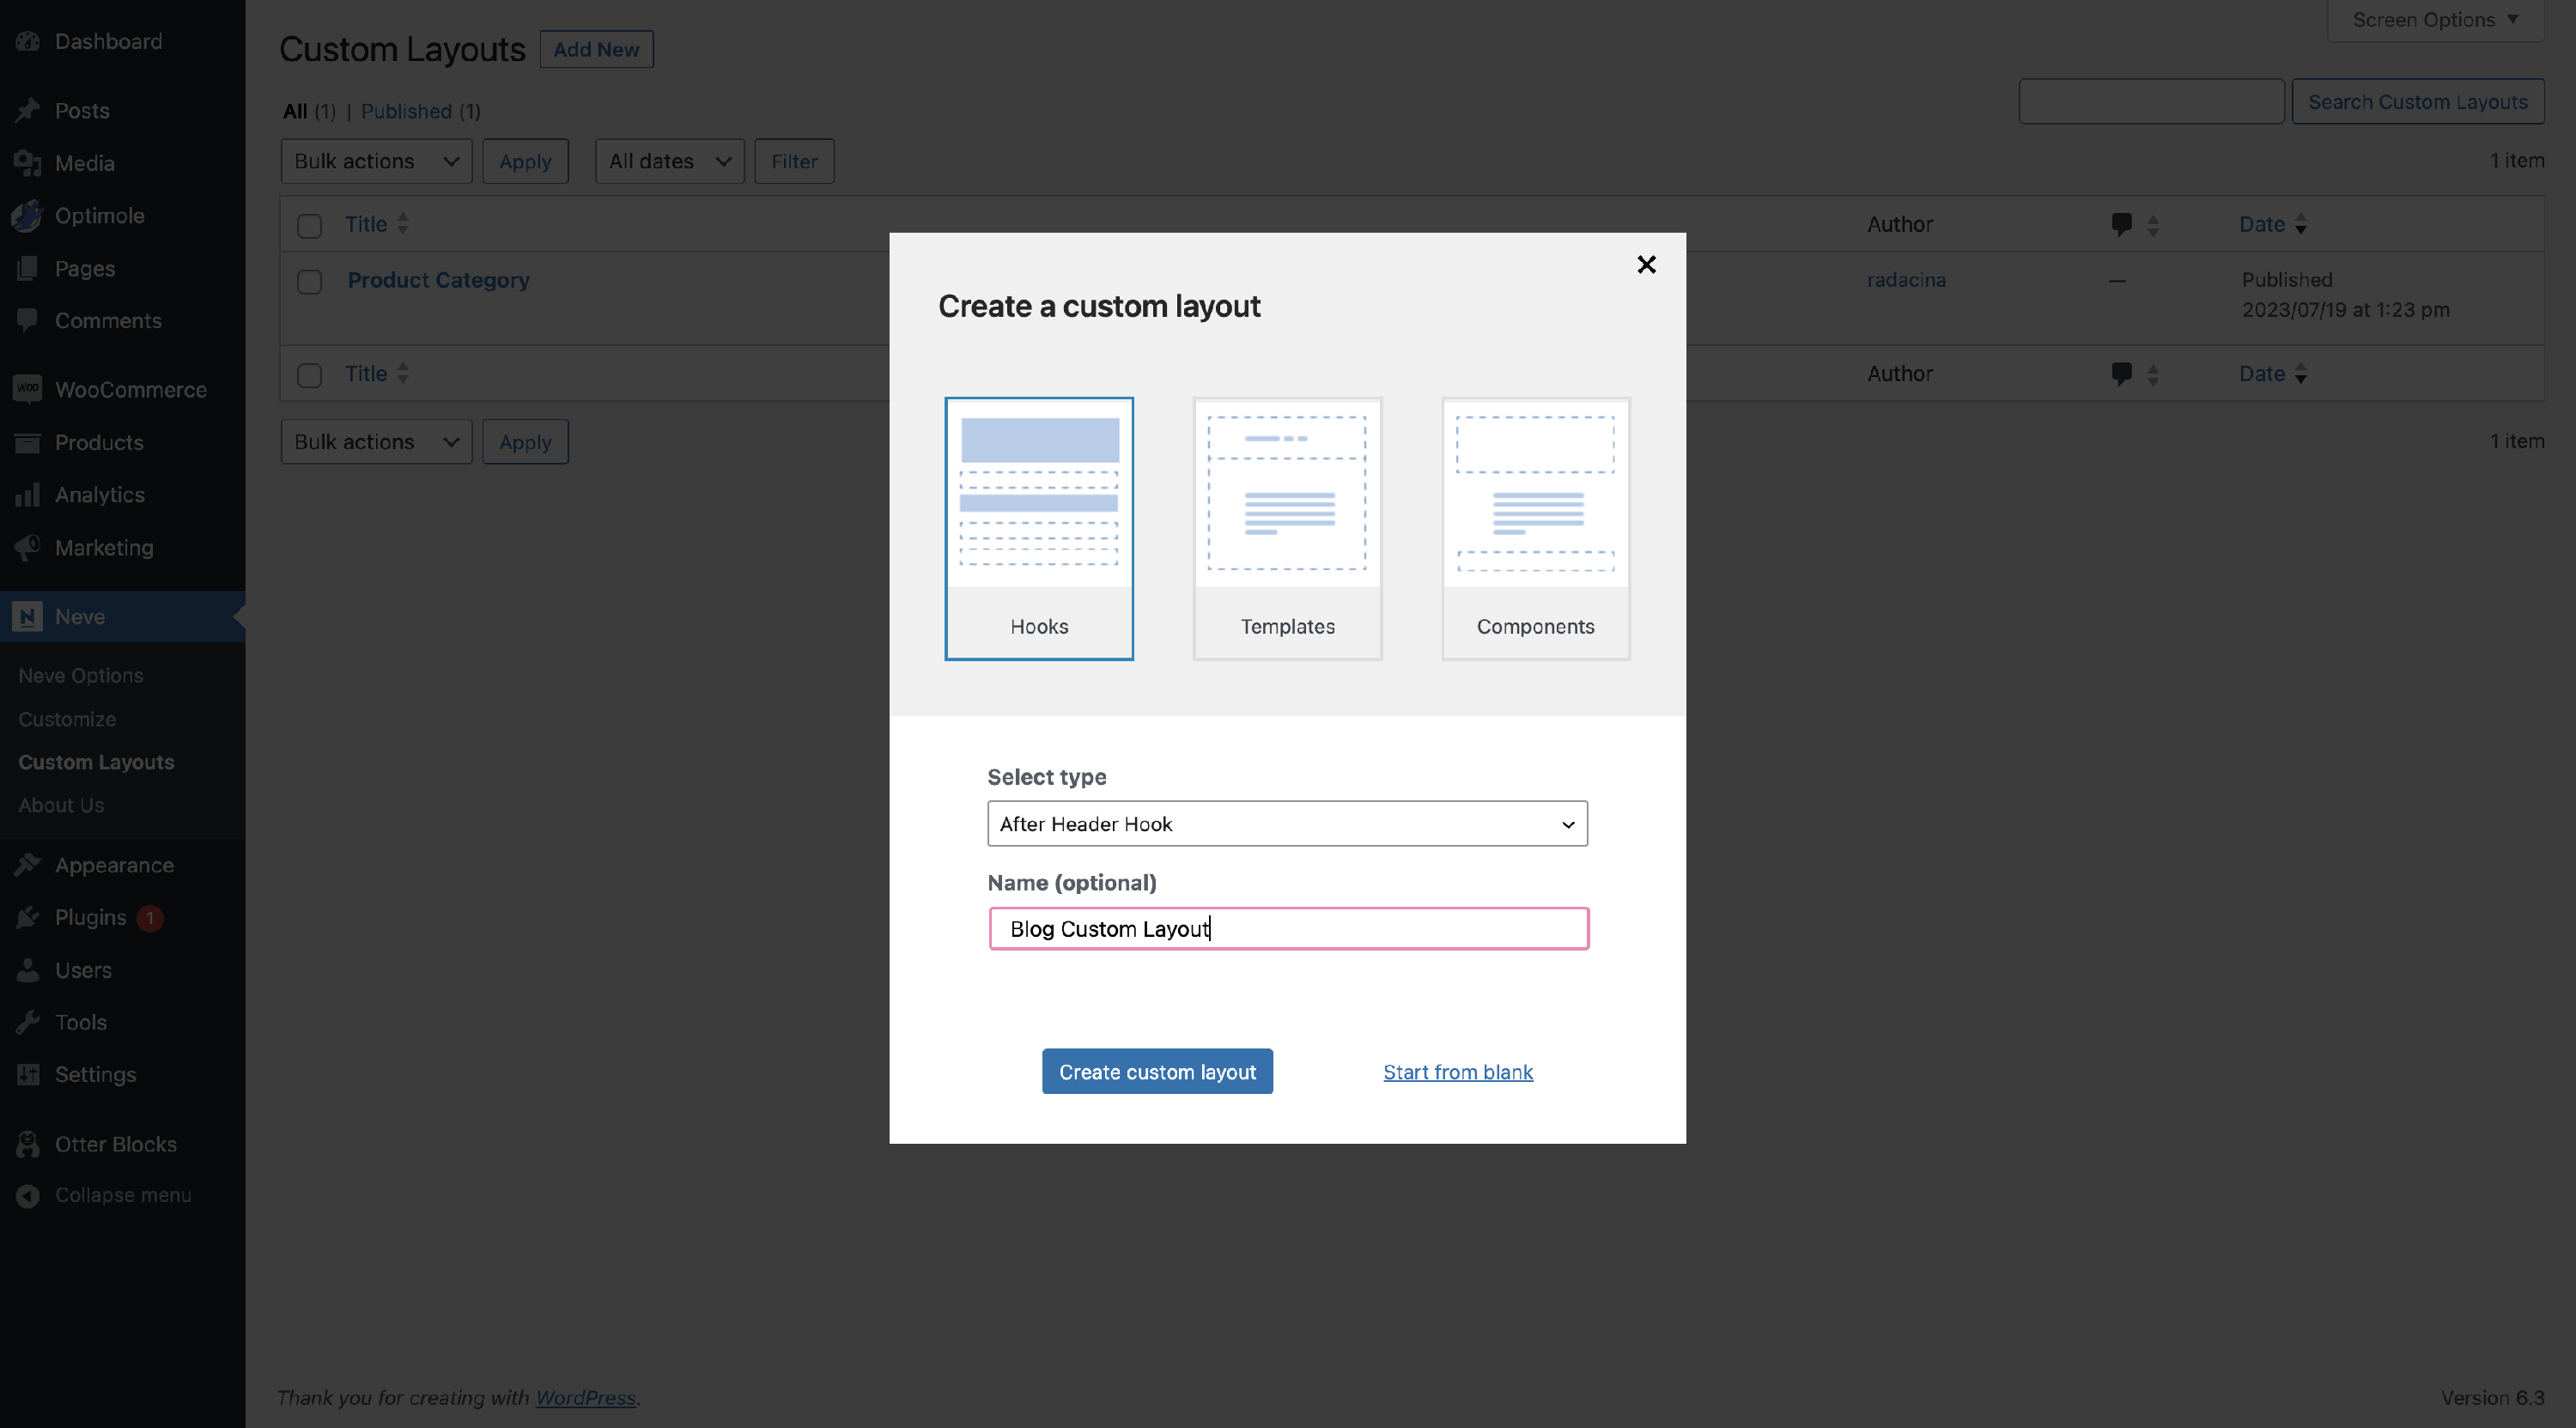
3. Select the Hooks type inside the modal, then select the After Header Hook from the dropdown and add a suitable name.
📝 Note: You can see the hooks' locations by clicking on the 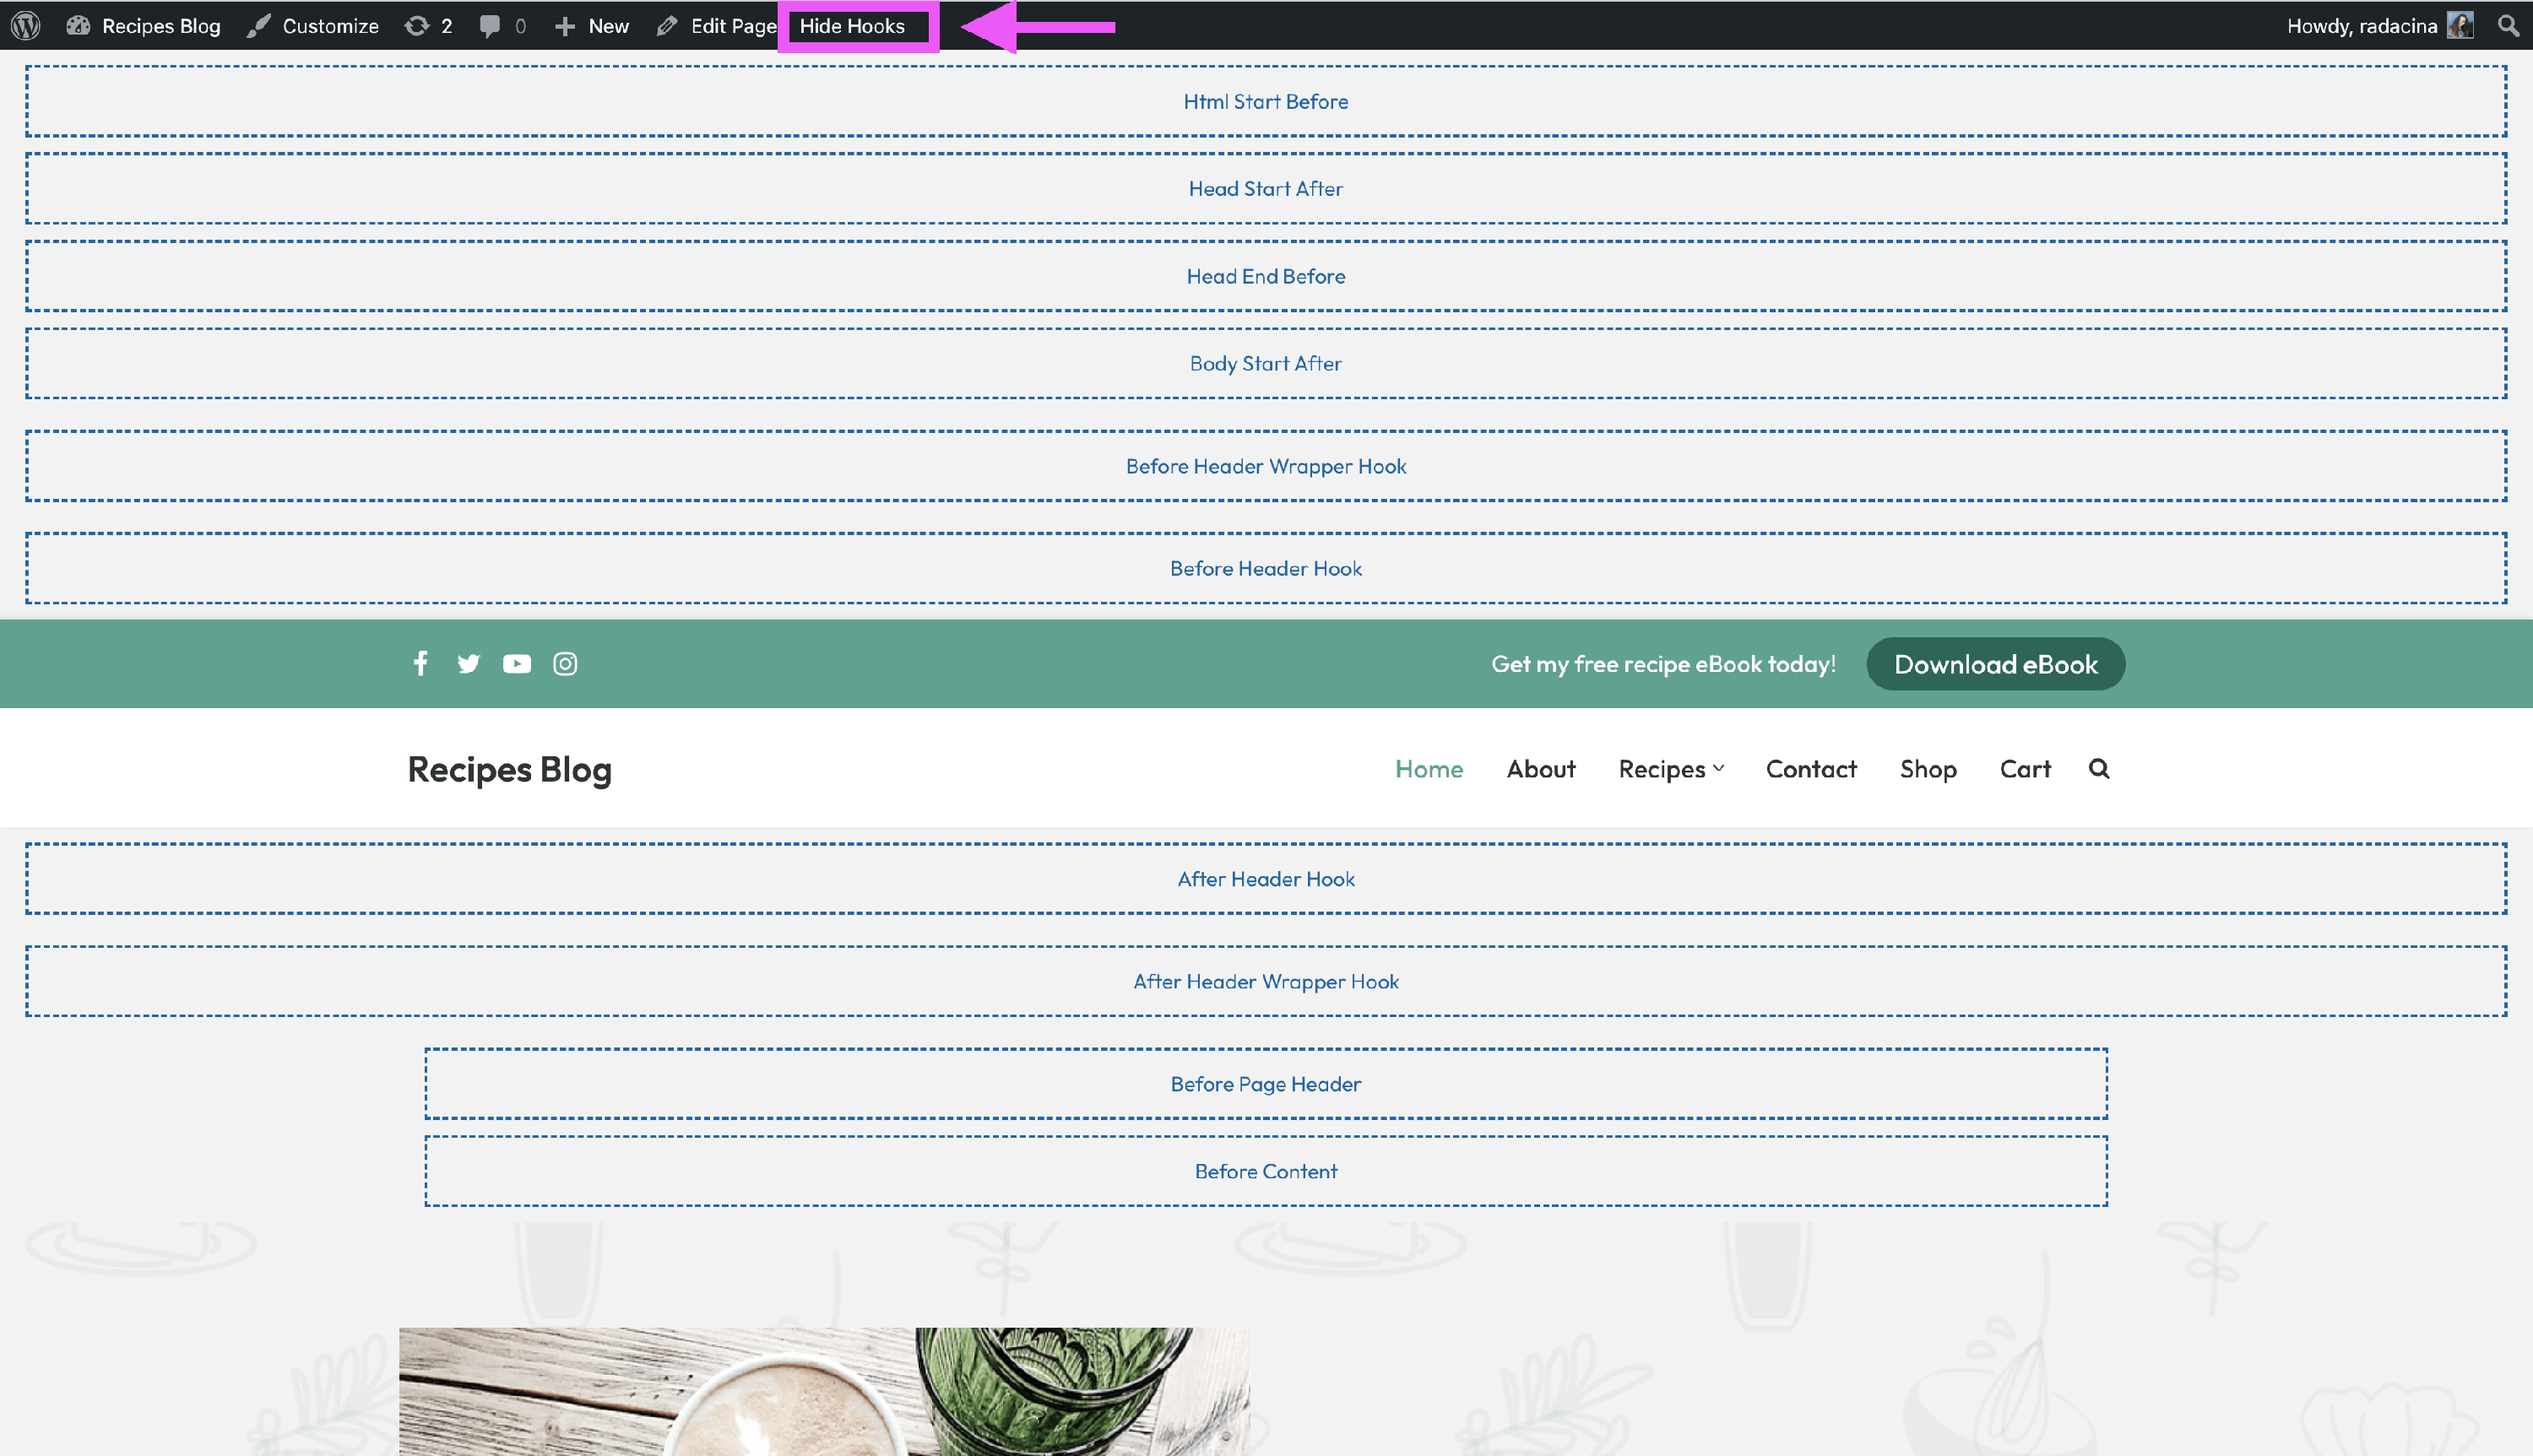 Show Hooks button (into the black menu bar from the top) in the Customizer.
4. Inside Conditional Logic, insert the following rule: Archive Type is equal to Posts.
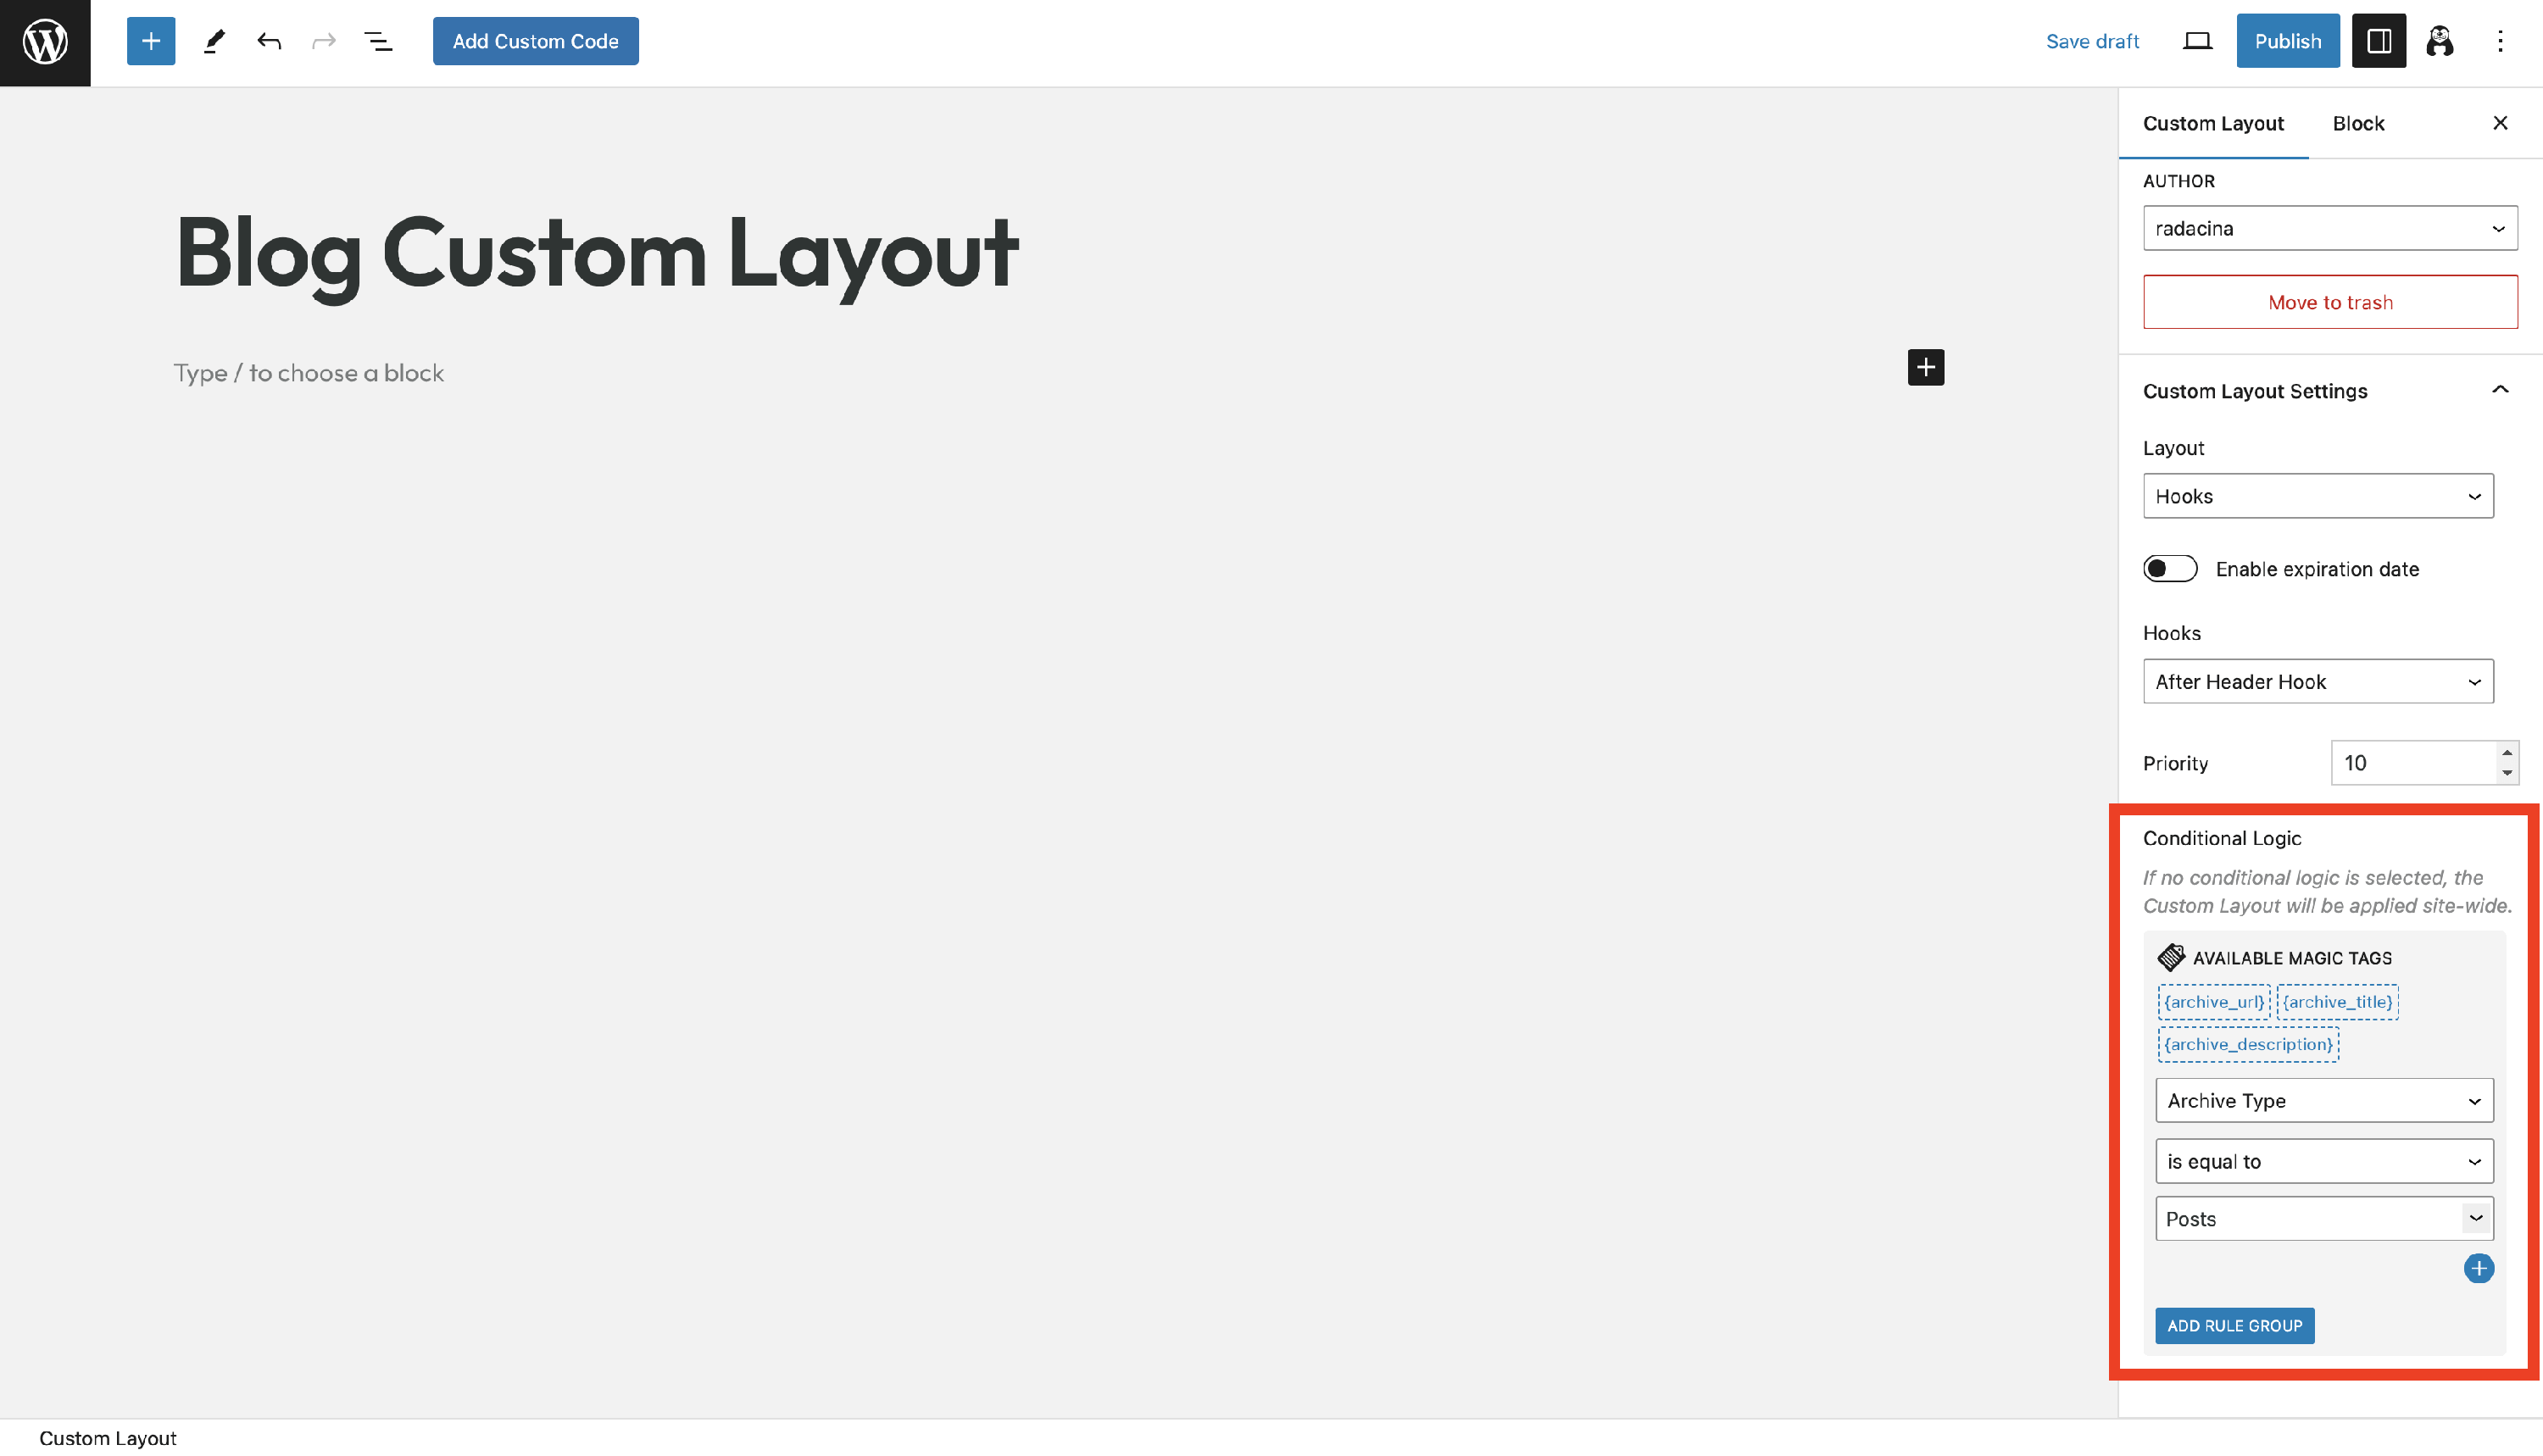
5. Edit the custom layout to suit your needs. If you want to display dynamic information, use the magic tags.
📝 Note: Learn more about the magic tags in custom layouts from this doc.
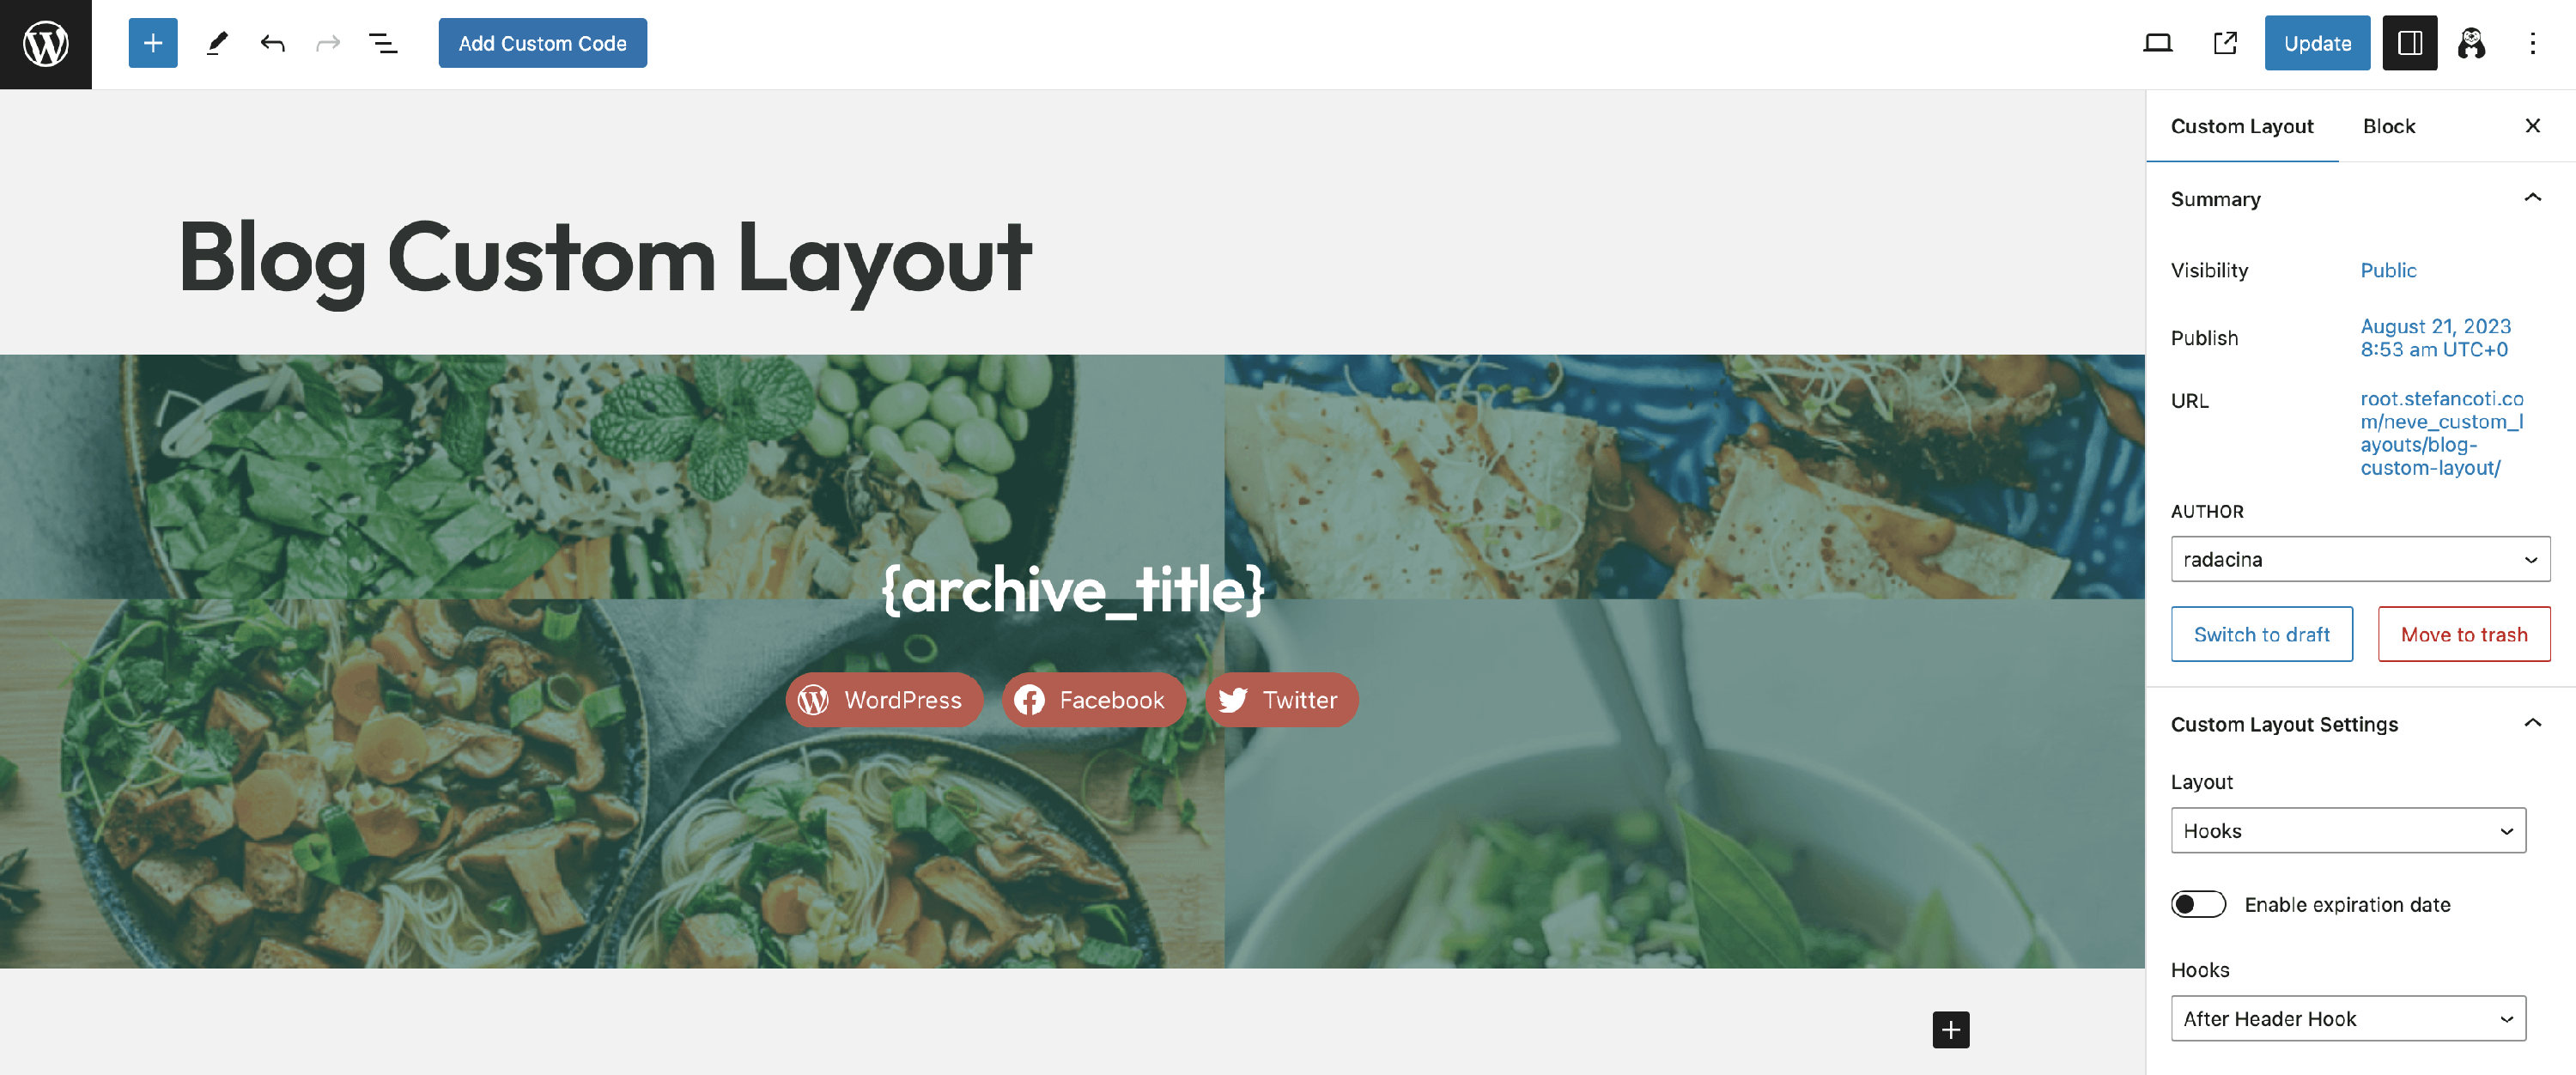
💡Result