Orbit Fox Documentation
Orbit Fox brings together all the extra functionality you need to build a professional-looking website in one plugin.
- ⚙️ All Essential Website Features in One Place
- ⚔️ Eliminate Plugin Bloat
- ⚡️ Smart Performance Optimization
🎨 Orbit Fox is compatible with most popular themes and works best with Themeisle themes.
In this article
Download and Install
To download and install the Orbit Fox plugin, follow the steps below:
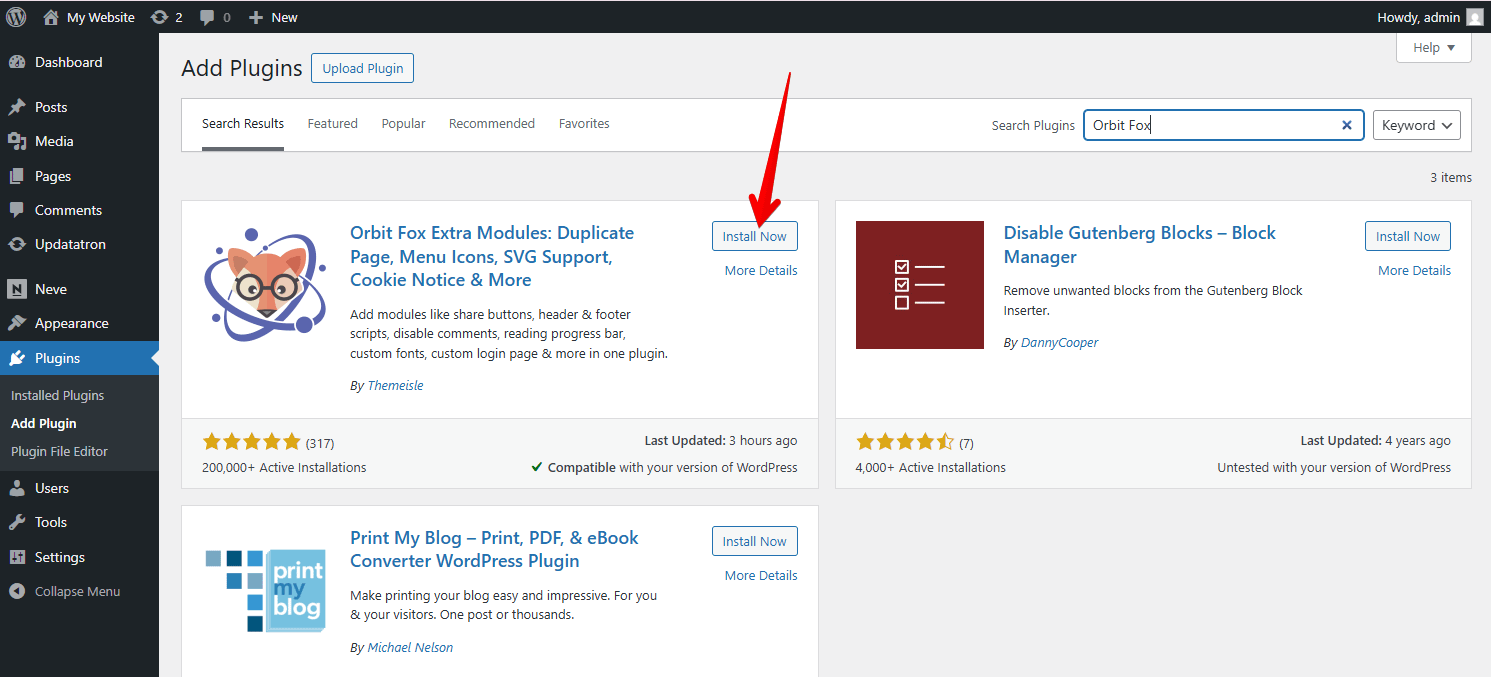
1. Navigate to the WordPress Dashboard > Plugins.
2. Click the Add Plugin button and type in Orbit Fox in the Search Bar.
3. When the plugin appears, click on the Install Now button and wait for the installation to complete. When it appears, click the Activate button.
📝 Note: For further information about the plugin, check this link.
Using the Modules
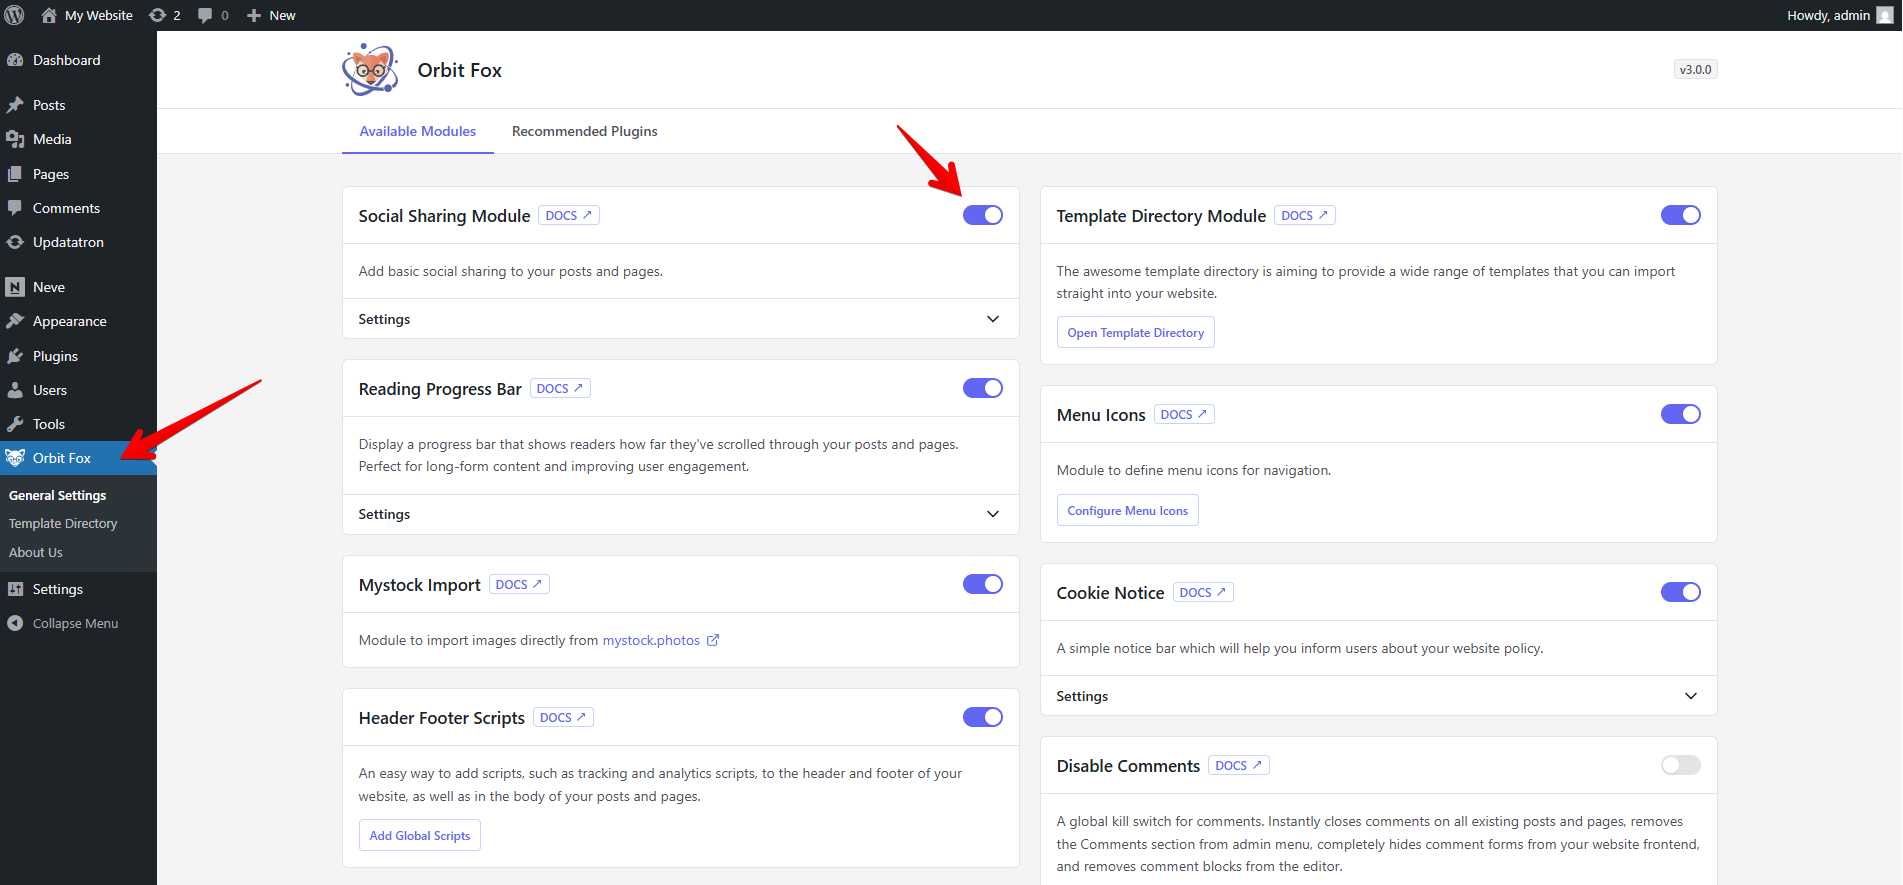
After installing and activating the Orbit Fox plugin, you'll find a new Orbit Fox menu item in your WordPress dashboard's left sidebar. Click on this menu item to access the plugin's General Settings page.
The General Settings dashboard serves as your central control hub for all Orbit Fox modules. From this single location, you can:
- View all available modules at a glance
- Enable or disable modules as needed
- Access module-specific settings when available
Enabling/Disabling Modules
Each module features a toggle switch that allows you to activate or deactivate it instantly:
- Locate the module you want to manage in the dashboard
- Click the toggle switch next to the module name
- The module will be immediately enabled (toggle on) or disabled (toggle off)
☝️ Modules like page builder widgets will only display in your Orbit Fox dashboard if you have compatible page builders installed and activated on your site.
Module Settings
When you activate a module that includes configurable options:
- Settings will automatically appear on the dashboard below the module toggle
- Configure the settings according to your needs
- Click the Save button to save your settings
⚙️ Some modules display their settings directly on the General Settings dashboard below the module toggle. You can configure these options immediately without leaving the page.
🔗 Other modules will show a configuration link that takes you to a dedicated settings page. Click on the provided link to access the full range of options for that particular module.
Modules Library
Orbit Fox adds the following modules to your website:
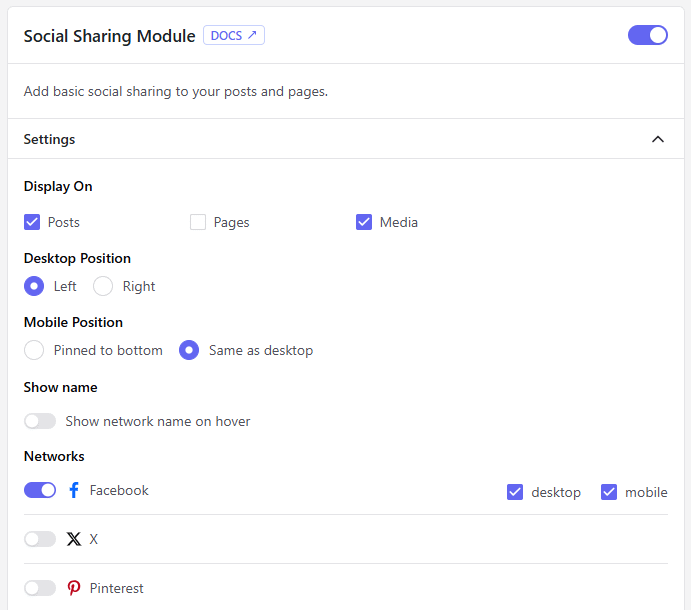
1. Social Sharing Buttons
Add social sharing buttons to your Posts, Pages, and all public Custom Post Types. Choose from a wide range of networks including Facebook, X (Twitter), LinkedIn, WhatsApp, Bluesky, and Threads. Configure separate settings for mobile and desktop devices, including button position and network selection.
📚 For more information, see the full documentation for this module.
2. Menu Icons
Add icons to ANY menu on your WordPress website. Choose from over 300 available dashicons to customize your navigation menus.
📚 For more information, see the full documentation for this module.
3. Website Templates
You can import pre-designed website templates or starter sites. Access them from your WordPress Dashboard under Orbit Fox > Template Directory.

📚 For more information, see the full documentation for this module.
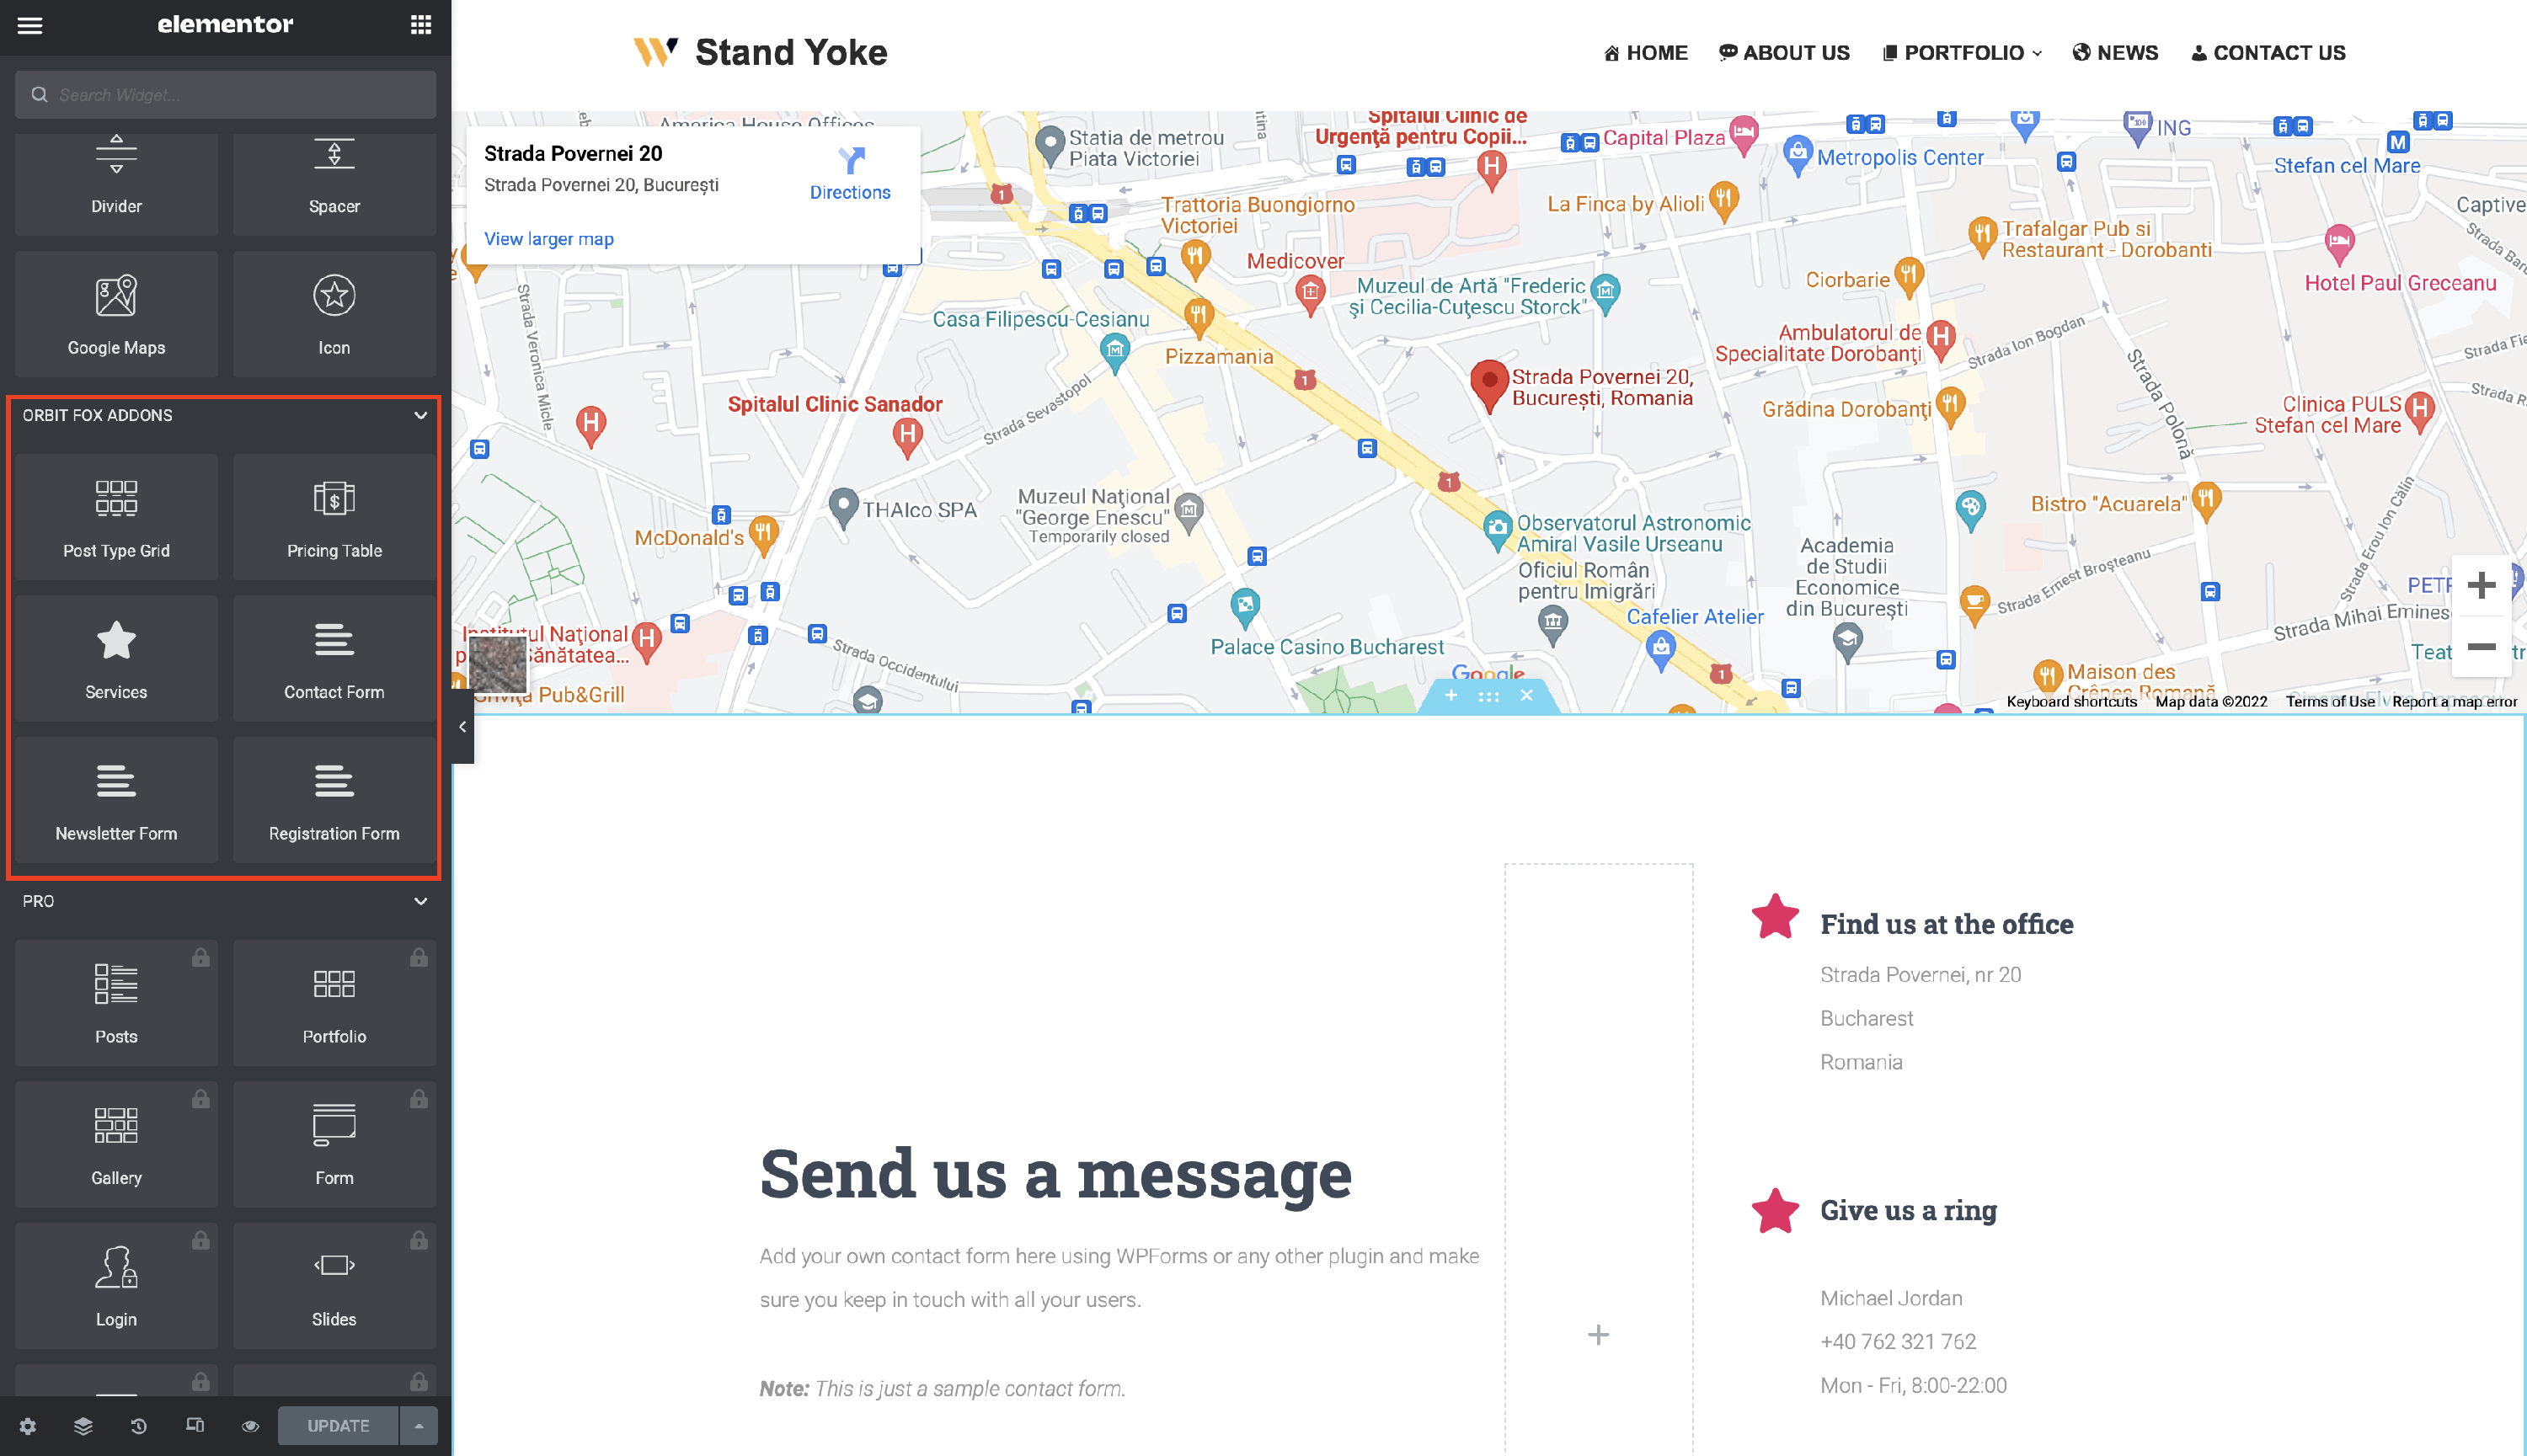
4. Page Builder Widgets
Adds six new widgets to Elementor and Beaver Builder: Services, Post Type Grid, Pricing Table, Newsletter Form, Registration Form, and Contact Form.
📝 Note: This module requires either Elementor or Beaver Builder to be installed and activated.
📚 For more information, see the full documentation for this module.
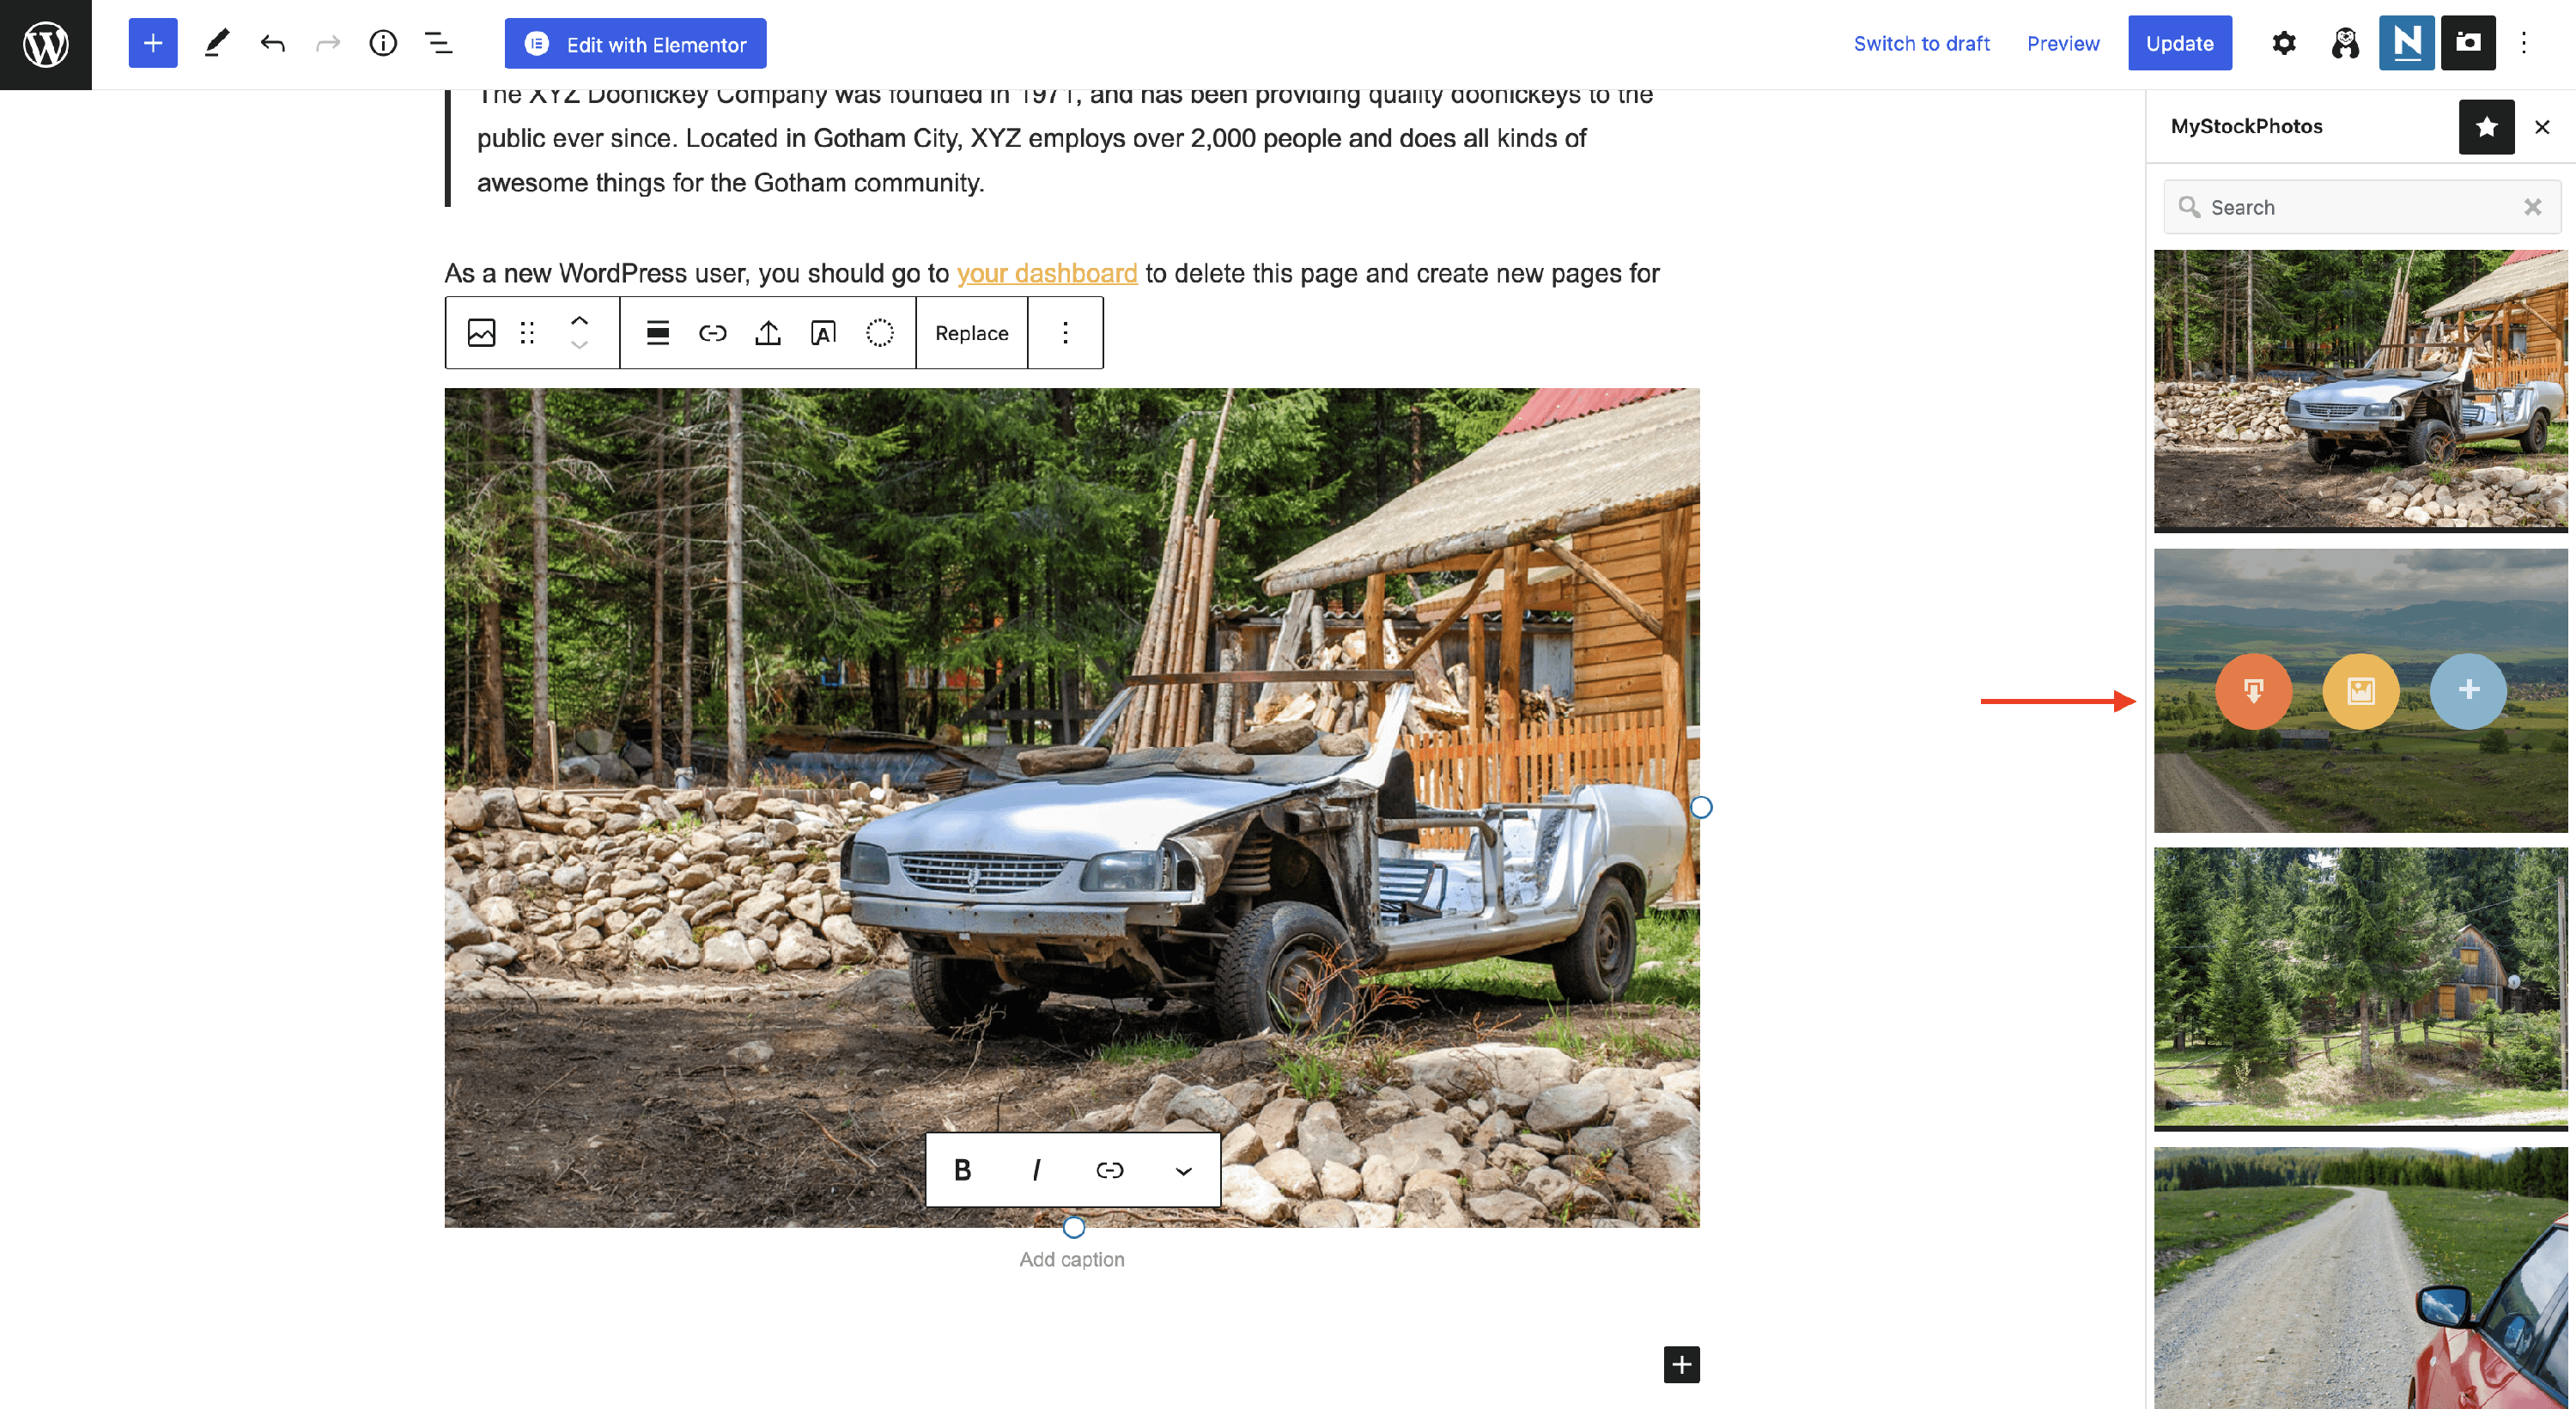
5. Free Stock Photos
Using this module, you can import over 1,300 images from MyStock directly into your posts and pages. All images are licensed under CC0 license which means that there's no attribution required and you can use them for both personal and commercial purposes.
📚 For more information, see the full documentation for this module.
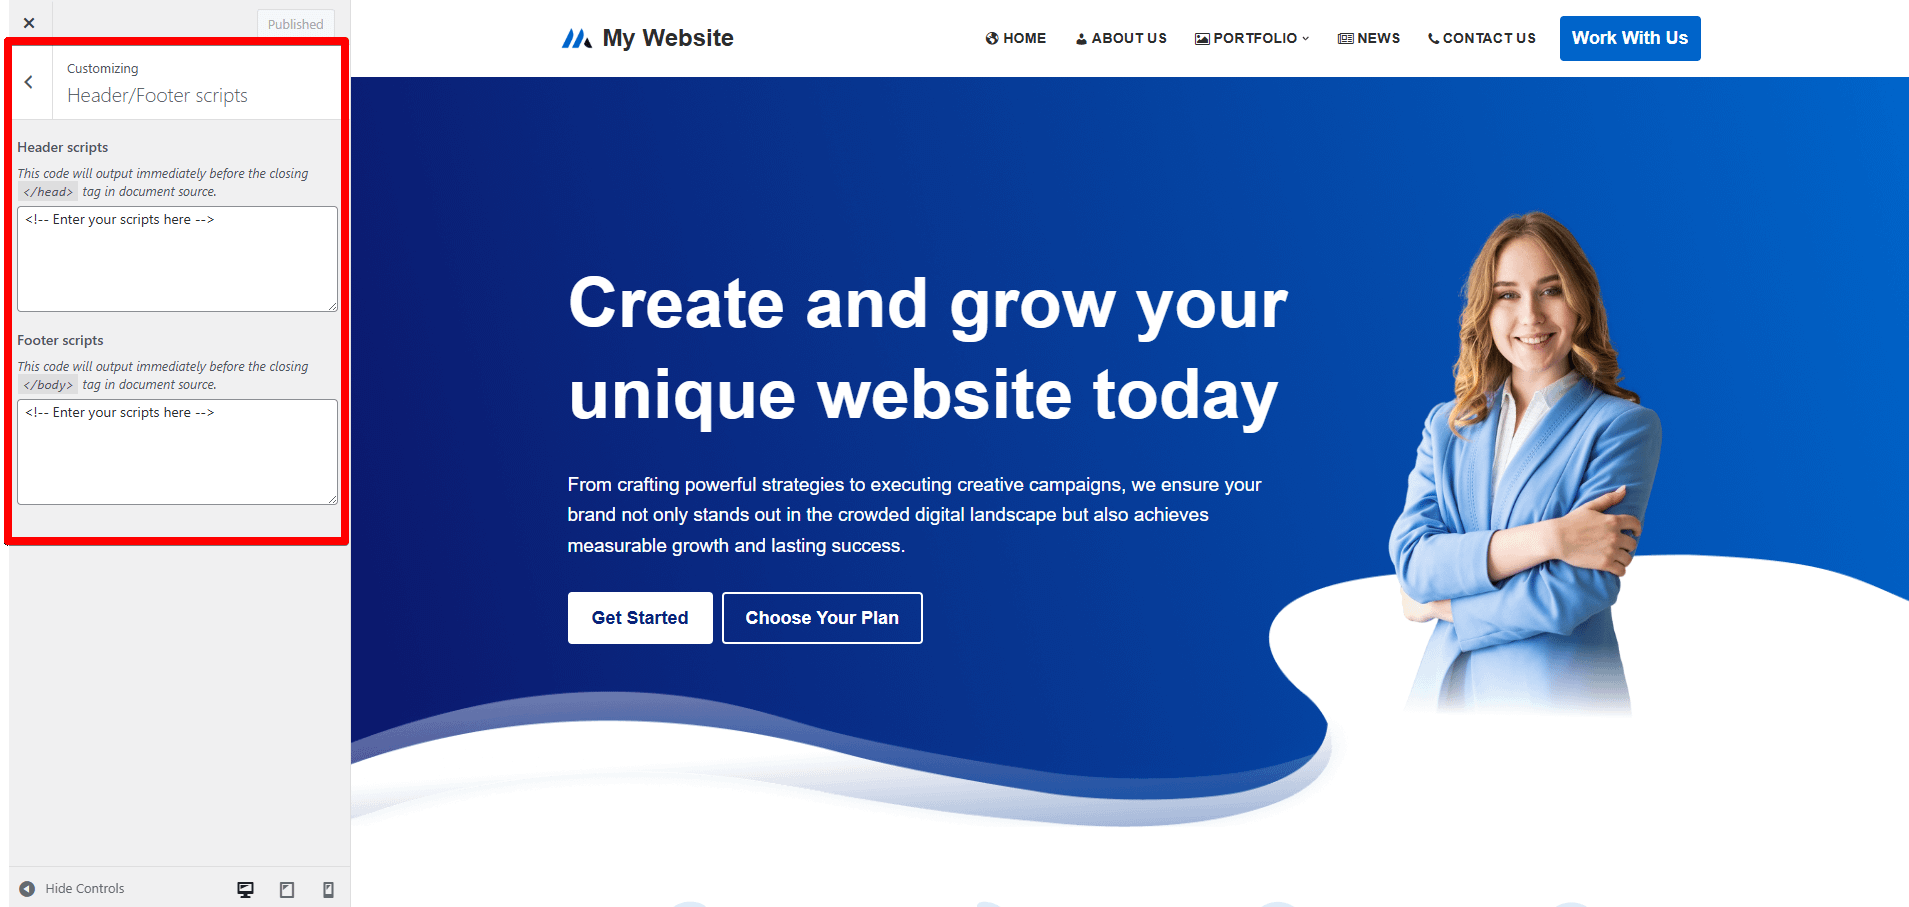
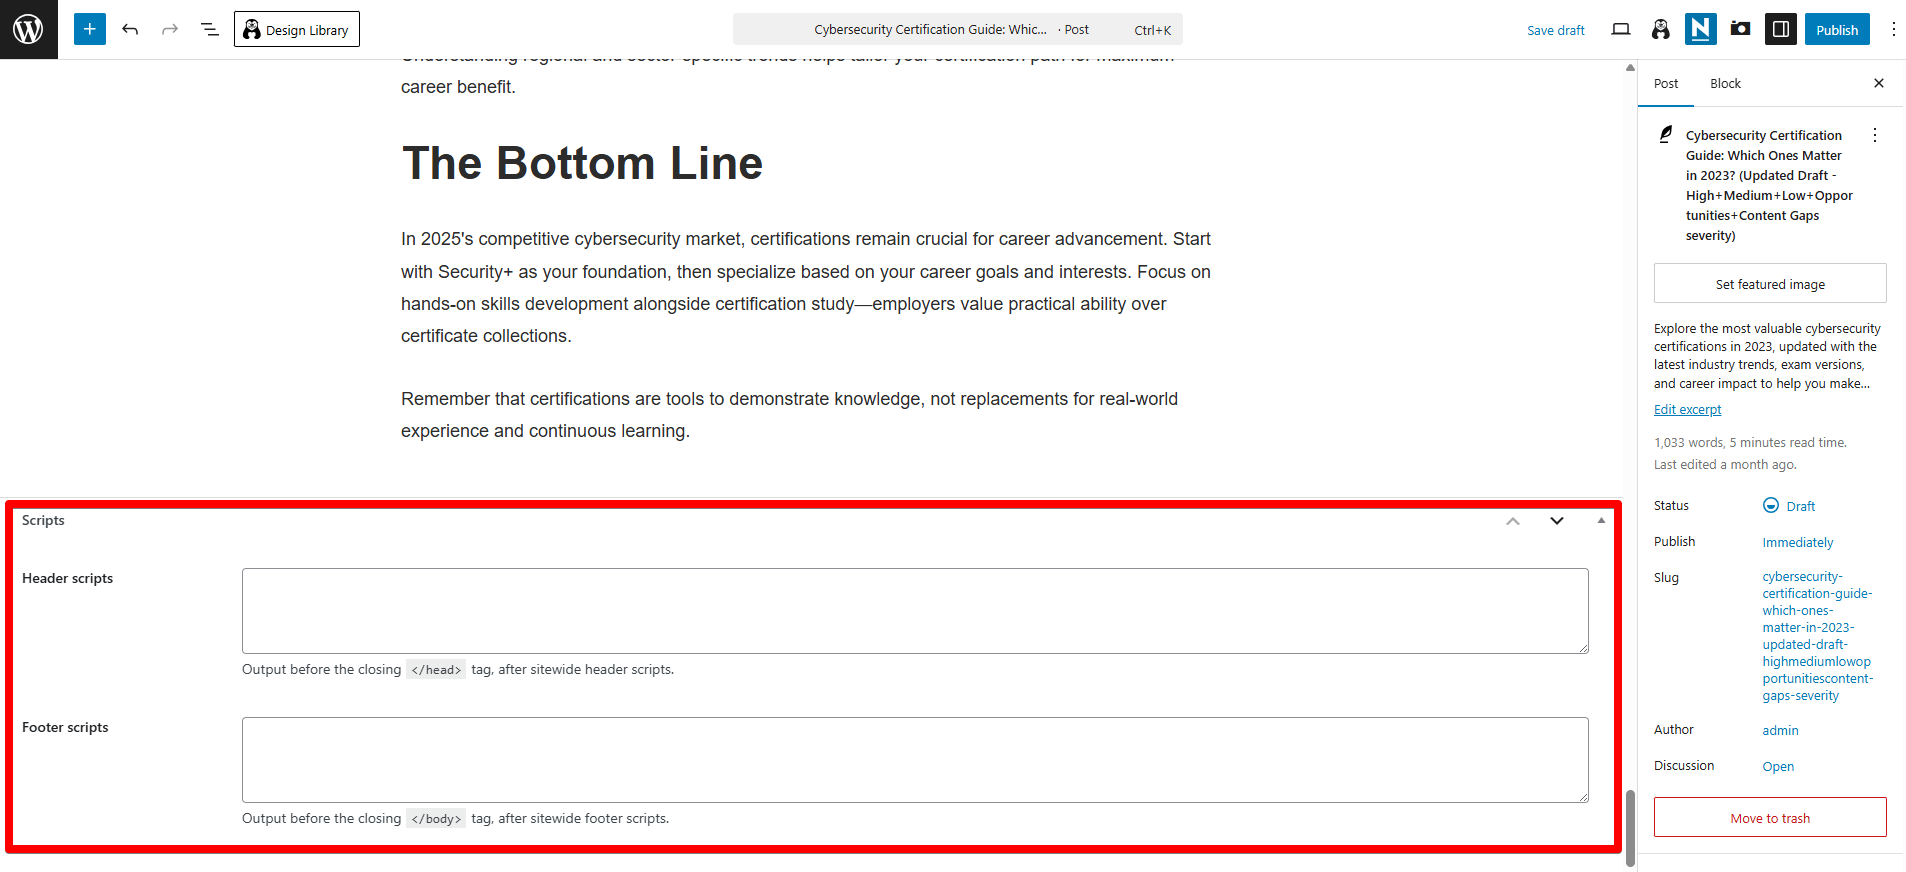
6. Header & Footer Scripts
This module allows you to add scripts to the header or footer tags without installing a dedicated plugin or creating a child theme. There are two types of header & footer scripts:
- Global scripts that will execute on every page of your website. These are managed through WordPress Customizer and apply site-wide.
- Individual scripts that will load on specific posts or pages only. You can configure these directly in the post/page editor.
📚 For more information, see the full documentation for this module.
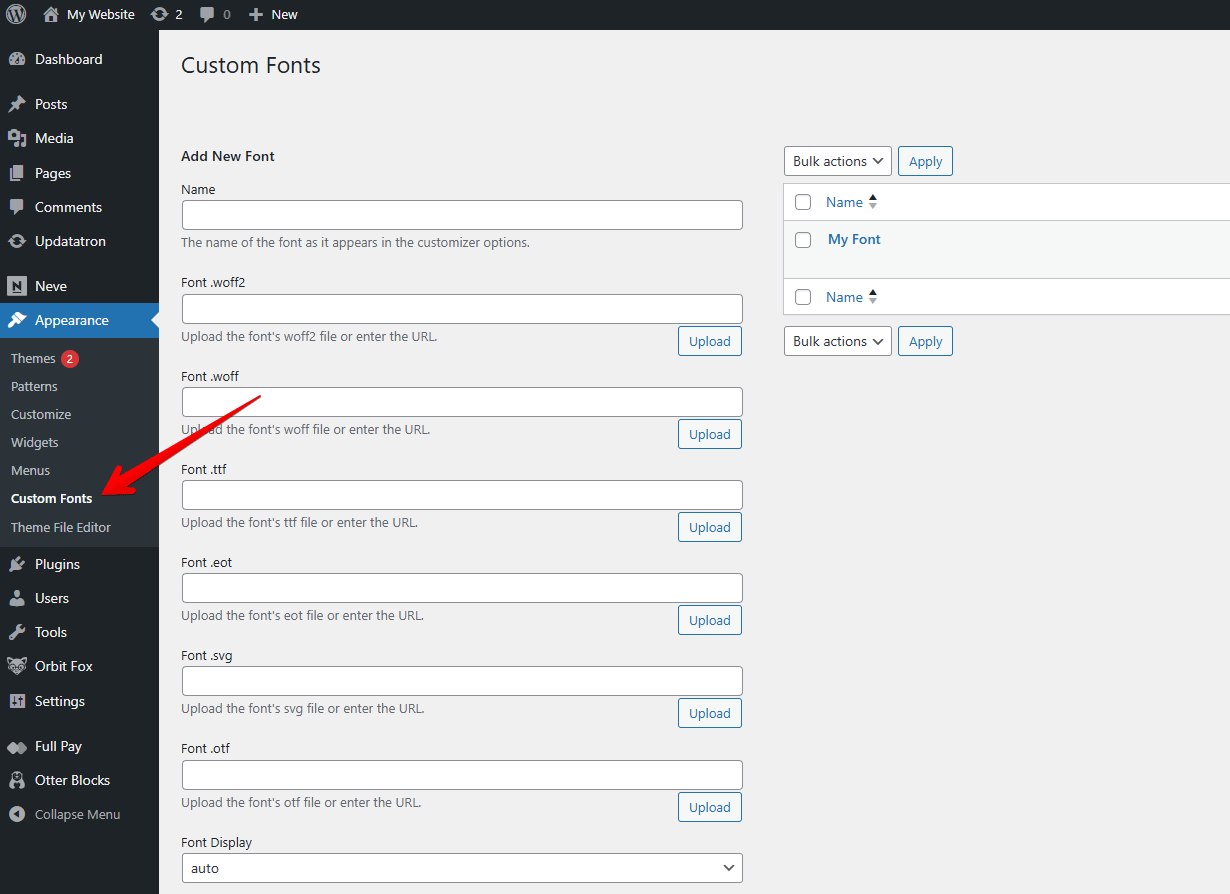
7. Custom Fonts
Upload and use any custom font on your website. Upload your font files by going to Appearance → Custom Fonts, and they'll become available in your Customizer settings for use throughout your site.
📚 For more information, see the full documentation for this module.
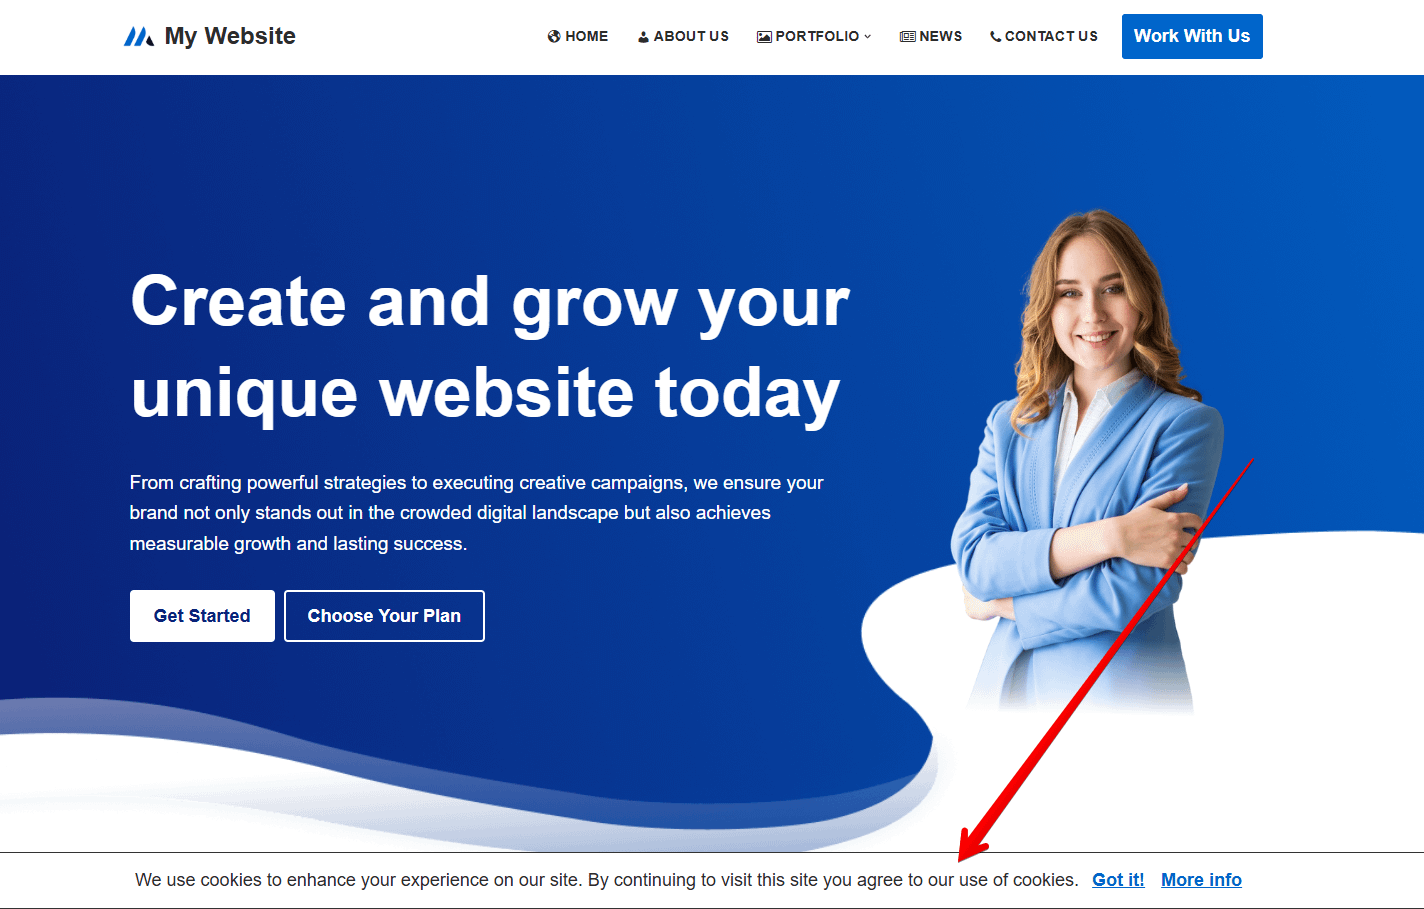
8. Cookie Notice
Add a simple cookie notice bar to your website. Configure the text and links directly in the General Settings dashboard.
📚 For more information, see the full documentation for this module.
9. SVG Support
Enable SVG file uploads and media library support. By default, WordPress doesn't allow uploading SVG files for security reasons. This module safely enables SVG support with proper sanitization.
⚠️ Important: Only enable this if you trust all users who can upload files to your site. SVG files can contain malicious code if not properly sanitized.
How to enable
- Go to Orbit Fox → General Settings.
- Toggle SVG Support on.
- Upload SVGs from Media → Add New like any other image.
What it does
- Allows uploading and previewing
.svgfiles in the Media Library. - Sanitizes SVG markup on upload to reduce security risks.
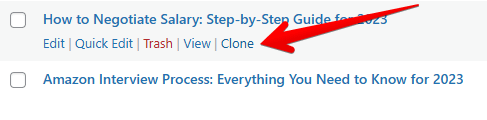
10. Post Duplicator
Adds a Clone action to posts and pages in the WordPress admin list. It creates a new draft that copies the original’s content and most settings—handy for reusing complex layouts without rebuilding from scratch.
How to enable
- Go to Orbit Fox → General Settings.
- Toggle Post Duplicator on.
How to use
- Open Posts → All Posts (or Pages, Any Custom Post Types).
- Hover an item and click Clone.
- A new draft is created—update the title/slug and make any edits before publishing.
Good to know
- The original post/page isn’t changed; the copy is a separate draft.
- After cloning, review SEO fields and internal links so the duplicate doesn’t compete with the original.
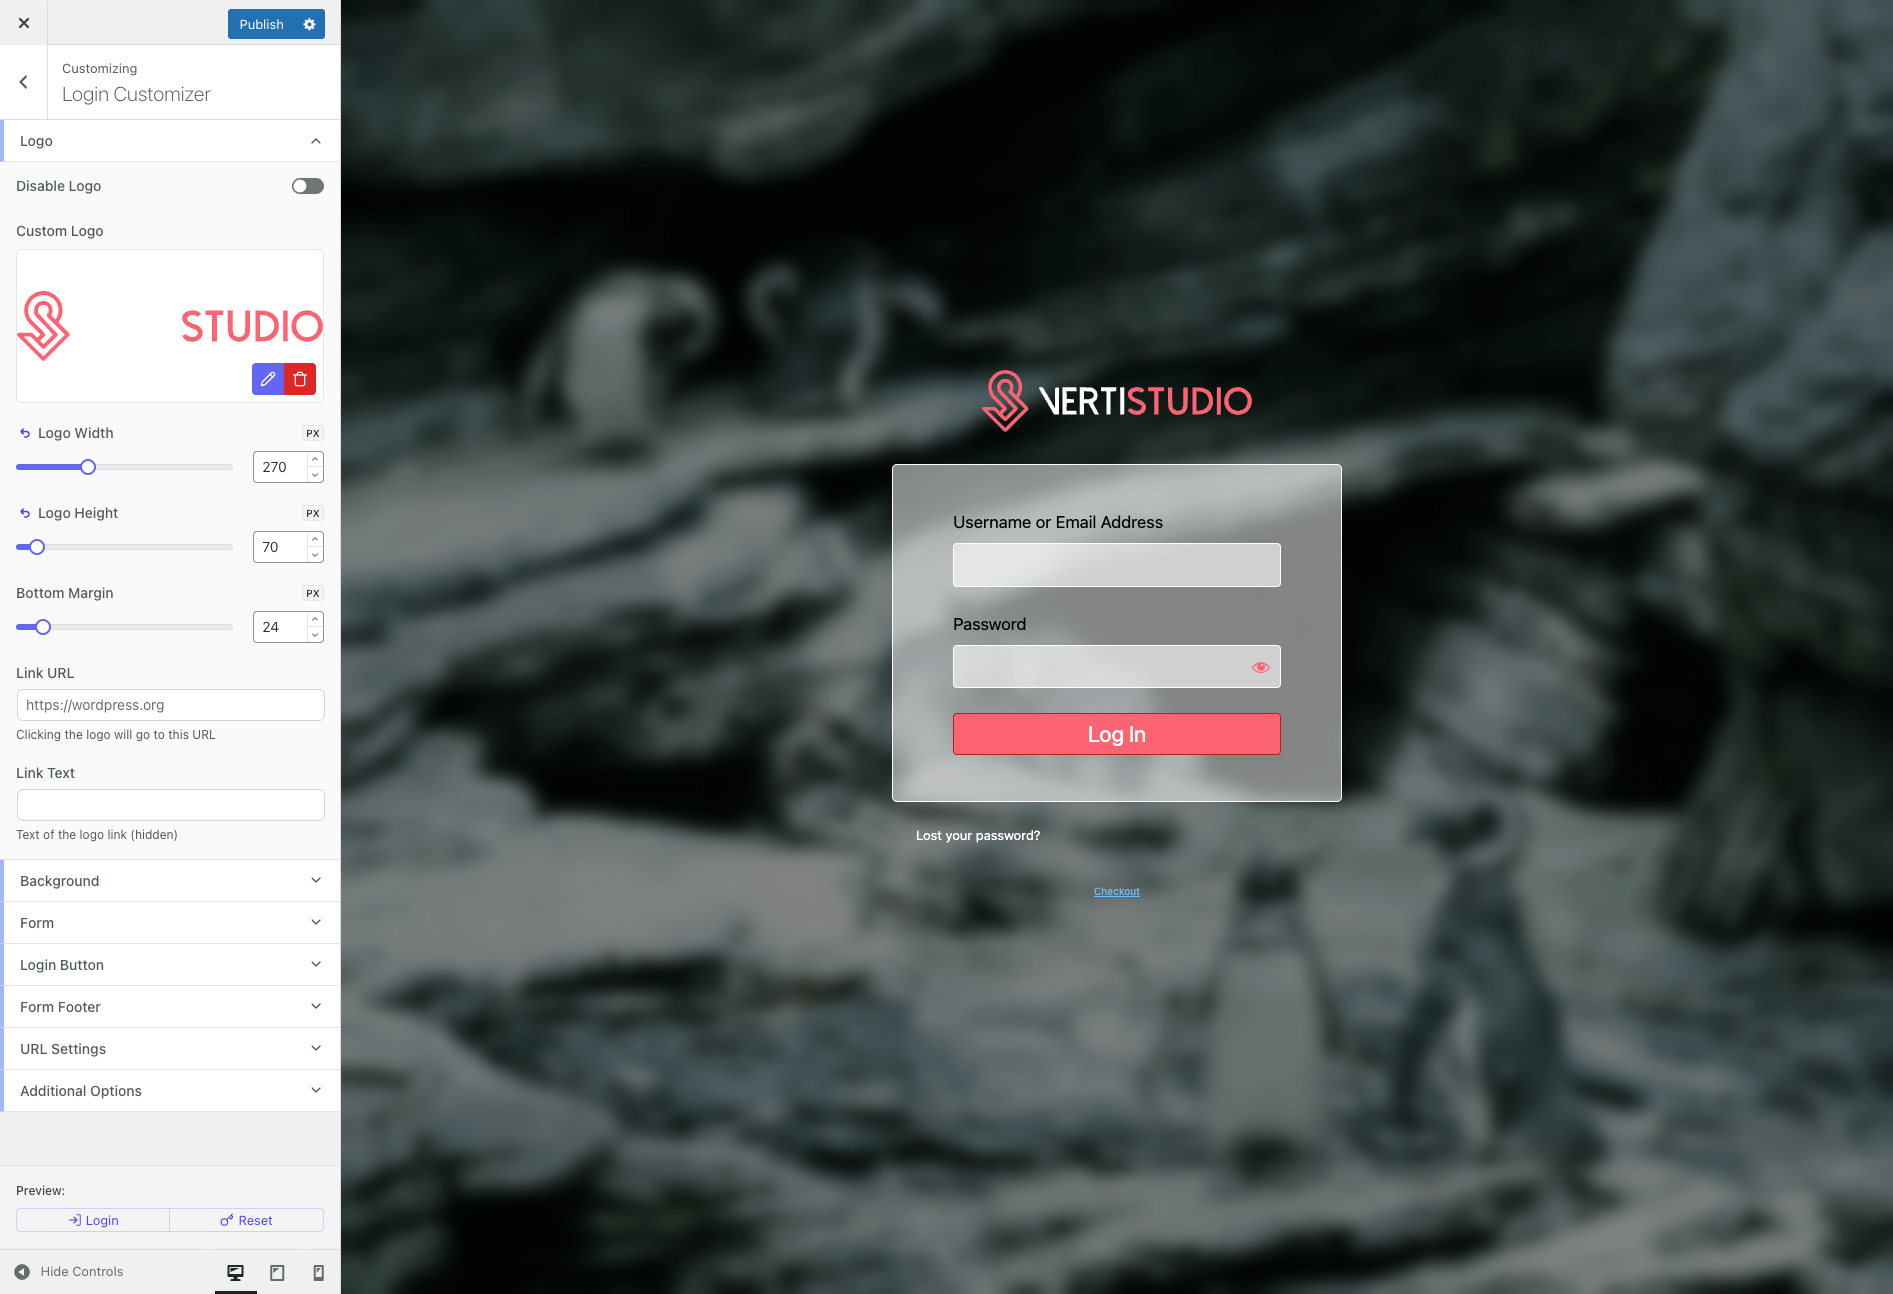
11. Login Page Customizer
Customize your WordPress login page with an easy, live-preview interface. Change the logo, colors, background, and layout — and optionally set a custom login URL.
How to enable
- Go to Orbit Fox → General Settings.
- Toggle Login Page Customizer on.
- Click Customize Login Page to open the live preview in Customizer.
What you can change
- Logo: upload your own, set size and link, hide the WP logo.
- Background: color or image with overlay/opacity controls.
- Form panel: width, padding, border radius, shadow, background/opacity.
- Colors & text: labels, inputs, links, and buttons (normal/hover).
- Footer & links: show/hide Remember me, Lost password, Back to site; toggle the language switcher (useful on multilingual sites).
- Login URL (optional): replace
/wp-login.phpwith a custom slug (e.g.,/signin).
Good to know
- Enable registration on your test site to preview the Register form.
- There are no responsive-specific controls; the core login page has limited mobile variations.
- If you change the login URL, bookmark it and keep admin access. If locked out, disable the module via FTP/WP-CLI to restore
/wp-login.php. - Rate-limiting/brute-force protection isn’t included—use a security plugin for that.
Result - how it appears on the Customizer
12. Disable Comments
A one‑click global kill switch for comments across your site.
What it does
- Closes comments on all existing posts and pages immediately (no bulk editing needed).
- Removes comment UIs in the dashboard, including the Comments admin screen and Discussion settings page, to simplify the admin for sites that don’t use comments.
- Hides everything on the front‑end: no comment form, no existing comments, and the Latest Comments widget won’t be available.
- Blocks & shortcodes related to comments can no longer be inserted; if they already exist in content, they remain in the editor but won’t render on the front‑end.
How to enable
- Go to Orbit Fox → General Settings.
- Toggle Disable Comments on.
Good to know
- Turning the module off restores the default WordPress behavior; existing comment data is not deleted.
- Theme templates for comments are bypassed while the module is active.
13. Reading Progress Bar
Display a progress indicator as readers scroll your content—great for long posts and guides.
How to enable
- Go to Orbit Fox → General Settings.
- Toggle Reading Progress Bar on.
- Click the module card to configure.
Settings
- Position: show the bar at the Top, Bottom, Right or Left of the page.
- Post types: choose where it appears (e.g., Posts, Pages, or custom types).
- Color: pick the bar color.
- Size: set the bar thickness in pixels.
- Show on mobile: optionally disable the bar on small screens.

Good to know
- The bar reflects progress through the page’s main content area; very short pages may show as complete quickly.
- If your layout loads content dynamically (infinite/lazy load), the bar updates as the page height changes.
Screenshot
- Module settings UI and a frontend example of the bar:
💌 SUPPORT
Whether you have questions or need assistance with Orbit Fox, we'd love to hear from you. You can get in touch with us in our community-based forum, where you can learn new things and share ideas with other users.