Custom fonts - Orbit Fox module
📝 Note: This module is part of the Orbit Fox plugin. For more information about the plugin, please check the main documentation.
Upload and use any custom font on your website. Once uploaded, you can apply these fonts to any text elements throughout your site, giving you complete control over your typography.
In this article
Activating the Module
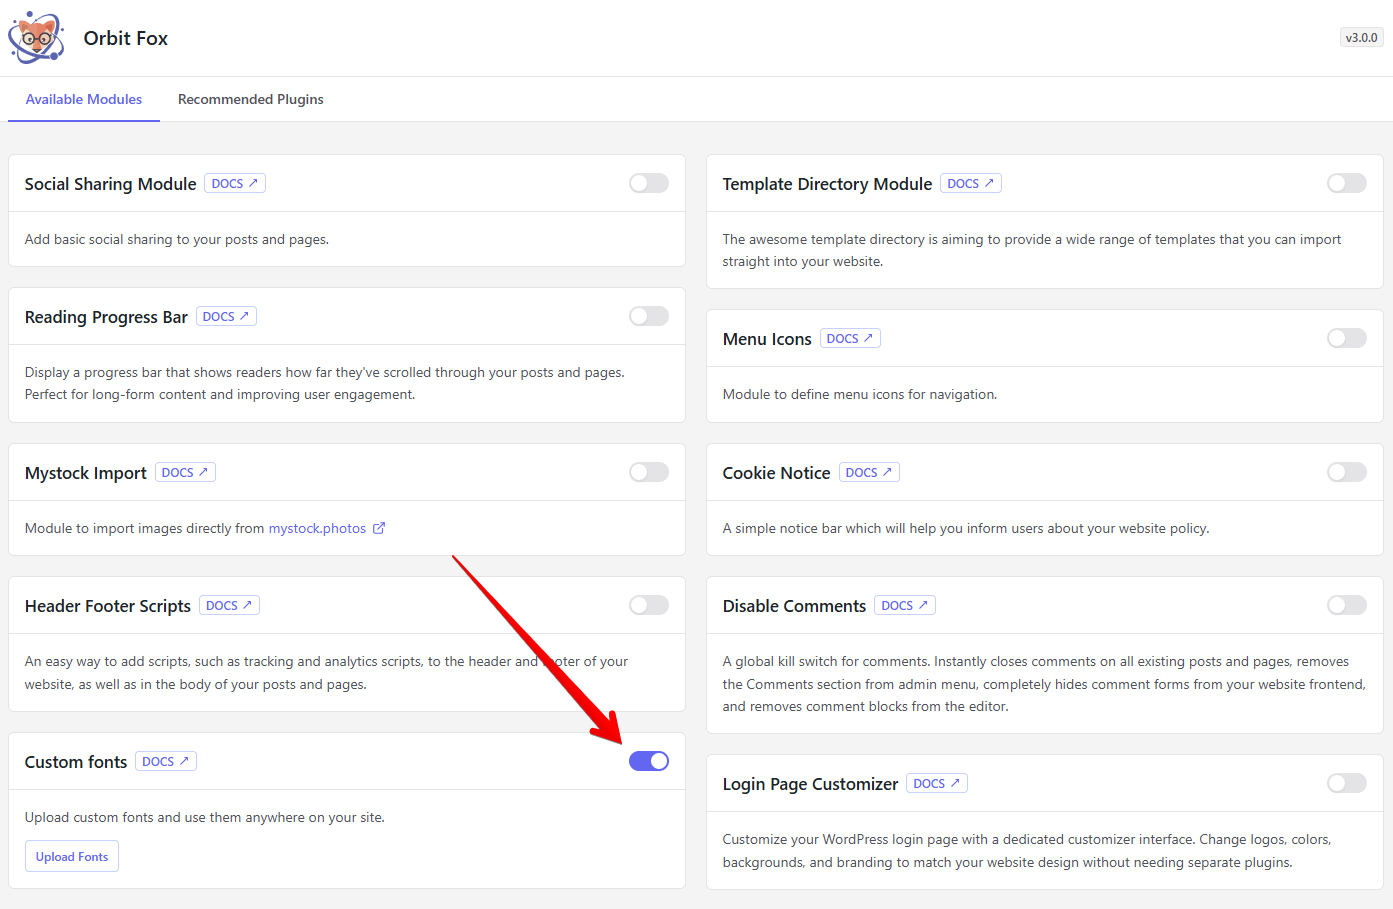
1. Navigate to Orbit Fox > General Settings.
2. Scroll down until you find the Custom Fonts module and enable it.
Using the Module
Step 1: Upload Your Custom Font
- Navigate to Appearance → Custom Fonts in your WordPress dashboard
- Give your font a descriptive name
- Upload your font file
- Select the font display settings
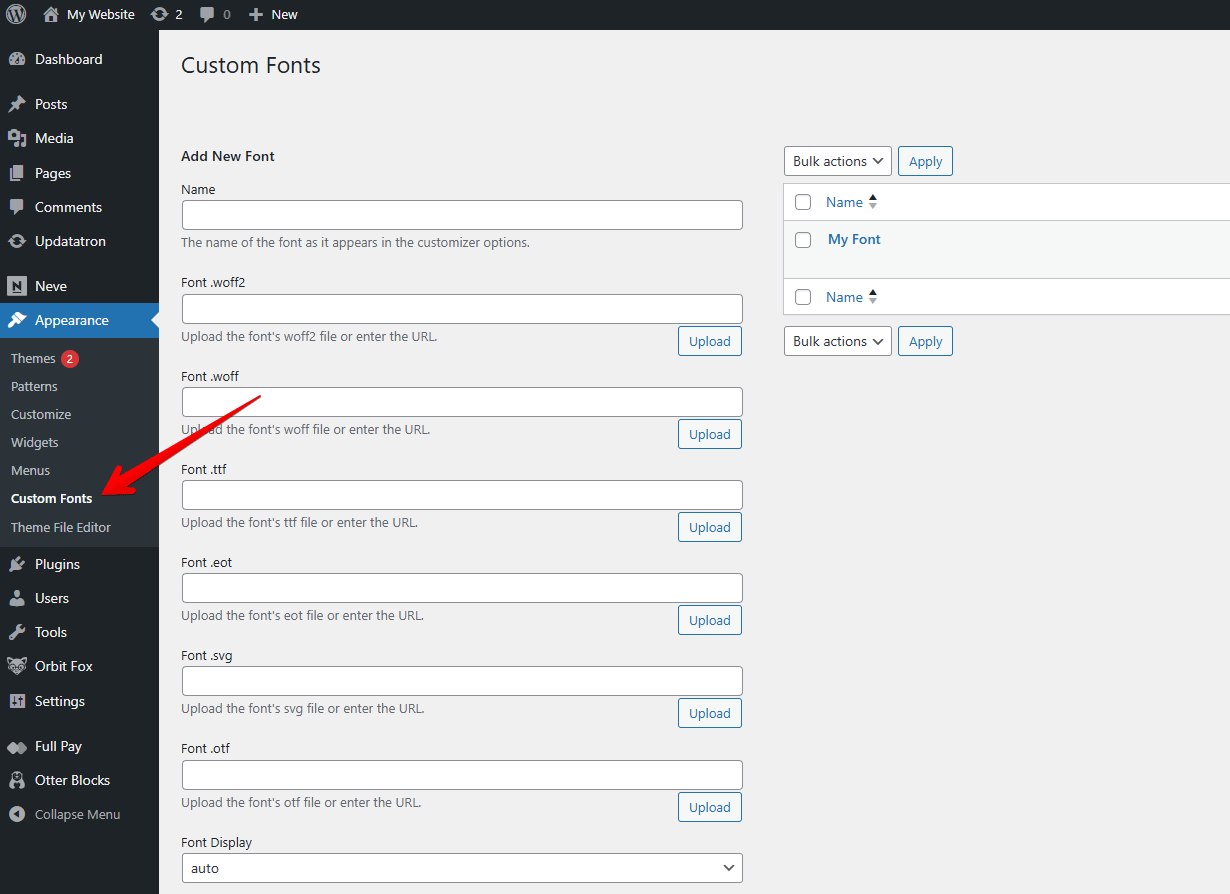
Supported Font File Types
Orbit Fox supports the following font file formats:
- woff2 (recommended for modern browsers)
- woff (widely supported)
- ttf (TrueType fonts)
- svg (scalable vector fonts)
- otf (OpenType fonts)
Step 2: Using Your Custom Font
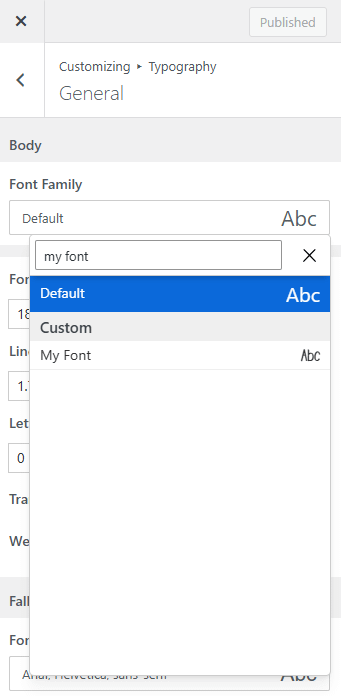
Theme with Custom Font Support
If your theme supports custom fonts, your uploaded font will automatically appear in the typography settings within the Customizer. Simply select it from the font dropdown menu.
🎨 Note: If you need full control over your site's typography (or any other advanced visual aspect of your website), we recommend using the Neve theme. It integrates beautifully with all Orbit Fox modules and will display your custom fonts in its typography options.
Theme Without Custom Font Support
If your theme doesn't have built-in custom font support, you can still use your uploaded fonts by adding custom CSS:
- Go to Appearance → Customize → Additional CSS
- Add CSS rules to apply your custom font to specific elements
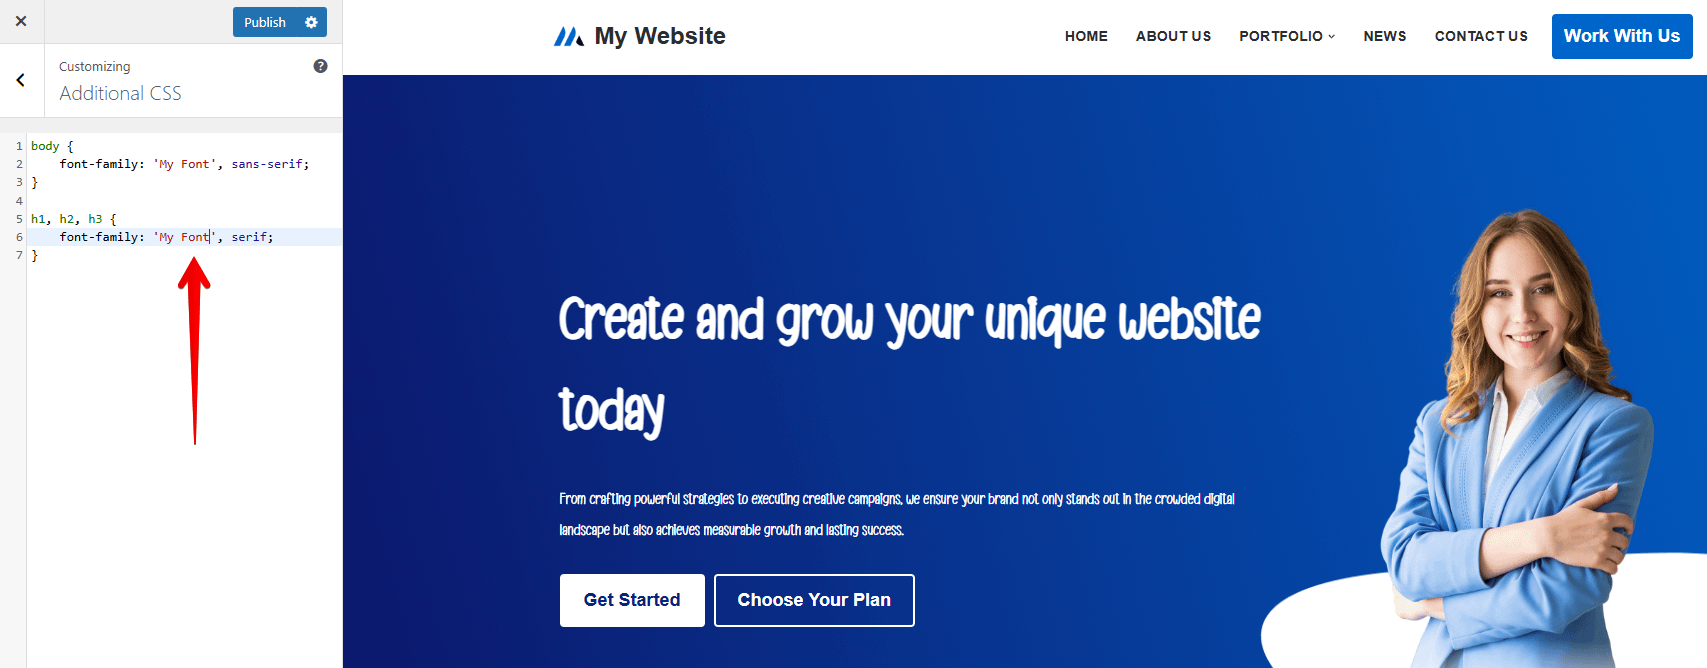
Example CSS:
body {
    font-family: 'Your Custom Font Name', sans-serif;
}

h1, h2, h3 {
    font-family: 'Your Custom Font Name', serif;
}
Replace 'Your Custom Font Name' with the exact name you gave your font when uploading it.