How to show tagline below or beside logo in header?
Neve offers multiple options for positioning the logo and Site Title and Tagline:
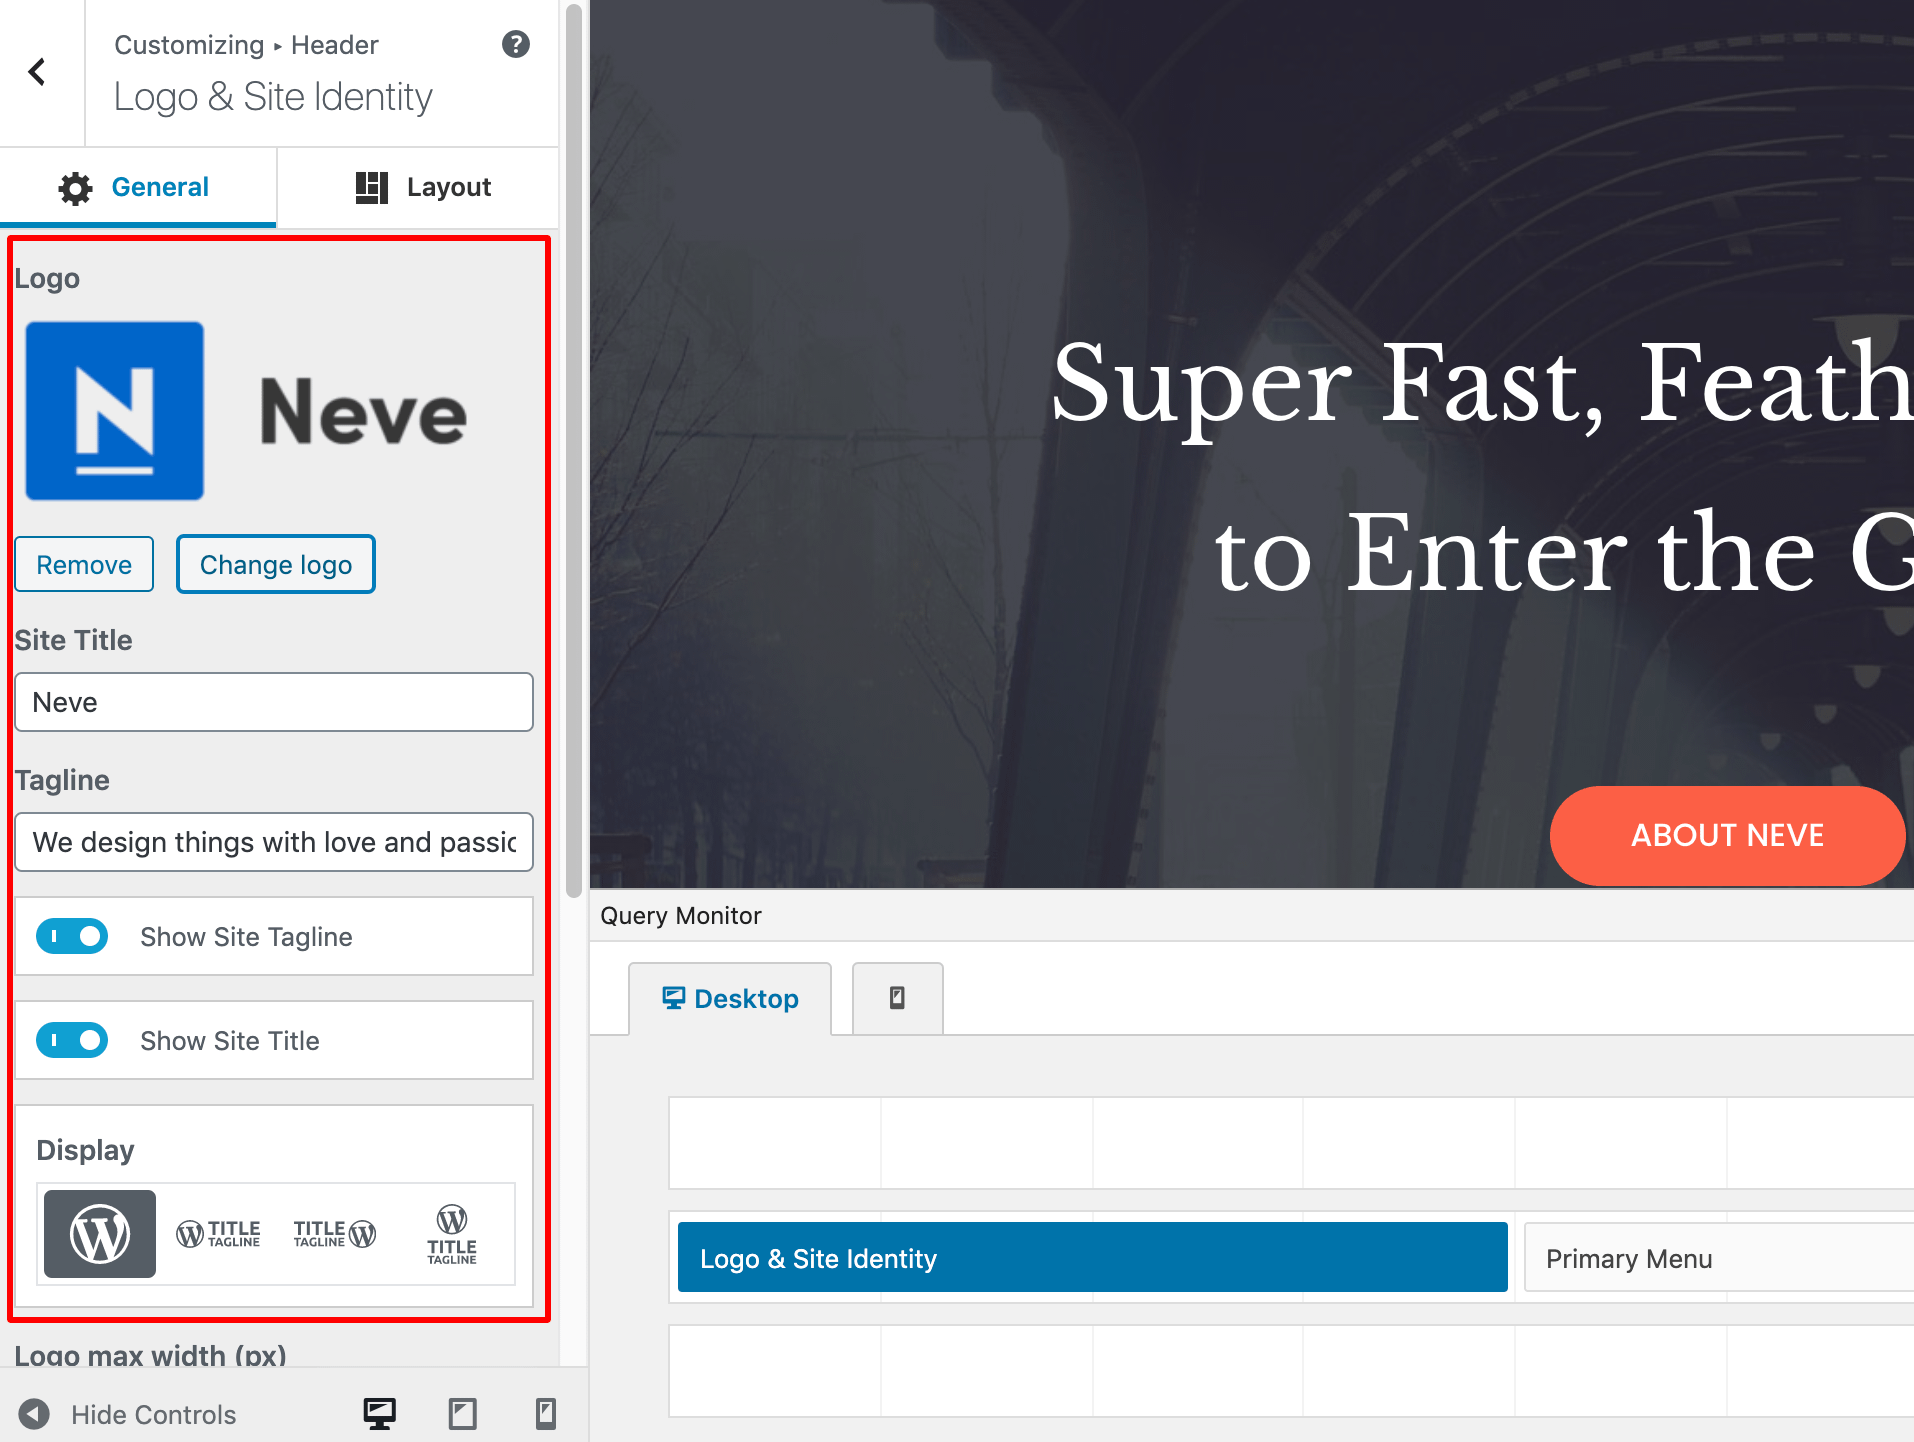
- Just logo
- Logo followed by Site Title & Tagline on the right side
- Logo preceded by Site Title & Tagline in the left side
- Logo with the Site Title & Tagline below the logo
Besides this, both Site Title and Site Tagline can easily be enabled/disabled.
All these options are available in Appearance > Customize > Header > Logo & Site Identity.