How to create a Page Header for the Product Categories using the Custom Layouts Module
📝 Note: The Custom Layouts are part of the Neve PRO Addon's modules. If you would like to learn more about the Neve Pro Addon, take a look at Neve Pro Addon's full documentation.
This article will present step-by-step how to create a page header for the product categories using Custom Layouts. Here is a dedicated doc about the Custom Layouts Module.
🧰Tools needed
- the Neve theme - here is a doc that will help with the installation.
- the Neve PRO Addon - here is a doc that contains instructions regarding purchasing it.
🛠 Creating the Page Header
Before creating the hero section, make sure you have activated the Custom Layouts module. For this, navigate to Neve > Dashboard > Settings > Manage Modules, scroll down until you will find the Custom Layout module and activate it.
1. Navigate to Dashboard > Neve > Custom Layouts.
2. Click on the Add New button to create a custom layout from scratch.
3. From the modal, select the Hooks option and the After Header Hook as type.
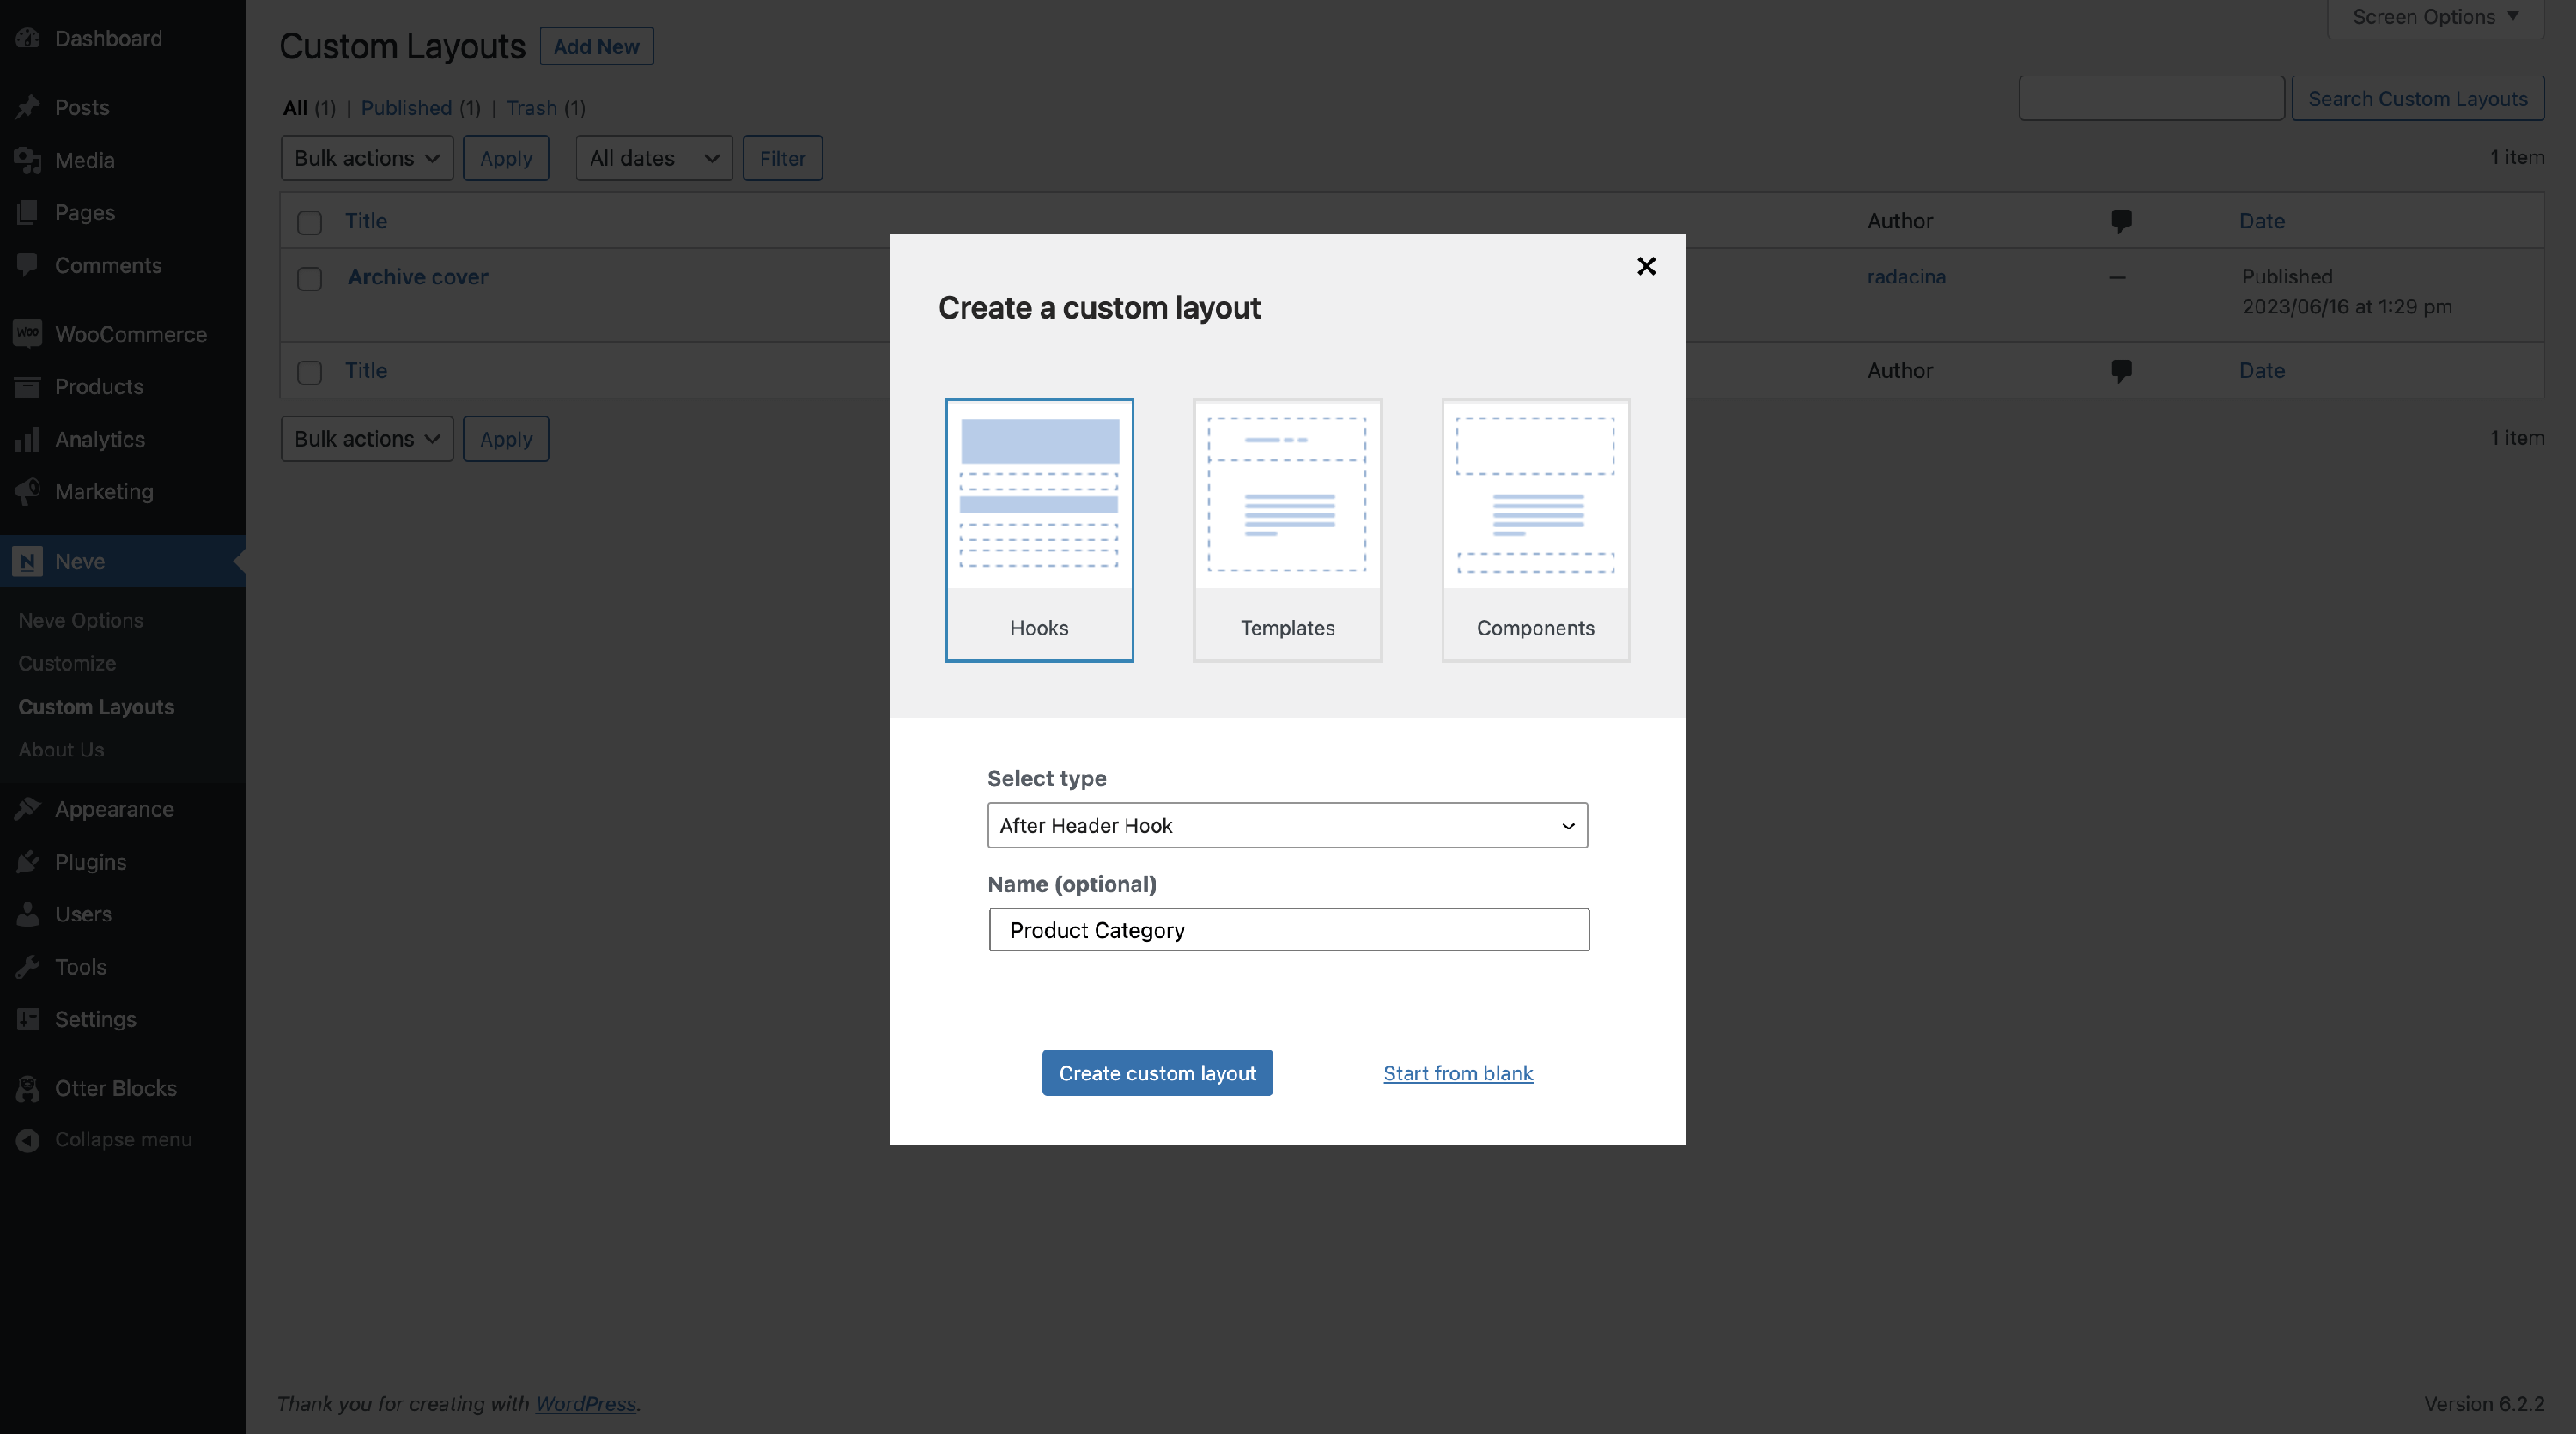
4. Insert a name, then click on the Create custom layout button.
📝 Note: You can see the hooks locations by clicking on the 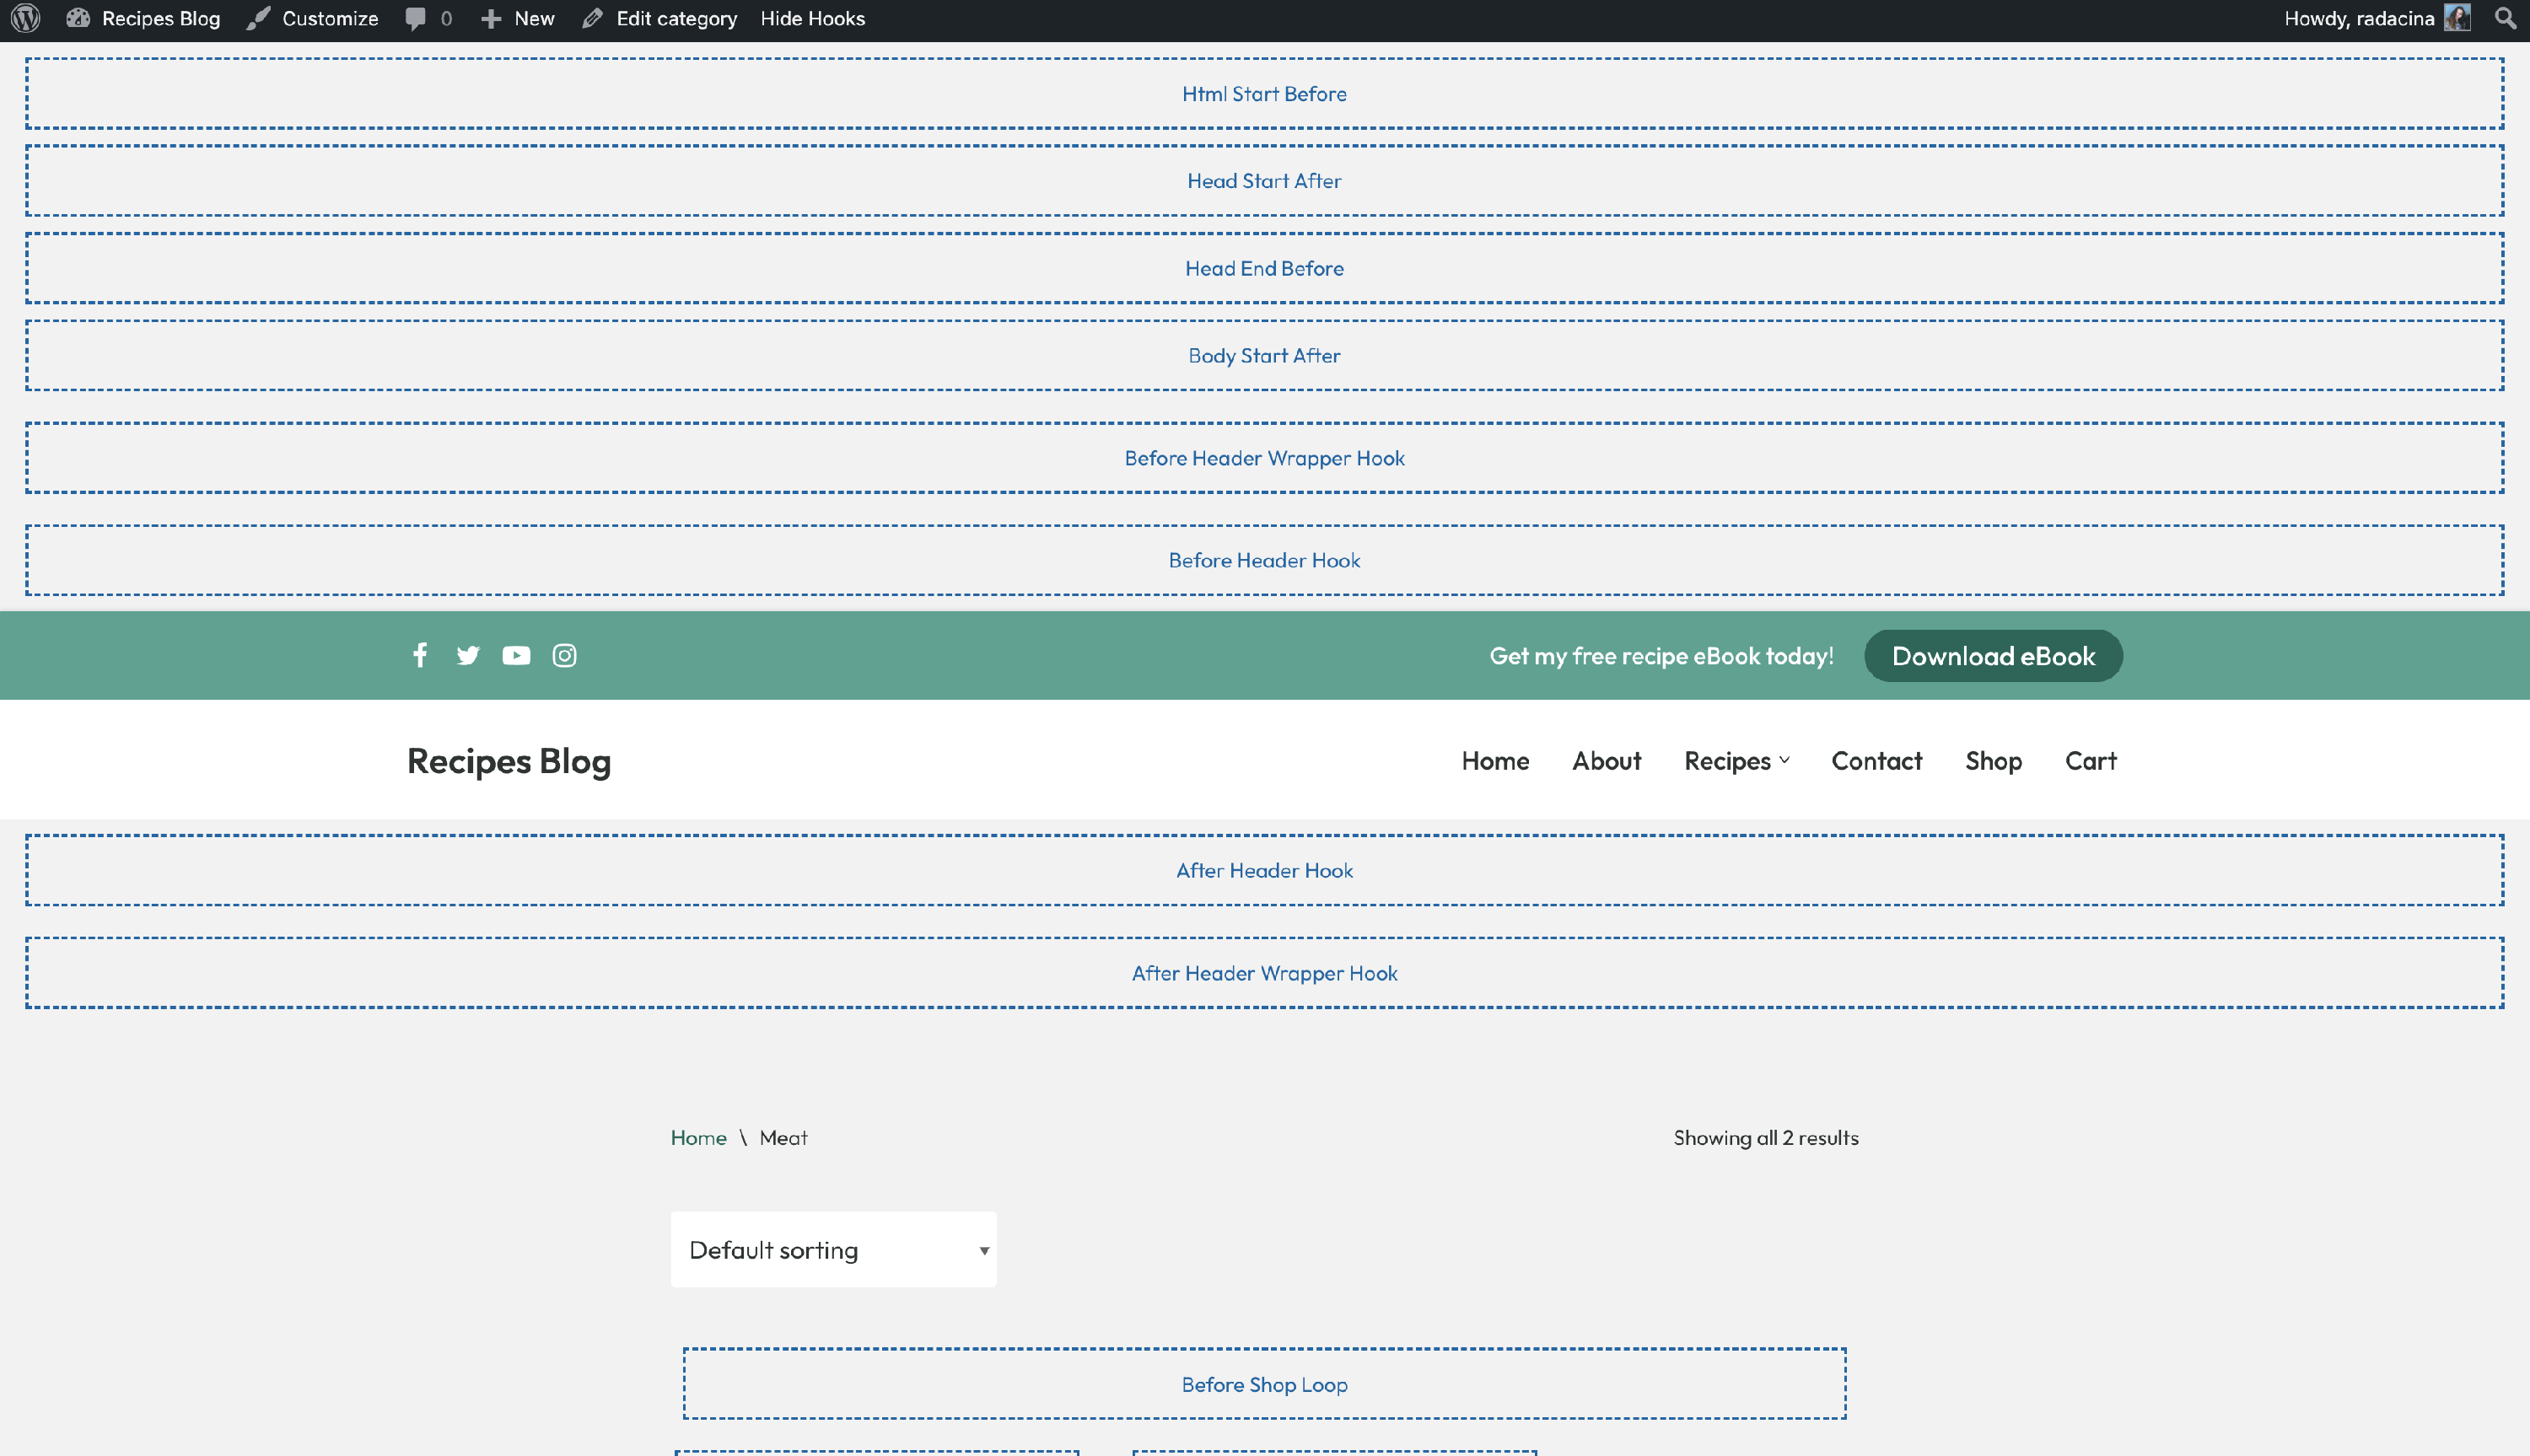 Show Hooks button inside the Customizer, on the black menu from the top.
🚀 Customizing the Custom Layout
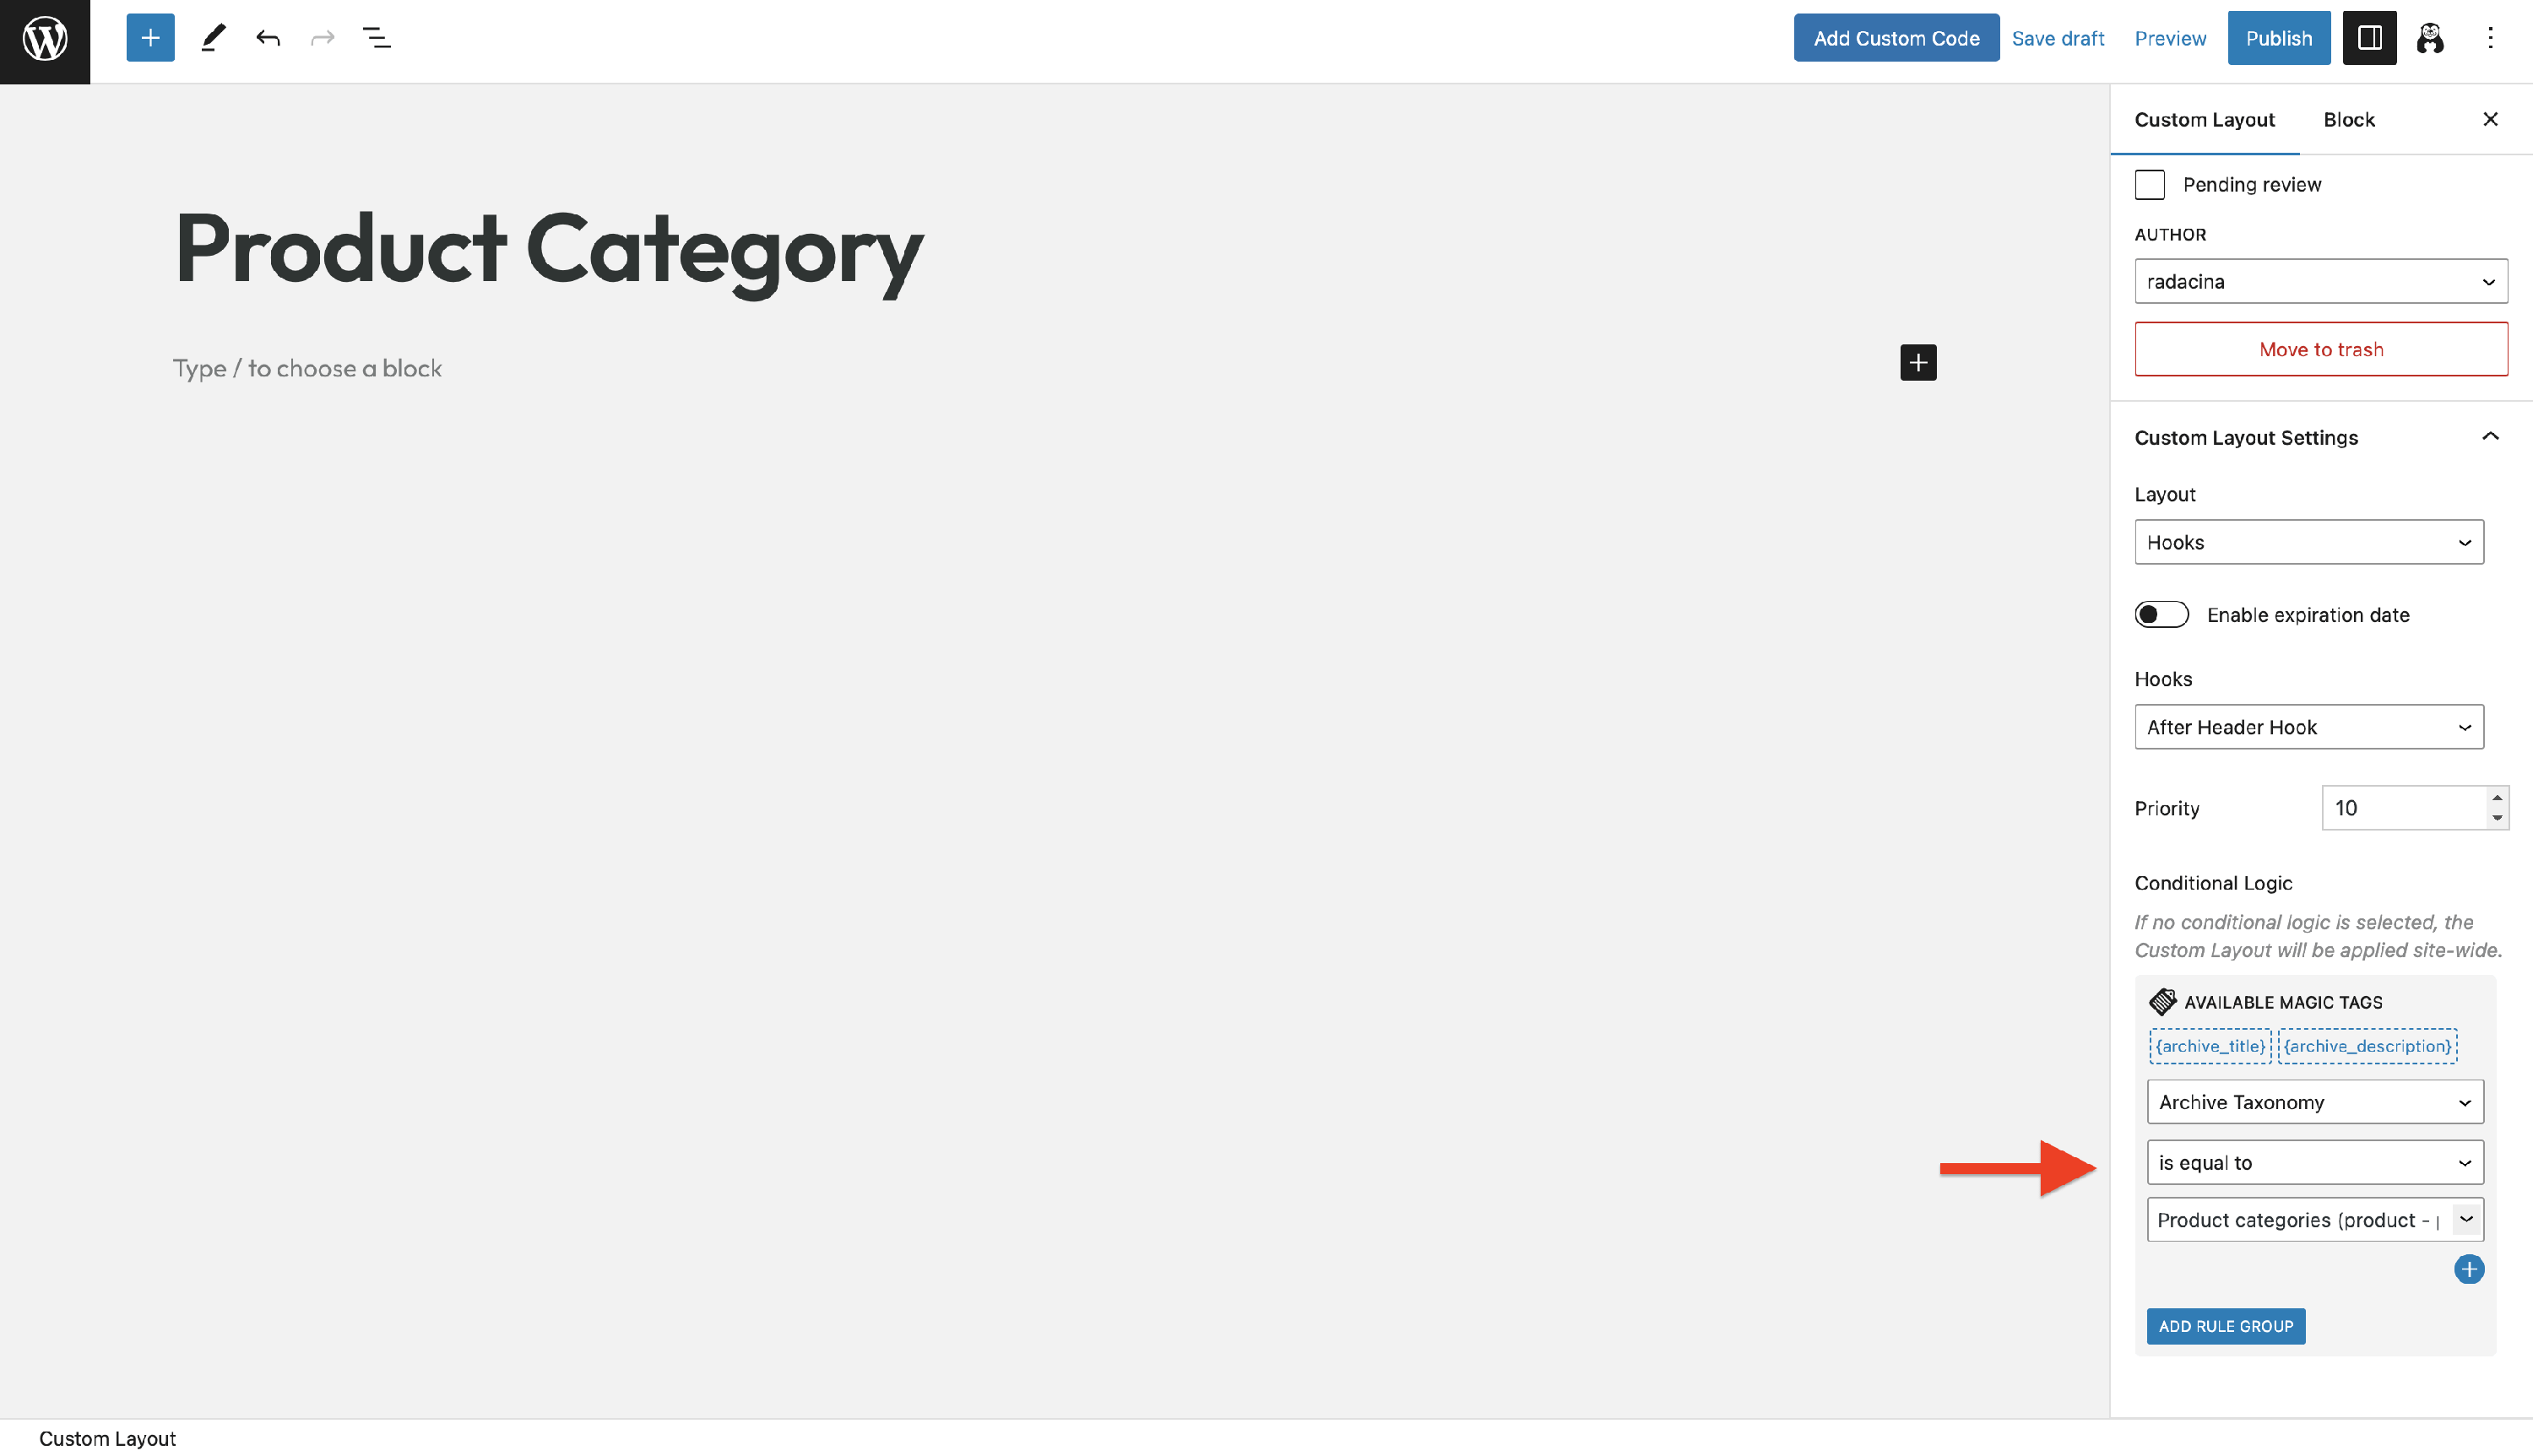
Using the Conditional Logic panel, you can create two types of custom layouts:
| Global custom layout | Individual custom layout |
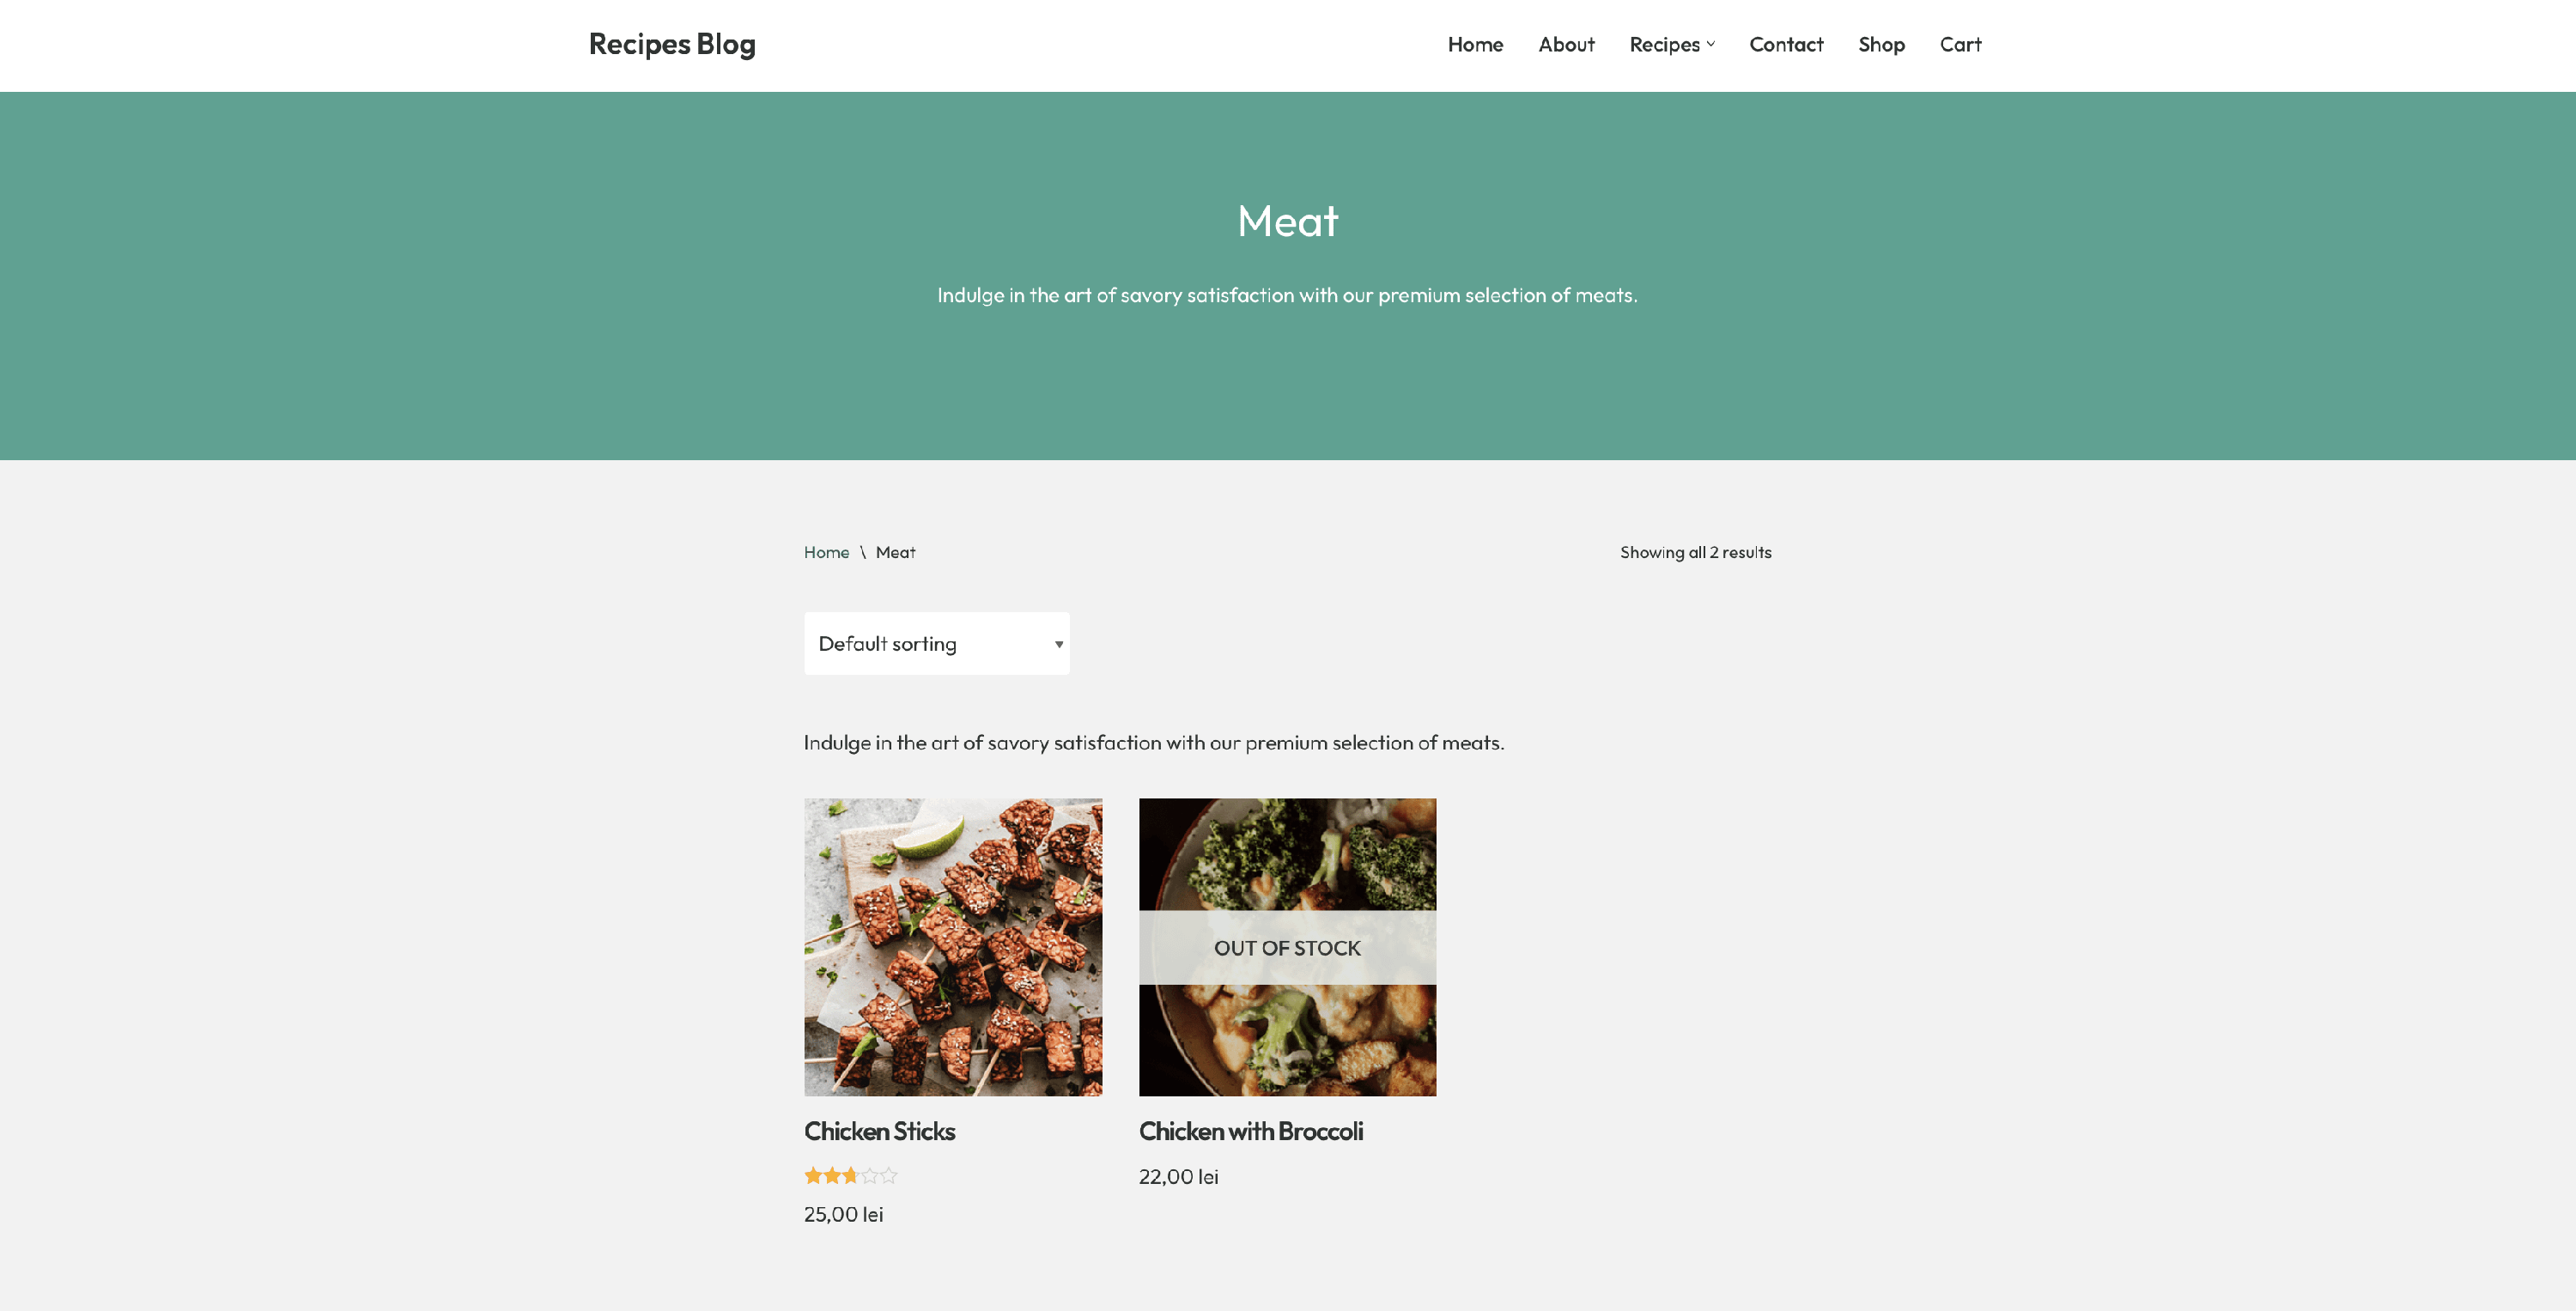
Global custom layout
In this case, it will be Archive Taxonomy is equal to Product categories, which will enable the same Custom Layout across all categories.
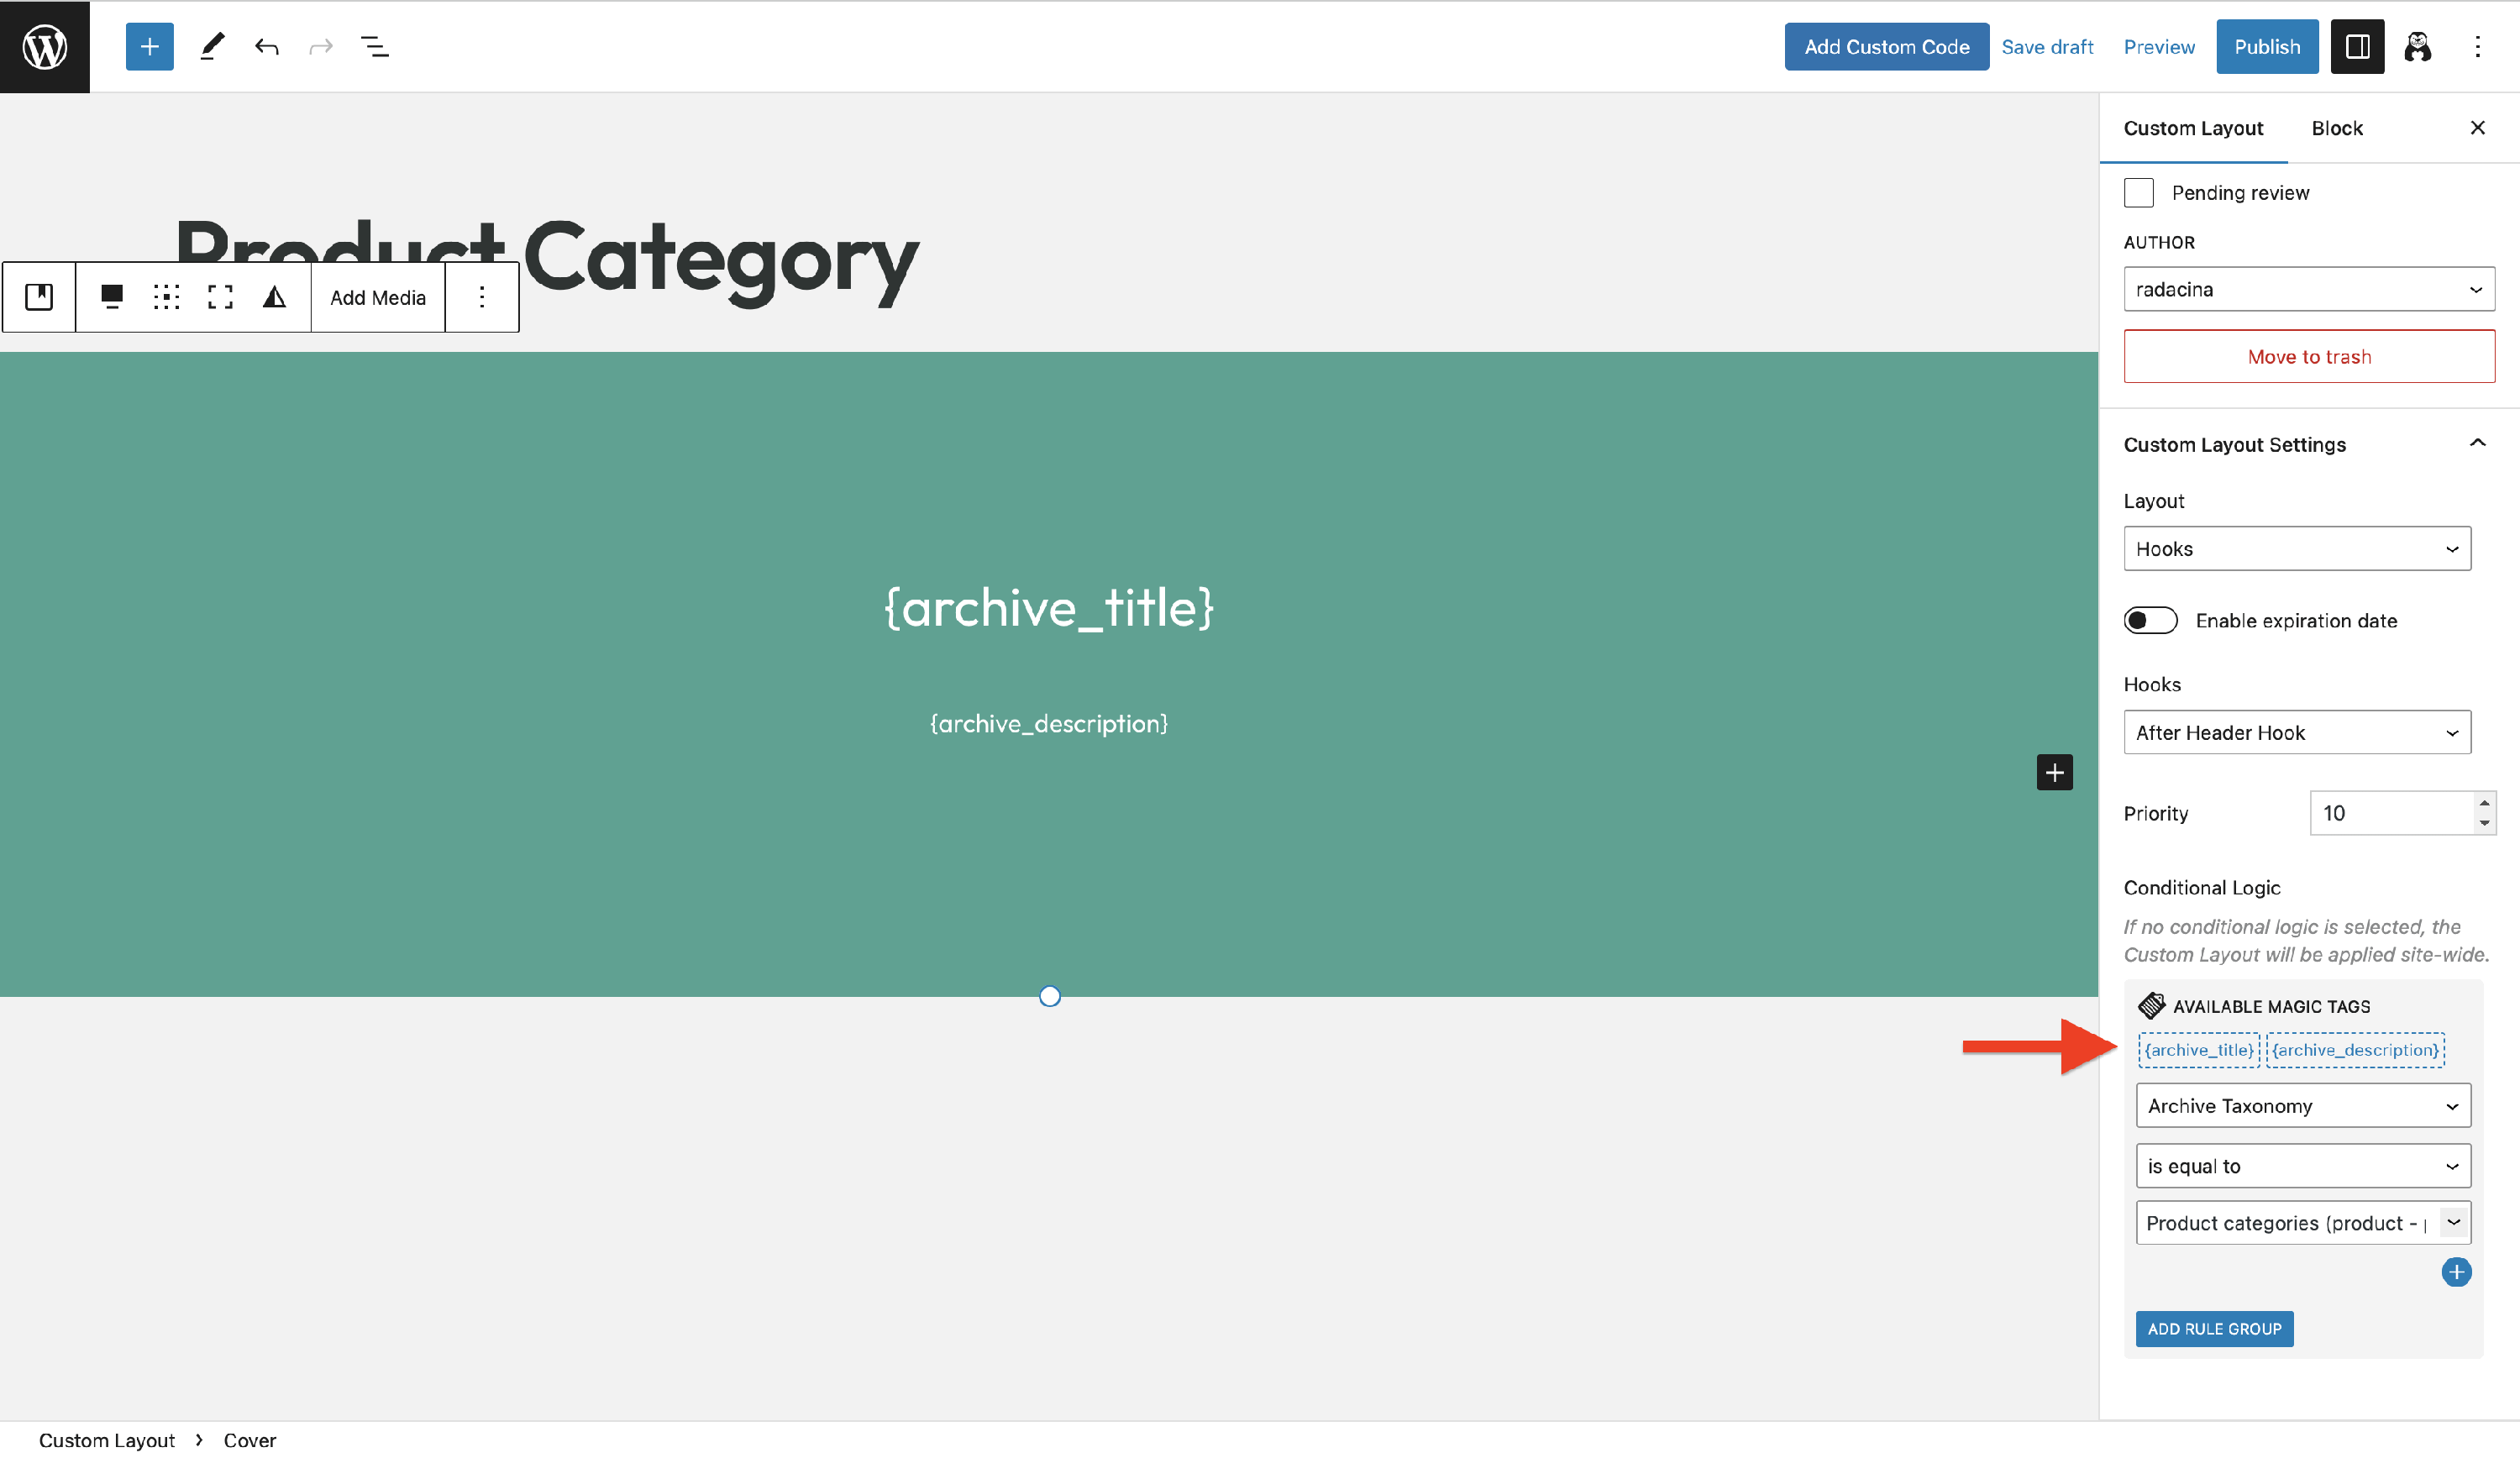
Start editing the page by using any options or blocks you wish. In the following steps, we will present you with our version of the hero section.
1. First, we added the Cover block and selected a color from our website's palette.
2. After this, we used the tools bar to set it to Full Width.
3. To make it suitable for any category, we used the magic tags presented in the Custom Layouts settings. To do that, copy the {archive_title} and the {archive_description}, and paste them into the text field of the photo.
📝 Note: Setting an expiration date is optional, and in case you don't use it, the current layout will be displayed as long as its status is Published, same as for posts.
💡Result
Individual custom layout
In this case, the condition will be Archive Term is equal to Vegetables, which will enable the same Custom Layout on a specific category (vegetables).
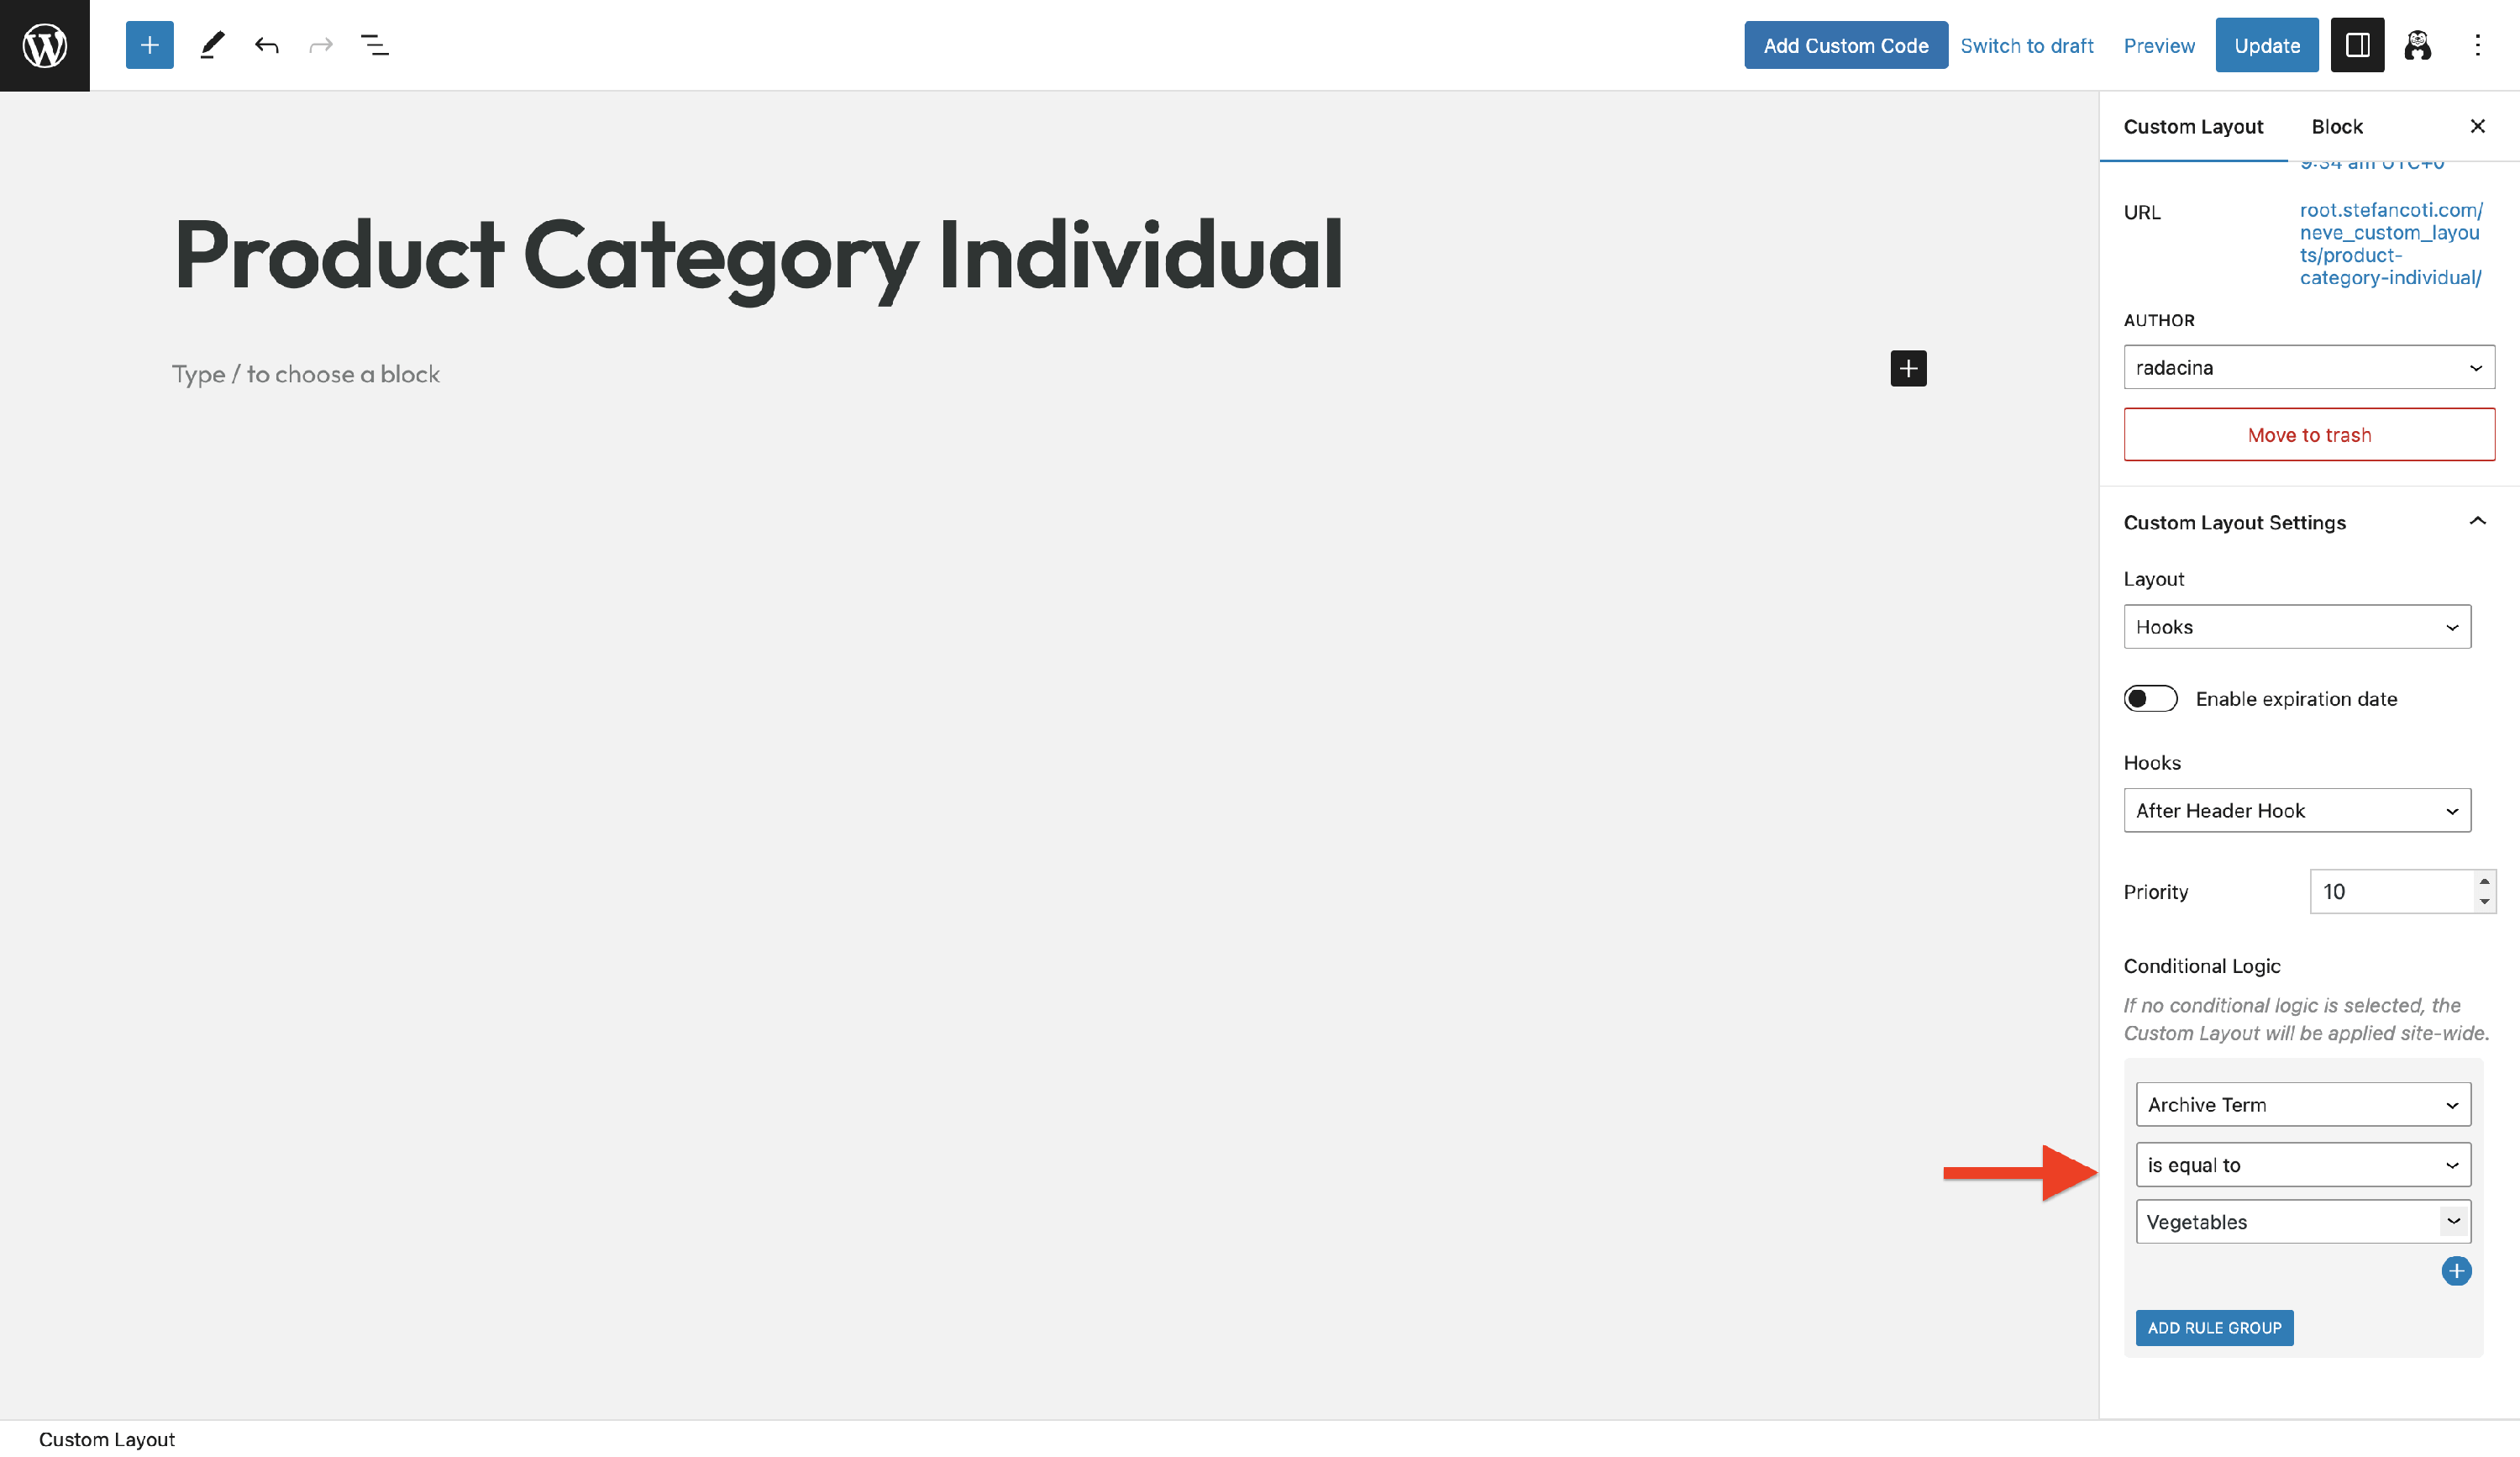
📝 Note: Please note that the Vegetables category is just an example. You can select a different category name from the dropdown.
1. After configuring the condition, it's time to customize the layout.
2. Start editing the page by using any options or blocks you wish, similar to what we presented above.
🎥 Video Resources
How to create a custom header for product category pages?
How to create a Sales Countdown header for product category pages?