How to build a landing page in WordPress
This article aims to present you how to build your own landing page, from the scratch, using the WordPress Editor and some tools.
Tools Needed:
- 🔝 A theme for your website - you can find our themes on this page and for the following steps we'll use Neve.
- 🧩 The Otter plugin - you can learn more about it from here.
For more advanced blocks in the WordPress editor, you can check the ones from Otter and Neve Pro, and get them on this page.
In this article
Preparing the dashboard
The first step is to install the Neve theme, which will make everything easier with the website's customization.
- check this guide in order to install it.
In order to use the page building blocks and templates for the WordPress block editor, the Otter blocks collection is the next installing requirement.
- check this guide in order to install the plugin.
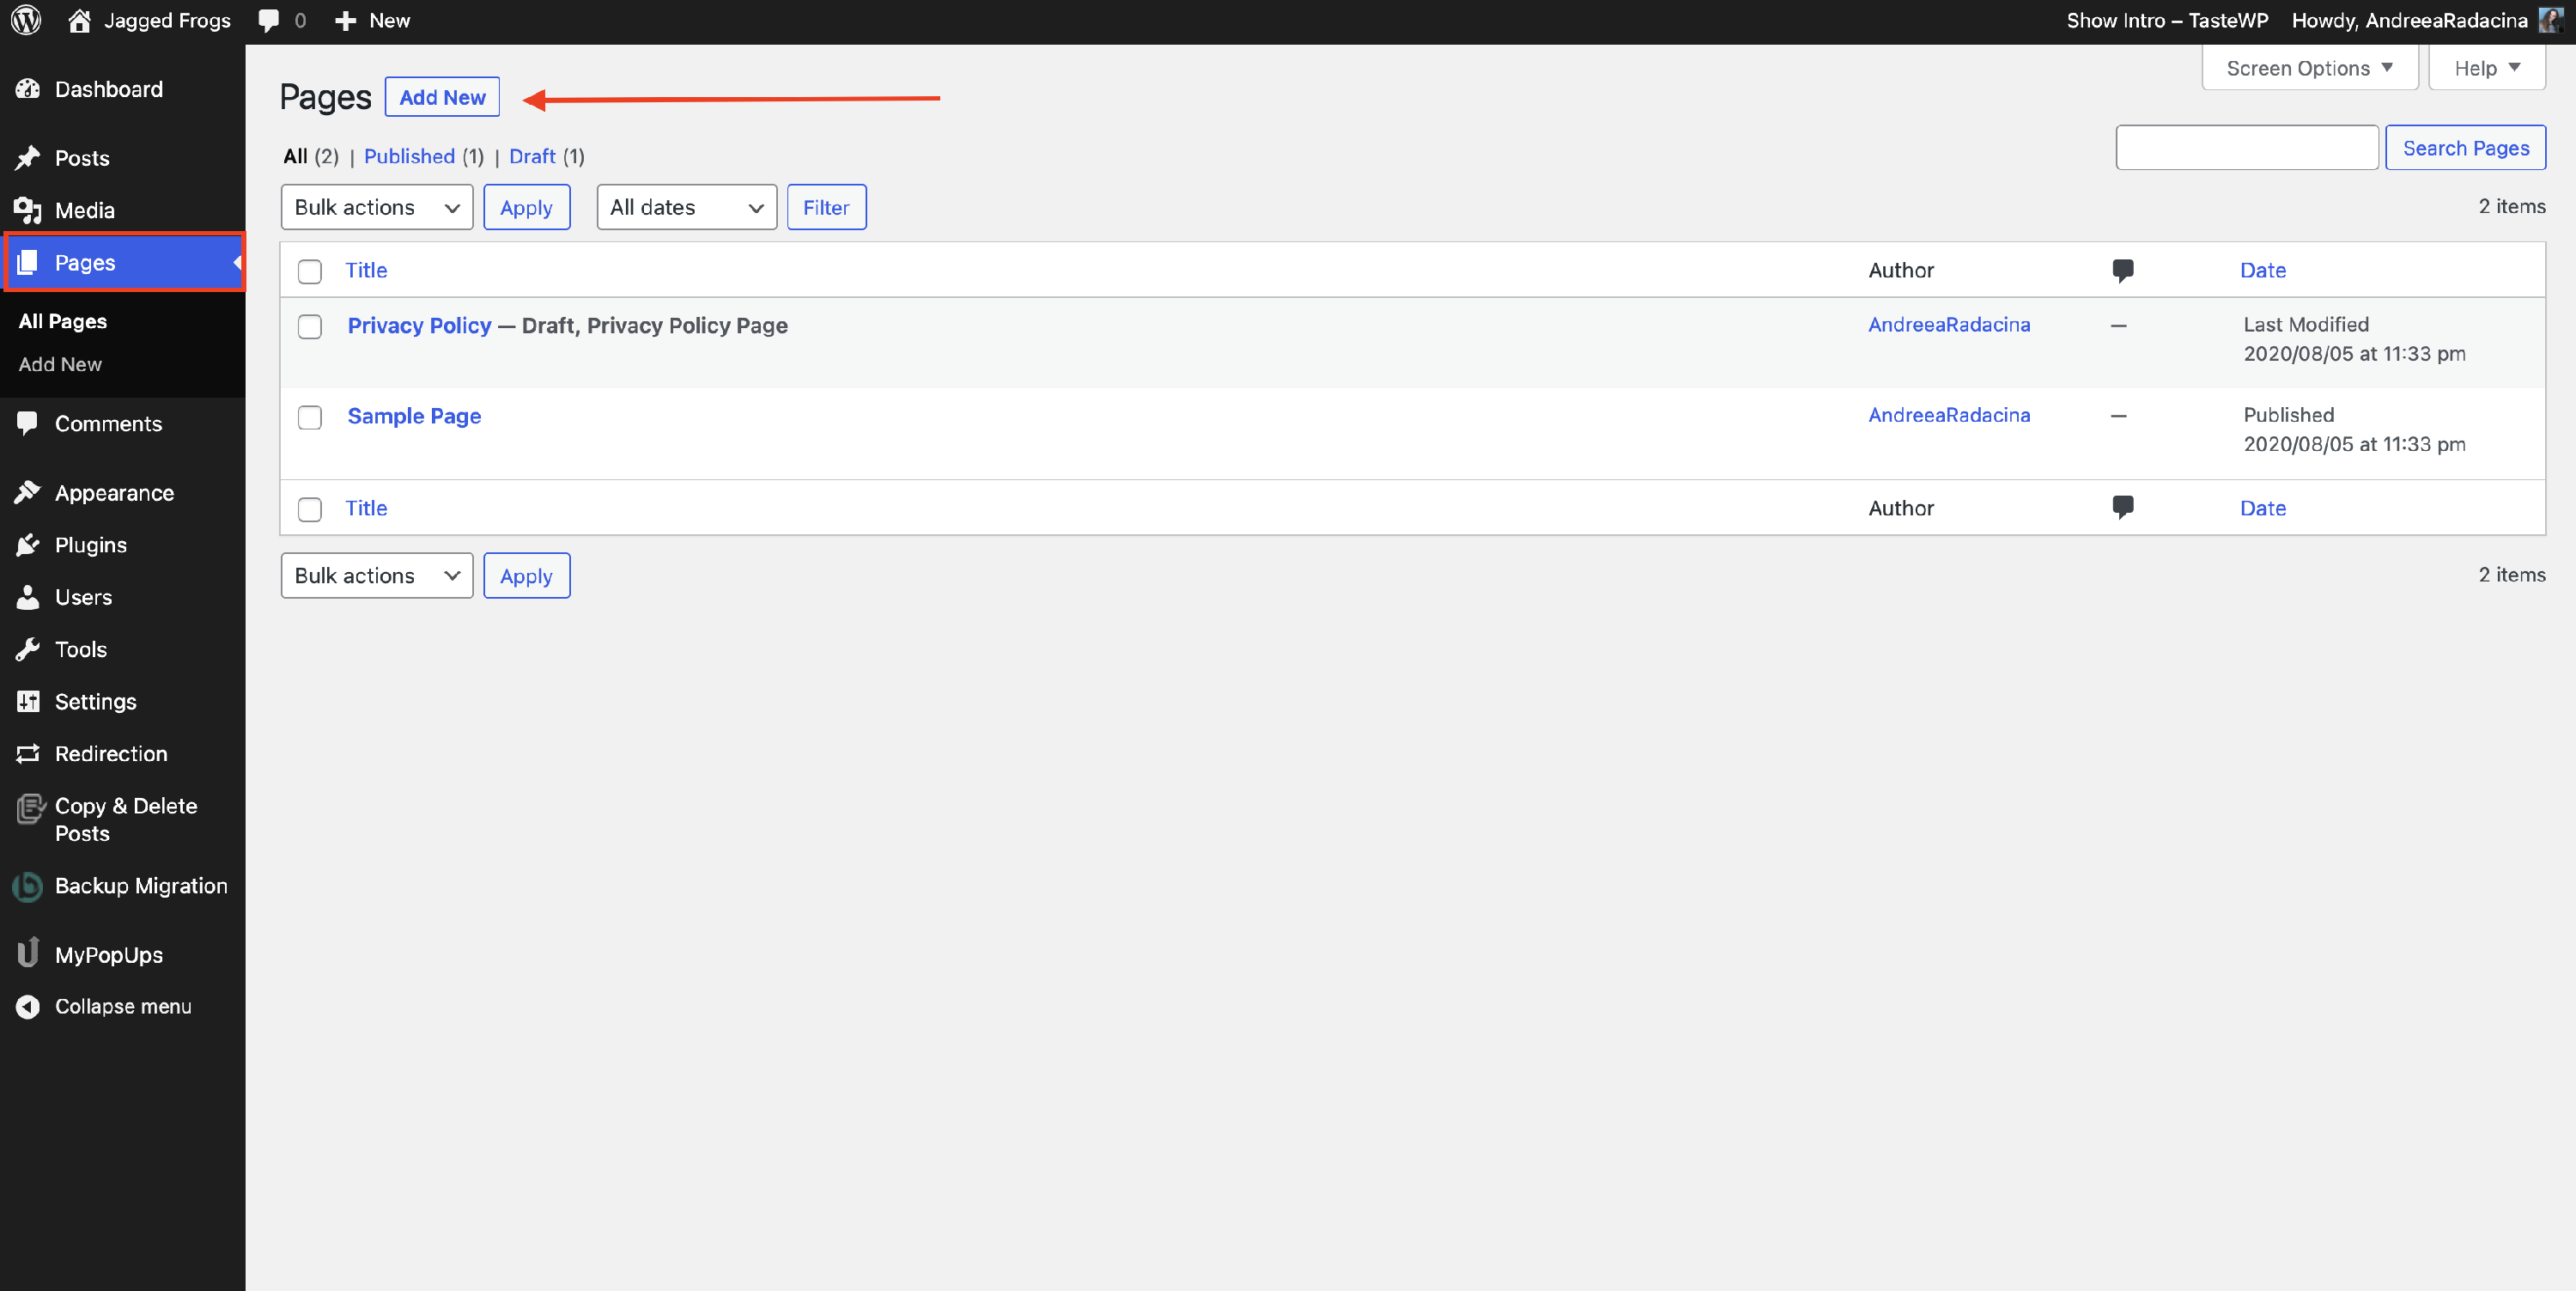
To get started with the website, you have to start adding pages. Navigate to Dashboard > Pages > Add New.
Tour of the interface
When entering the WordPress editor, this is how the page will look like.
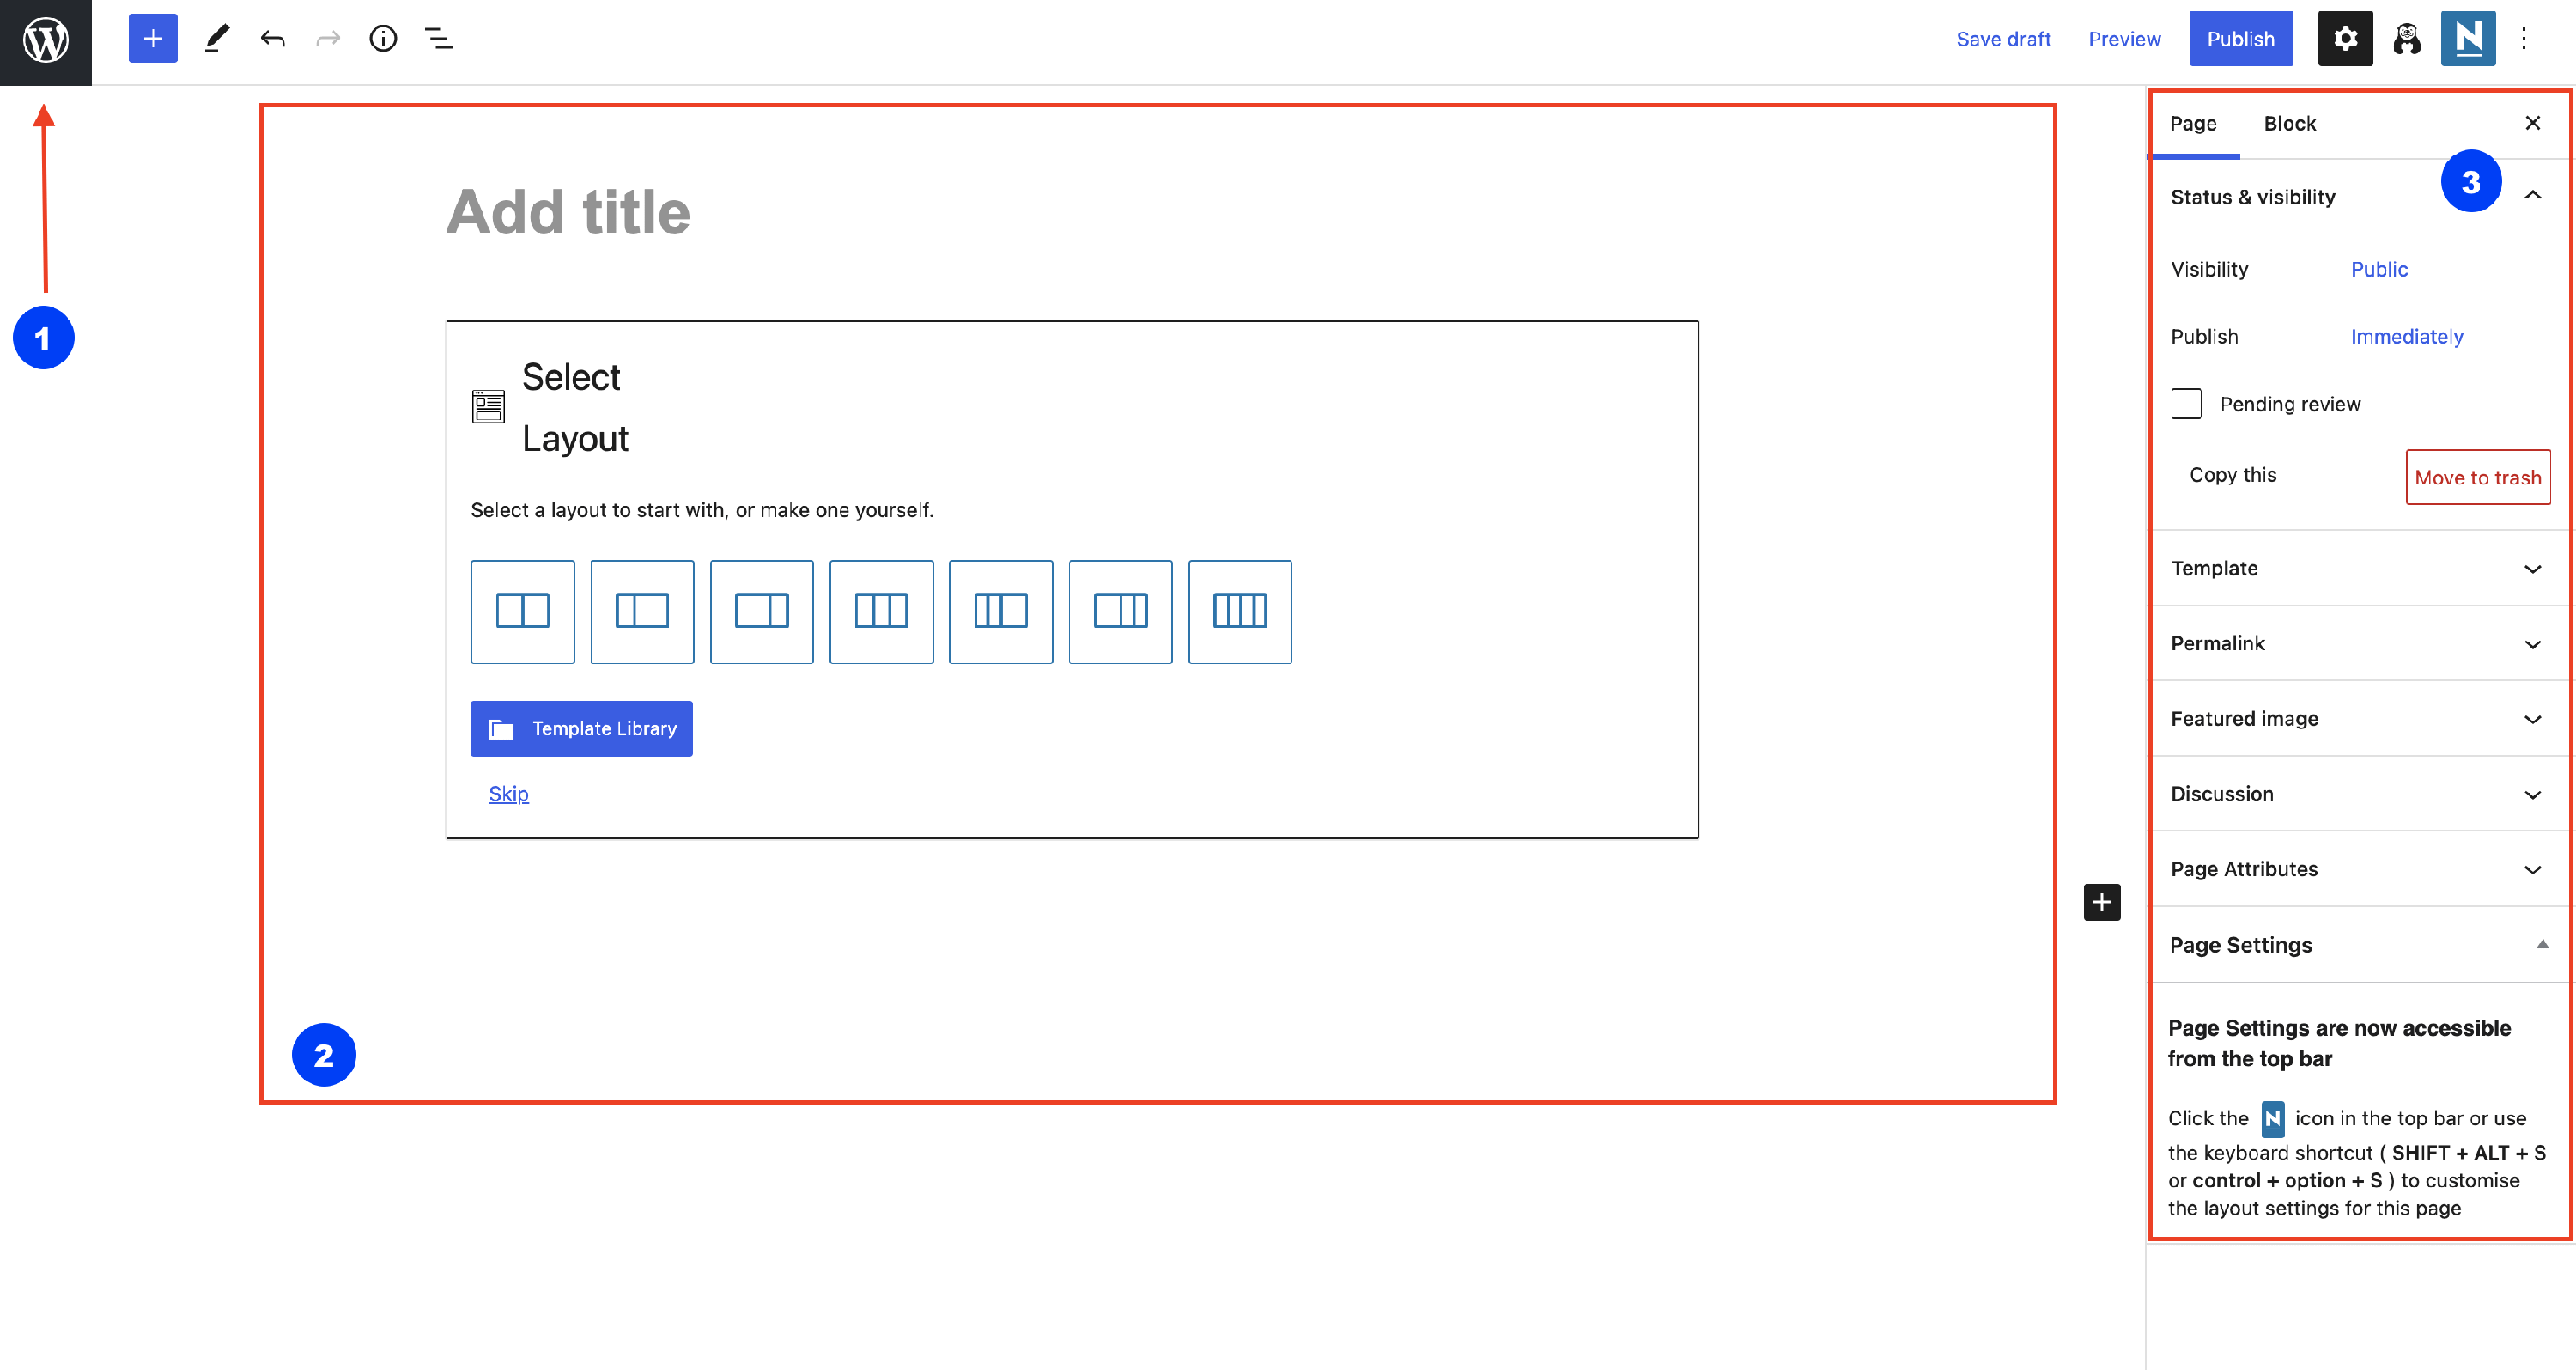
- 1 = press the "W" button to go back to the Dashboard.
- 2 = this will be the area where you will create the website, by inserting blocks and content.
- 3 = settings panel, containing the settings of the page or of the blocks.
There are some useful options in the editor, as you can see in the picture below.
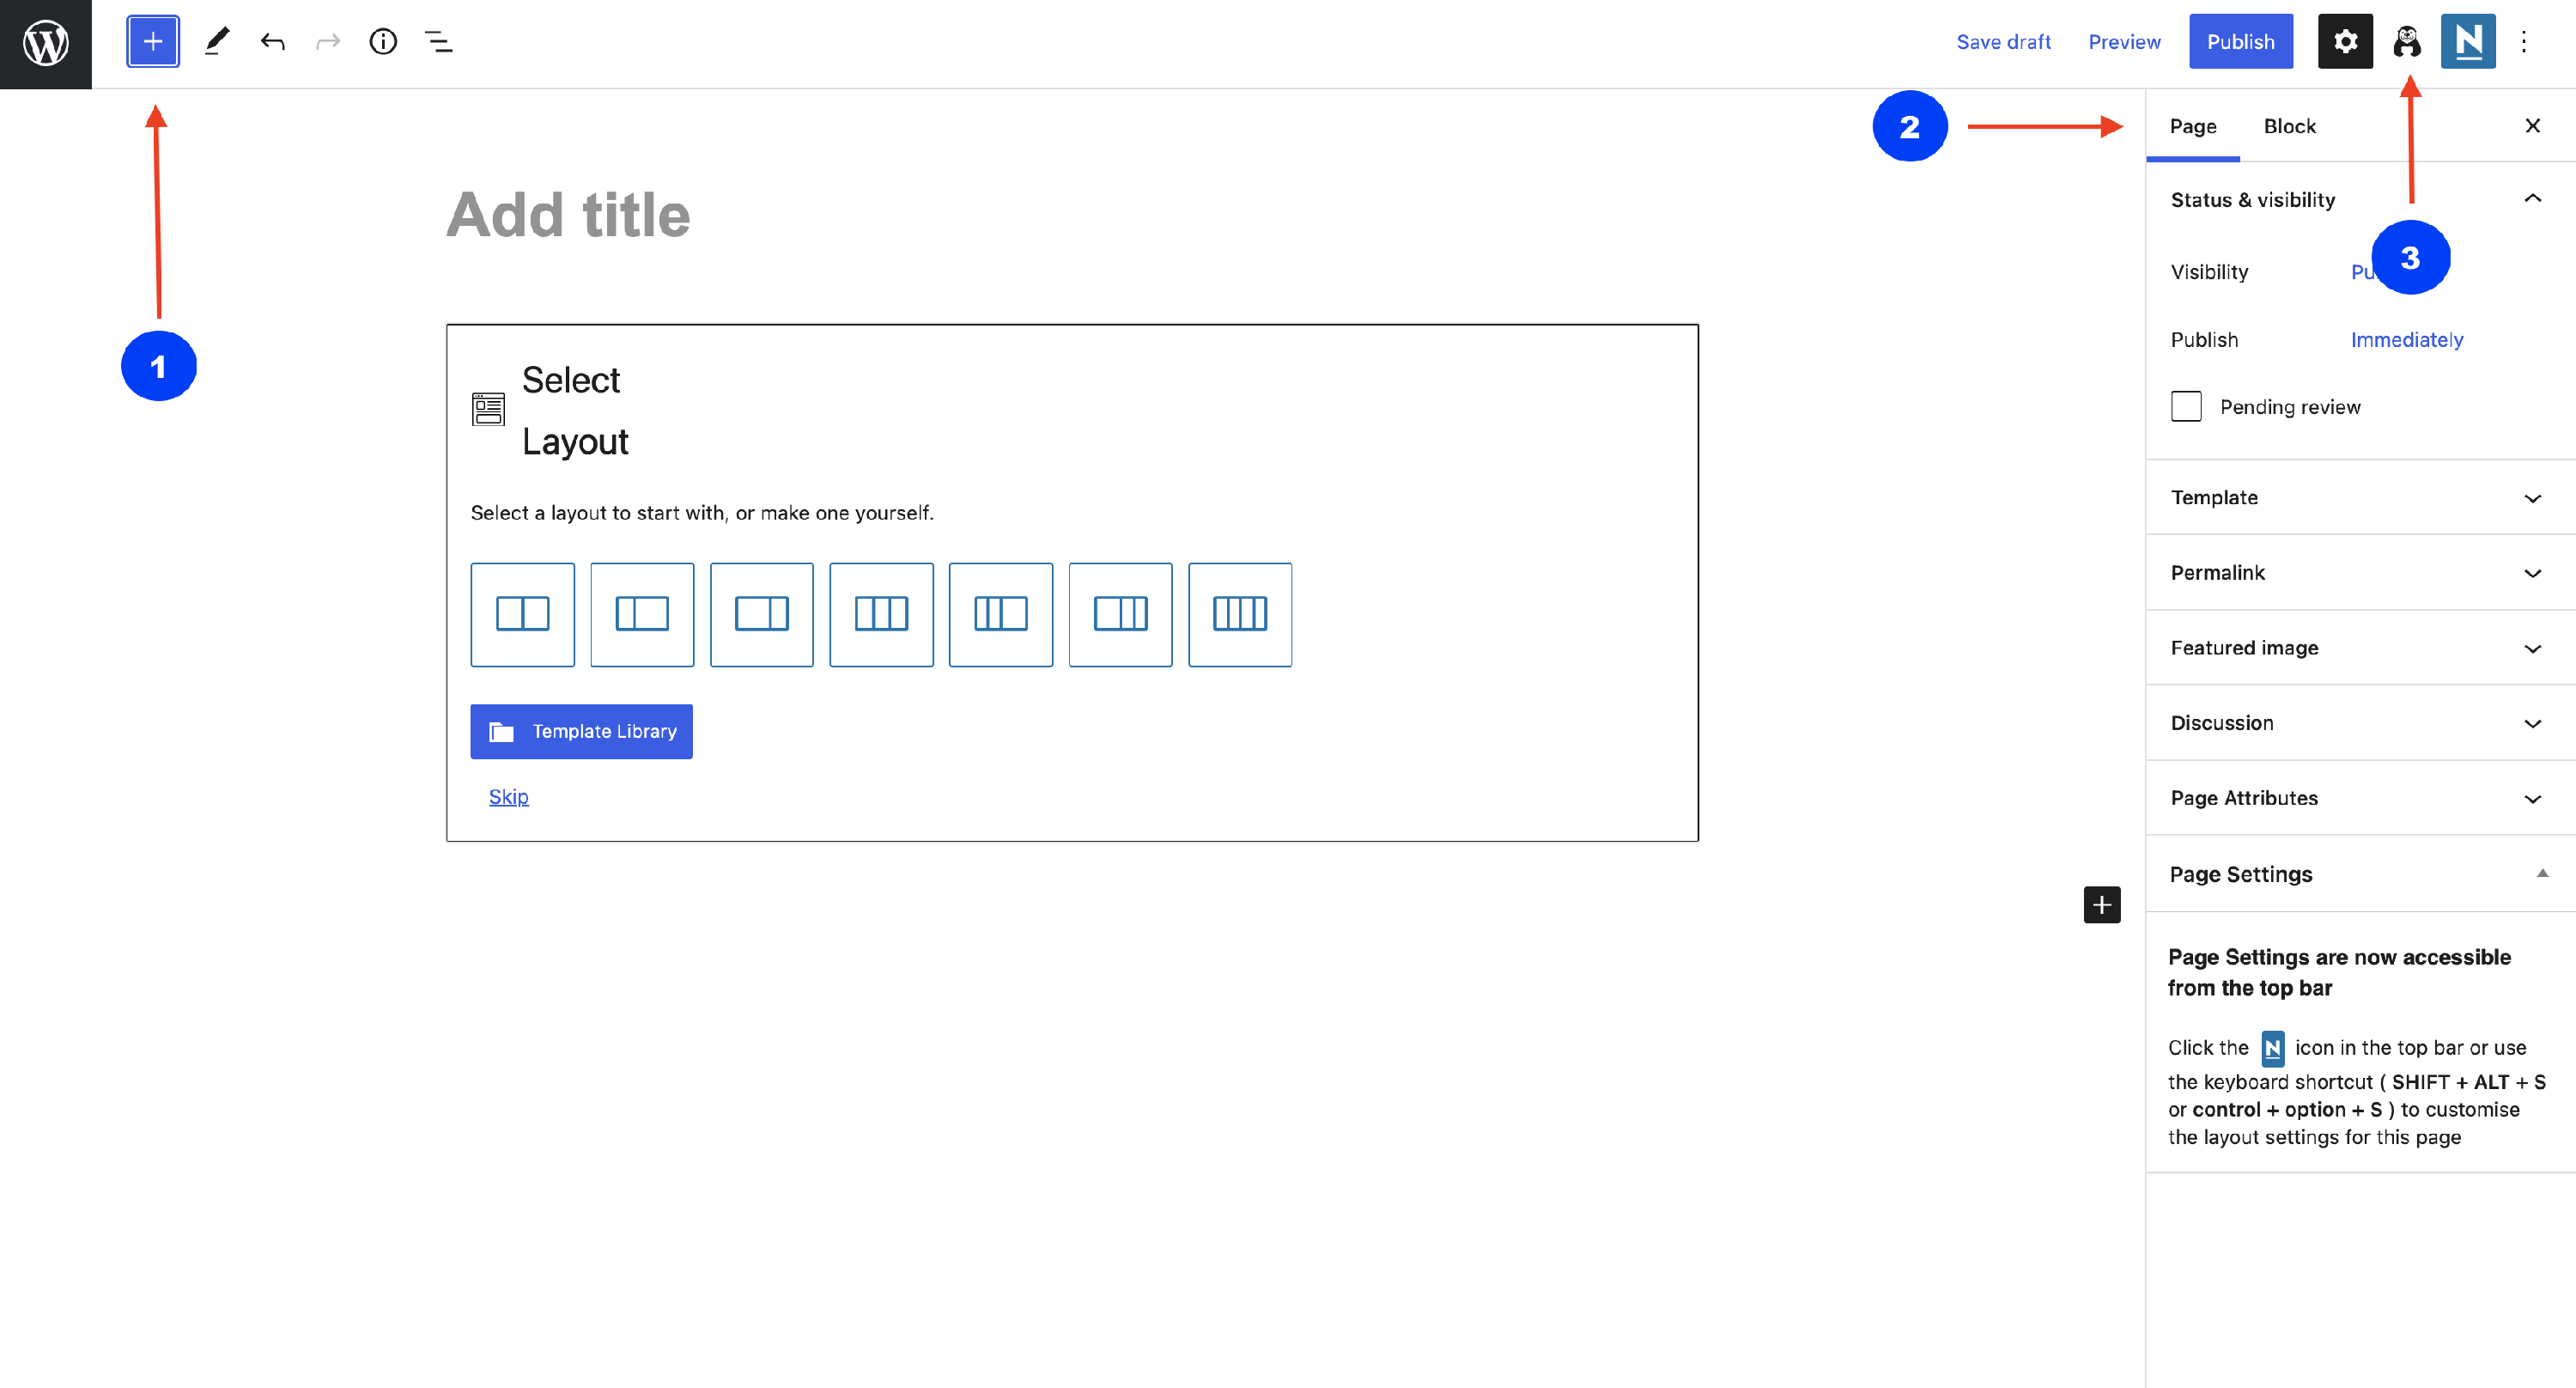
- 1 = this button will open the blocks library.
- 2 = global settings of the page.
- 3 = global settings of the Otter blocks.
Building the Headline Section
The Headline Section is the first contact of the user with your website, so you have to take care of it.
📝 Note: In this example, we will use the Neve theme.
Step 1: Insert a title for your page - Home.
Step 2: Click on the ➕button to add a new block. Scroll until the Otter blocks appear and drag and drop the Section block.
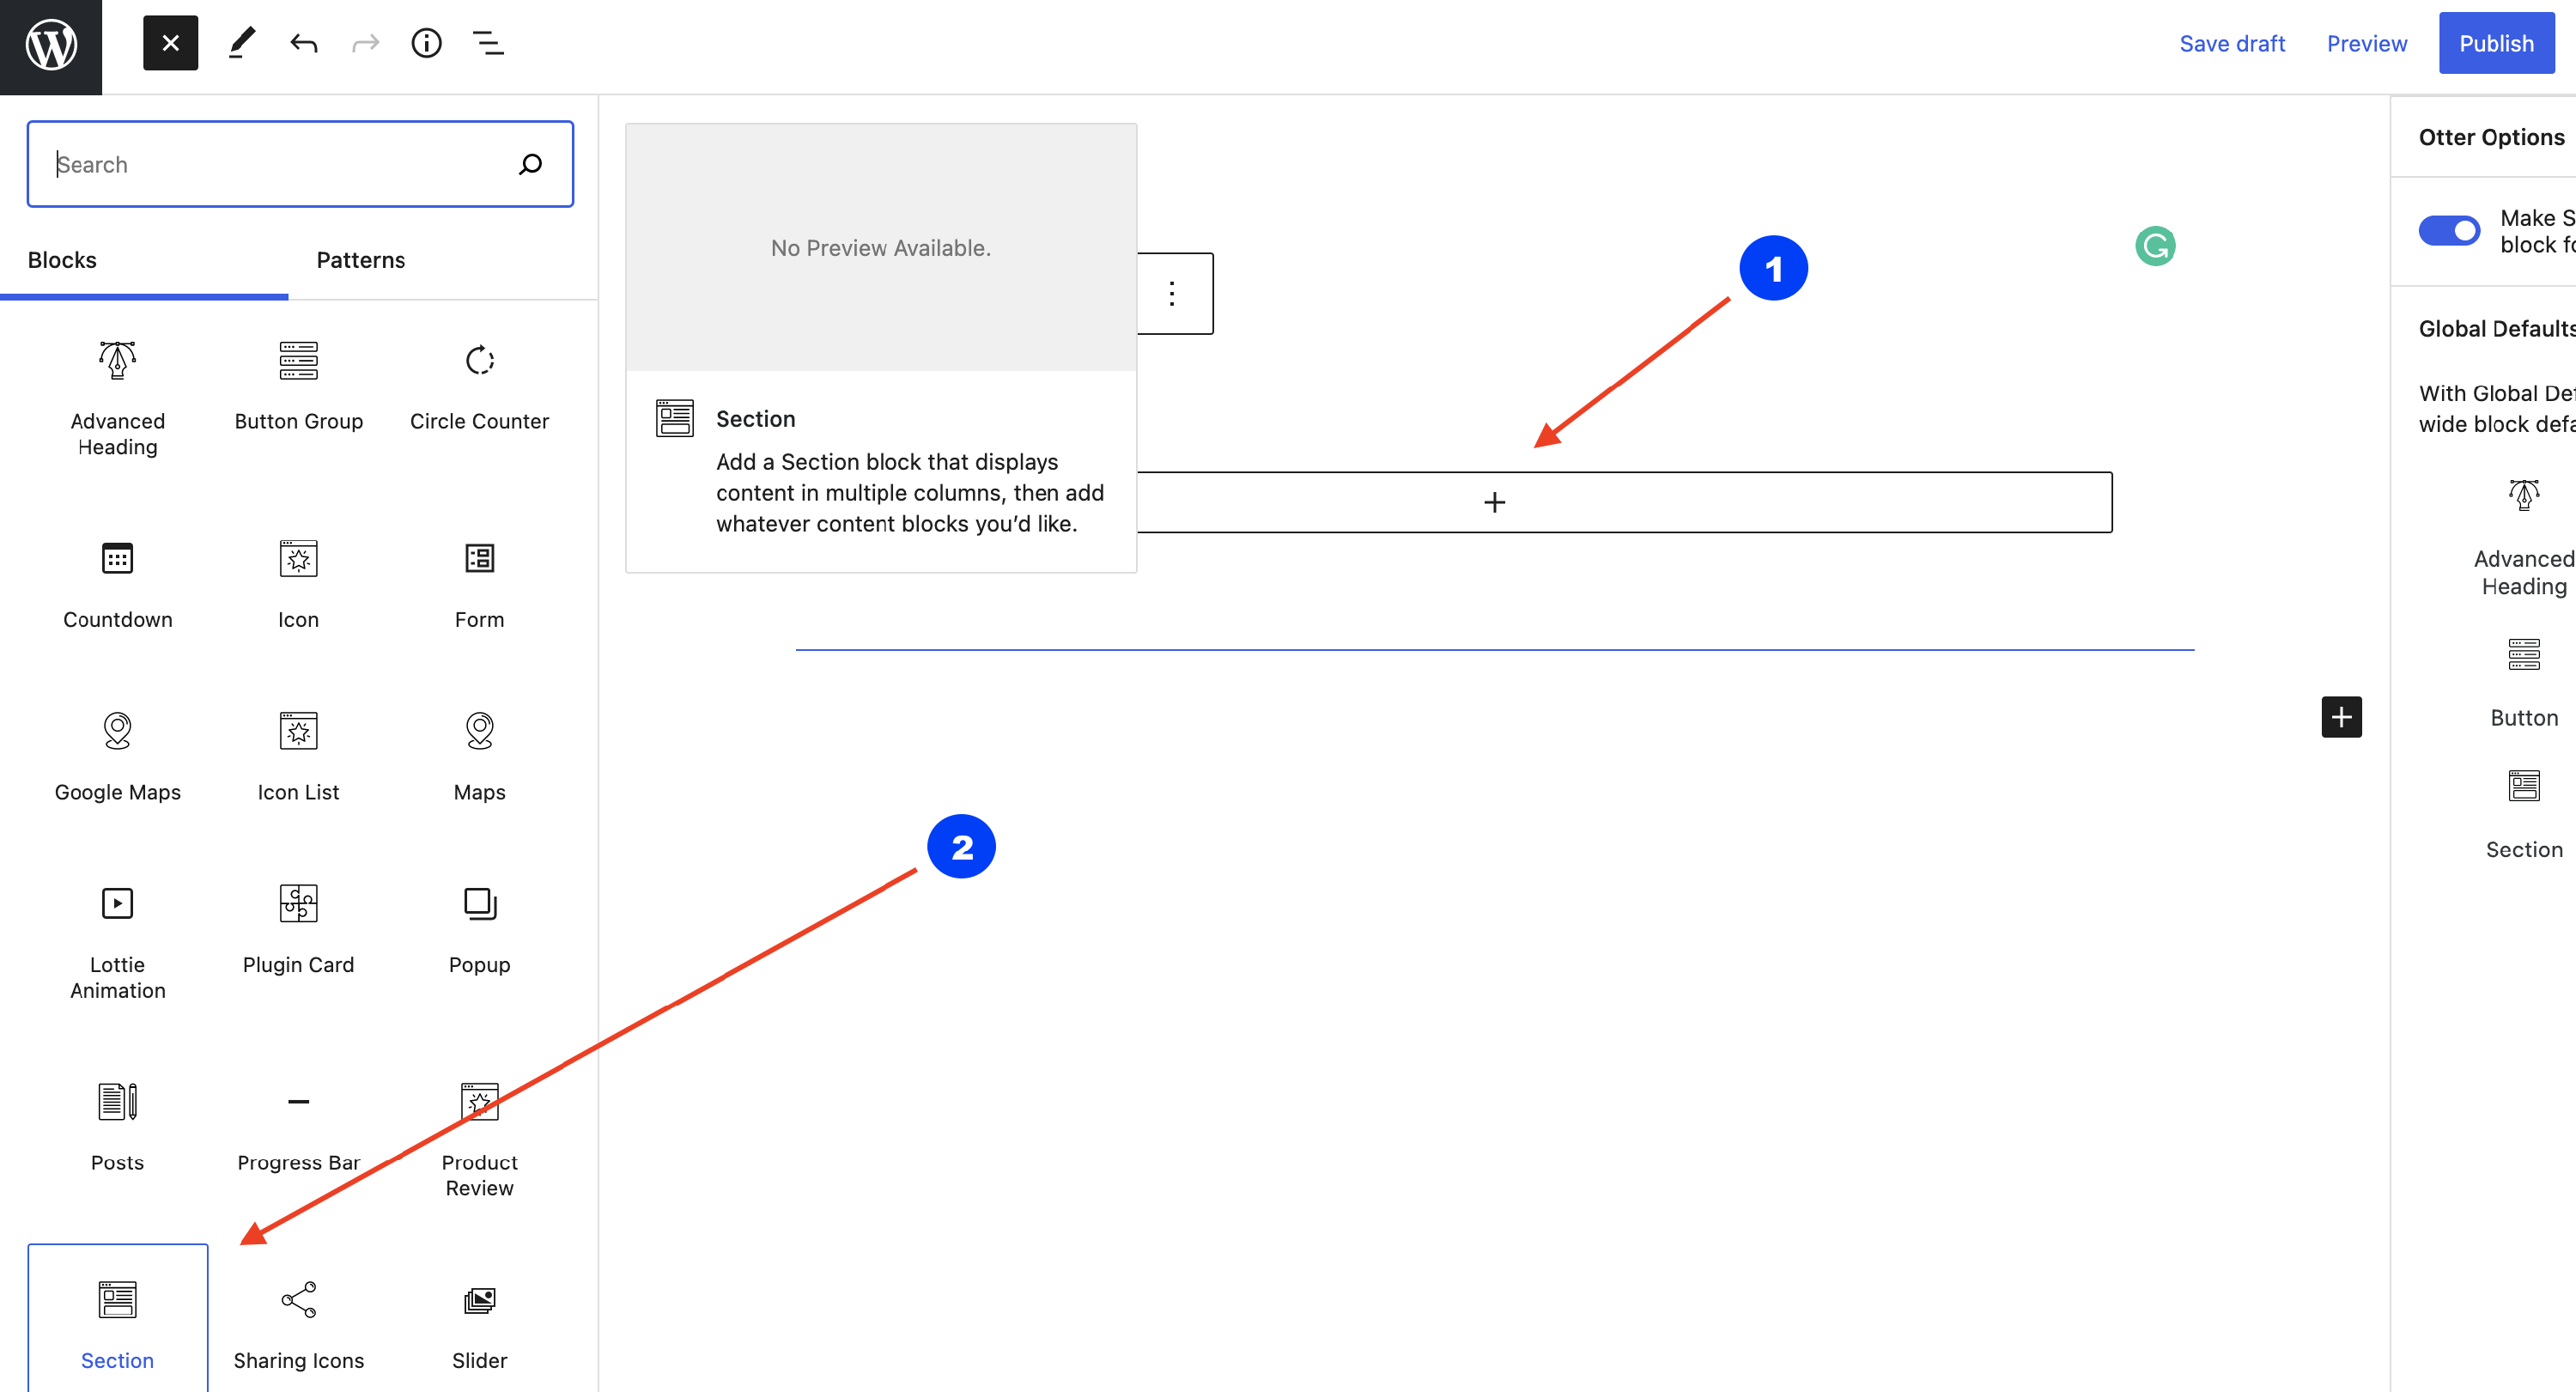
📝 Note: Check this doc for further details about the Section Block.
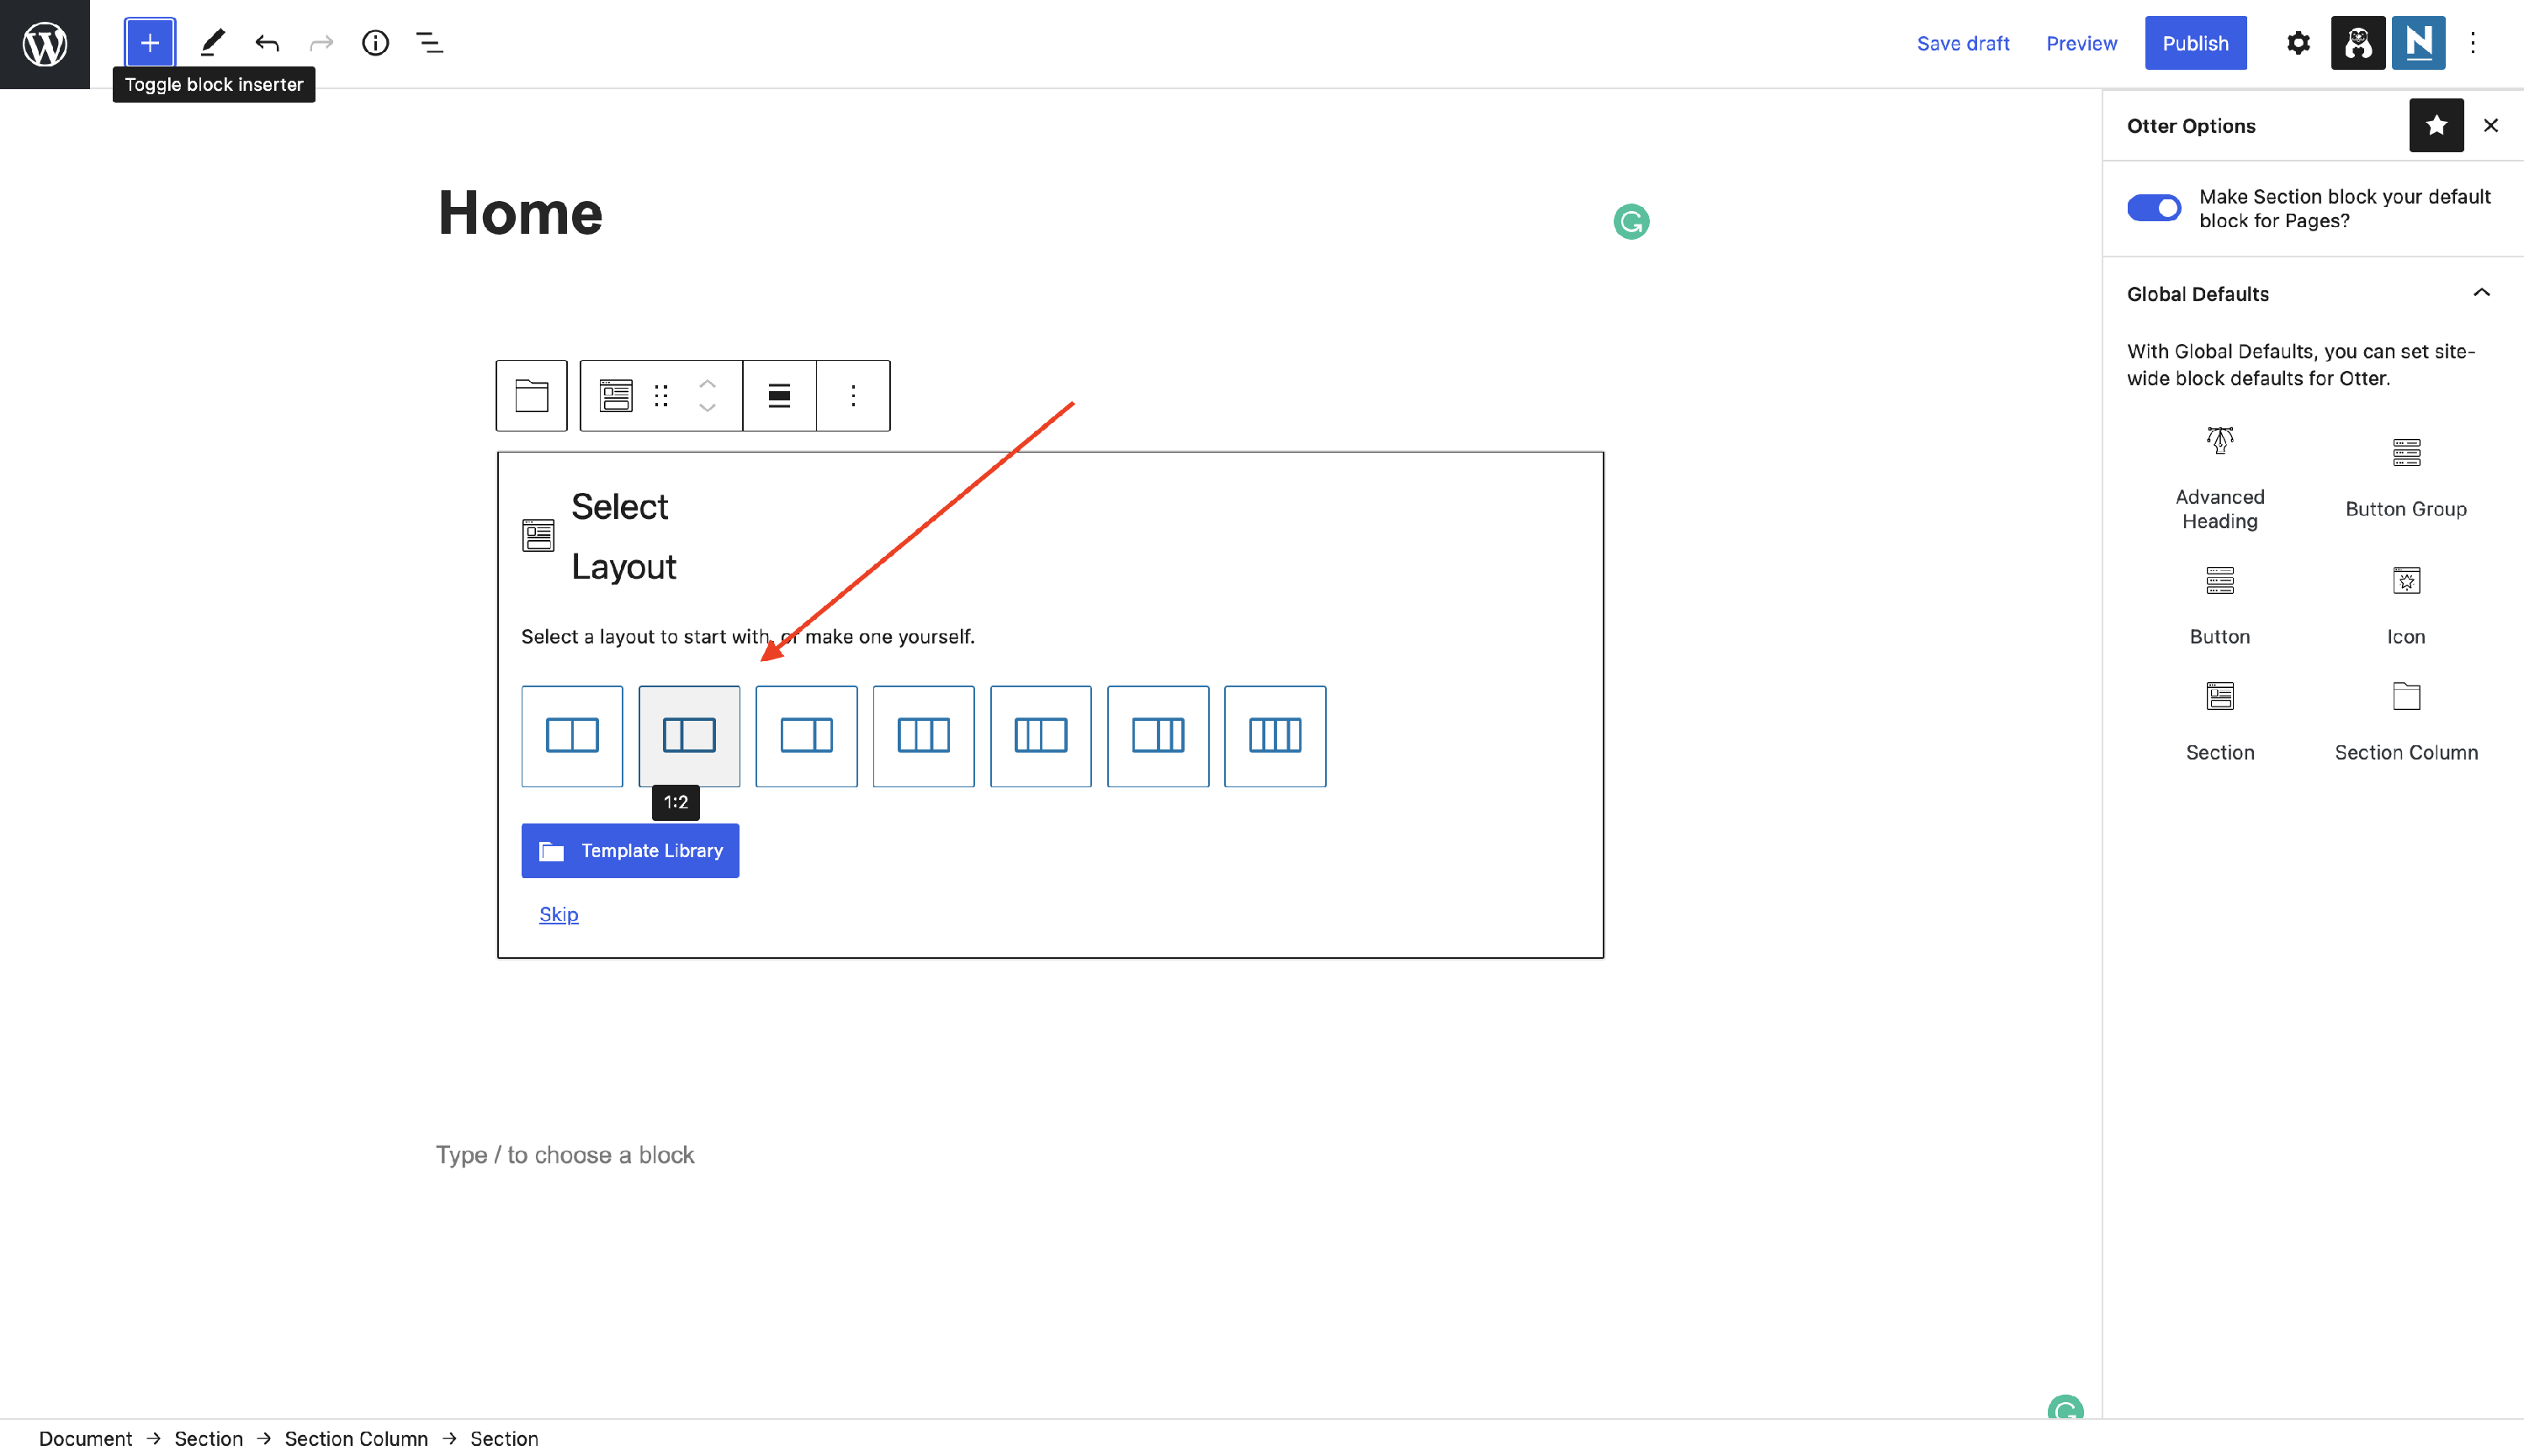
Step 3: Select a layout to start with or skip this step, if you want.
Step 4: Insert an Advanced Heading and play with its options, to create a special one.
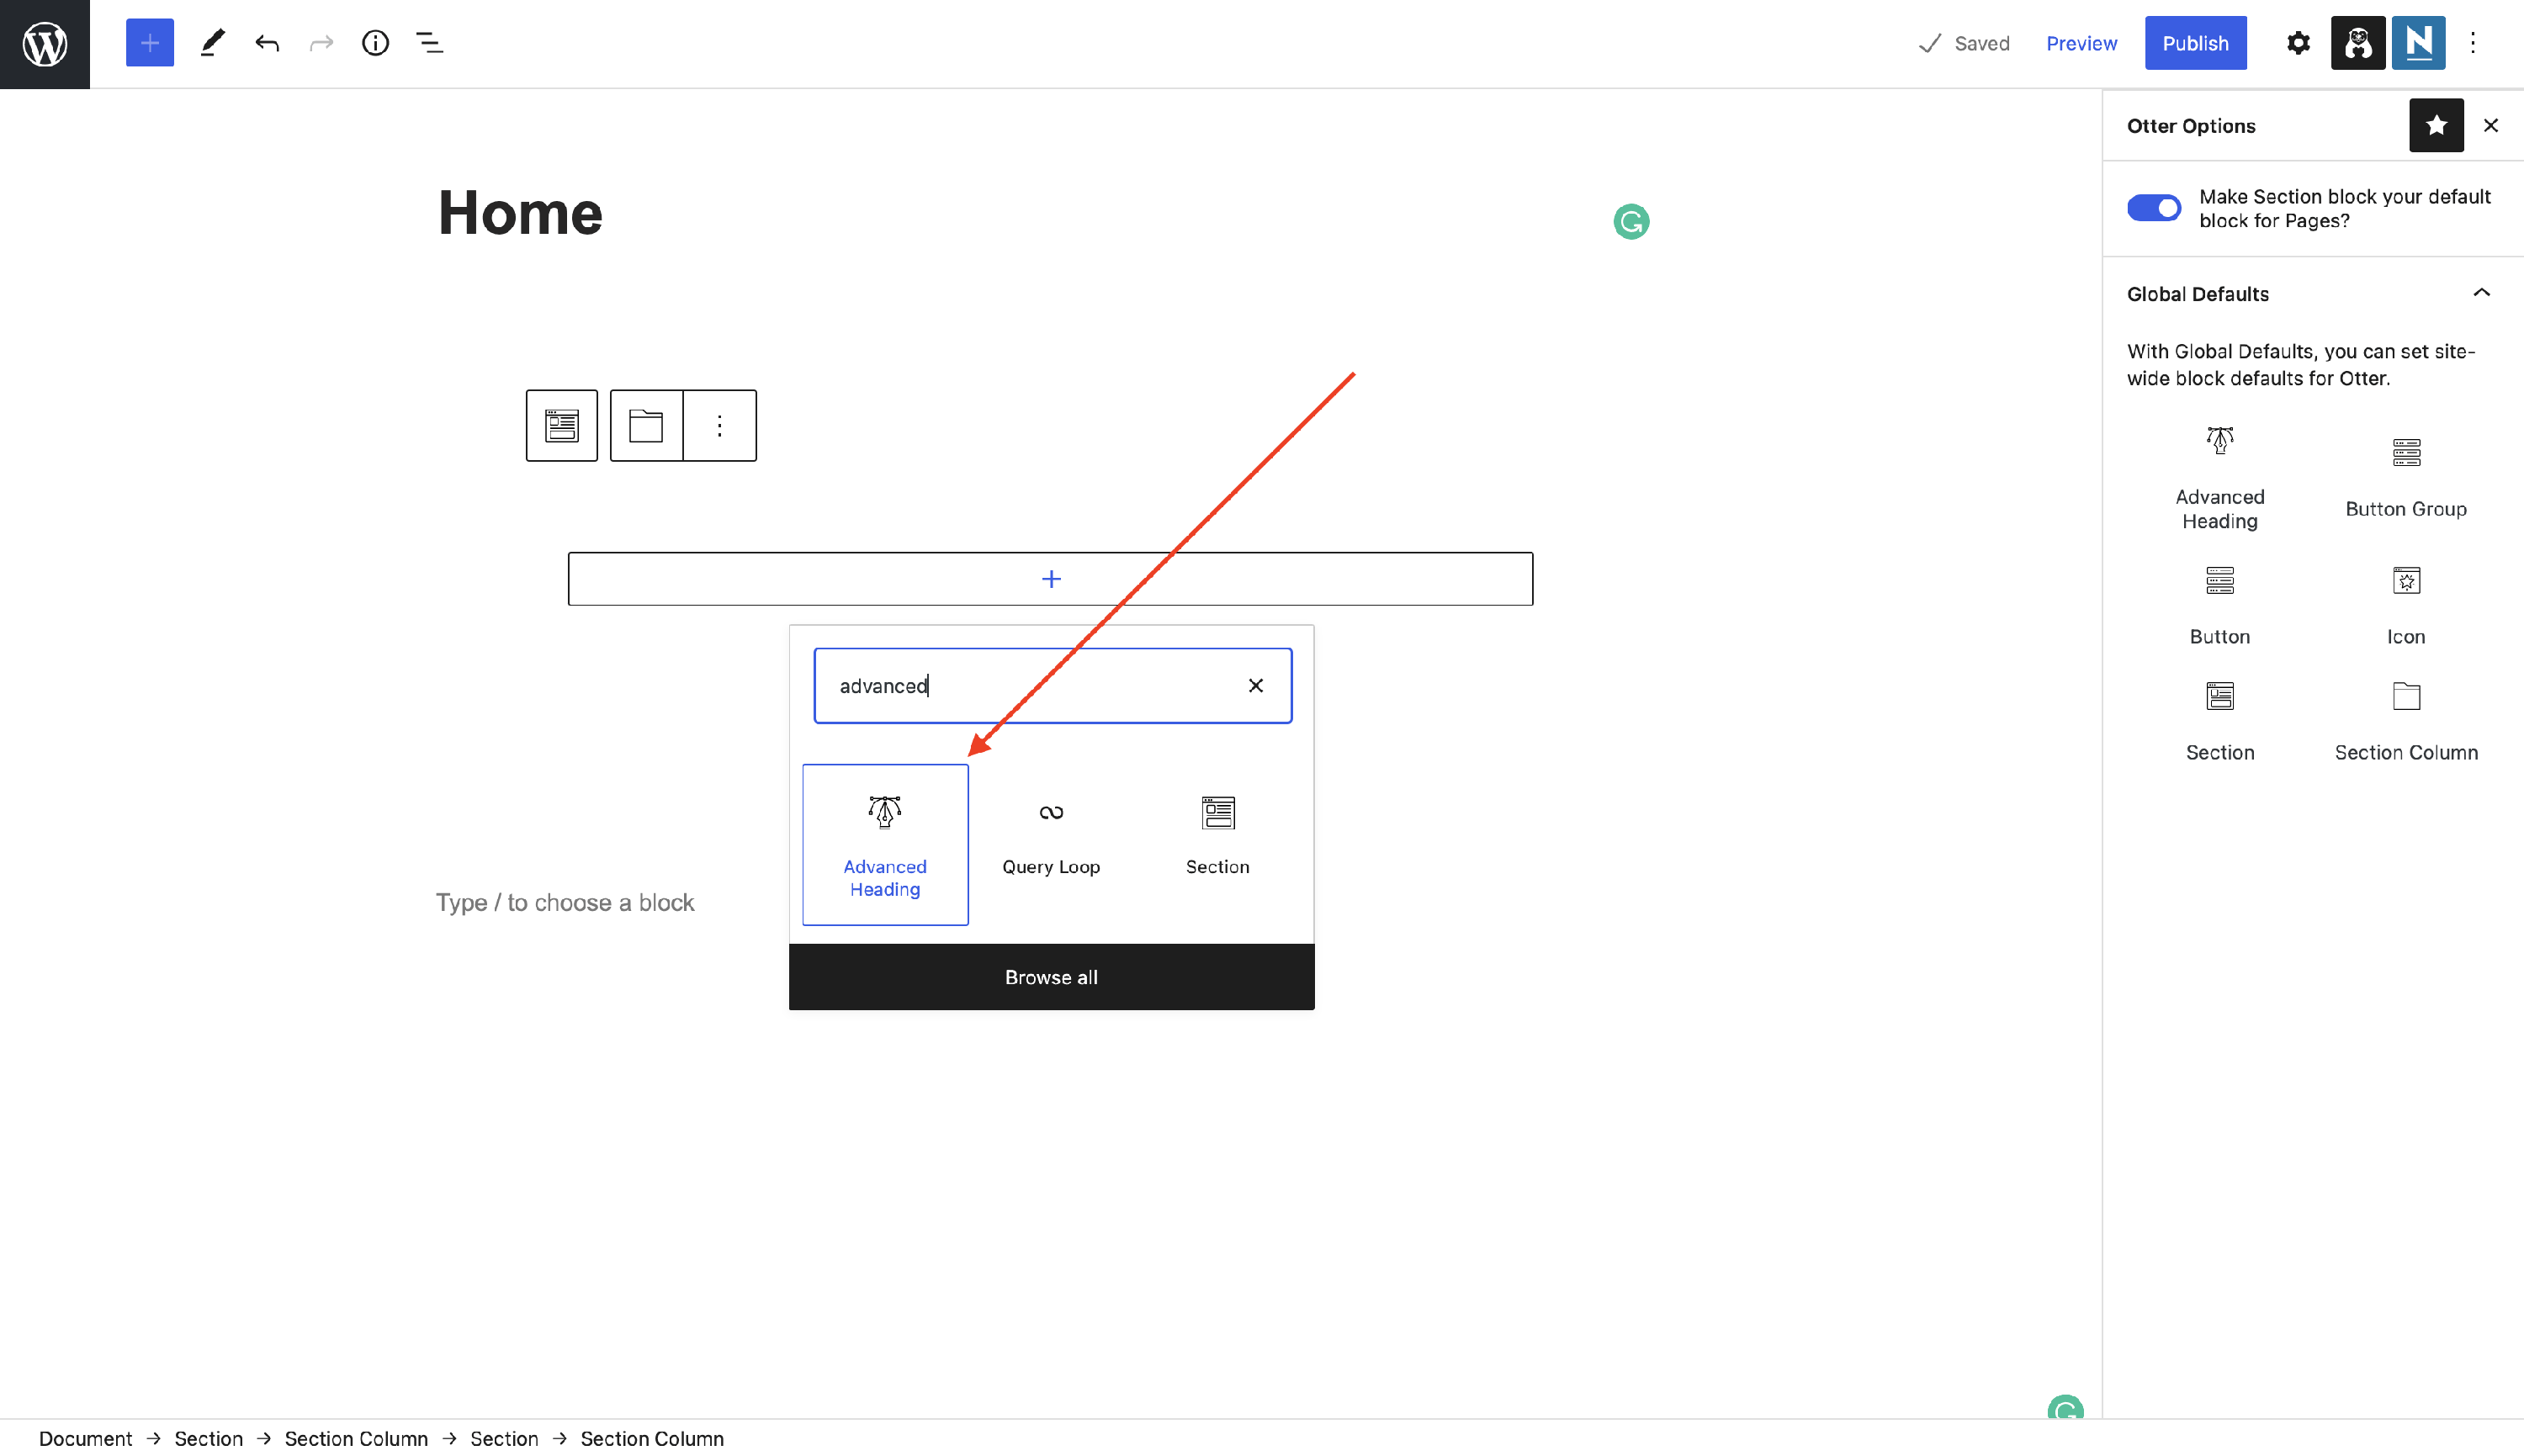
📝 Note: Check this doc for further details about the Advanced Heading.
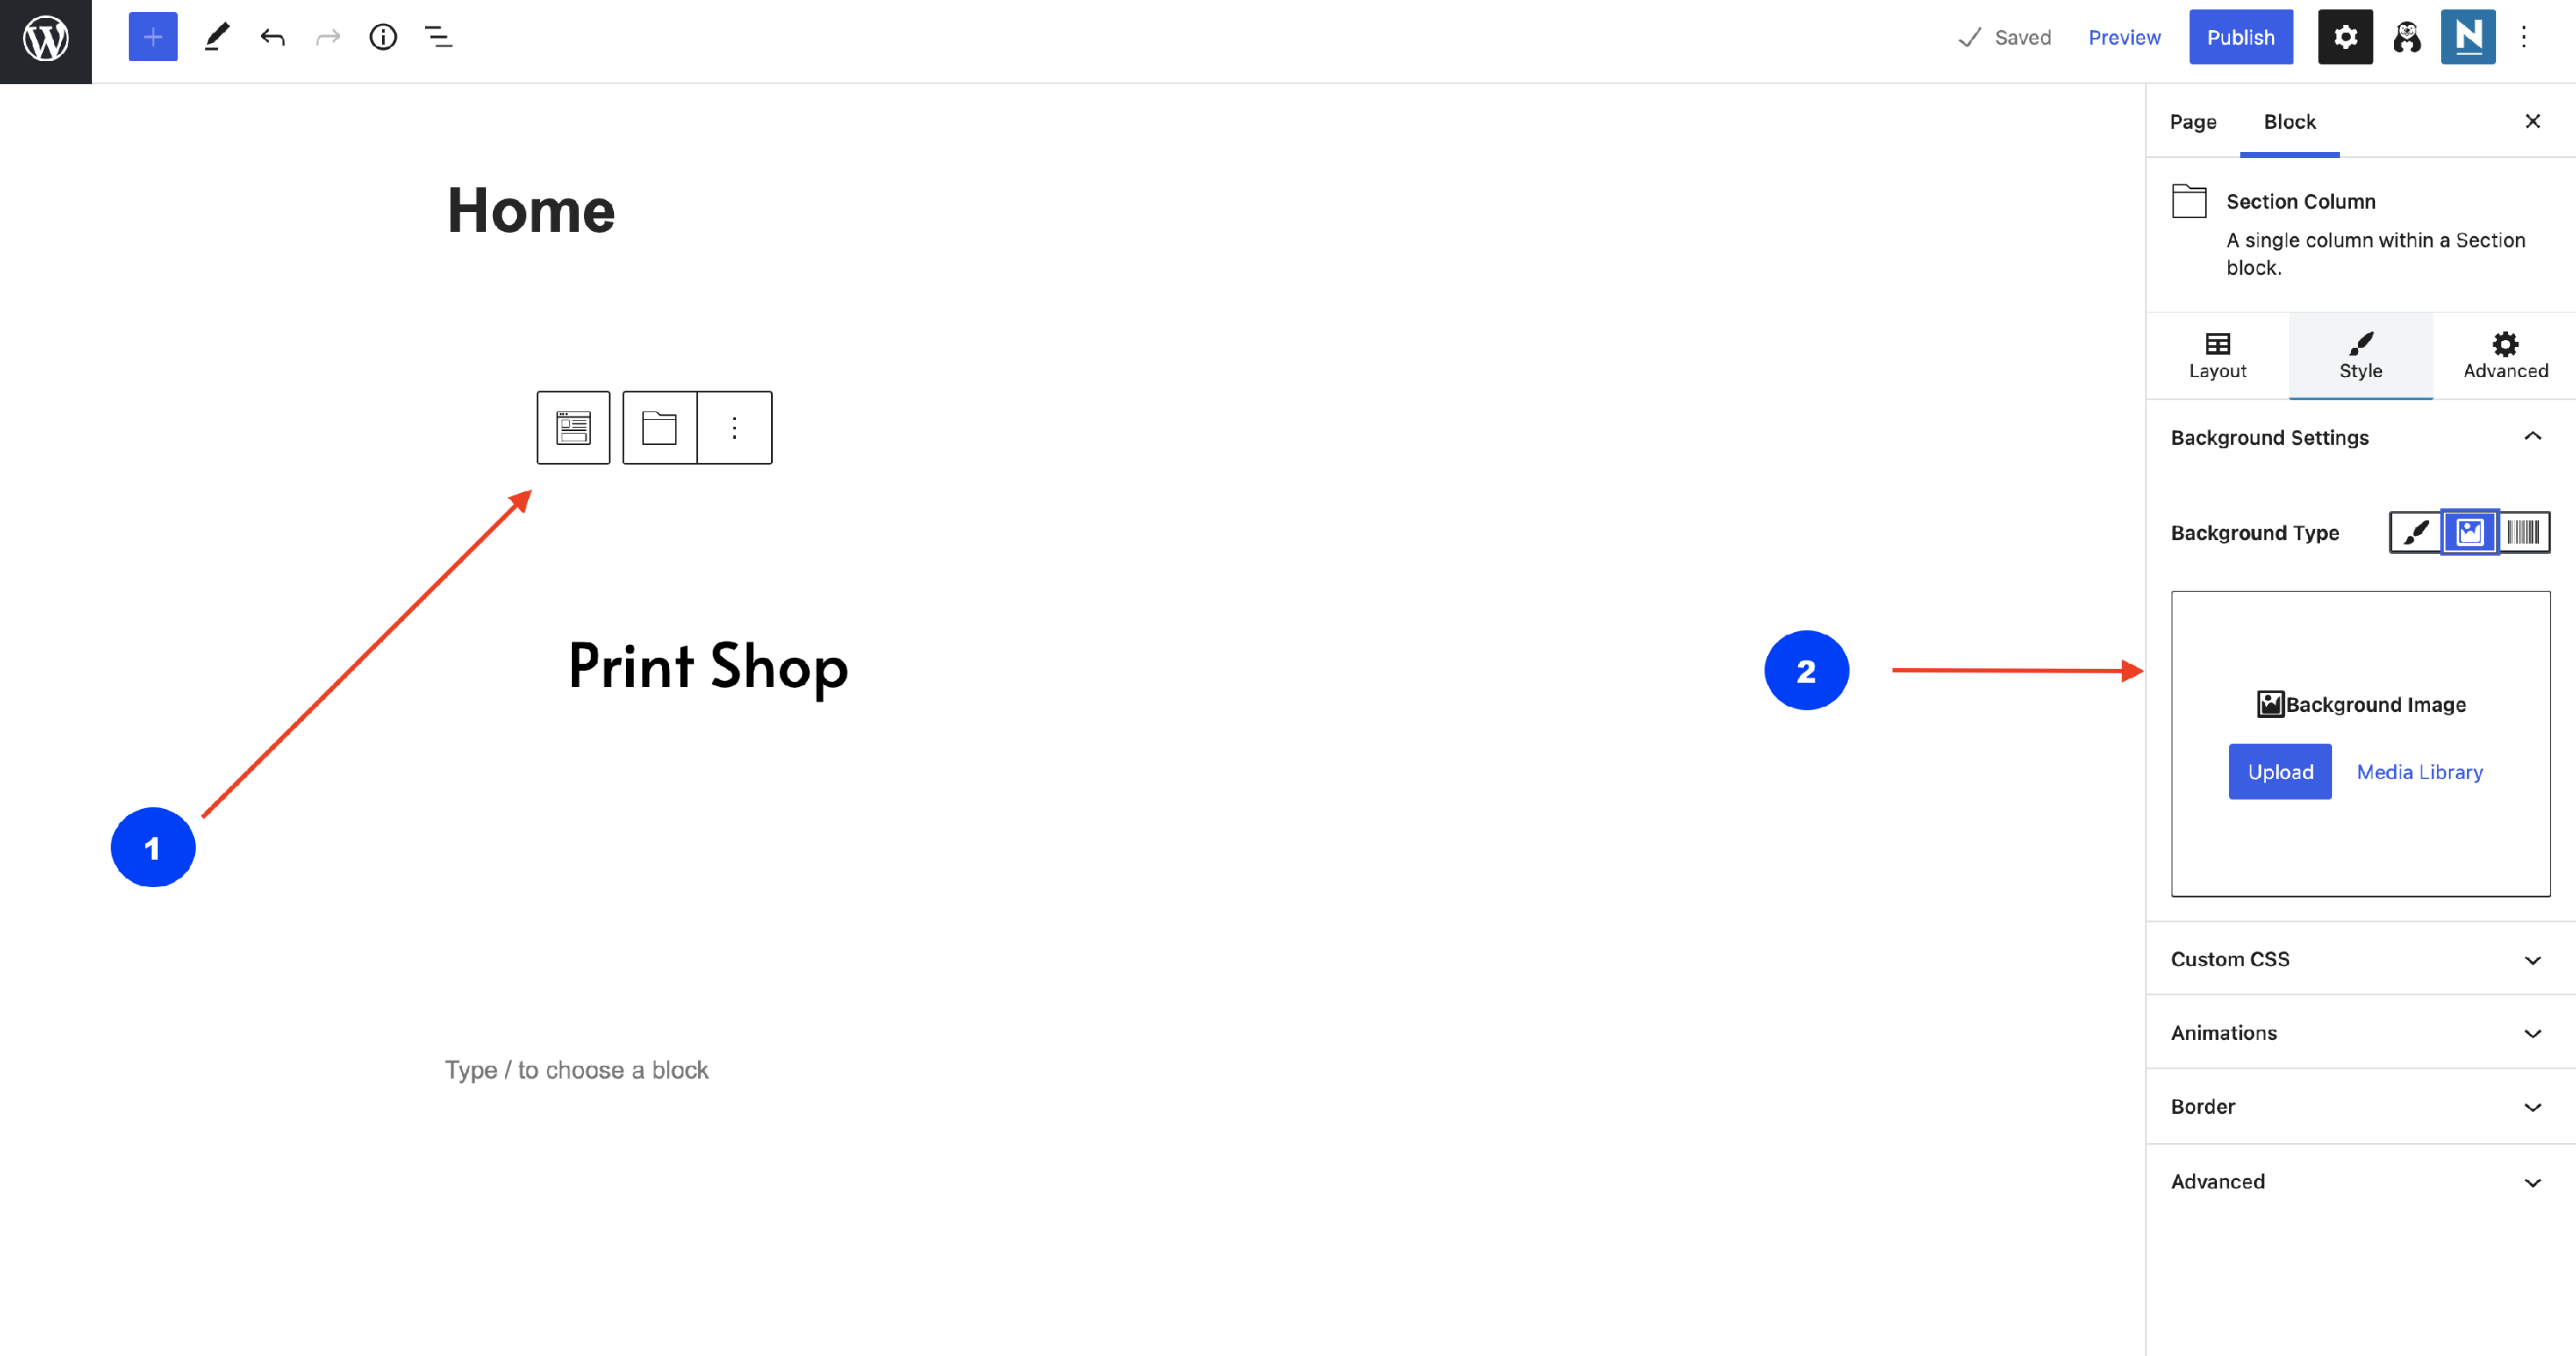
Step 5: Click on the Section Block to open the specific settings (1). Go to the Style tab and insert a background to enhance the beauty of the page ( e.g. image background ) (2).
Here is an example of how the section can look like: 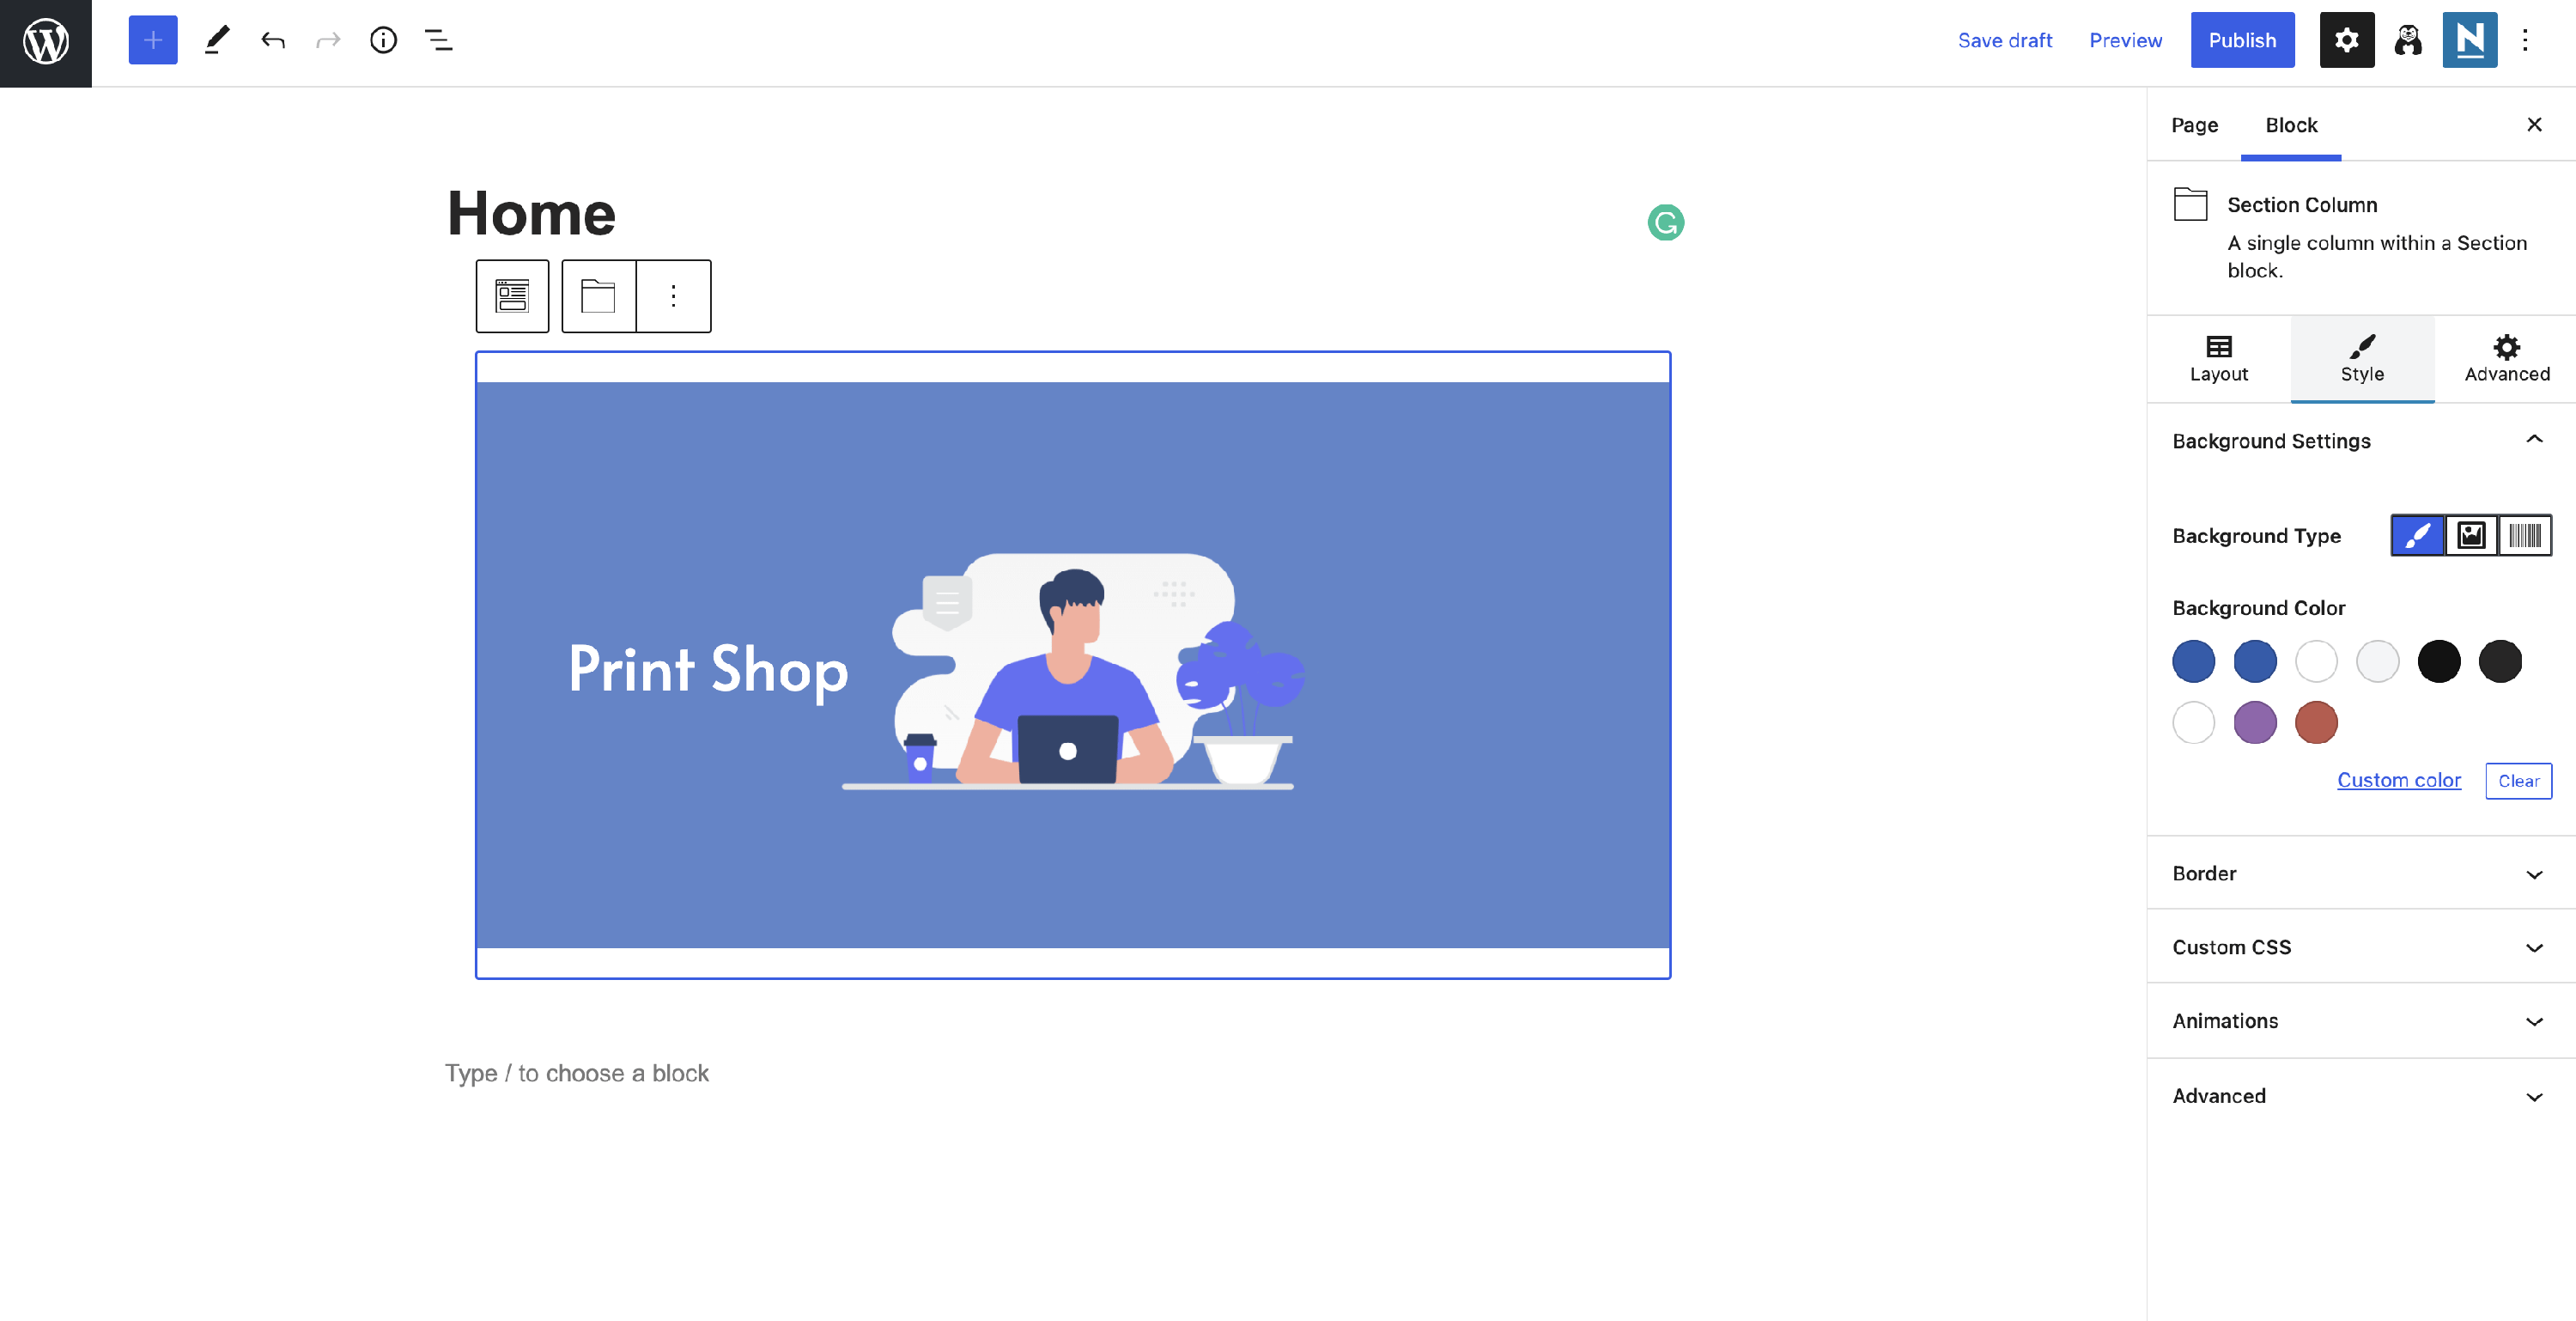
Step 6: Add a short description of the website, to attract the public, using a Paragraph block.
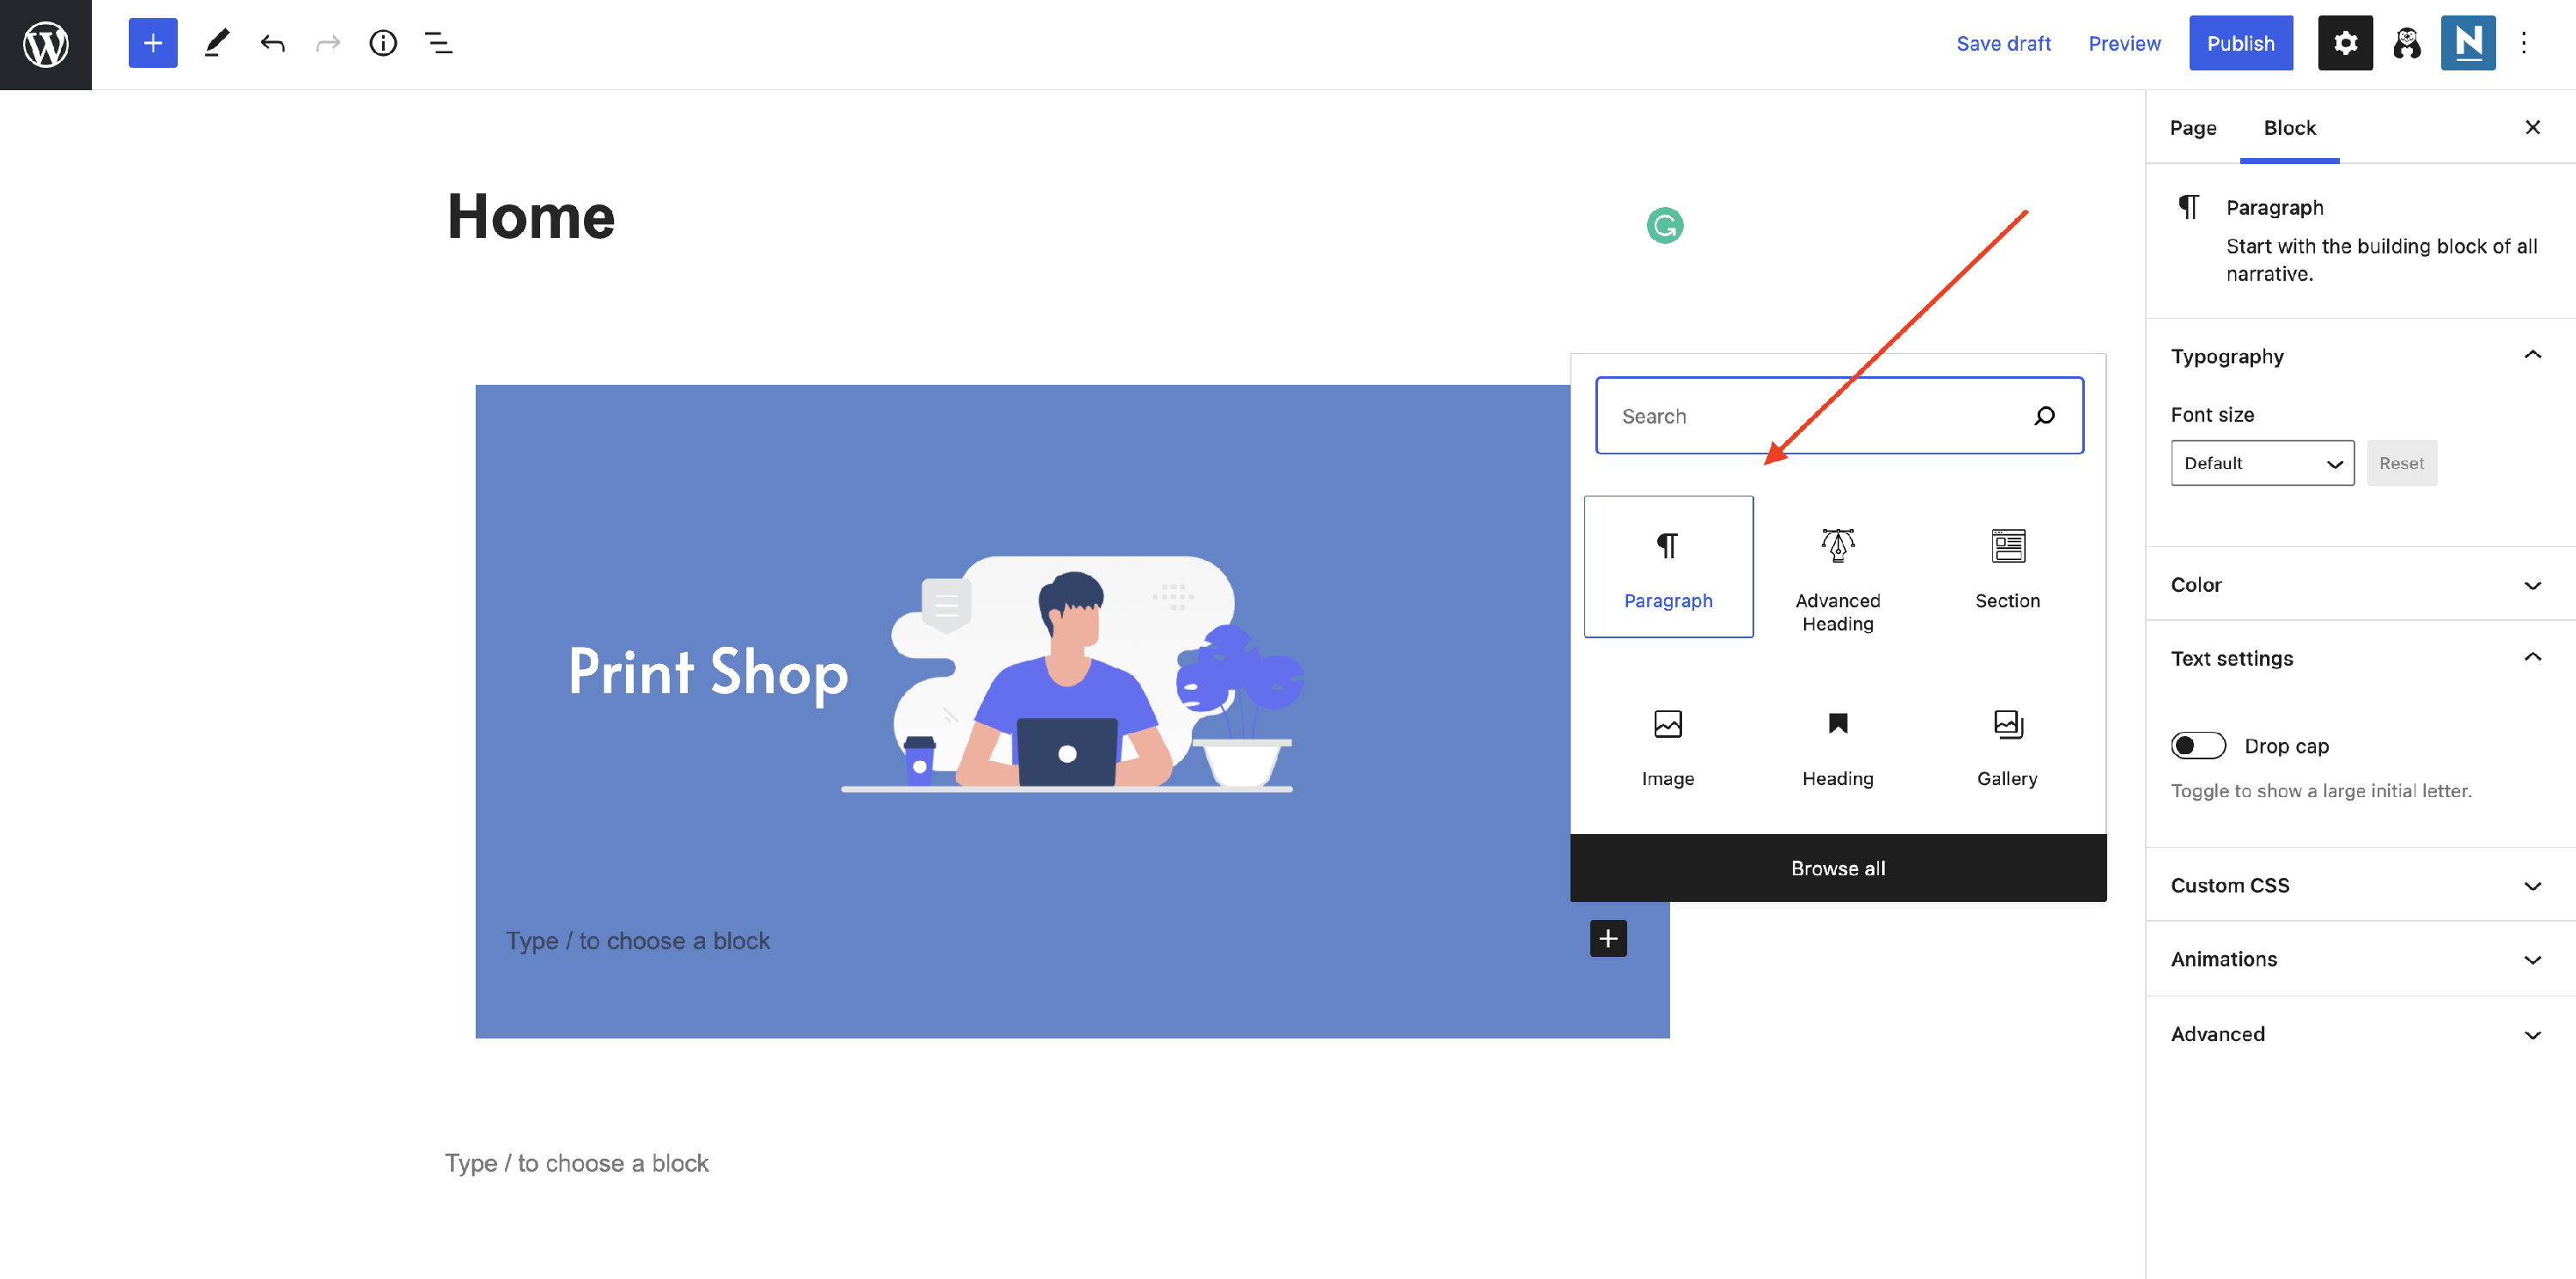
📝Note: You can adjust many things by commingling the settings available for the blocks and sections, such as alignment or text color.
Step 7: Insert a Button Group block, to ensure easy navigation on your website (e.g. Read More, Our Services).
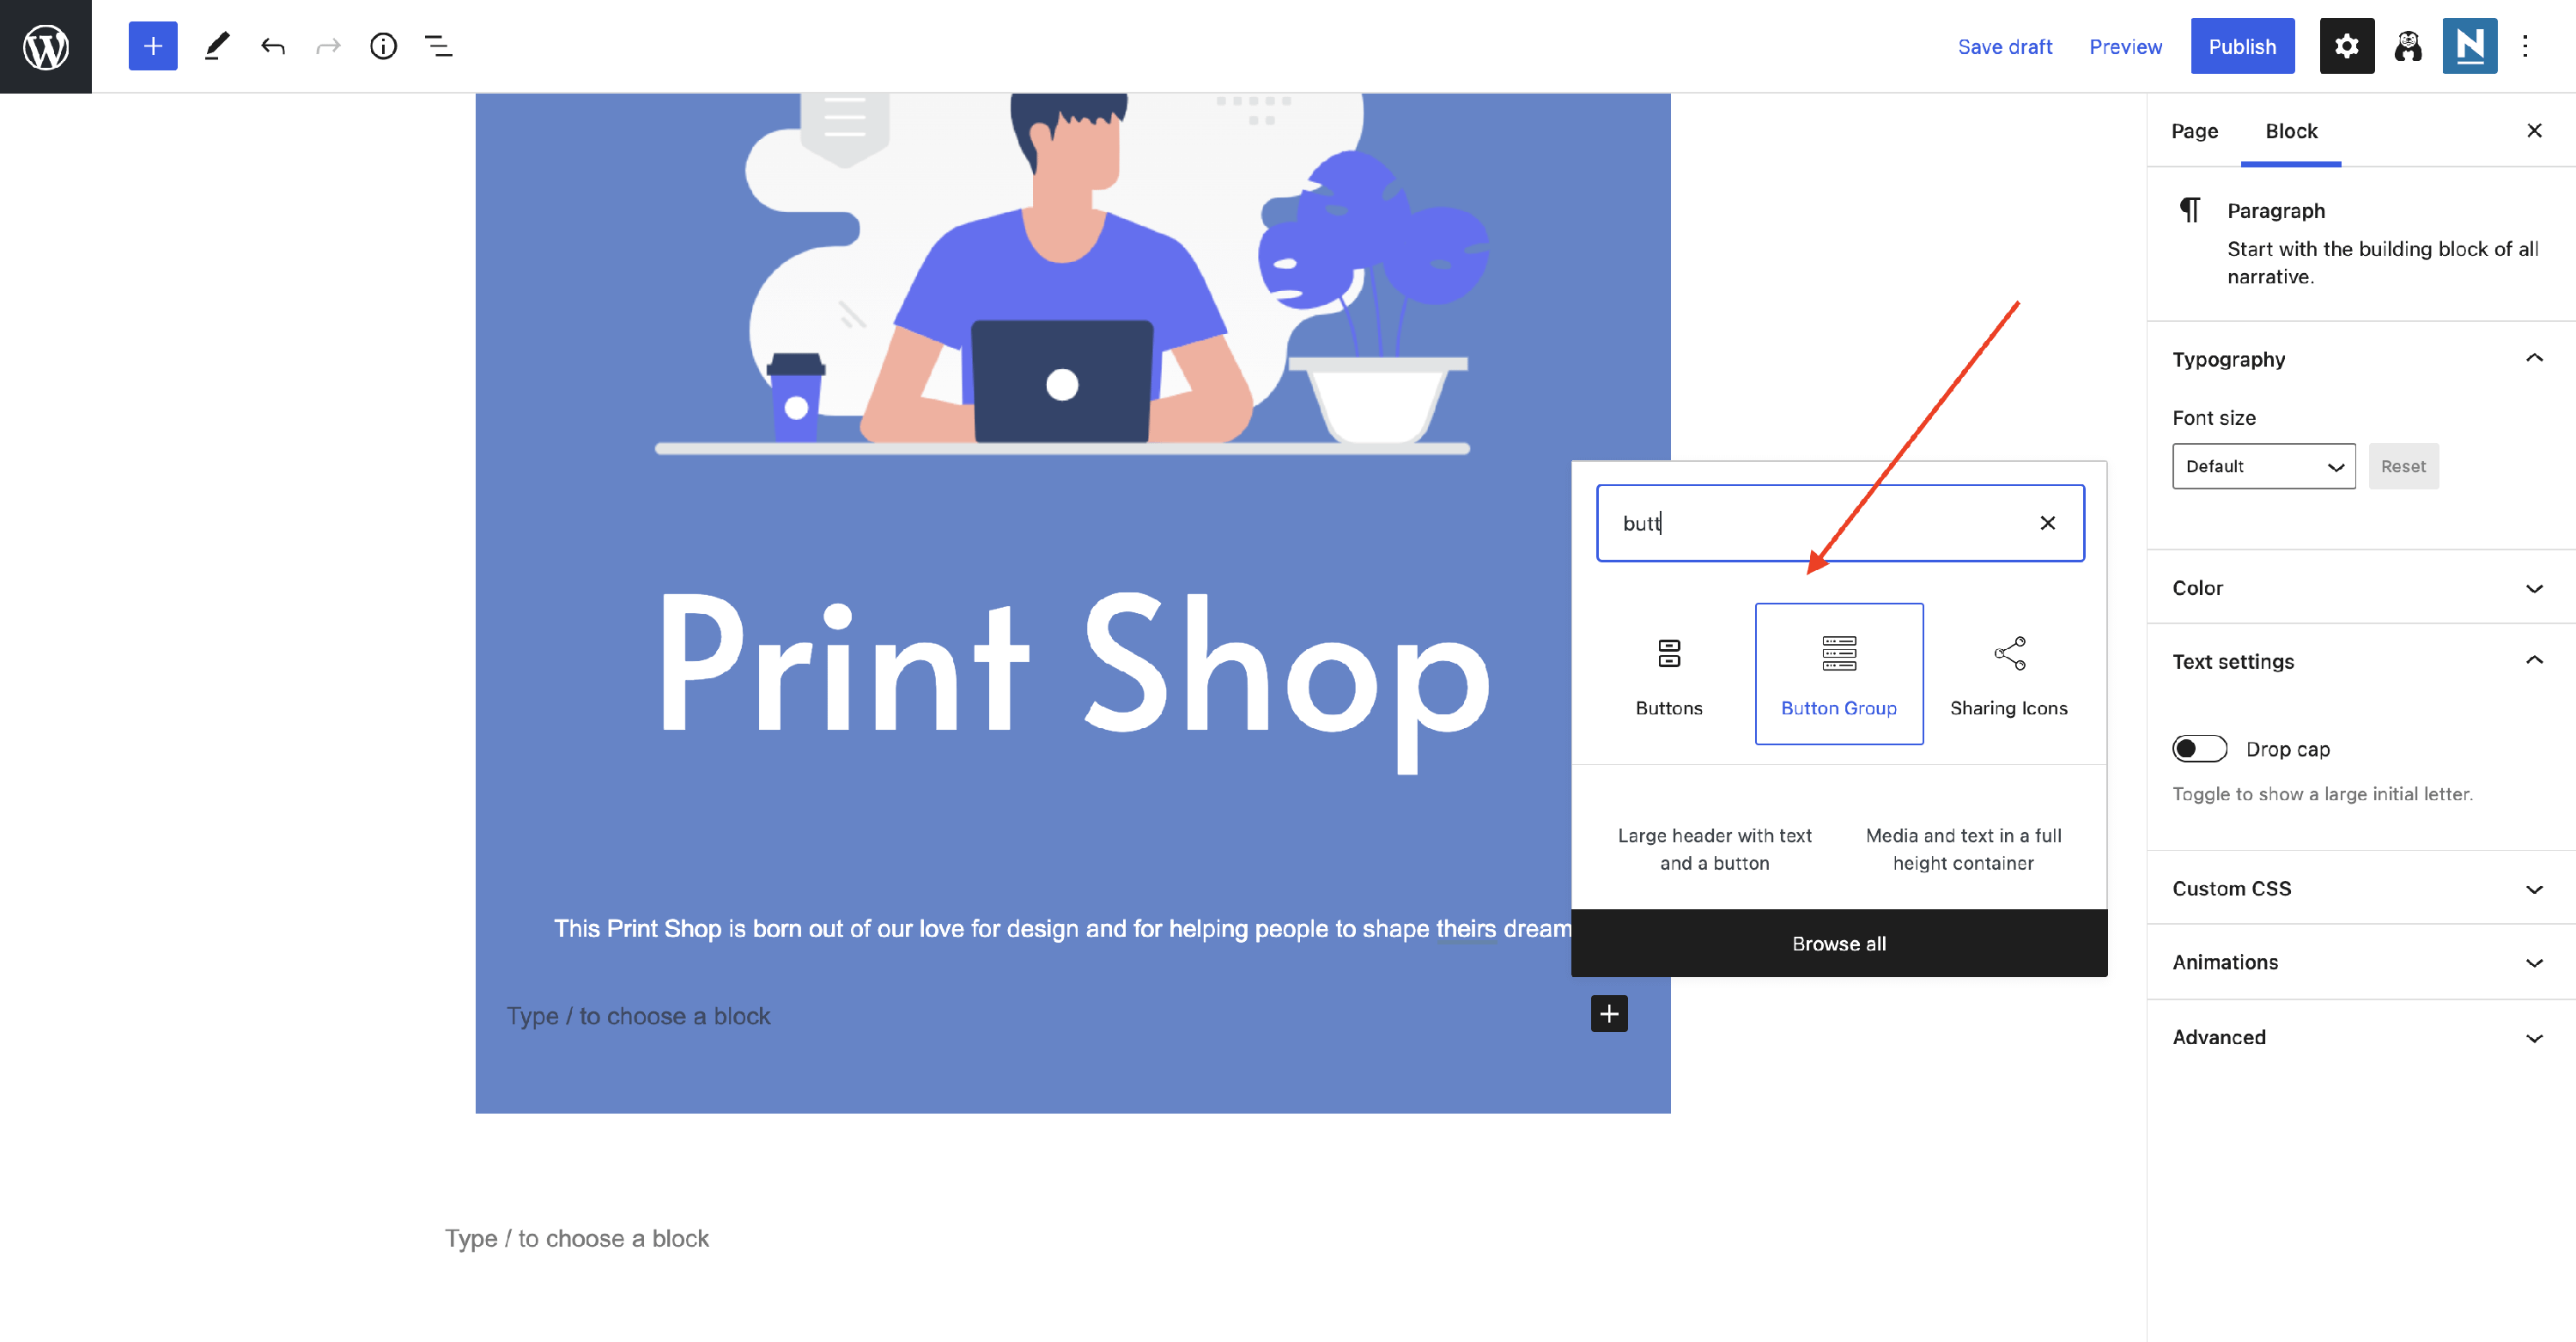
📝Note: Check this doc for further information about the Button Group block.
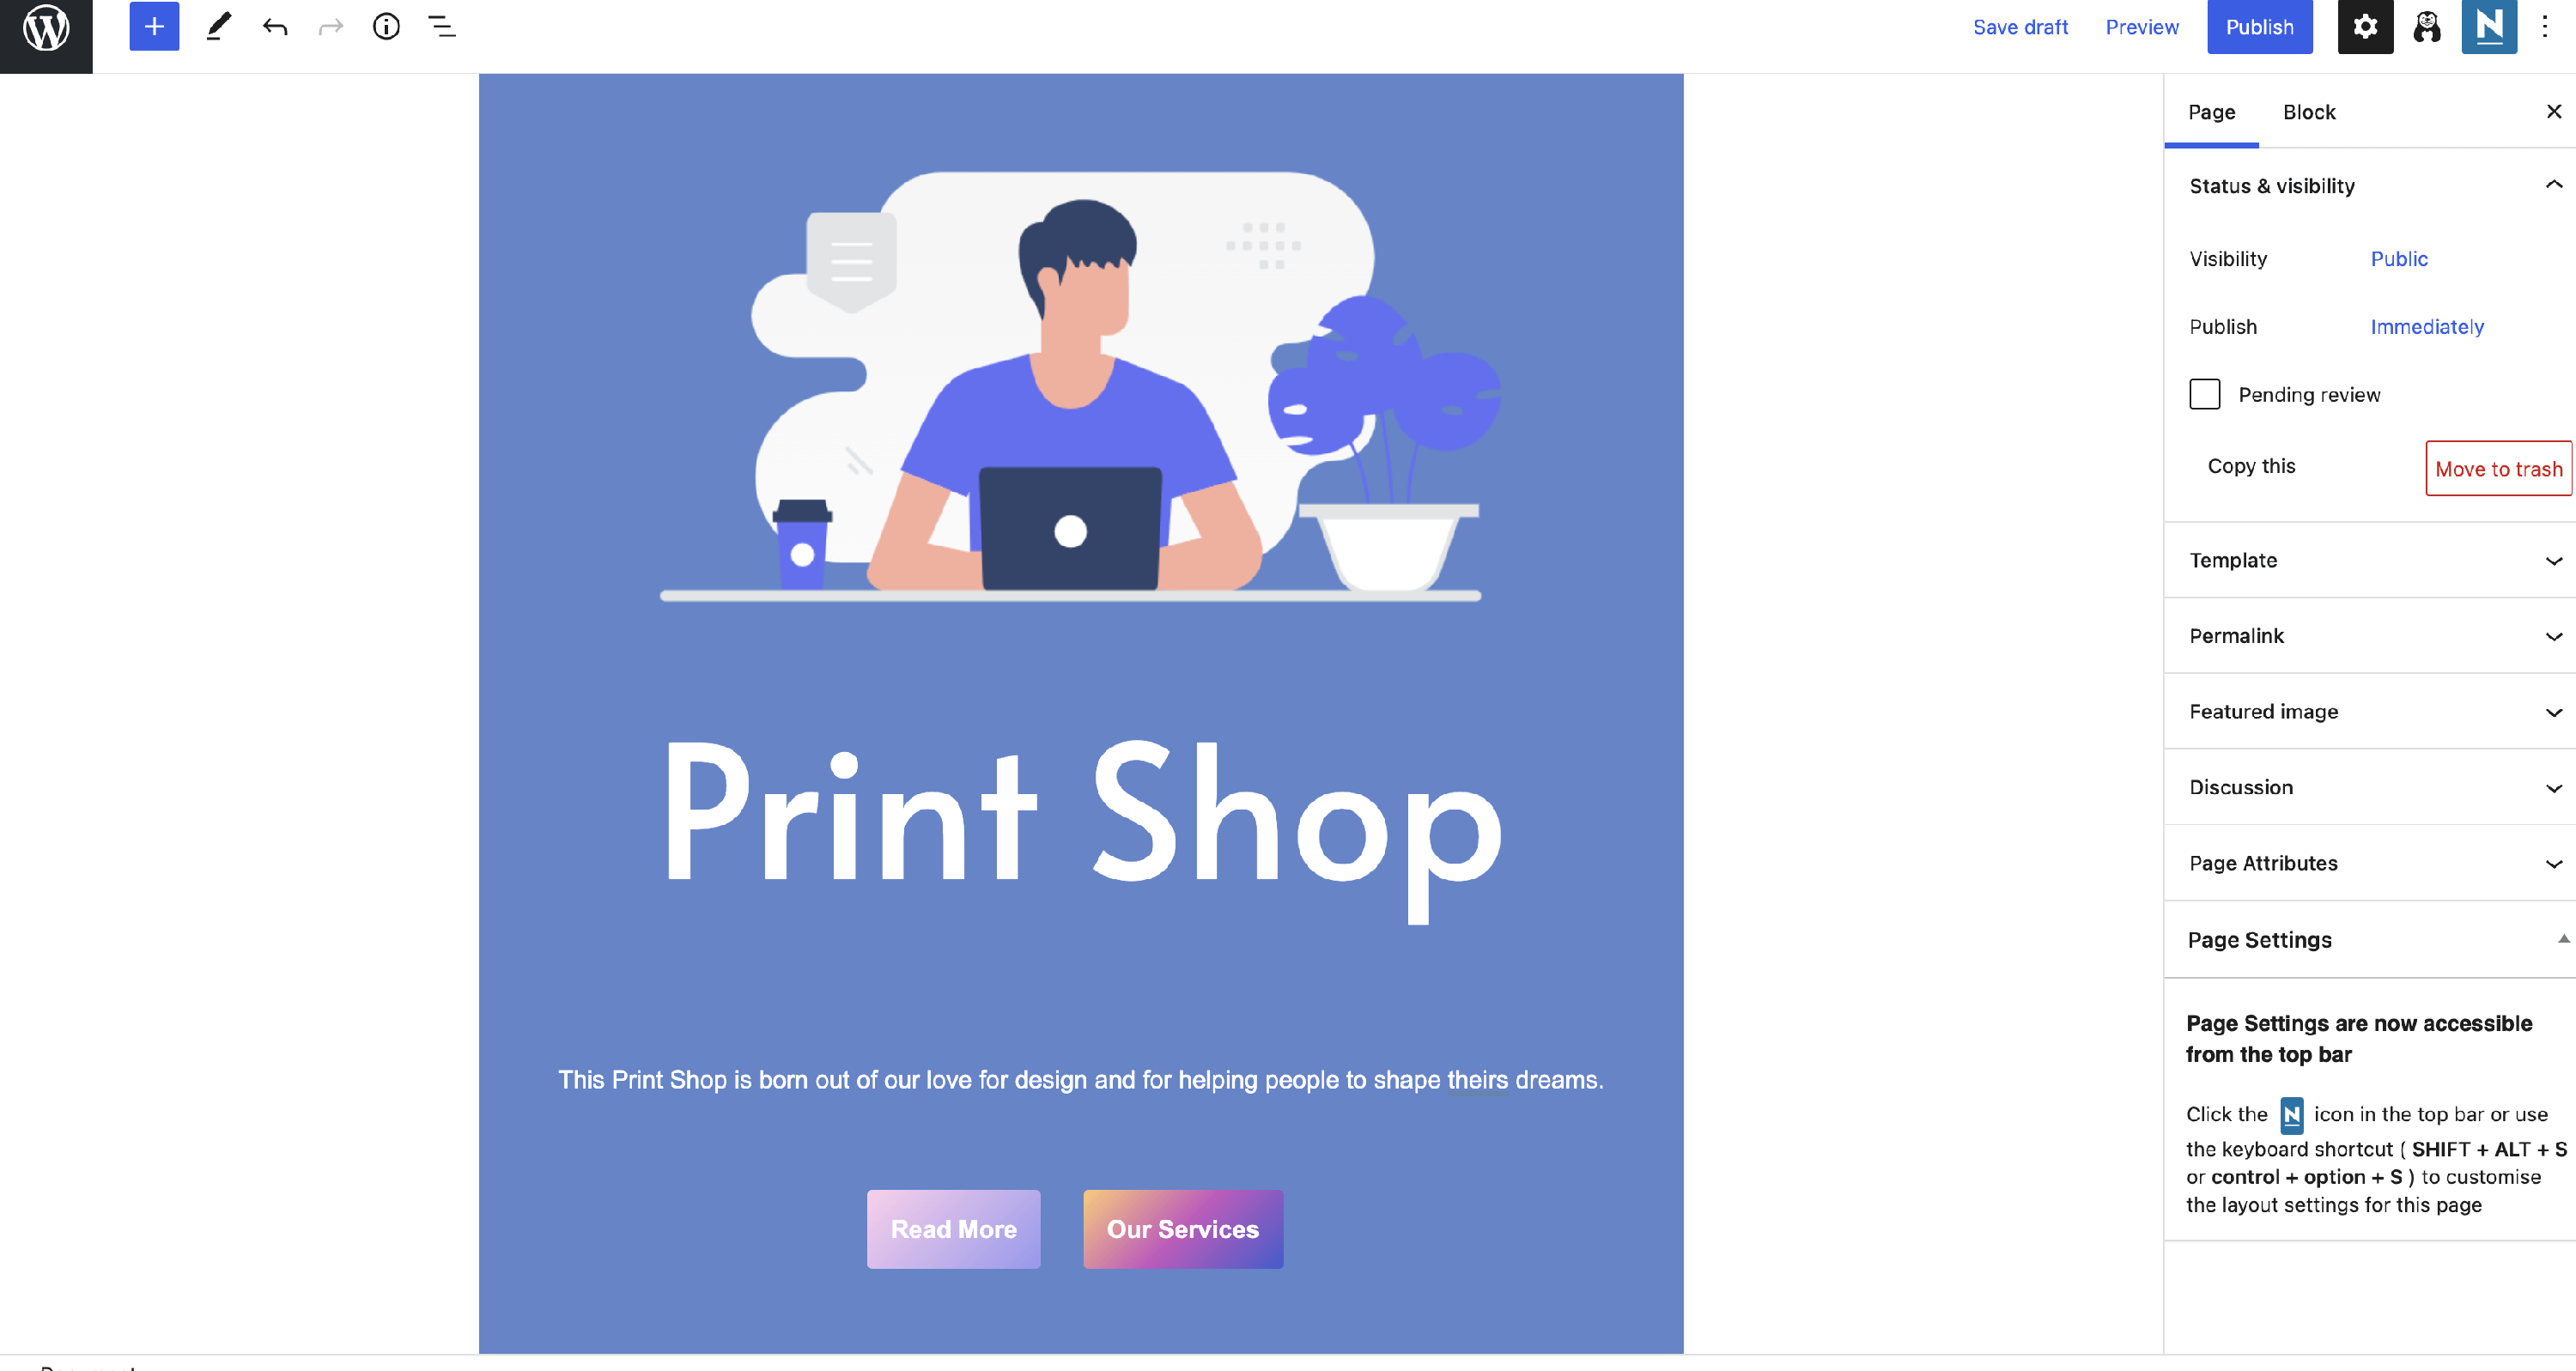
💡 Result - this is how the Headline Section can look like:
Building a Sub-Headline Section
The Sub-Headline Section is used to emphasize certain features of your brand.
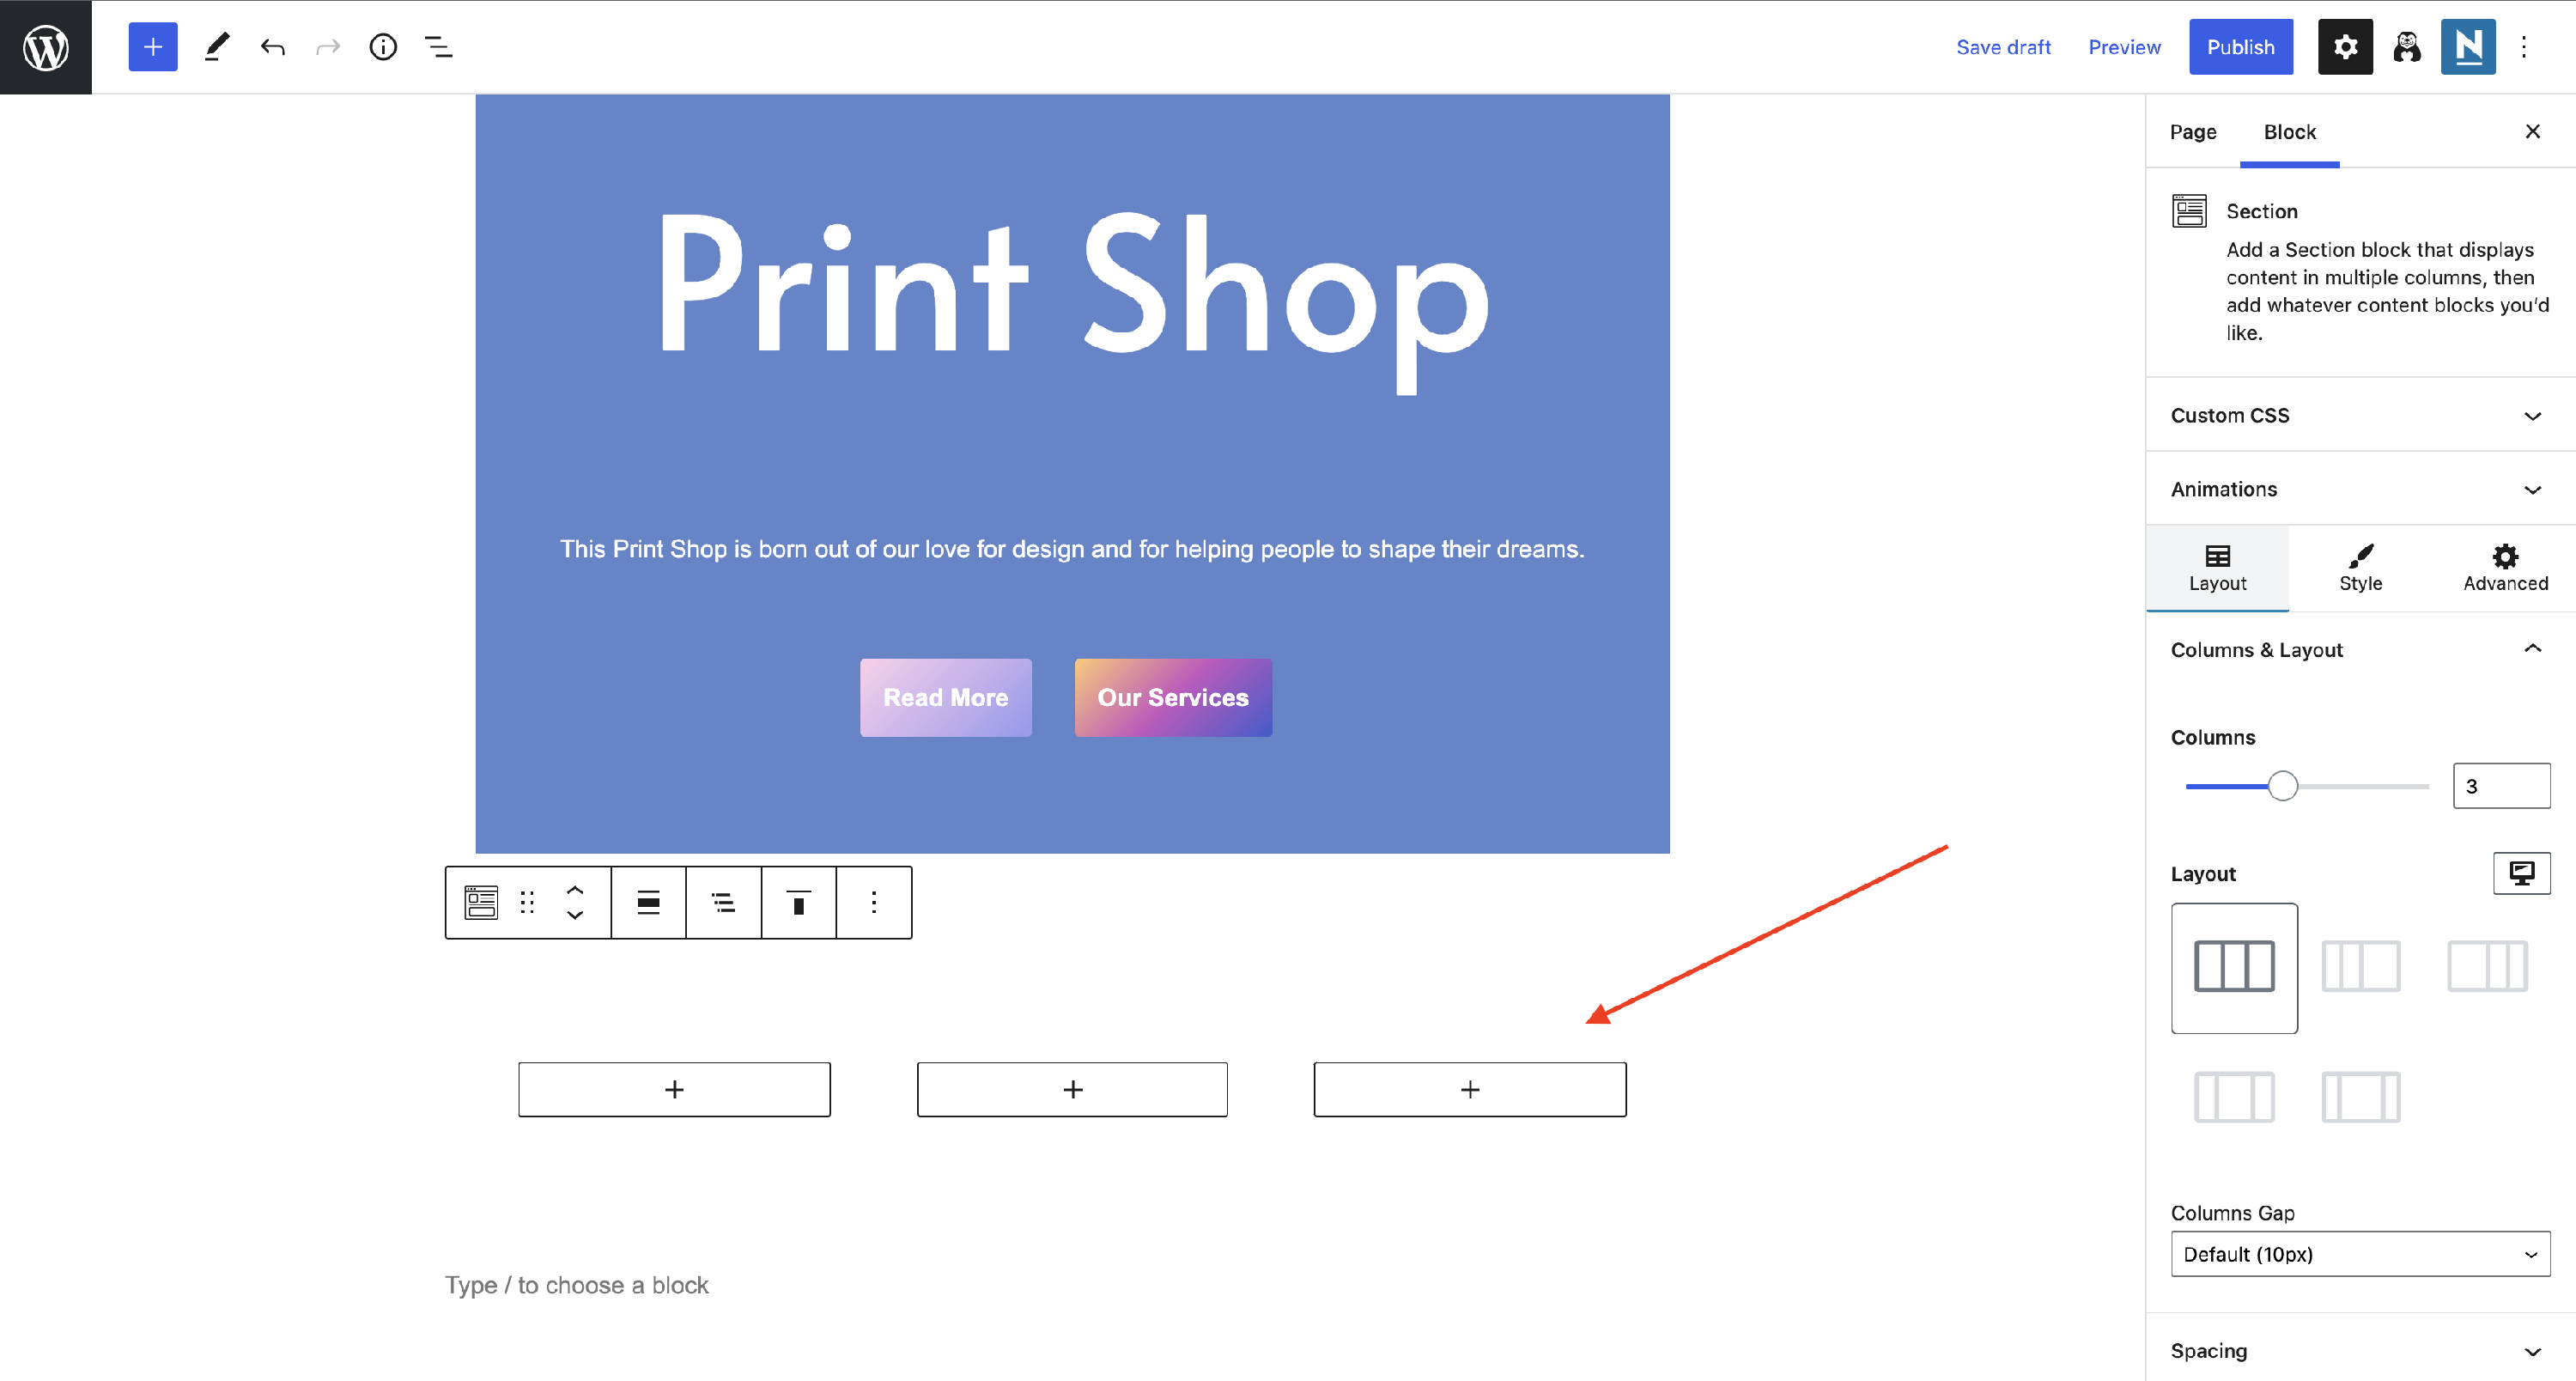
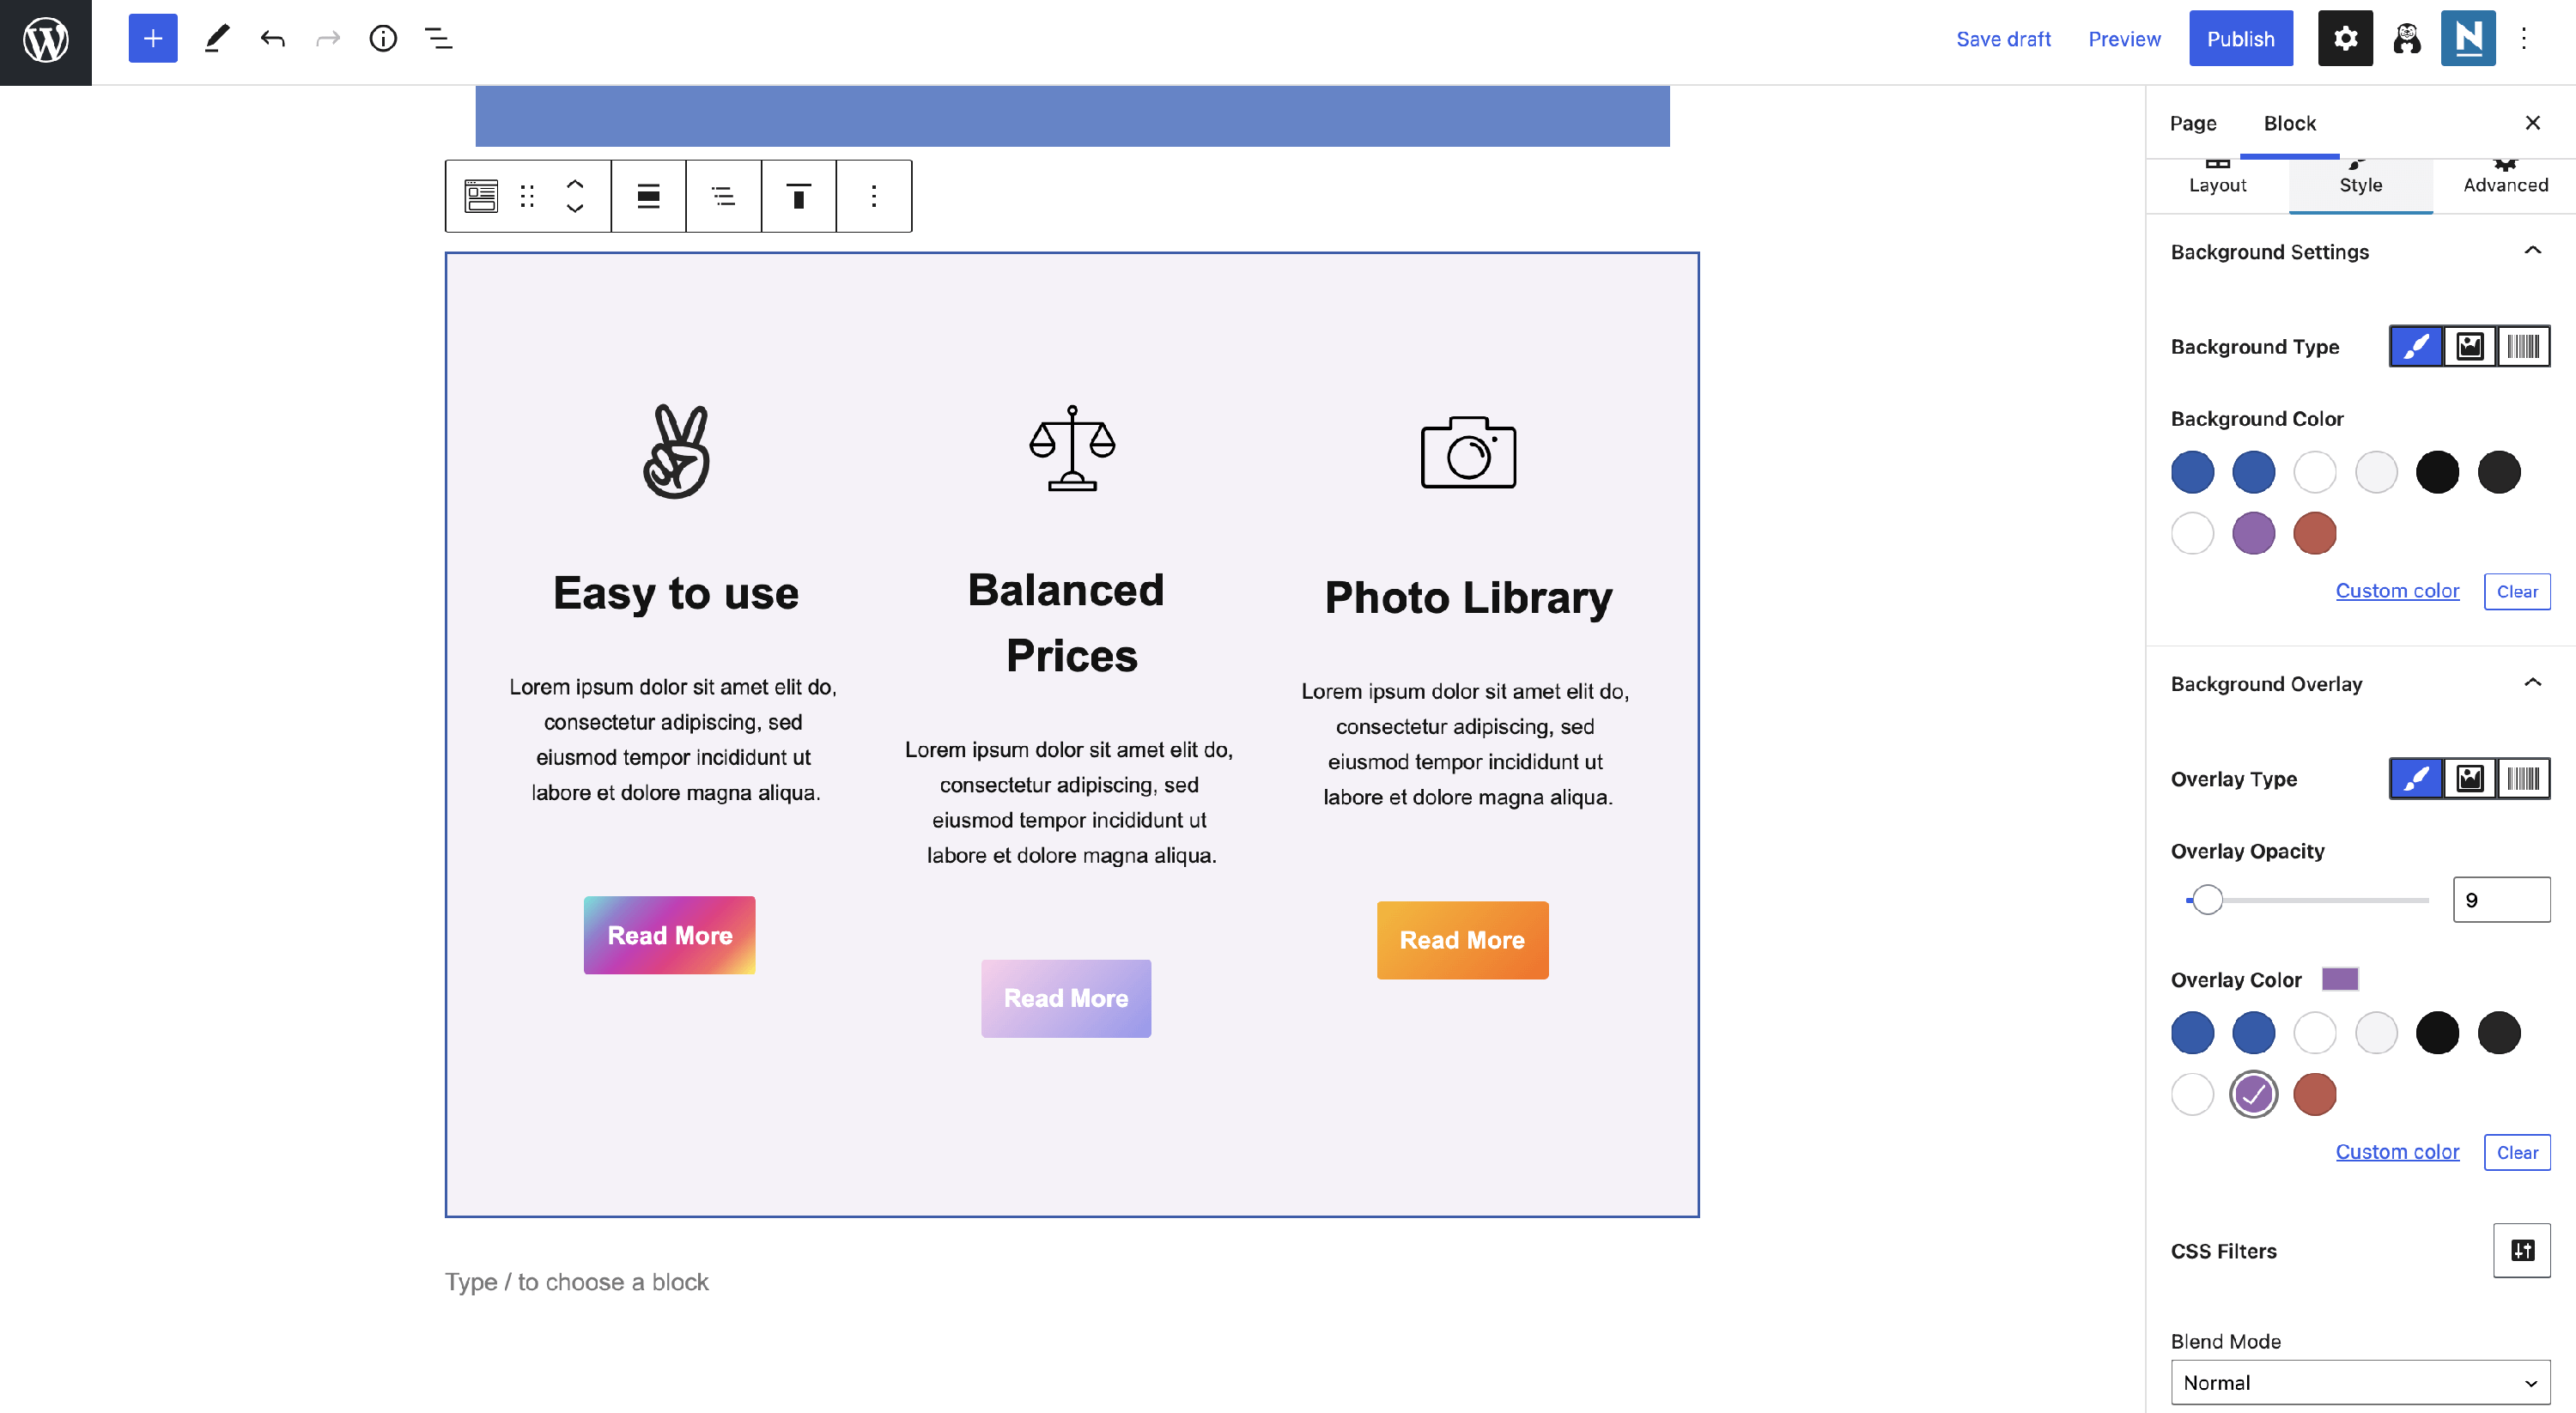
Step 1: Insert a Section block and choose a layout for it (e.g. a three-column layout, to showcase characteristics of your product).
Step 2: Populate the columns with useful advertisements of your brand, using the Service block.

The Service Block contains the Icon Block (1), the Advanced Heading, and also the Button Group Block.
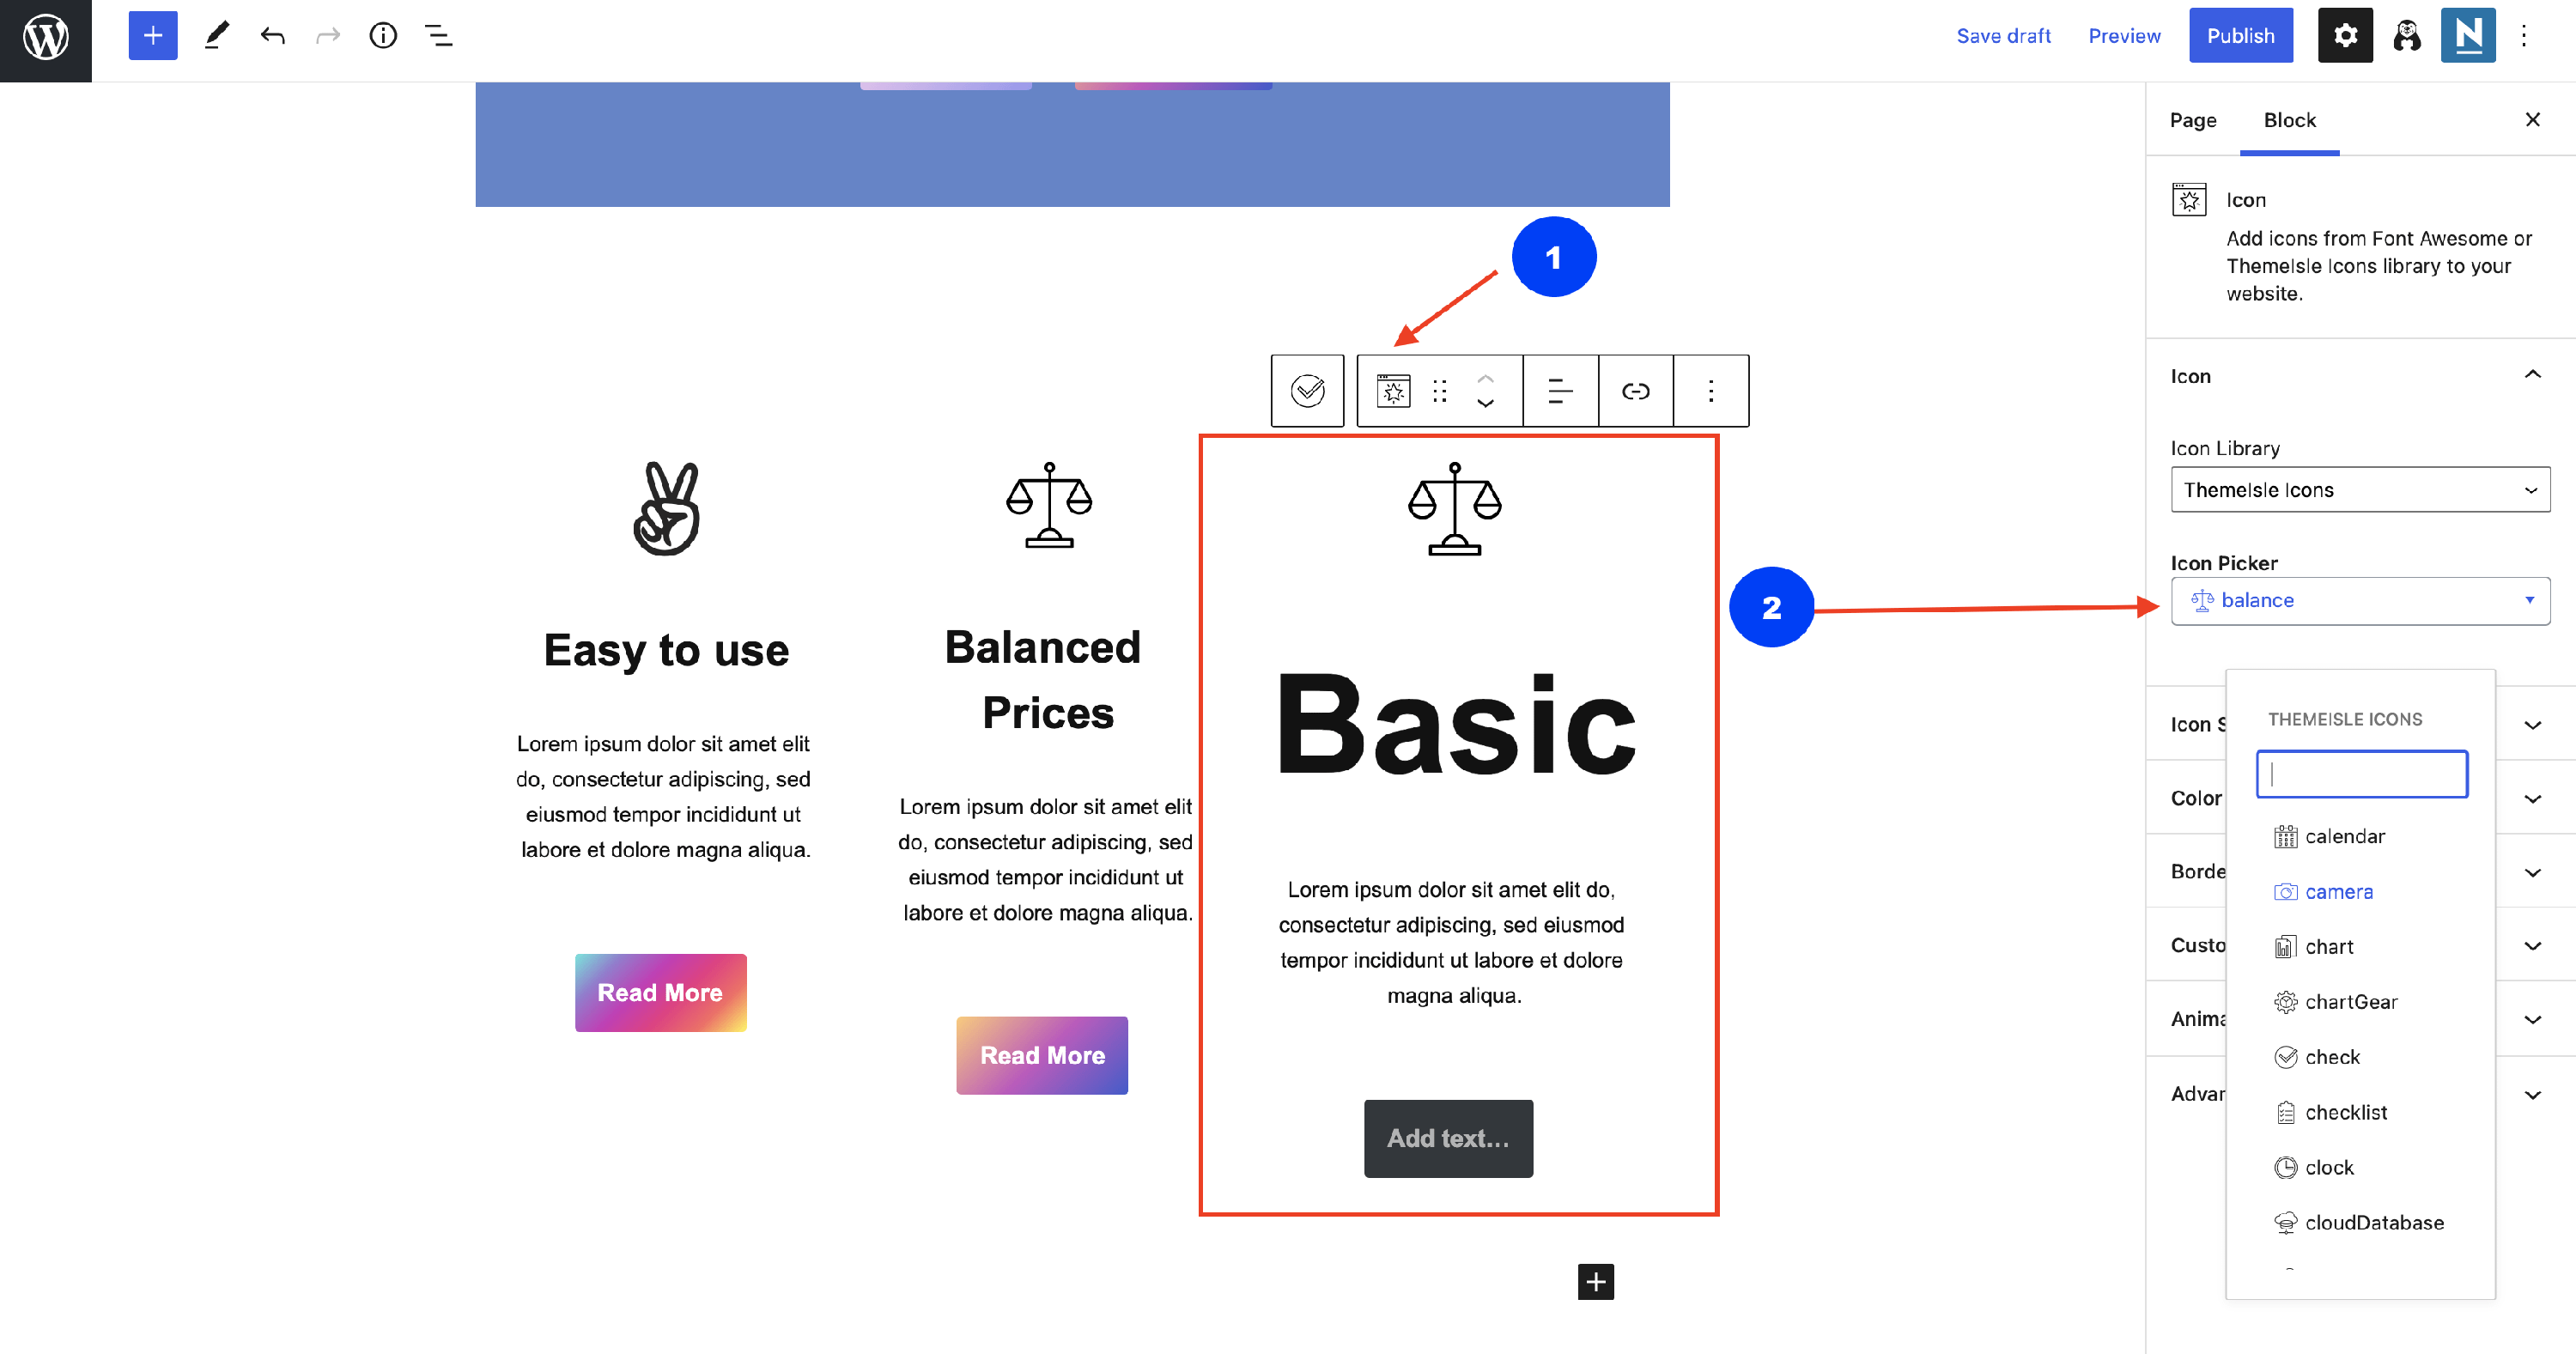
📝Note: Check this doc for further information about the Service block.
💡Result - this is how the Sub-Headline Section can look like:
Creating the Testimonials Section
The Testimonials Section boosts the credibility of your website, towards users' opinions.
Step 1: Insert a Section Block and choose a layout suitable to the number of testimonials that you want to add.
Step 2: Use the Testimonials block to easily create the real ones.
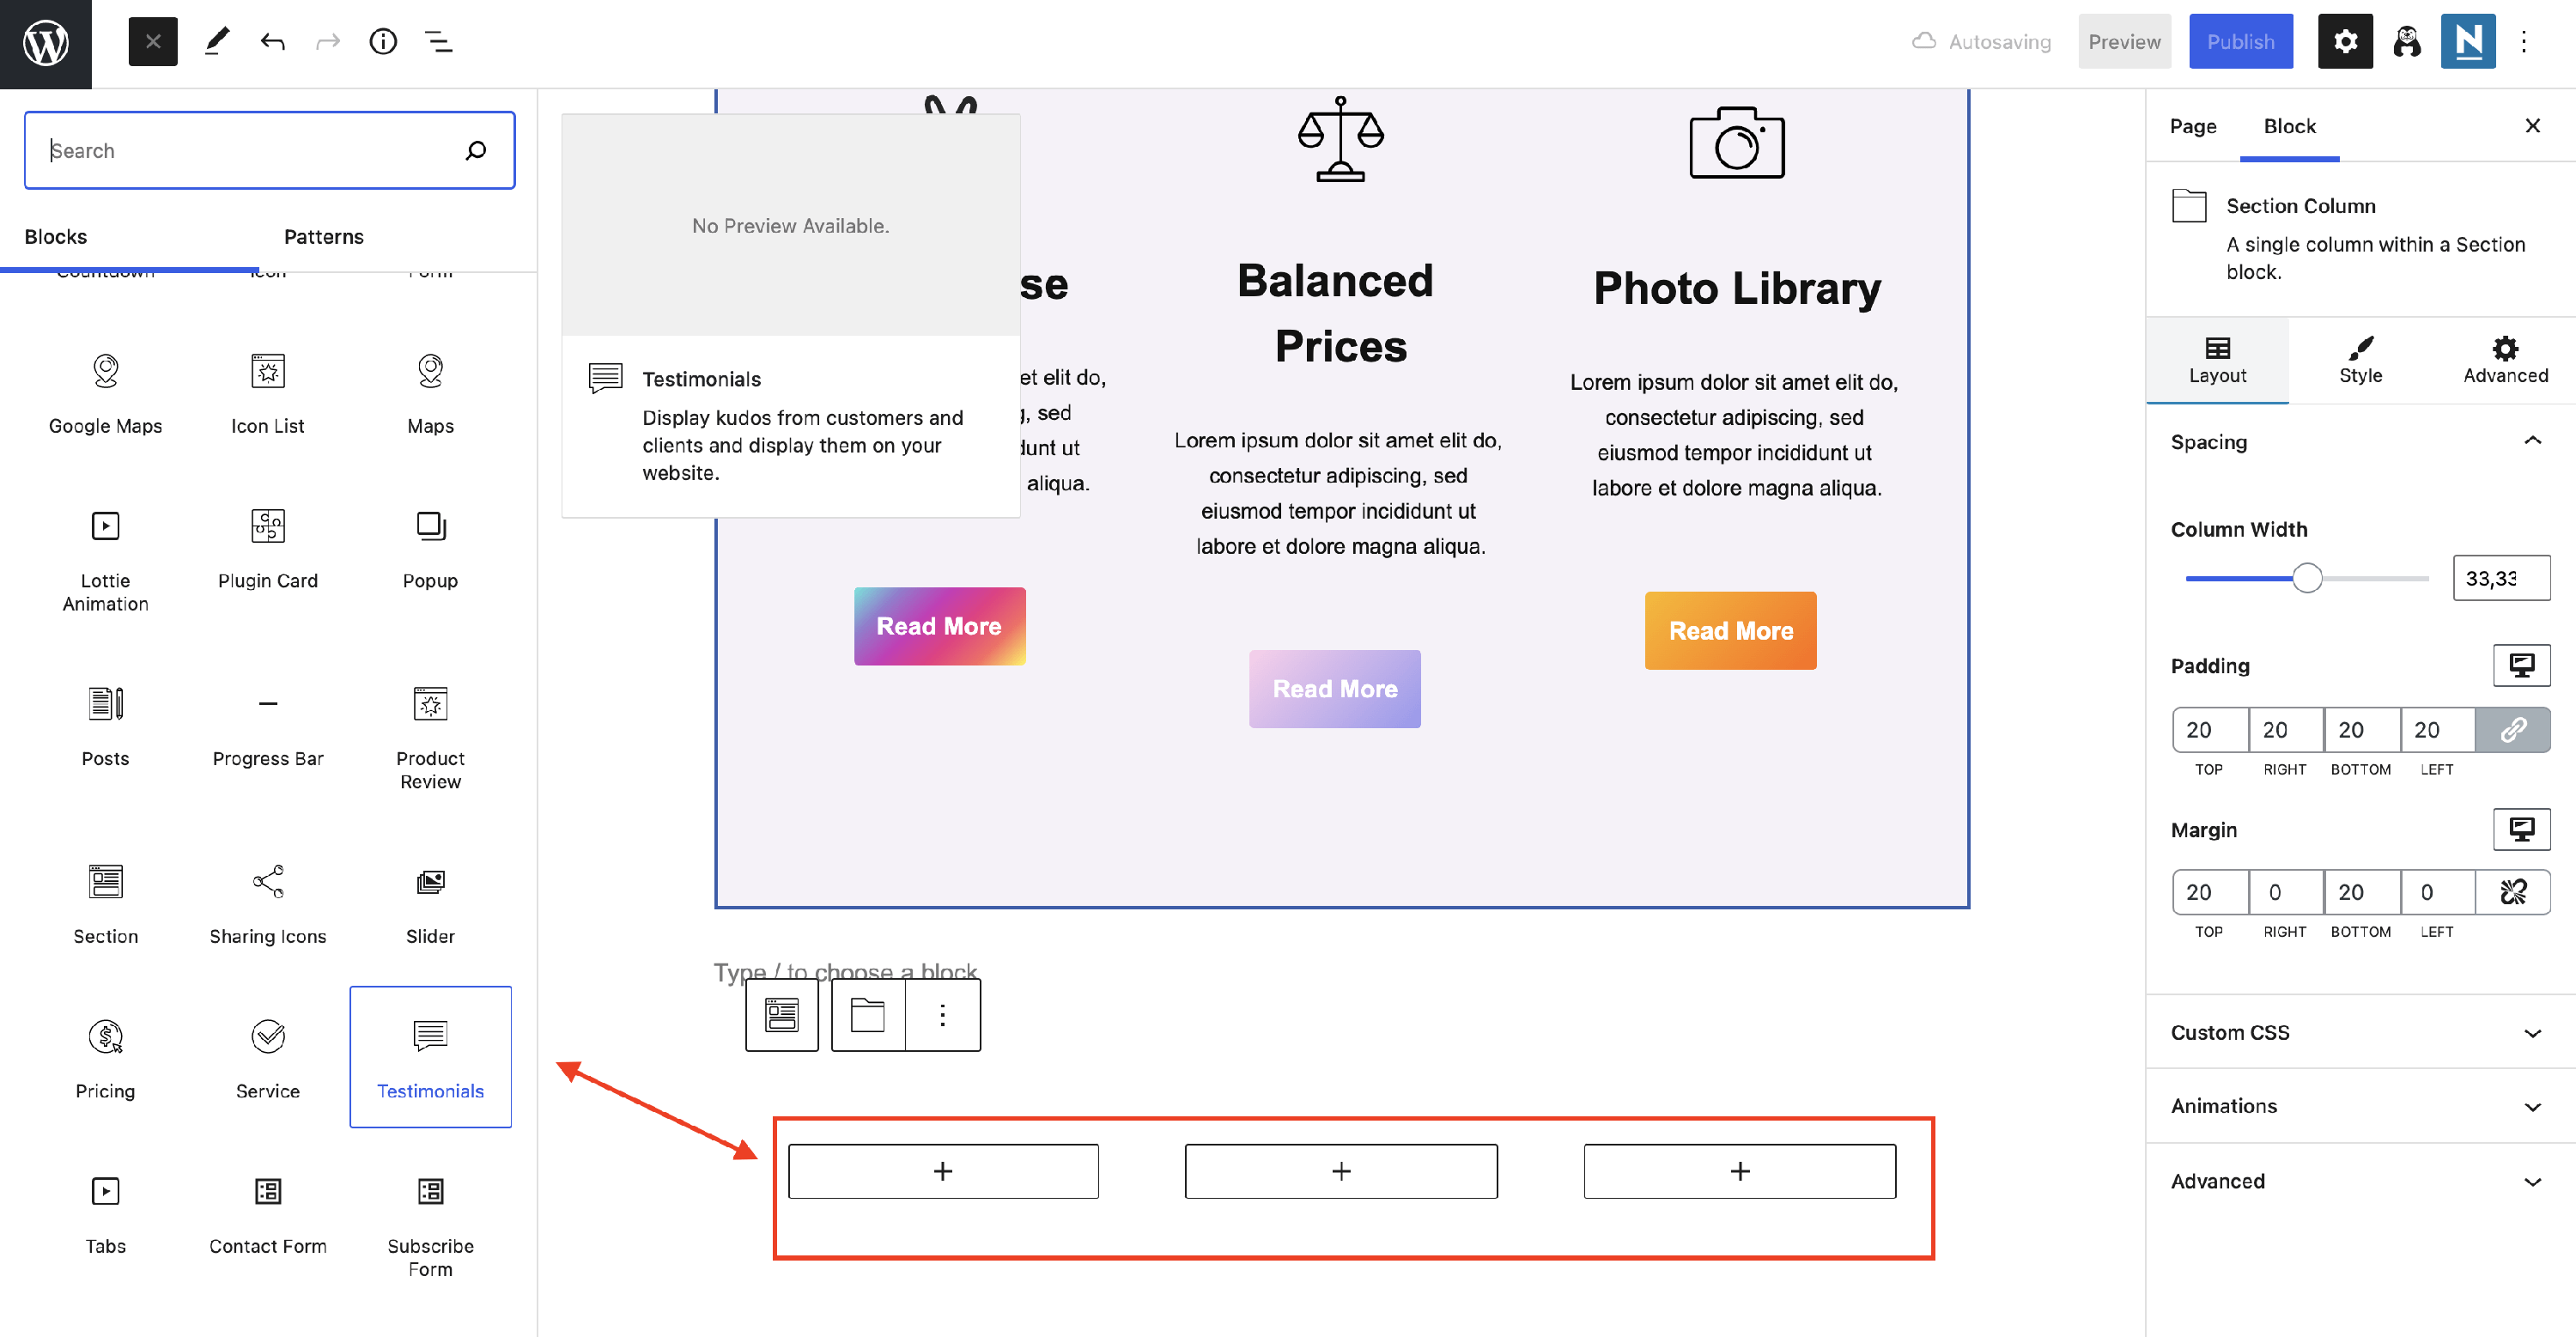
📝Note: Check this doc for further information about the Testimonials Block.
Step 3: Customize the content, by adding images, content, and background.
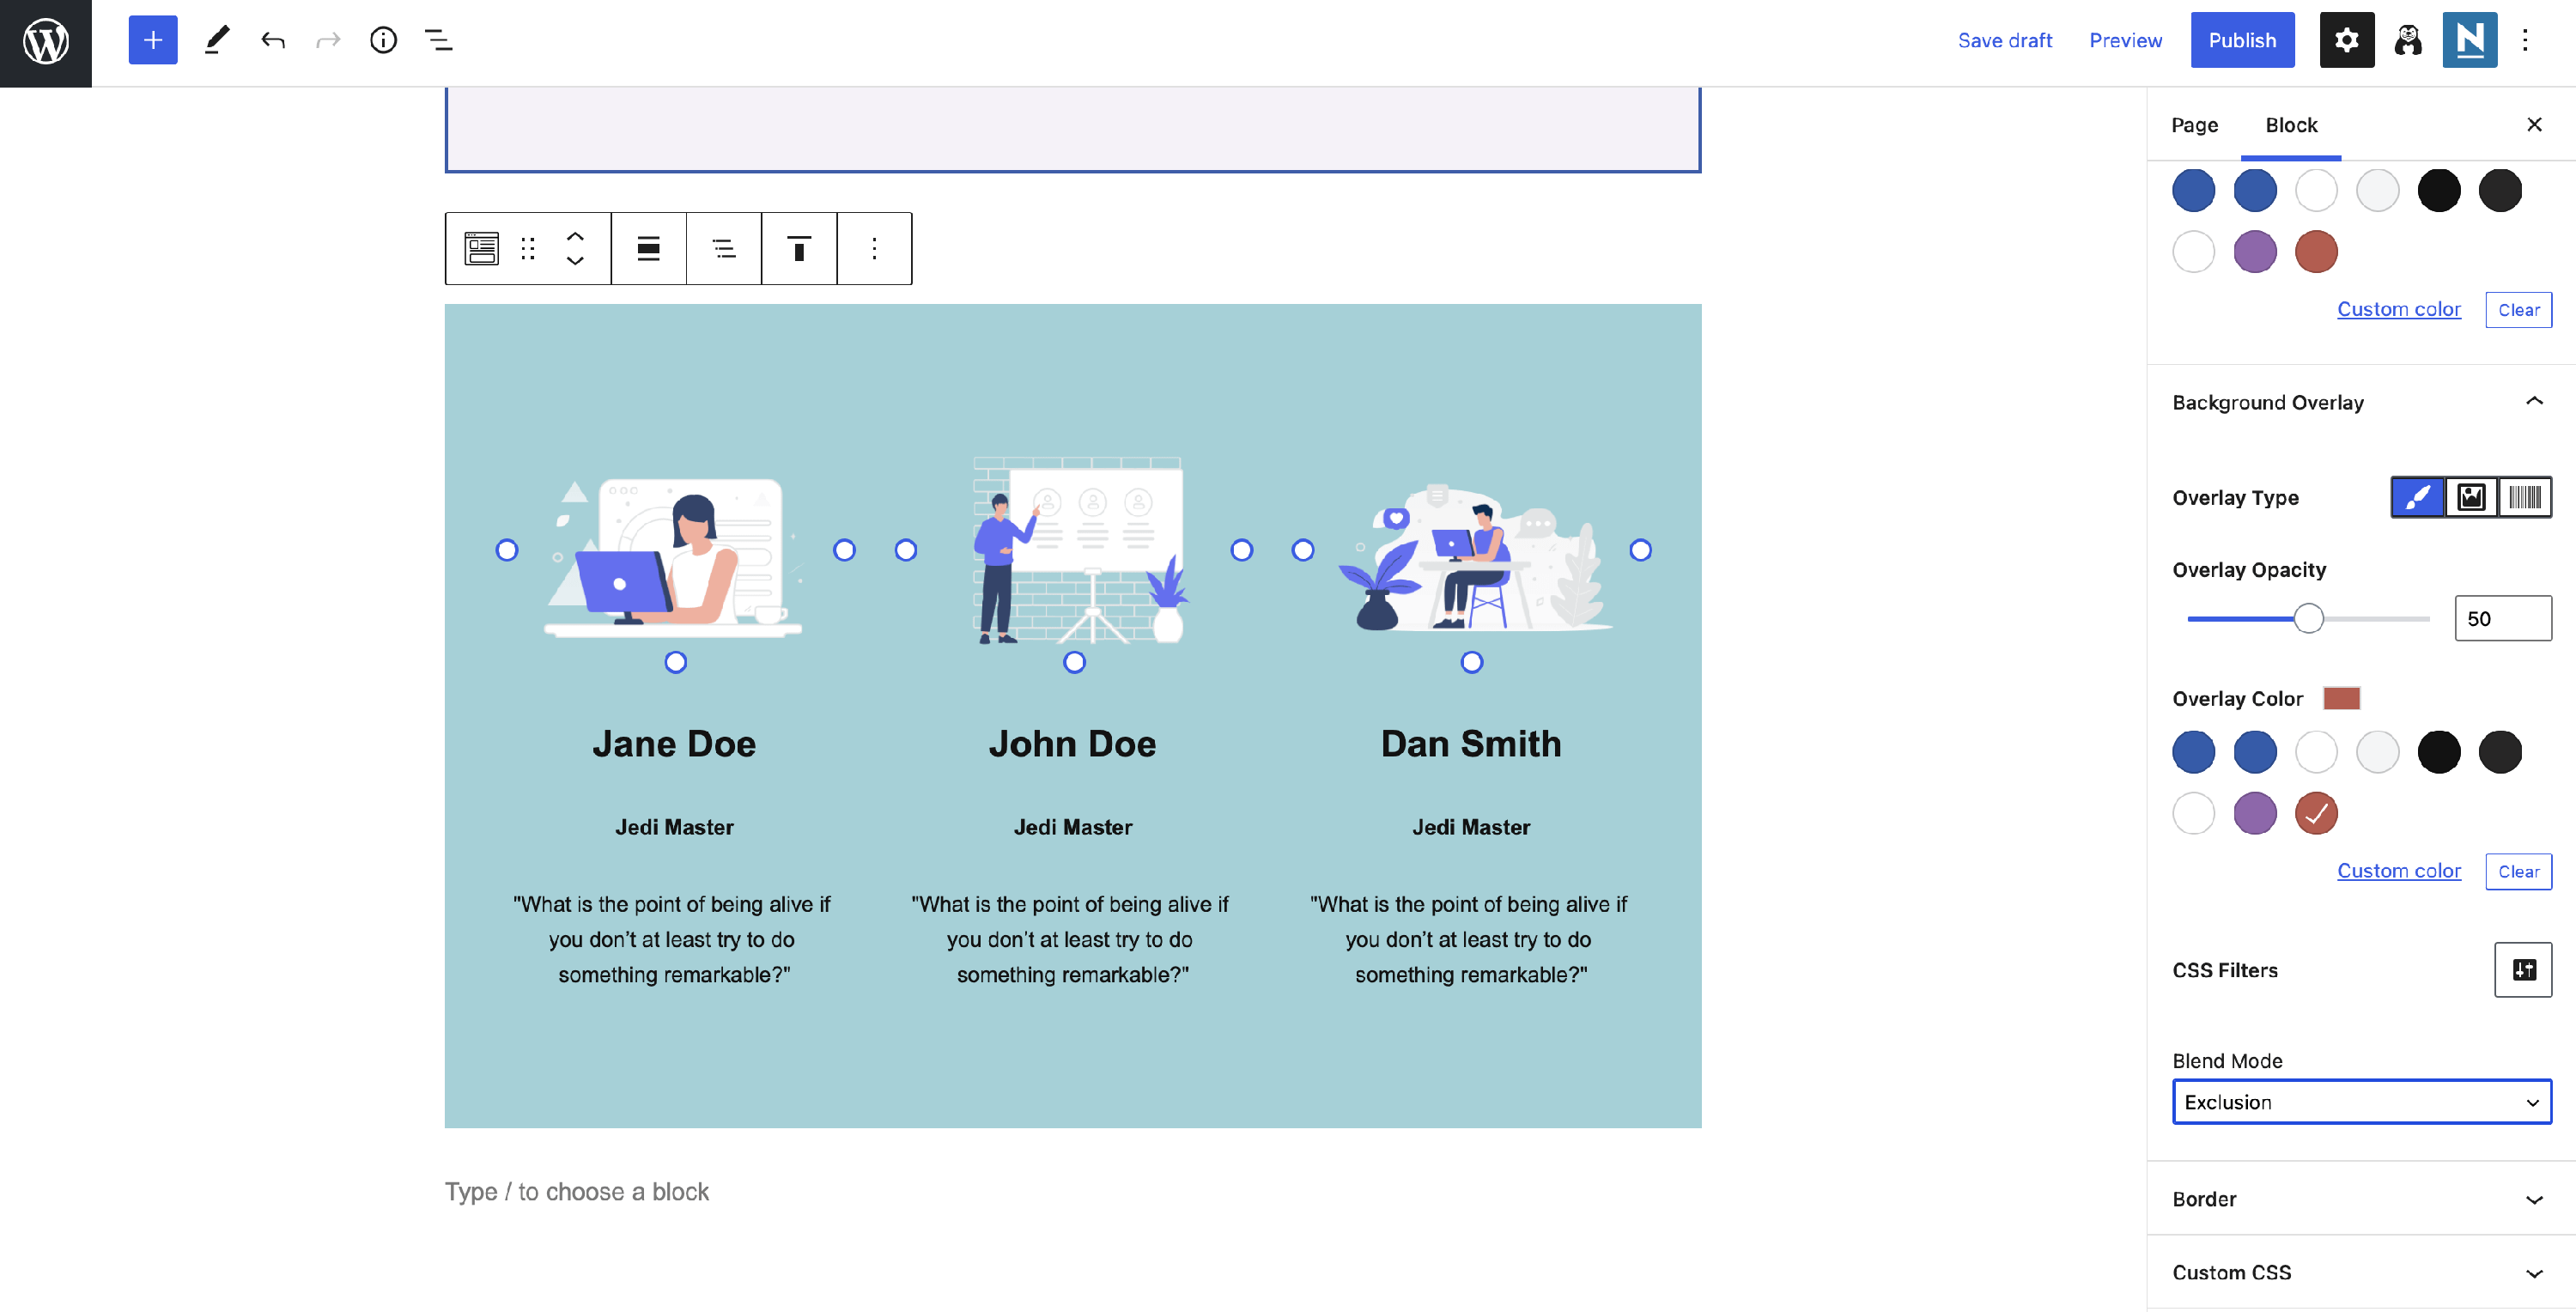
Step 4: To create a more appealing section, insert other blocks like the Advanced Heading, for the title (1), and a Progress Bar, to track the happiness score (2).
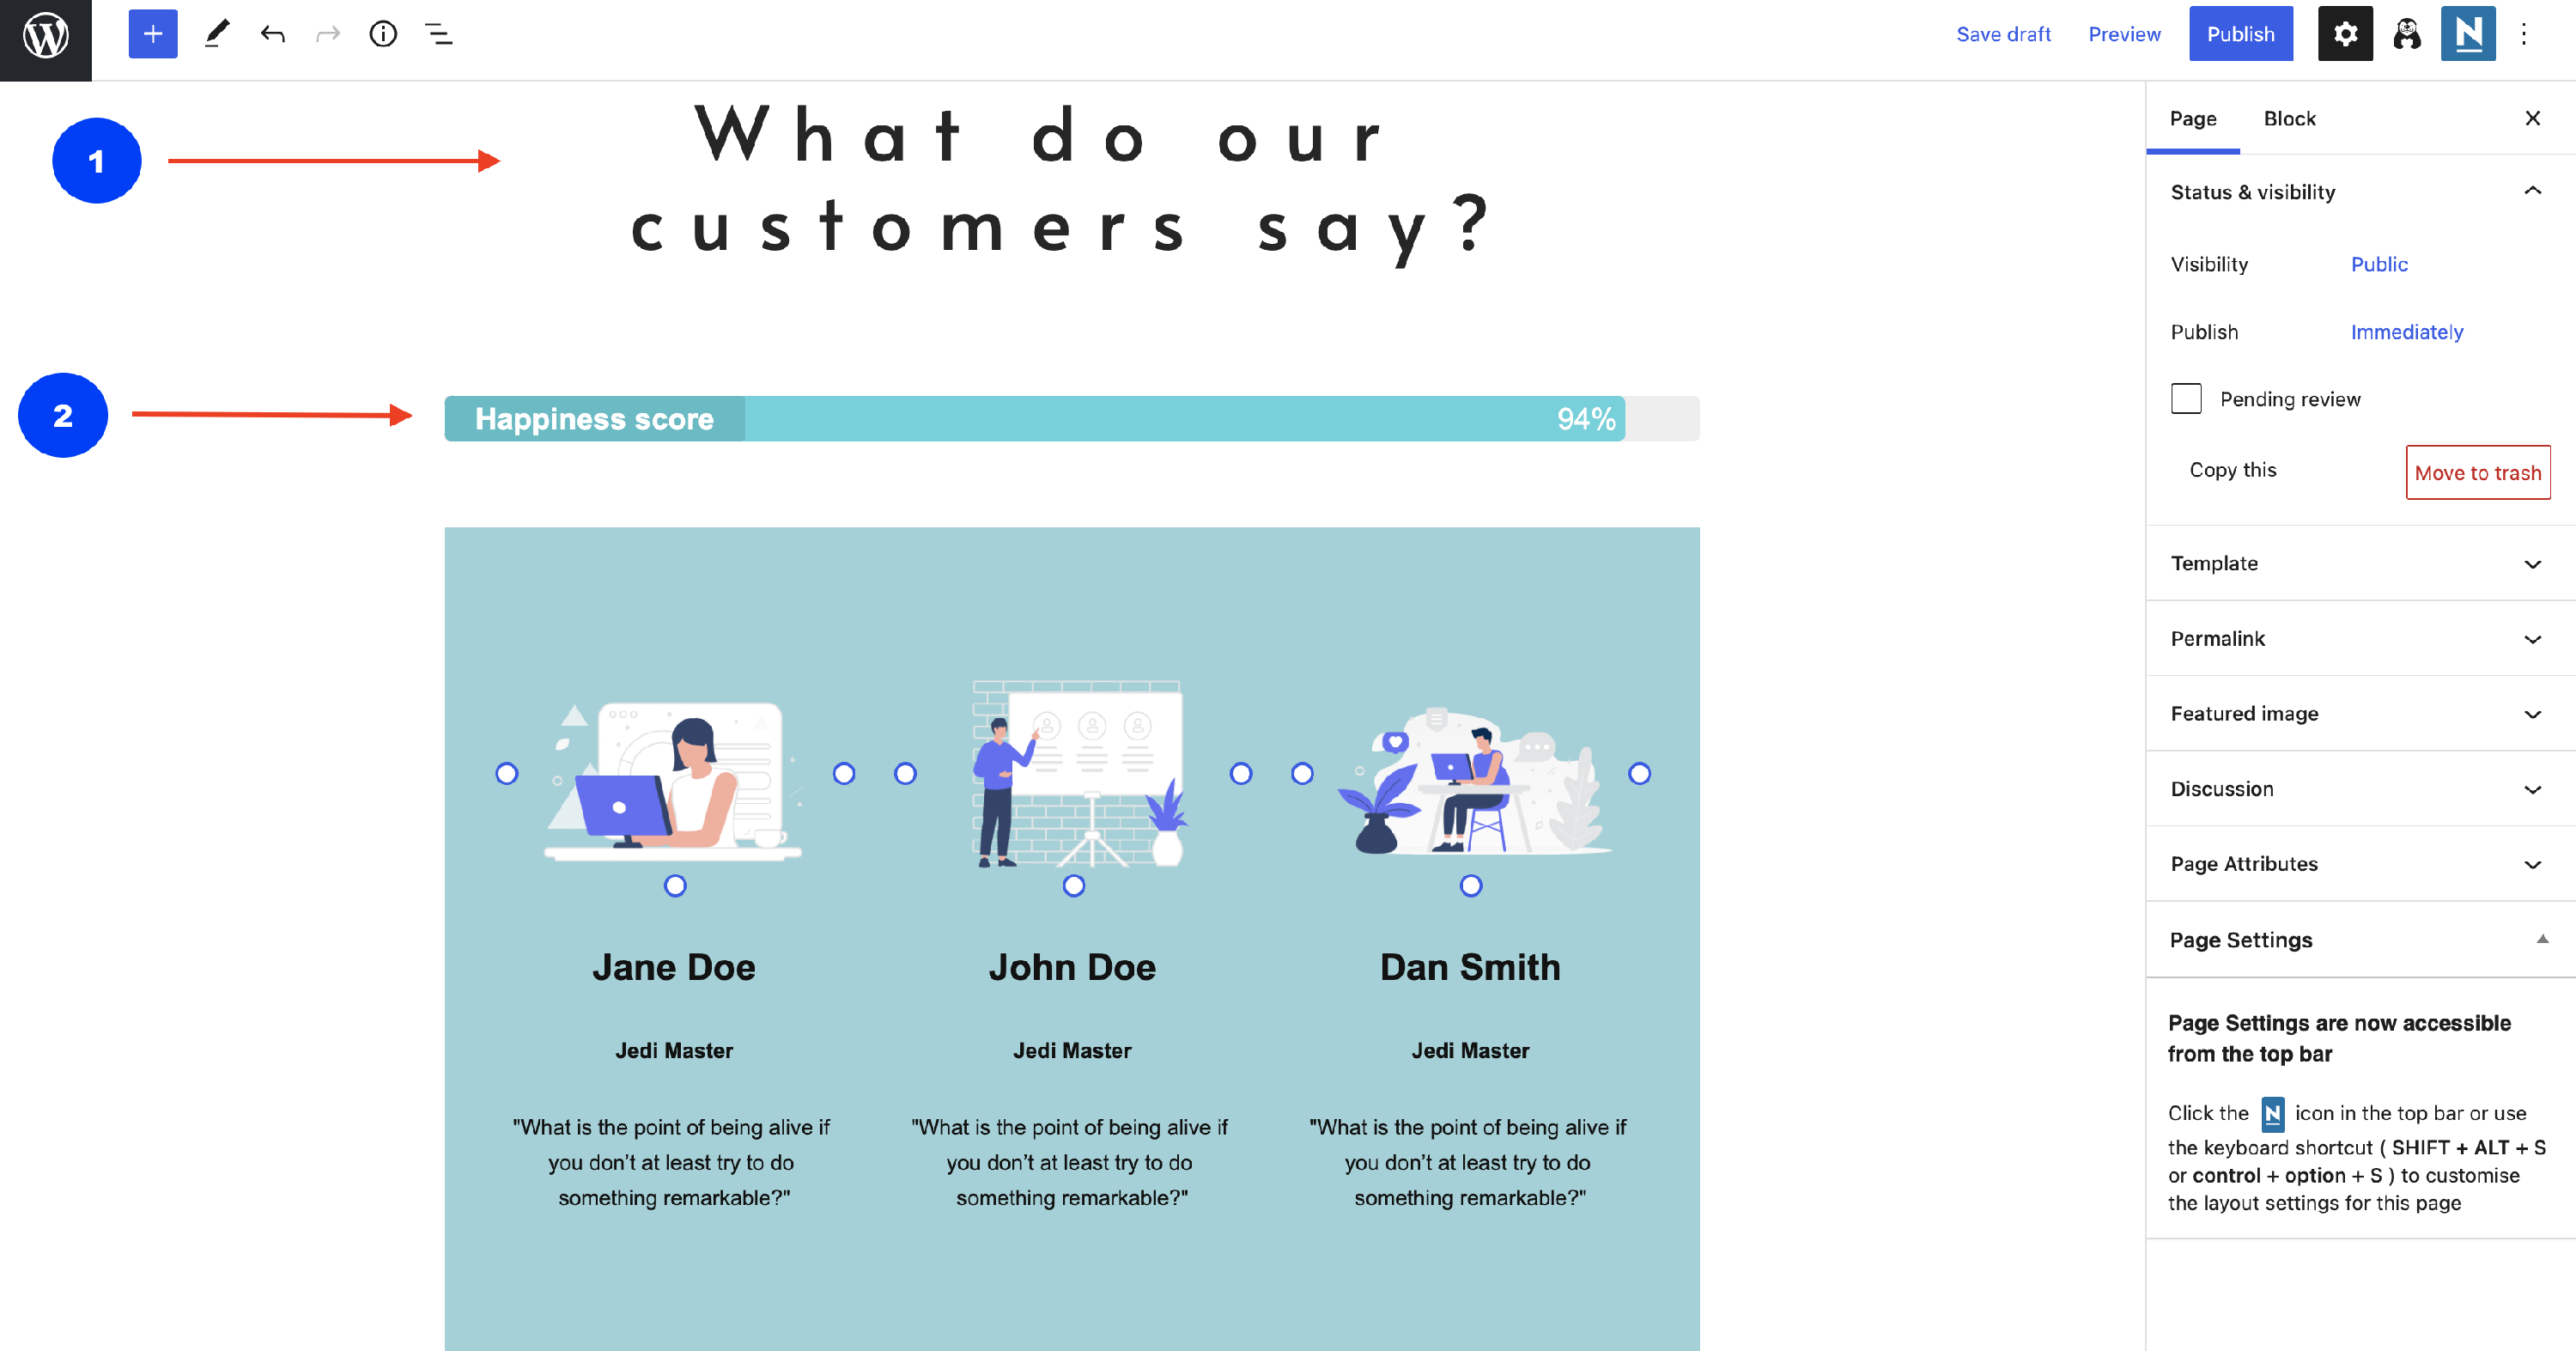
📝Note: Check this doc for further details about the Progress Bar.
Creating the About Section
The About Section is meant to establish a certain connection between the users and the creator of the website, by sharing some personal information.
Step 1: Insert a Section Block and choose a layout suitable to the details category that you want to deliver.
Step 2: Add the About Author block, to have an easier start with this section.
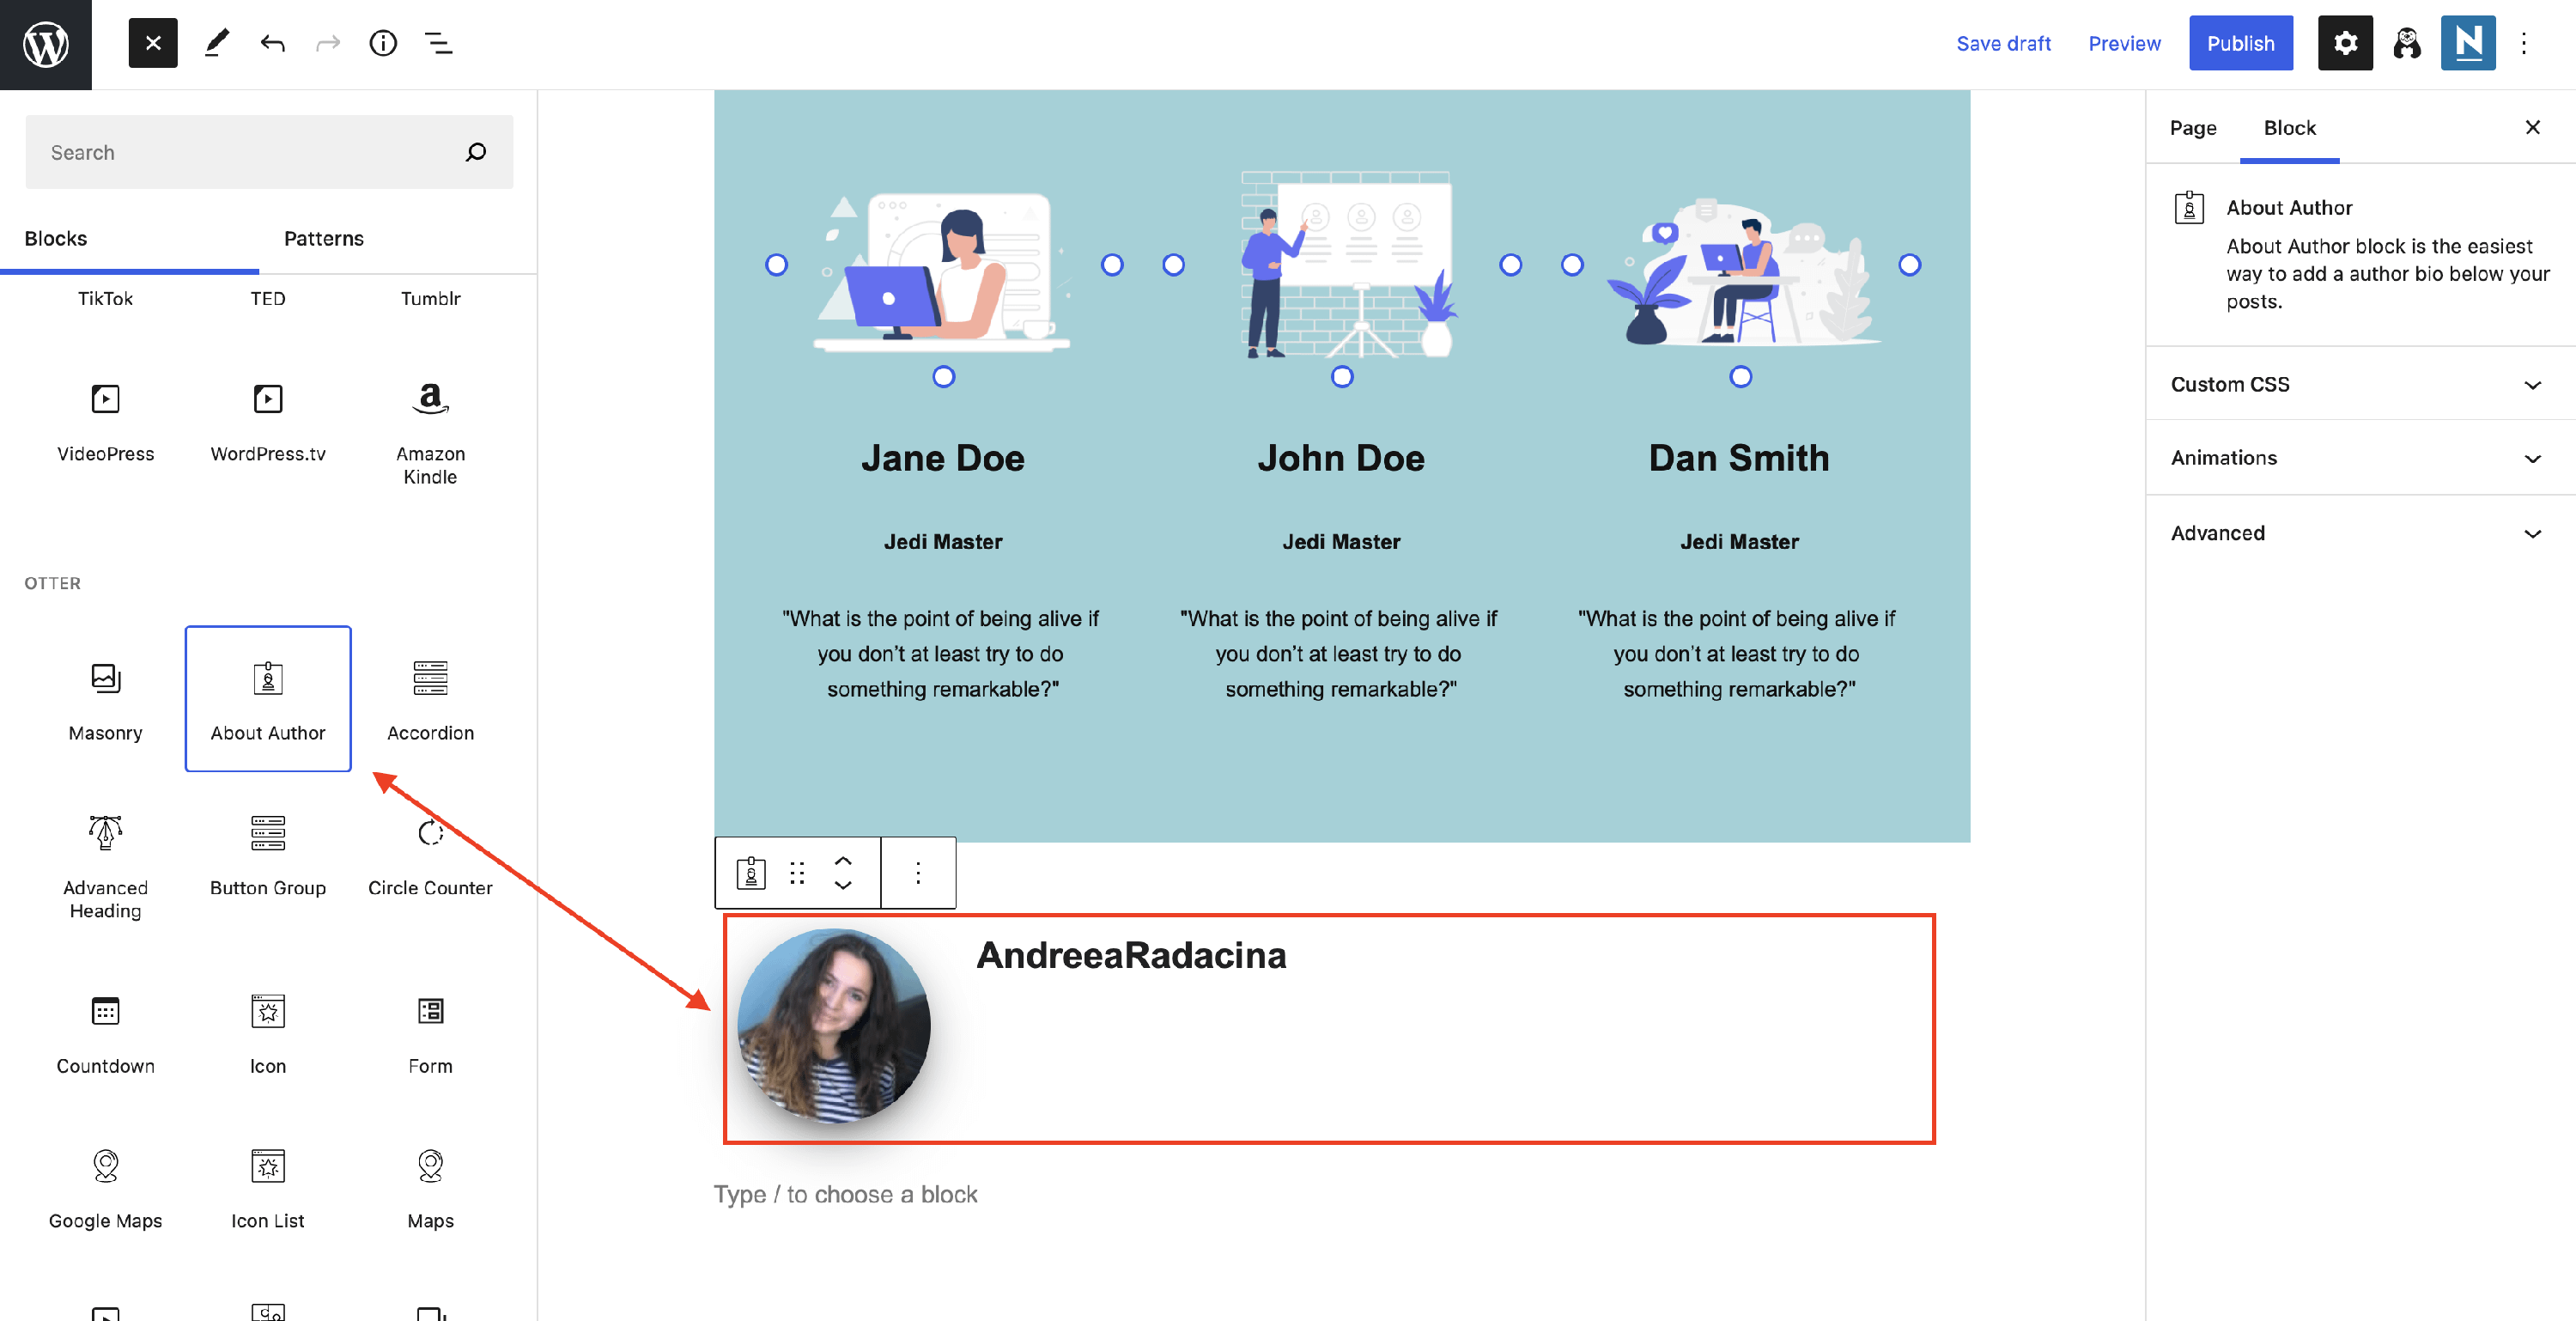
📝Note: Check this doc for further details about the About Author block.
Step 3: Customize the appearance of the About Section and create a better flux of your website by adding the Sharing Icons.
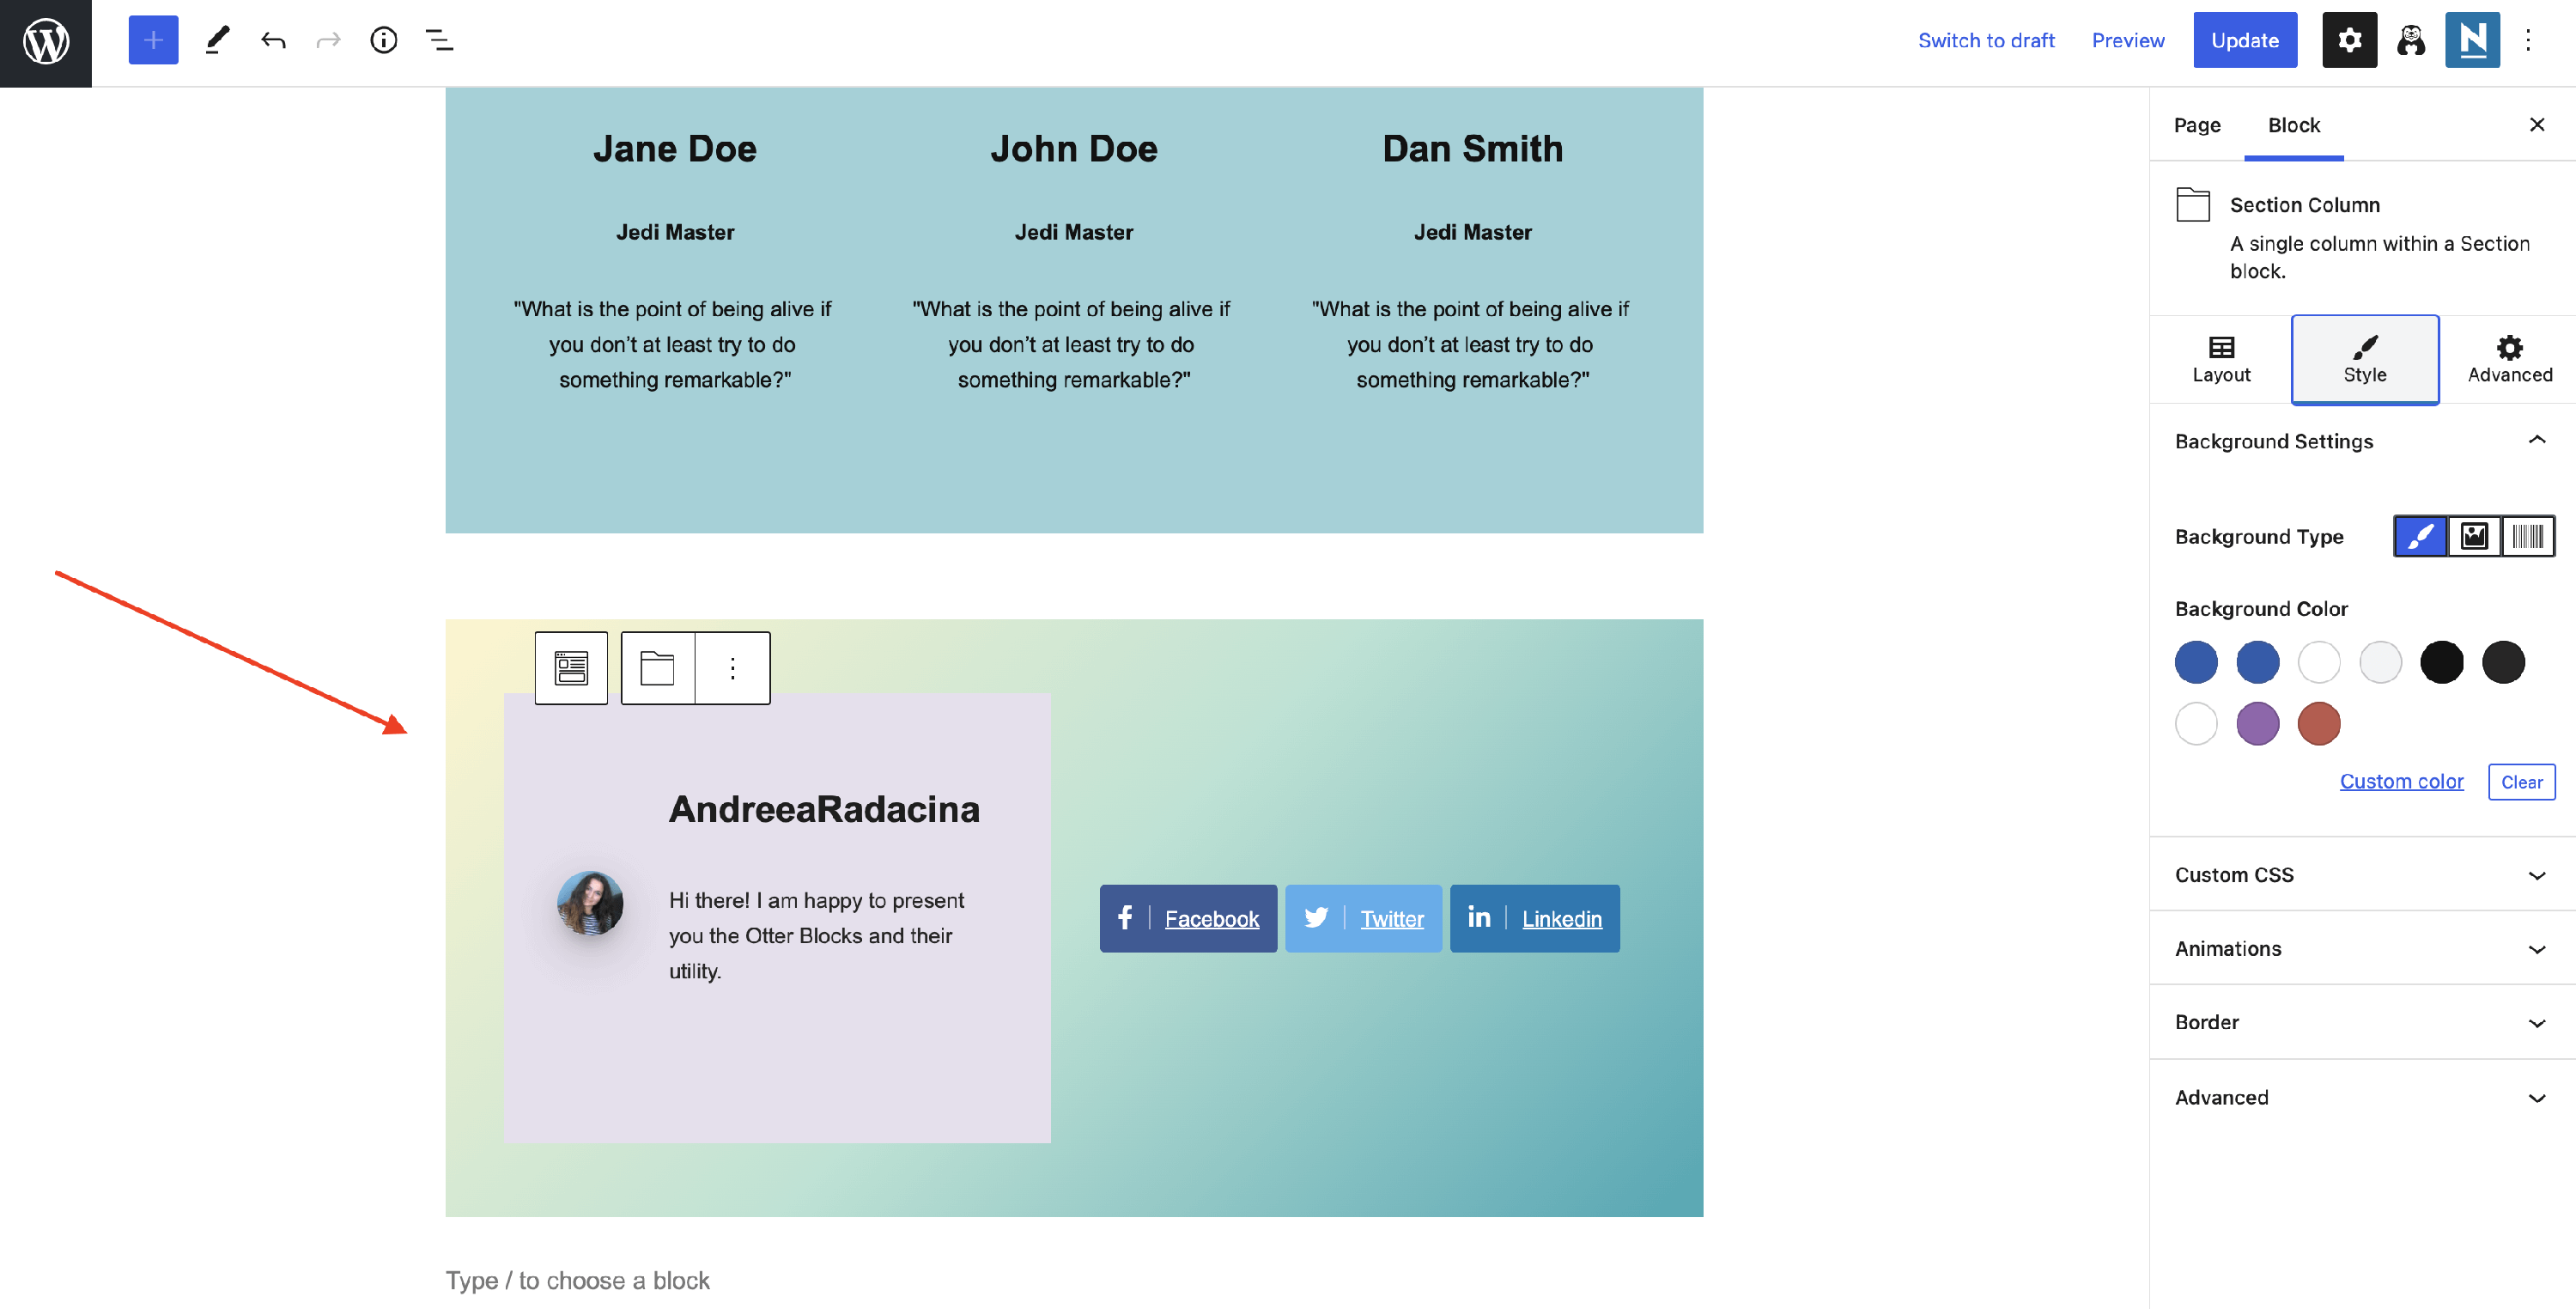
📝Note: Check this doc for further information about the Sharing Icons doc.
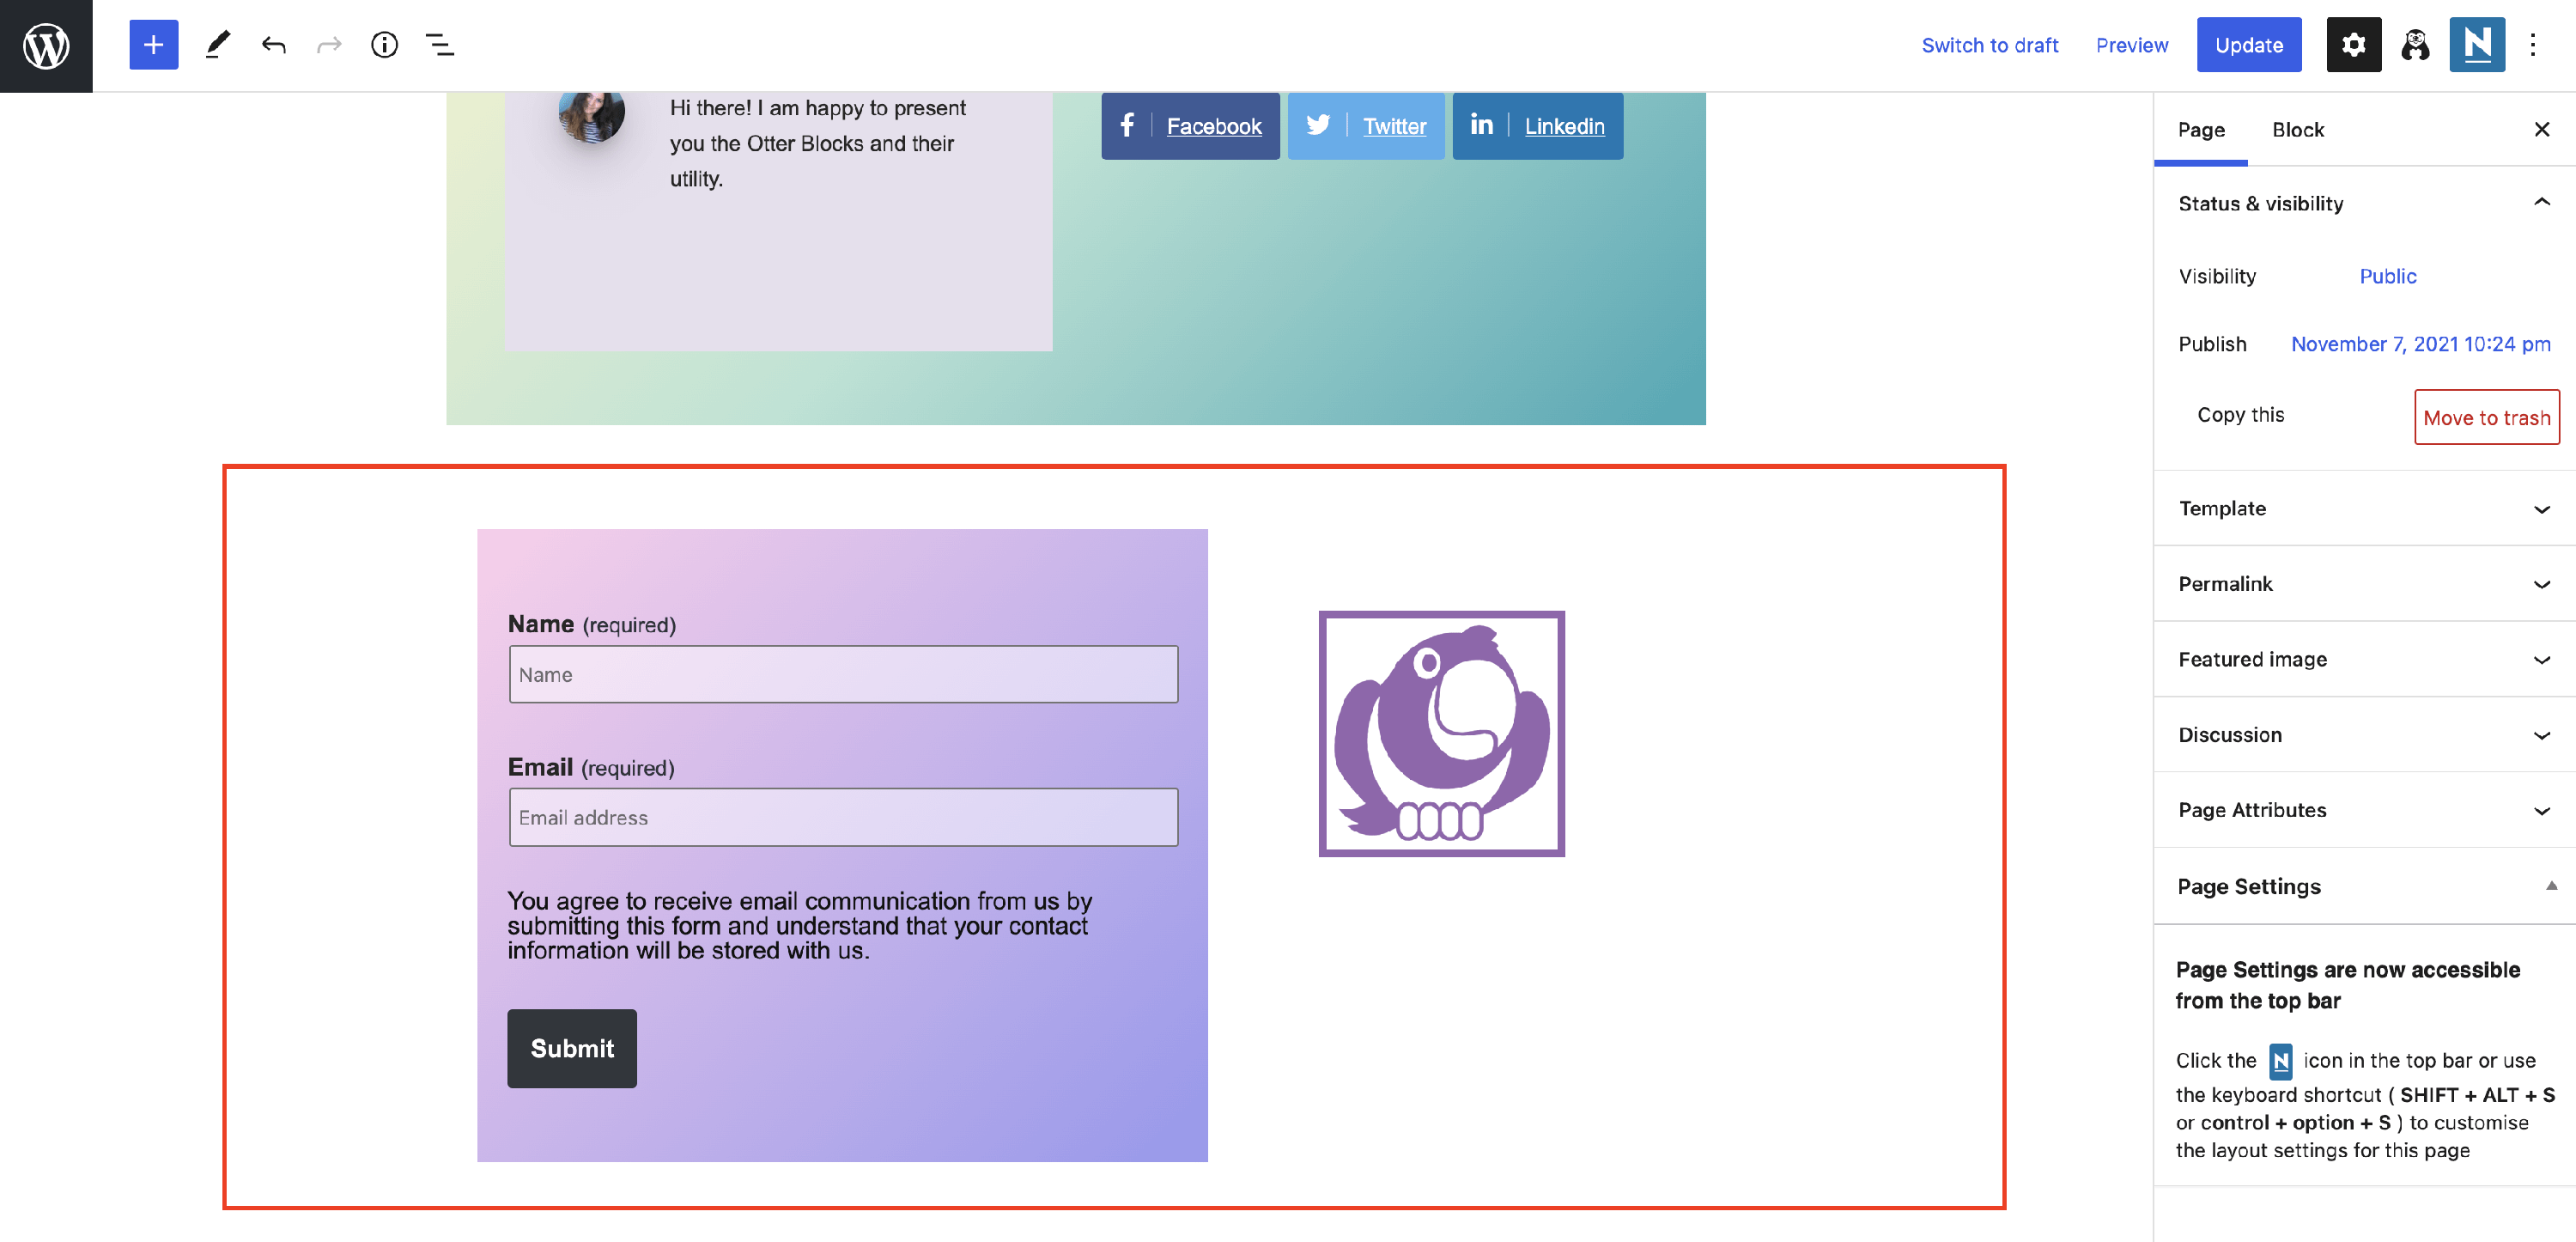
Building the Subscribe Section
Invite your users to subscribe to your newsletter using the Subscribe Form block.
Step 1: Insert a Section Block and choose a layout suitable to the delivery method that suits your needs.
Step 2: Insert the Subscribe Form Block from the Otter library.
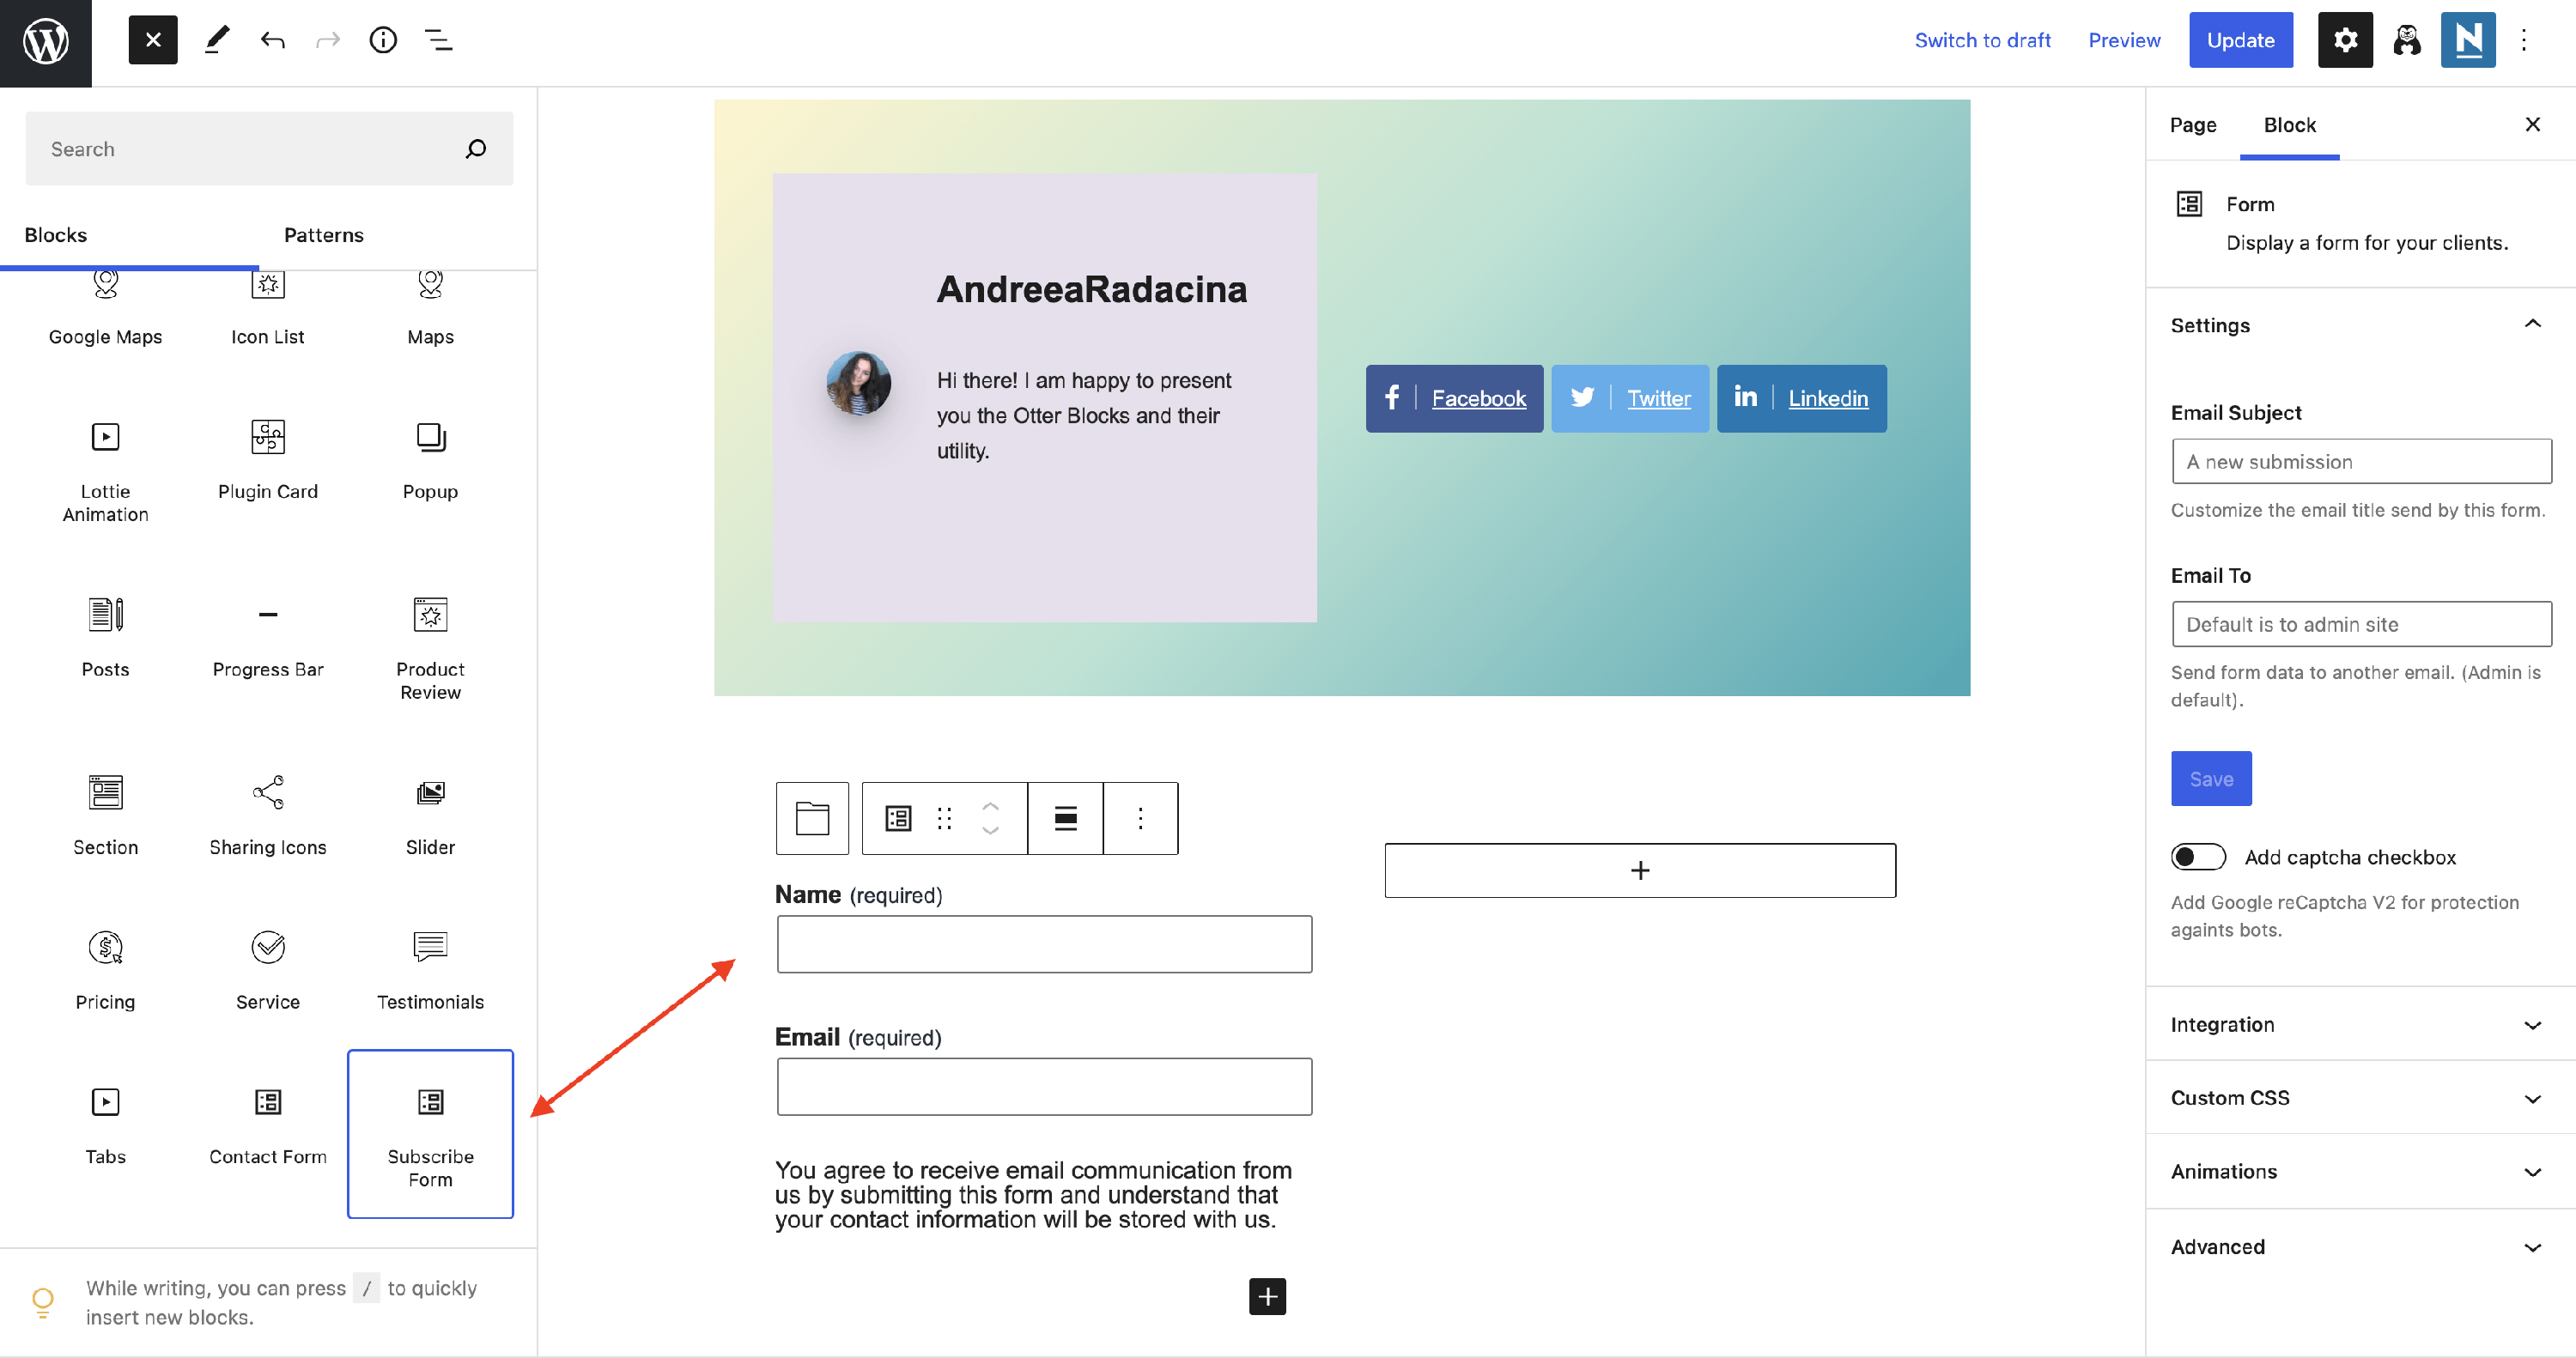
📝Note: Check this doc for further details about the Subscribe Form block.
Step 3: Add other blocks that you consider useful here ( e.g. Icon block ).
These are the basic blocks and sections that can be used when creating a landing page!