The Variation Swatches Module - Sparks
📝 Note: The Variation Swatches module is part of the Sparks plugin, which you can get from here.
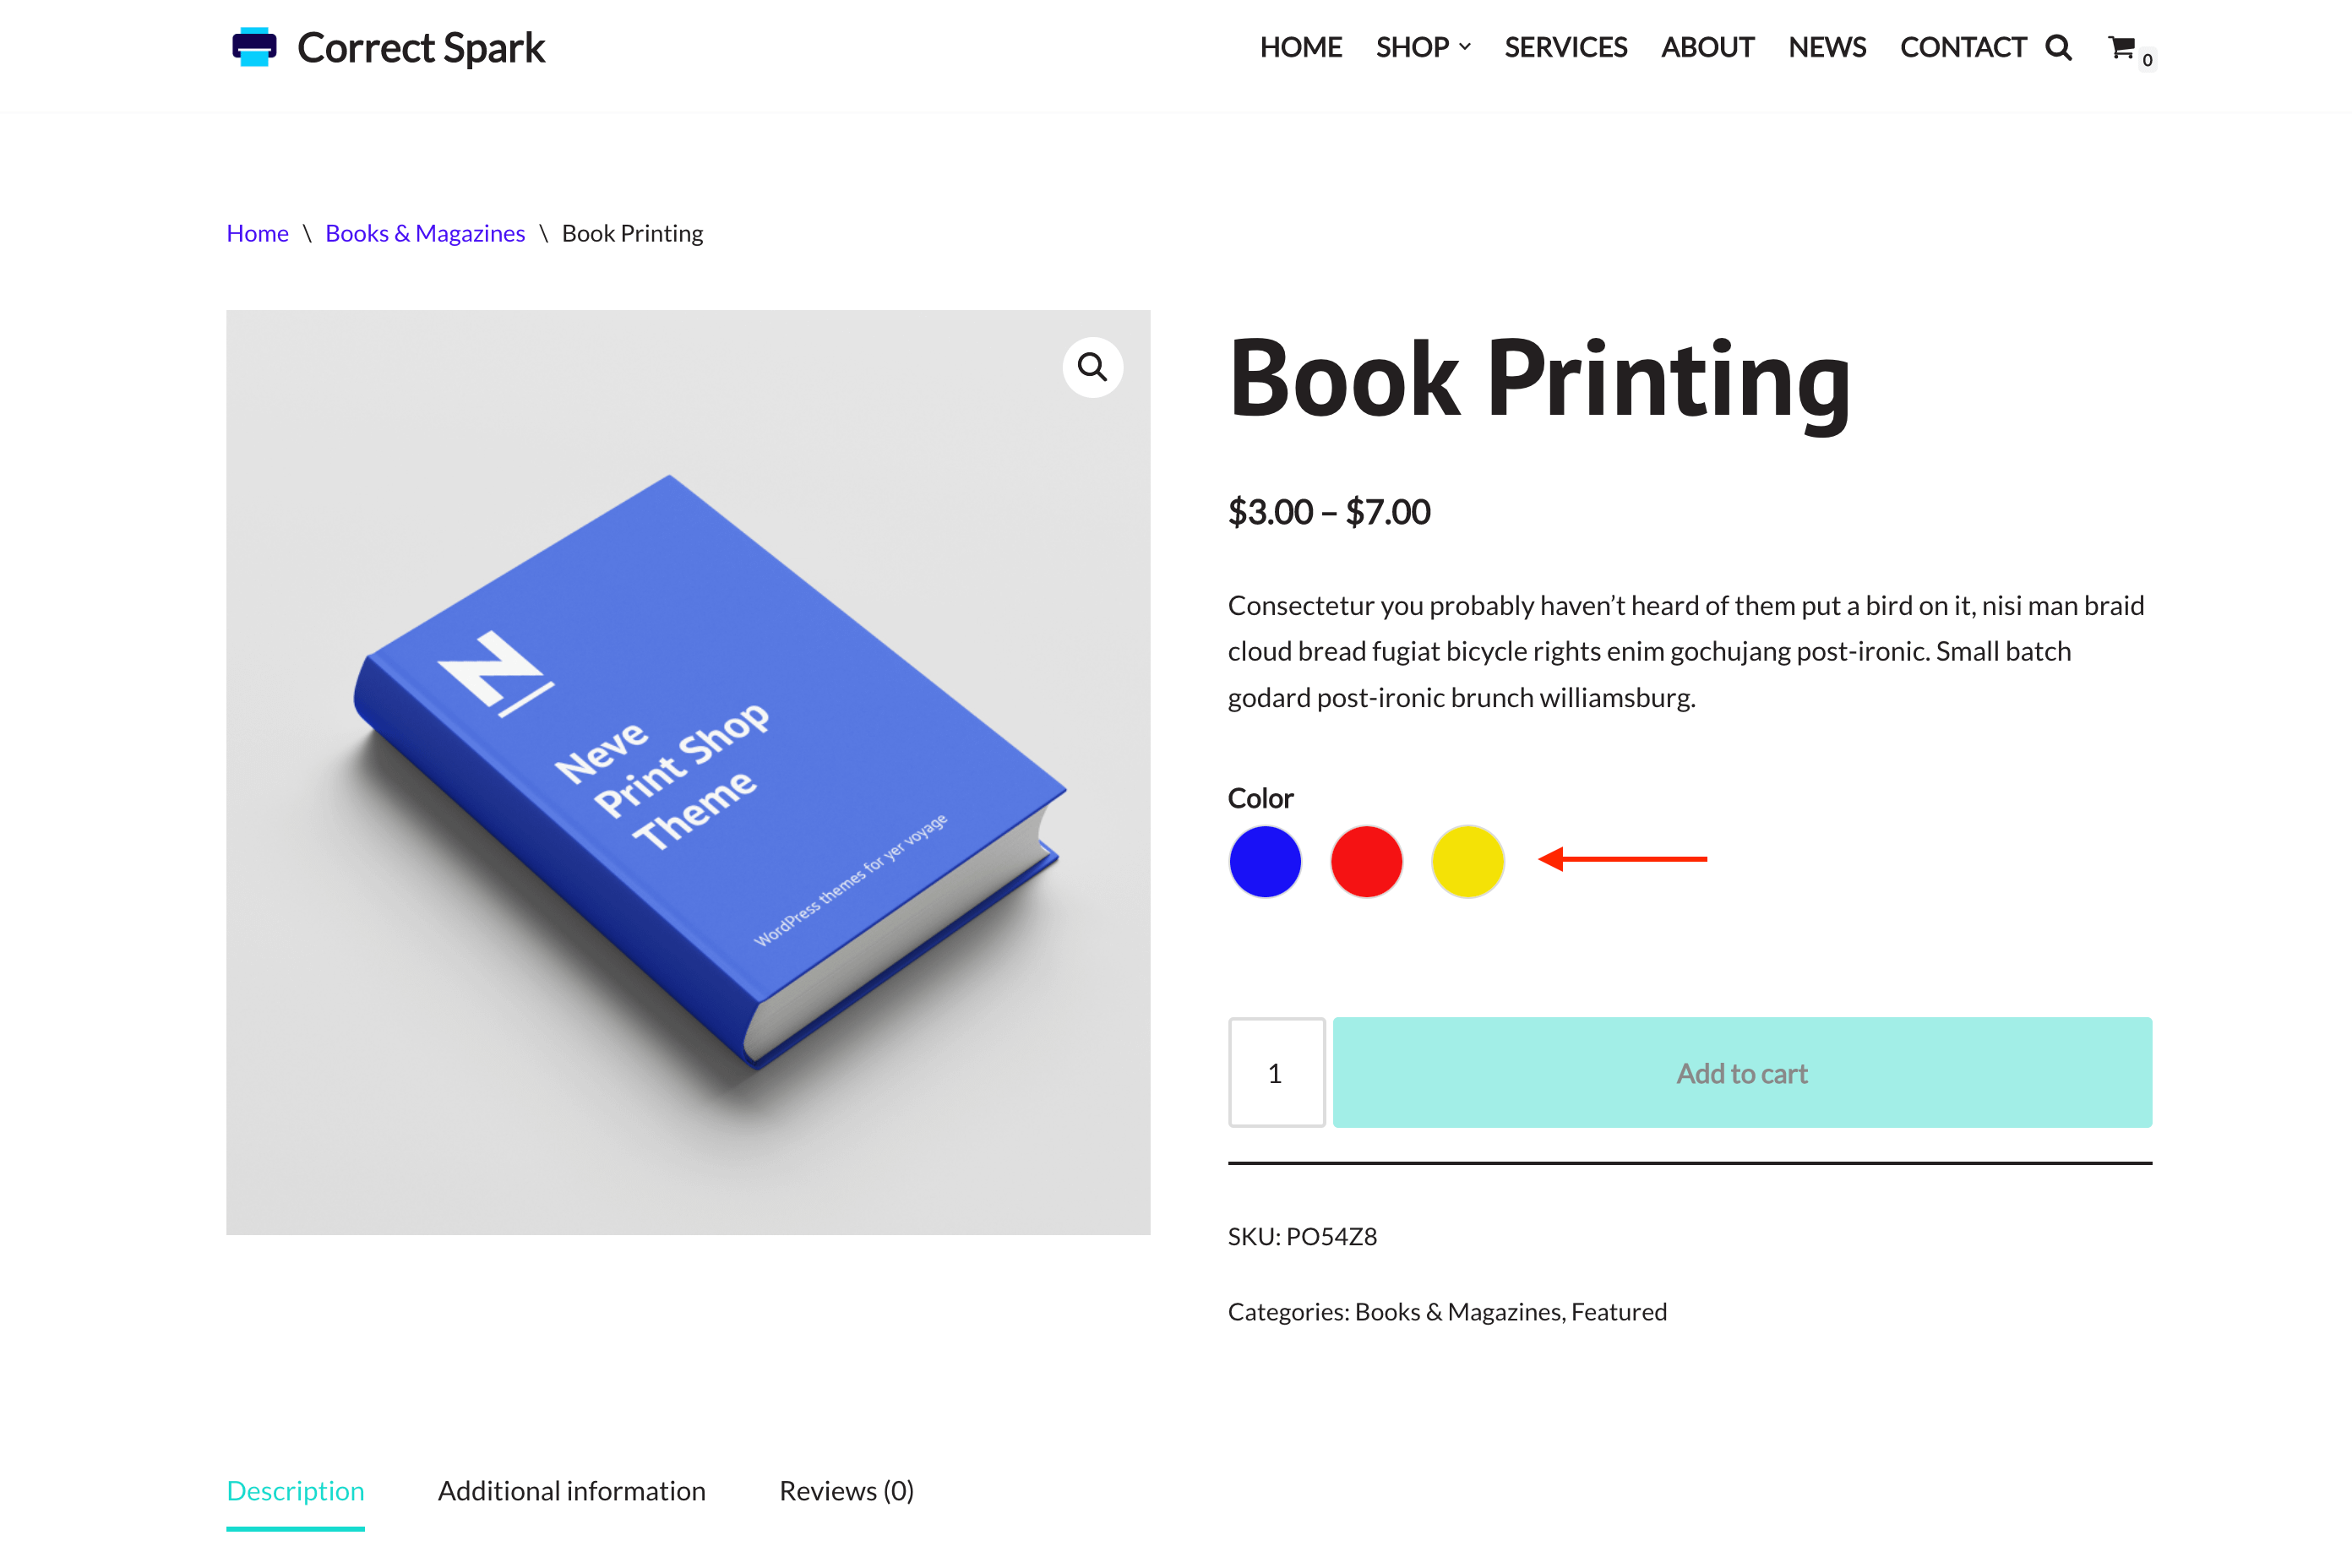
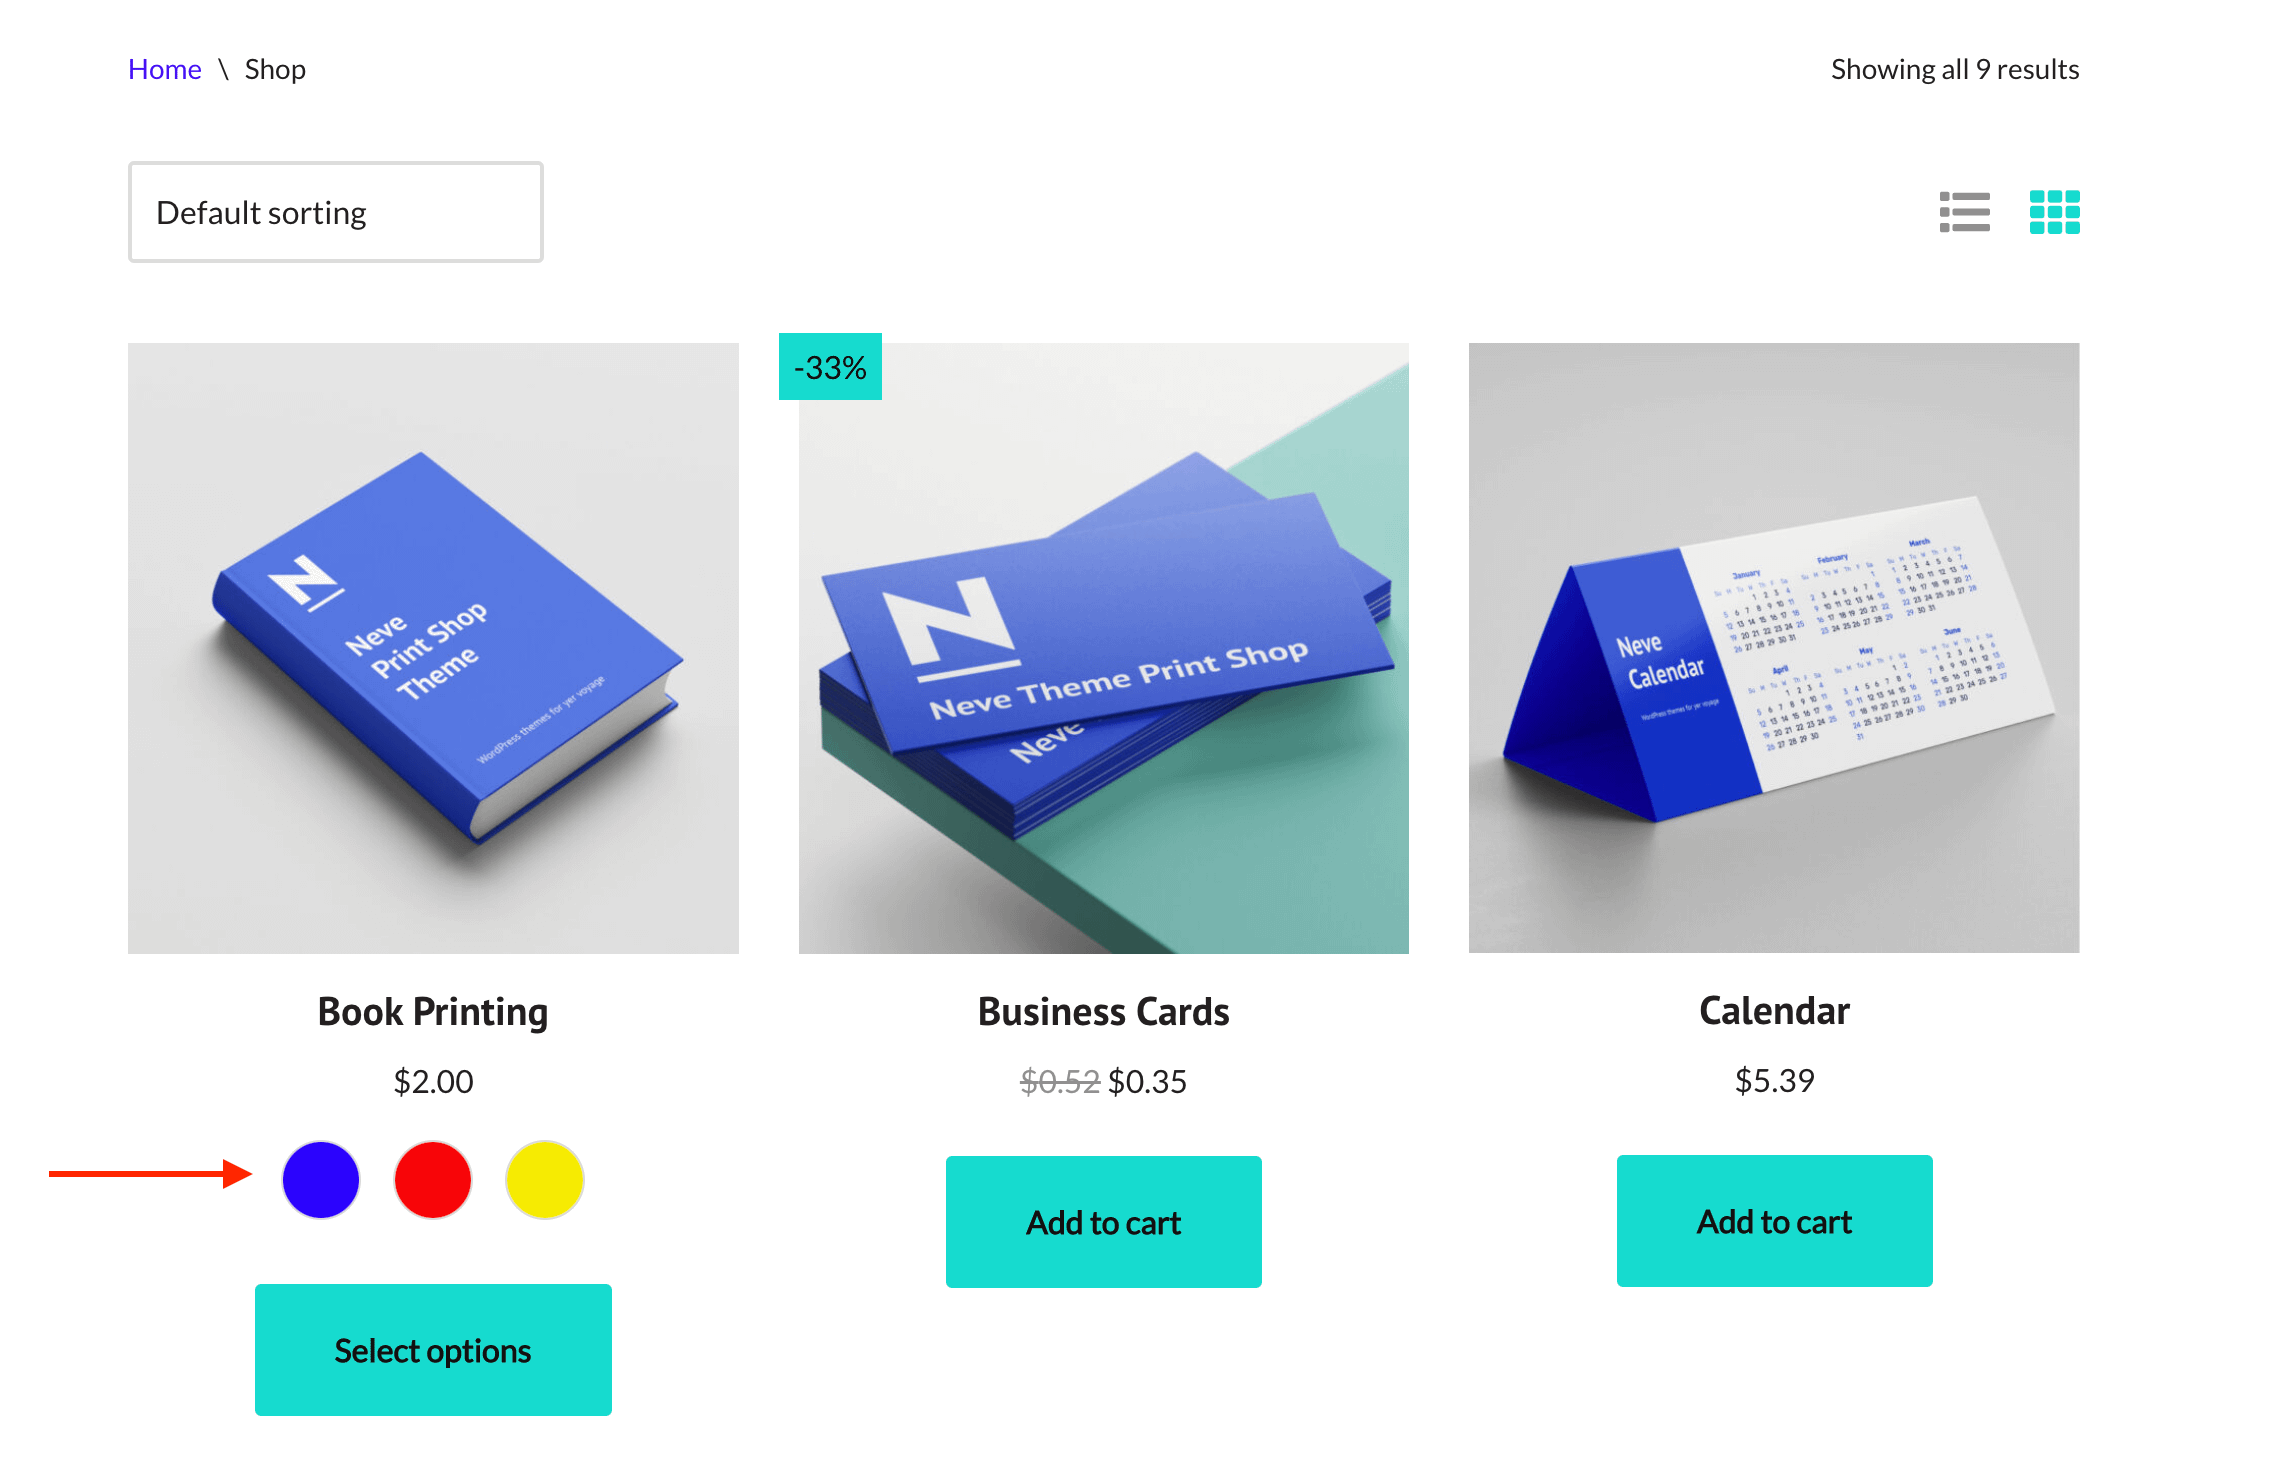
The Variation Swatches is a very useful tool that belongs to an online shop. It displays the product's availability in different shapes or colors, with different prices. The swatches are shown in colored dots, corresponding to the color attributes.
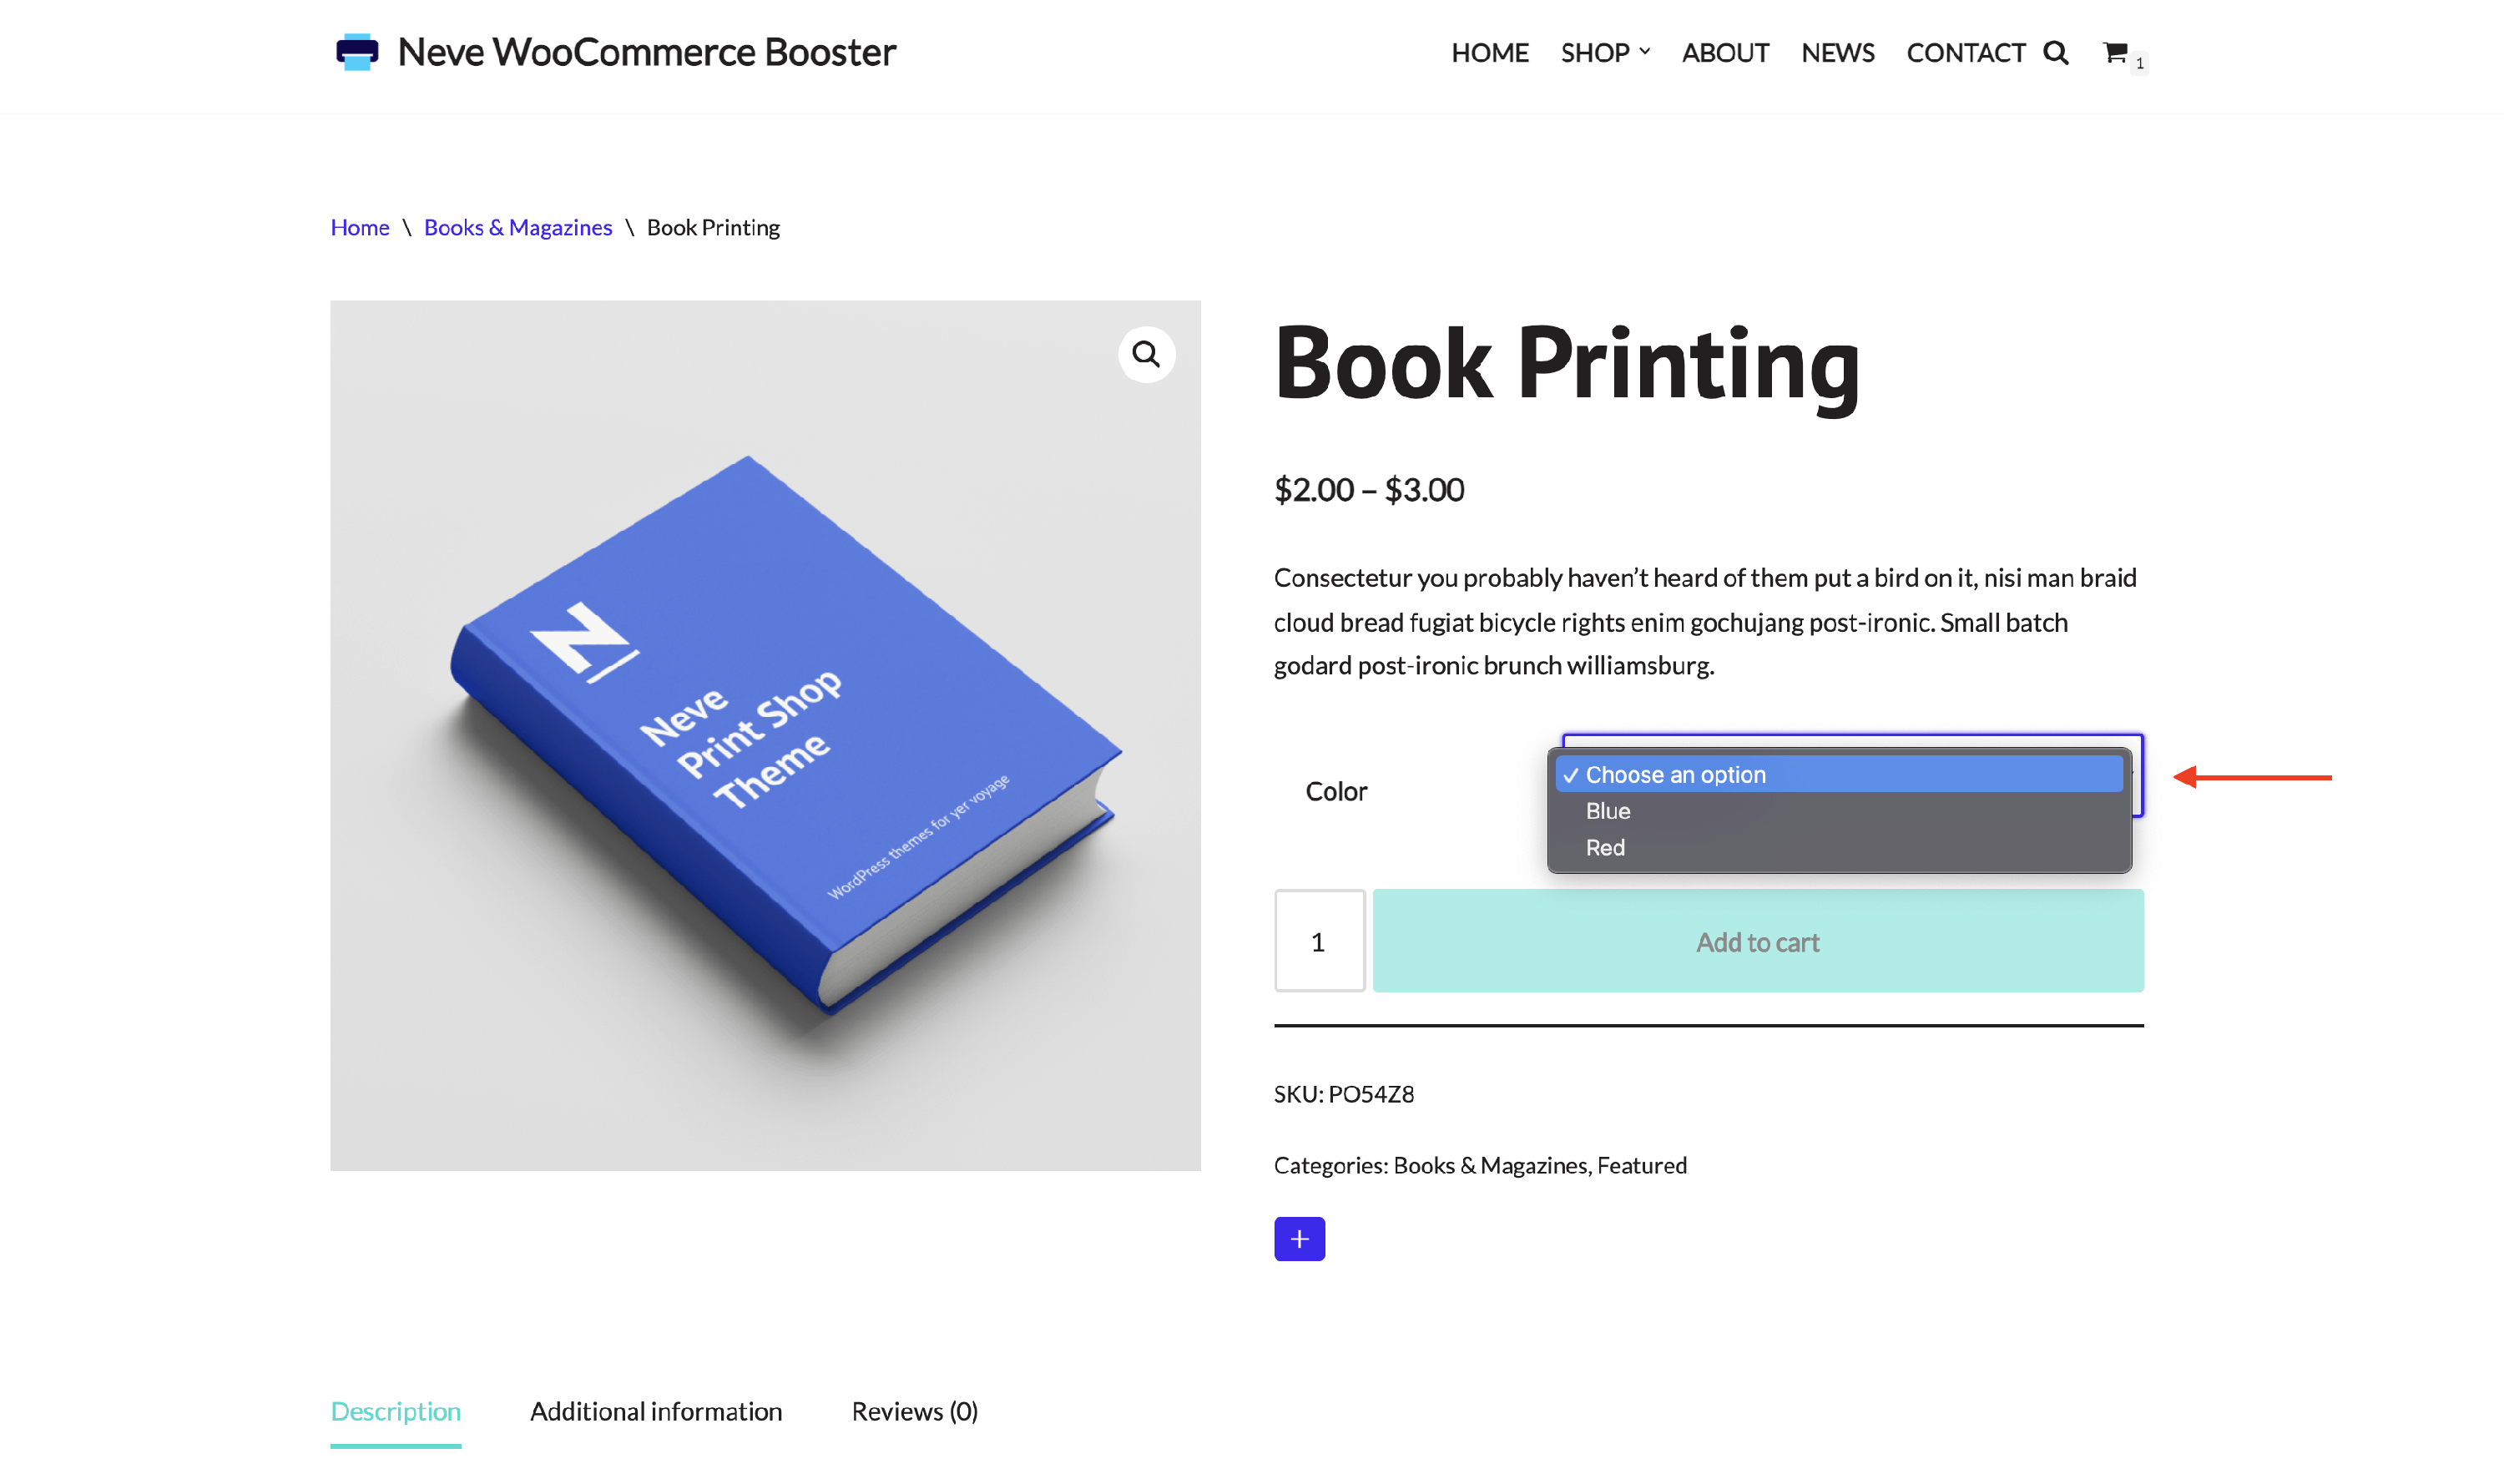
The default style for variable WooCommerce products in Neve is a drop-down choice.
In this article
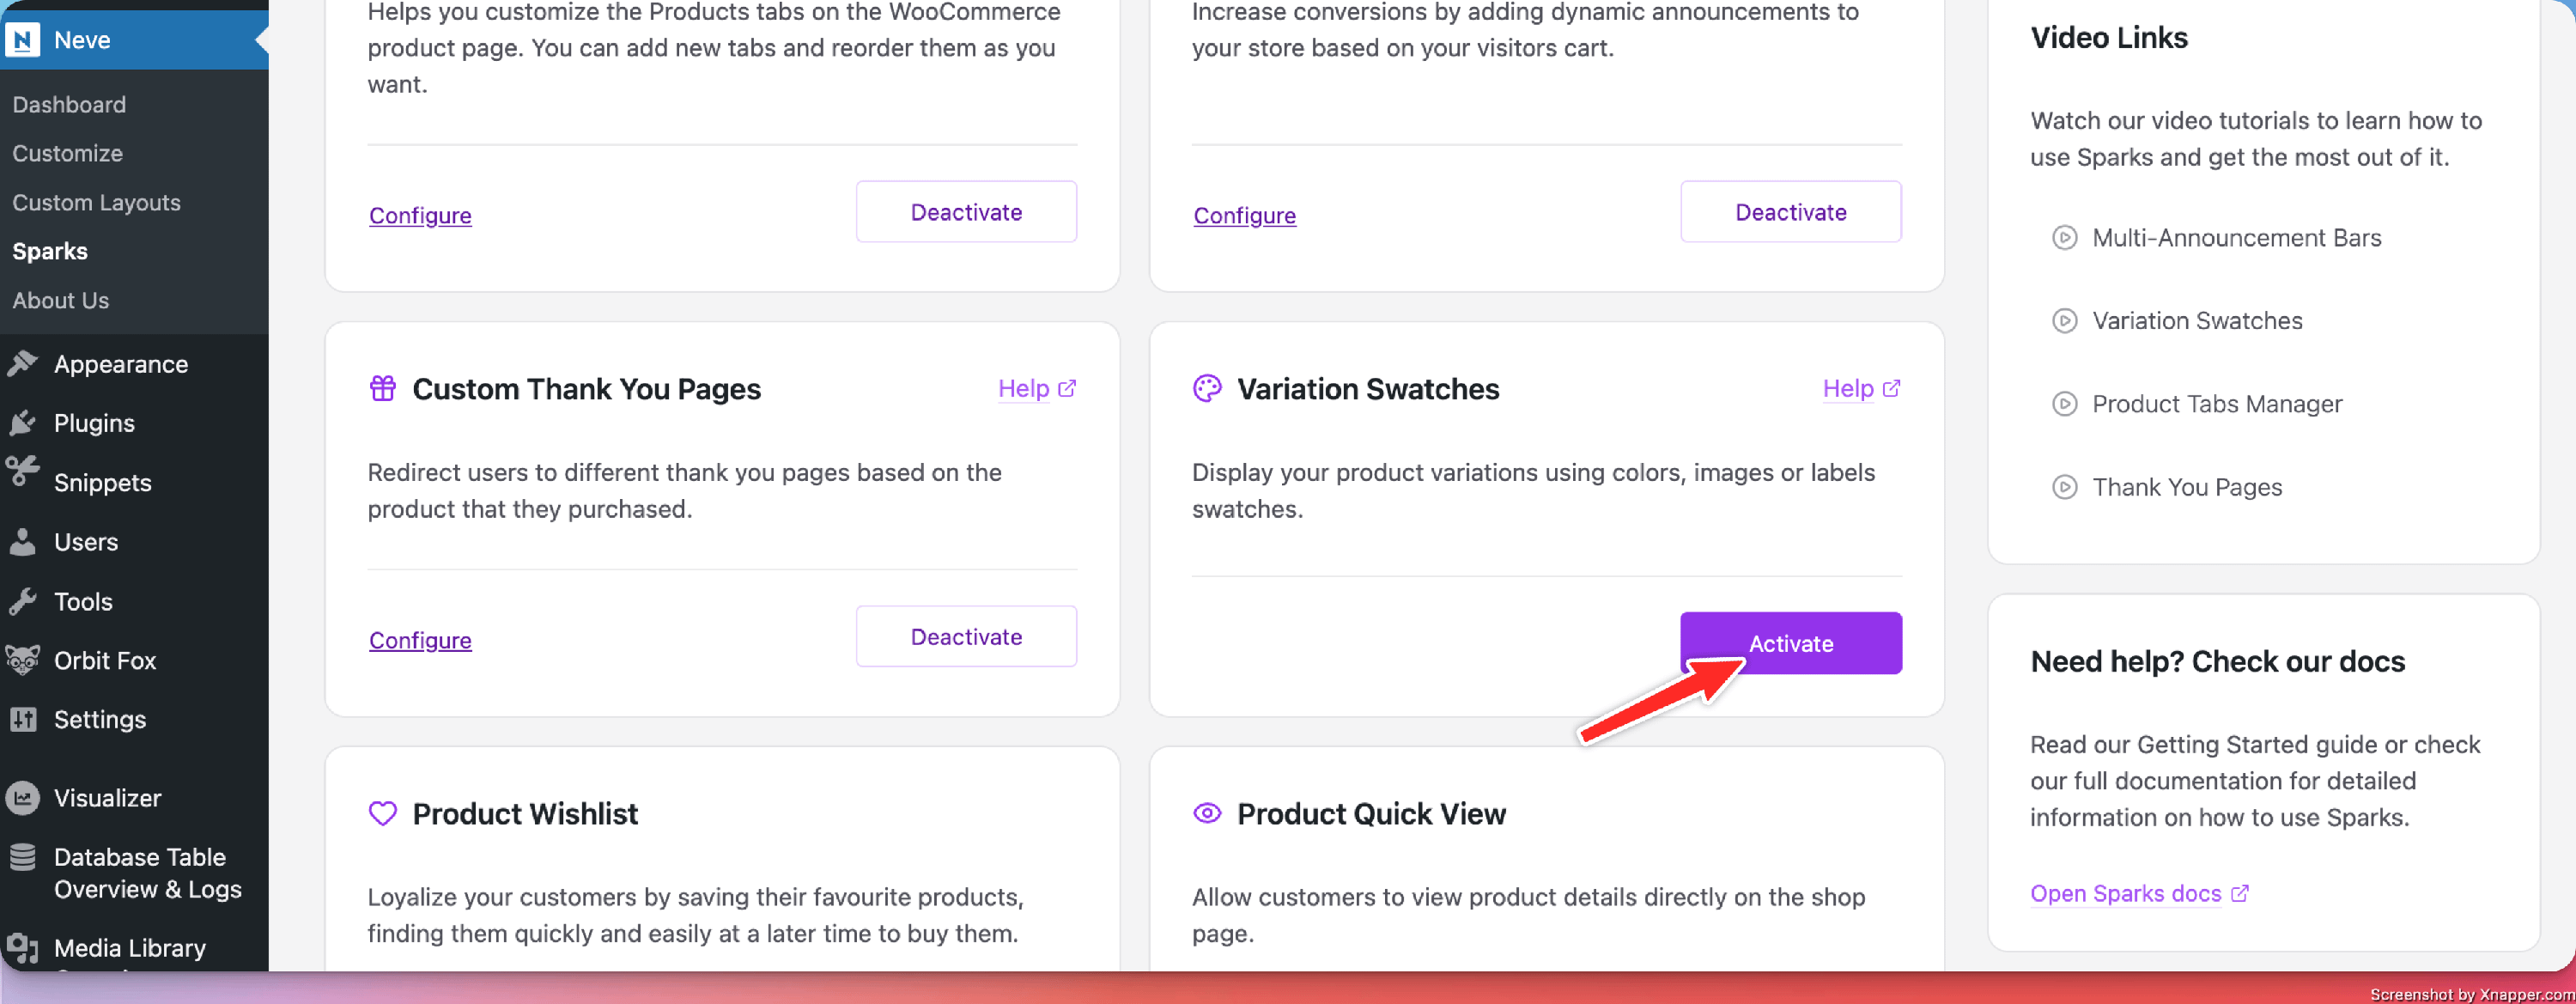
Activating the Module
1. Install the Sparks plugin, using these instructions.
2. Navigate to Settings > Sparks and activate the module.
NOTE: If you are using Neve, navigate to Neve > Sparks to access Sparks's options.
Using the Variation Swatches
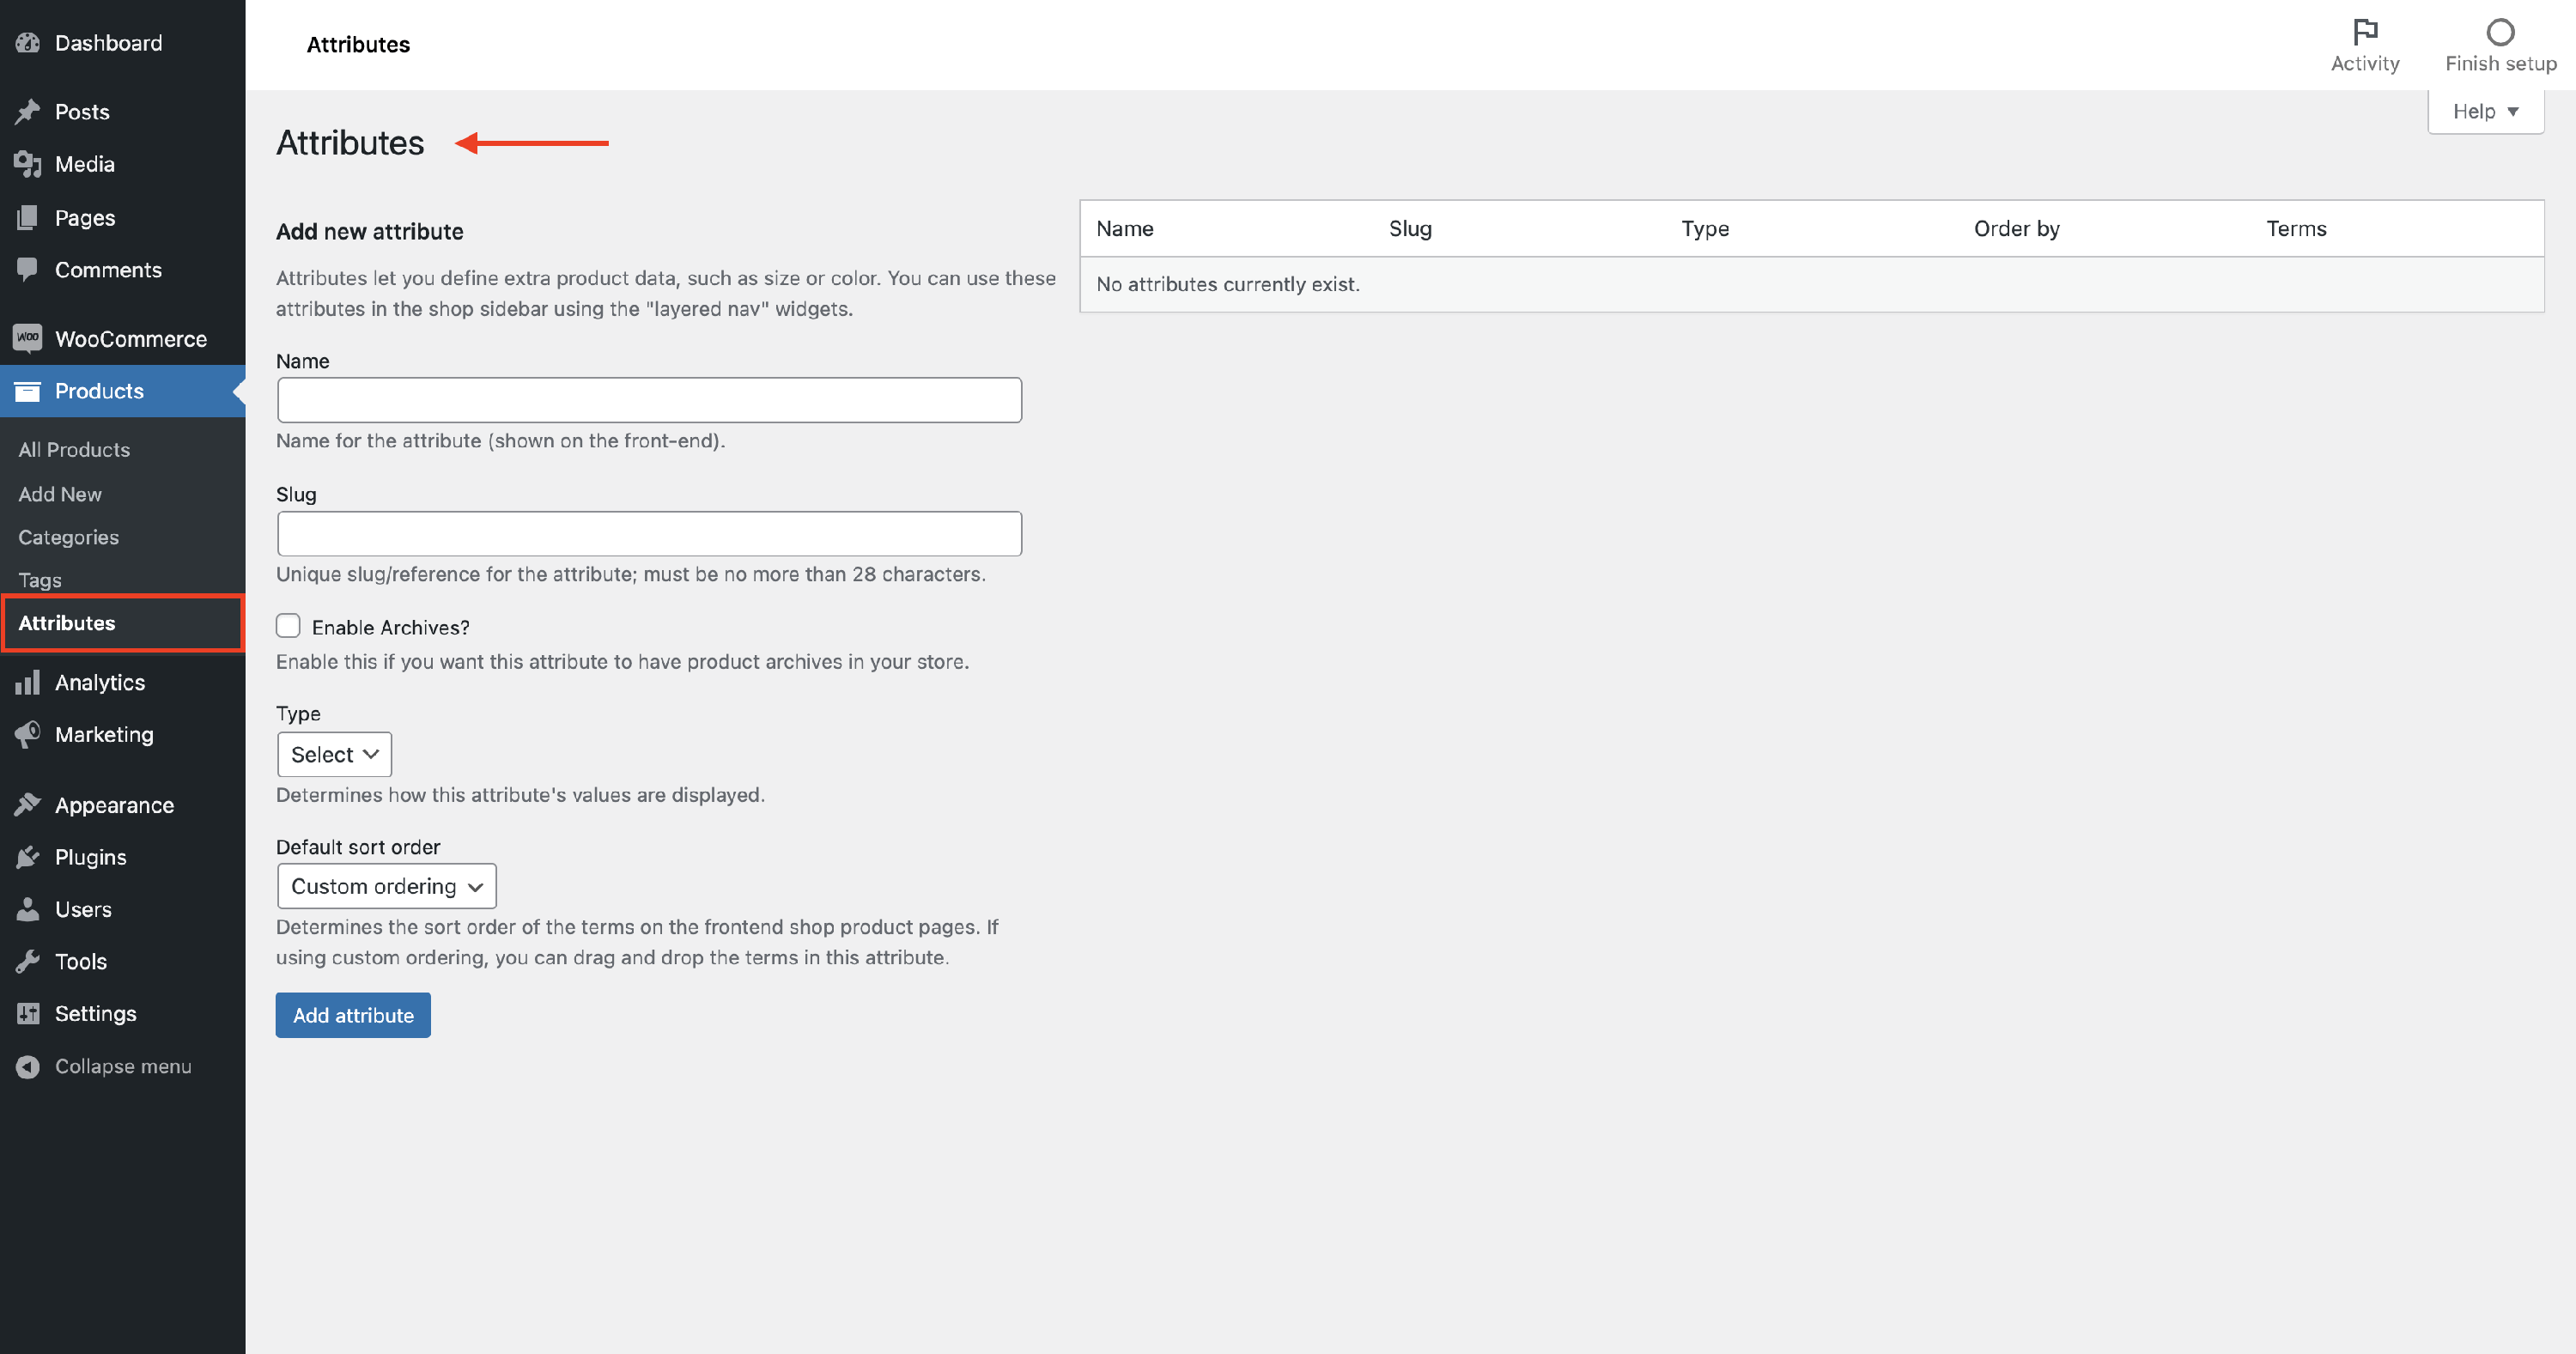
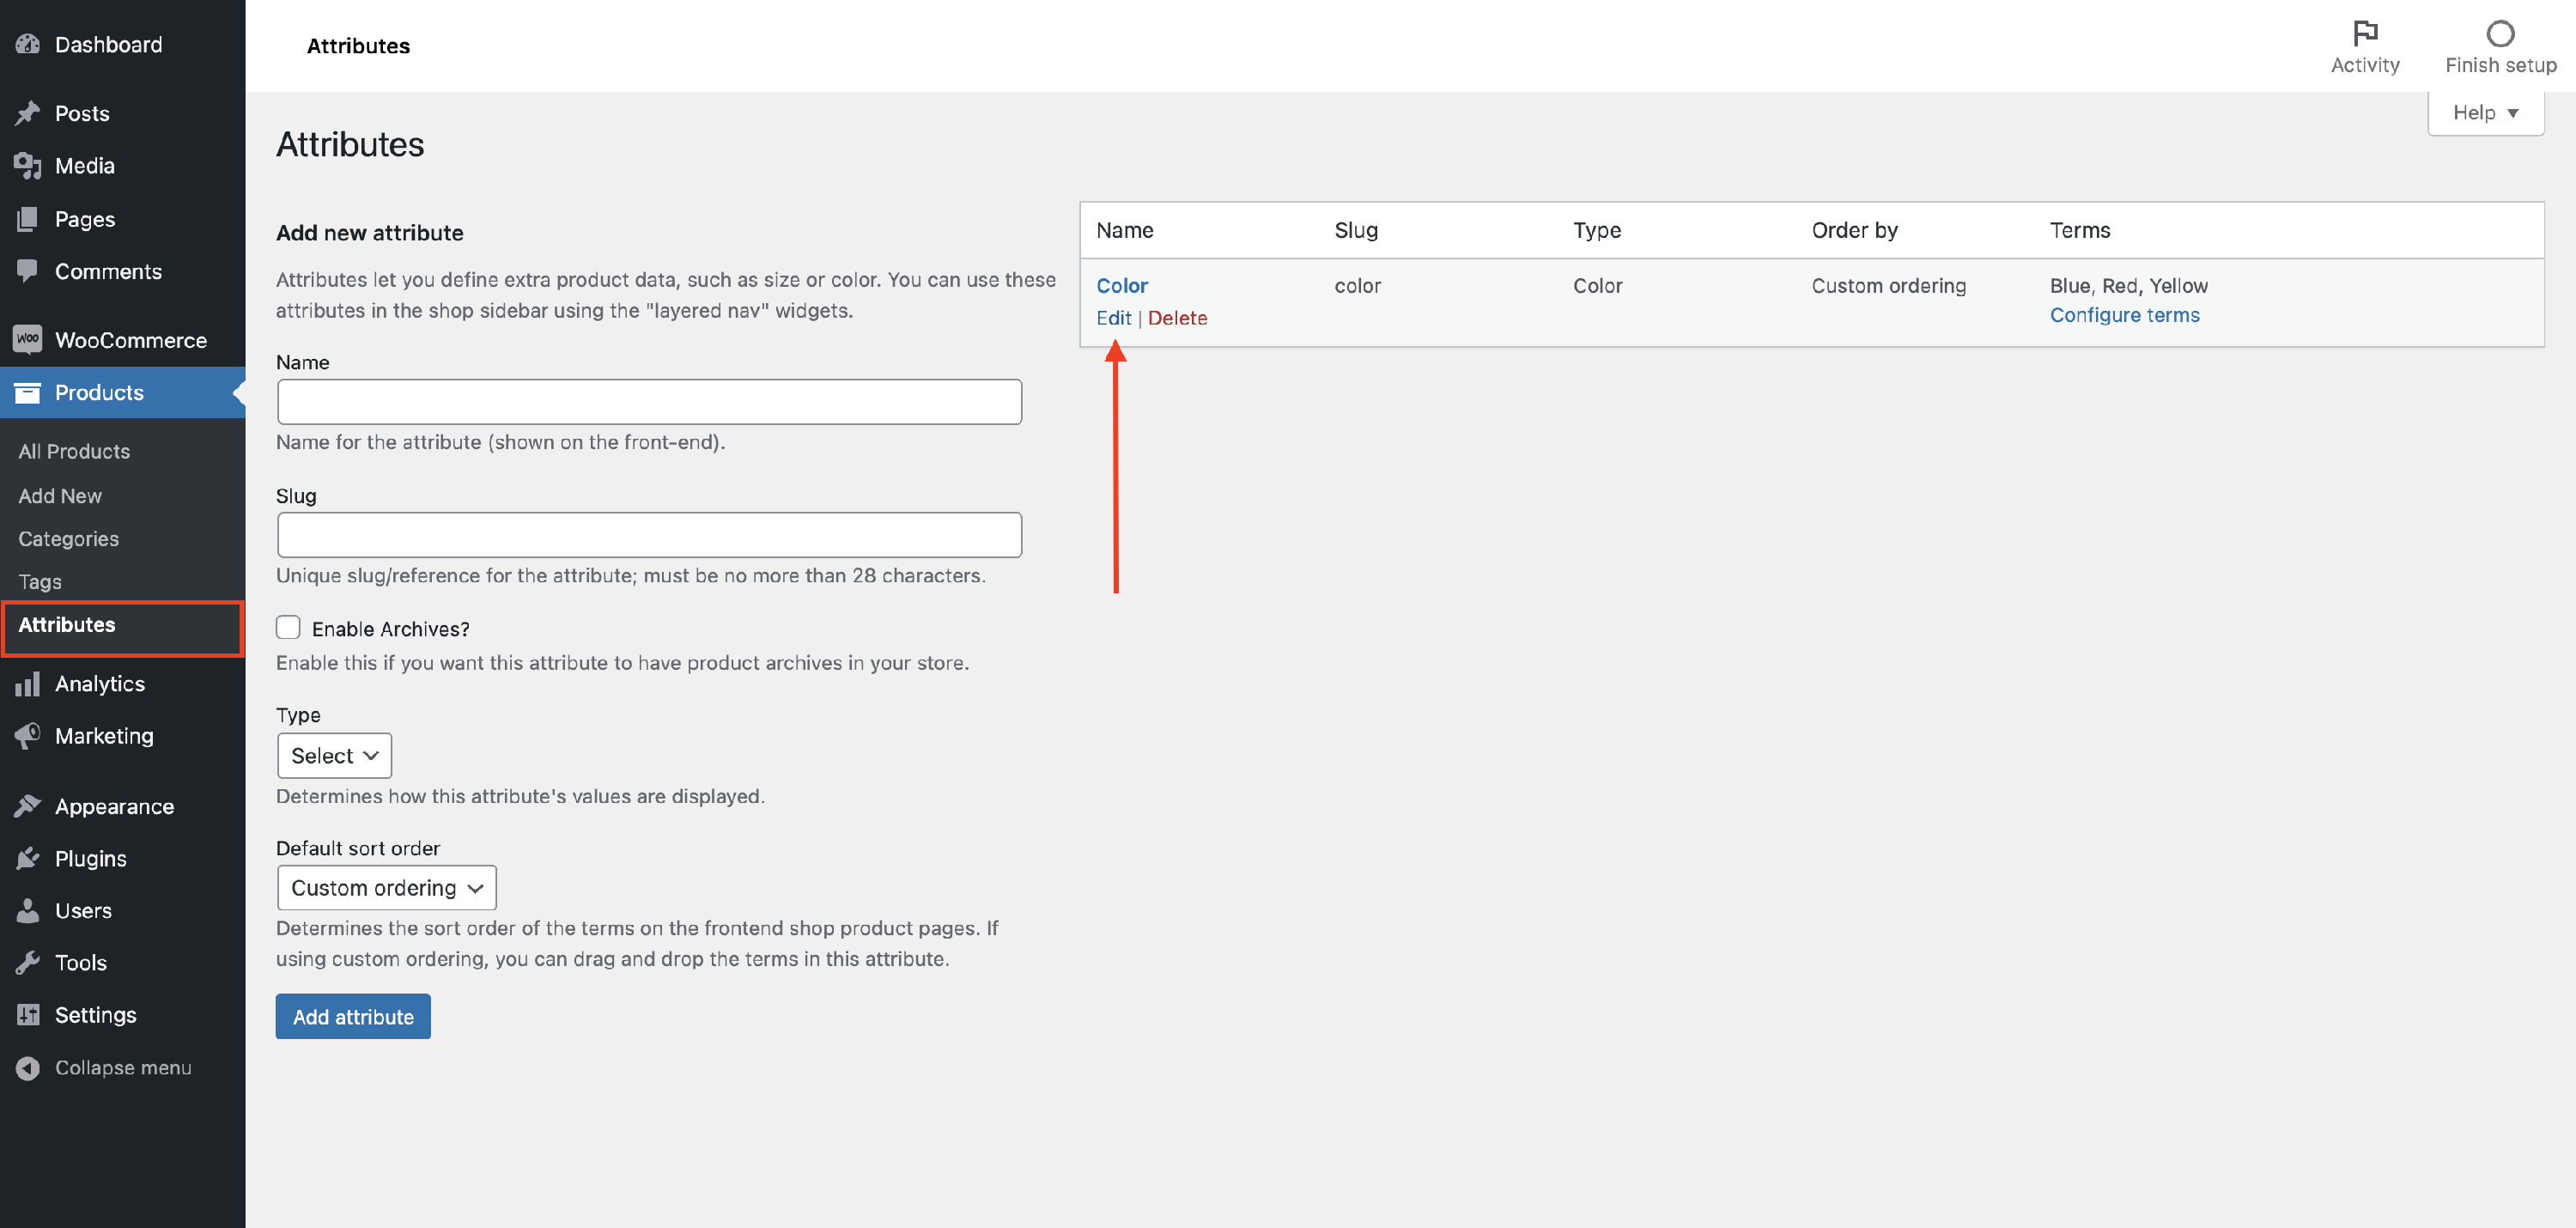
Creating a global attribute
To start configuring the module, navigate to Dashboard > Products > Attributes and create a global attribute, for example, Color.
This article will focus on the Color attribute, so follow the steps below to create and use one:
1. Set a suggestive name for the attribute that will appear on the website ( such as "Color" ), and choose an attribute type ( color, image, label ).
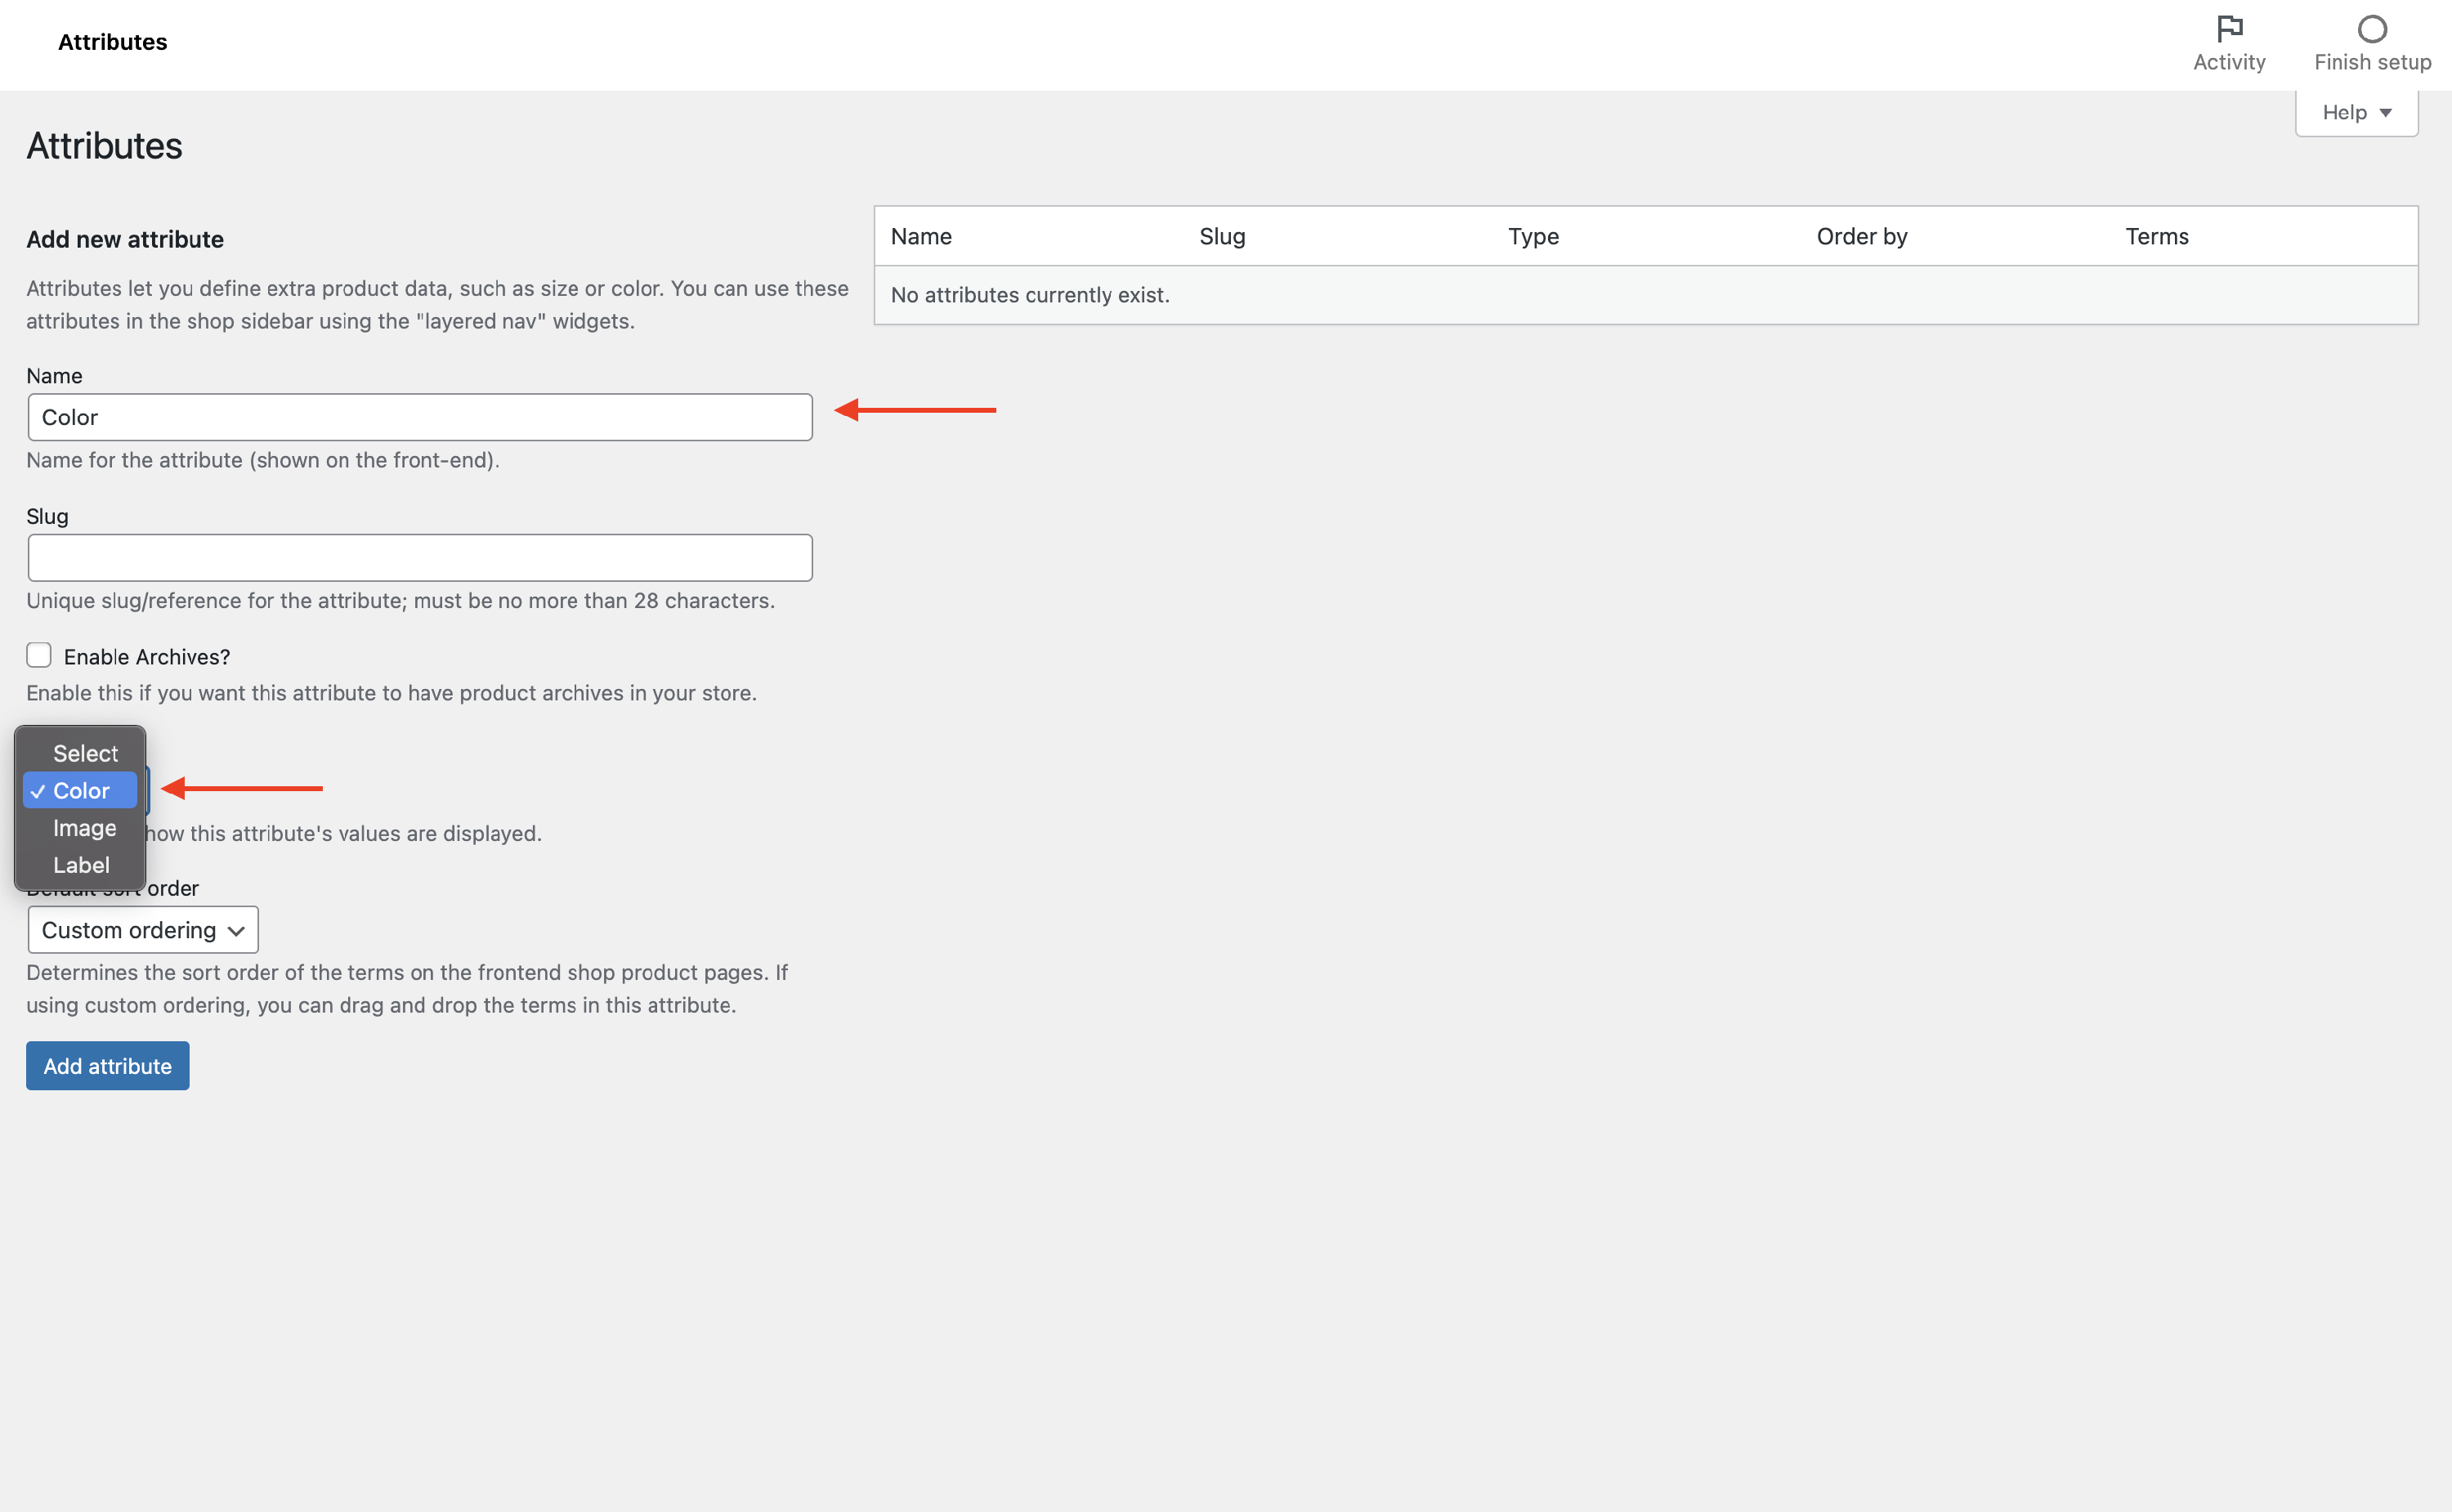
Don't forget to click on the Add attribute button.
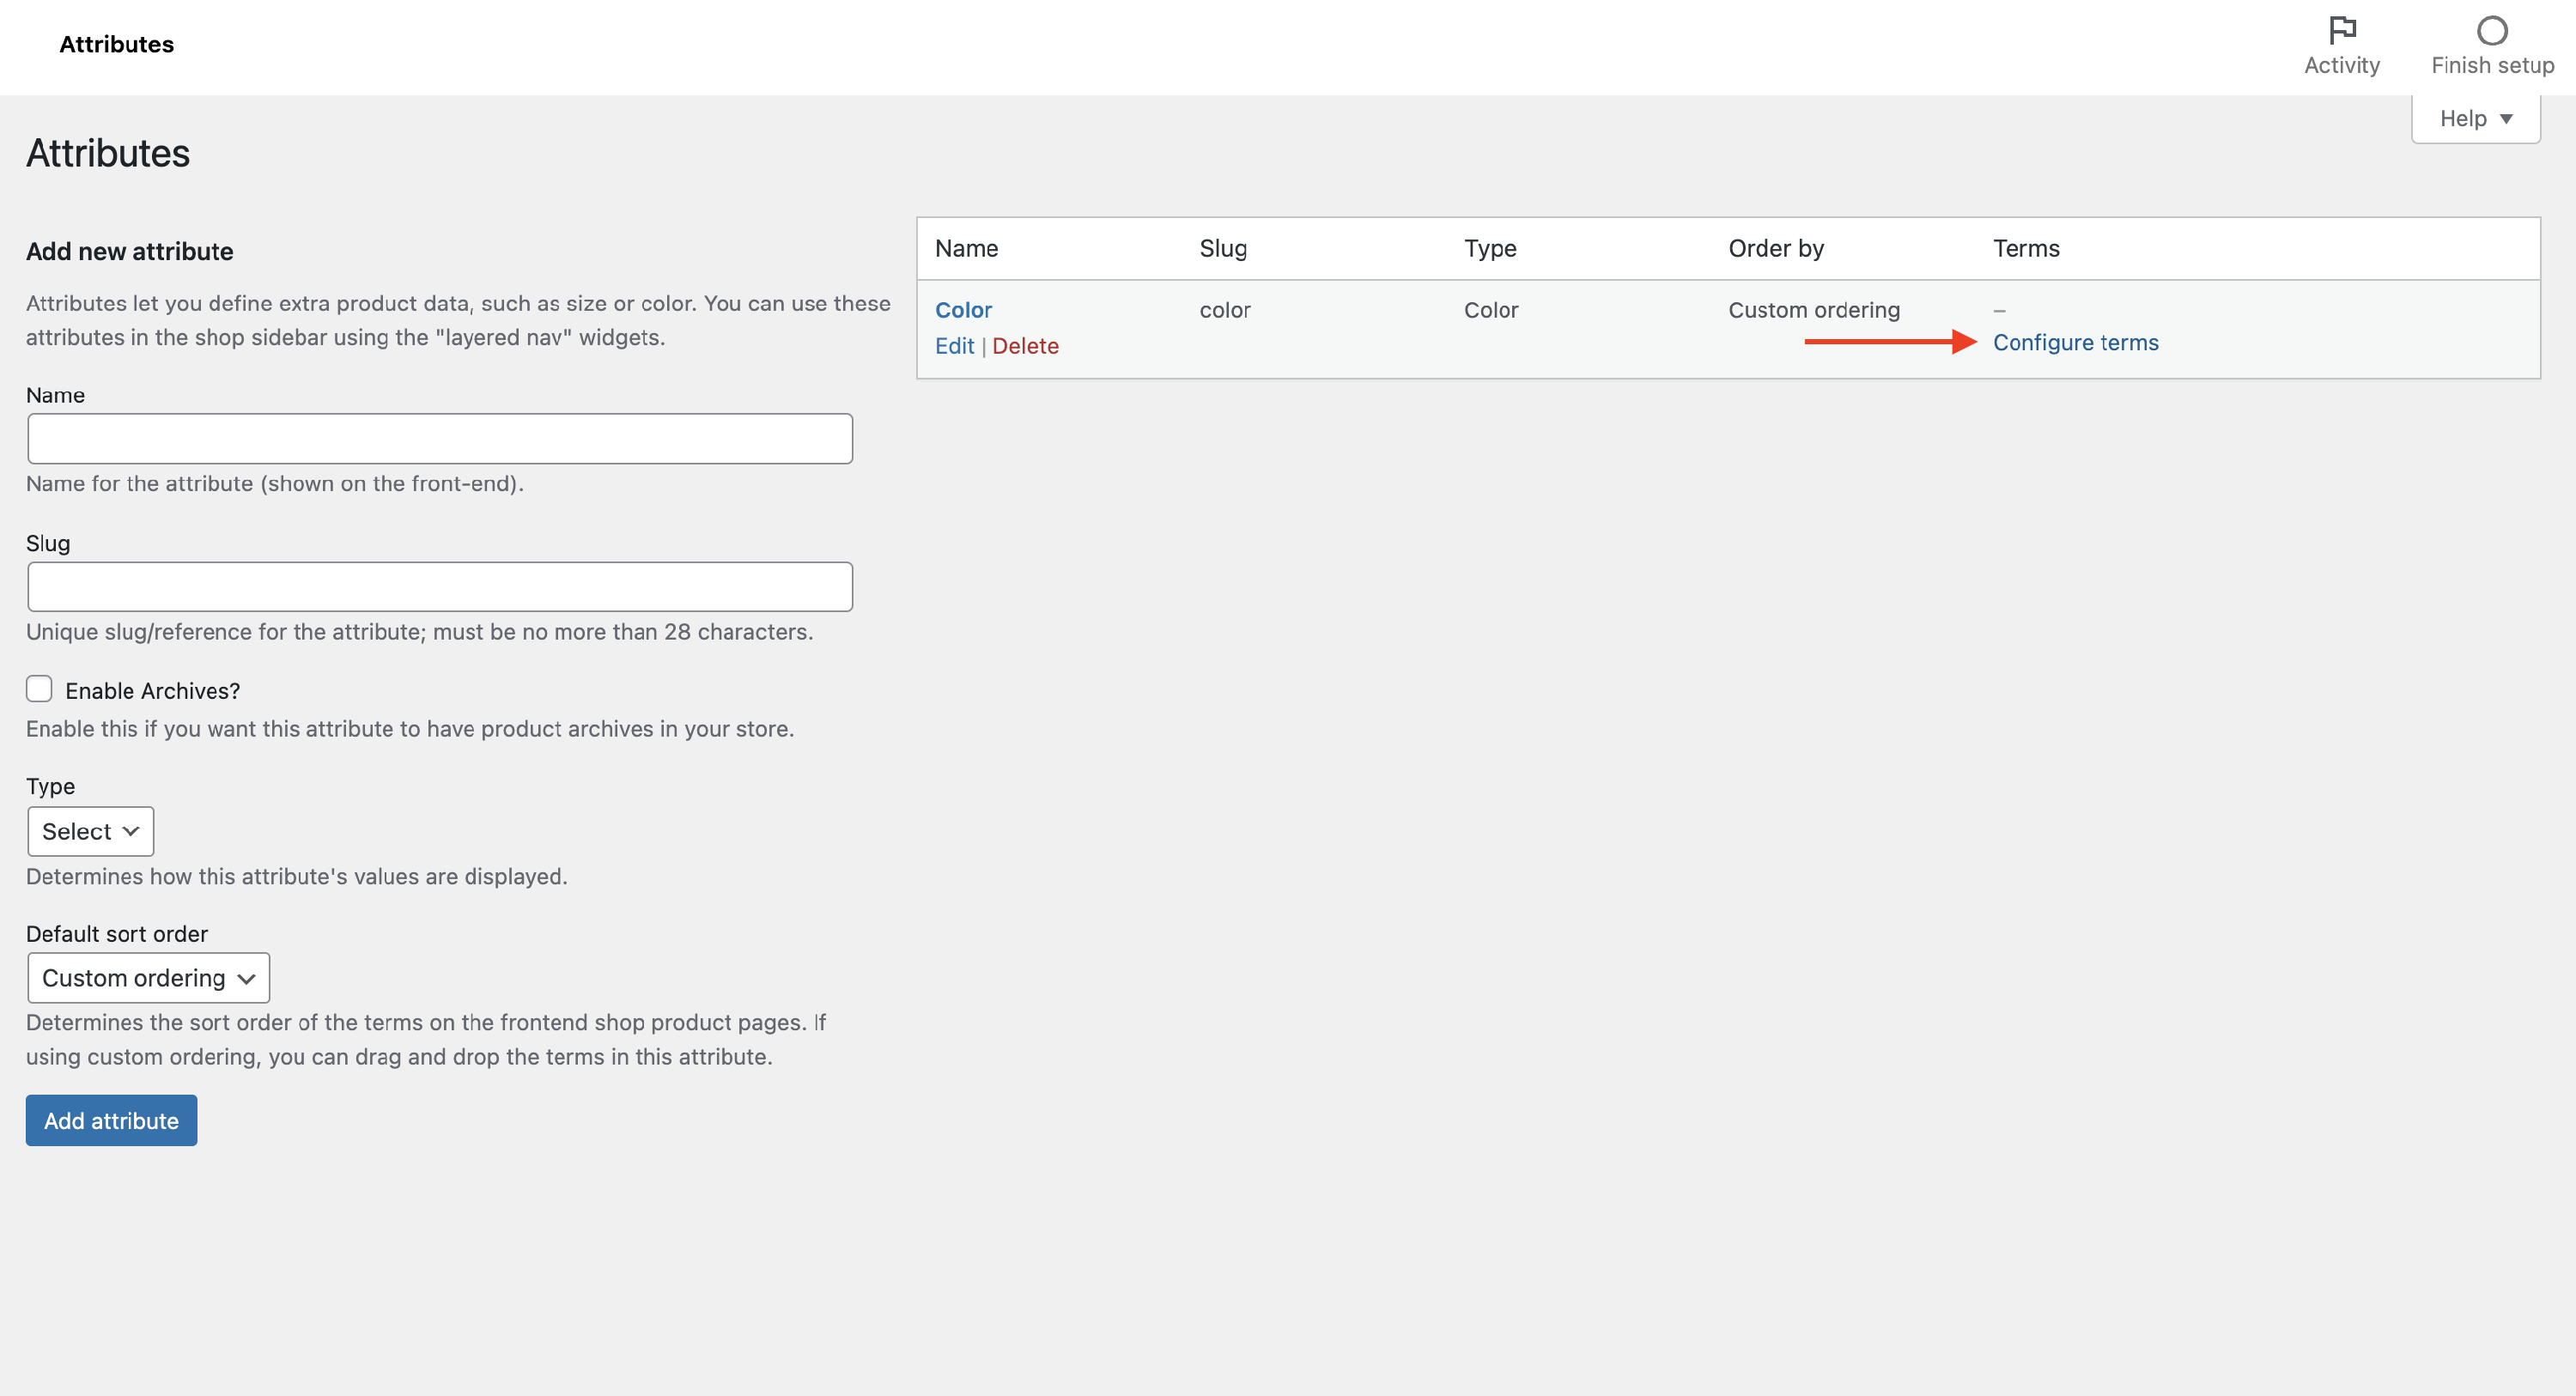
2. You will notice in the right-side table that the attribute that you have created is now available for configurations. Click on the configure terms button to start adding colors.
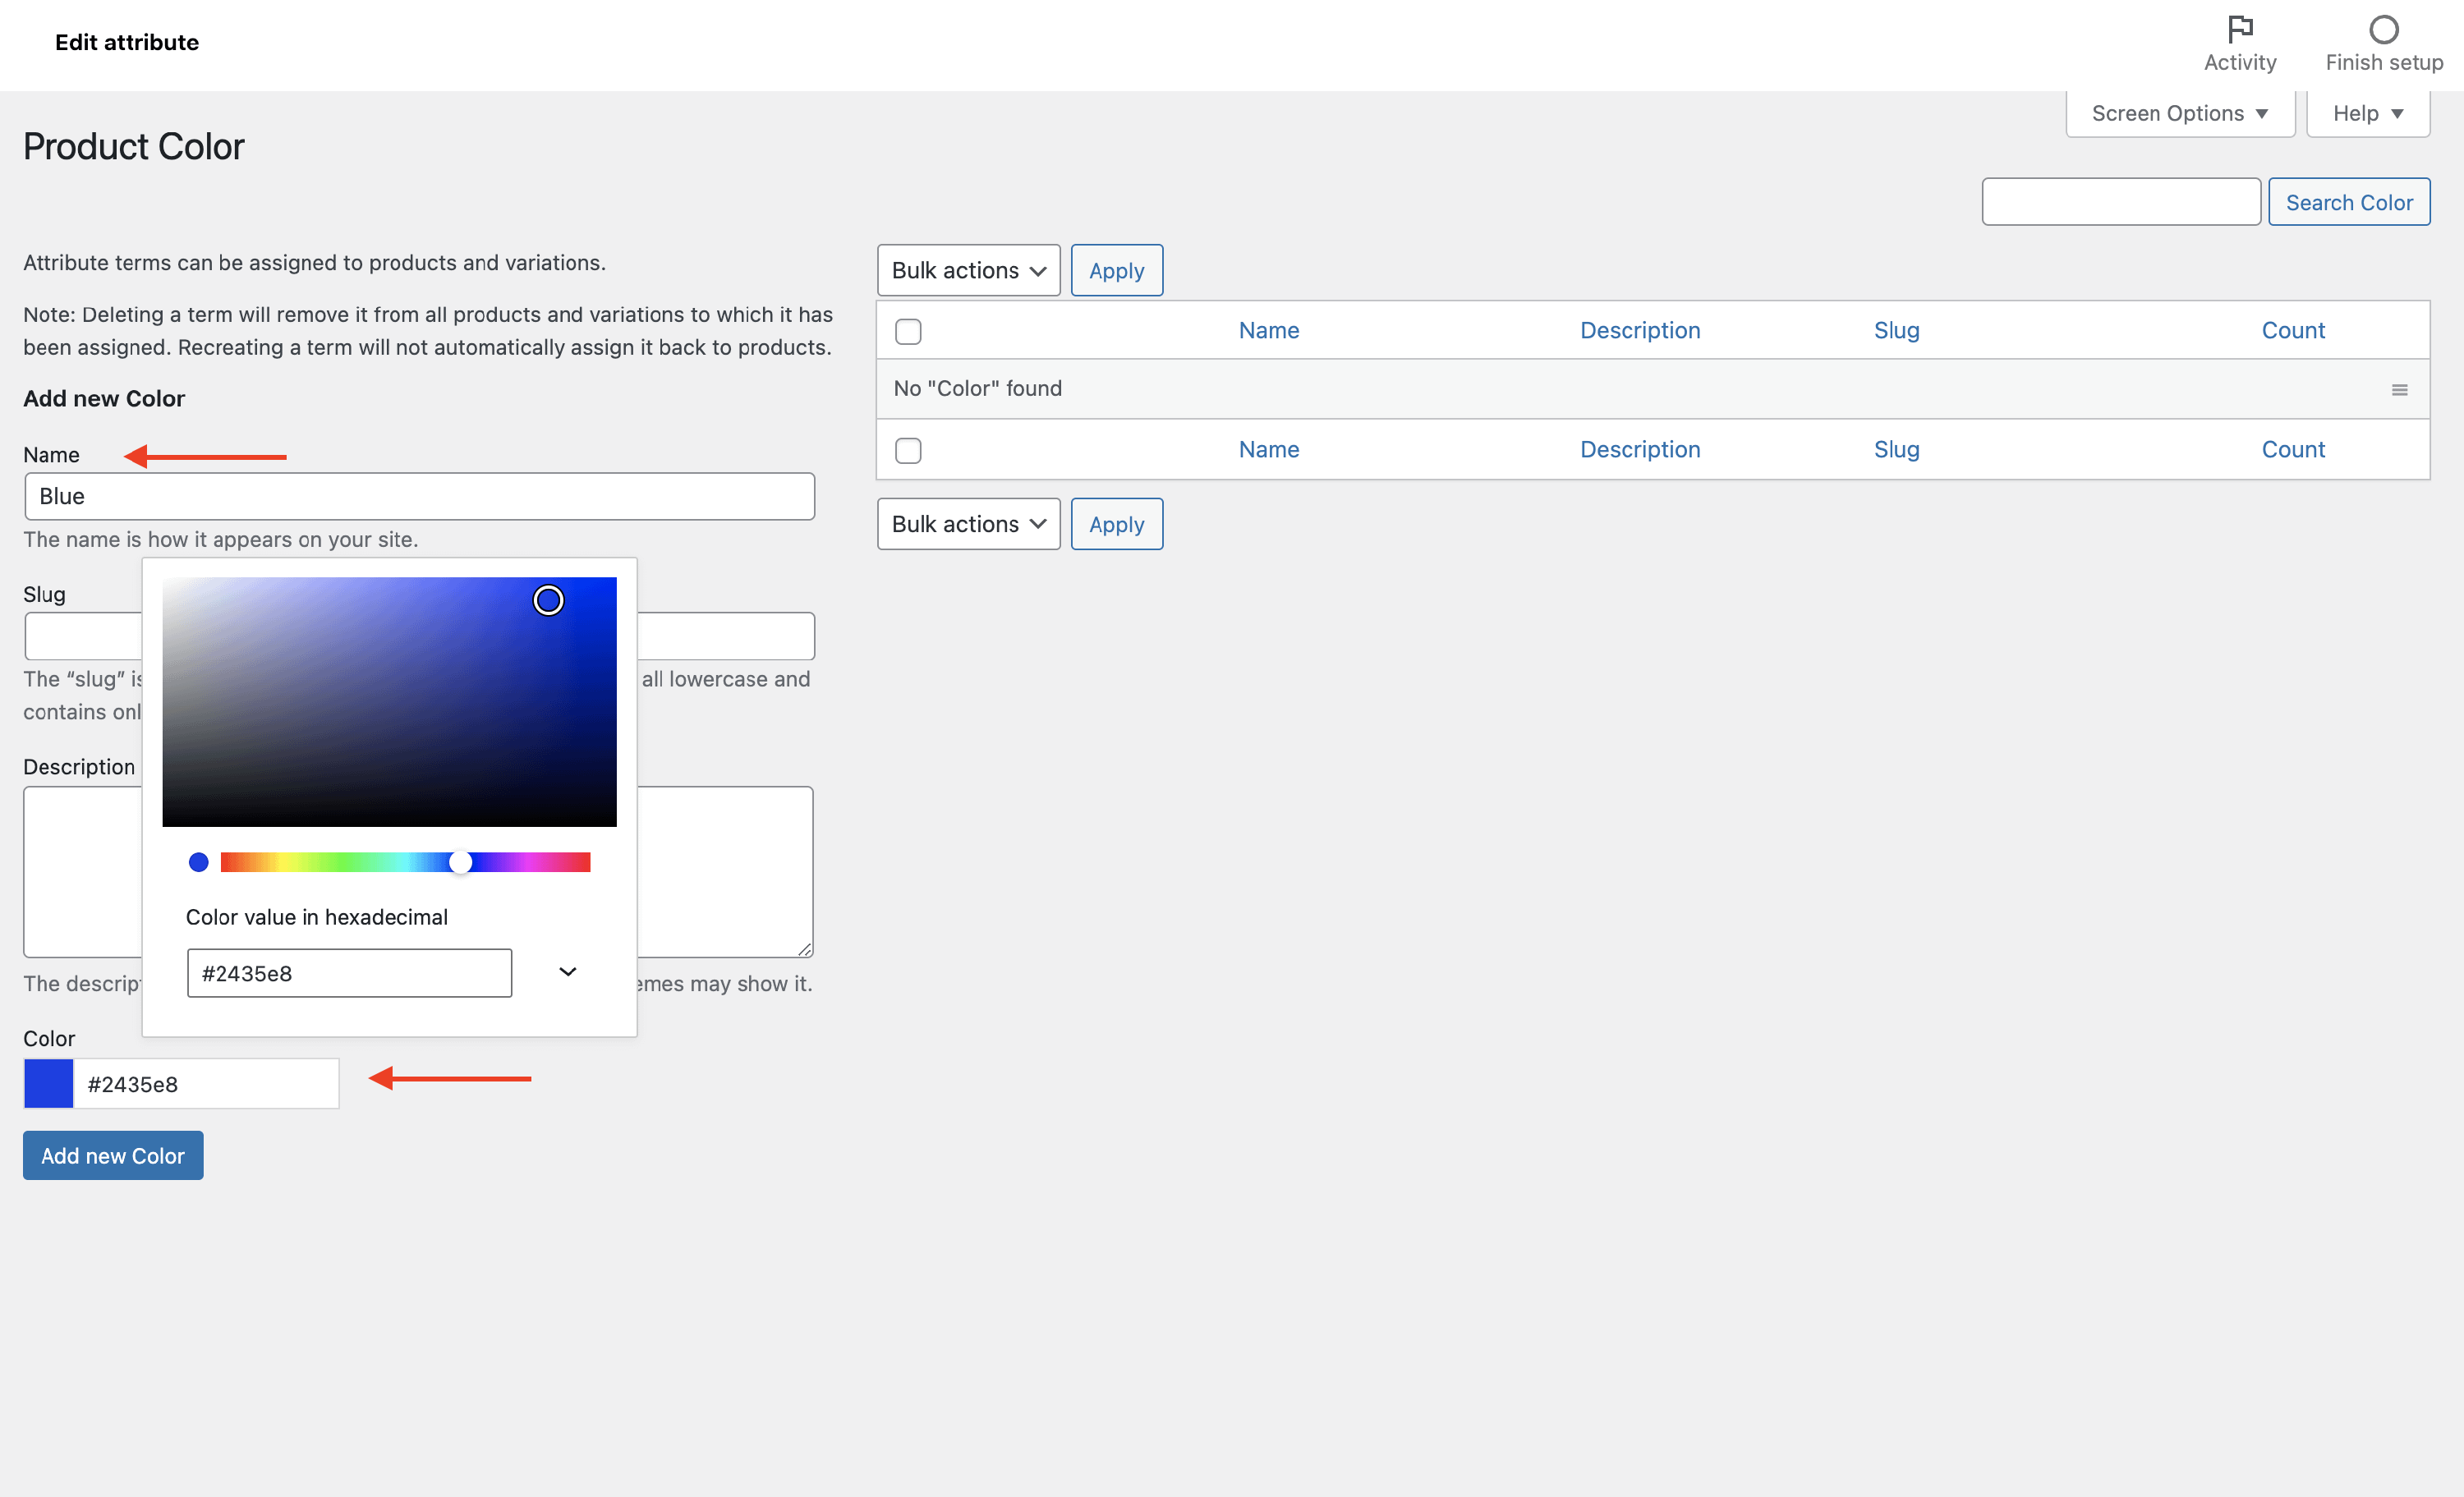
3. A panel like the one below will appear. Set a name of the color ( eg. blue ) and pick the corresponding color from the Color setting.
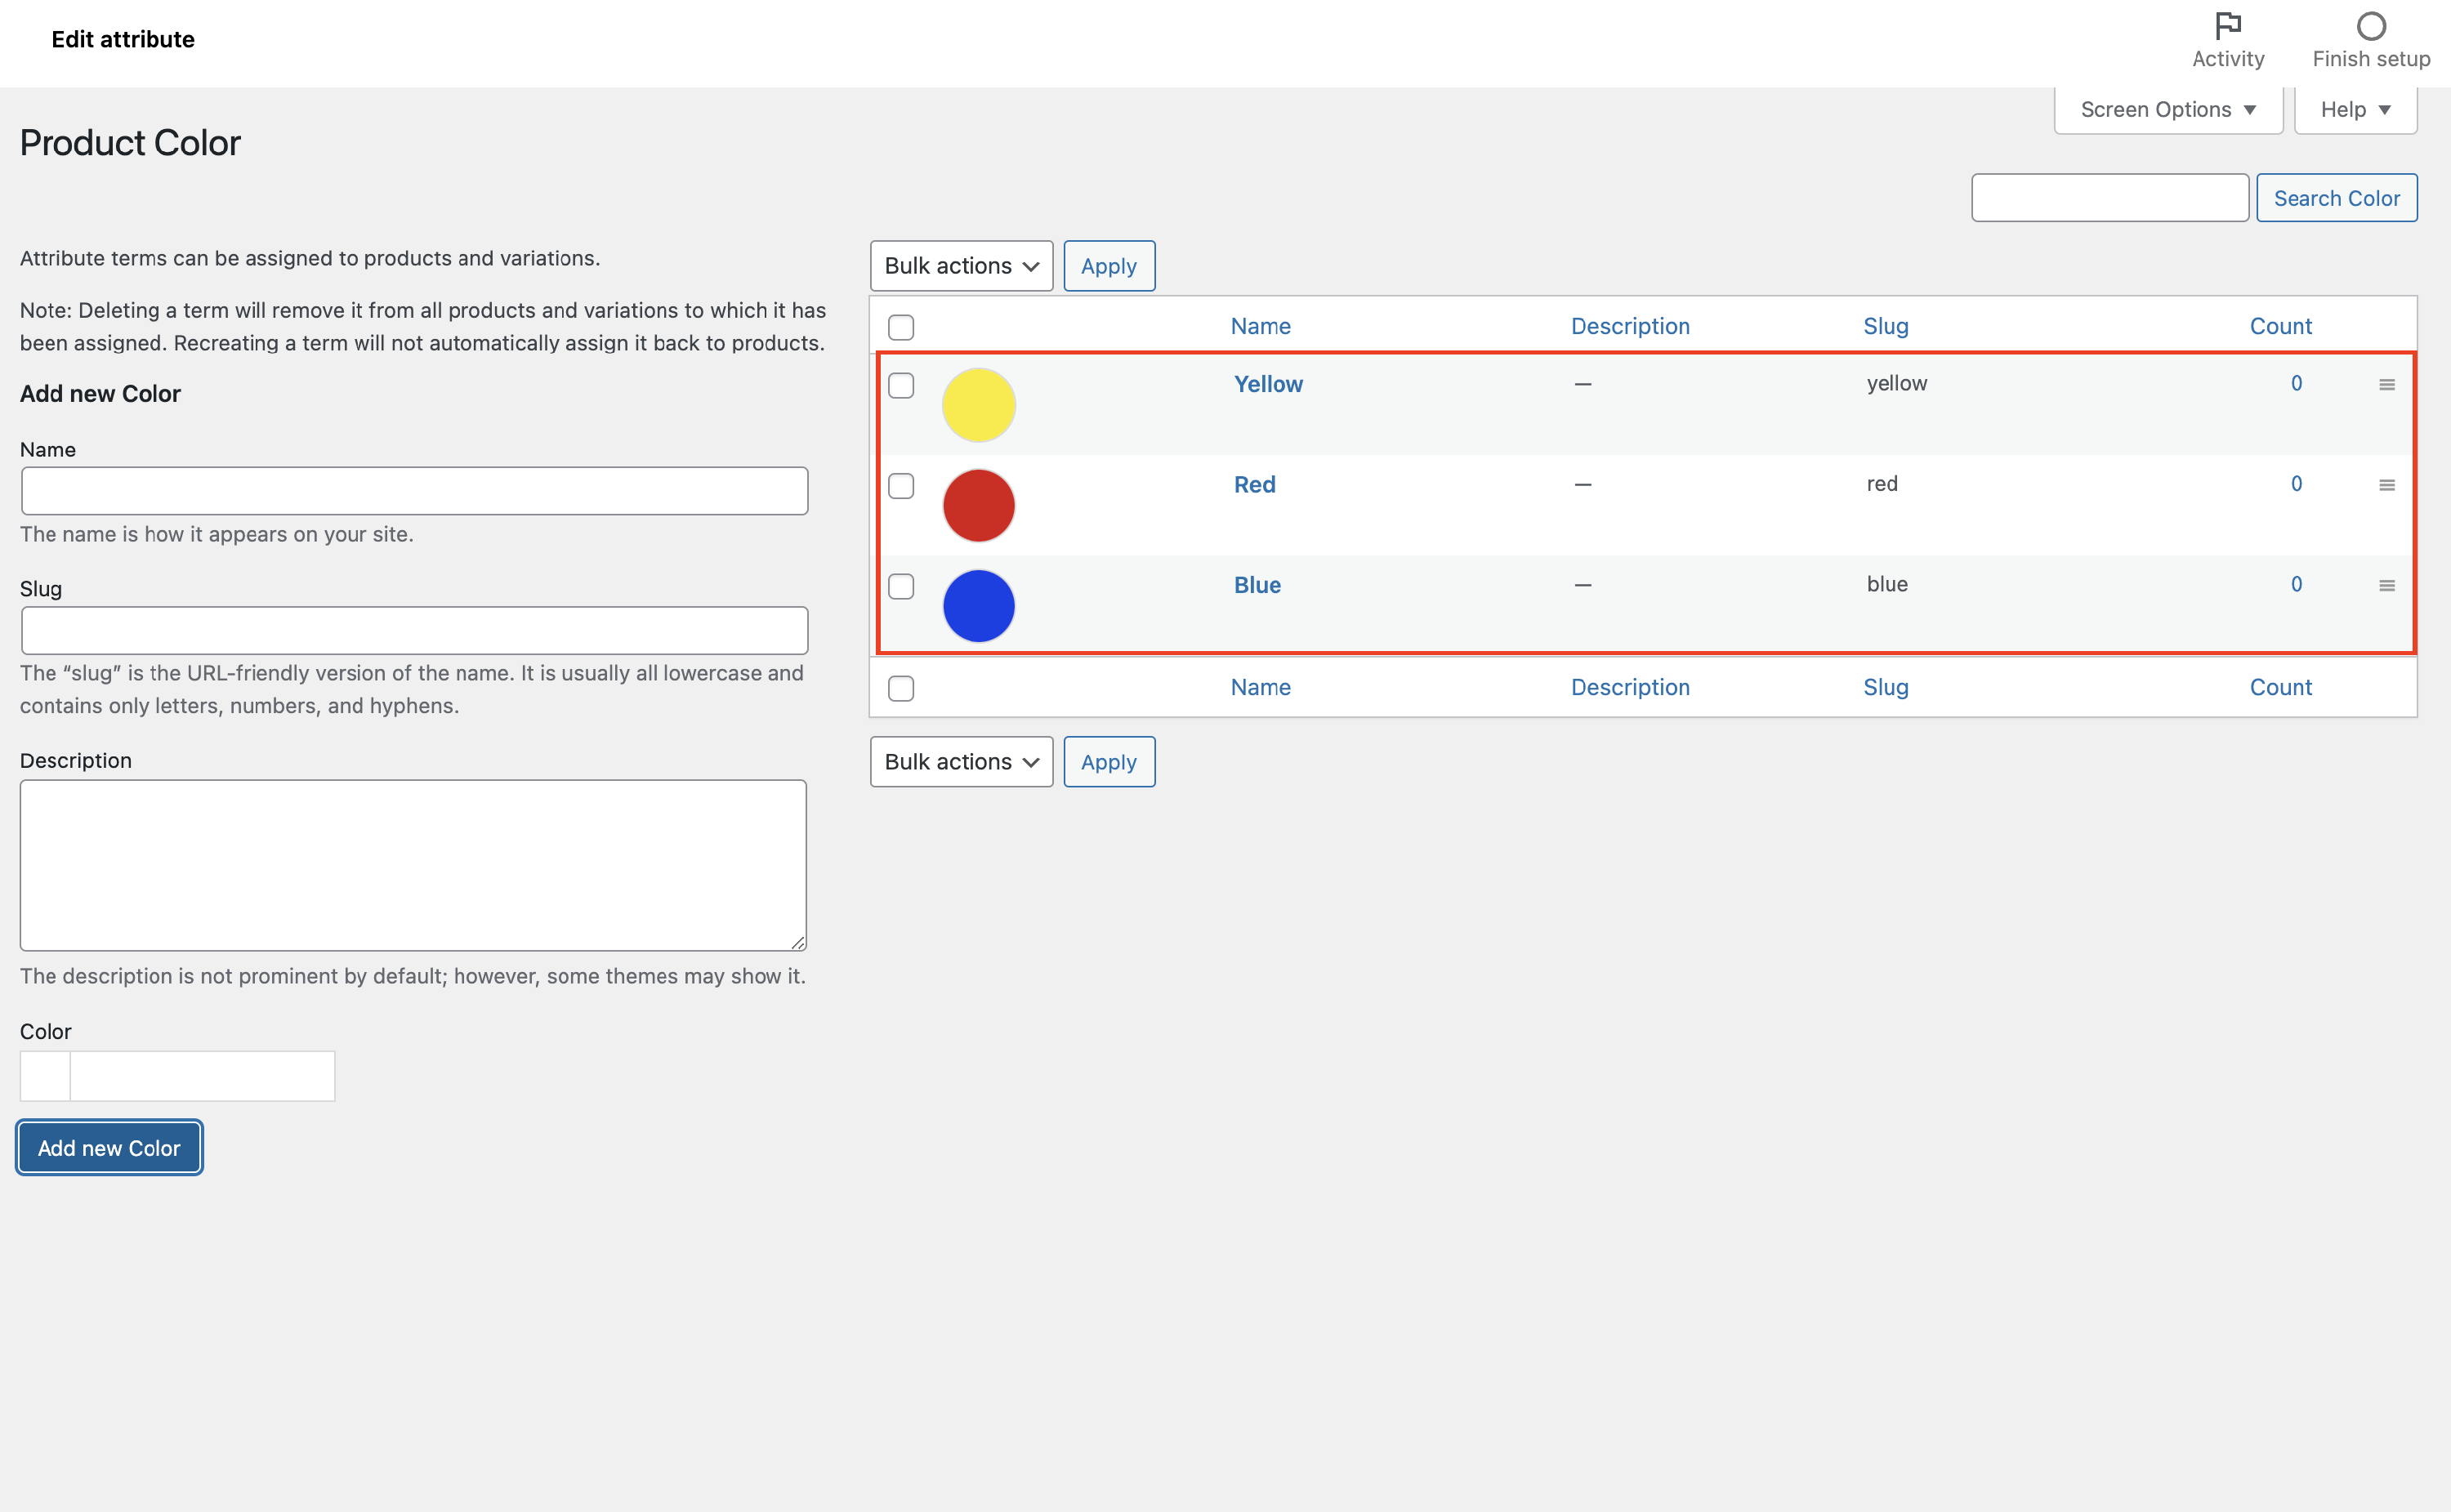
You can add multiple options there, and you will find them in the table.
📝 Note: You can also insert a description into the related field.
Once you get here, the attribute has been set, and it's time to use them as variations for the WooCommerce Products.
Attaching attributes to product
1. Navigate to Products and pick the desired one.
2. Into the Product data space, select the Variable product option from the dropdown list.
3. Select the Attributes panel.
4. Select the Color attribute and expand it.
5. Check the Used for variations option to enable them.
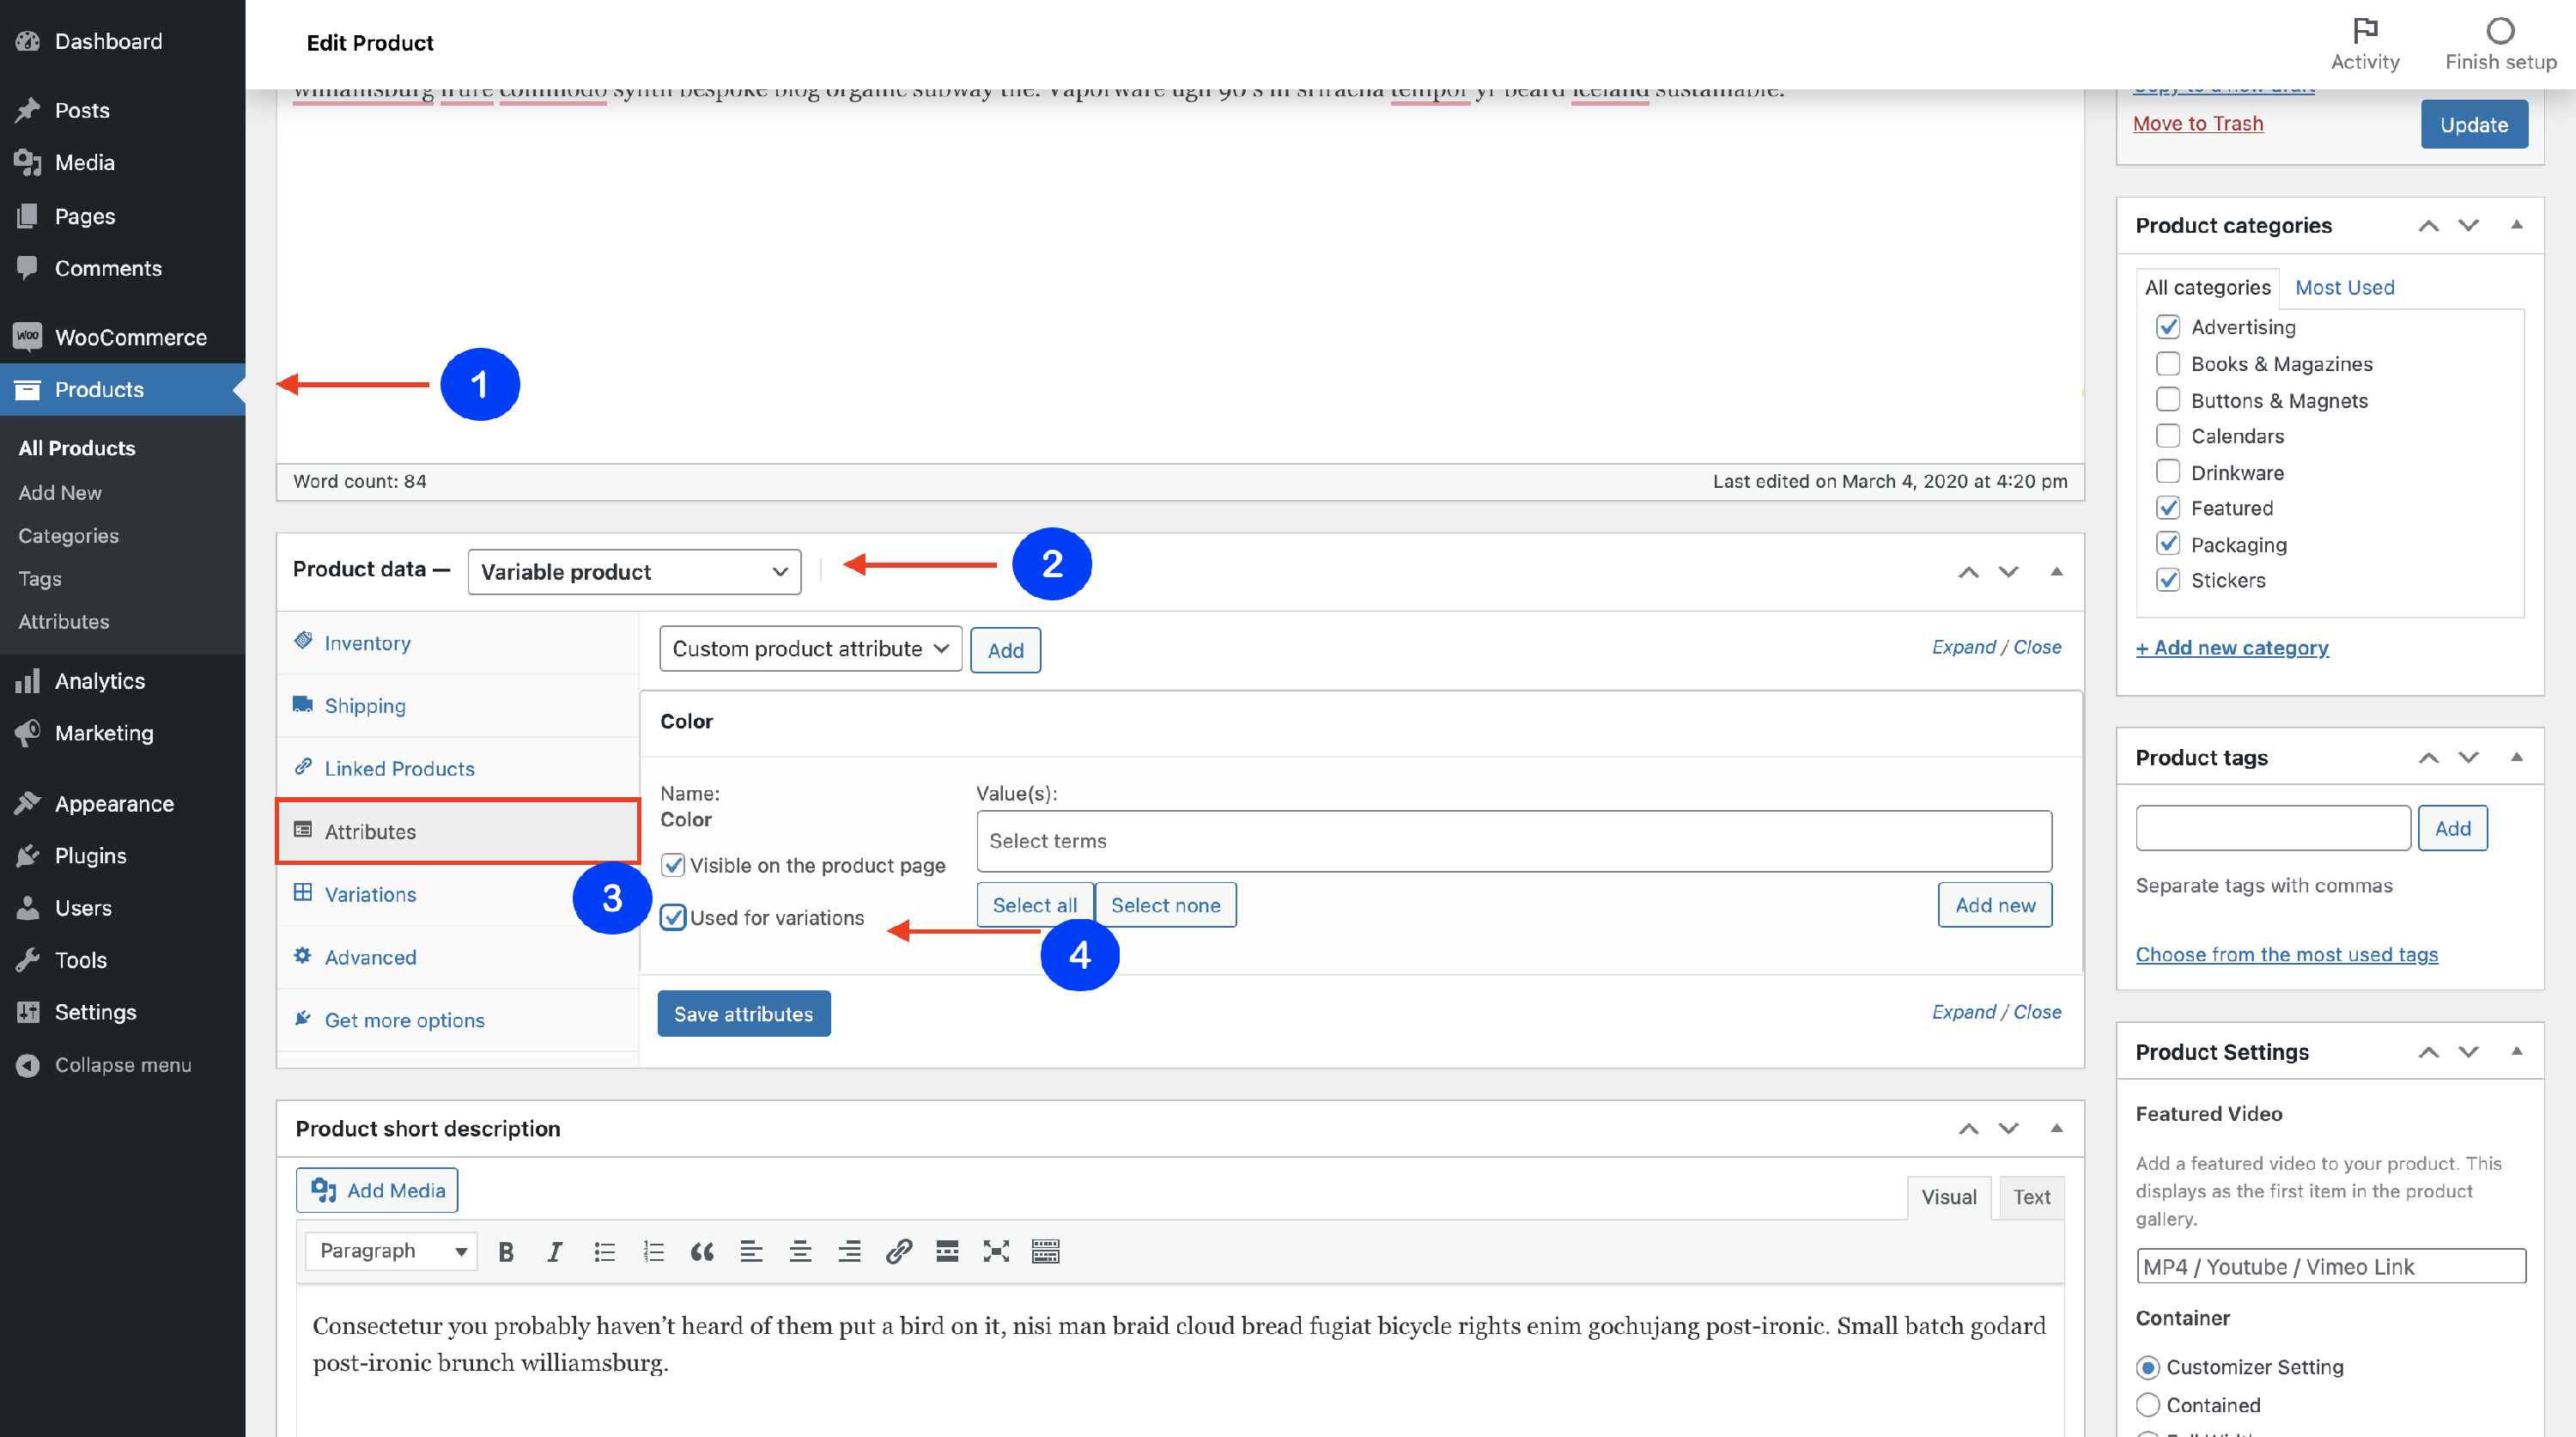
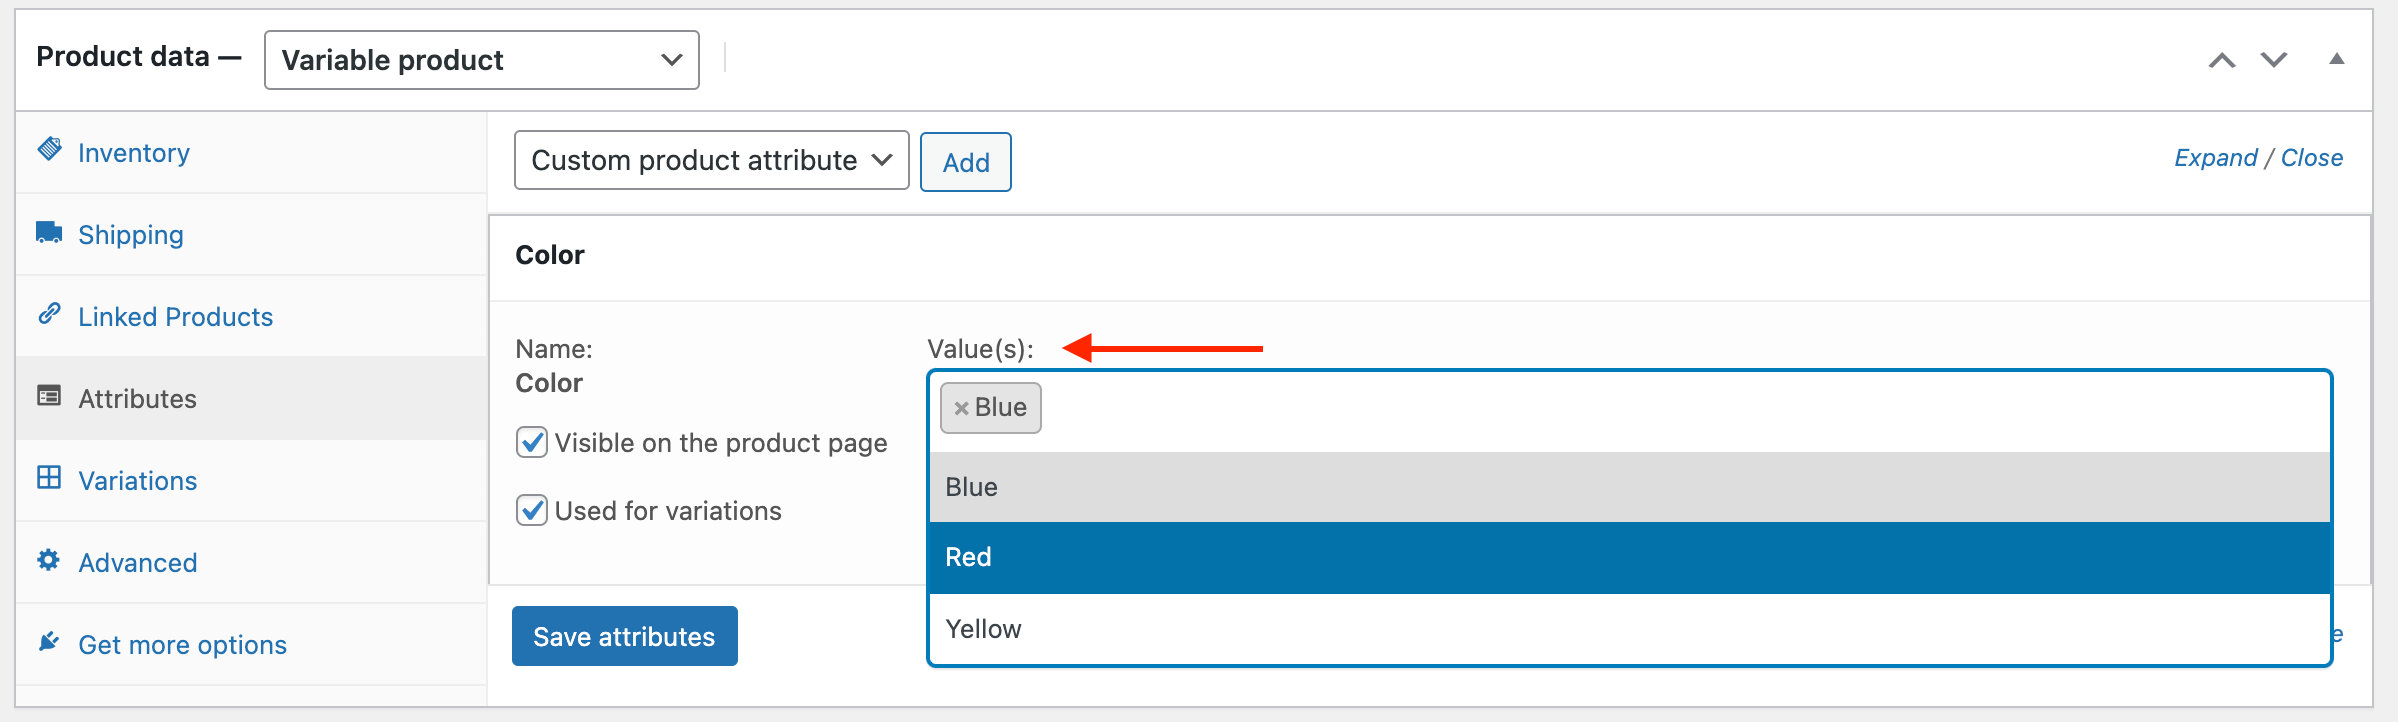
6. Before saving the attributes, you will have to add the values that you have created ( not necessarily all of them ).
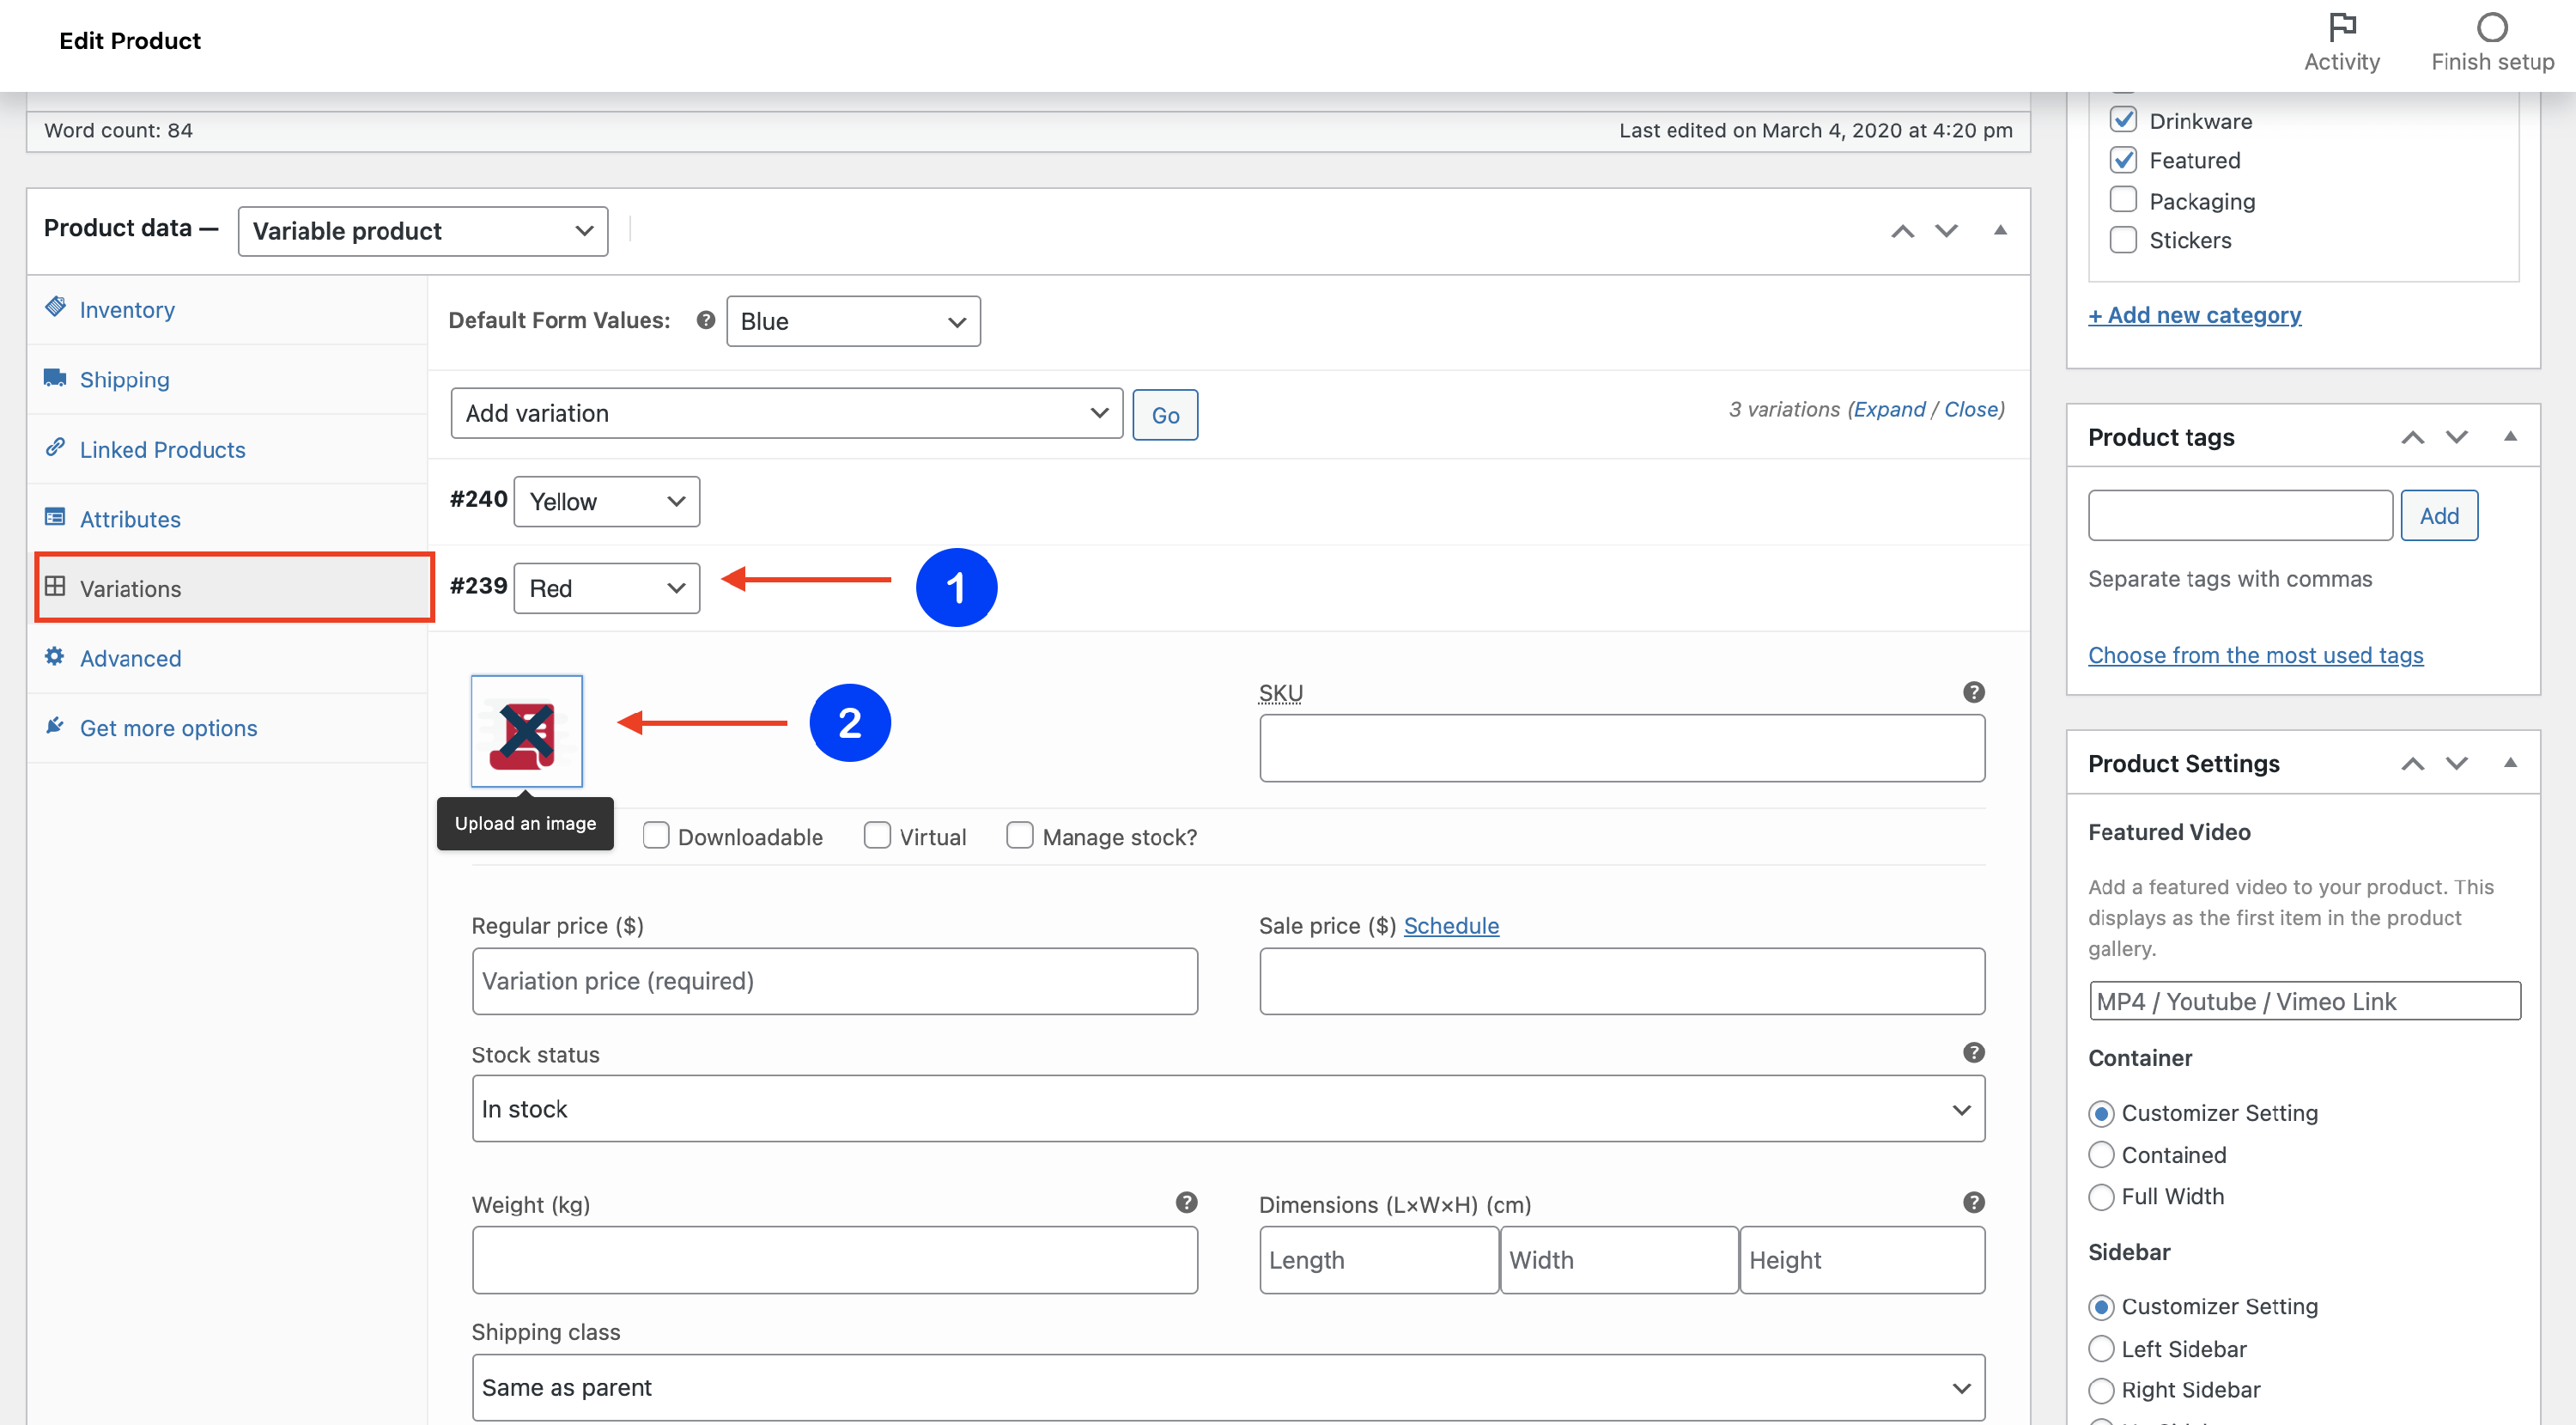
7. Navigate to Variations, and click on the Add Manually button.
8. For each value inserted, configure the price and the specifications.
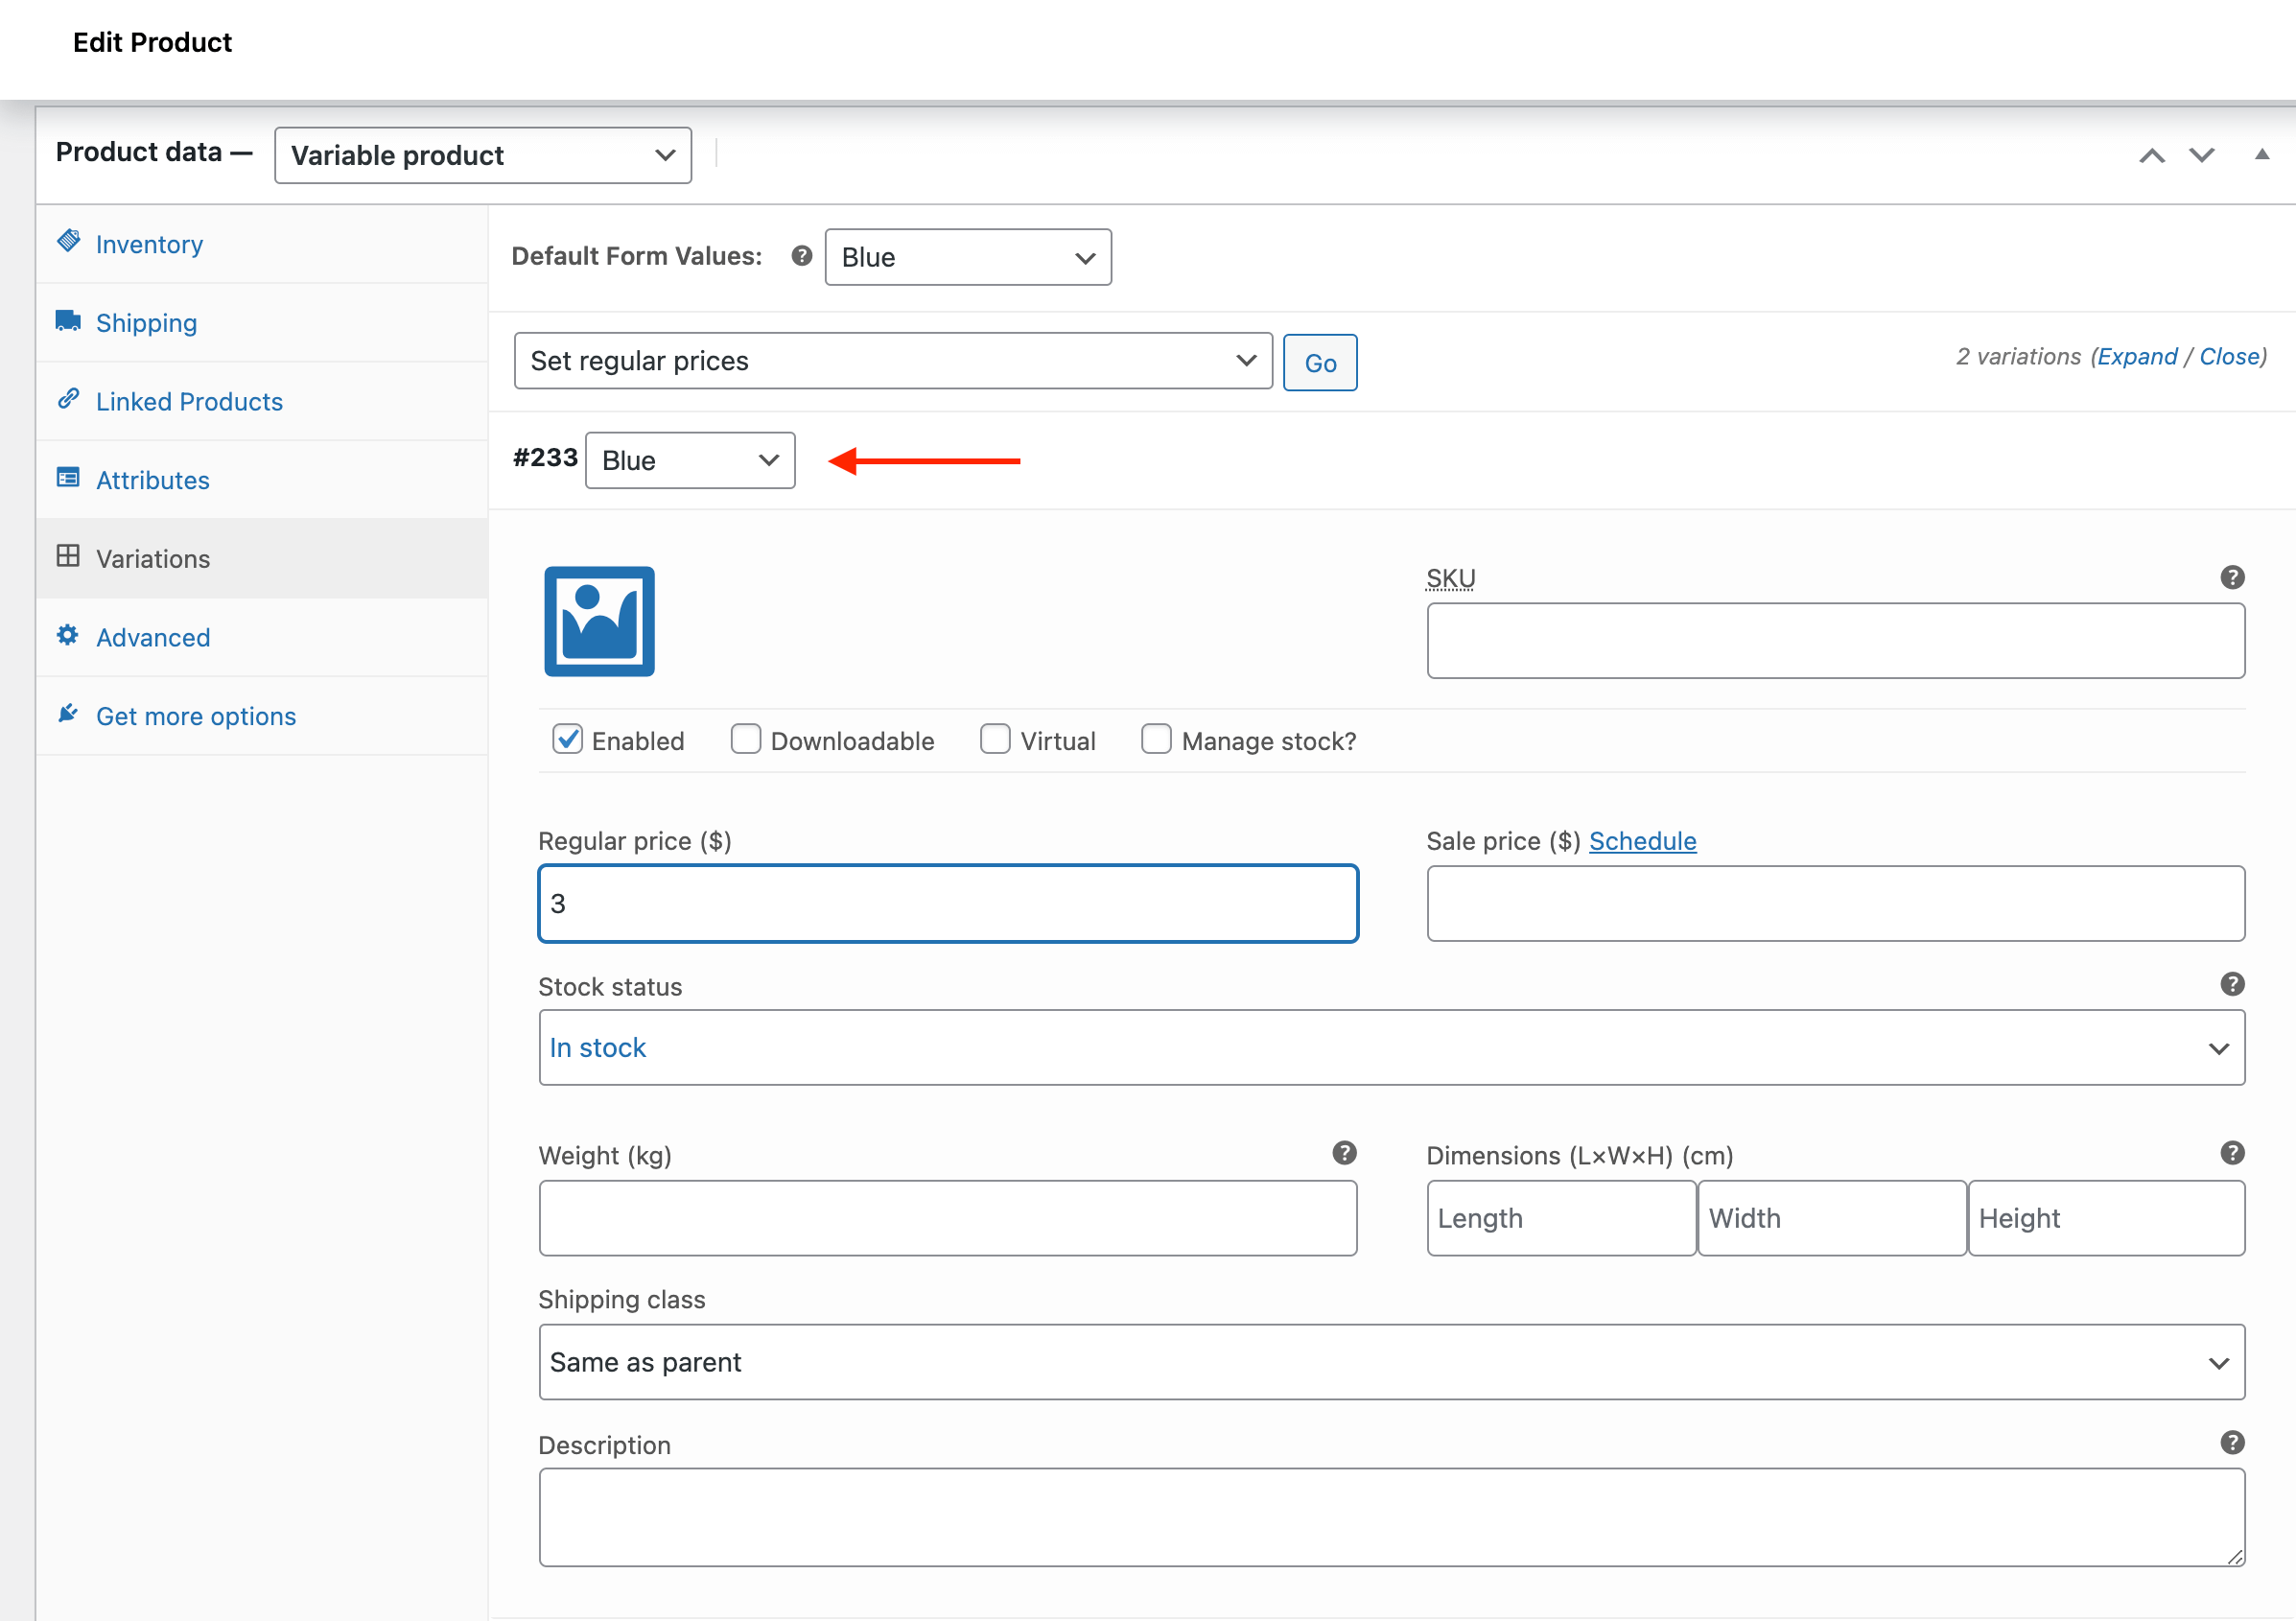
📝 Note: You can pick the default color of the product.
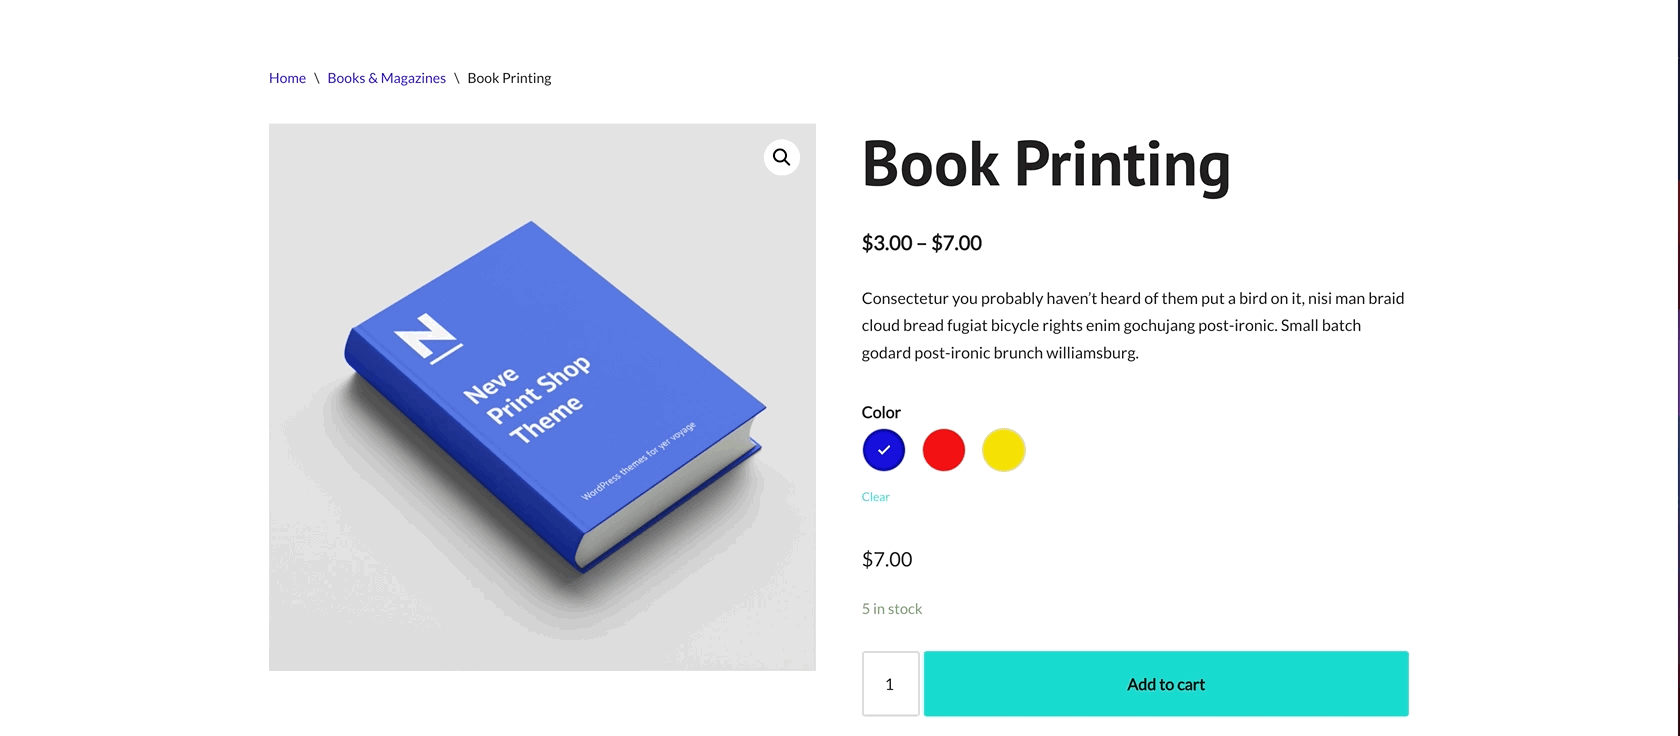
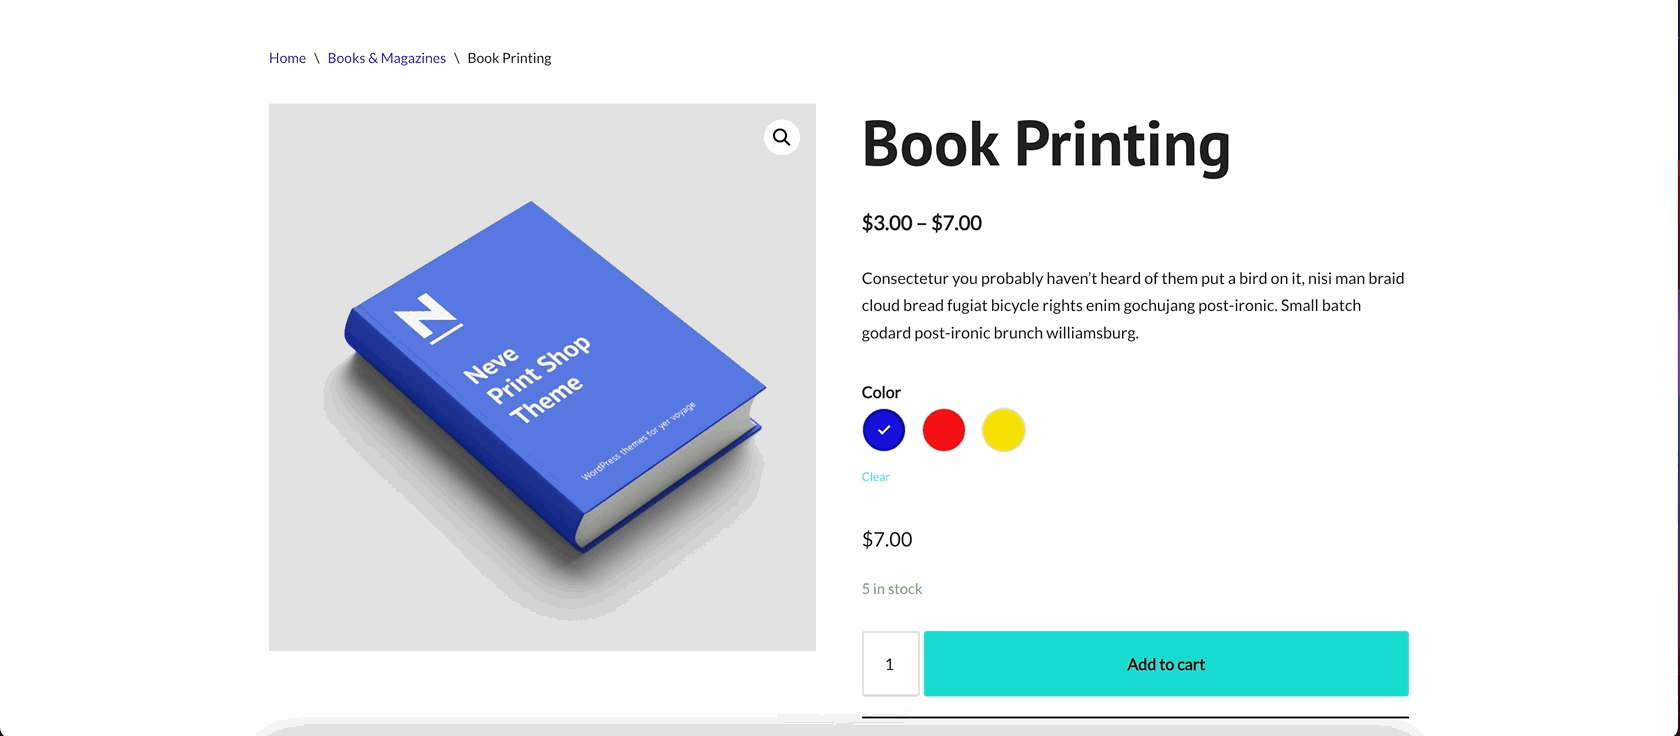
💡 Result - how the variation swatches appear on the front.
Sparks Options of the Variation Swatches
Sparks for WooCommerce, in combination with the Neve theme, allows for different customizations.
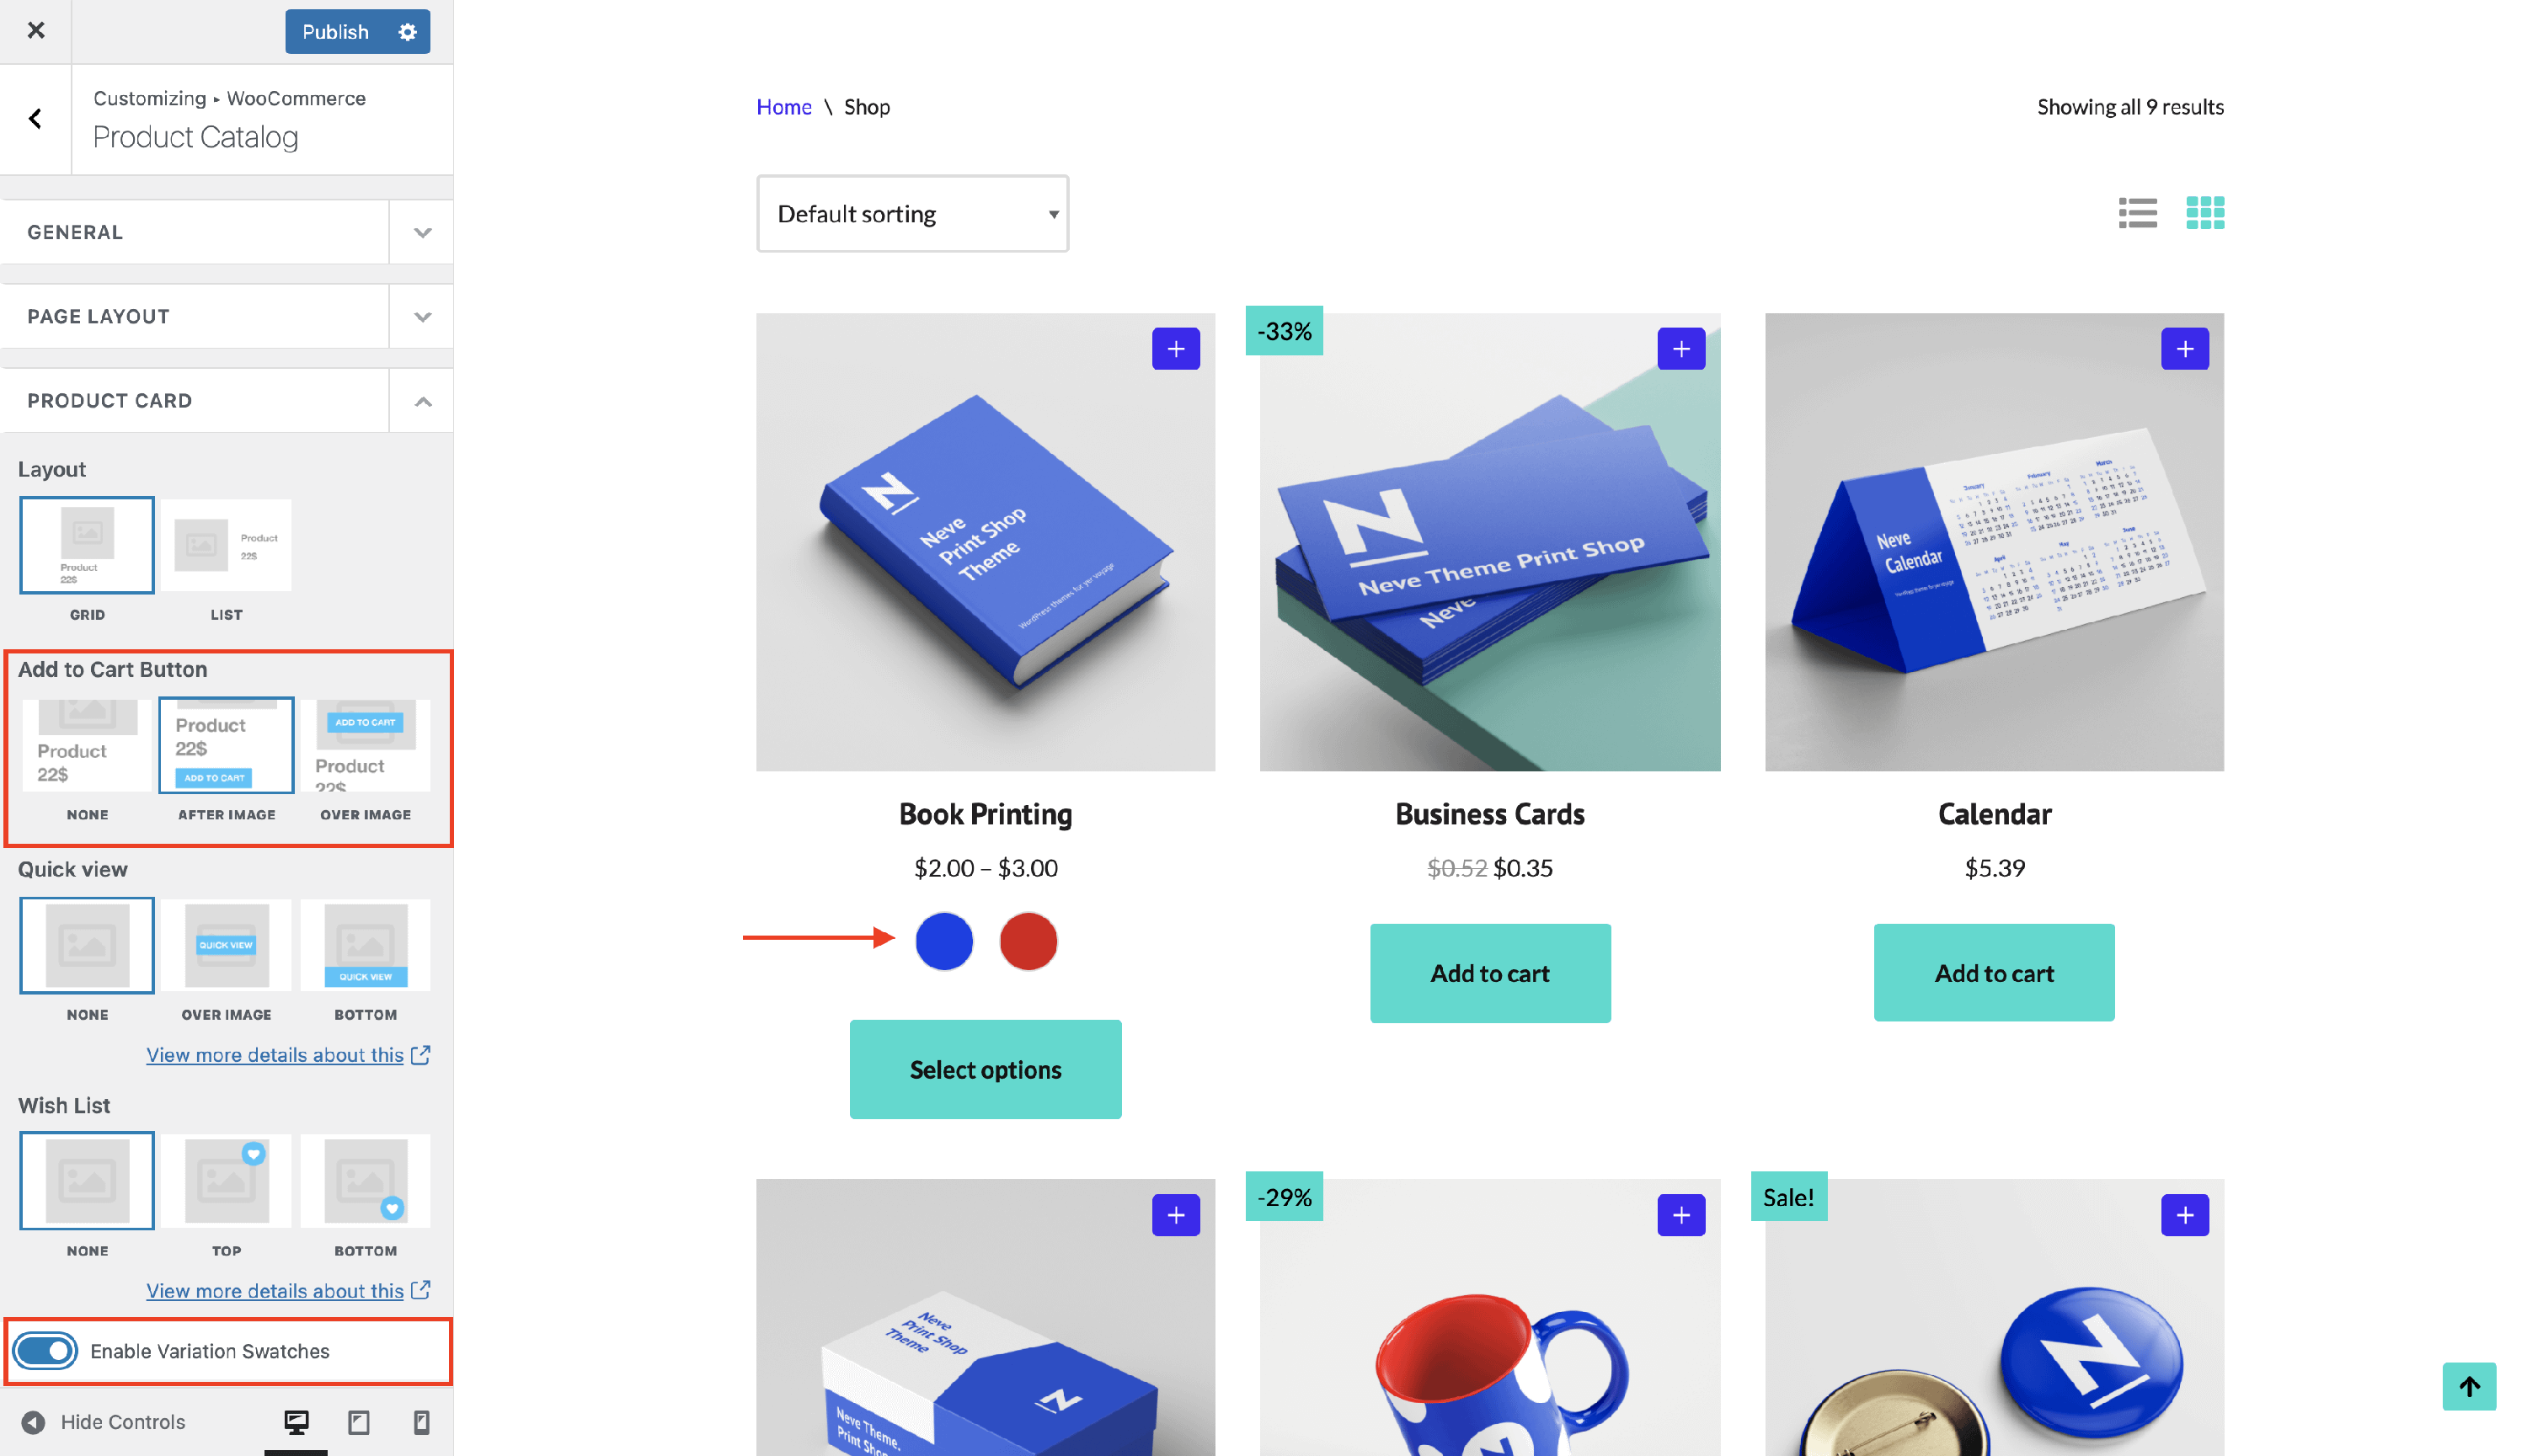
Make sure that you have set the Add to Cart button in the After Image position from Appearance > Customize > WooCommerce > Product Catalog > Product Card.
After that, navigate to Neve > Sparks and click on the configure button of the Variation Swatches, to enable the Show attributes products archive option:

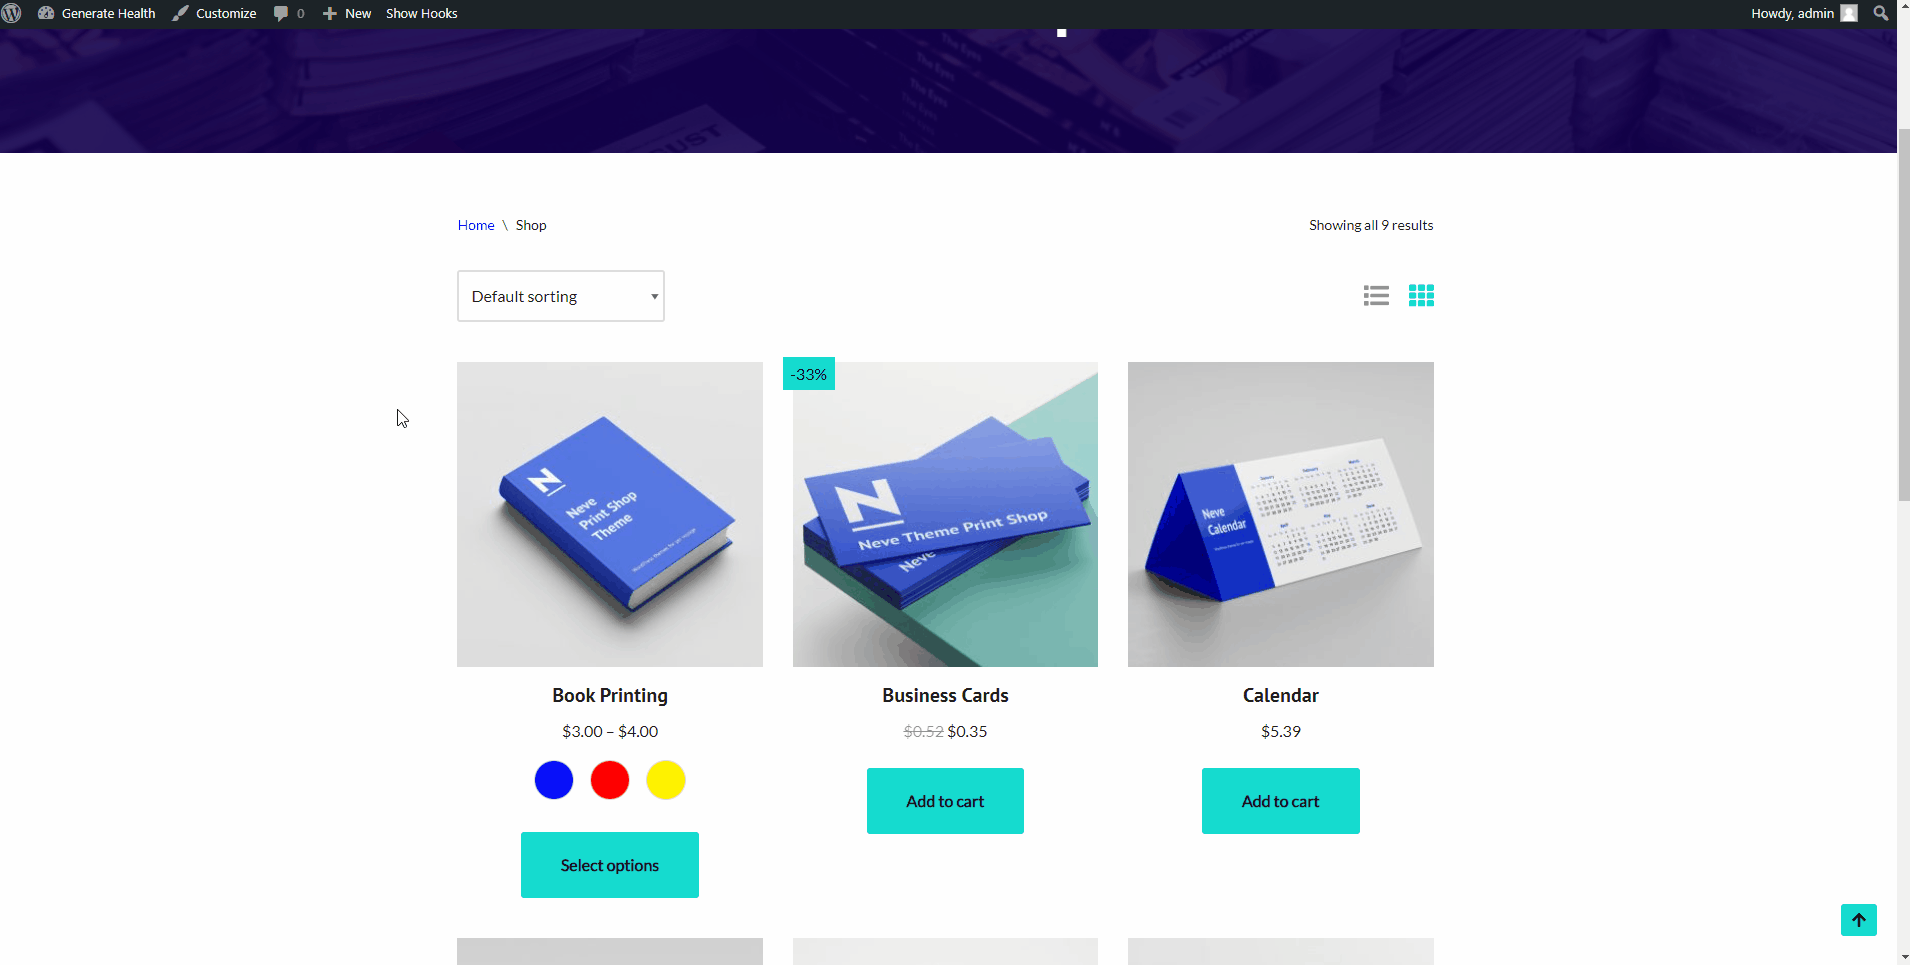
💡 Result - how it appears on the frontend
Useful Resources
Enabling the variation swatches on the shop page (including product archive pages)
It's also possible to enable the variation swatches on the product archive pages, there are two settings for it.
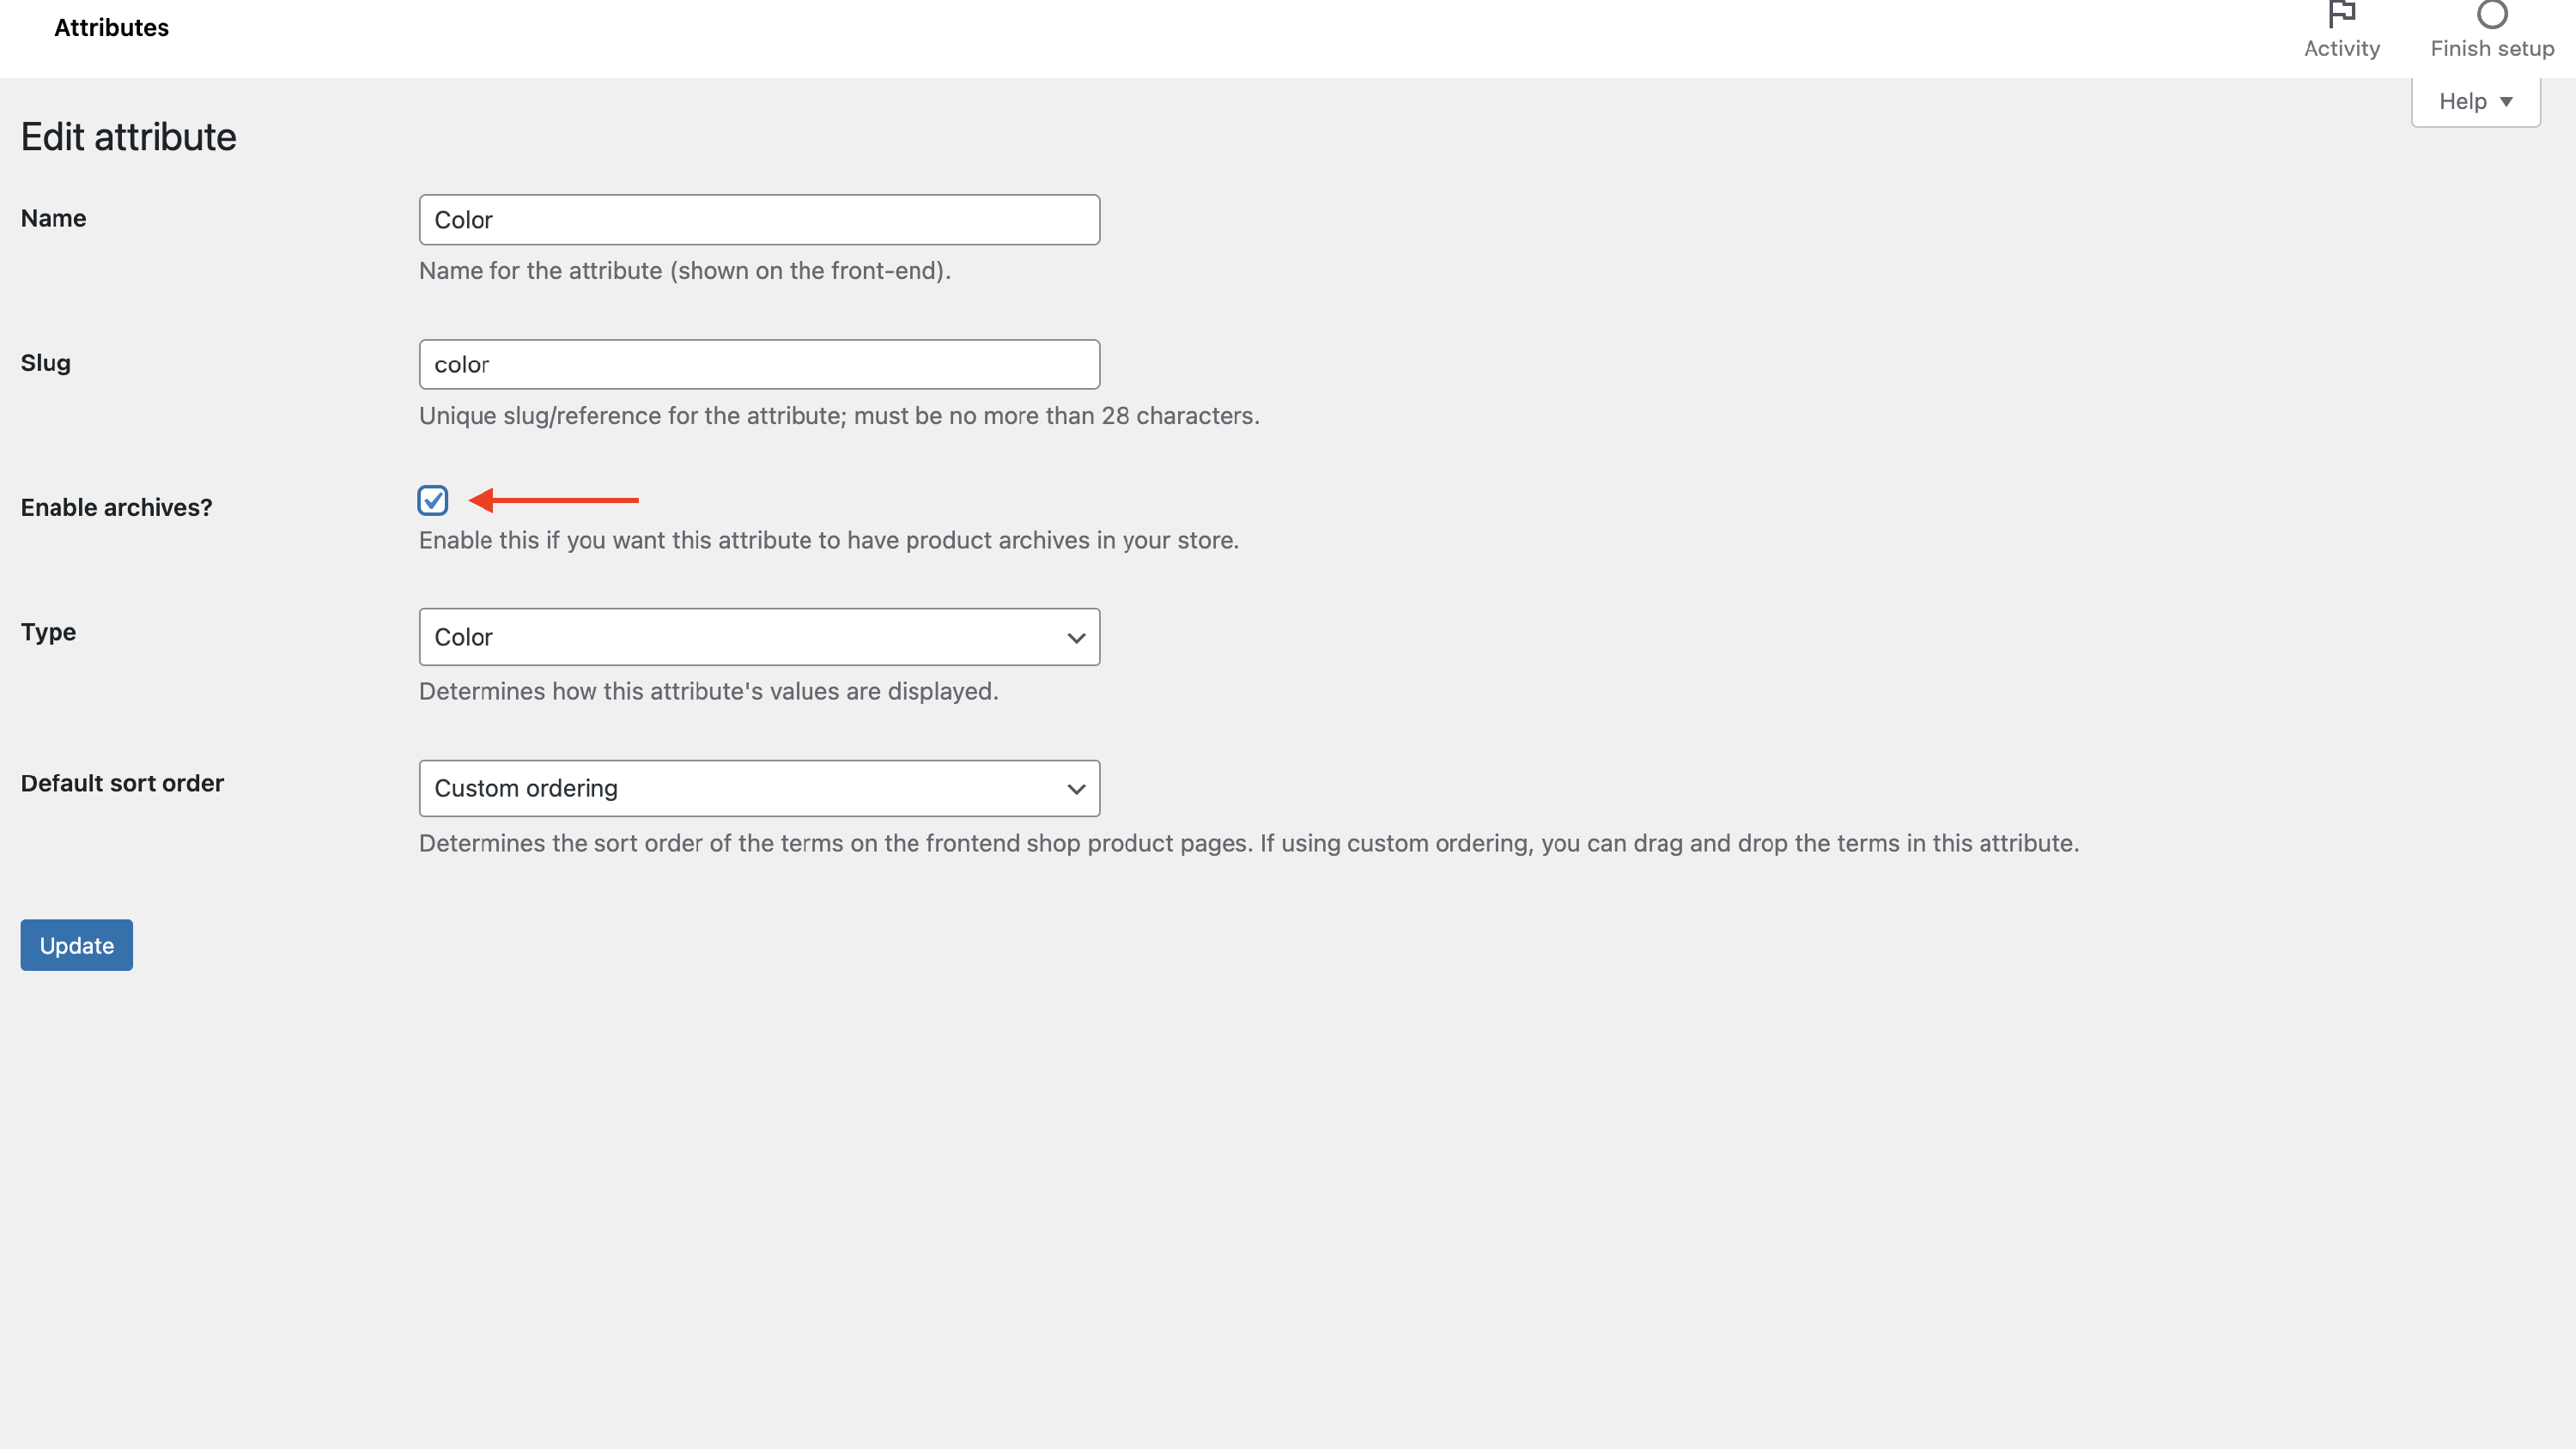
Step 1: Navigate to Dashboard > Products > Attributes, hover over the attribute, and click on the Edit button.
This way, it can be specified for each attribute if it should appear on the products archives pages or not.
Step 2: Then check the Enable archives checkbox:
Step 3: Navigate to Customizer > WooCommerce > Product Catalog. Under the Product Card, make sure the Add to cart is also enabled on the product archive pages and it's also set to appear below the product thumbnail ( and not in front of it with the hovering effect ).
Step 4: In the same set of Customizer settings with the add-to-cart button, there is also a toggle that needs to be enabled to show the variation swatches on the product archive pages.
Sync variation swatches with the product featured image
For a better user experience, it is possible to sync the variation swatches with the product's featured image. For example, if we have a Book product available in three different colors, each variation can be associated with a product image. This way, a different image will be shown based on the selected variation.
This can be configured while editing the product.
Step 1: Navigate to the product to the Variations tab.
Step 2: Expand each color and upload a specific photo for each color.
This feature works in the following cases.
Product page
Shop (product archive) page
📝 Note: If a product has more than 30 variations, you need to add custom code to support that, as Sparks limits variation swatches to 30 variations by default through the woocommerce_ajax_variation_threshold filter. You can install the plugin below or add this function to your child's theme.
<?php
/**
 * Plugin Name: Increase Variation Swatches limit in Neve
 * Description: Enable Neve Variation Swatches on products with more than 30 variations.
 * Author: Themeisle
 * Author URI: https://themeisle.com
 */

add_filter( 'woocommerce_ajax_variation_threshold', function() { return 60; } );