The Multi-Announcement Bars Module - Sparks
📝 Note: The Multi-Announcement Bars module is part of the Sparks plugin, which you can get from here.
The multi-announcement bars are very useful for the offers that appear from time to time, according to your configurations.
In this article
Activating the Module
1. Install the Sparks plugin, using these instructions.
2. Navigate to Settings > Sparks and activate the module.
NOTE: If you are using Neve, navigate to Neve > Sparks to access Sparks's options.
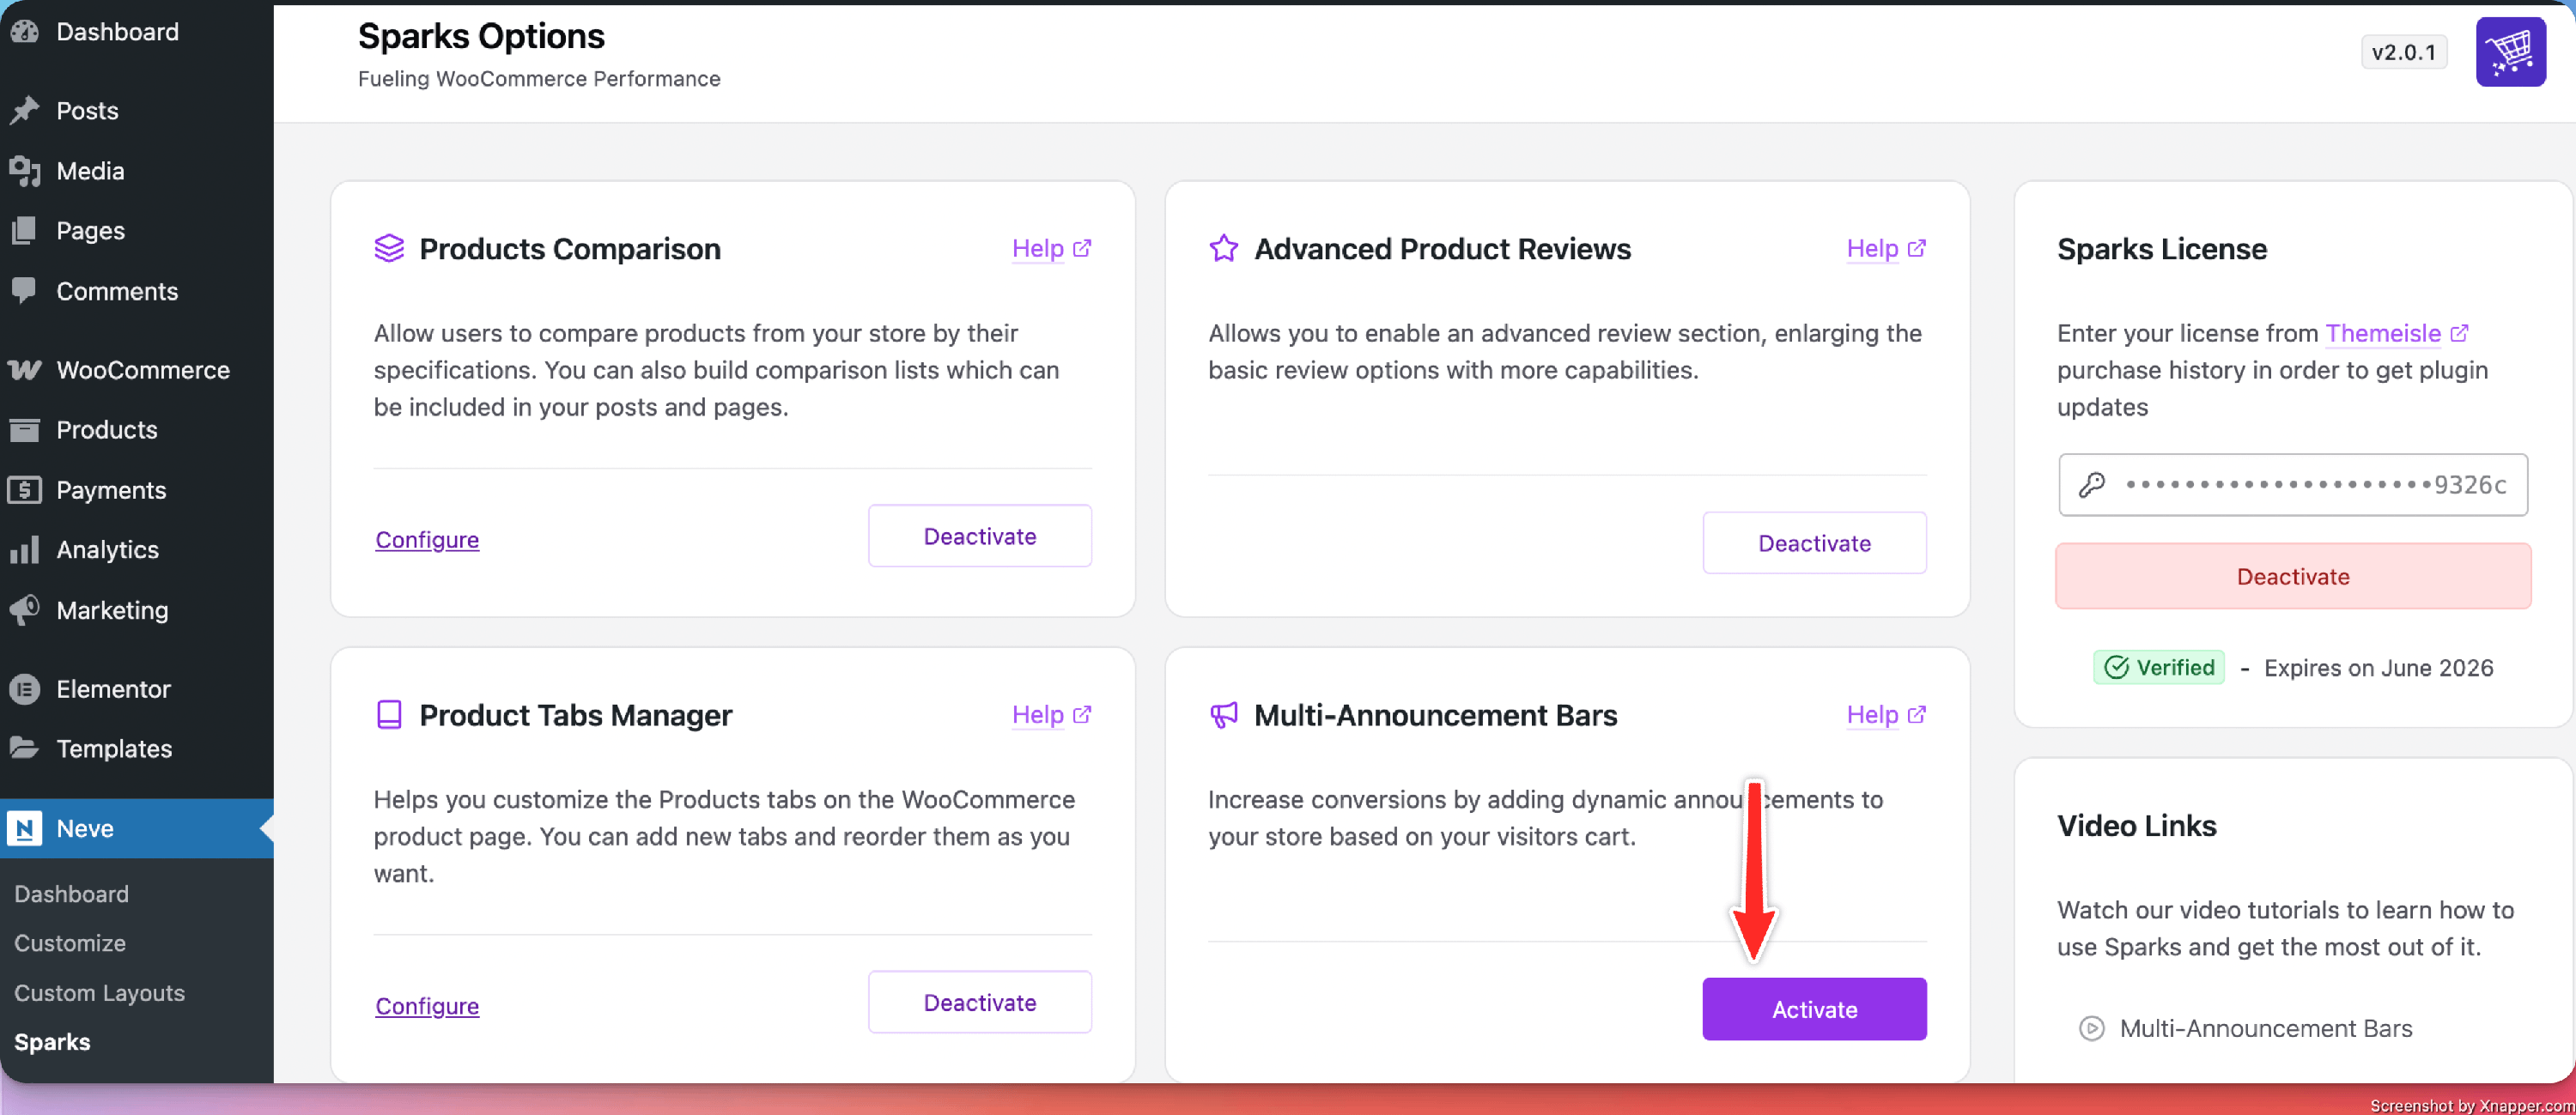
To start adding Announcement Bars, click on the Configure button.
Using the Multi-Announcement Bars
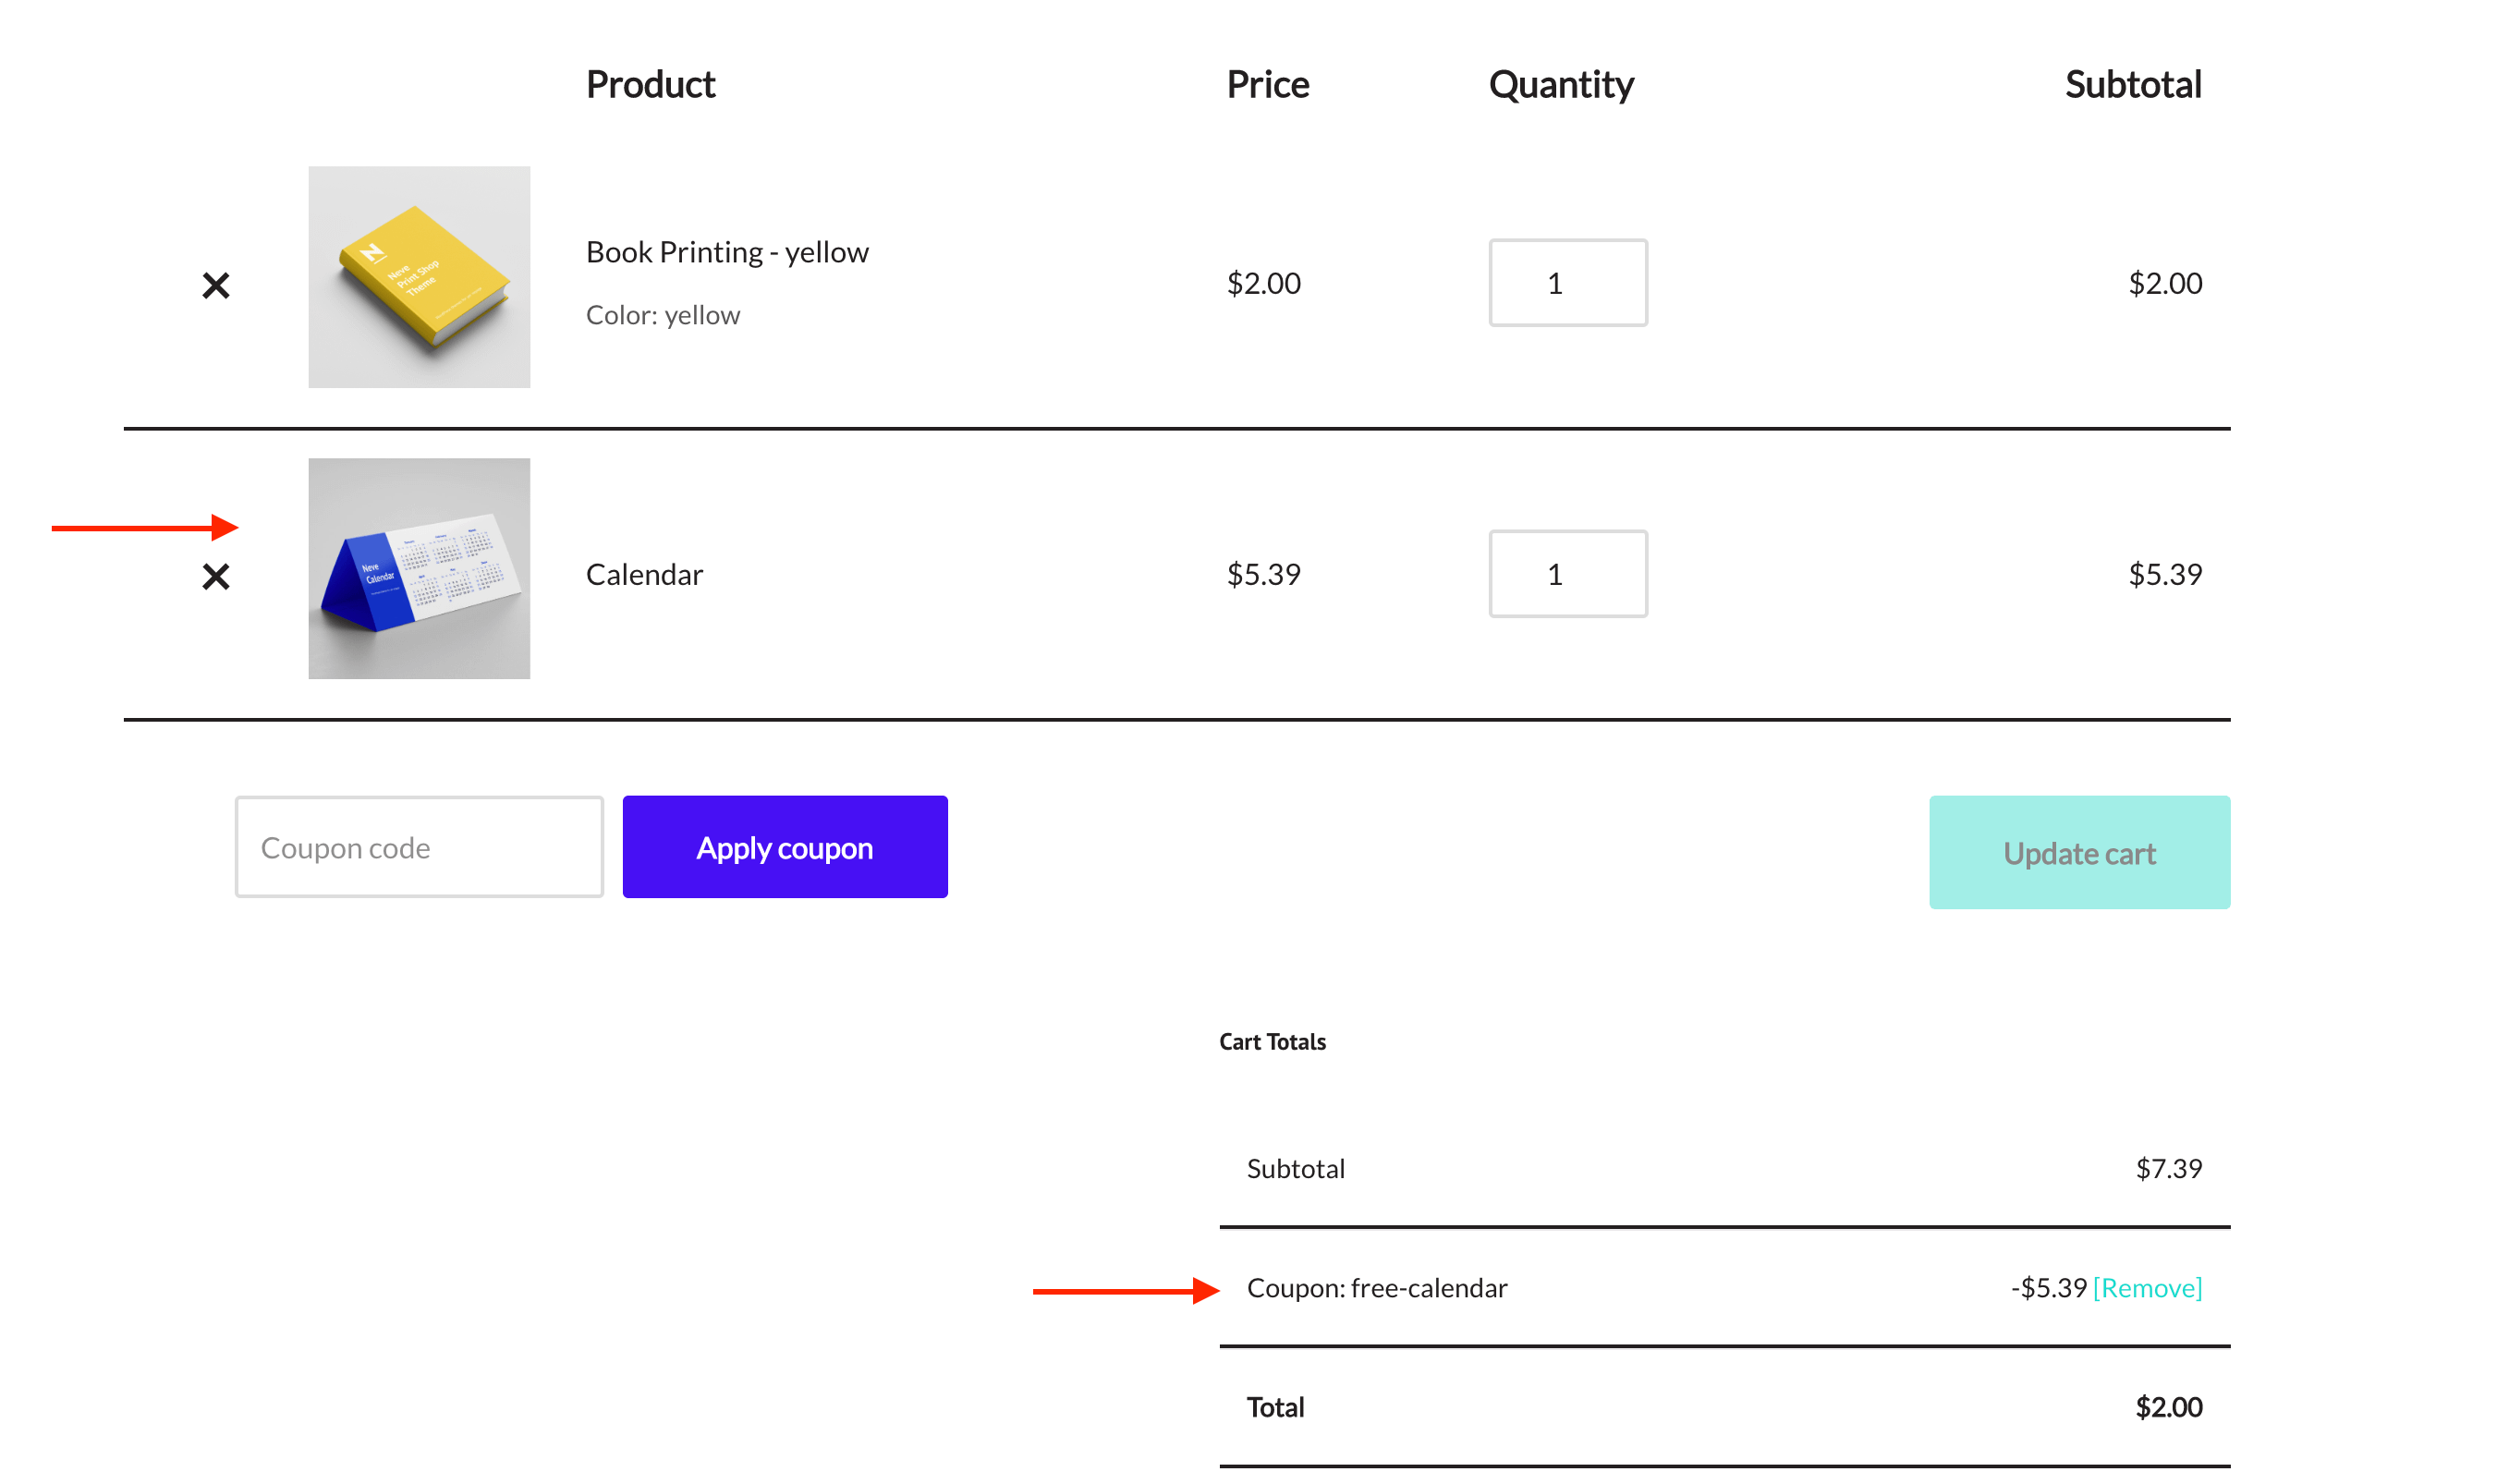
Multi-Announcements bars can be created within the Dashboard, and certain actions will automatically trigger those. Below is an example of offering a free product based on the ones added to the cart.
Creating the Coupon
Before styling the notice and set actions, a coupon needs to be configured with a 100% discount for the book.
1. Navigate to Marketing > Coupons.

2. Create a new coupon and insert a suggestive name.
3. Under Coupon data > Discount Type, select Percentage discount.
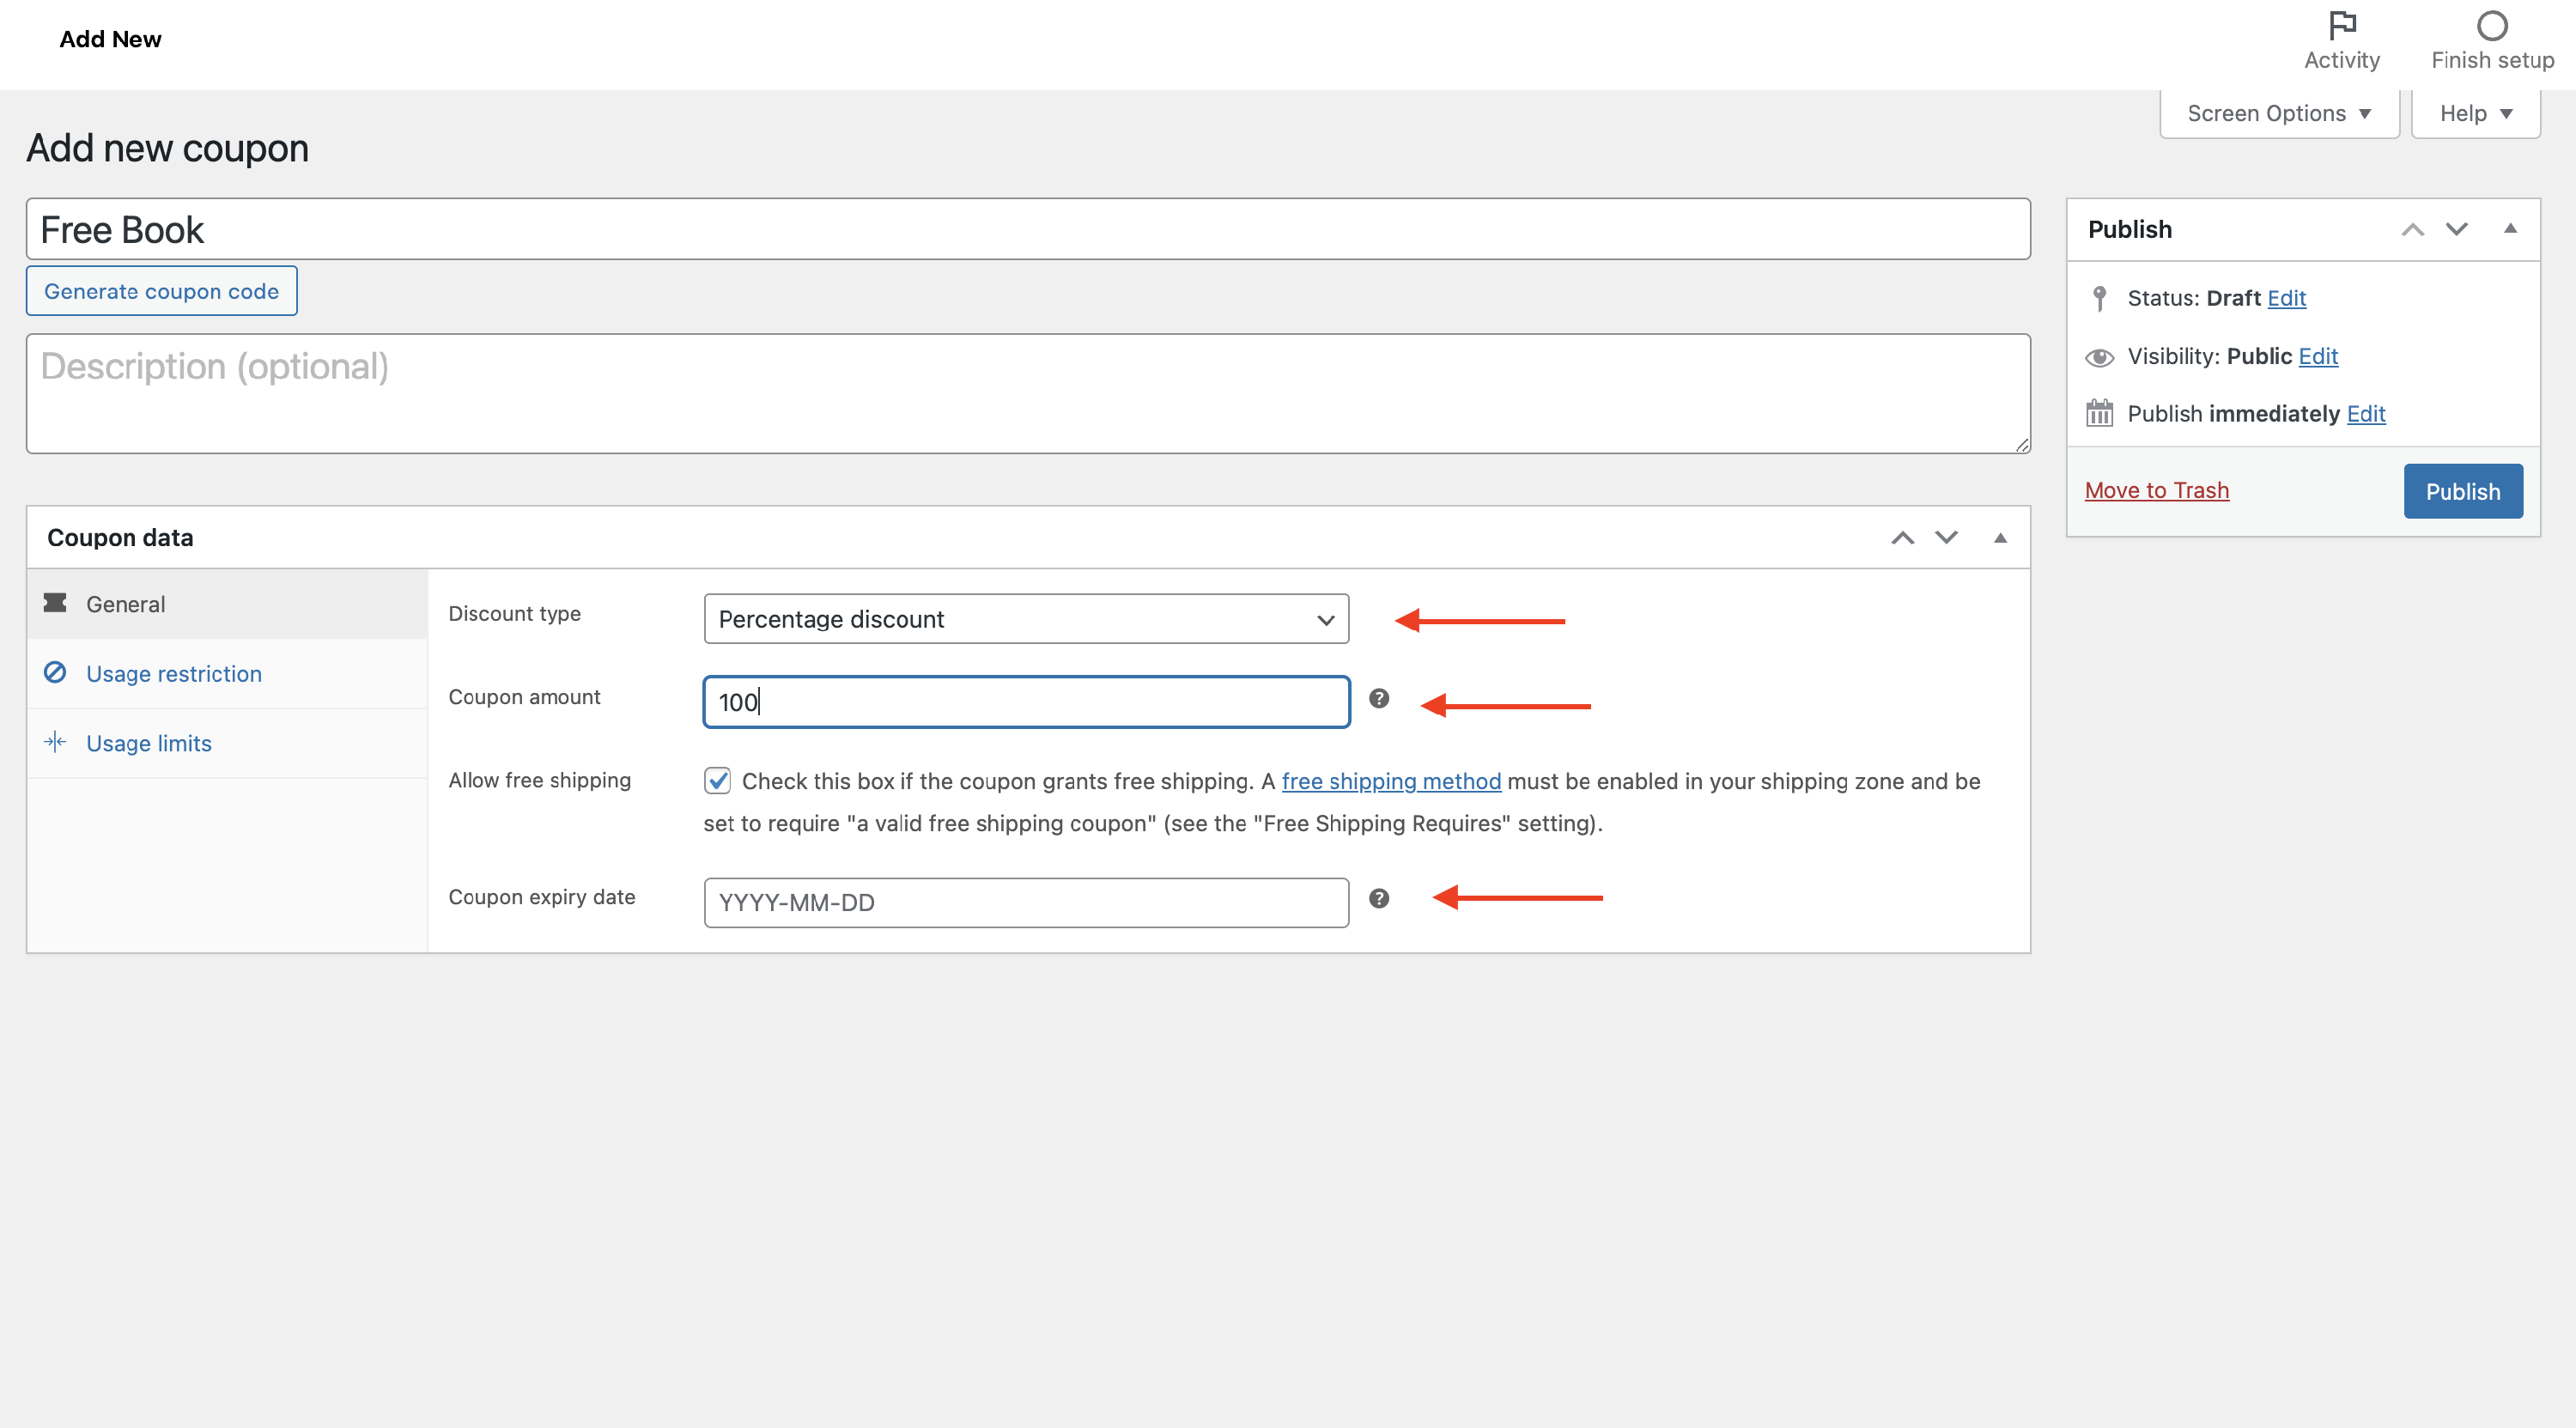
Next to the Coupon amount, insert 100 as a percentage of the offer. You can also allow free shipping and configure an expiry date.
4. Switch to the Usage restriction tab.
5. Next to Products, insert the name of the product which will be available for the offer (in this case, the Calendar).
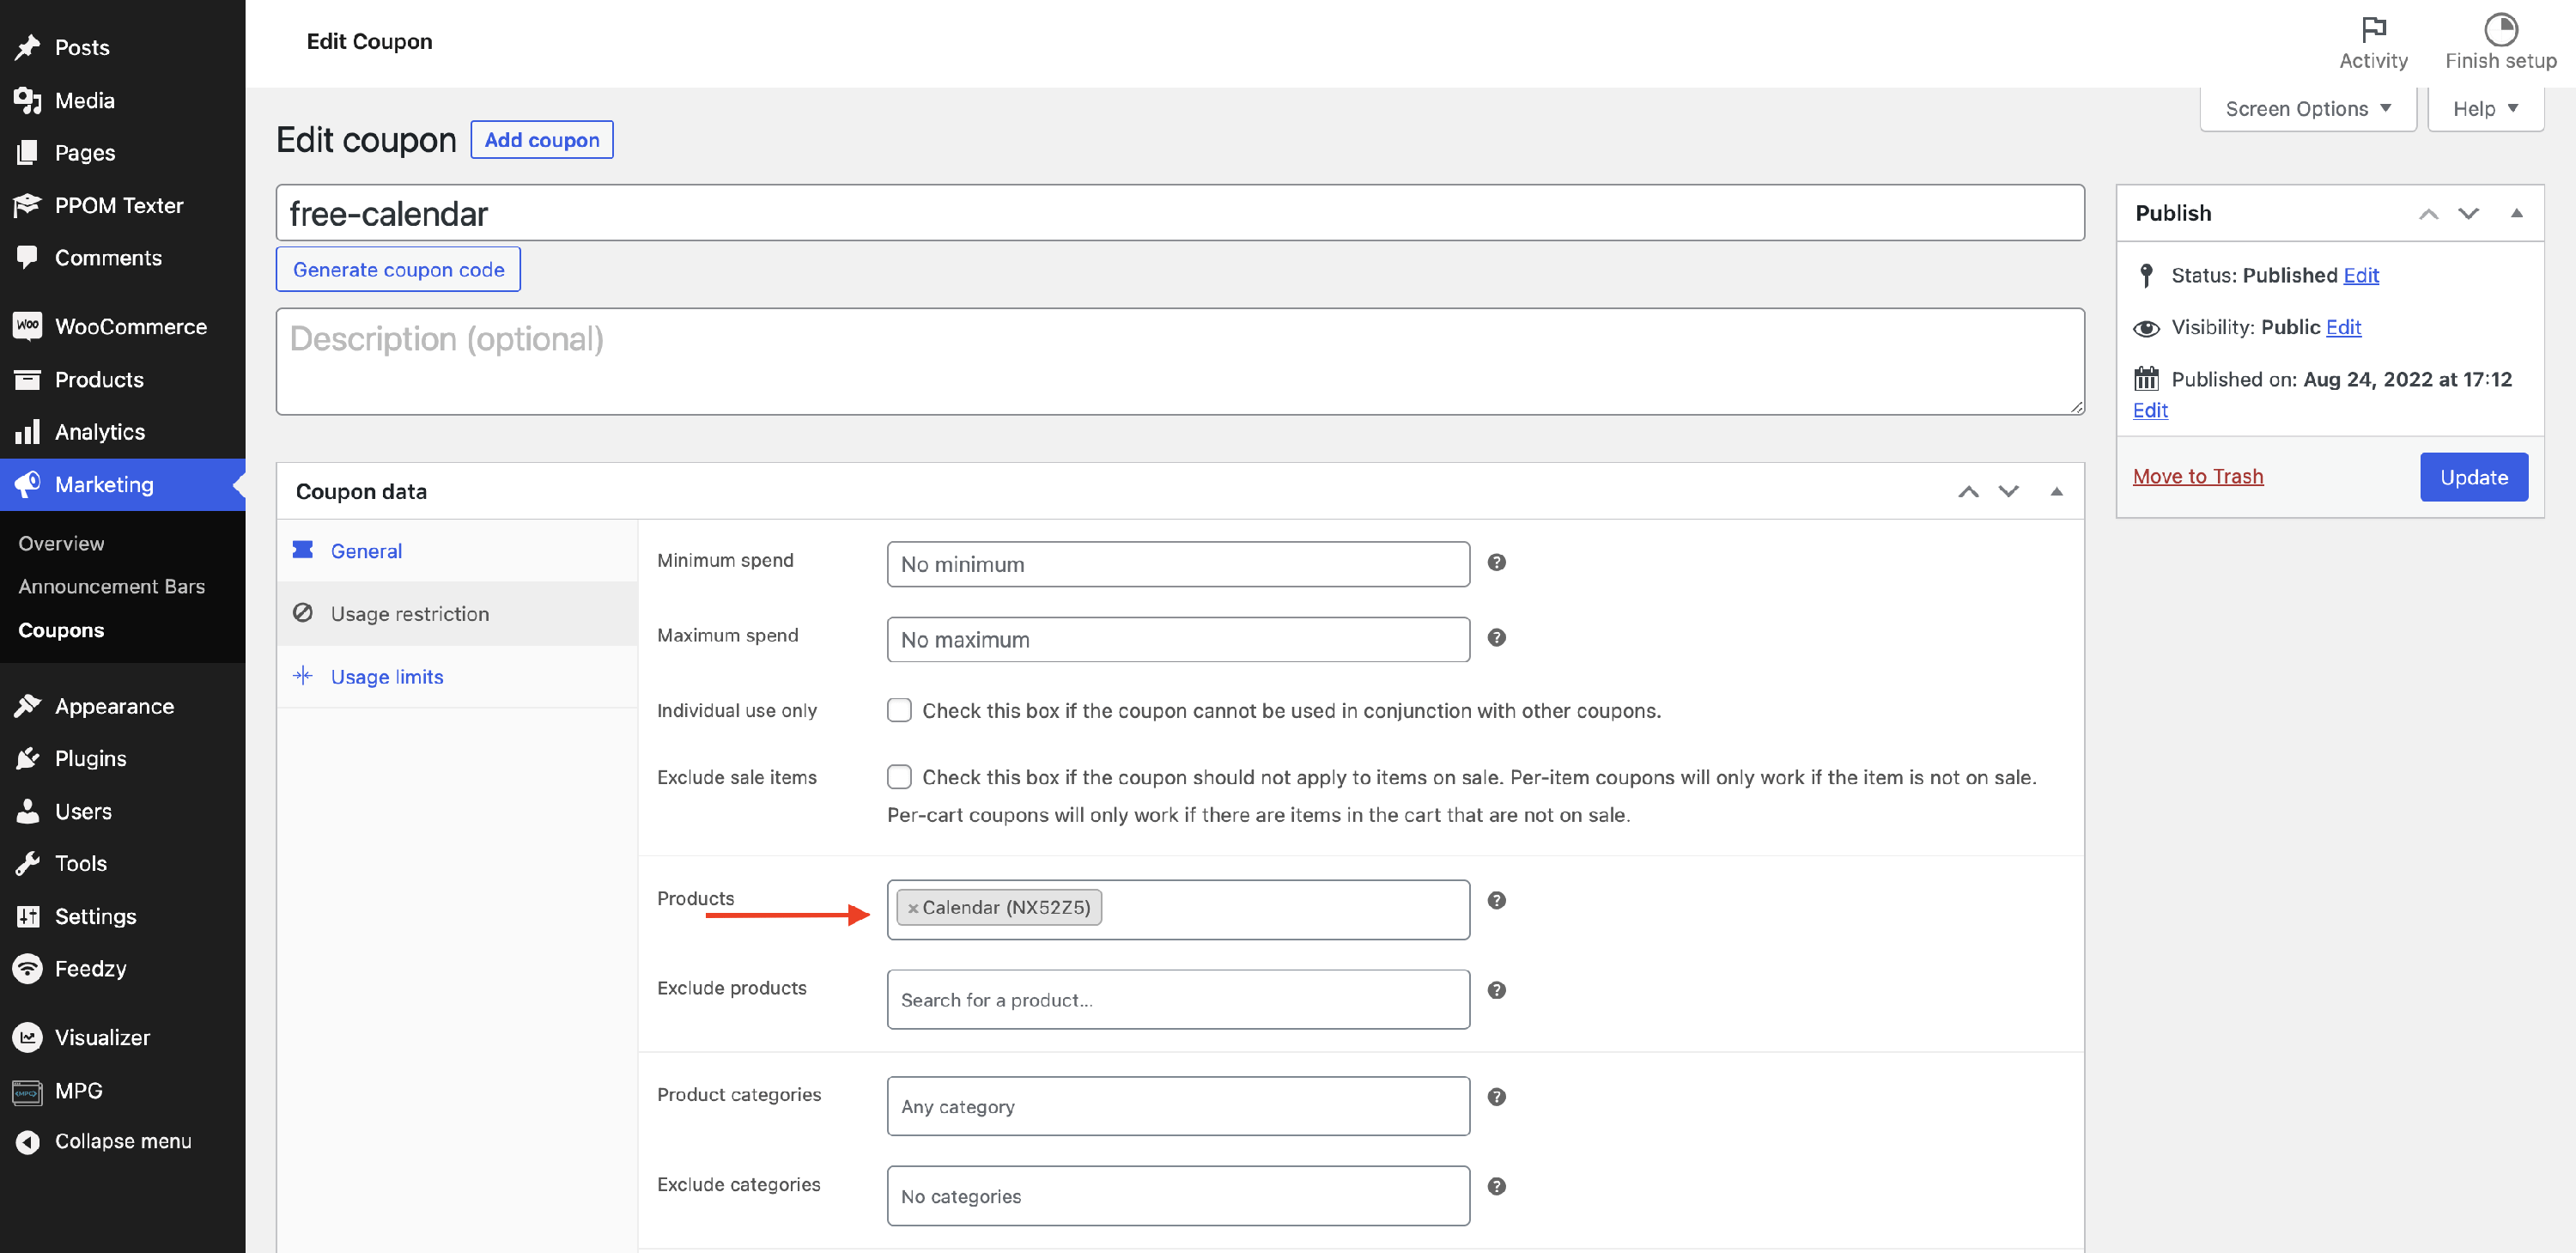
6. When everything is done, click on the Publish button.
Creating the Announcement Bar
Now that a coupon is available, the button within the announcement bar can be configured to add the free calendar to the cart automatically.
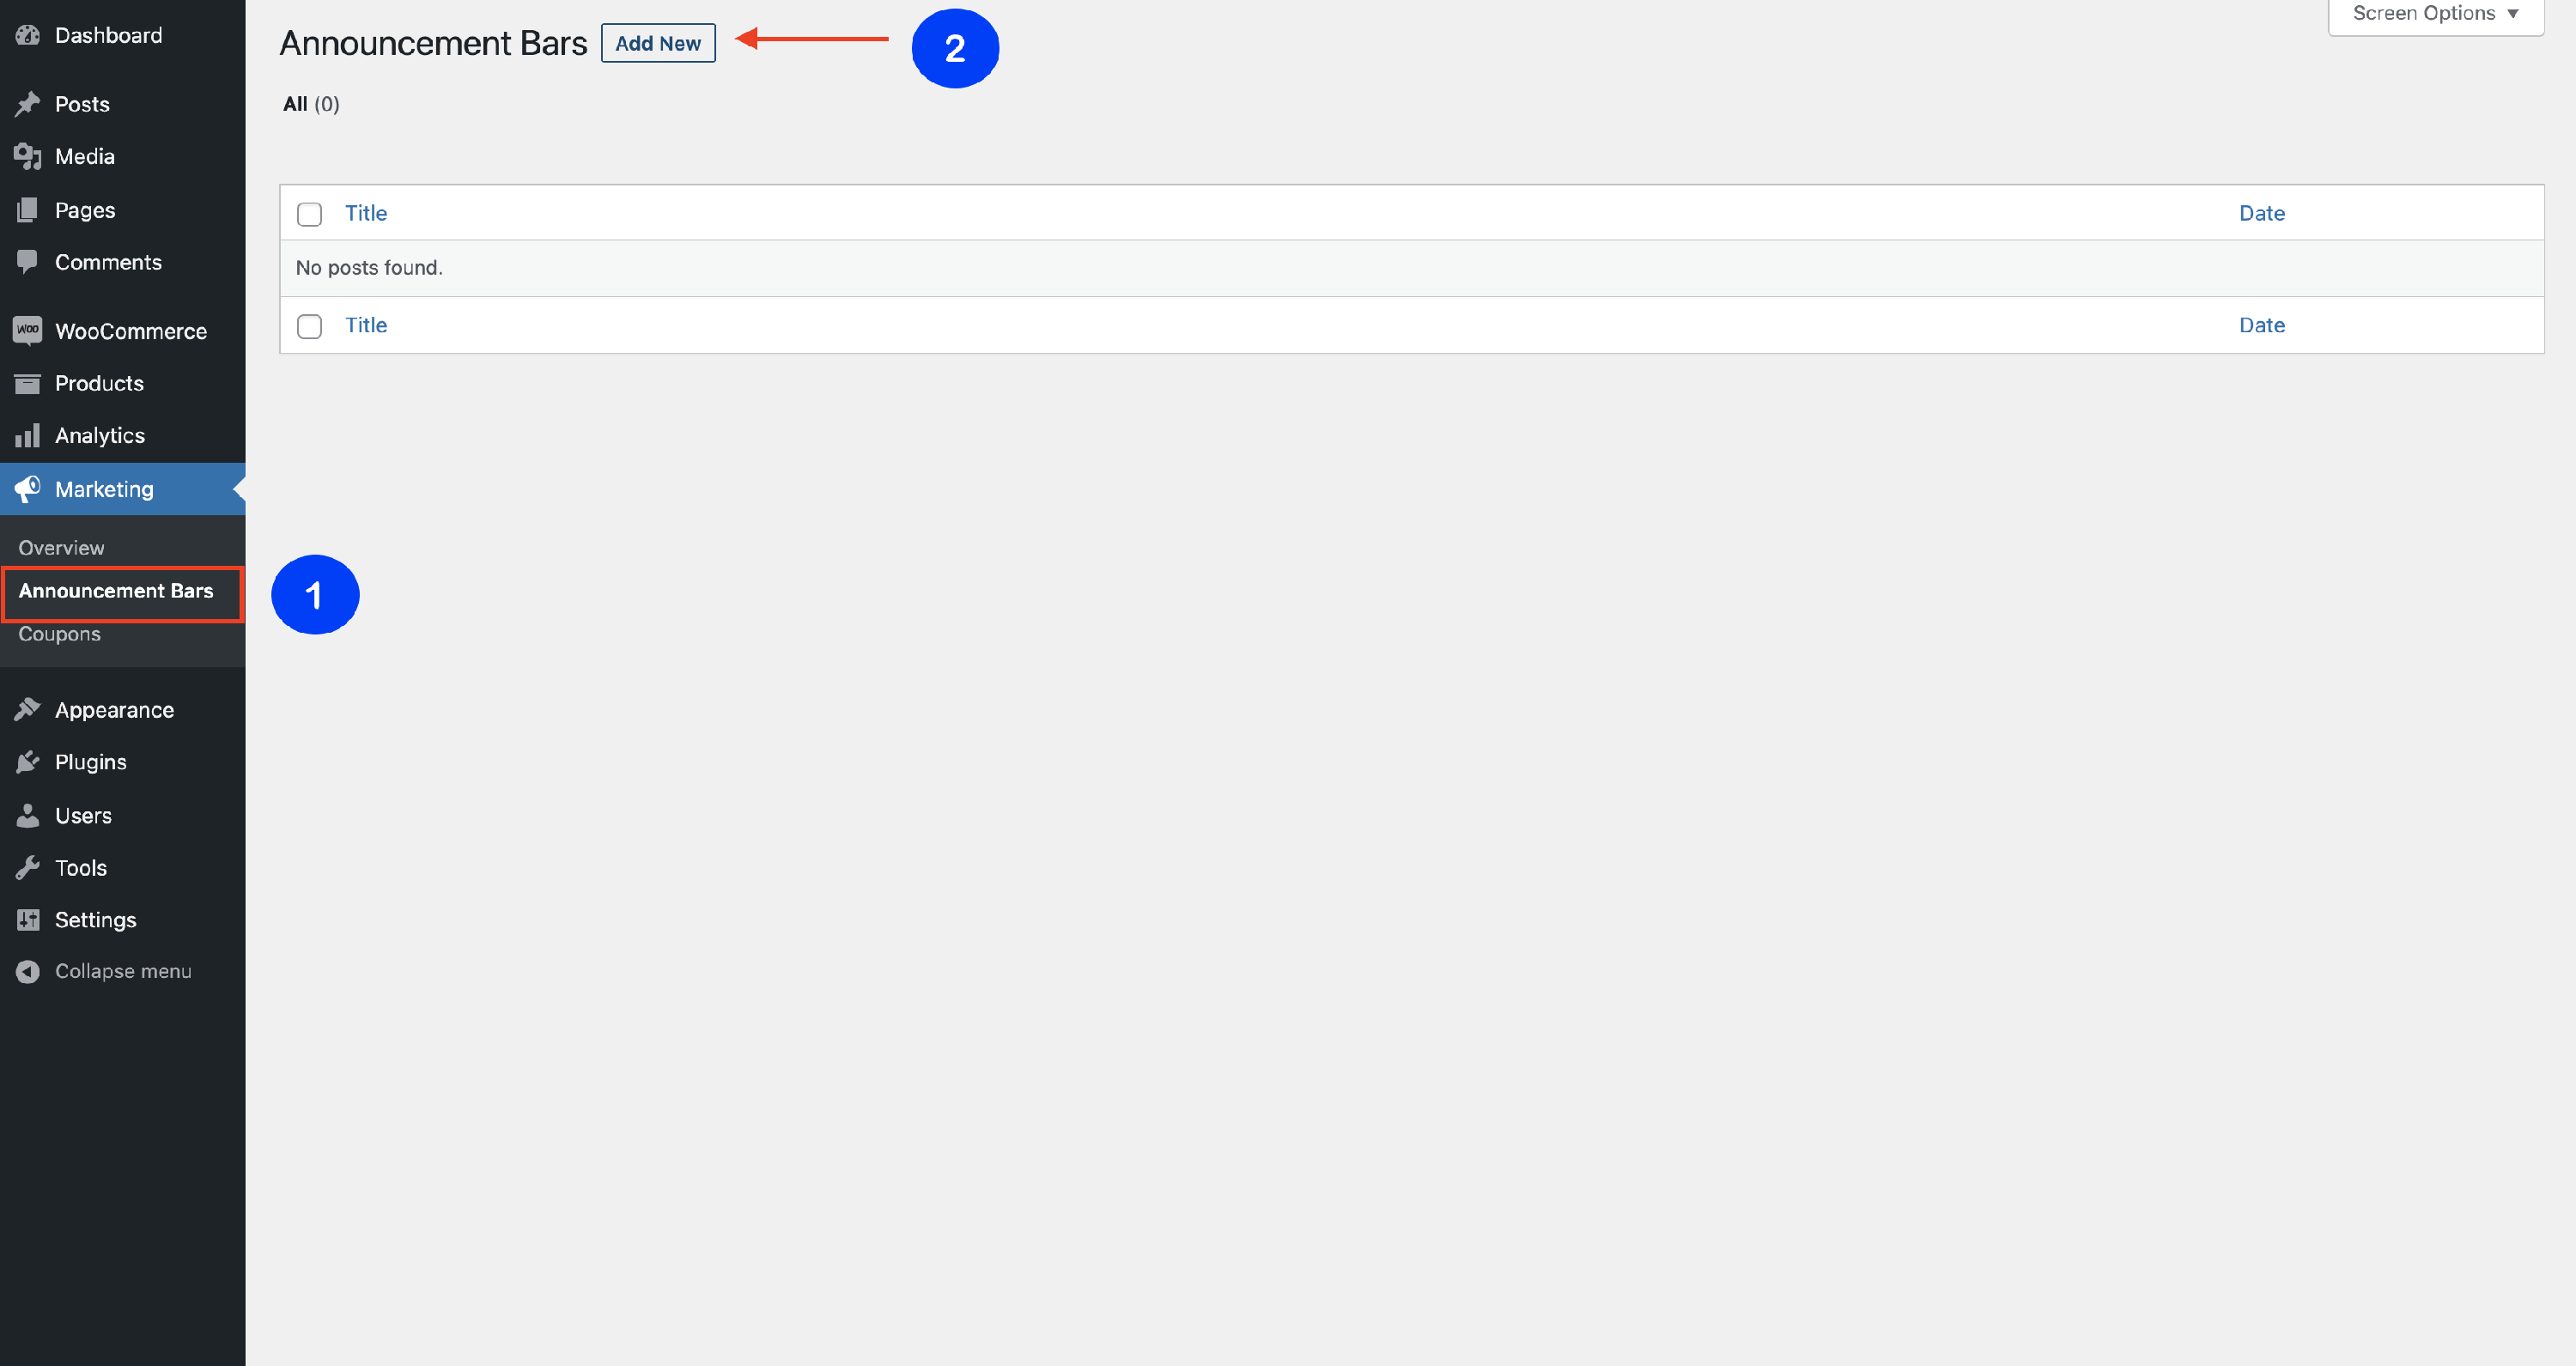
1. Navigate to Marketing > Announcement Bars.
2. Click on Add New, to create a new one from scratch.
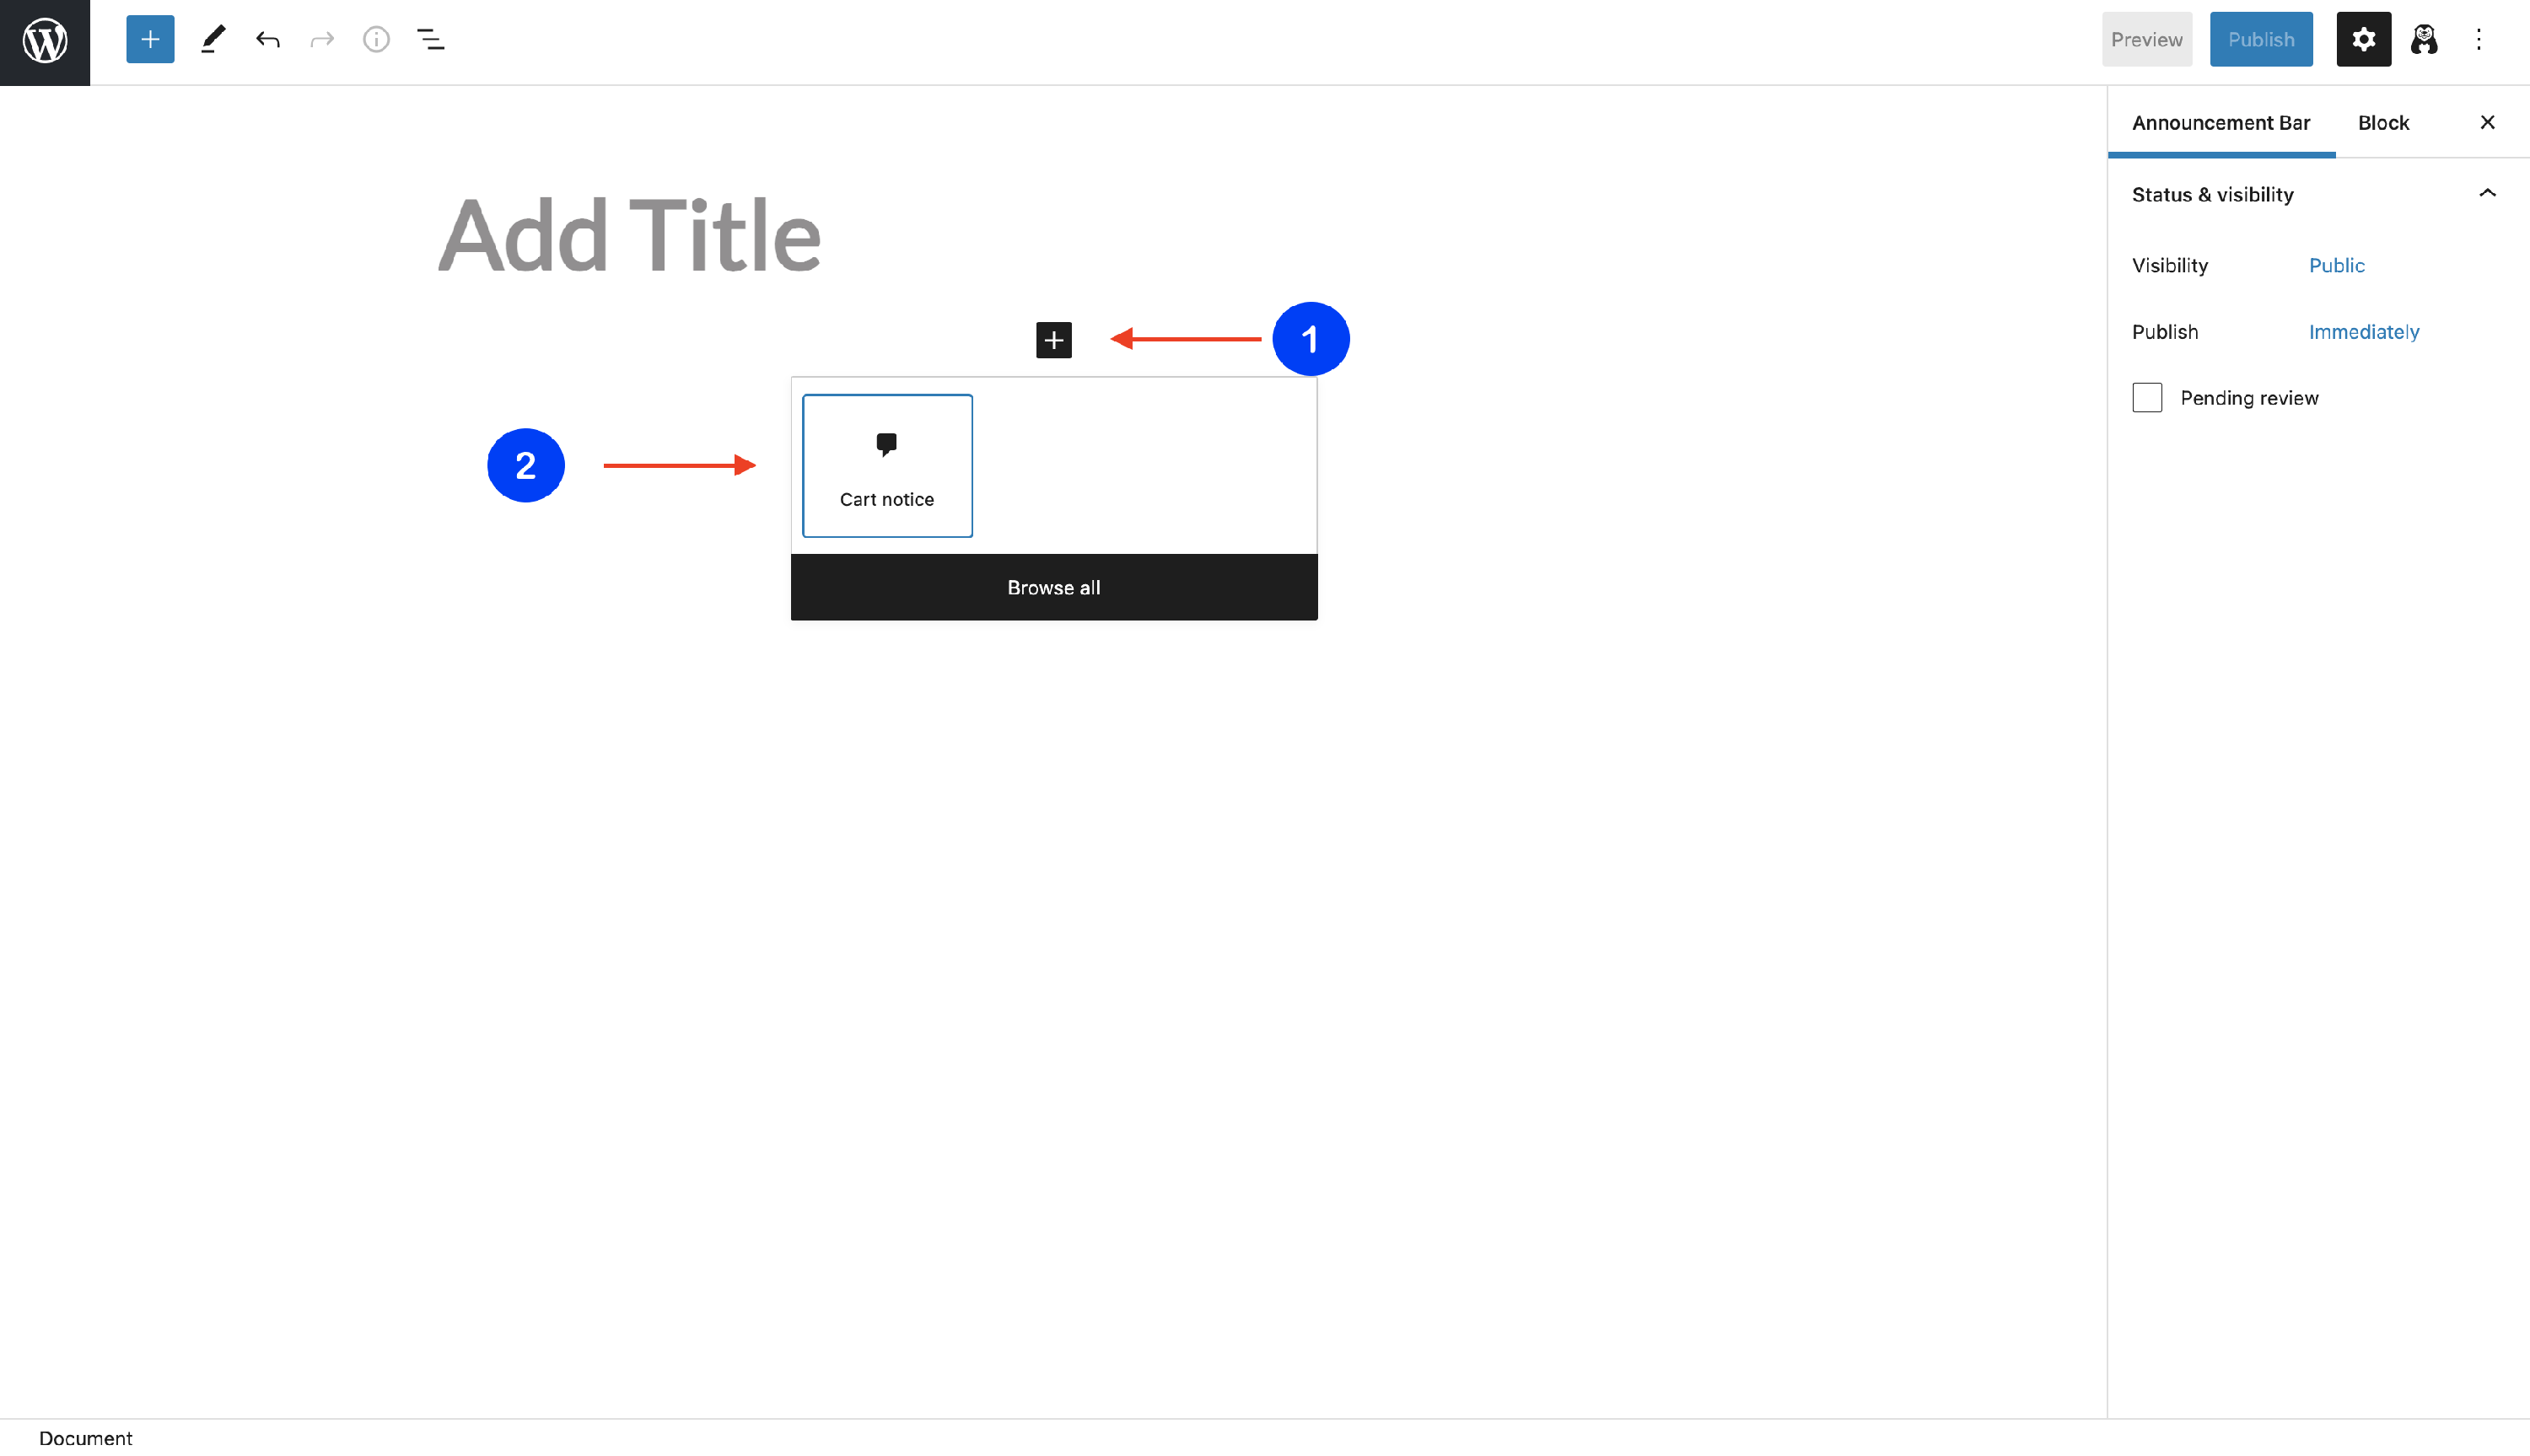
3. Once the editor opens, click on the plus sign and add the Cart notice block.
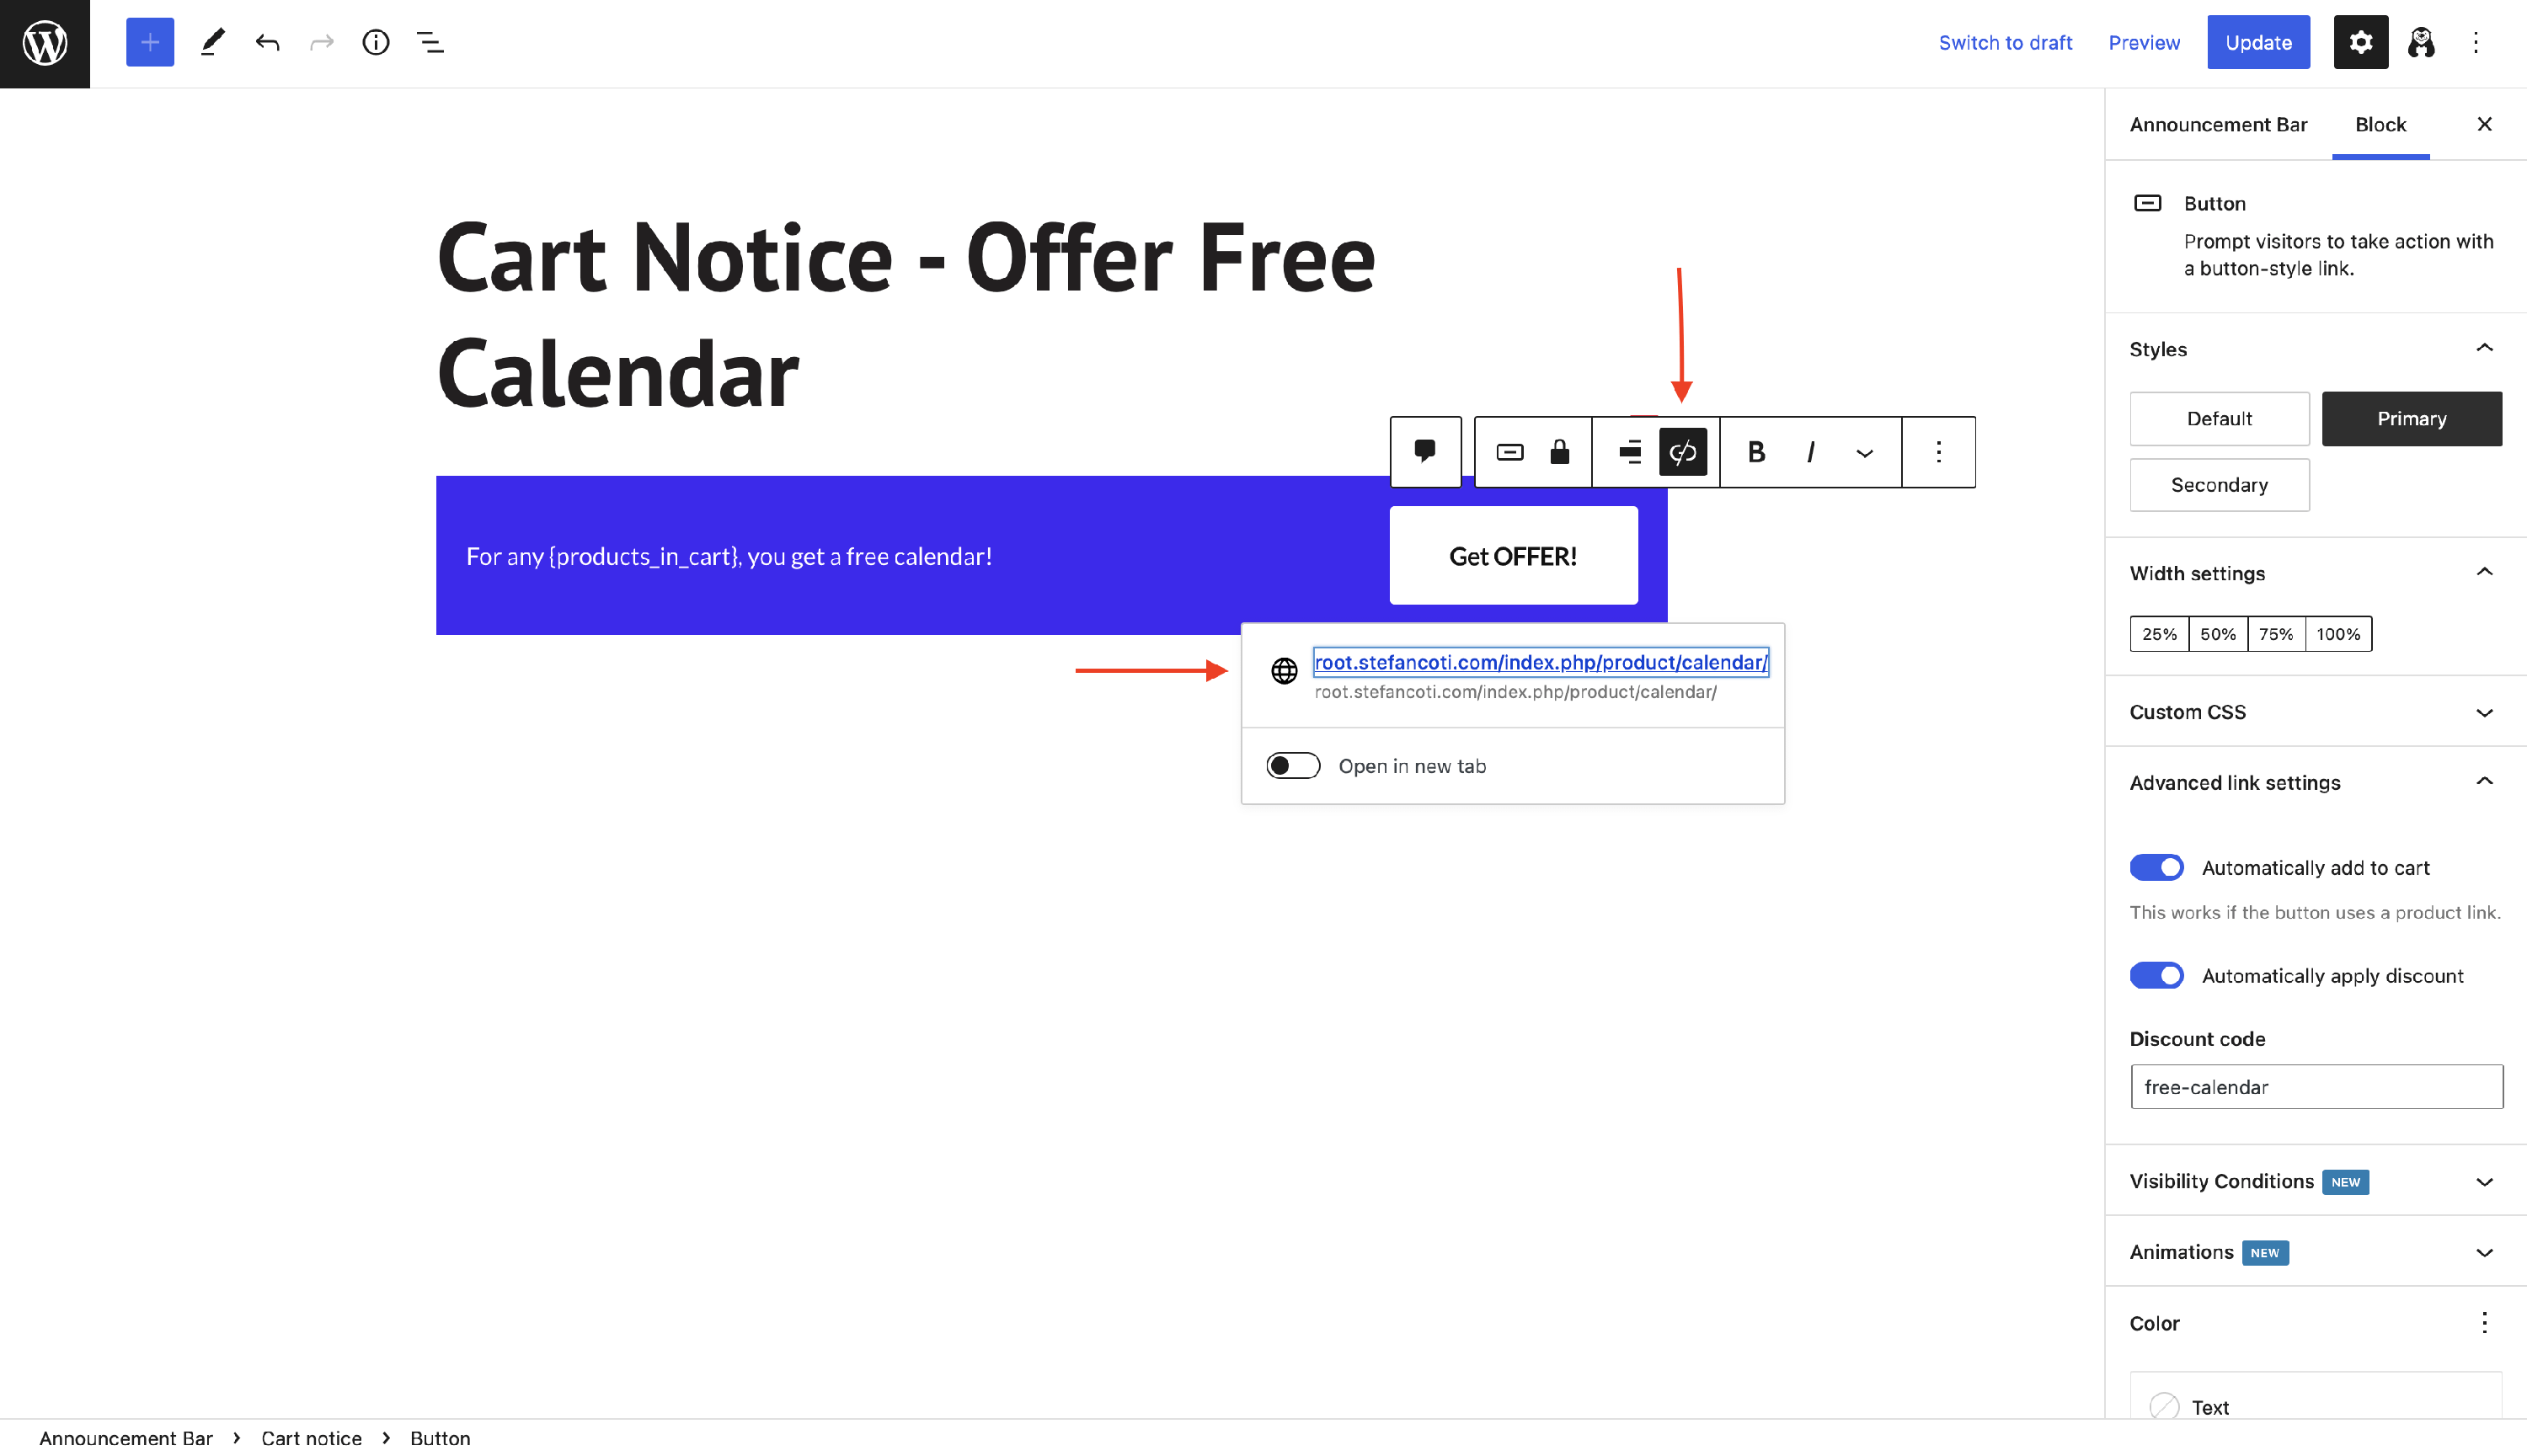
4. Click on the available button (here: Get Offer) to open its settings.
5. Expand the Advanced link settings and enable the options.
6. Insert a discount code for the offer, which must be the same as the coupon name.
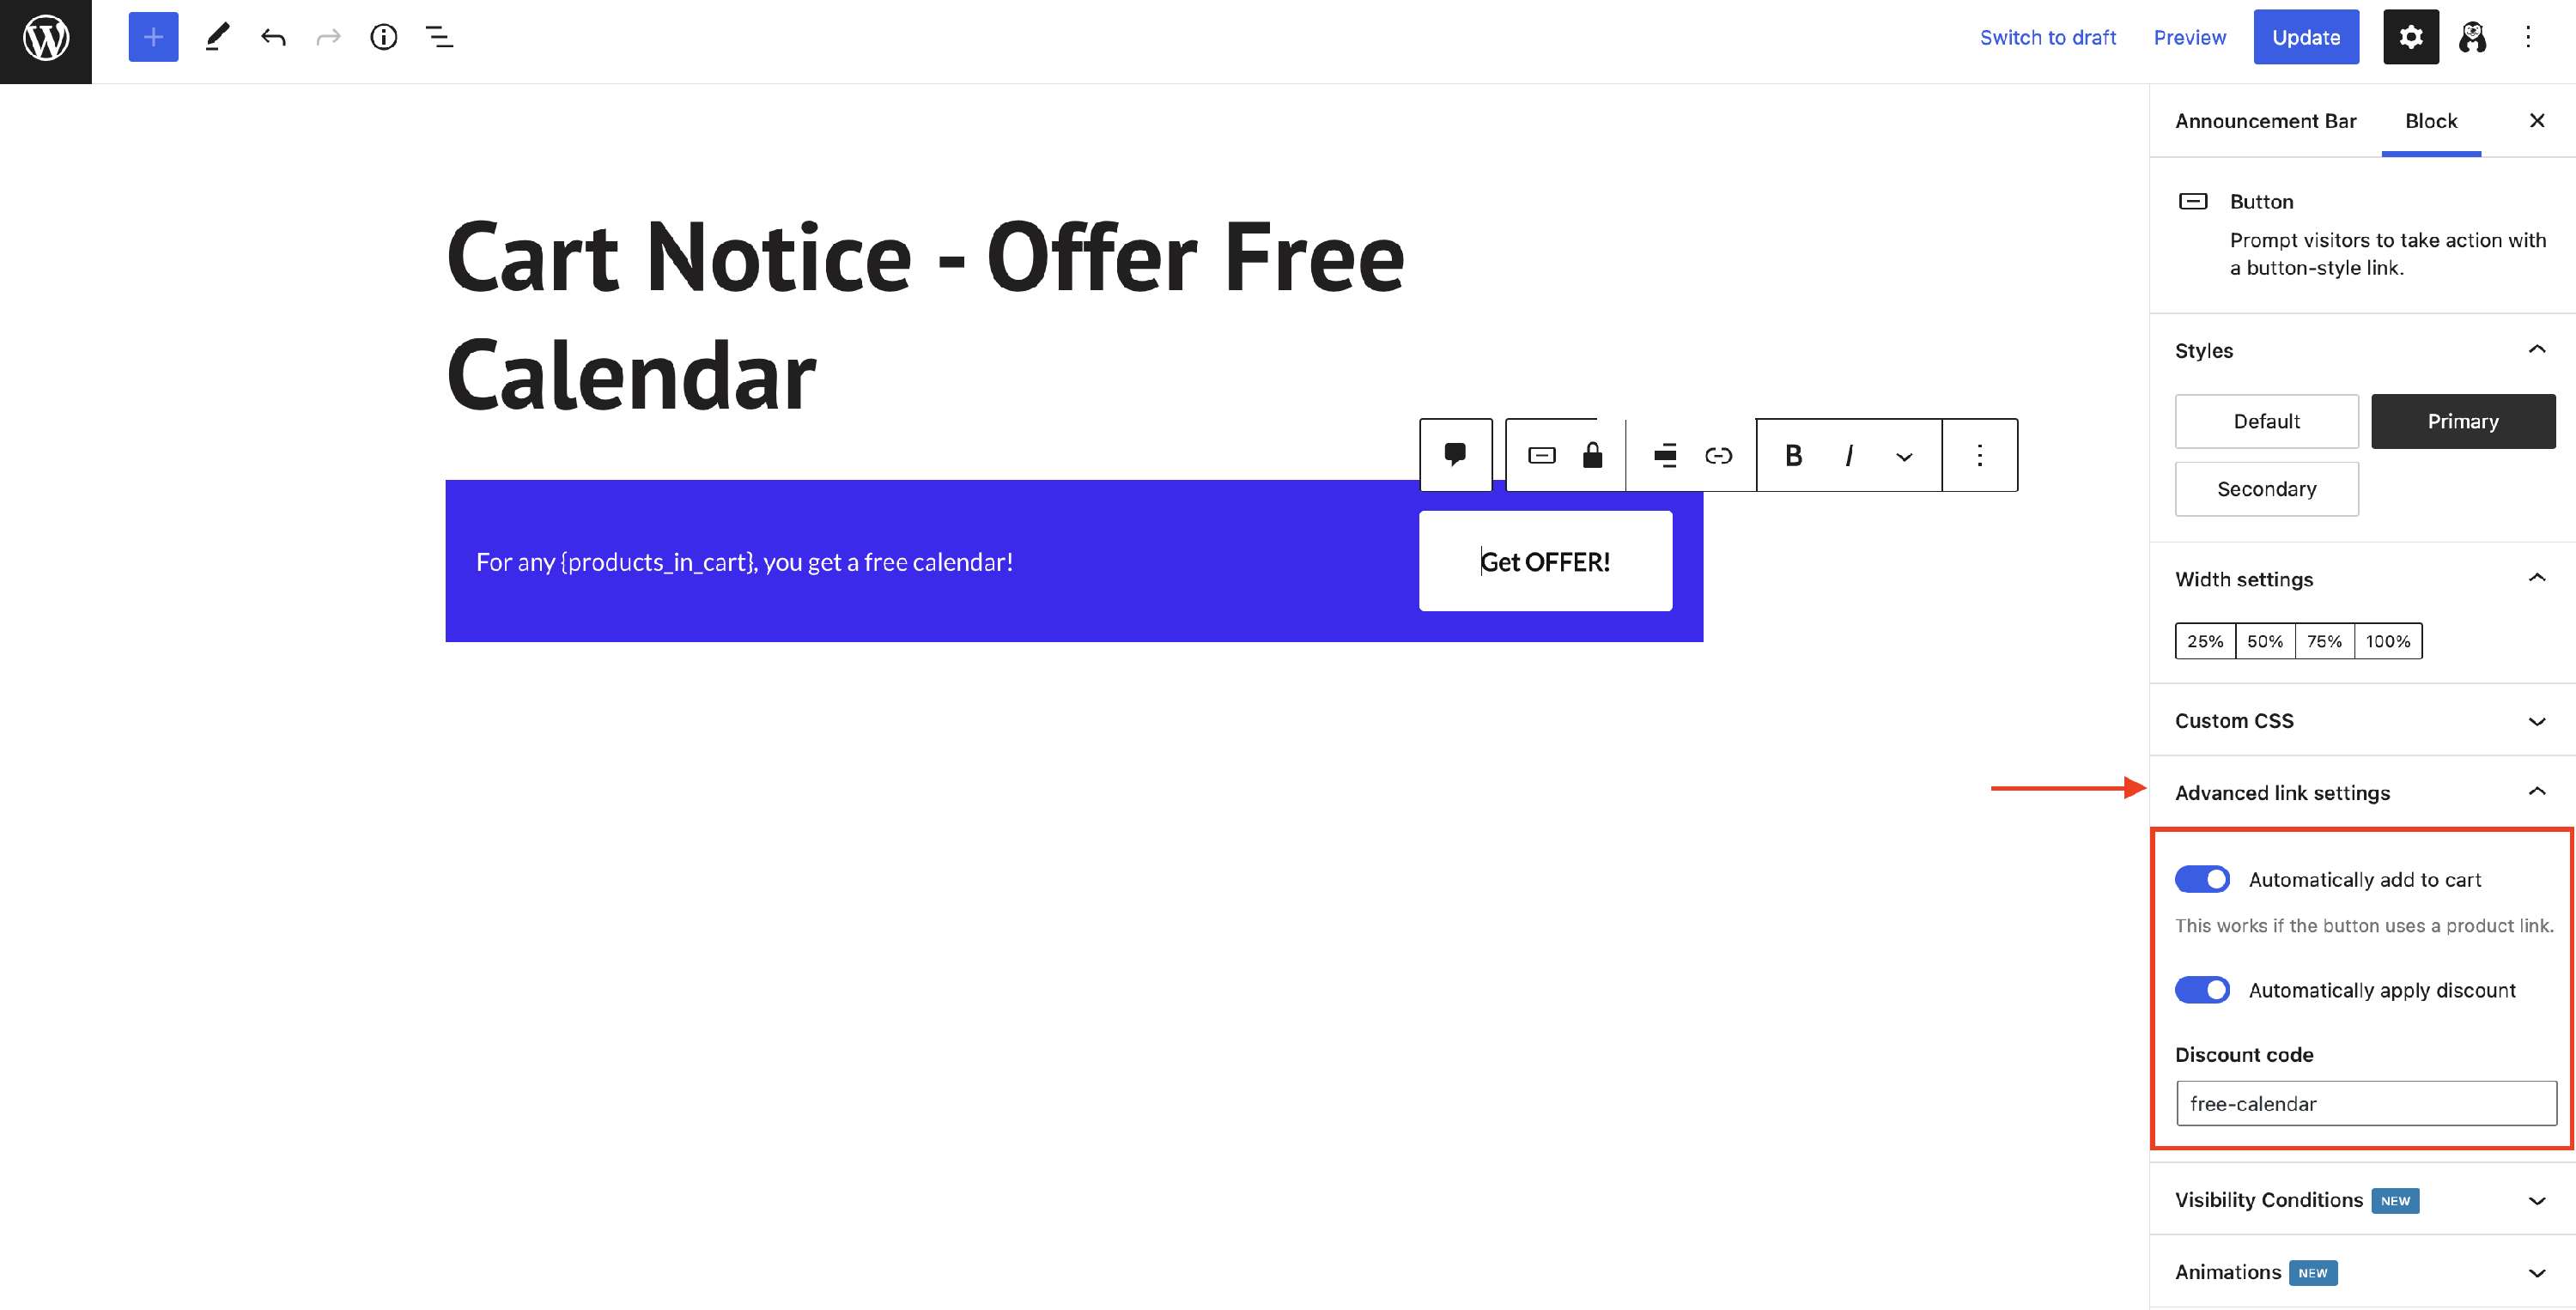
7. On the same button, make sure you set the button link to the desired product.
Other available settings:
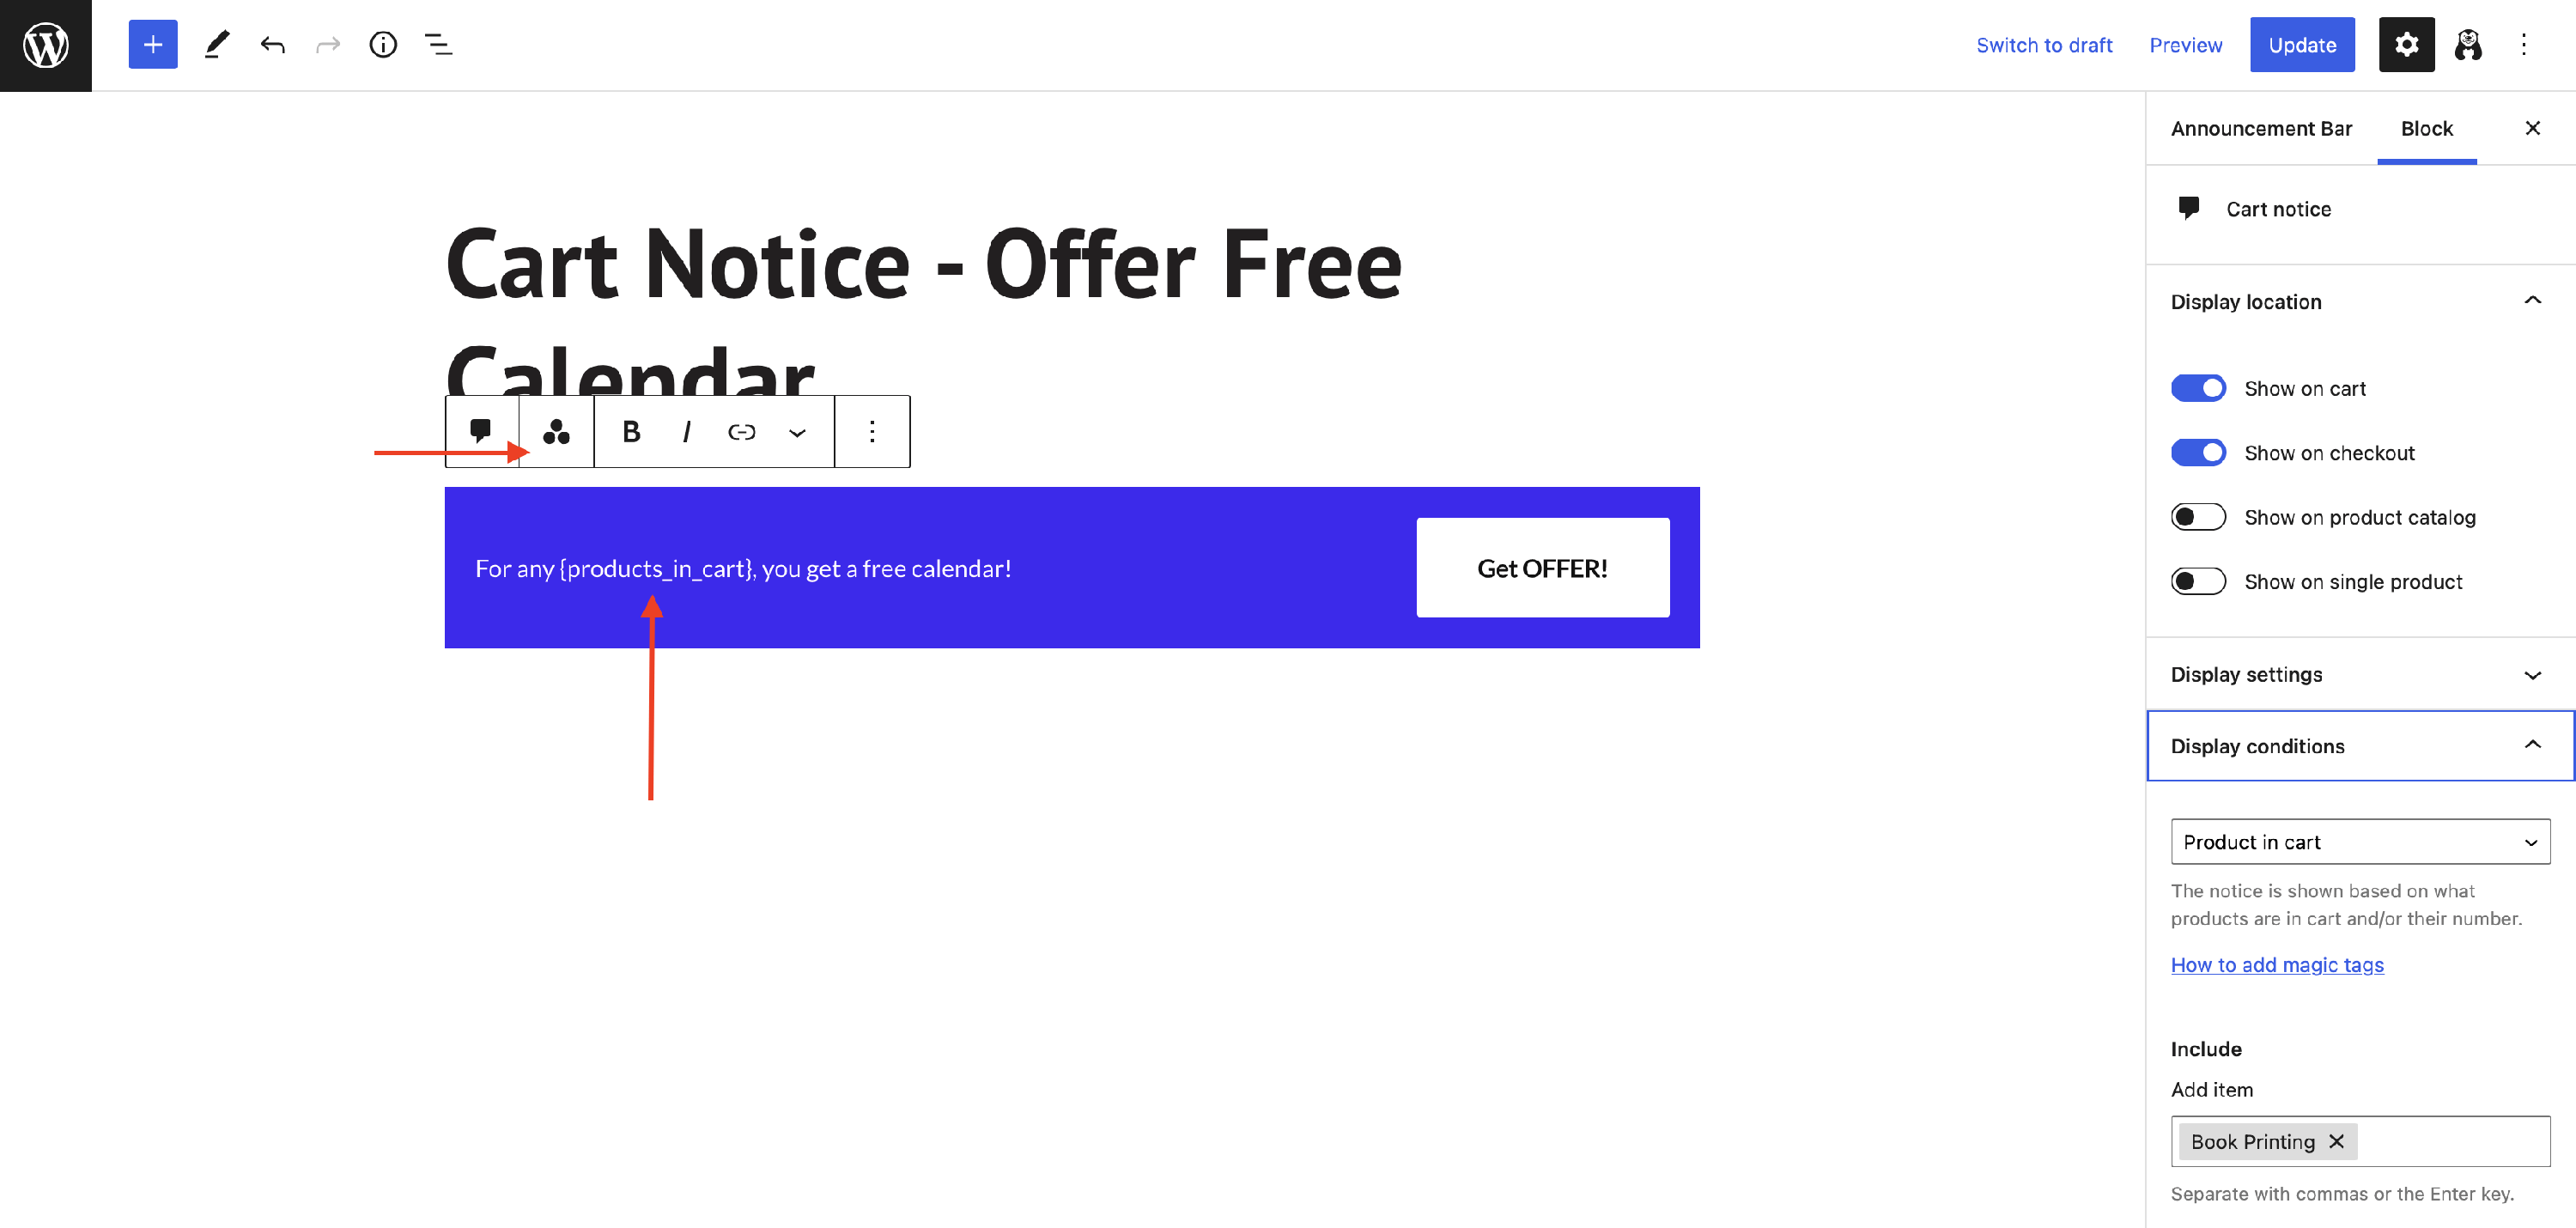
The announcement bar can be triggered by certain products added to the cart.
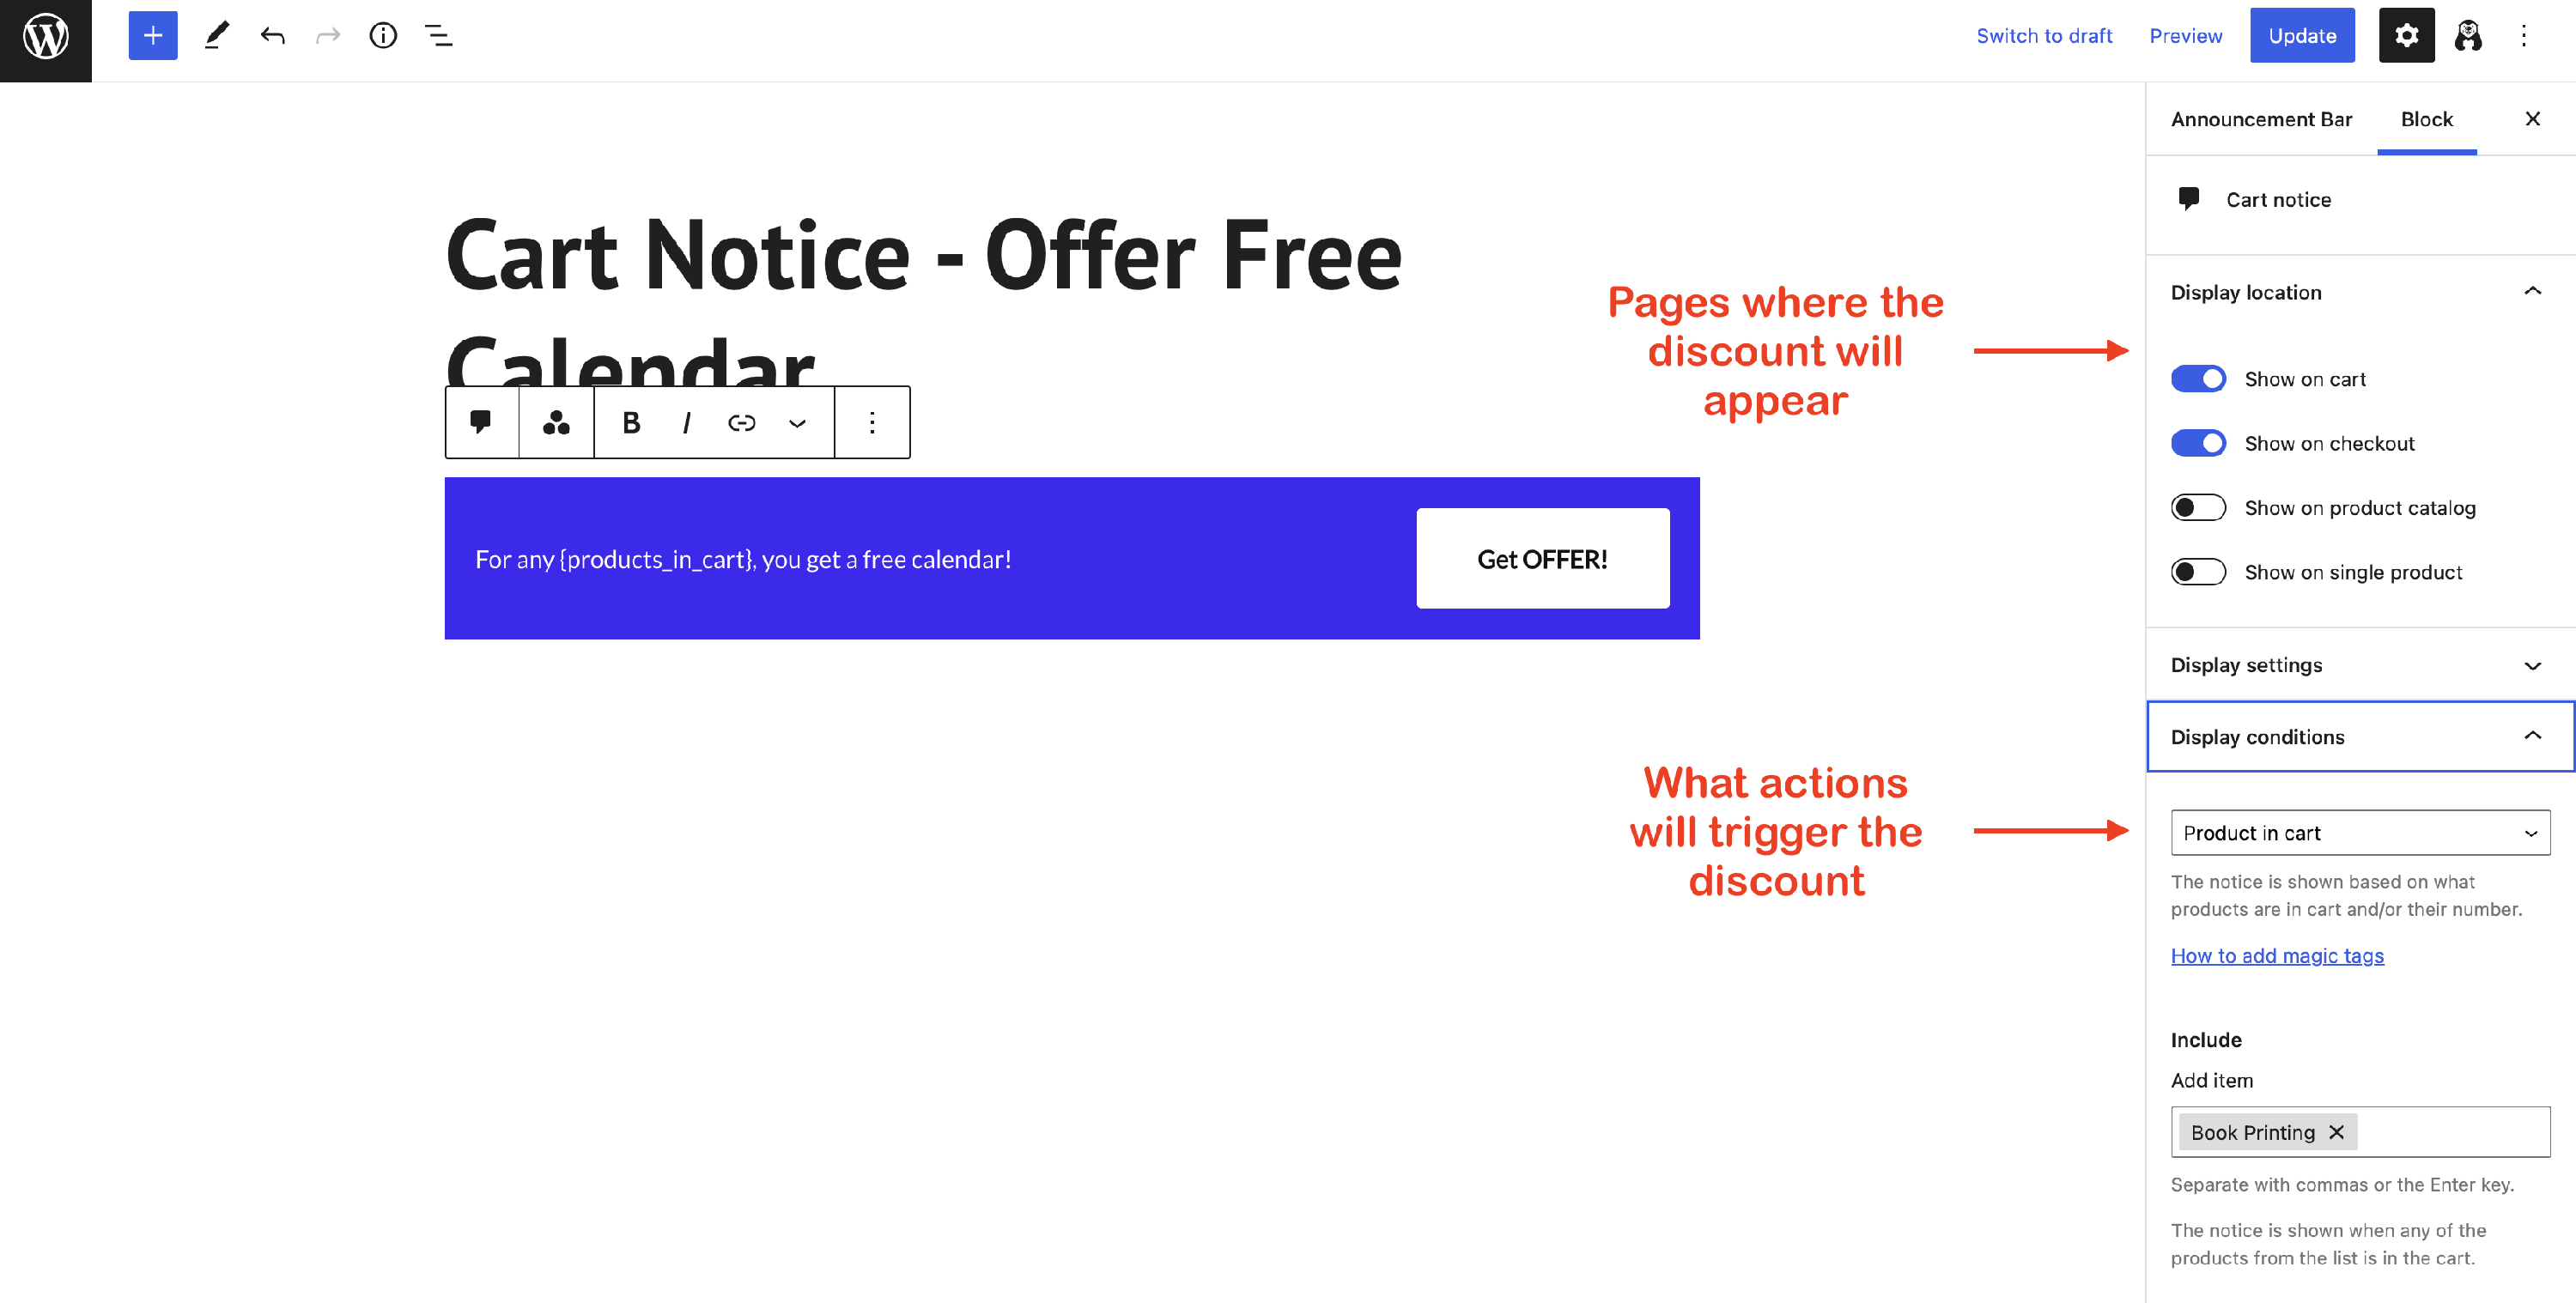
Magic tags can be used to show the name of the product that was added to the cart and triggered the announcement bar, but they can be configured only after you have set the Products in cart condition and included some of them.
Result
If the product triggering the announcement bar is added to the cart, the offer applies by clicking the button within the notice.
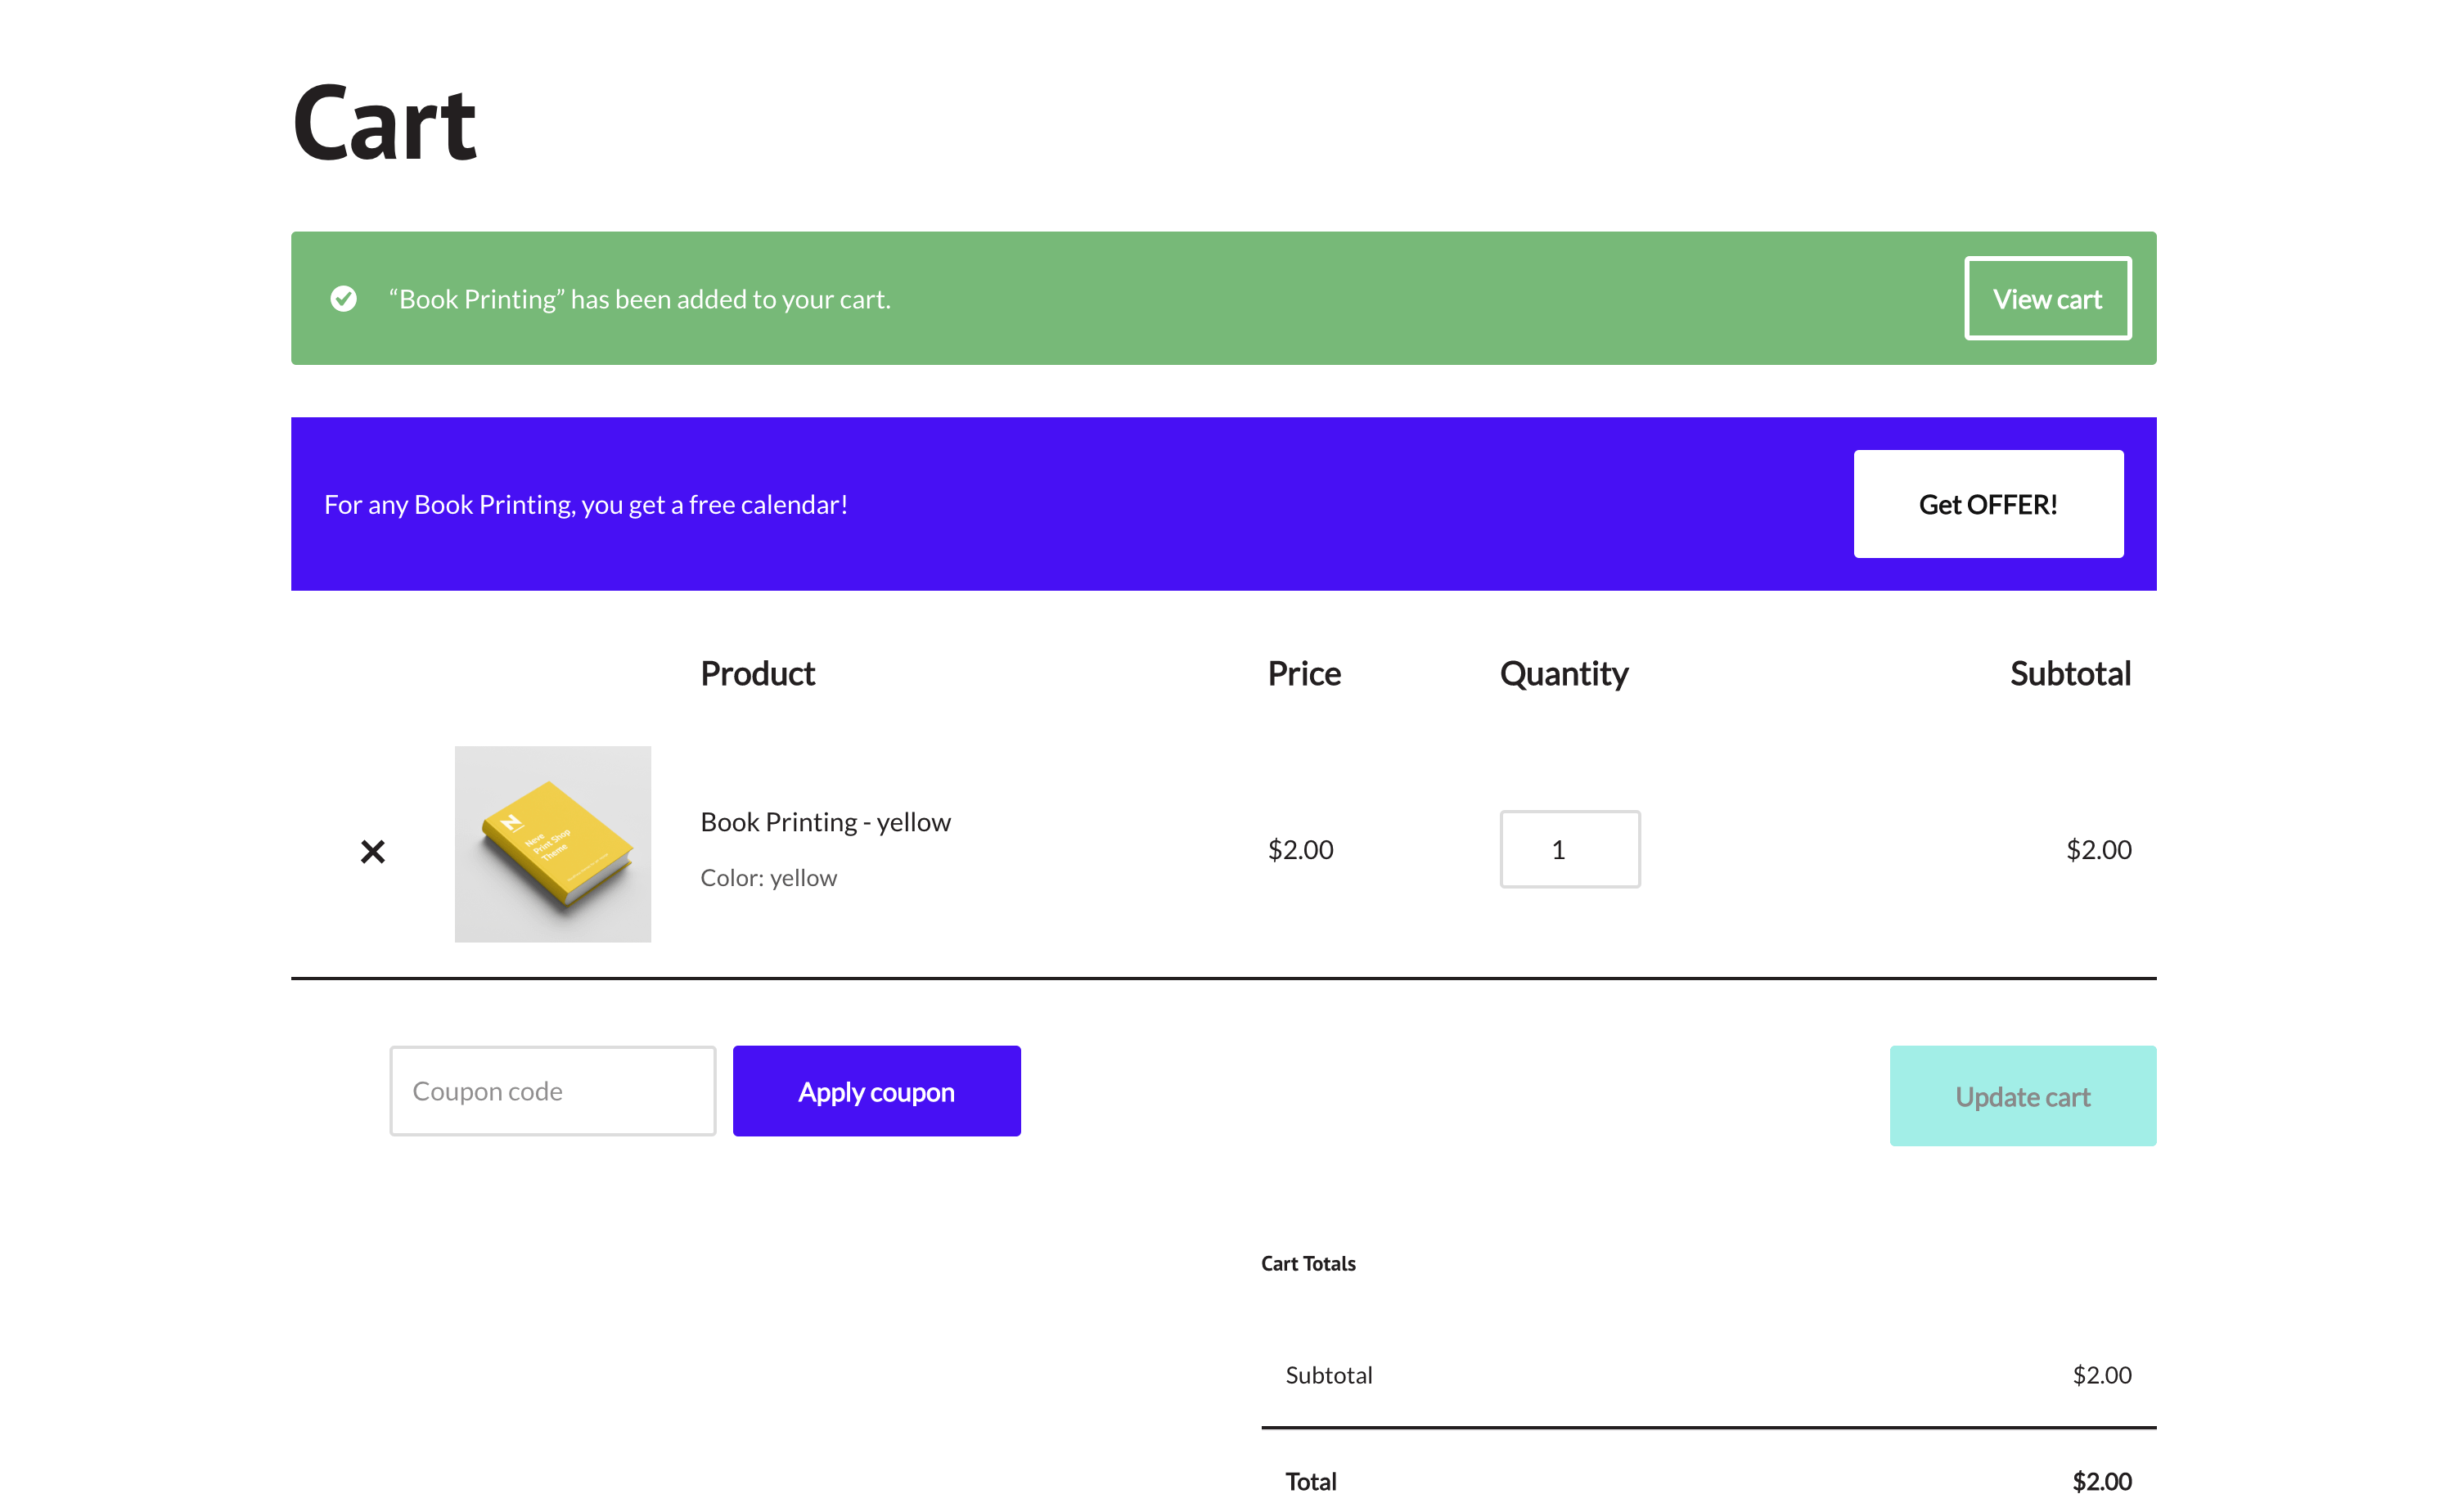
How the cart will appear after getting the offer: