Reading Your Analysis Report
Once a post shows "Ready" status, you can view the detailed analysis results:
- Find the post in your dashboard
- Click View Details in the Analysis column
This opens the Analysis Details page, which shows all issues found across the five categories.

Understanding the Analysis Layout
At the top of the page, you'll see:
- View Preference Switcher: Toggle between "Actionable Only", "All Issues", or "Dismissed Only"
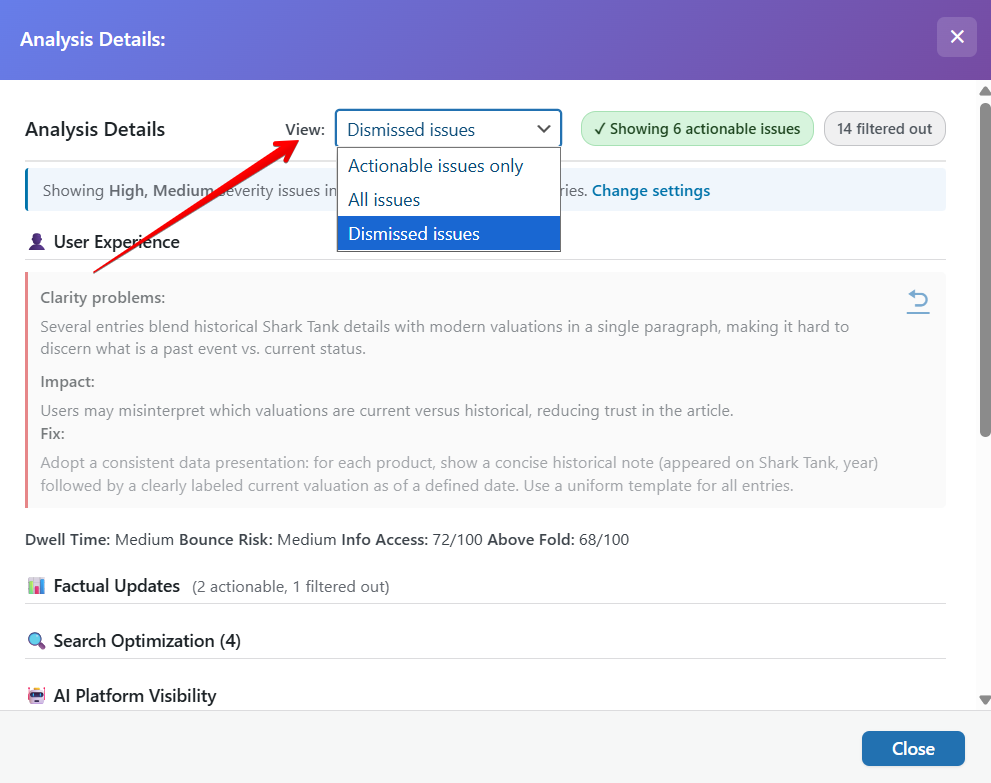
- Issue Count: Total number of issues found and how many are filtered out
Below that, issues are organized into five sections (one for each analysis category).
Reading Individual Issues
Each issue in the report includes:
- Severity Badge: High (red), Medium (yellow), or Low (gray)
- Issue Type: The specific problem identified (e.g., "outdated_data", "clarity_problems")
- Description: What the problem is and where it appears in your content
- Recommendation: Specific suggestions for fixing the issue
Some issue types include additional helpful information:
- User Experience issues: Show engagement metrics like expected bounce risk
- Factual Updates: Include the current (wrong) value and suggested correct value
- Search Optimization: Show the expected impact on rankings
- AI Visibility: Explain how the fix helps AI platforms cite your content
Note: See The Five Analysis Categories Explained to learn more.
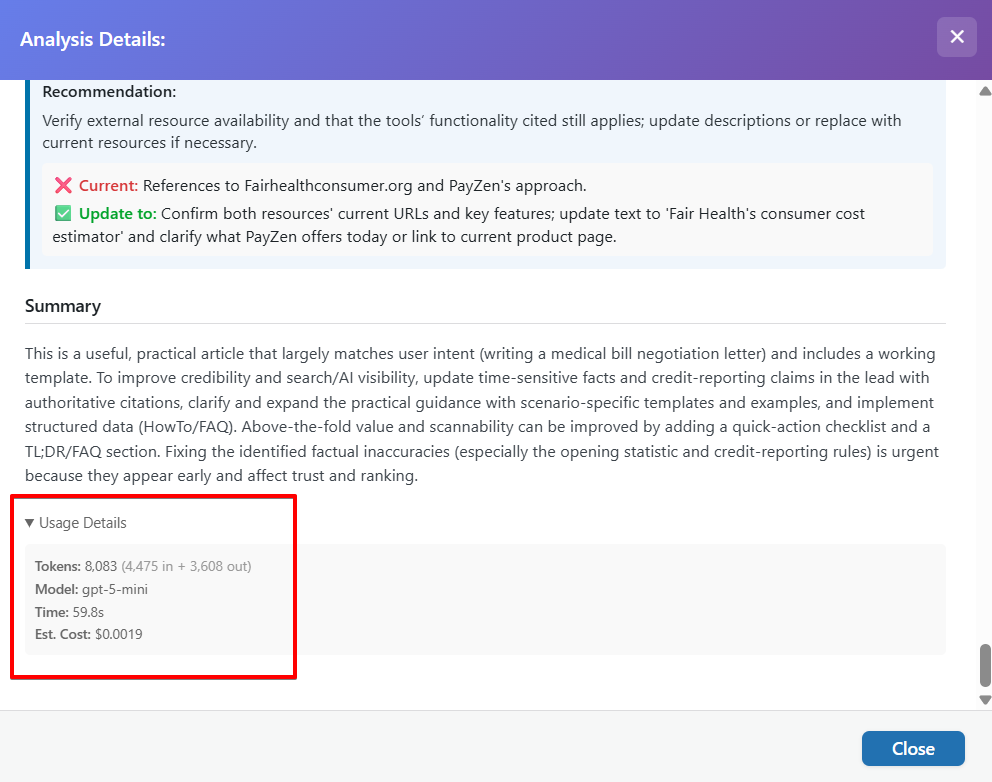
Analysis Summary and Usage Details
At the bottom of the analysis page, you'll find:
- Summary: An overview of the analysis findings
- Usage Details: Information about the analysis including:
- Number of tokens used
- AI model used for analysis
- Time taken to complete
- Estimated cost
This helps you track your AI usage and understand how the analysis was performed.
Understanding What Happens Next
After reviewing your analysis, you have two main options:
- Create a Draft: Generate an AI-powered updated version of your post that fixes the issues found
- Do Nothing: Keep the analysis for reference and make manual edits to your post yourself
The analysis results are saved permanently in your database, so you can return to them anytime.
Important Notes About Content Update Filters
Before creating a draft, make sure your Content Update Filters are configured correctly in Settings → Content Update Filters. These filters control which issues get fixed when you generate a draft.
For example, if you only enable "Factual Updates" and "High severity", the draft will only fix high-severity factual issues—even if the analysis found other problems.
Next step: Learn how to create and approve draft updates to fix the issues found in your analysis.