How to add featured image to post category?
For more details check out the full Neve documentation and Neve PRO documentation.
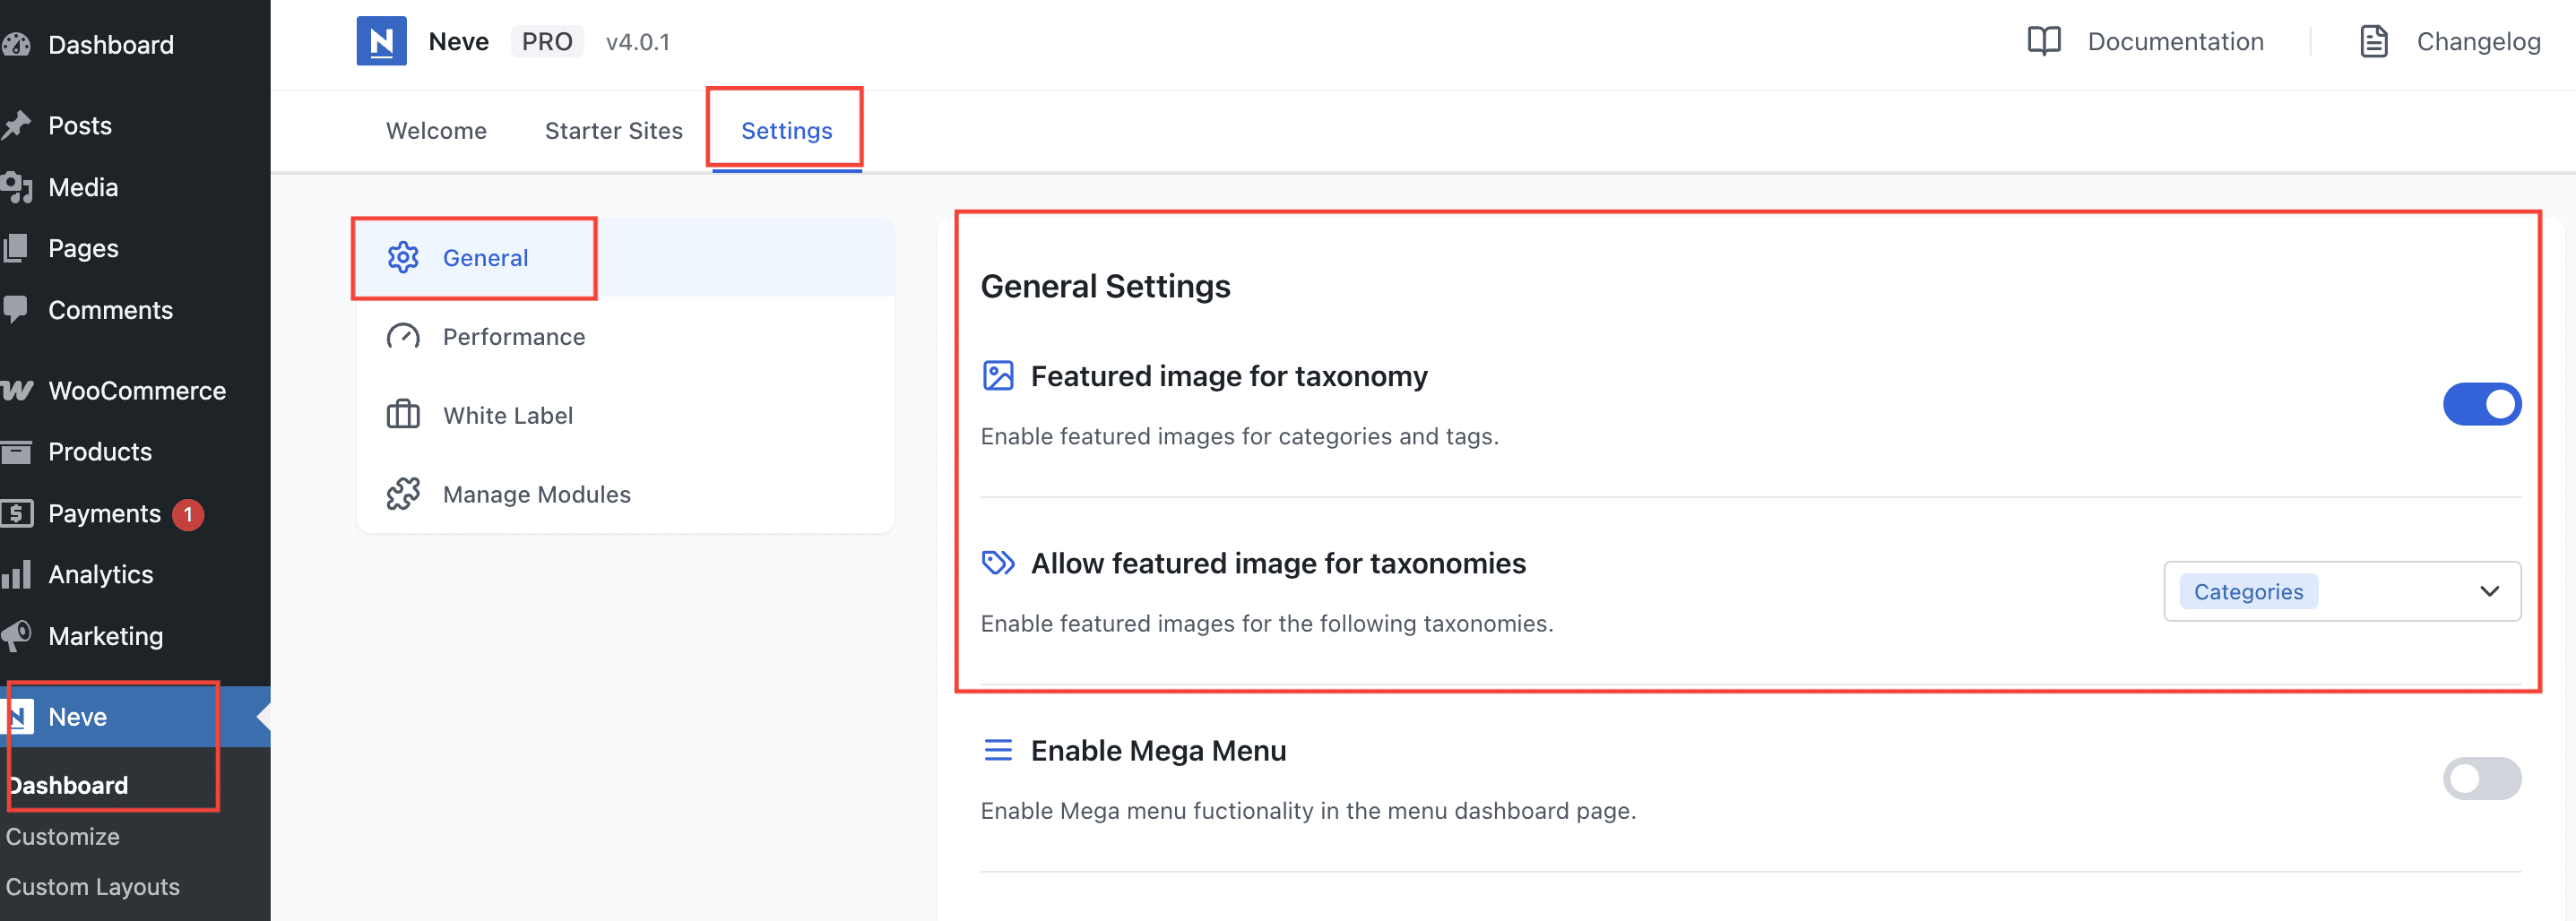
📝Note: This component is part of just Neve PRO.
The module allows taxonomies ( categories, tags etc ) to have their own featured image, similar to posts.
To use this, navigate to Neve > Dashboard > Settings > General and enable Featured image for taxonomy. In the Allow featured image for taxonomies dropdown select the taxonomies for which this should apply.
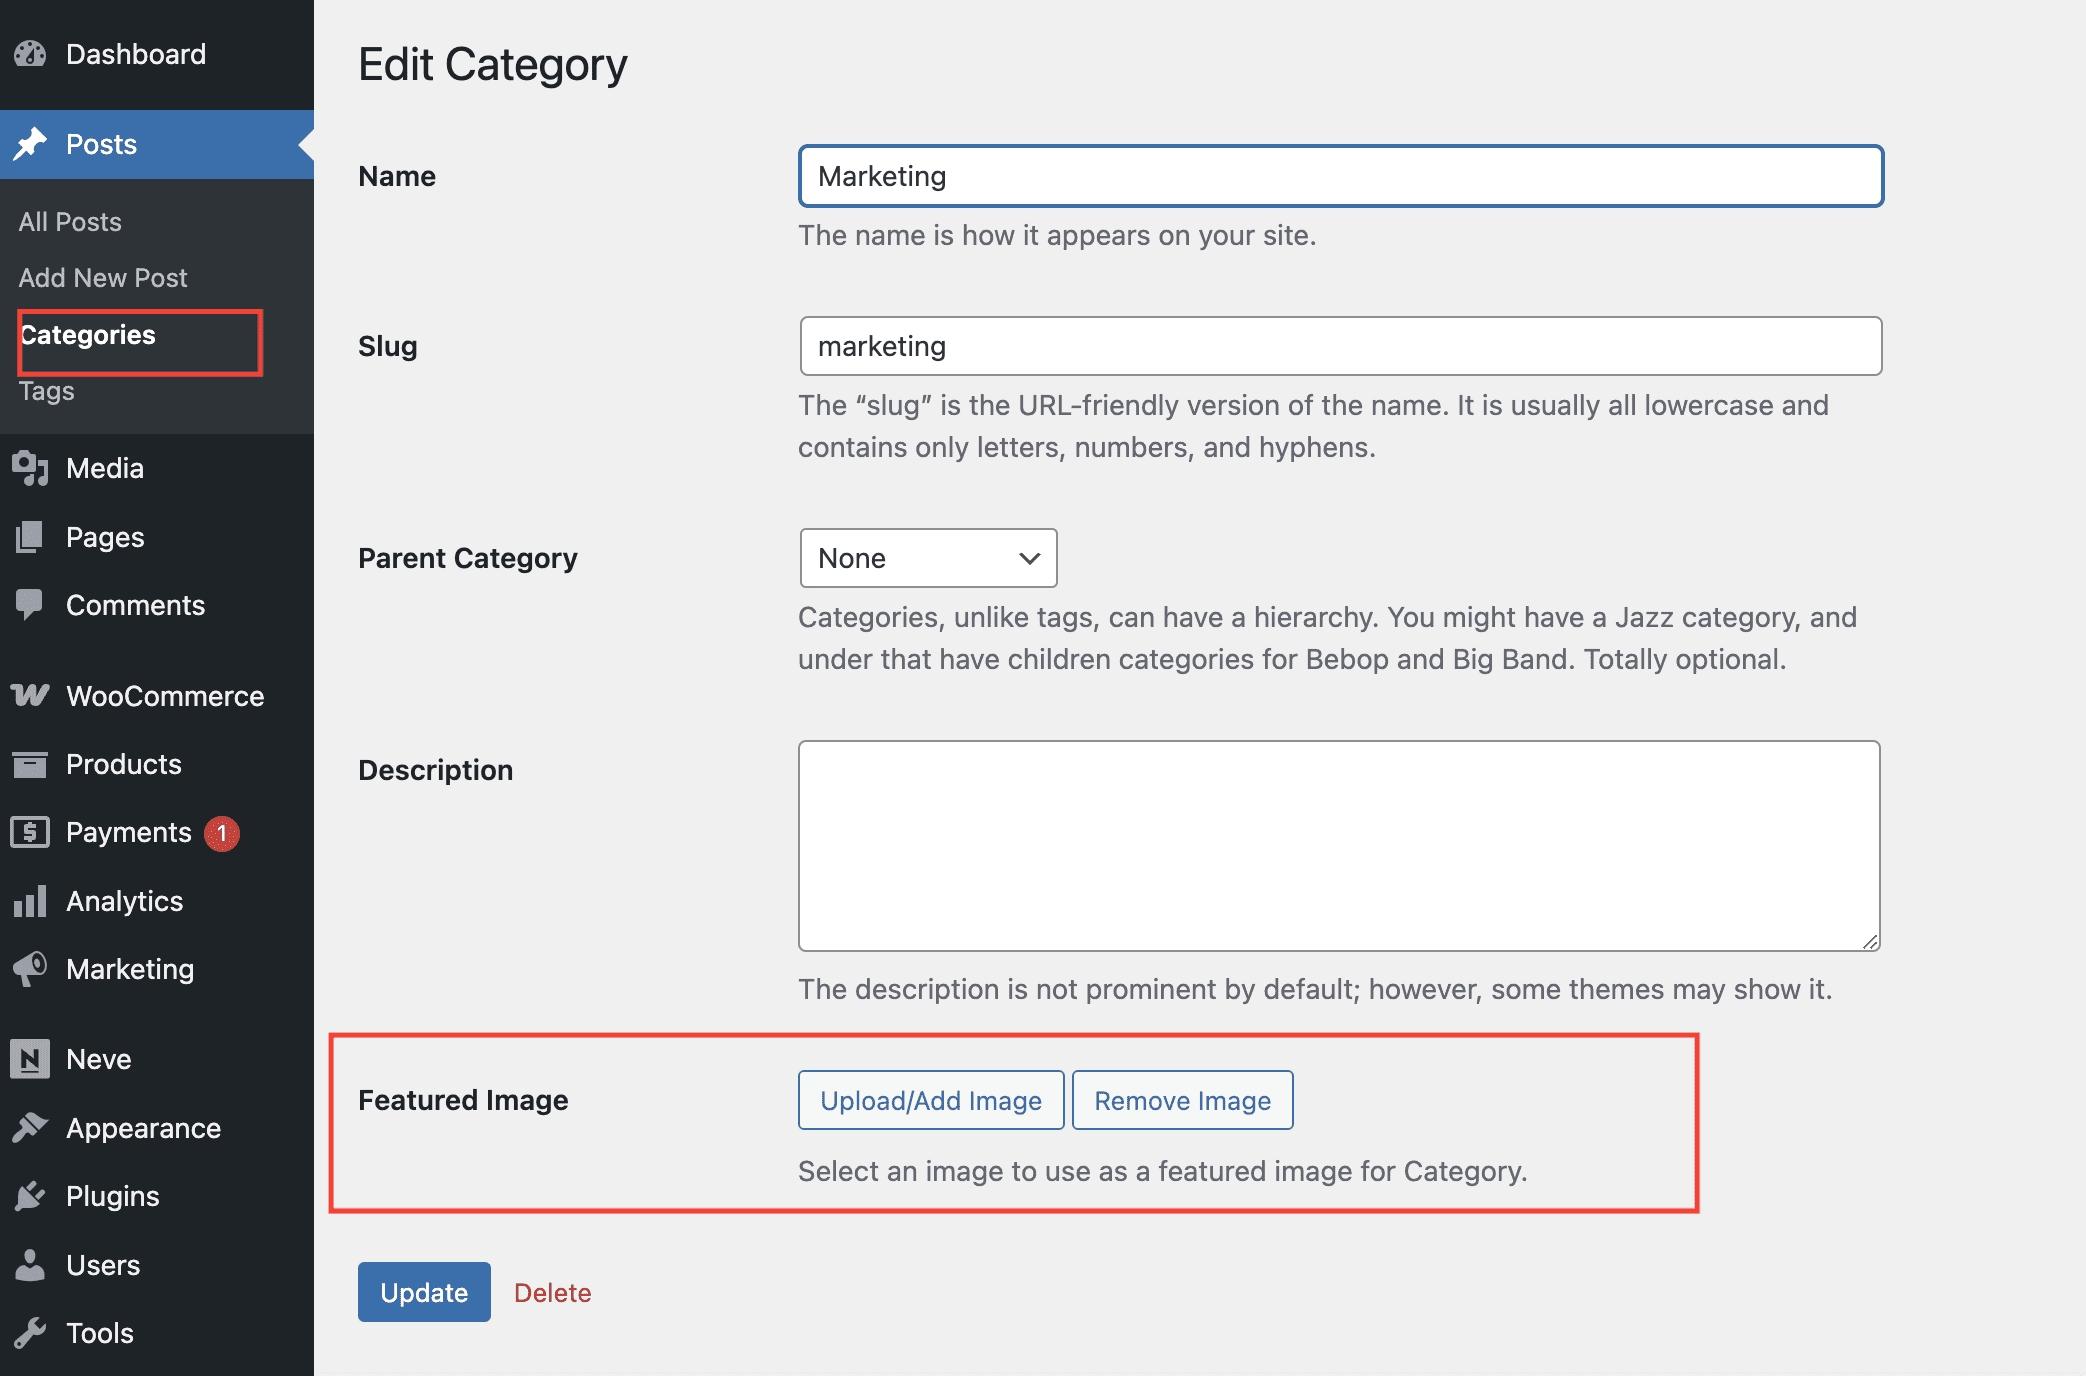
After that, when editing or creating a category, you will be able to add a custom featured image to it.
Important: The featured image option can also be used for taxonomies created using the ACF plugin. However, in order for the taxonomy to appear in the Allow featured image for taxonomies dropdown, you need to take an extra step of adding this code in the functions.php file of your child theme.
add_filter( 'neve_feature_image_taxonomy_support', function( $taxonomies ) {
	$taxonomies[] = 'genre'; // Add your taxonomy key here, duplicate this line if you want to add more
	return $taxonomies;
} );