
How to load Neve fonts locally
Hosting the Google Fonts locally in the Neve theme can be easily achieved in two ways:
The WordPress filter provided in this article enables the usage of the WPTT webfont-loader, and there is no additional action required, such as downloading fonts/css.
In this article
Local hosting does not guarantee that all Customizer font previews avoid requests to Google. The font controls reuse locally hosted font files that have already been downloaded. Font families not yet cached (saved locally), and selected font weights missing from the cache, may still load from Google.
After choosing your fonts, click Publish in the Customizer and visit your public site to let Neve download the required font files automatically. The Customizer font controls only read the existing local cache; they do not download missing files for local hosting.
Enabling the option in Customizer
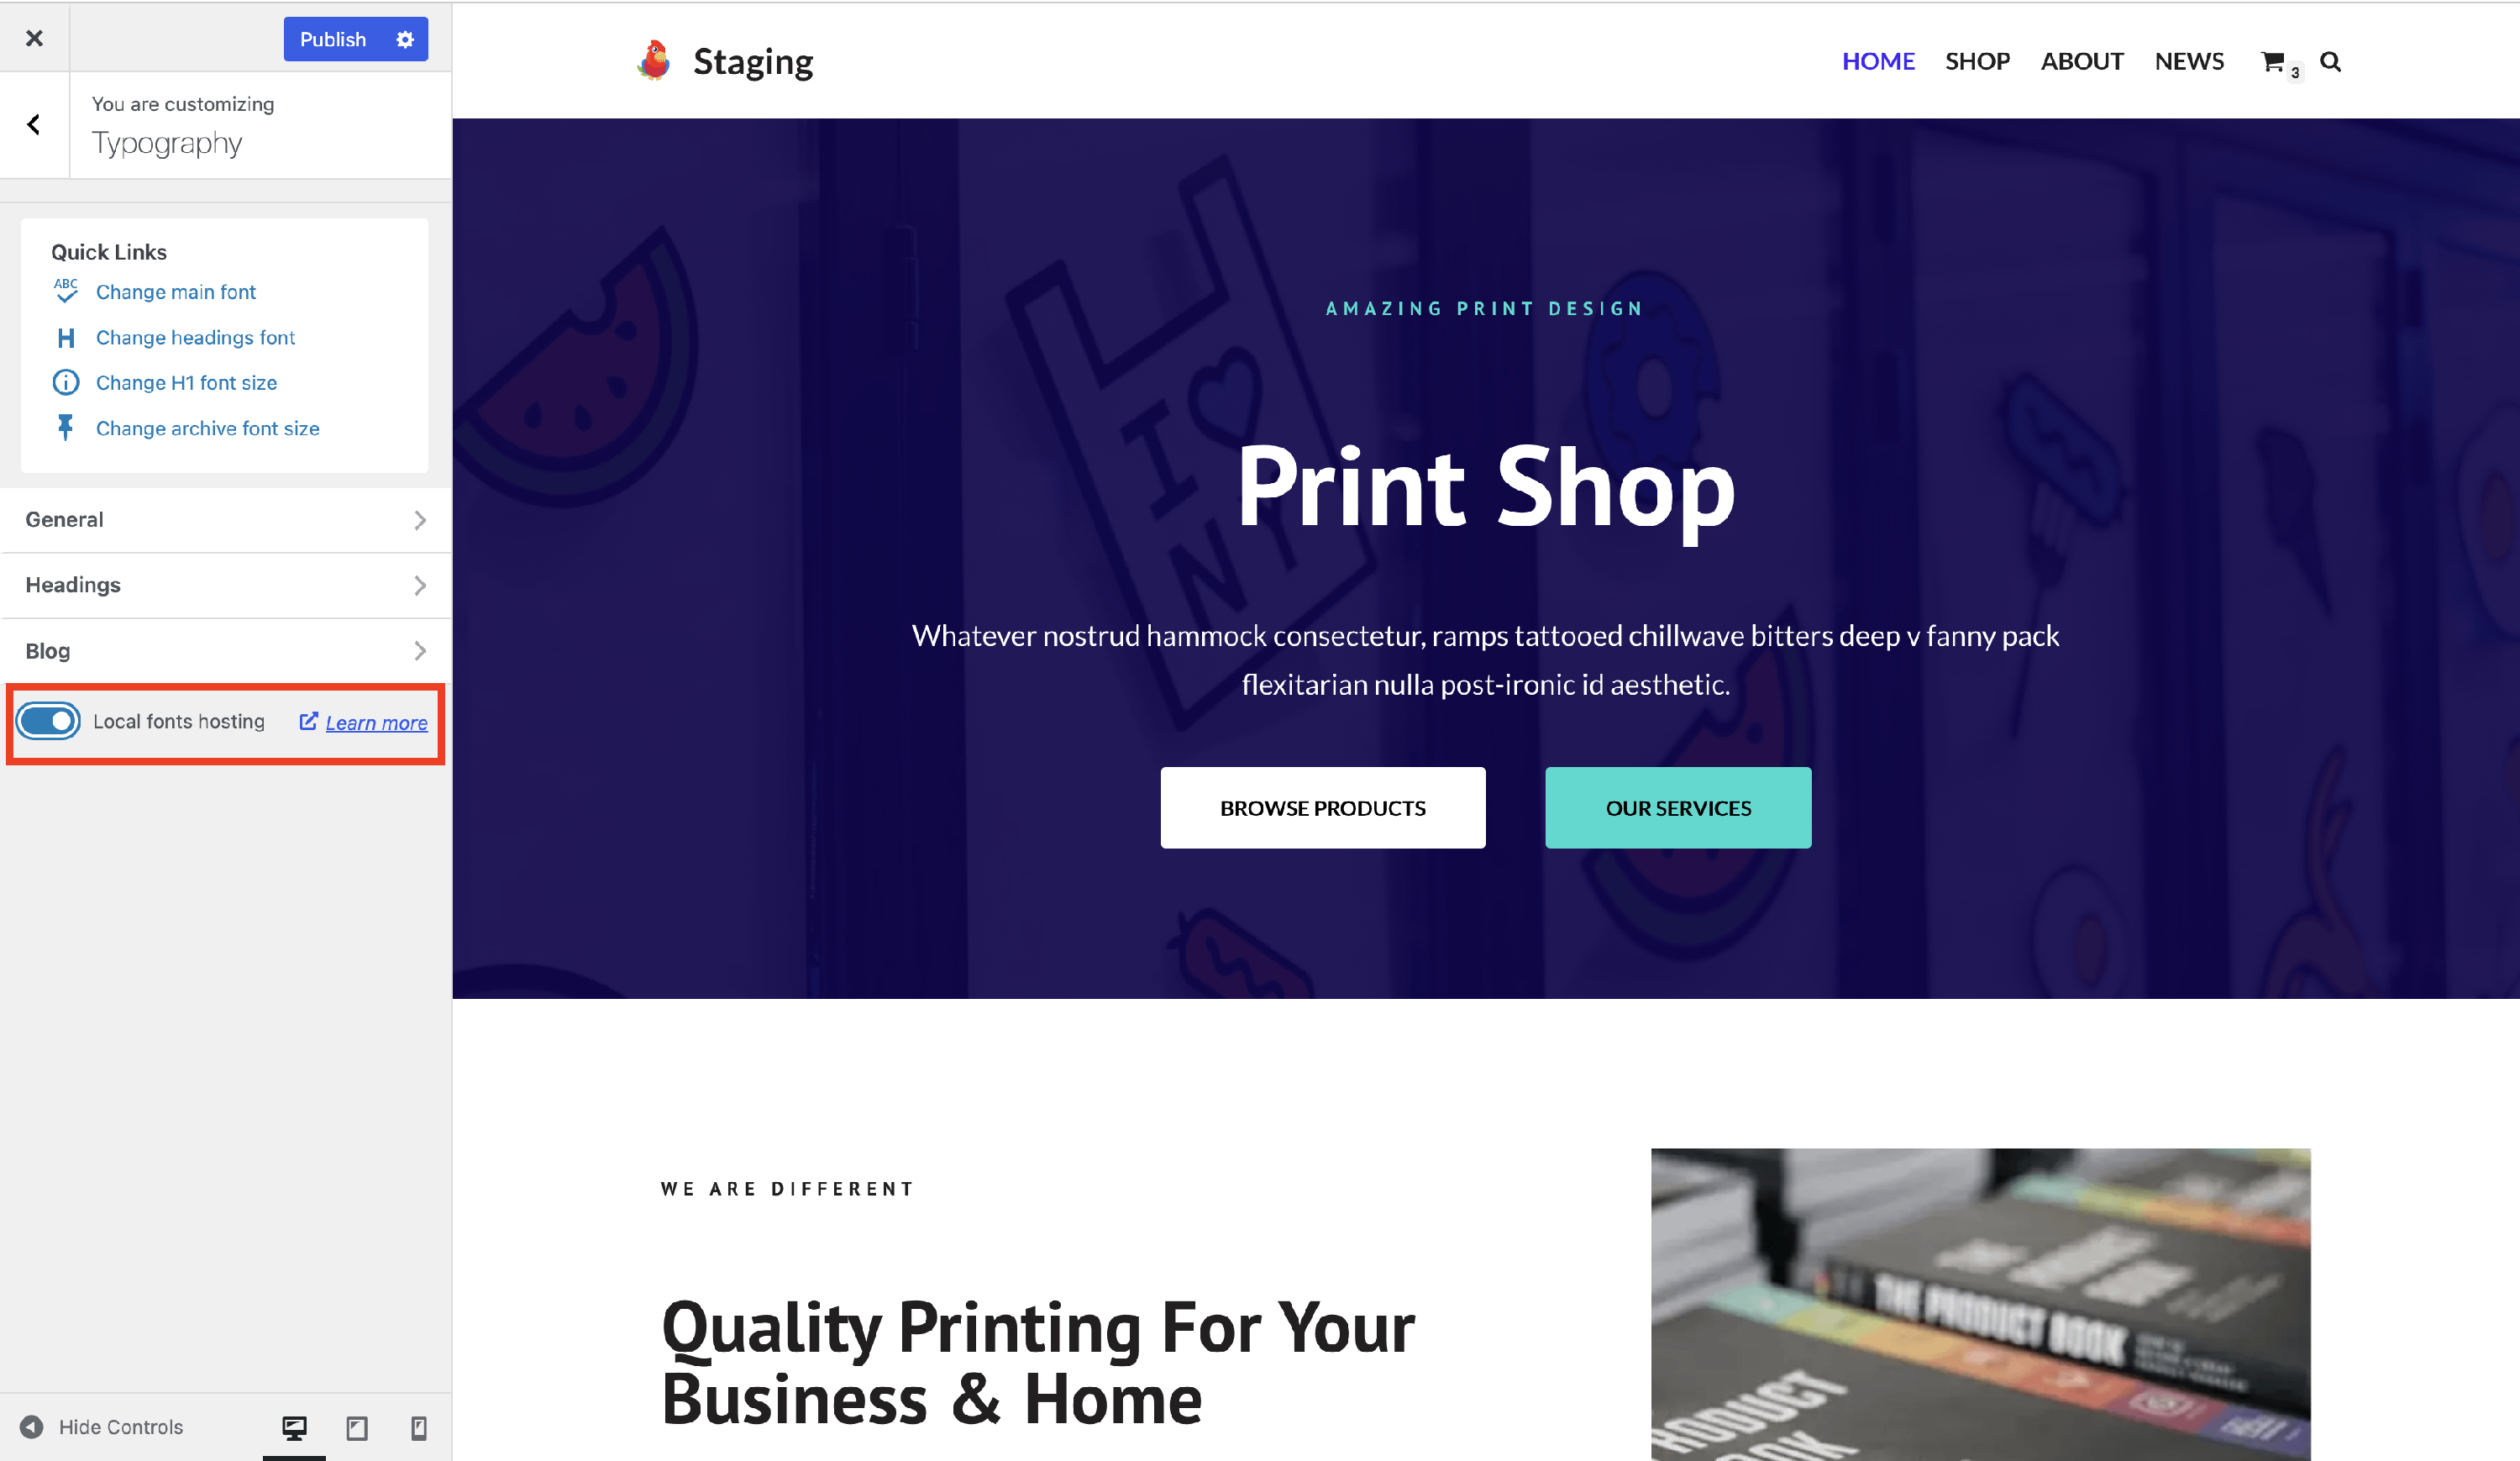
The Google Fonts can be hosted locally by simply enabling its toggle:
1. Navigate to Appearance > Customize > Typography.
2. Enable the Local fonts hosting toggle.
Note: If you choose the second scenario ( using a code snippet ), it's important to keep in mind that it overrides the toggle.
Using a code snippet
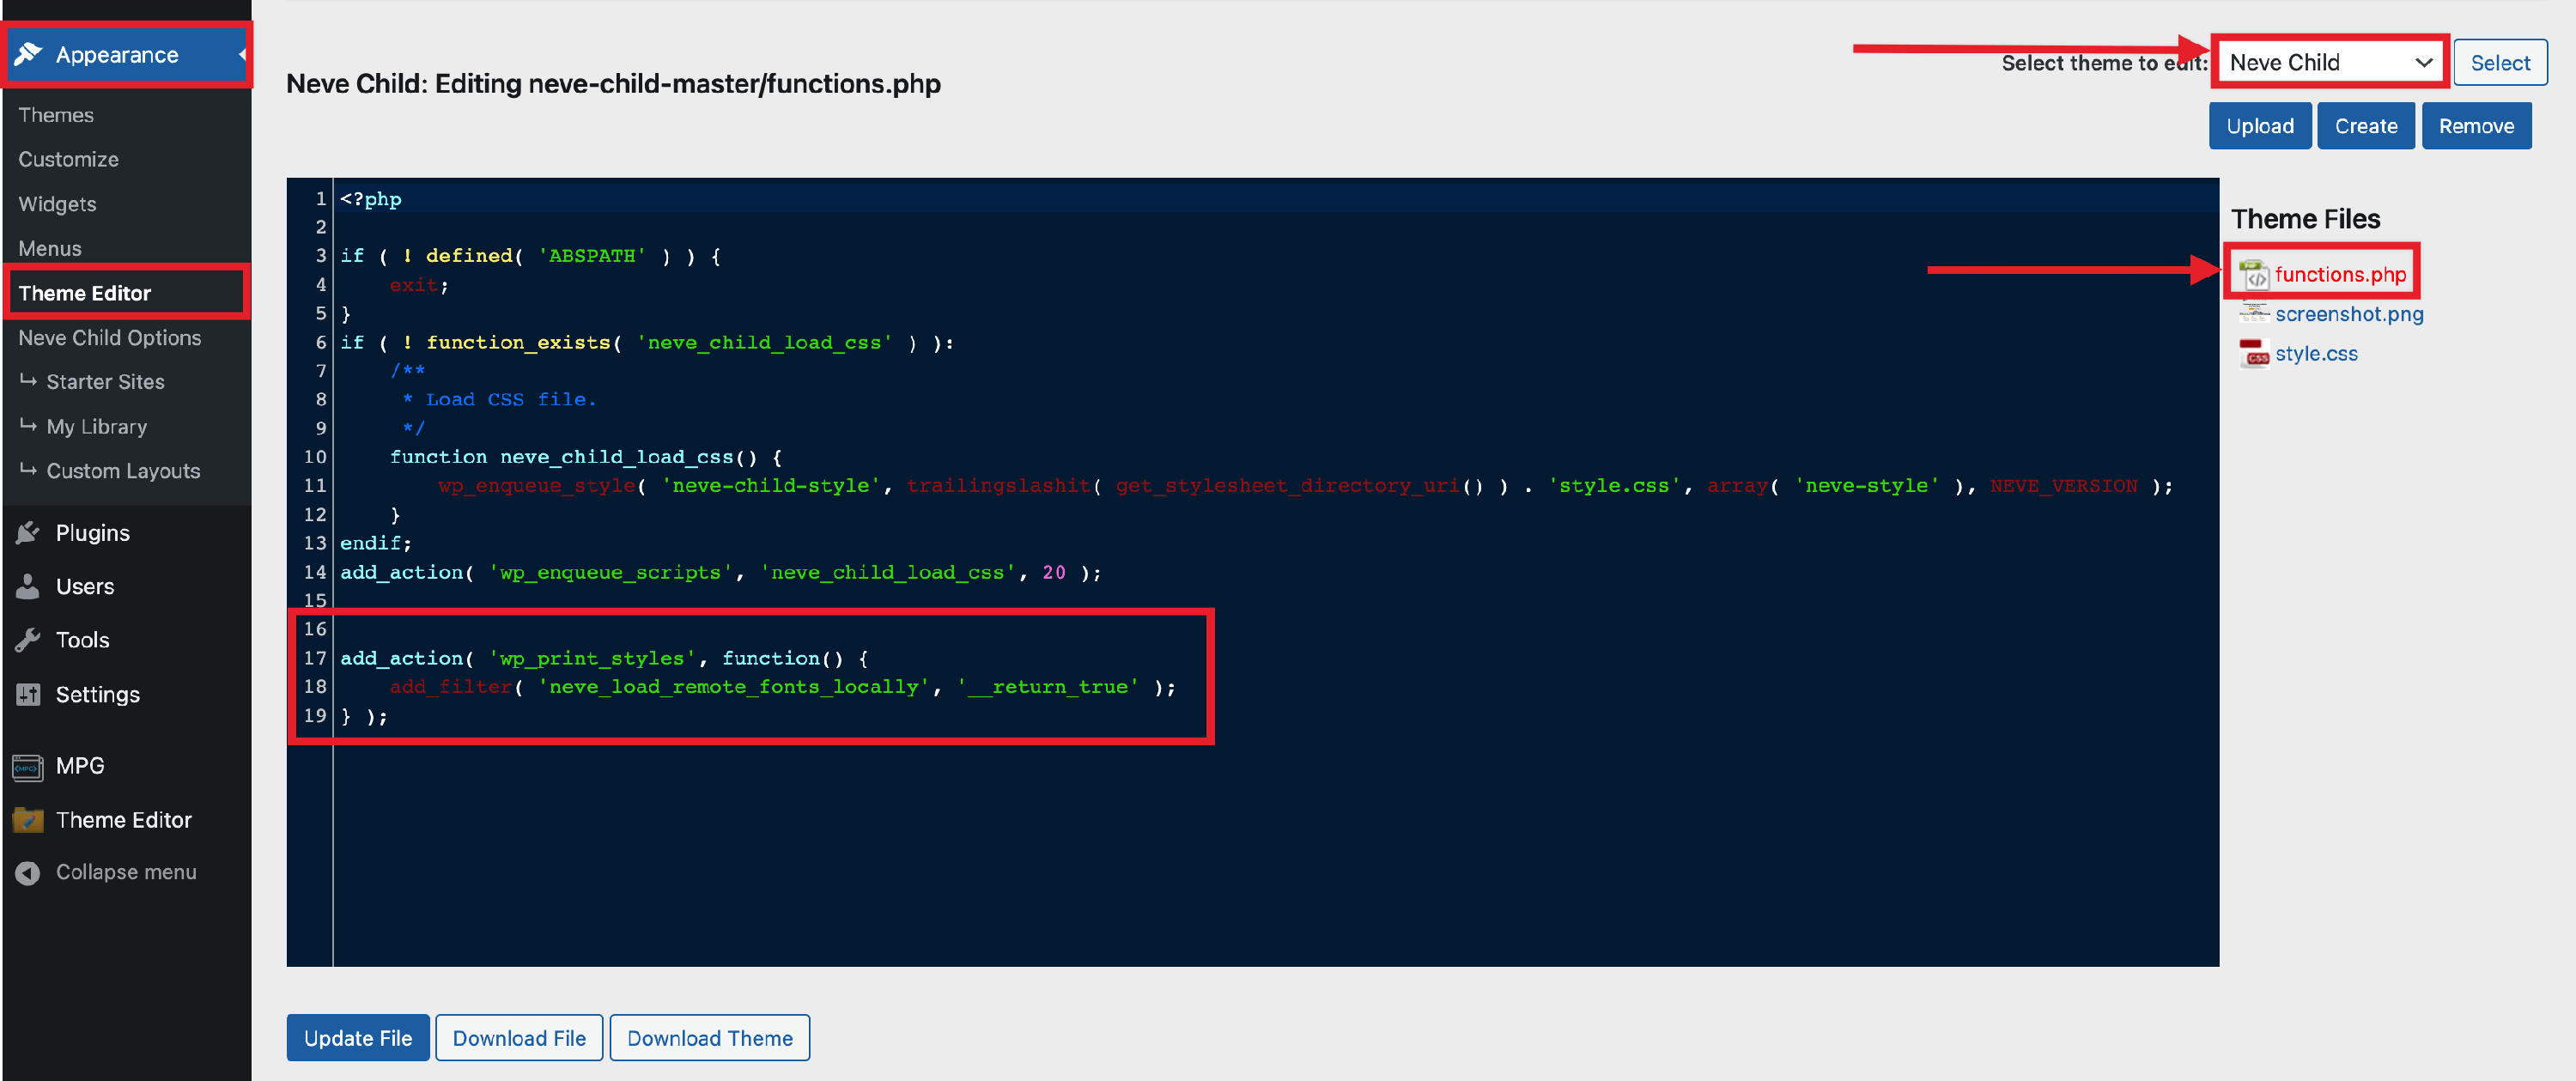
Neve fonts can be loaded locally by adding the following code at the end of the functions.php file of your child theme. The same approach also applies to the Typekit fonts.
add_filter( 'neve_load_remote_fonts_locally', '__return_true', 20 );Register this filter directly in your child theme or custom plugin, not inside a wp_print_styles callback. This makes local hosting available when the Customizer prepares its font controls. Priority 20 also ensures that this filter runs after Neve Pro's Performance module callback and overrides its local-hosting setting.
📝 Note: A ready-made child theme for Neve is available for download in this guide.
Installing a Site Specific plugin
This plugin is a dedicated file that contains the above code snippet, being a more straightforward approach.
1. Download the plugin at this link - download.
2. Extract the downloaded ZIP archive and open the plugin's PHP file in a text editor. Replace the entire add_action( 'wp_print_styles', ... ); block with the single add_filter line from Using a code snippet, leaving the plugin header intact. Save the file and compress the plugin folder into a new ZIP archive.
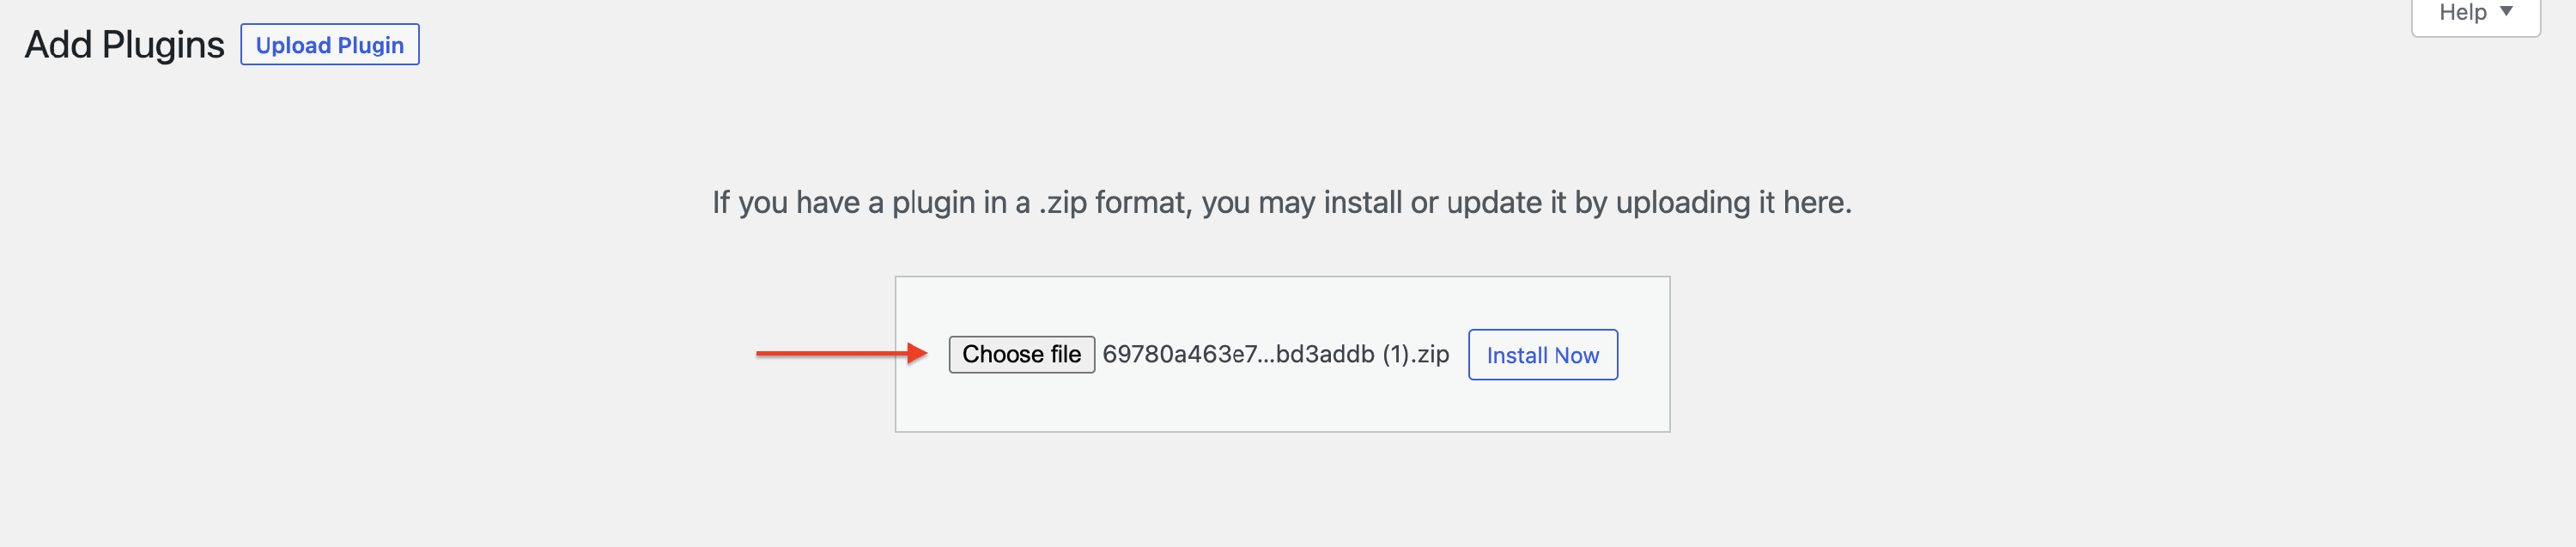
3. Navigate to Plugins > Add New, upload the updated archive, install it, and activate the plugin.
Troubleshooting: local fonts are enabled but fallback fonts appear
If you still see fallback fonts after enabling local hosting, it usually means the local font CSS or font files are not loading correctly, or another optimization setting is changing how that CSS is delivered.
Font files return 404 or are missing
If your browser loads fallback fonts and the Network tab in your browser's developer tools shows font requests returning 404, Neve usually could not save the local font files when they were generated.
Current local font files should be saved in wp-content/fonts/. If you still see requests to wp-content/uploads/fonts/, those URLs are usually coming from an older cached CSS file or another stale cache layer.
Check that WordPress can write font files
Make sure WordPress can write to these folders:
wp-content/wp-content/fonts/
Many hosts use directory permissions like 755 or 775, but the correct value depends on your hosting setup. If you are not sure which permissions your site should use, ask your hosting provider to confirm that both folders are writable by WordPress.
Regenerate local fonts after fixing permissions
After you fix the permissions, regenerate the local font files:
1. Navigate to Appearance > Customize > Typography.
2. Toggle Local fonts hosting off.
3. Click Publish.
4. Toggle Local fonts hosting on again.
5. Click Publish one more time.
This forces Neve to generate the local font files again. After that, continue with the cache-clearing steps below so your site loads the new font URLs.
Check for caching or CSS optimization conflicts
Caching and performance plugins can interfere with local font loading. WP Rocket is one common example, but the same behavior can happen with other optimization plugins too.
1. Temporarily deactivate your caching/performance plugin and reload the page.
2. If the font starts loading correctly, reactivate the plugin and test by disabling optimization options one by one.
3. Start with these settings first:
- Optimize CSS Delivery
- Minify CSS
- Remove Unused CSS
- CSS/JS Delay or Defer options
- Font loading or font preload options
📝 Info: Test one change at a time so you can identify exactly which setting causes the conflict.
Clear caches and retest
After each change, clear all cache layers before testing again:
- Plugin cache (for example, WP Rocket cache)
- Hosting/server cache
- CDN cache, including Cloudflare if you use it
- Browser cache
Old font URLs can remain in one of these cache layers even after the files are fixed. If you still see requests to wp-content/uploads/fonts/, clear every cache again and then retest in a private/incognito window.