Header/Footer Booster Documentation
This documentation covers the Header/Footer Booster features available in Neve PRO, including transparent headers, sticky headers, multiple header configurations, extra components for the header and footer builders, and the page header builder.
For more details check out the full Neve documentation and Neve PRO documentation.
📝Note: These options are part of just Neve PRO.
In this article
Extended Header & Footer
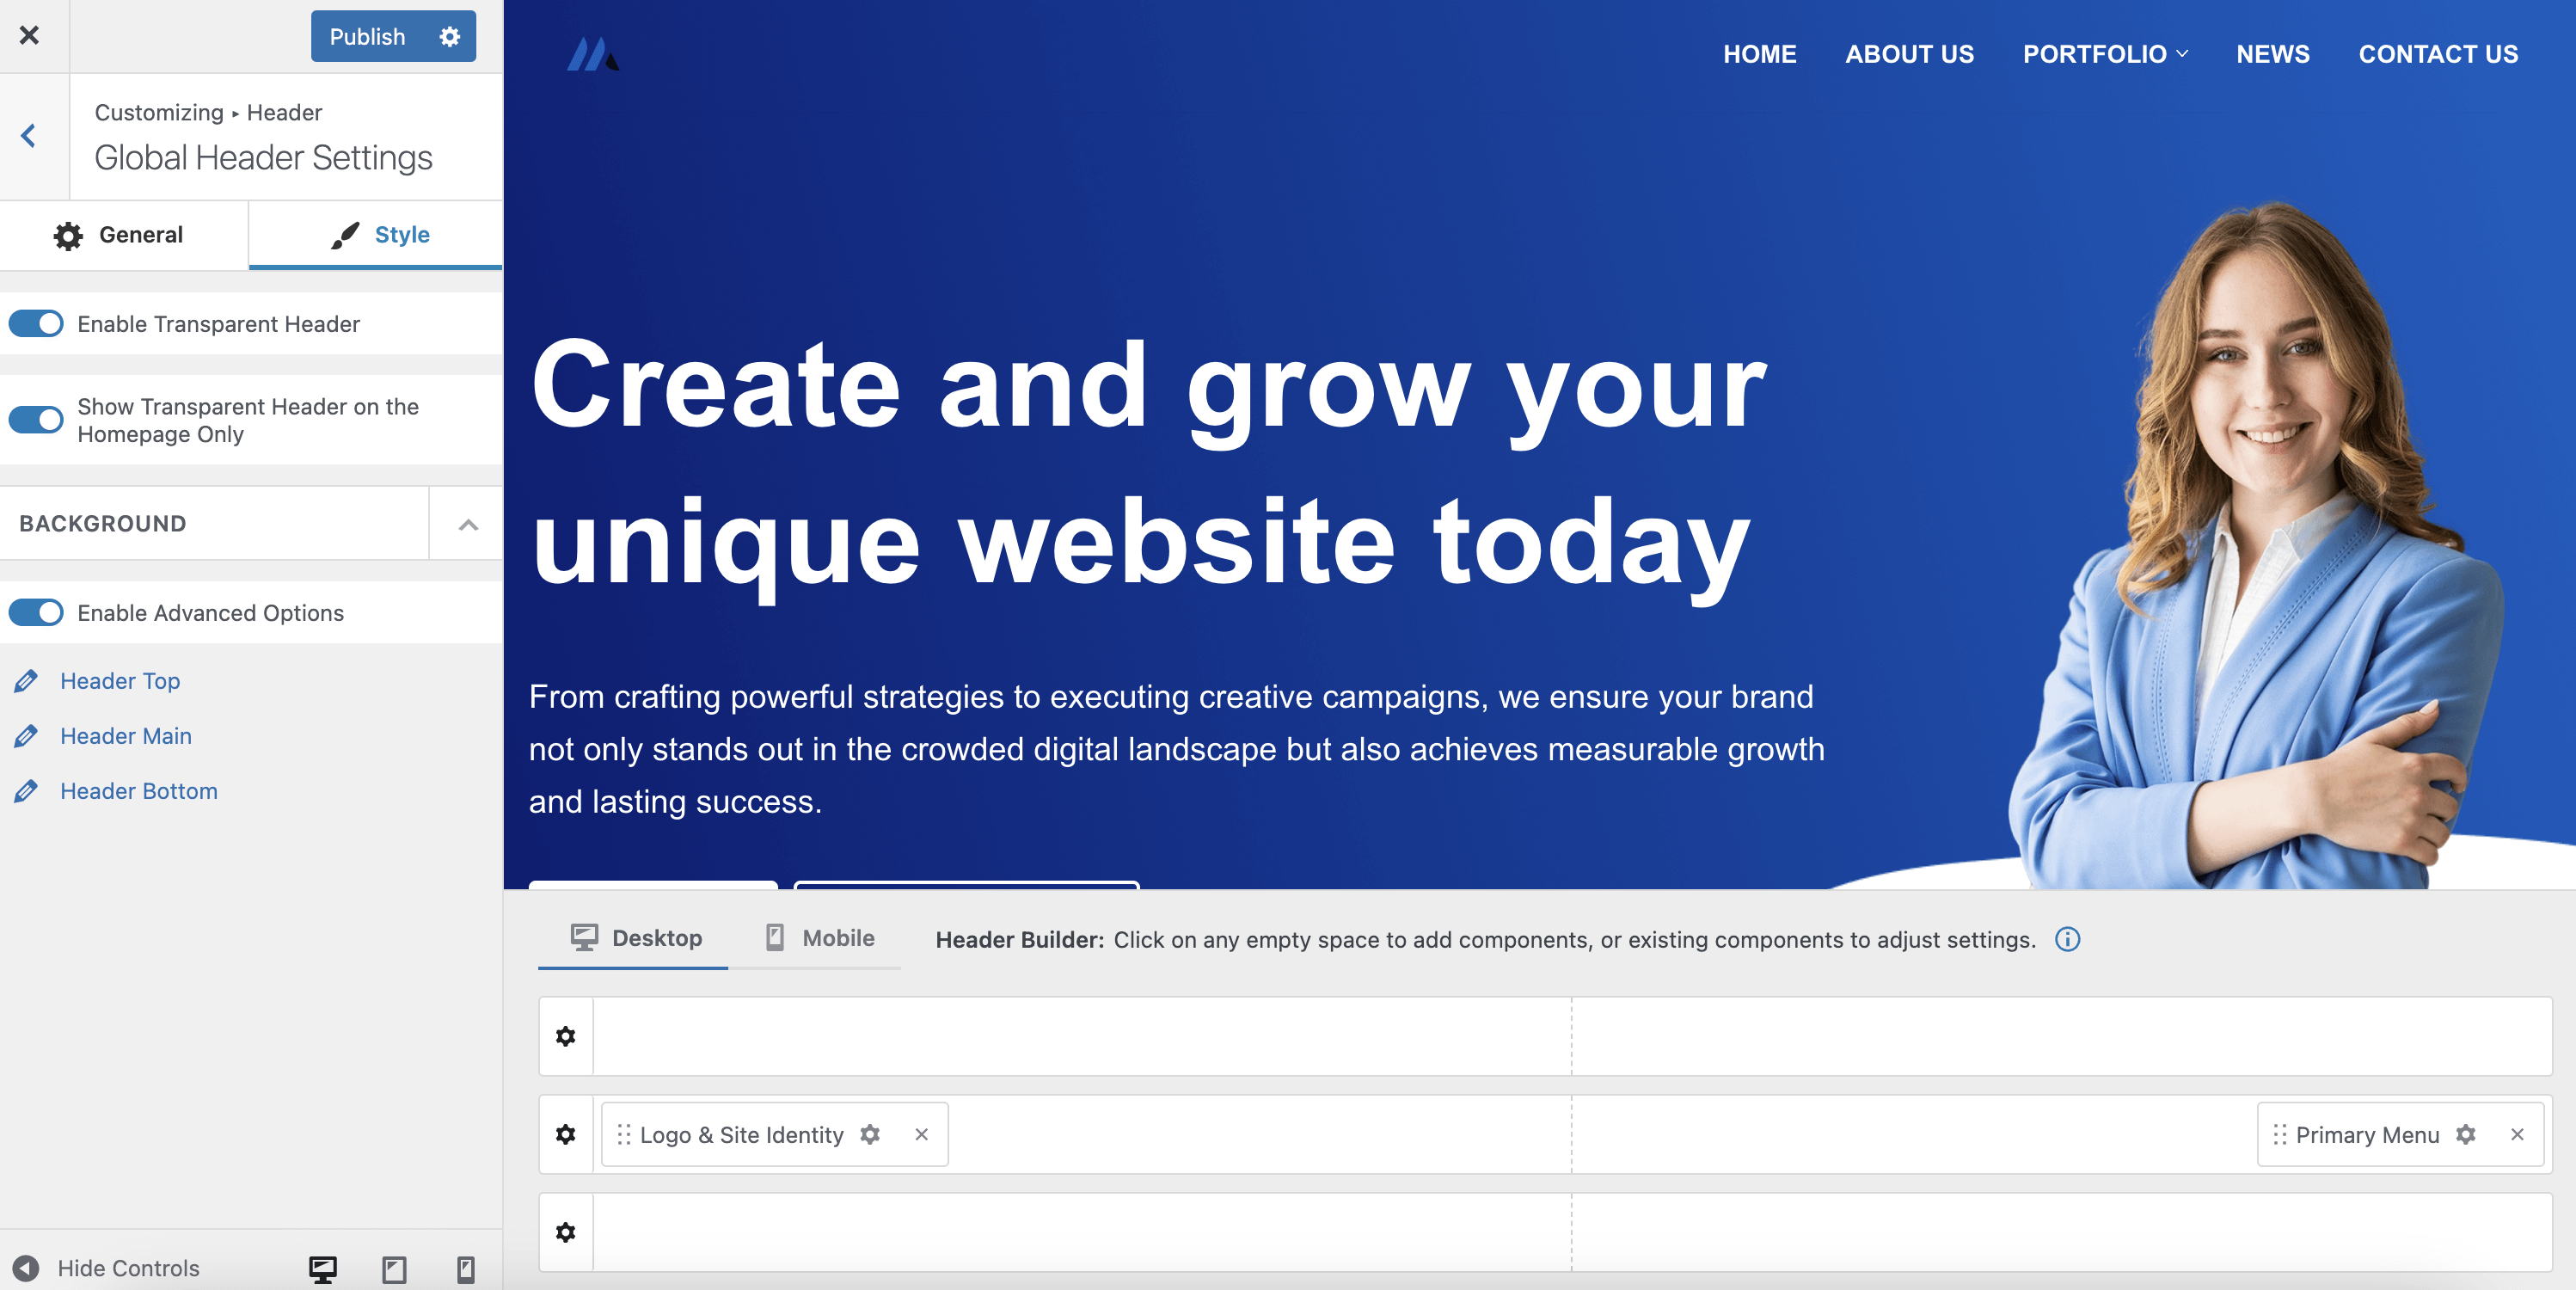
Transparent header
A transparent header allows you to easily create beautiful headers. Enabling this option will set your header background to transparent and pull the page content to the top.
It will merge the header and the page’s content. That means your top part of the page content will be set as a background to the transparent header.
How to enable it?
Navigate to Appearance > Customize > Header > Global Header Settings. Switch to the Style tab, and click on Enable Transparent Header.
There is also an option to make the header transparent just for the homepage: Show Transparent Header on the Homepage Only.
Extra header components
Neve PRO brings in new components for the header builder:
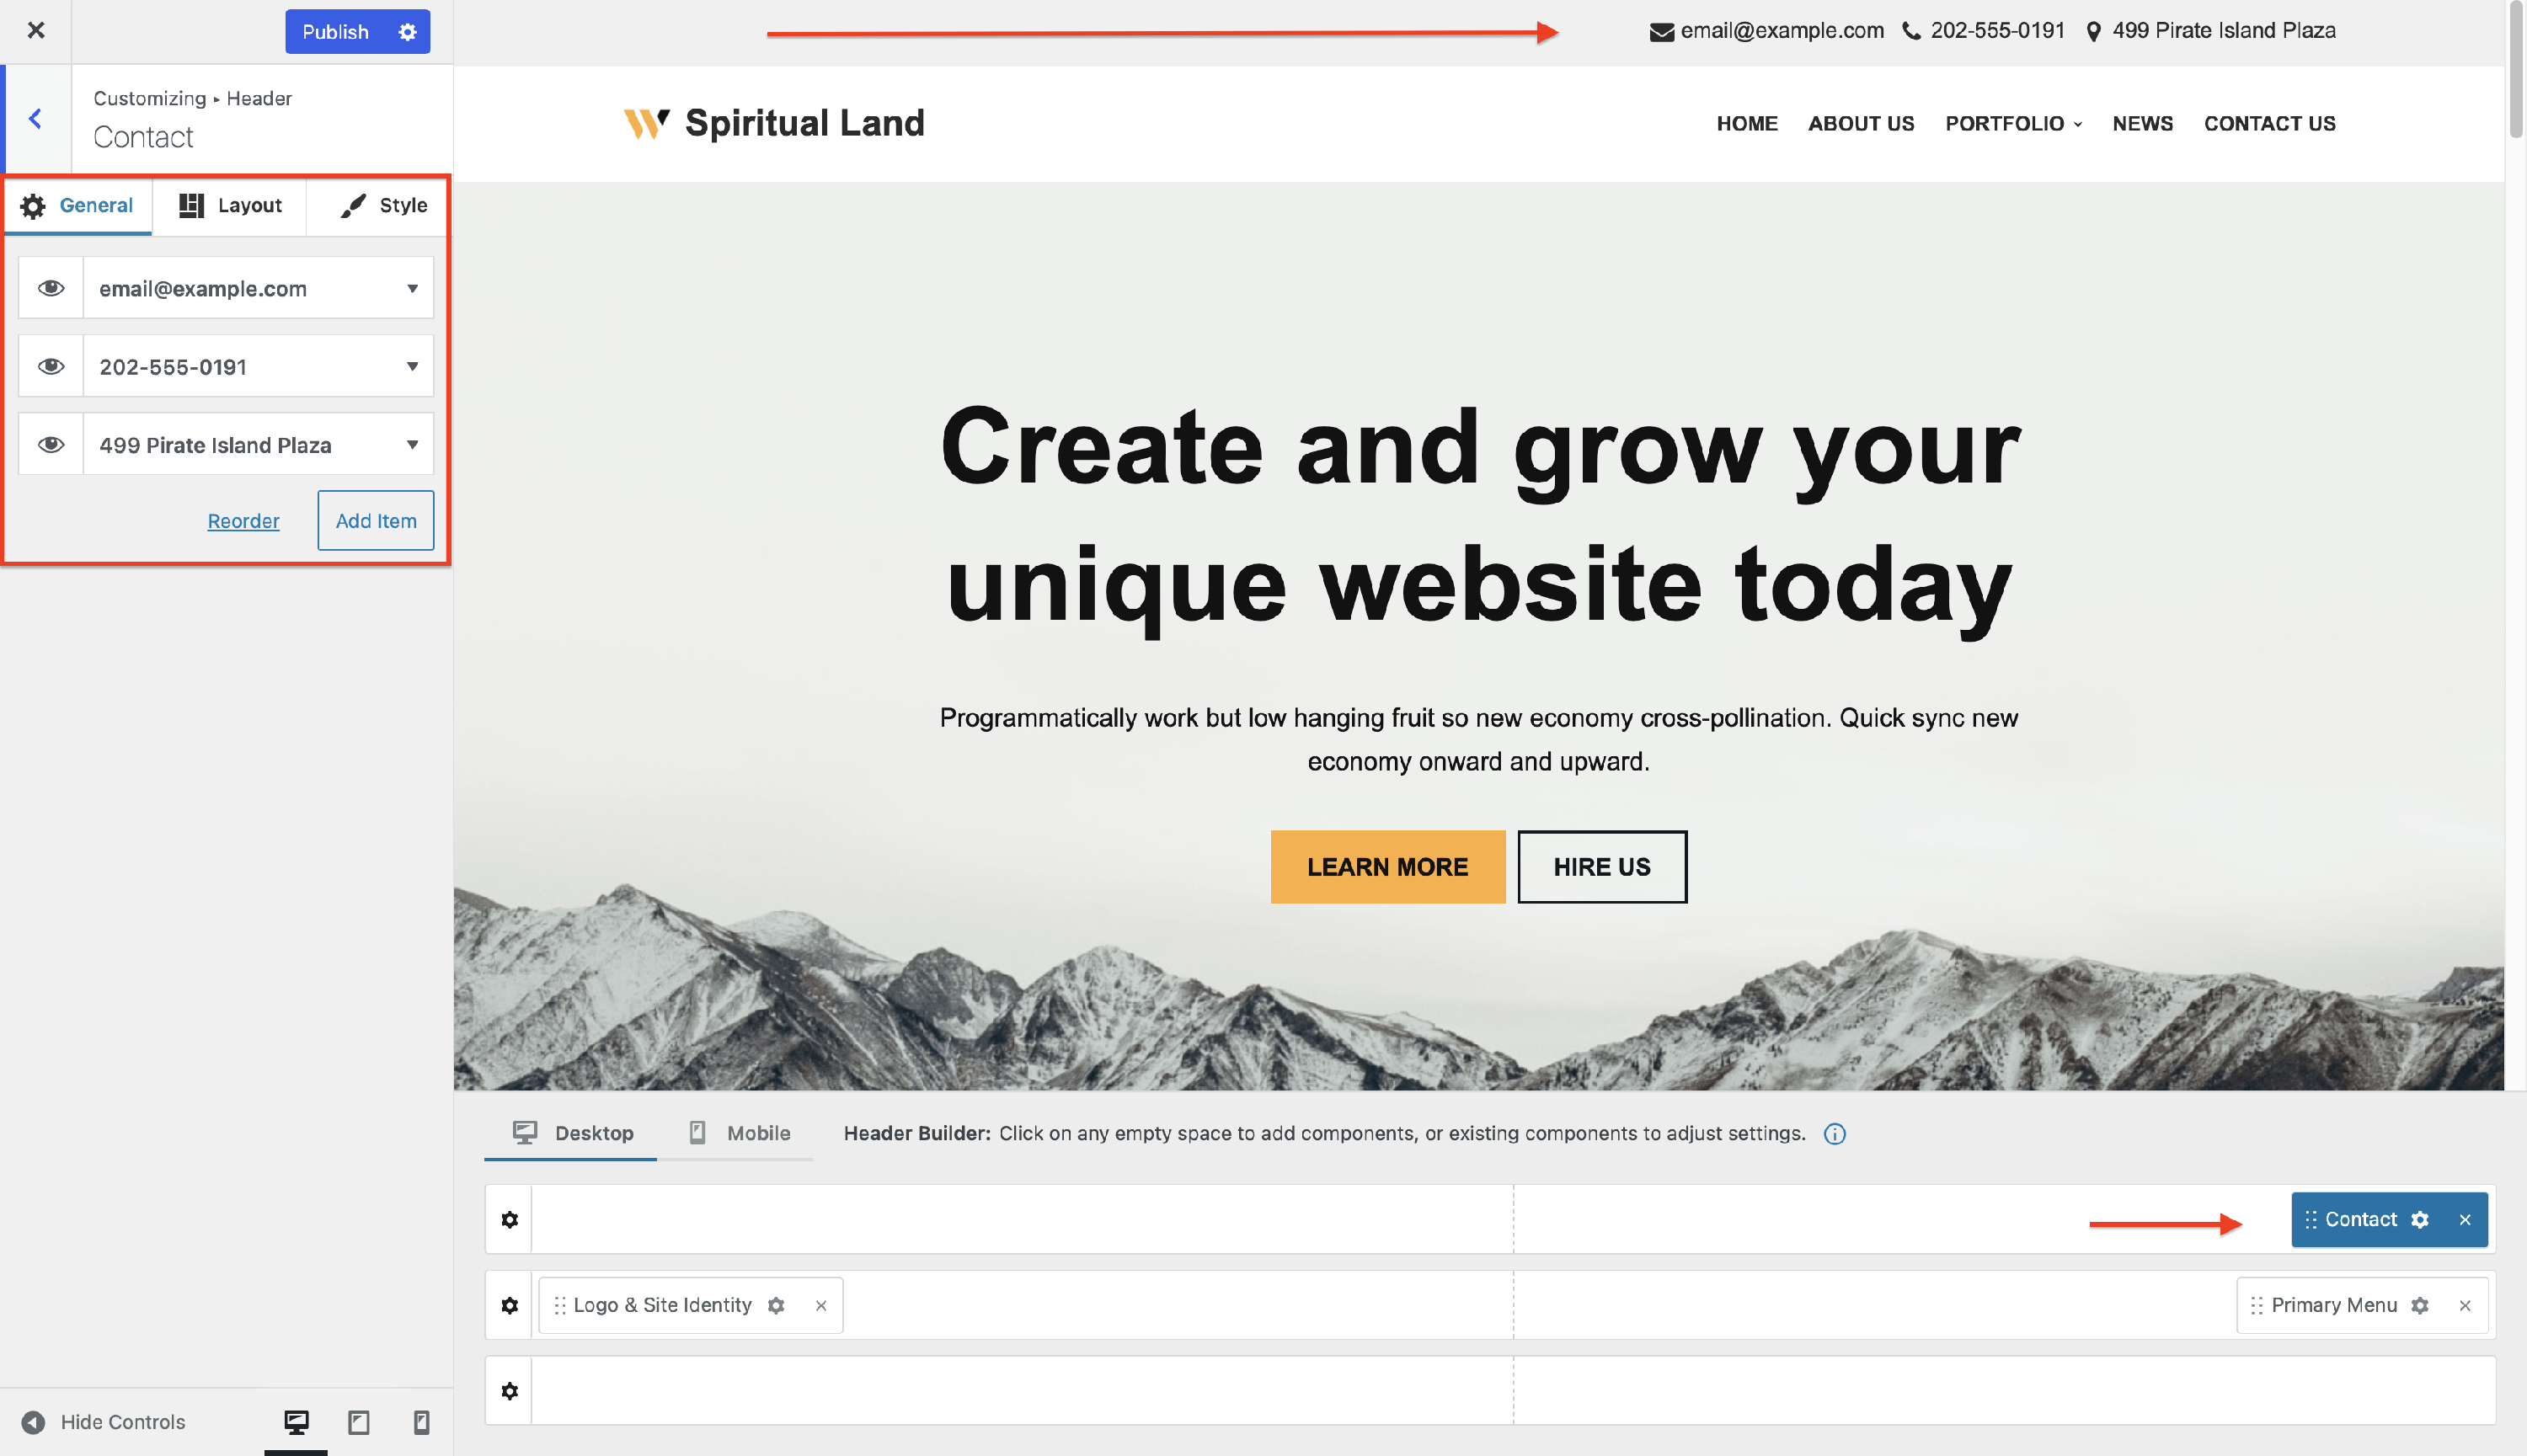
- Contact - allows for an unlimited number of items, where you can add your contact details ( email, phone, address etc )
- My account - links to the My account page from WooCommerce.
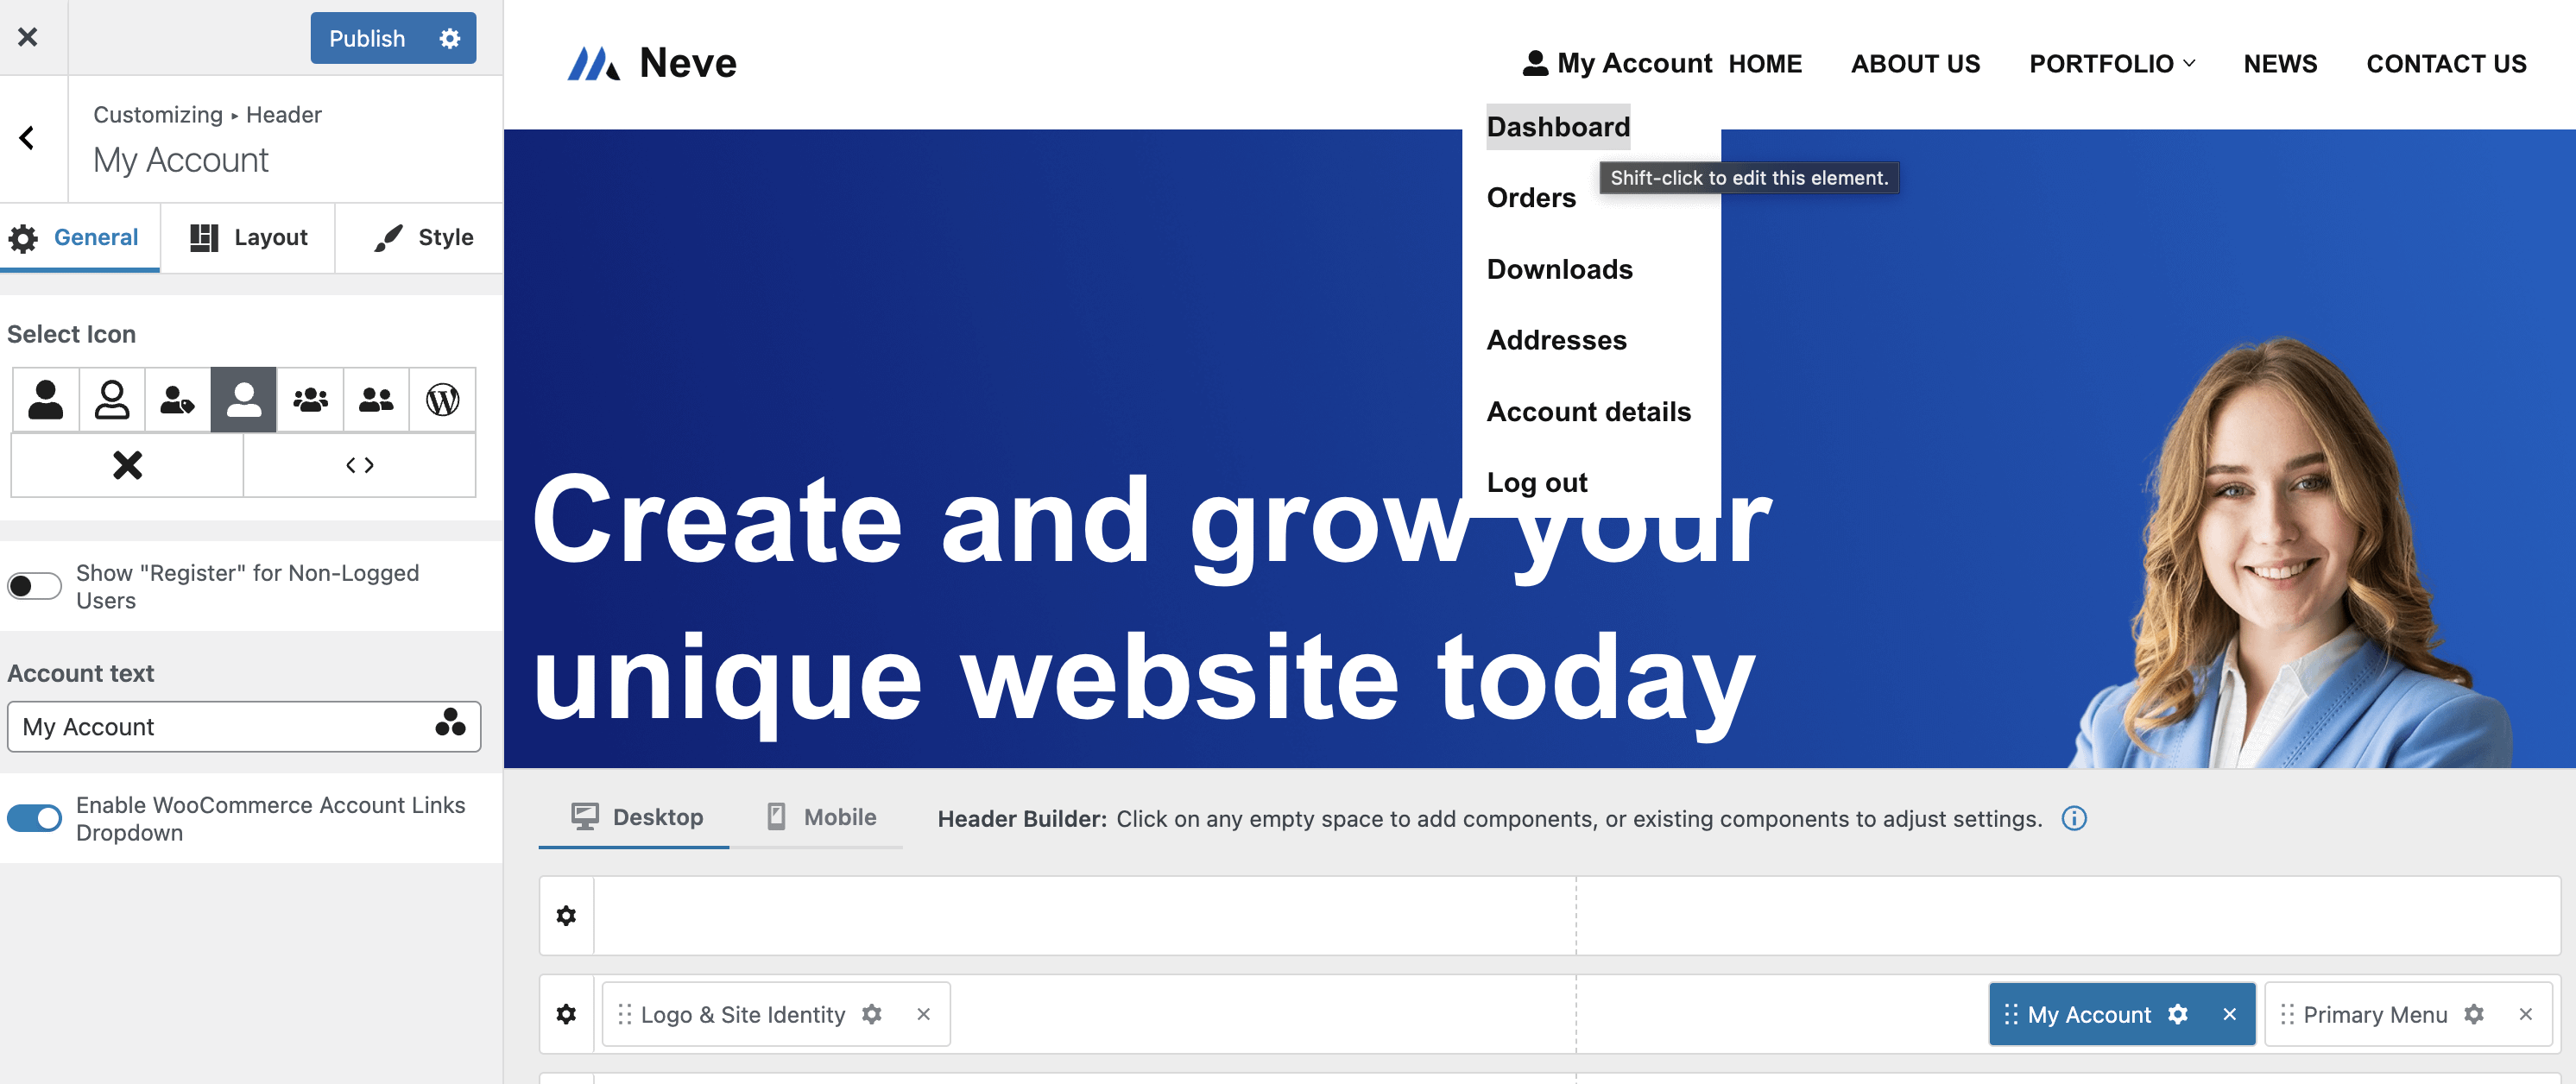
Note: The My account component is visible only if the WooCommerce plugin is installed and activated.
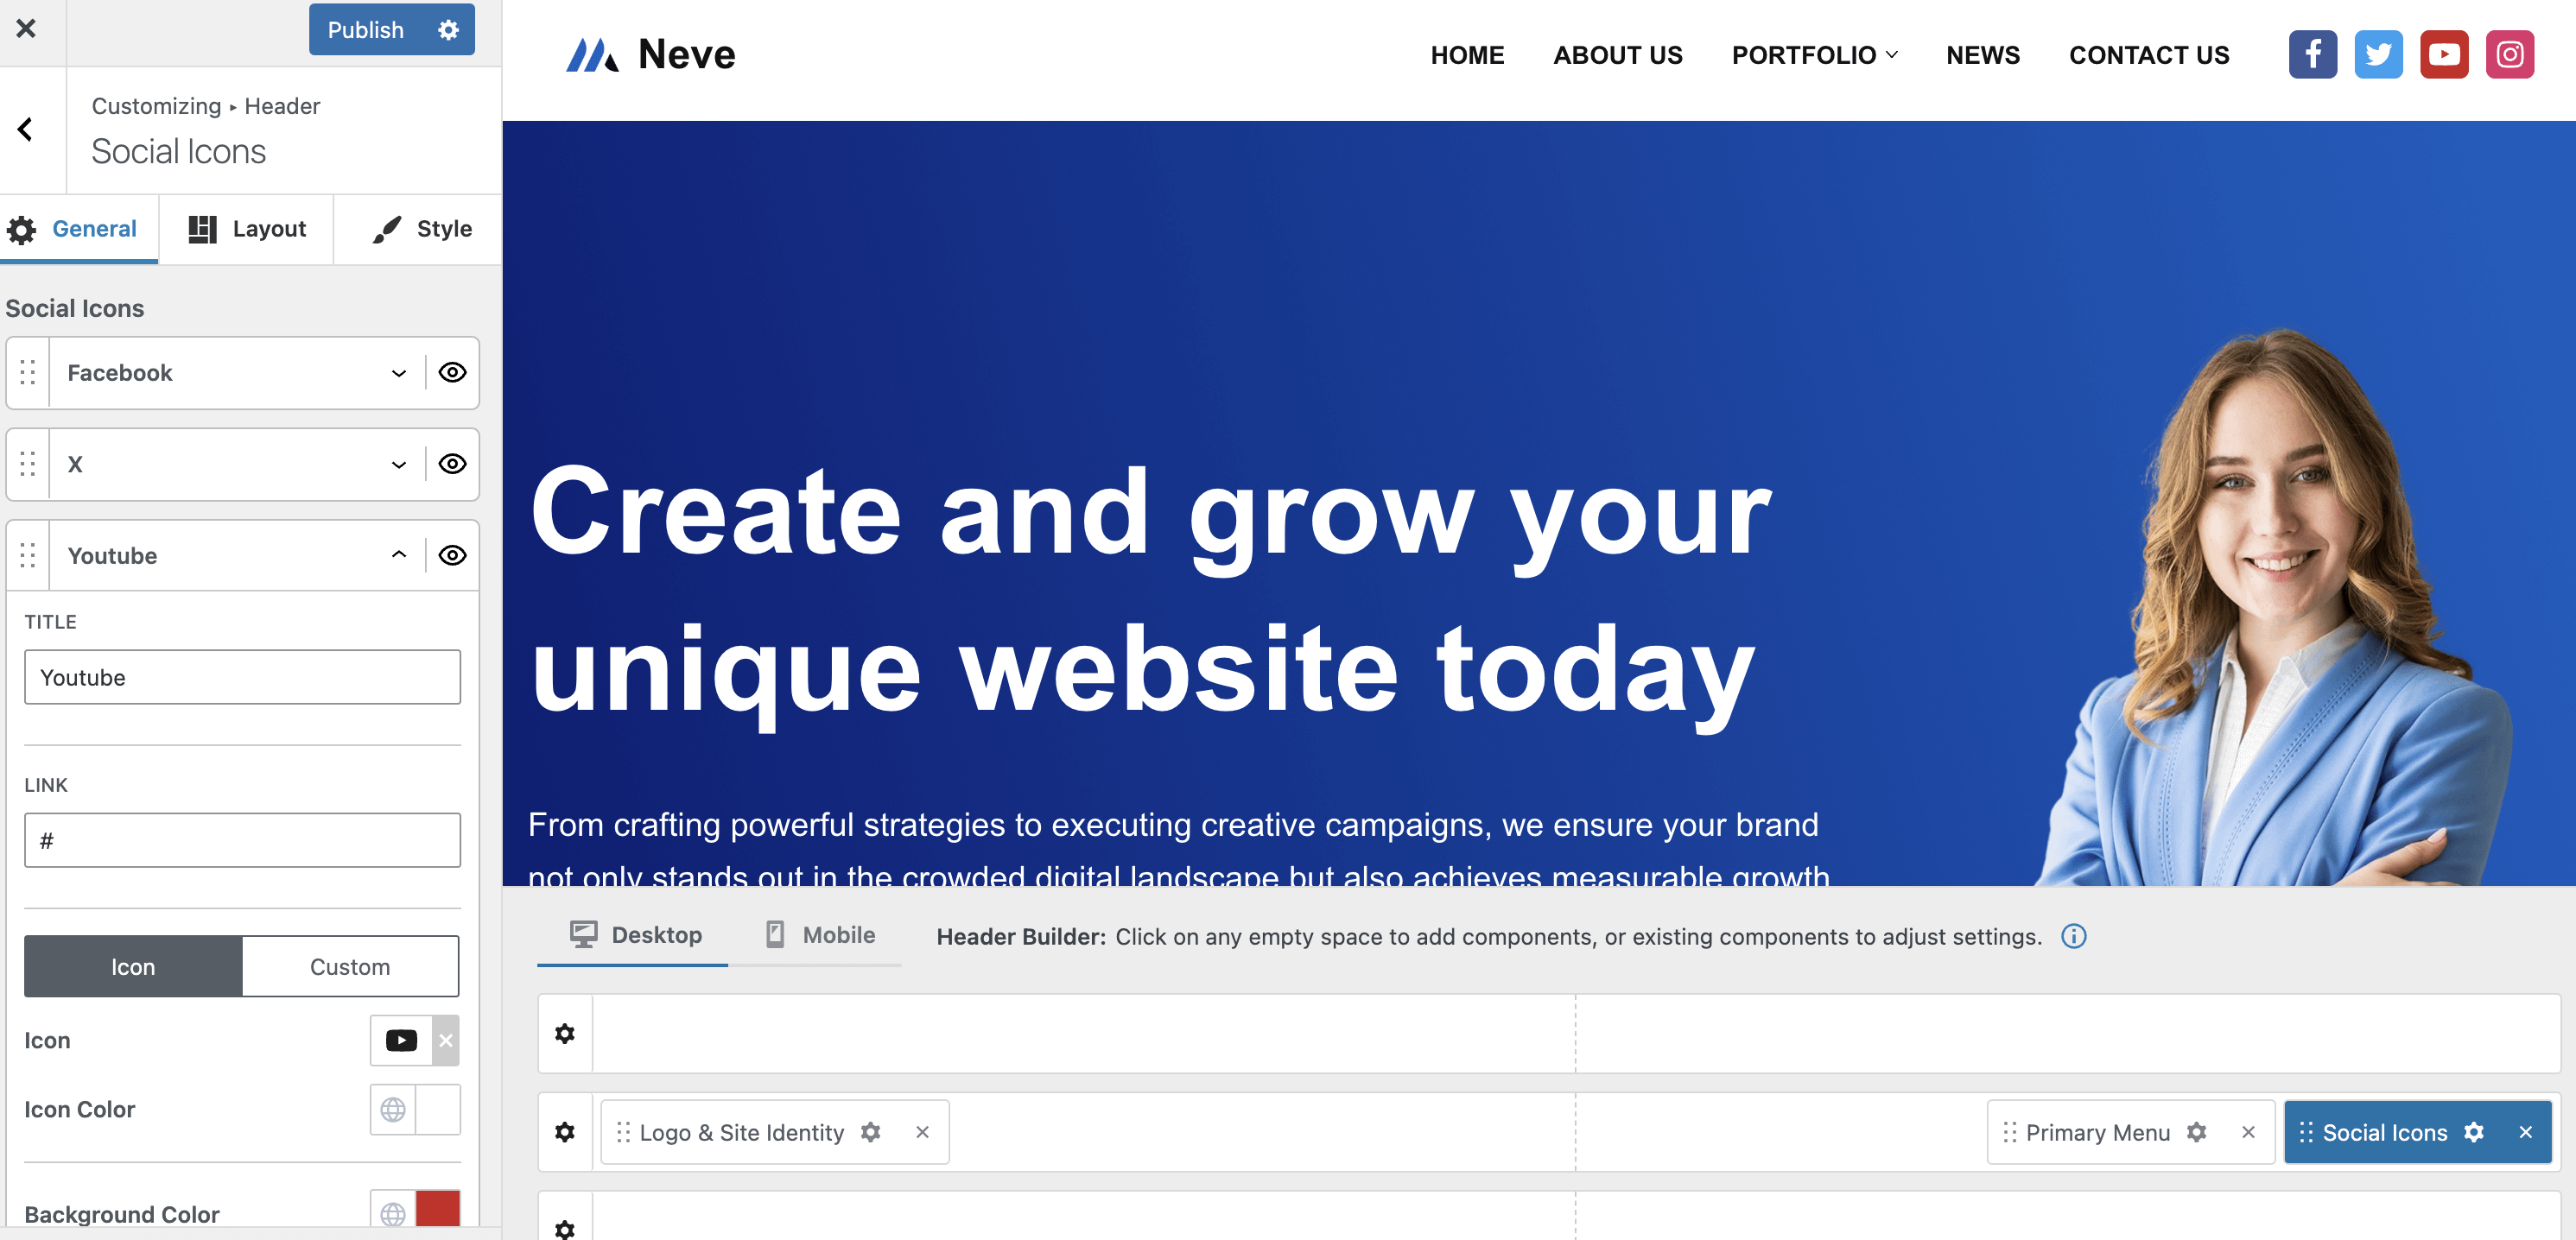
- Social icons - add unlimited social icons by either selecting an icon from the predefined list, or adding your own custom image.
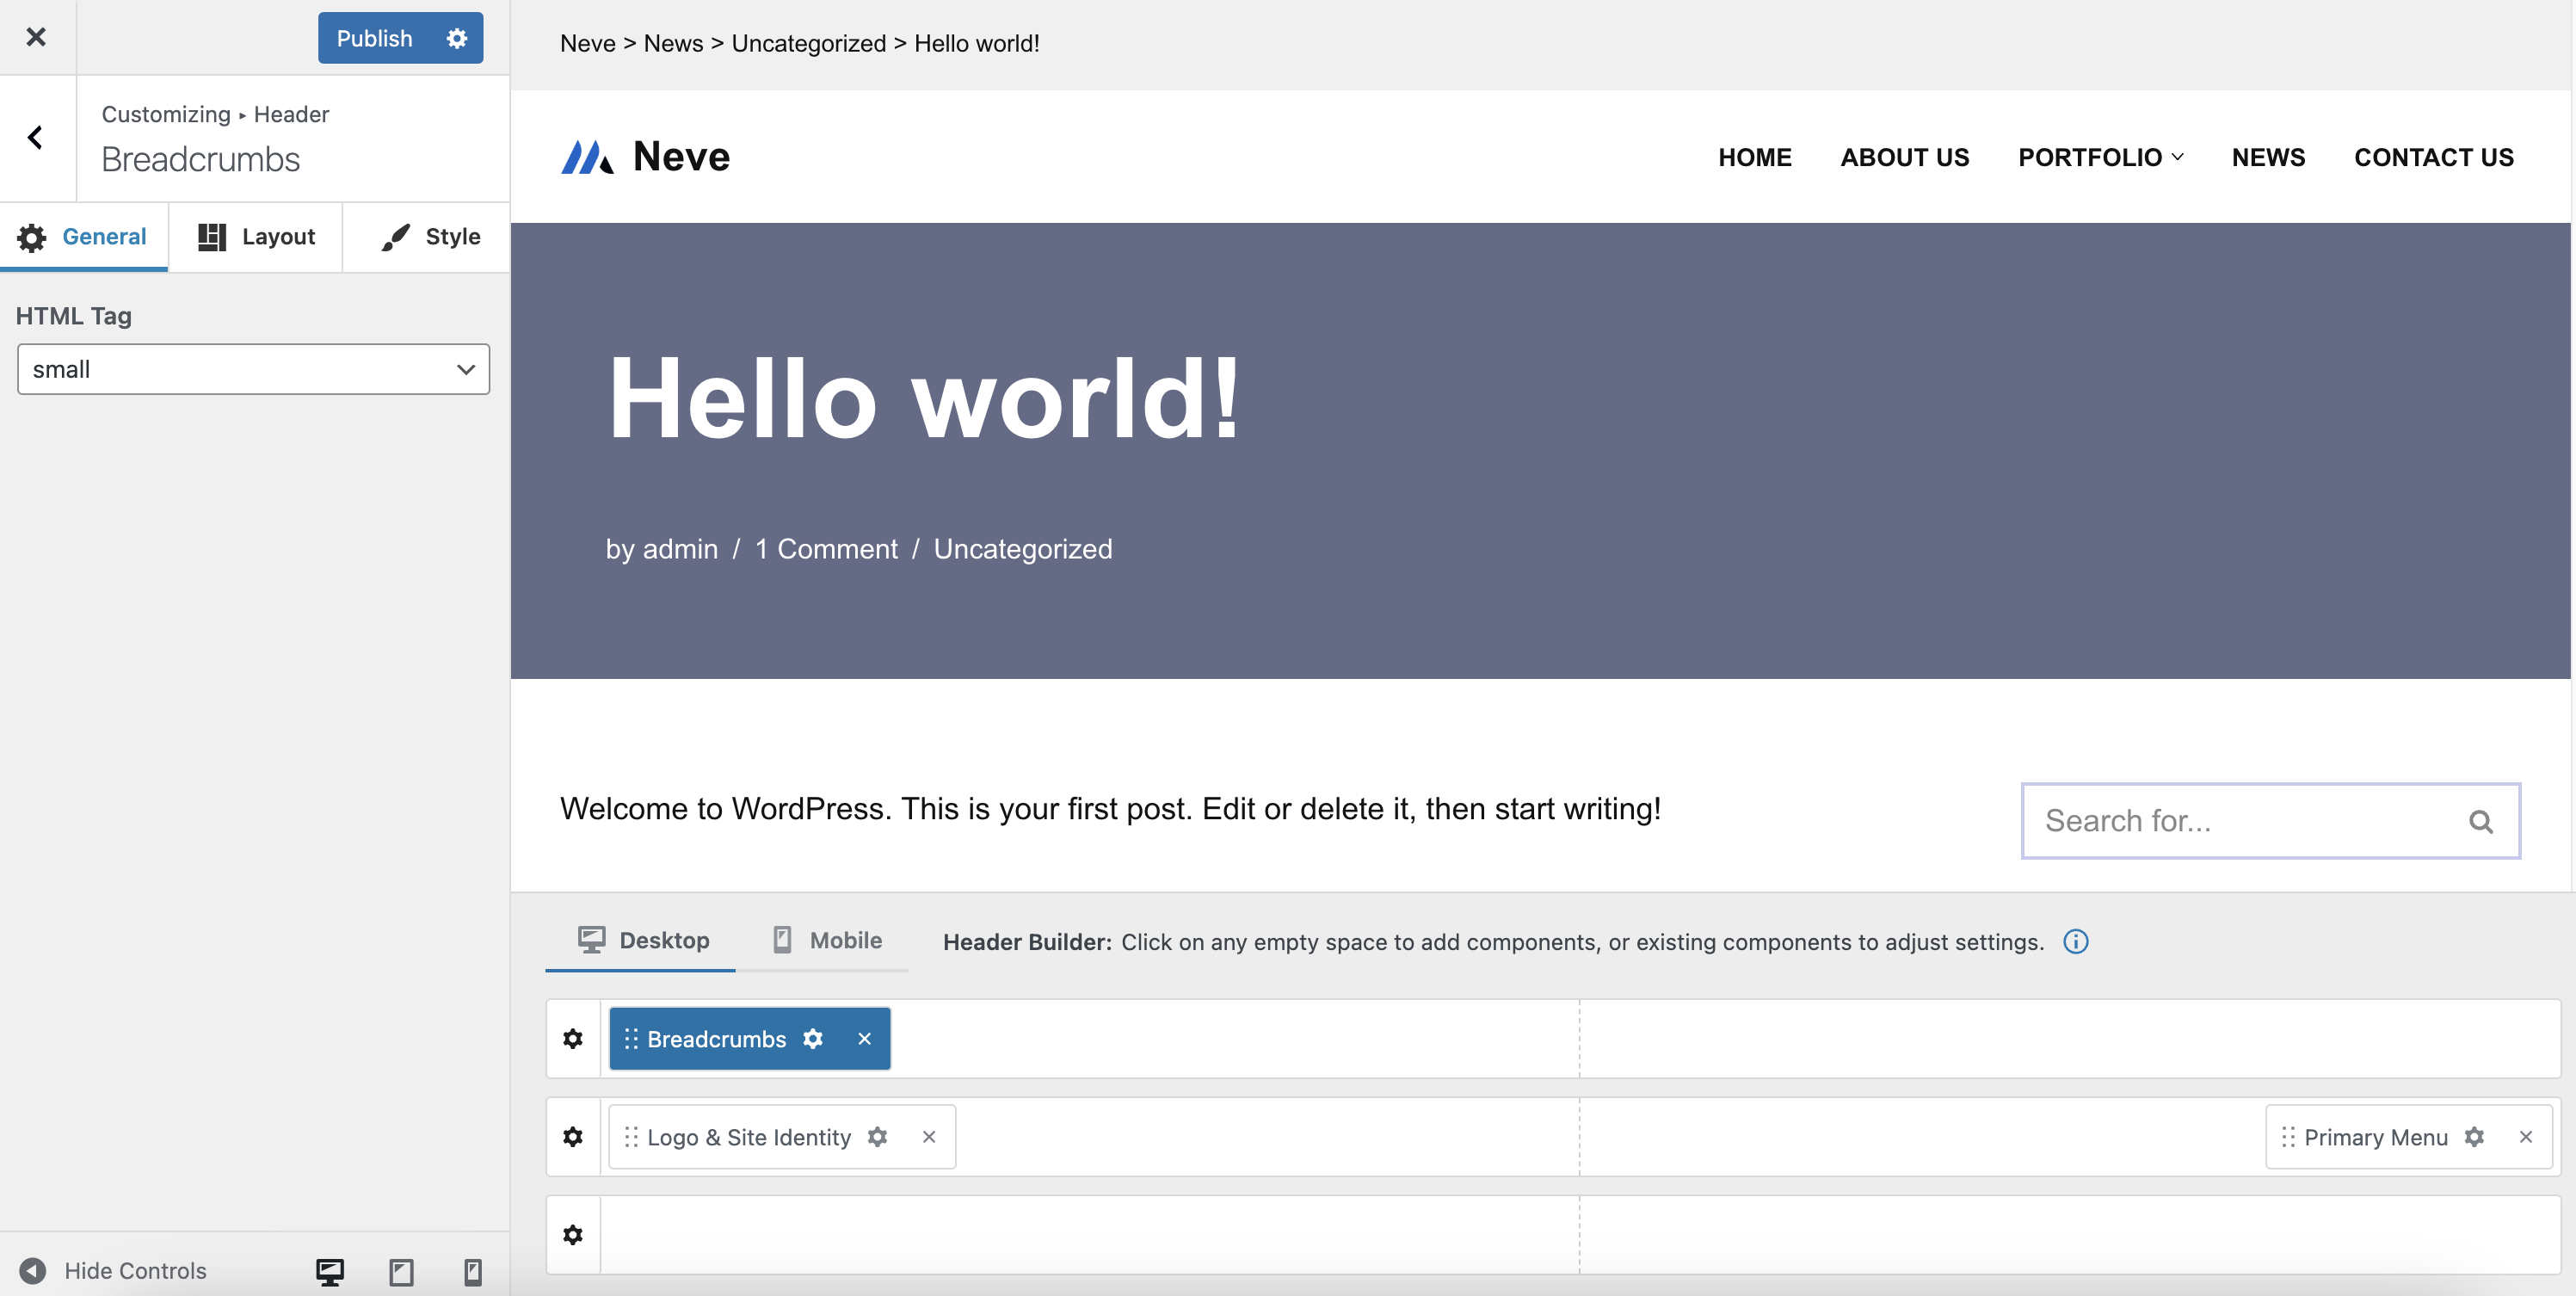
- Breadcrumbs
By default, Neve supports breadcrumbs on the Shop and Product pages.
But Neve also supports the most popular plugins used for breadcrumbs: Yoast SEO, Rank Math SEO, Breadcrumb NavXT, and SEOPress Pro.
After installing and activating any of these plugins, and activate their breadcrumbs functionality, breadcrumbs will be displayed on other pages as well, like the Blog and Single post pages.
While in the free version, there is no control over where the breadcrumbs appear, in Neve Pro, using the Breadcrumbs component for the header builder, breadcrumbs can be placed anywhere in the header area.
- Custom Layout (3 instances) - show a Custom Layout in the Header area.
Note: Only Custom Layouts of type Individual can be used in this case.
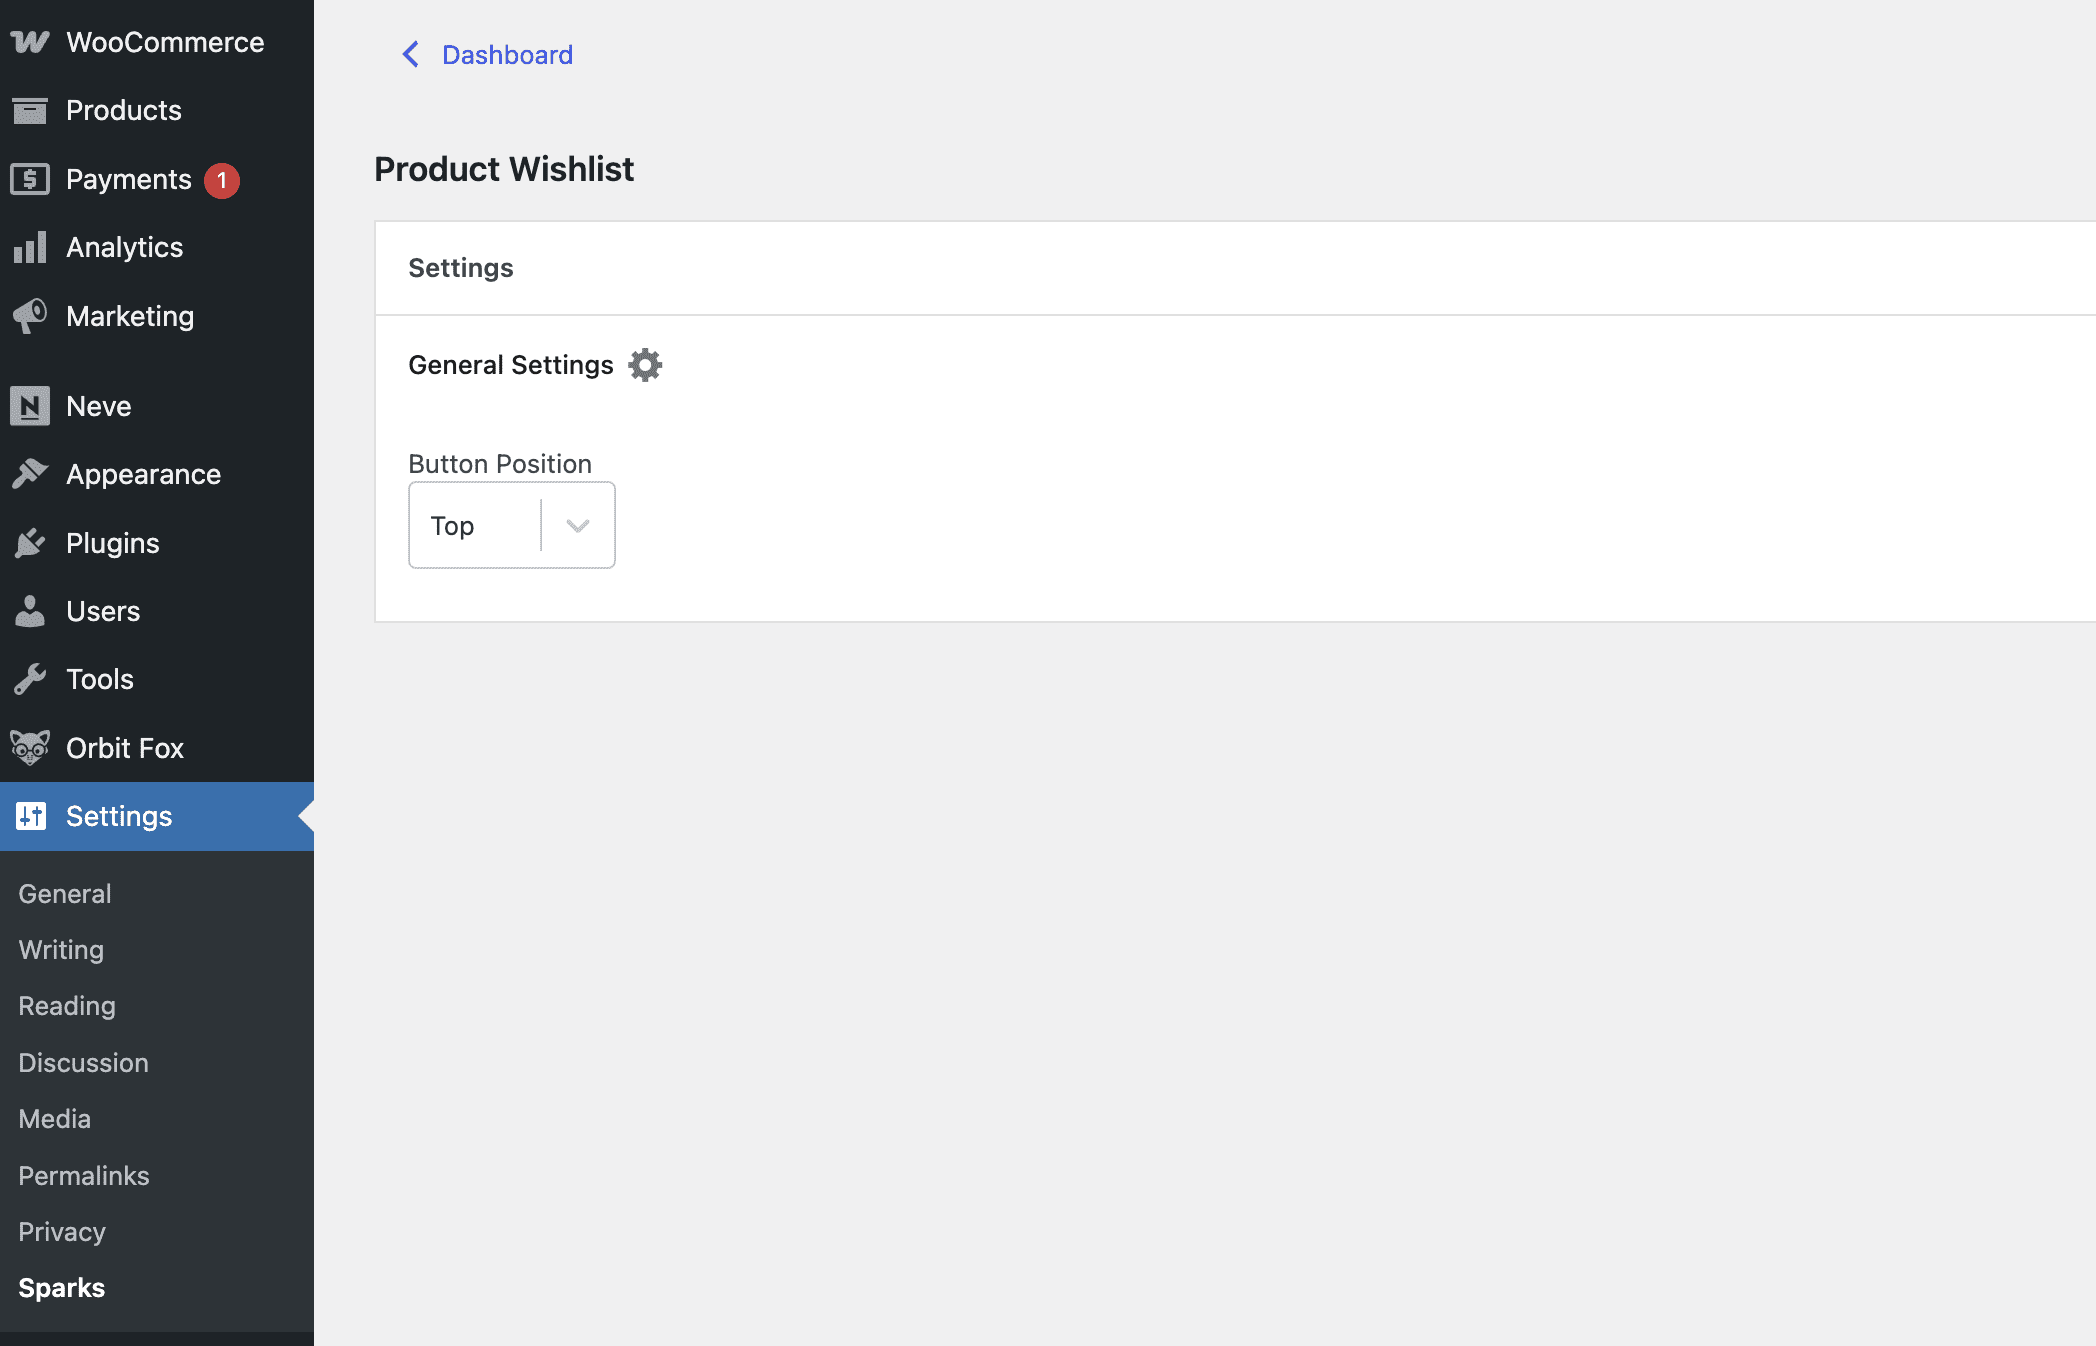
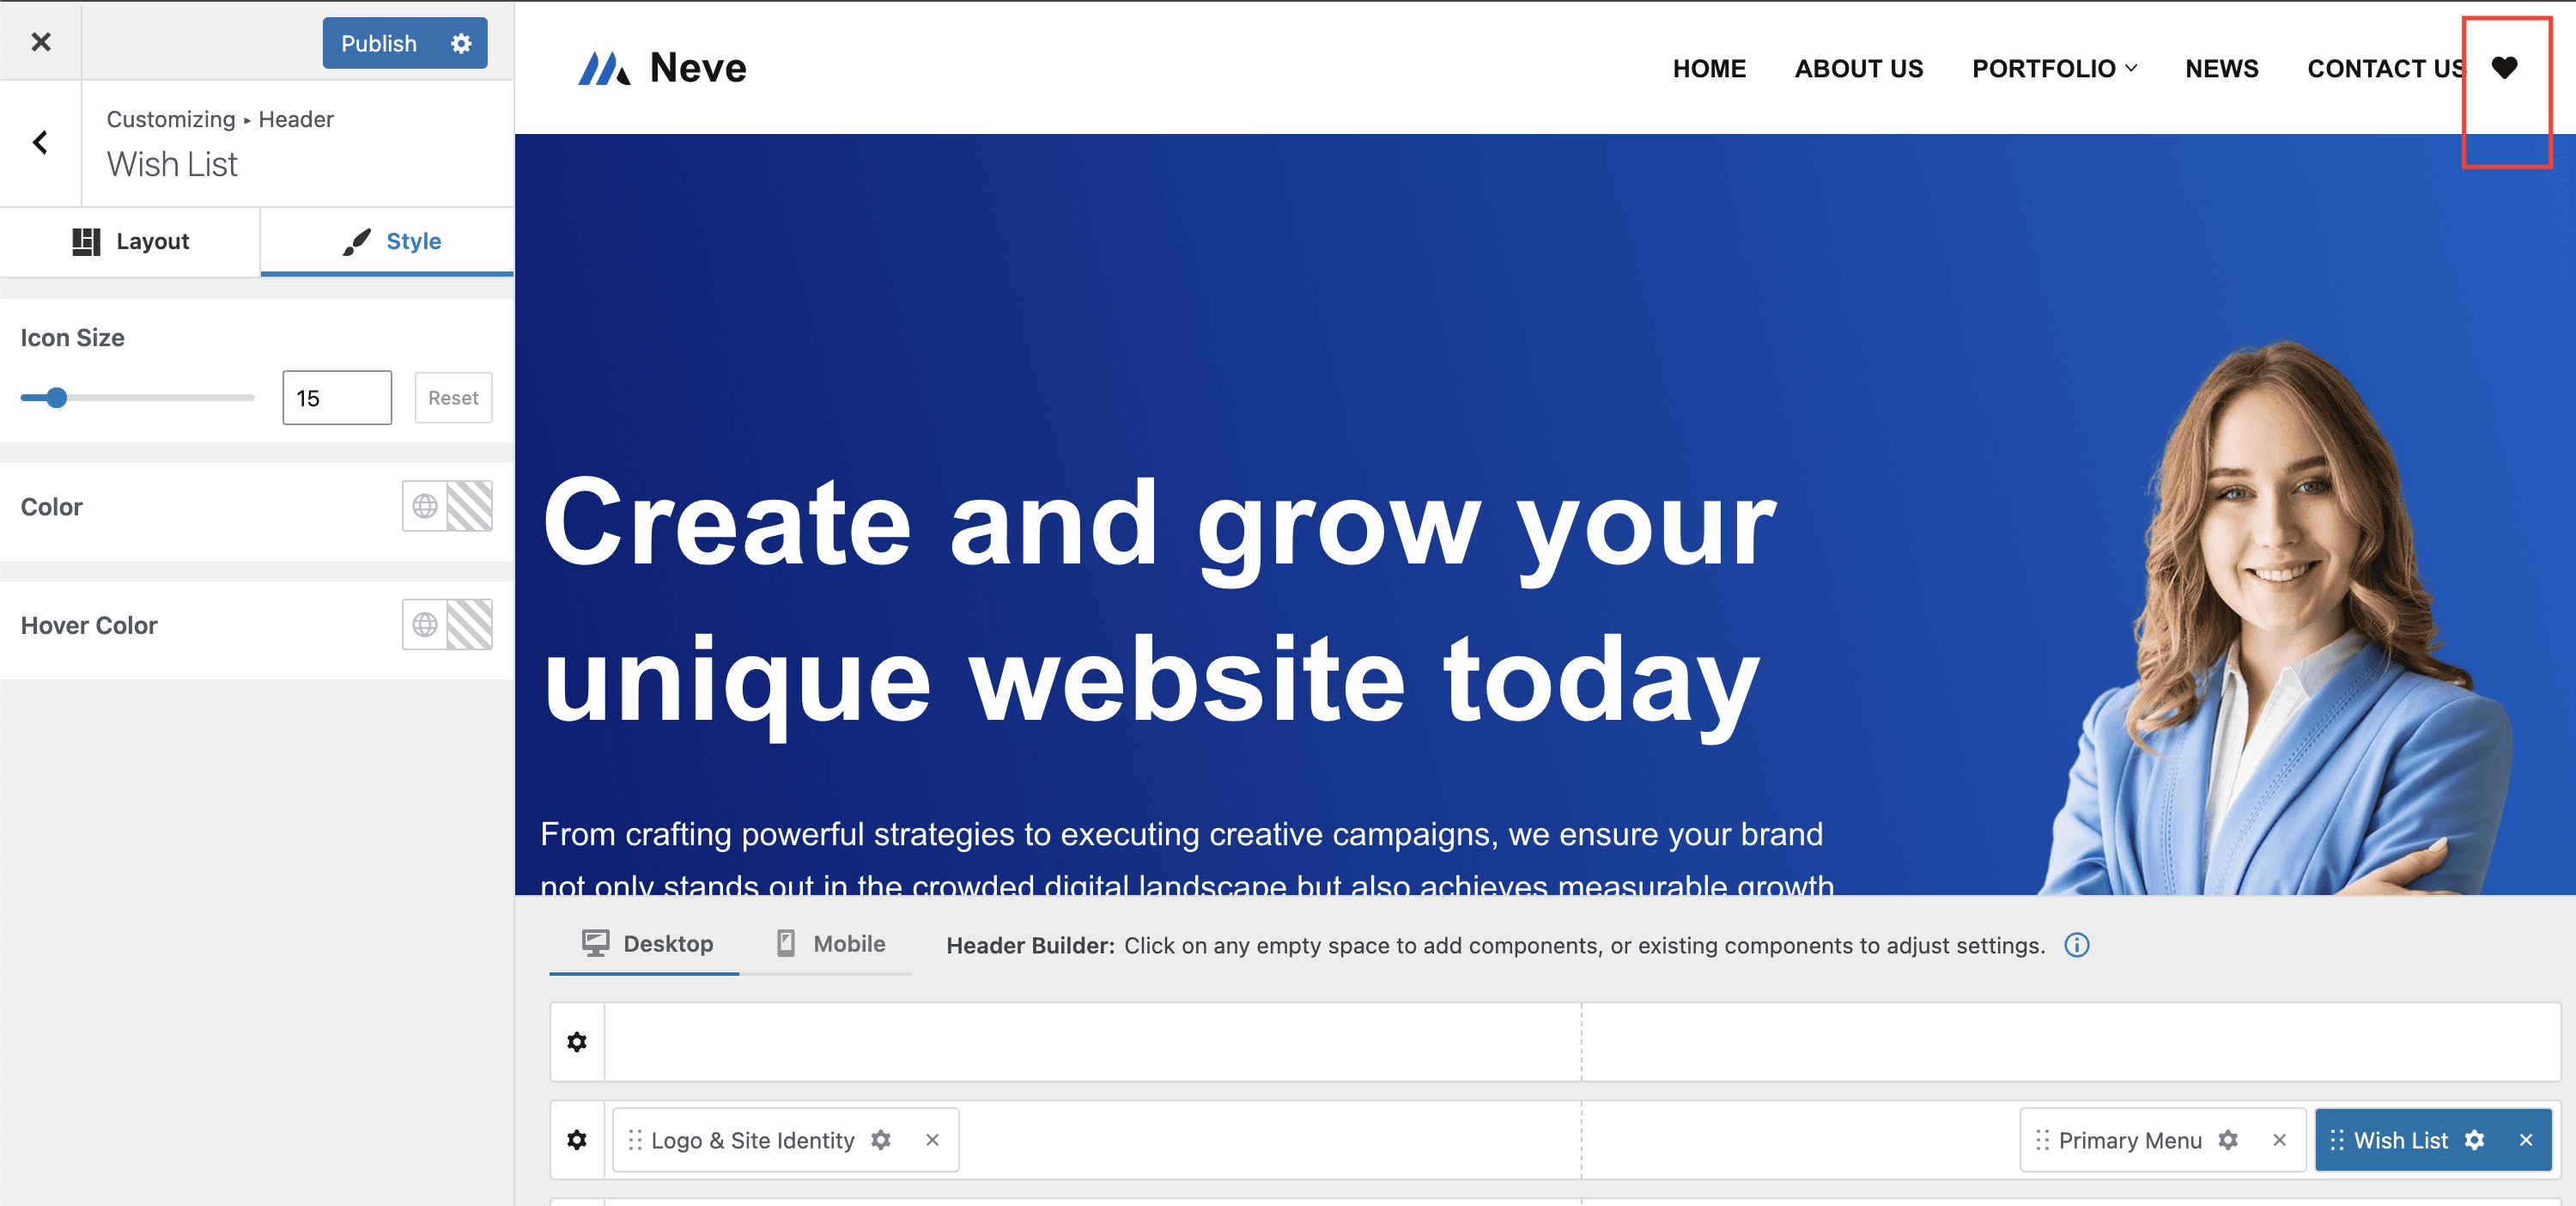
- Wish List
Note: The Wish List component is visible only if the WooCommerce plugin and Sparks (from the WooCommerce Booster module) are installed and activated.
The component is available only if the Product Wishlist module is enabled in Settings > Sparks > Product Wishlist and the Button Position option is set to Top or Bottom.
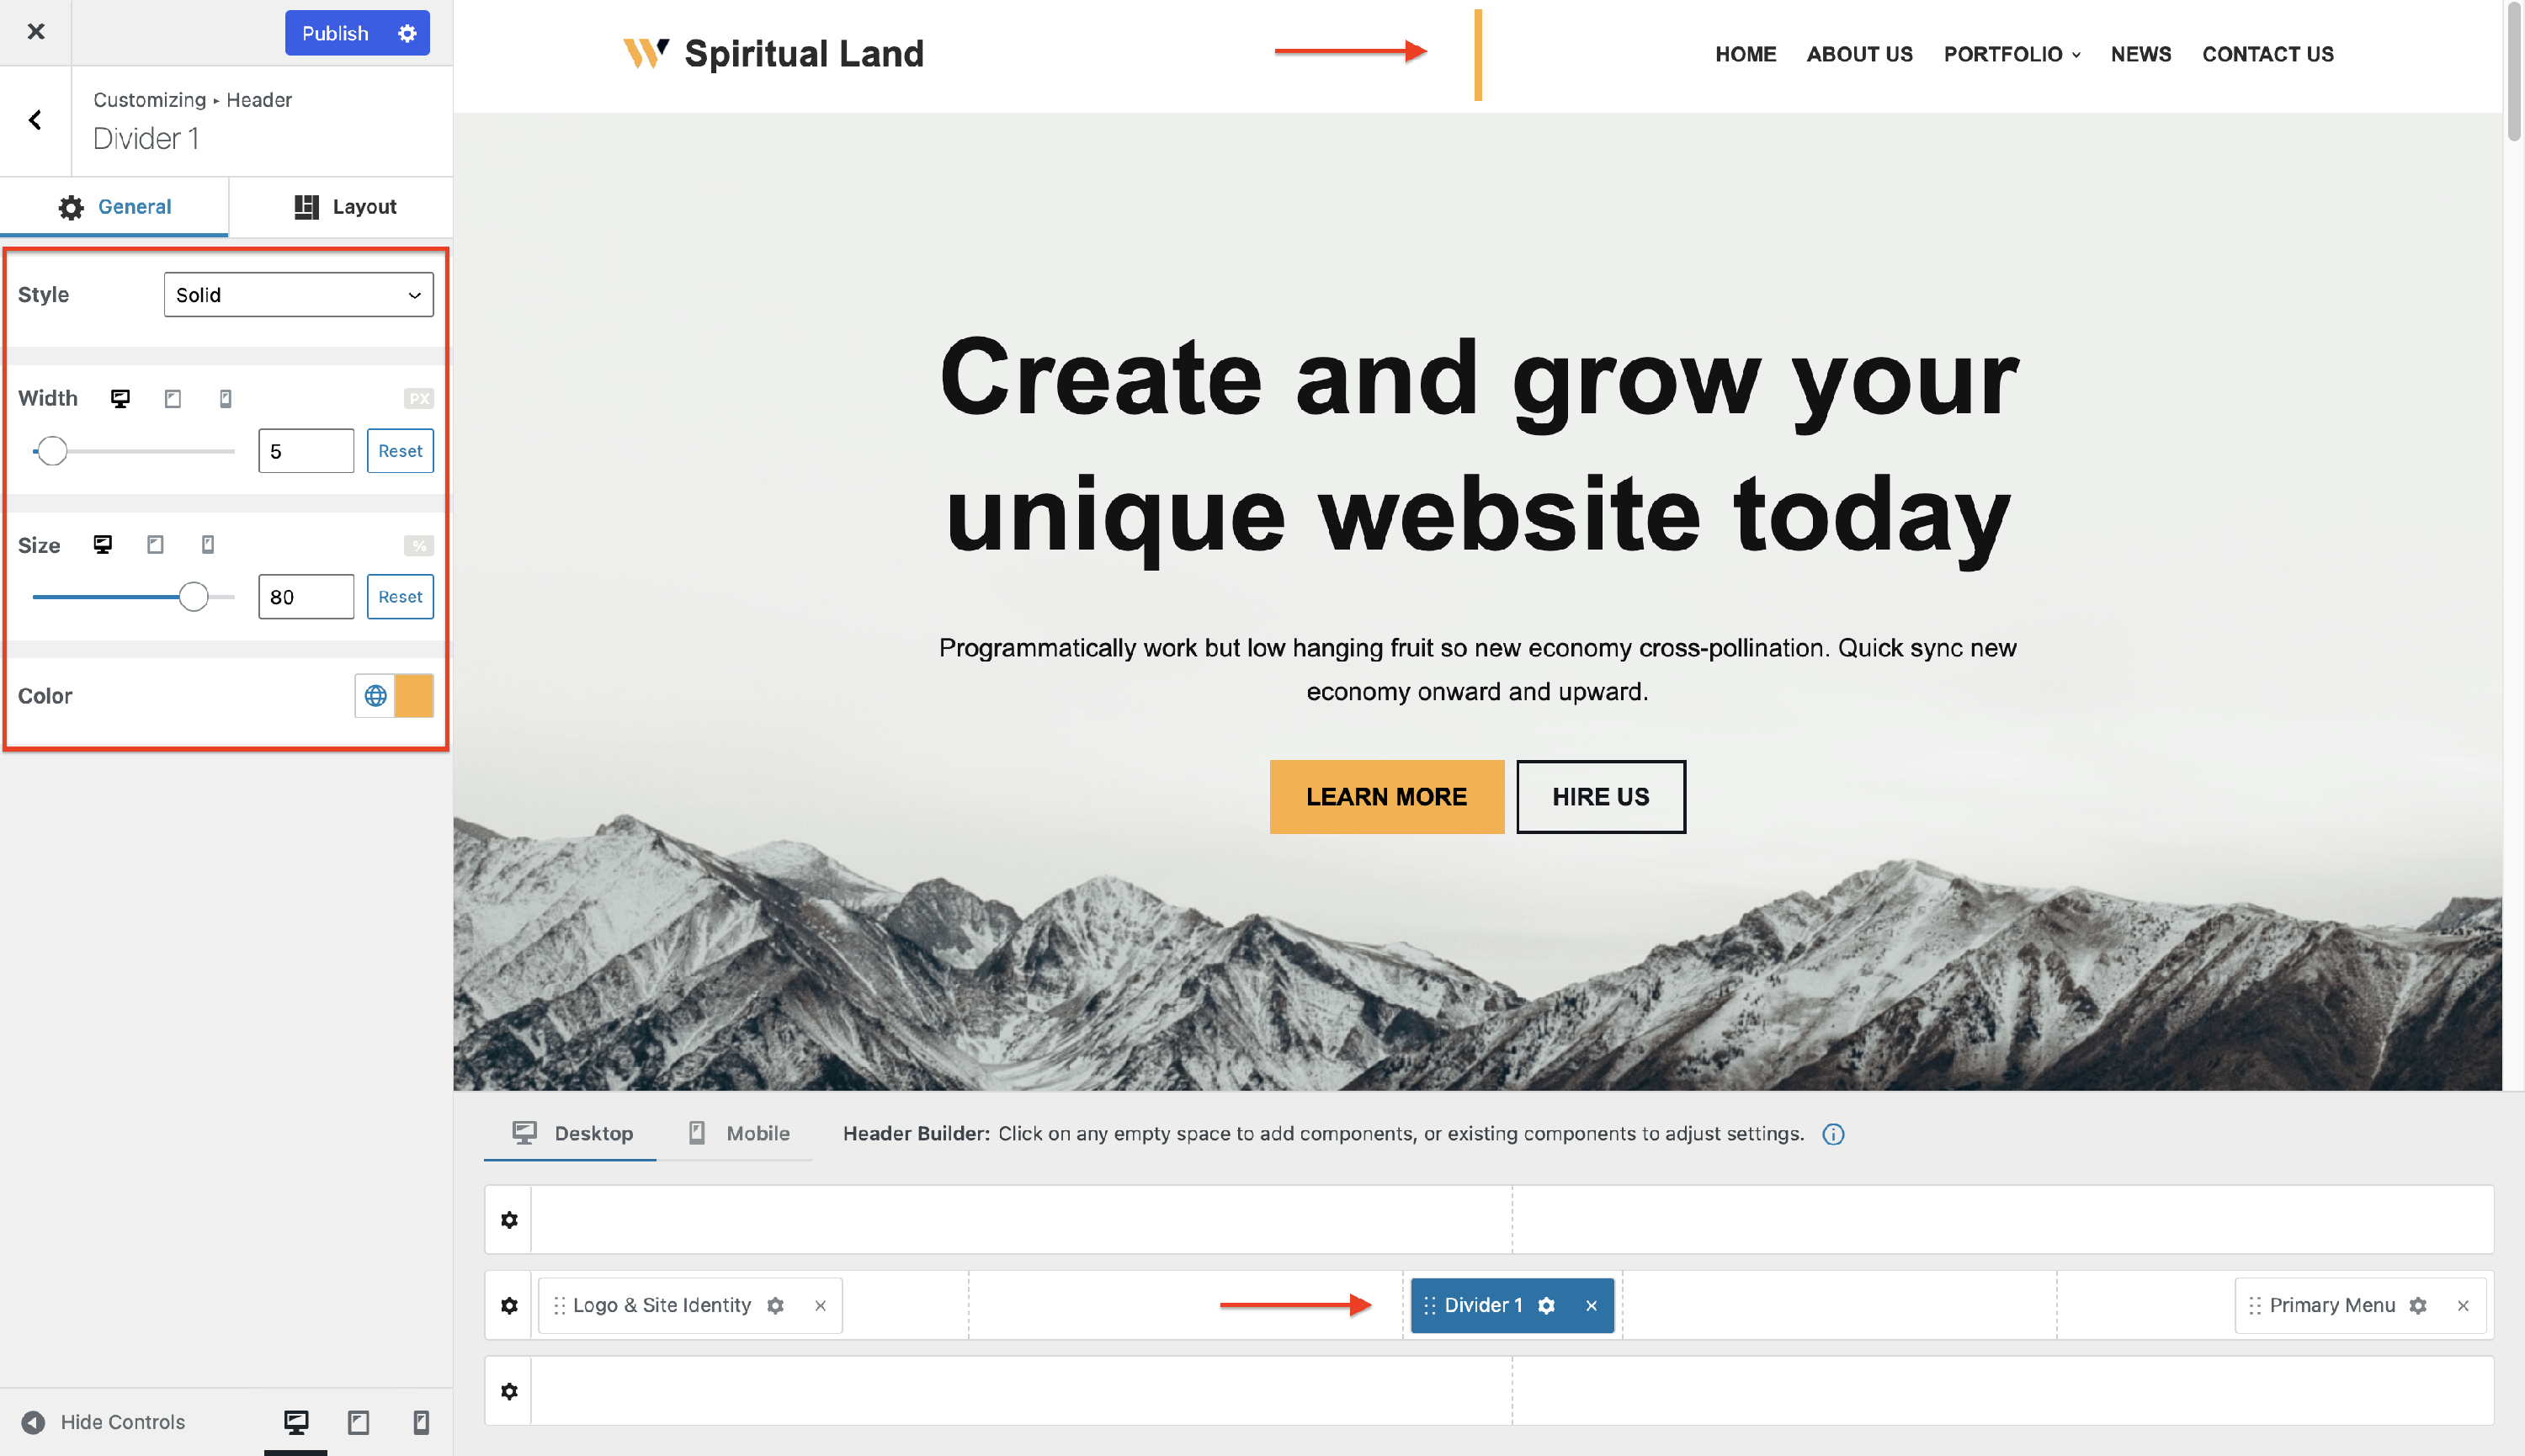
- Divider (2 instances) - add a divider between the components from the header, for a better delimitation.
- 2 extra instances for the Button component
- 2 extra instances for the HTML component
- 1 extra instance for the Logo & Site Identity component
- 1 extra instance for the Search Form Component
- 1 extra instance for the Menu Icon Component
- 2 extra instances for the Primary Menu Component
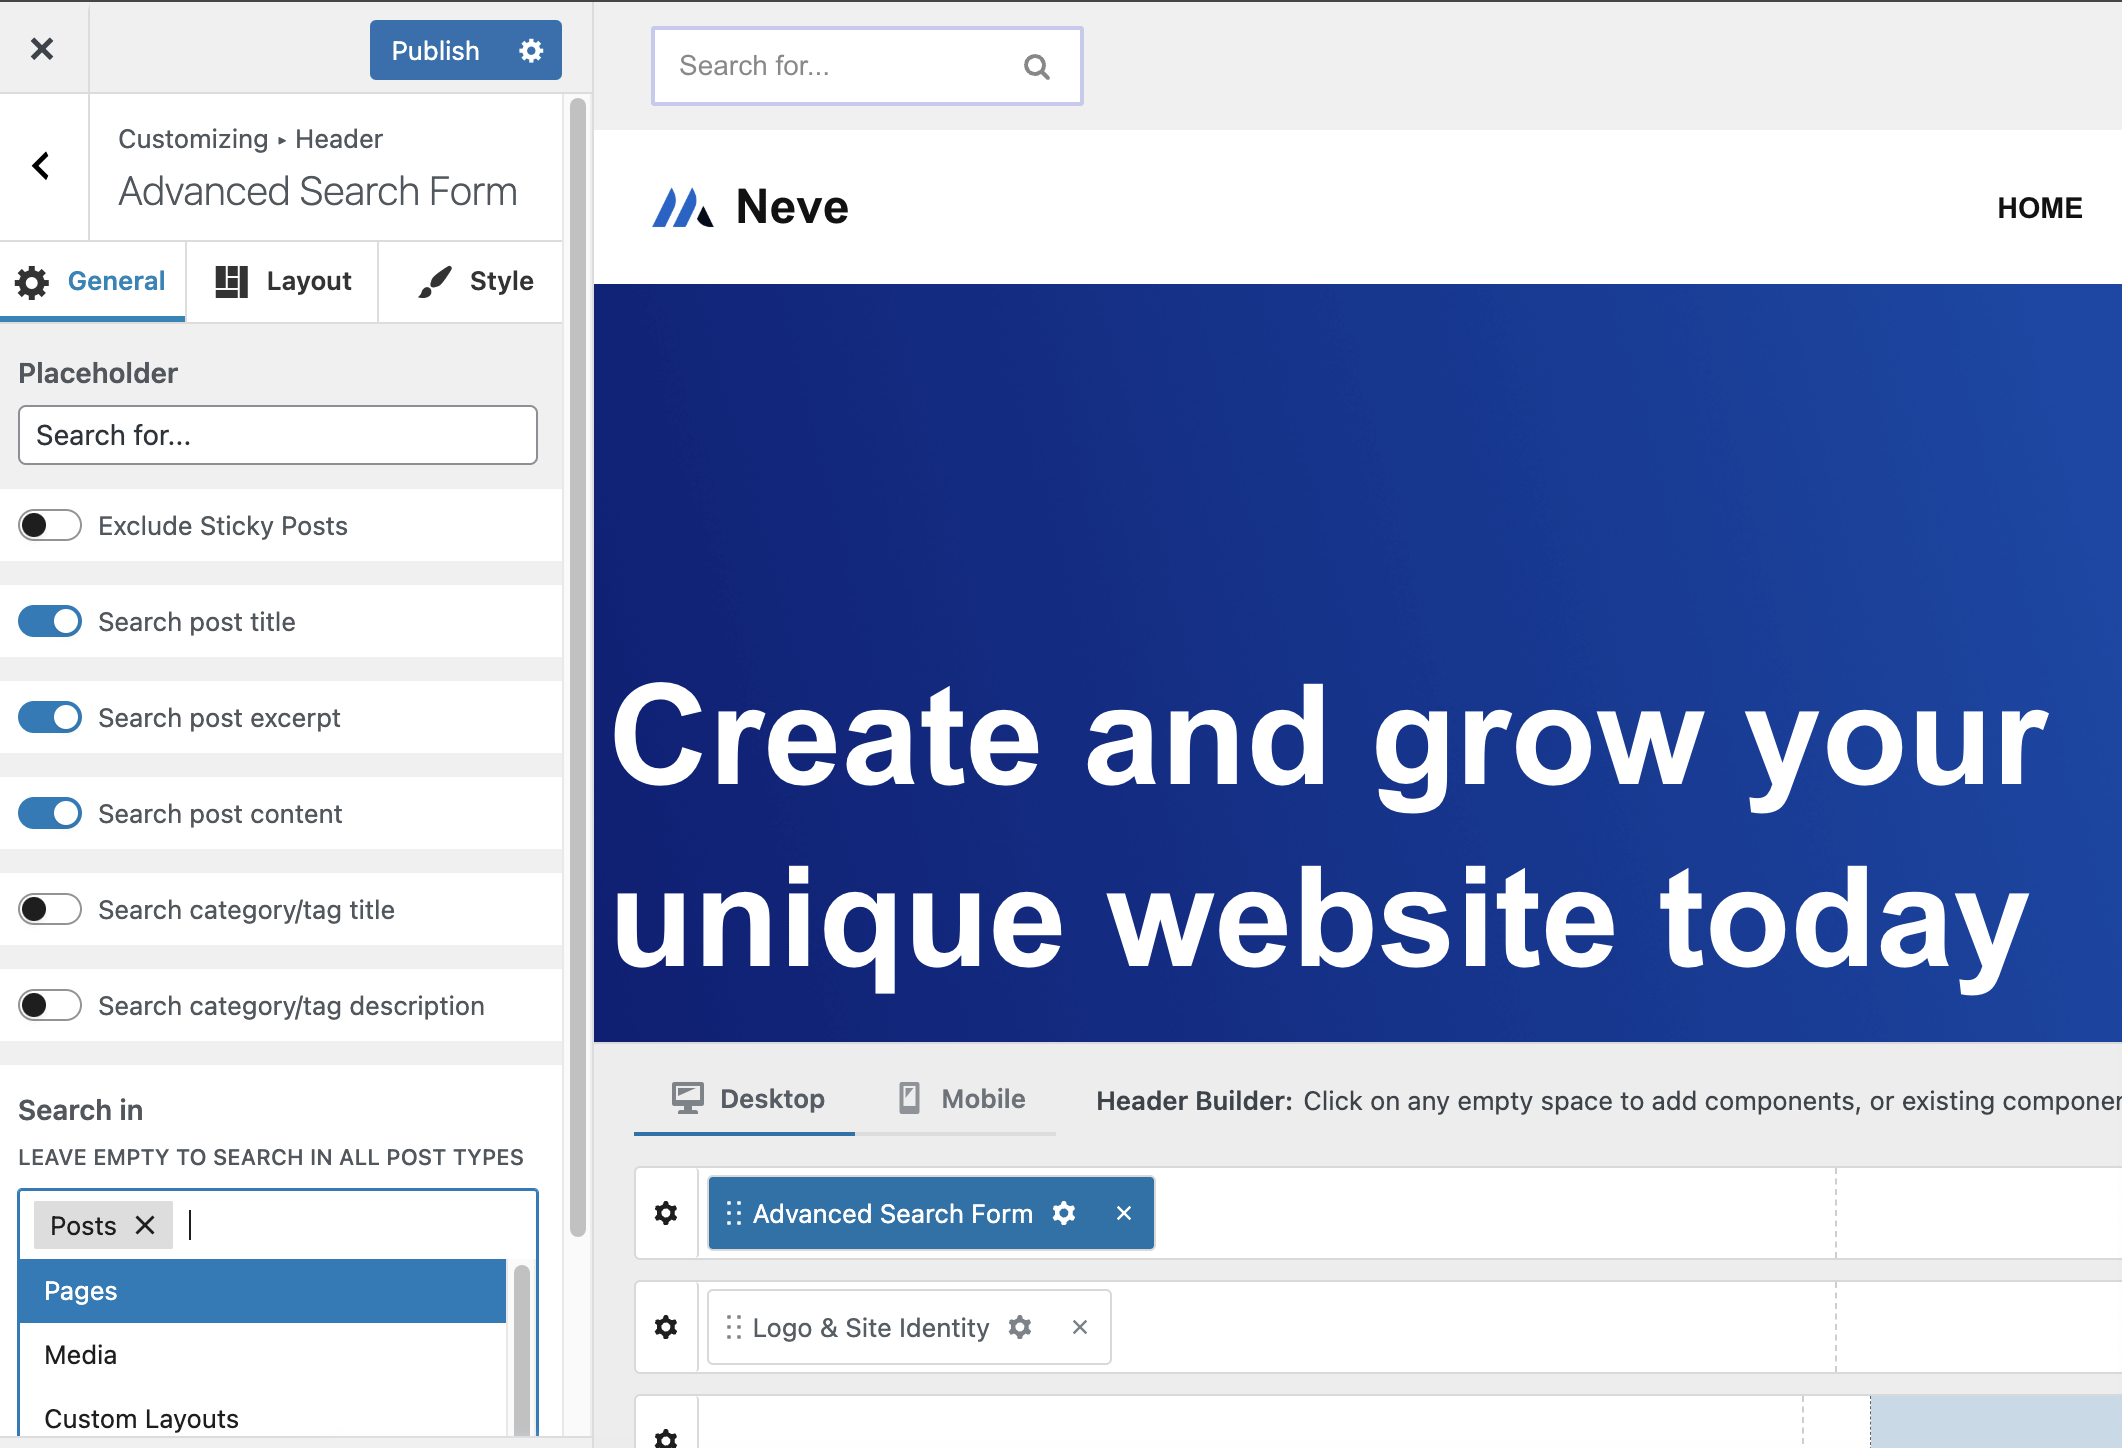
- Advanced Search Form (2 instances) - enhances the basic search form with specific options for post types in which the search is performed.
- Advanced Search Icon (2 instances) - same as the Advanced Search Form, allows for more options for the Search Icon component.
- Widget Area (3 instances) - used to add widgets.
- Language Switcher - the component is visible in the list of components only if a translation plugin is installed and activated (Polylang, Translate Press, WPML, or Weglot Translate).

Extra footer components
Neve PRO brings in new components for the footer builder:
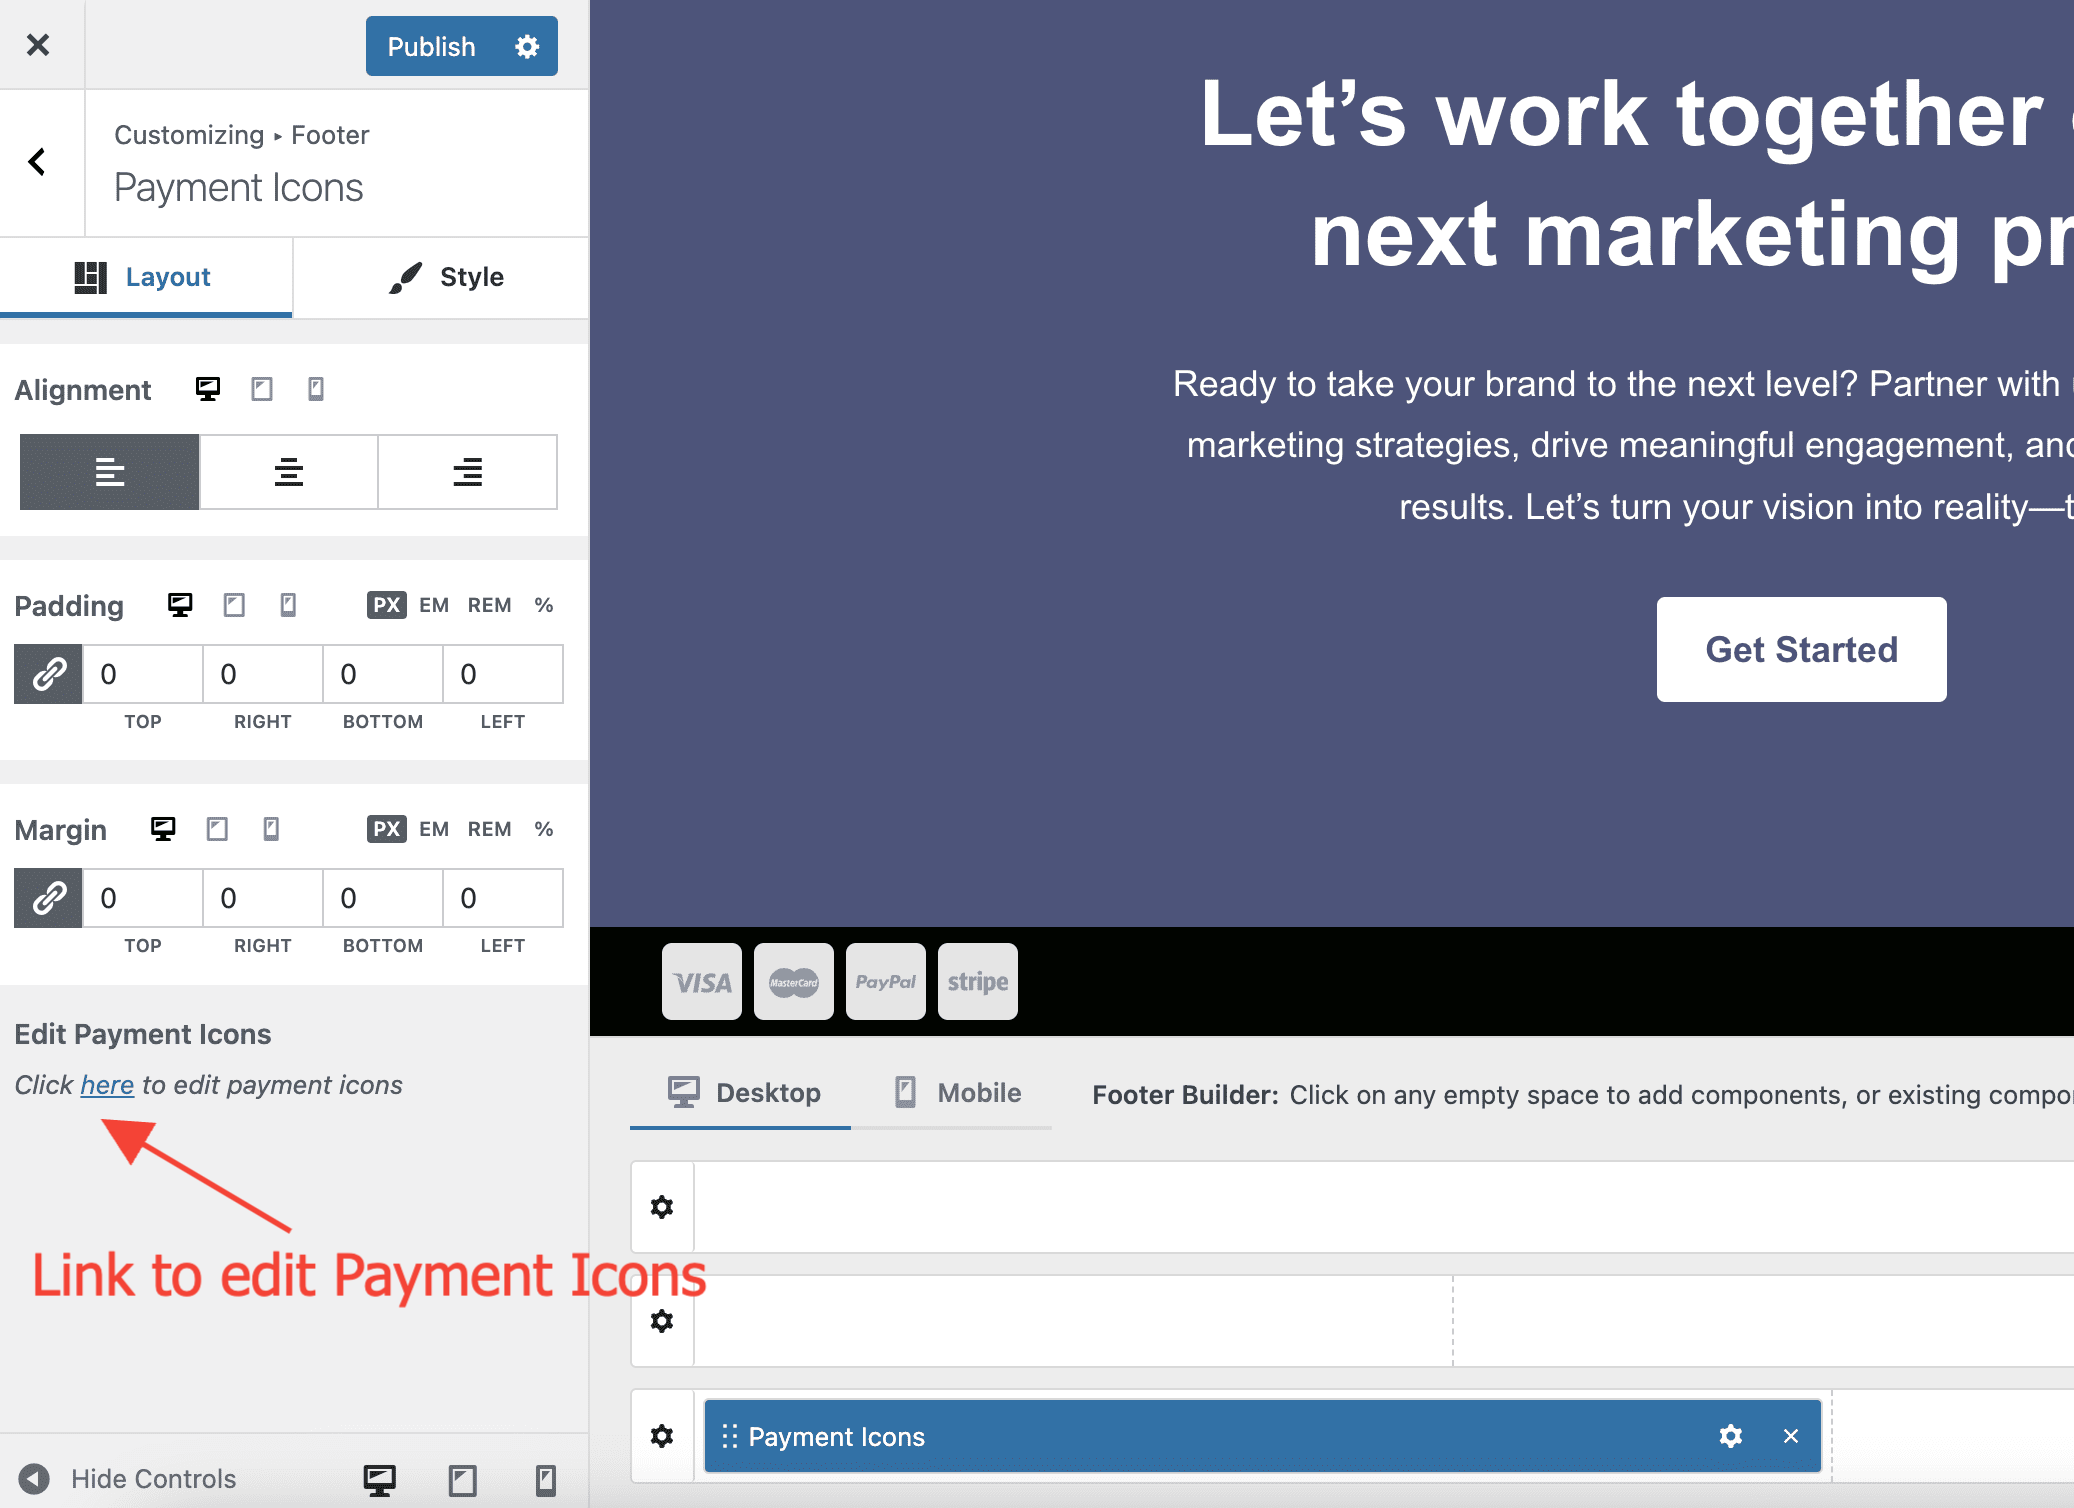
- Payment Icons
Note: This component is available only if the WooCommerce Booster is enabled.
- Contact - allows for an unlimited number of items, where you can add your contact details ( email, phone, address etc )
- Social Icons - add unlimited social icons by either selecting an icon from the predefined list, or adding your own custom image.
- Custom Layout (3 instances) - show a Custom Layout in the Footer area.
Note: Only Custom Layouts of type Individual can be used in this case.
- Widget Area (3 instances) - used to add widgets.
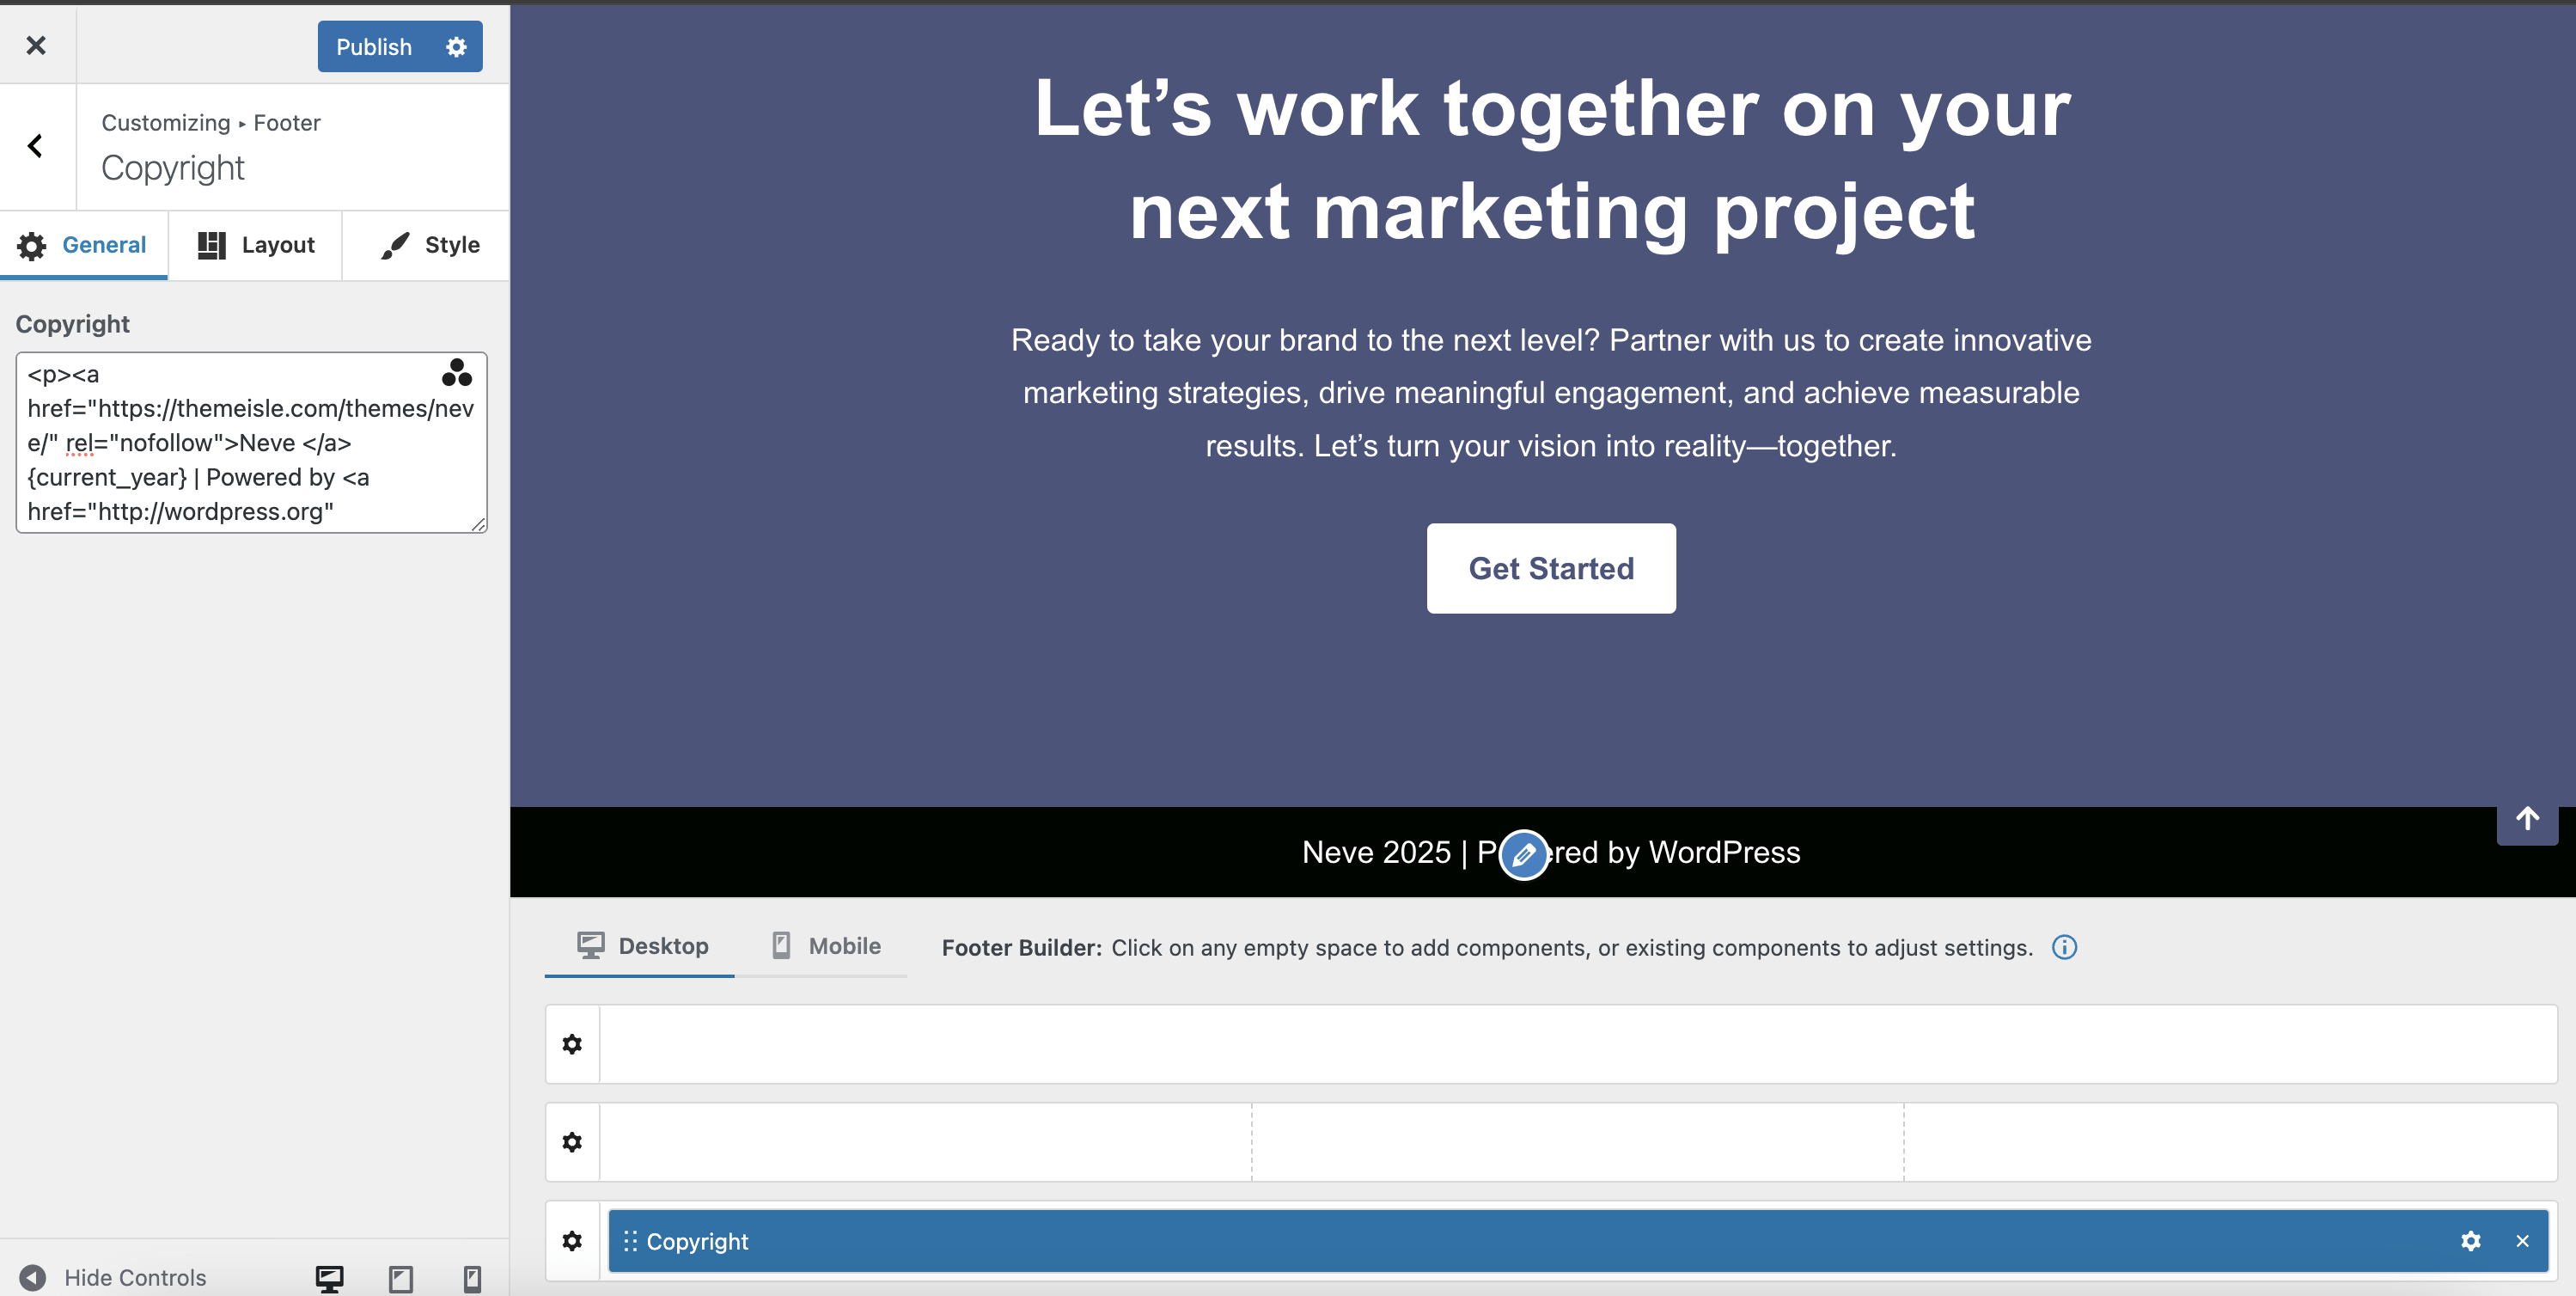
- Copyright
Sticky header
A sticky header will always stay on top of the screen, no matter if you scroll down the page.
How to enable it?
Navigate to Appearance > Customize > Header, choose any of the three rows ( Top, Main or Bottom ), and click on the little wheel that is in front of it. Enable the Stick to top option to make the header sticky.
If you want it to stick to the top of the page, just after you started scrolling, enable the Show only on scroll option.
Each of the header builder's three rows can be set up as Sticky and/or Show only on scroll, while the Transparent header option applies to the entire header area.
Want to shrink the sticky header on scroll? Follow this doc.
Sticky footer
A sticky footer will always stay at the bottom of the screen, no matter if you scroll up the page.
How to enable it?
Navigate to Appearance > Customize > Footer, choose any of the three rows ( Top, Main or Bottom ), and click on the little wheel that is in front of it. Enable the Stick to bottom option to make the footer sticky.
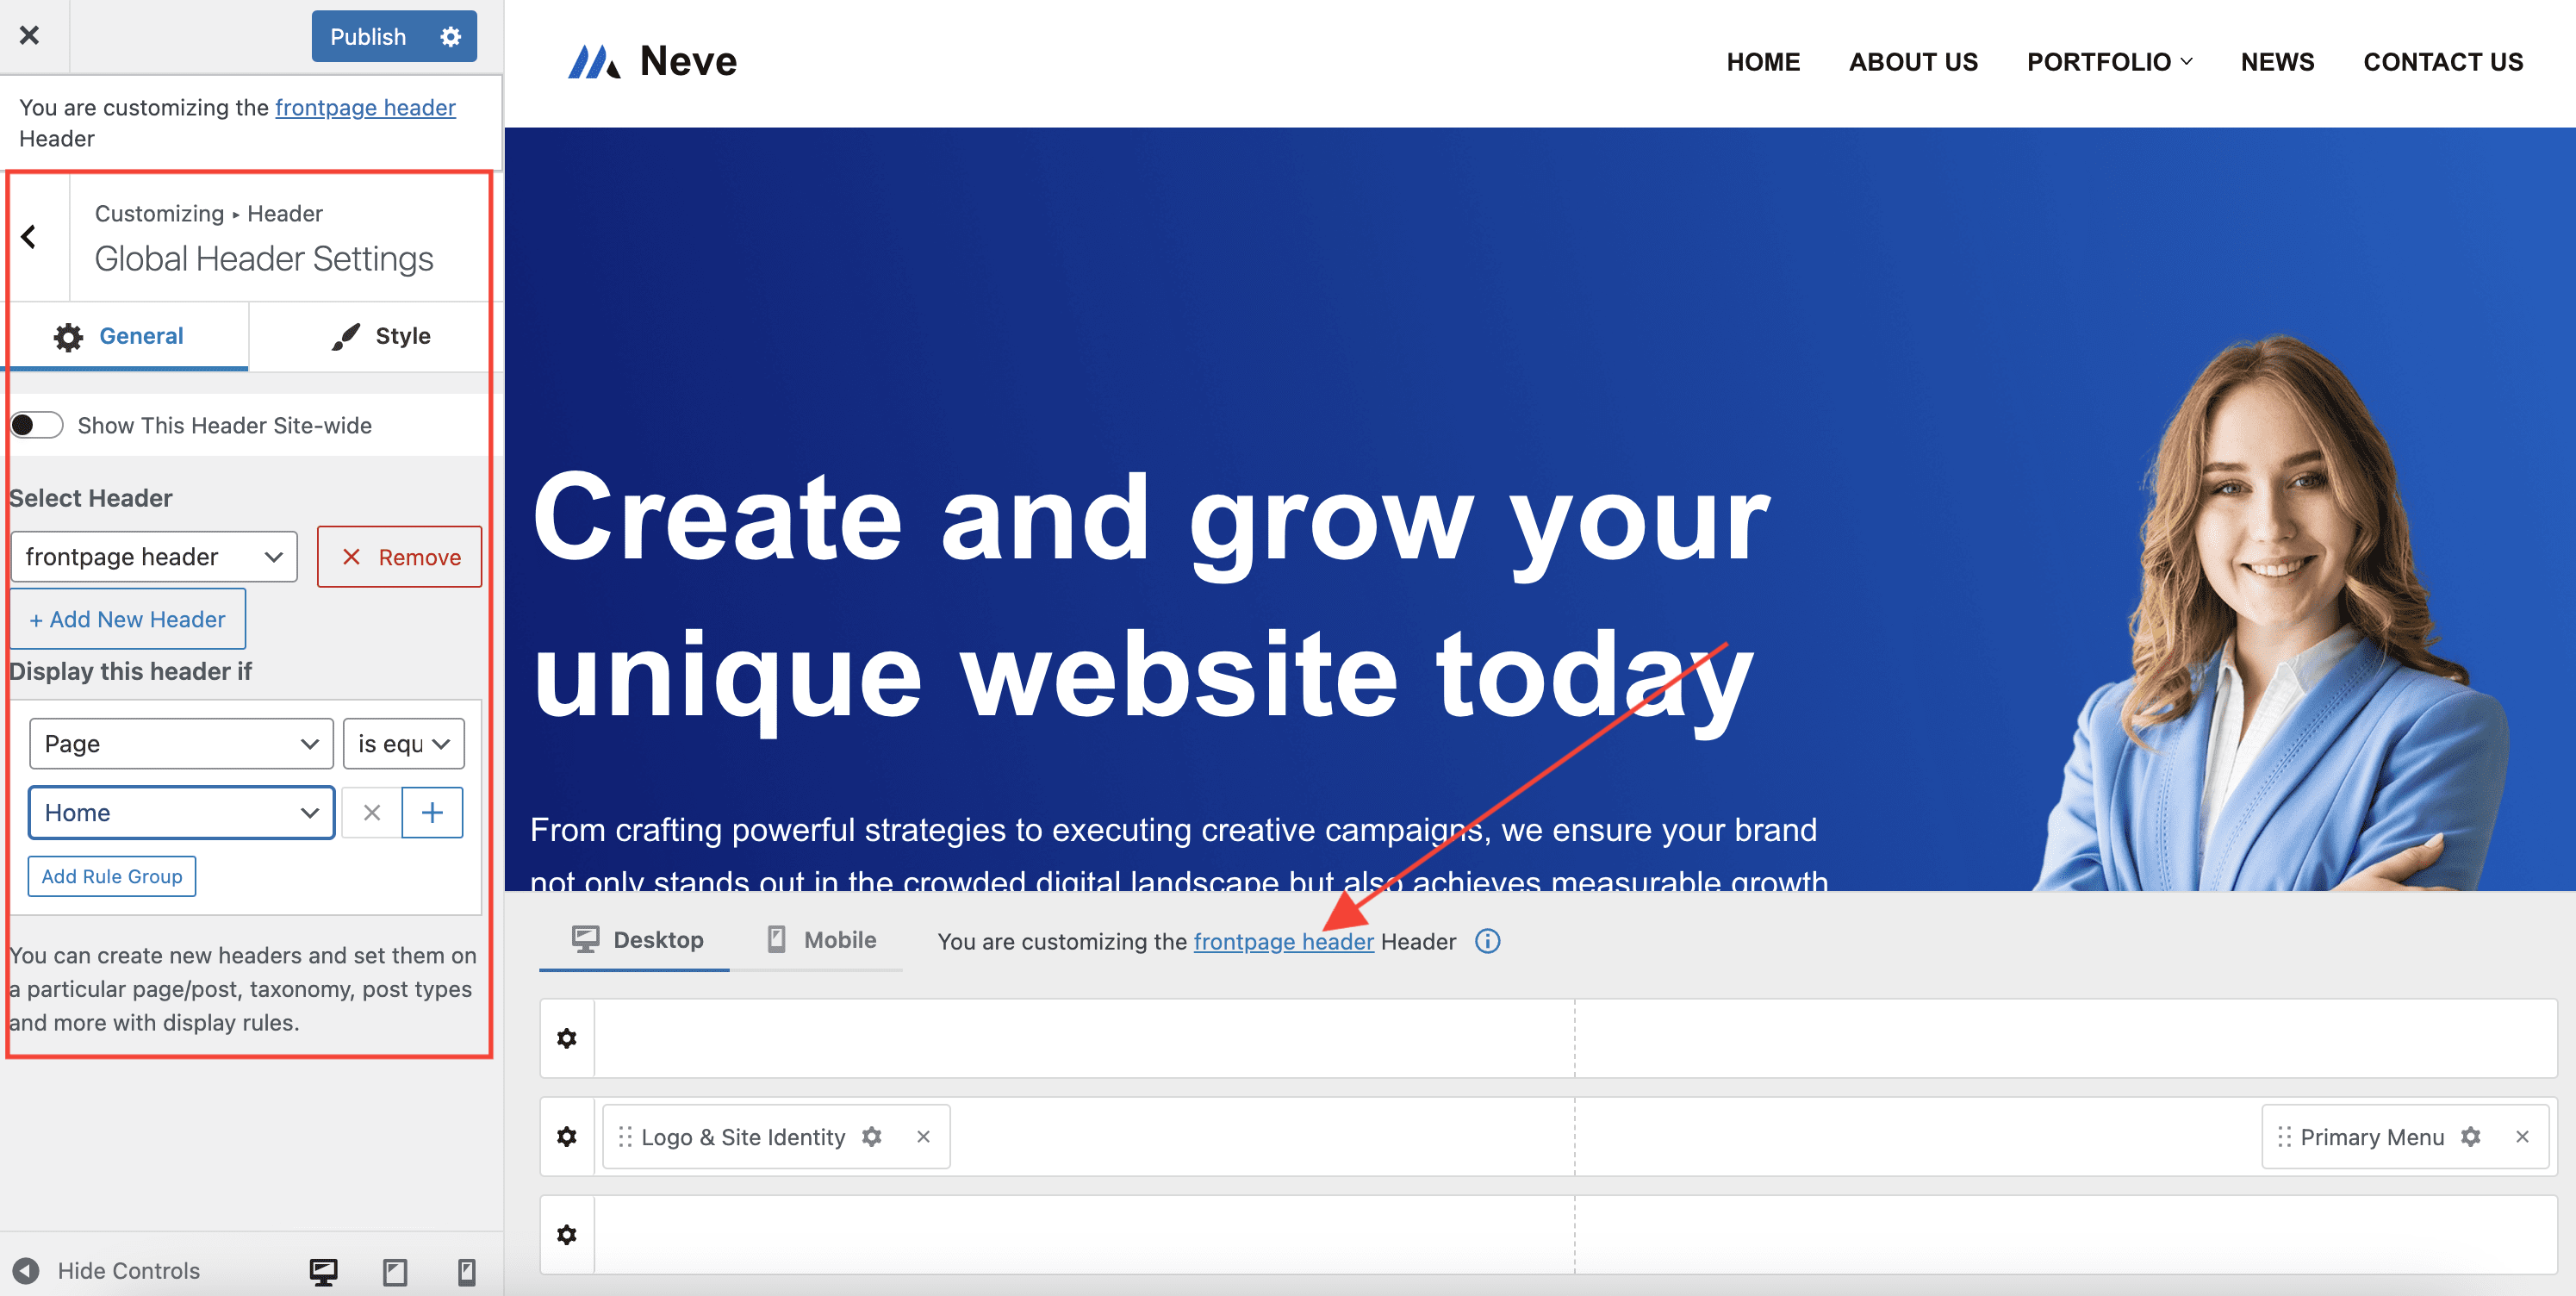
Multiple headers
Neve PRO allows for multiple different headers on multiple pages.
For that, navigate to Appearance > Customize > Header > Global Header Settings and disable the Show This Header Site-wide option.
At this point, click on the Add New Header button, name the header, and start adding components in the header builder to create the header of your choice. Add some logical conditions for the page/s where the newly added header should display and publish the changes.
Add as many headers as needed.
In the example below, the header called "frontpage header" will display on the Home page, while the "Default" header will display on all other pages.
Custom copyright in the footer
Navigate to Appearance > Customize > Footer to open the footer builder and have access to the new Copyright component, which can be used to add your own copyright. Click on the three dots triangle icon, to access Dynamic Tags which draw content from the website, or from the current page/post, changing dynamically according to the Page or Post it’s on.
Page header
Apart from the header builder, Neve PRO allows for the customization of the Page Header area as well ( the area below the header, where usually the page title is displayed ). The page header builder consists of two rows, and can be used in the same matter as the header and footer builders.
Navigate to Appearance > Customize > Page Header to access the Page Header builder.

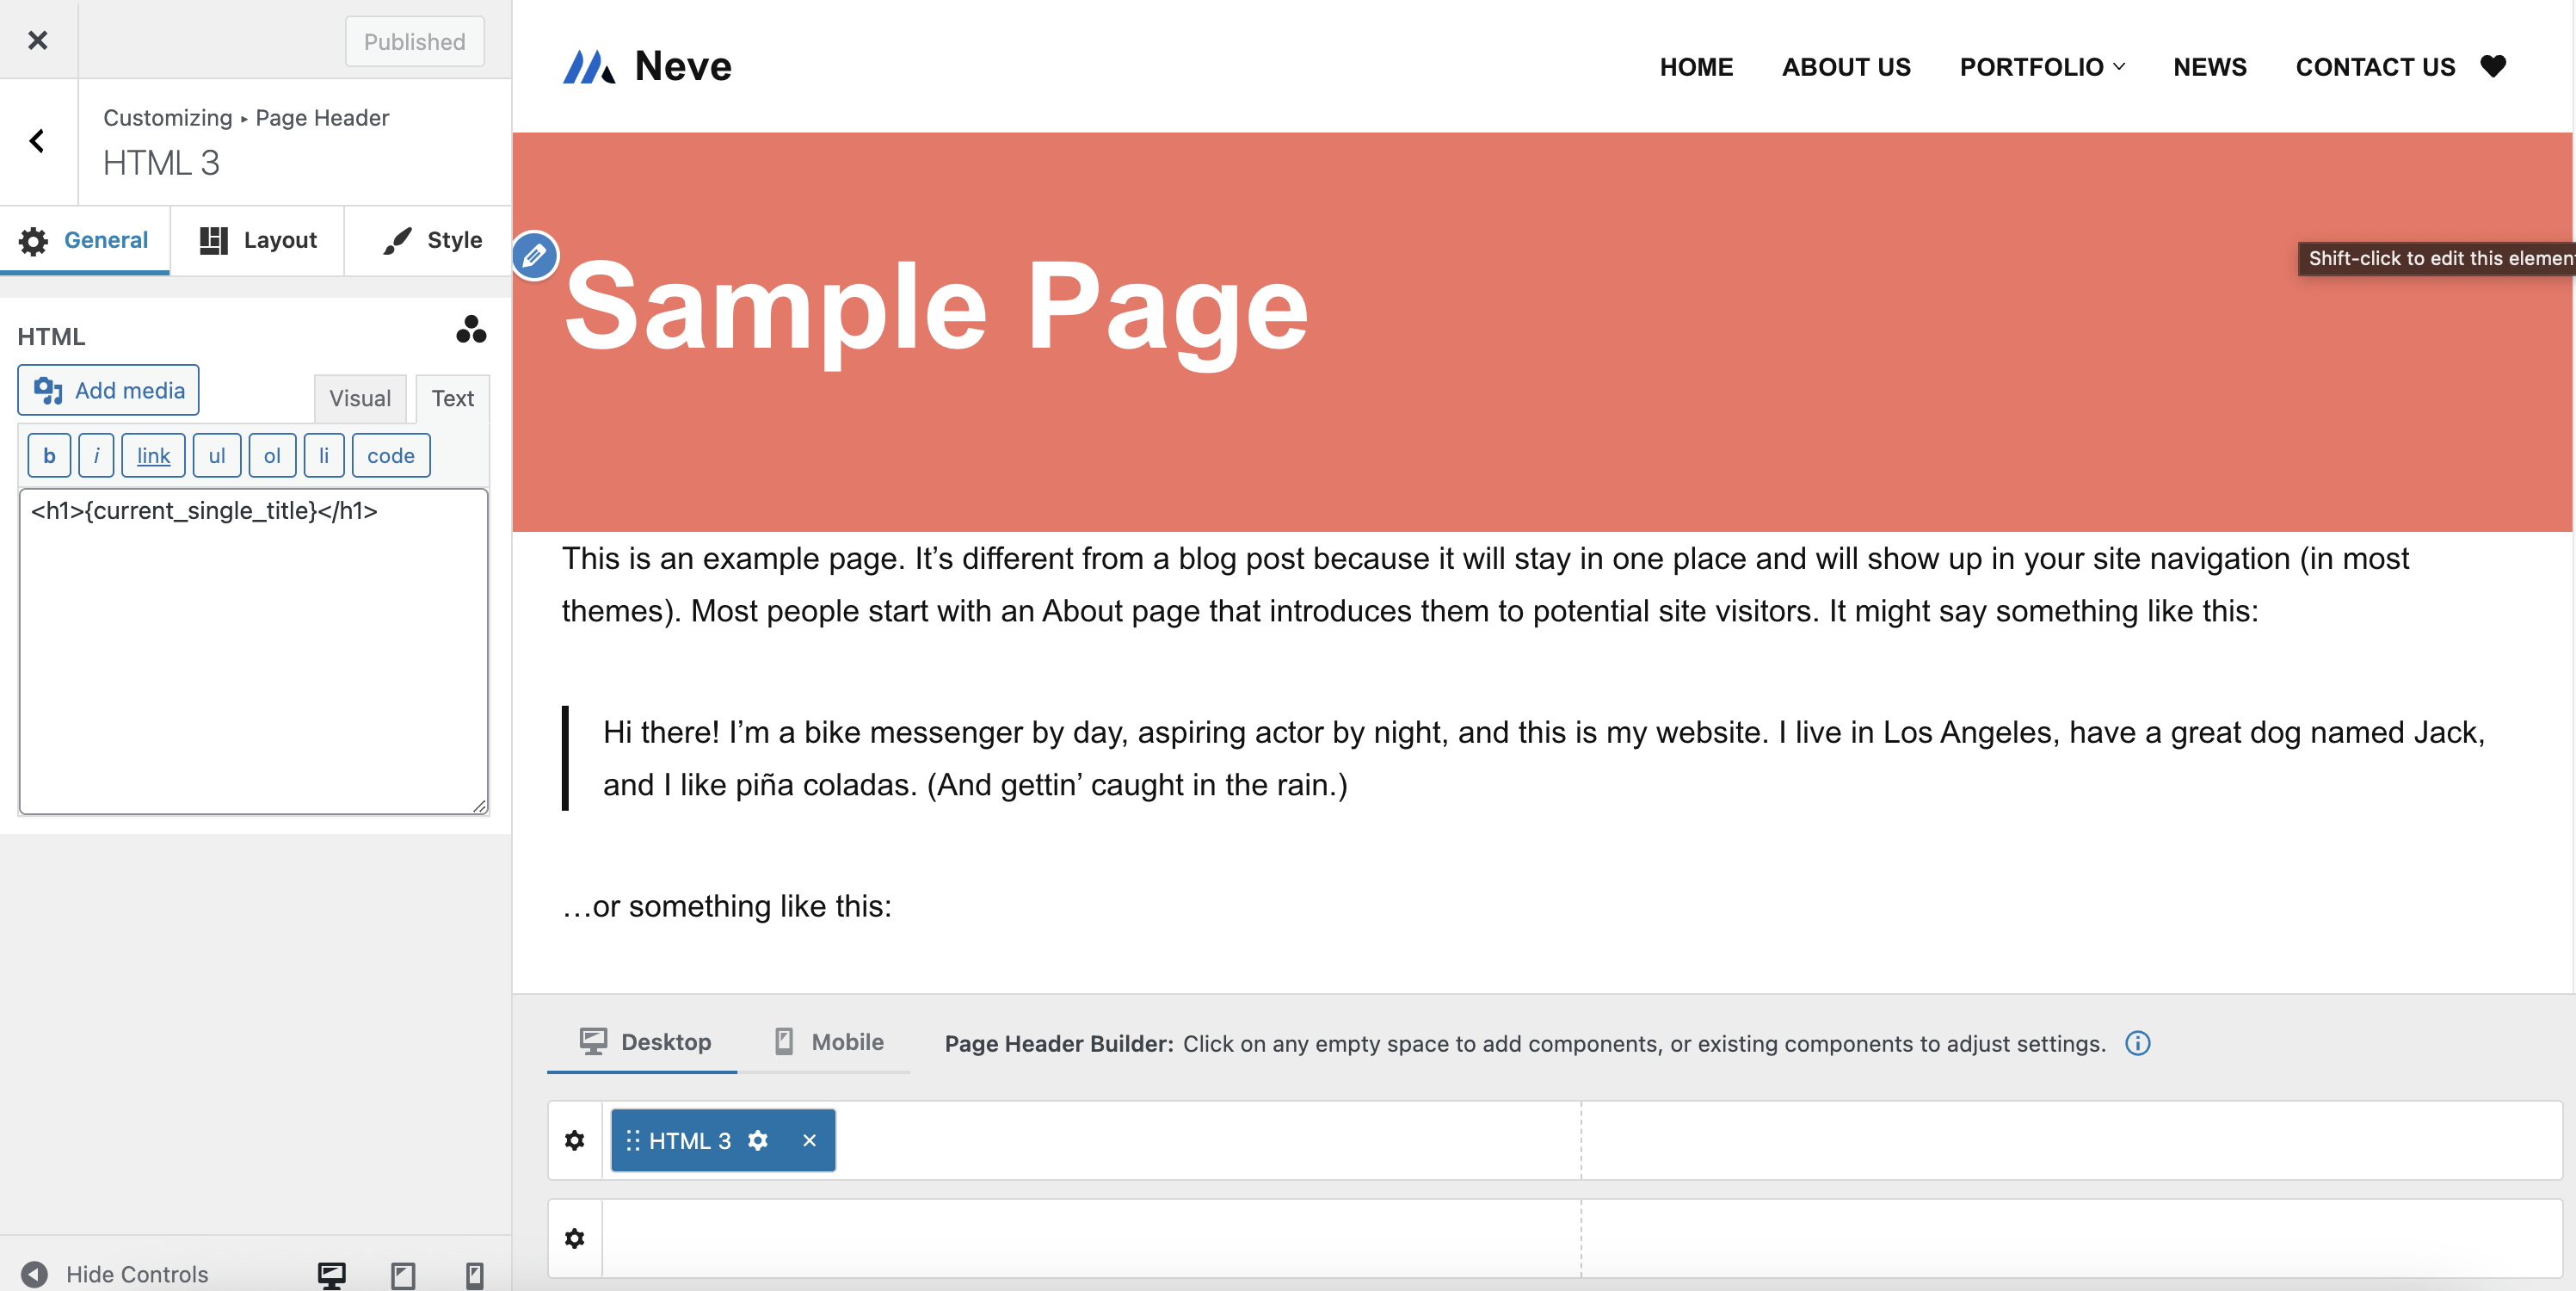
Available components for the page header builder:
- Button (3 instances)
- HTML (3 instances)
- Secondary Menu
- Custom Layout (3 instances)
- Widget Area (3 instances)
- Divider (2 instances)
Note: Please note that by default, the Page Header will be visible on all pages. To display it only on certain pages, use the options available in the Global Page Header Settings.
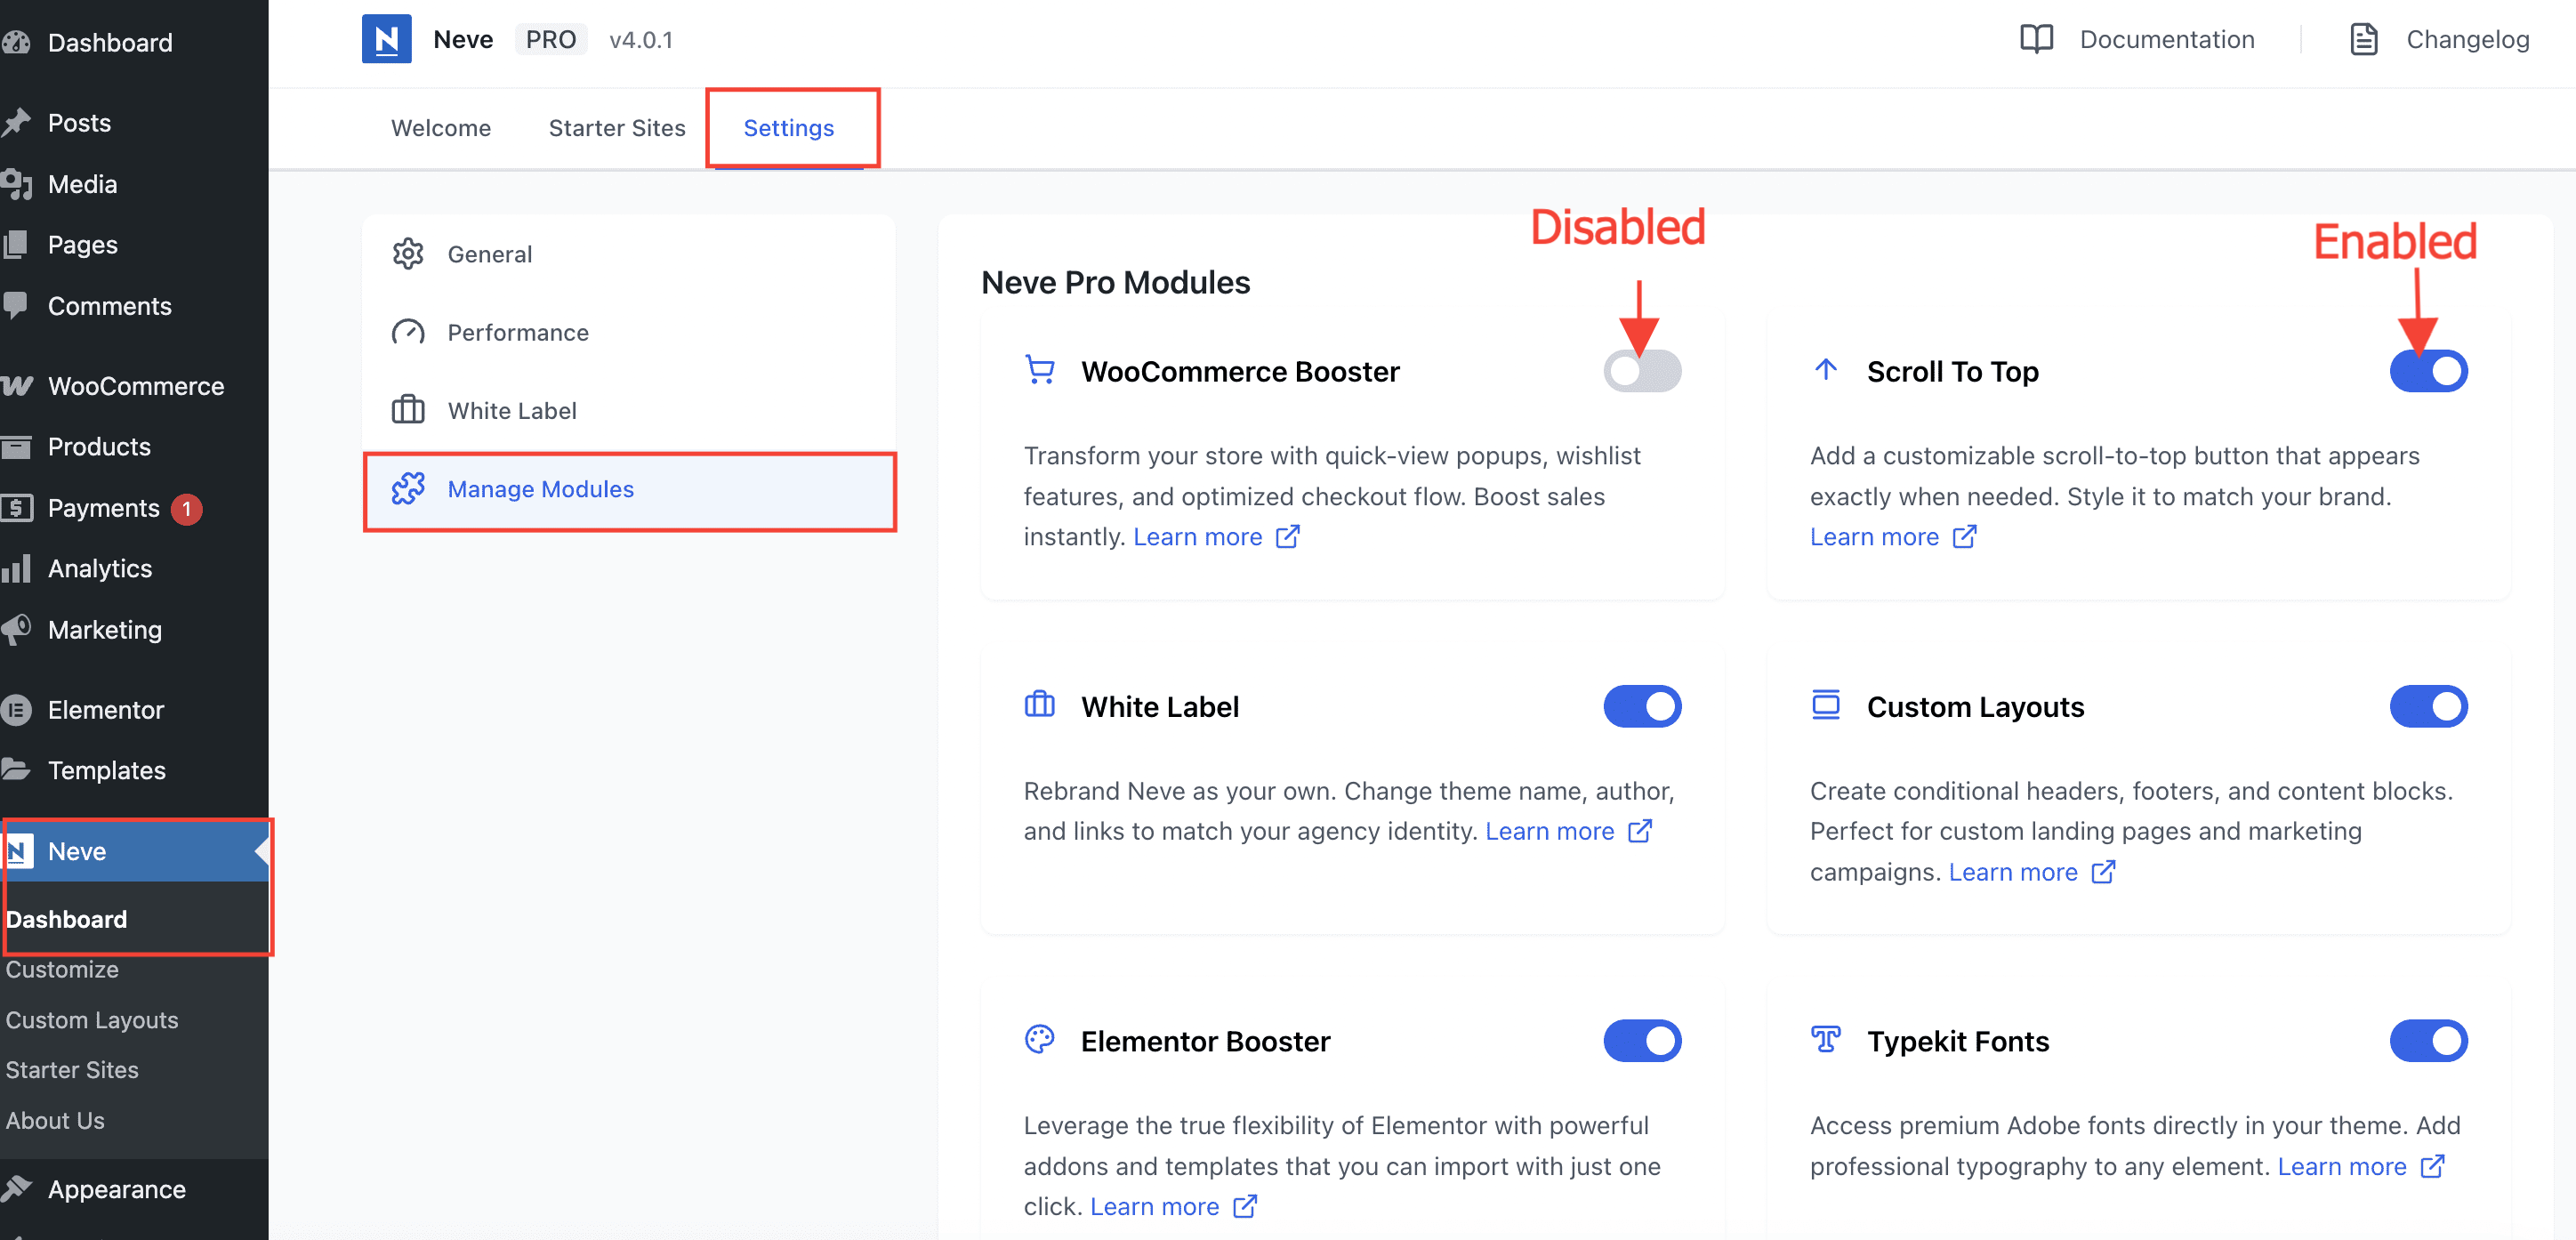
Enable or disable modules
Part of Neve PRO options consists of modules which can be enabled/disabled if used or not.
To enable/disable modules, navigate to Neve > Dashboard > Settings > Manage Modules.