How to display Custom Taxonomies in Post Meta using Neve PRO?
📝 Note: This feature is part of Neve PRO Addon, which you can purchase here.
In WordPress, taxonomies are a way to organize and categorize the content. While WordPress provides built-in taxonomies like categories and tags, you can also create custom taxonomies to better structure your content. This document will guide you through the process of creating a custom taxonomy using a Custom Post Type (CPT) plugin in WordPress.
In this article
Tools Needed:
- Neve theme - download and install
- Neve PRO Addon - download and install
- CPT UI plugin - this is our choice, but you can use other similar plugins as well (e.g. Pods, ACF)
Install and Activate CPT UI Plugin
1. Log in to your WordPress admin dashboard.
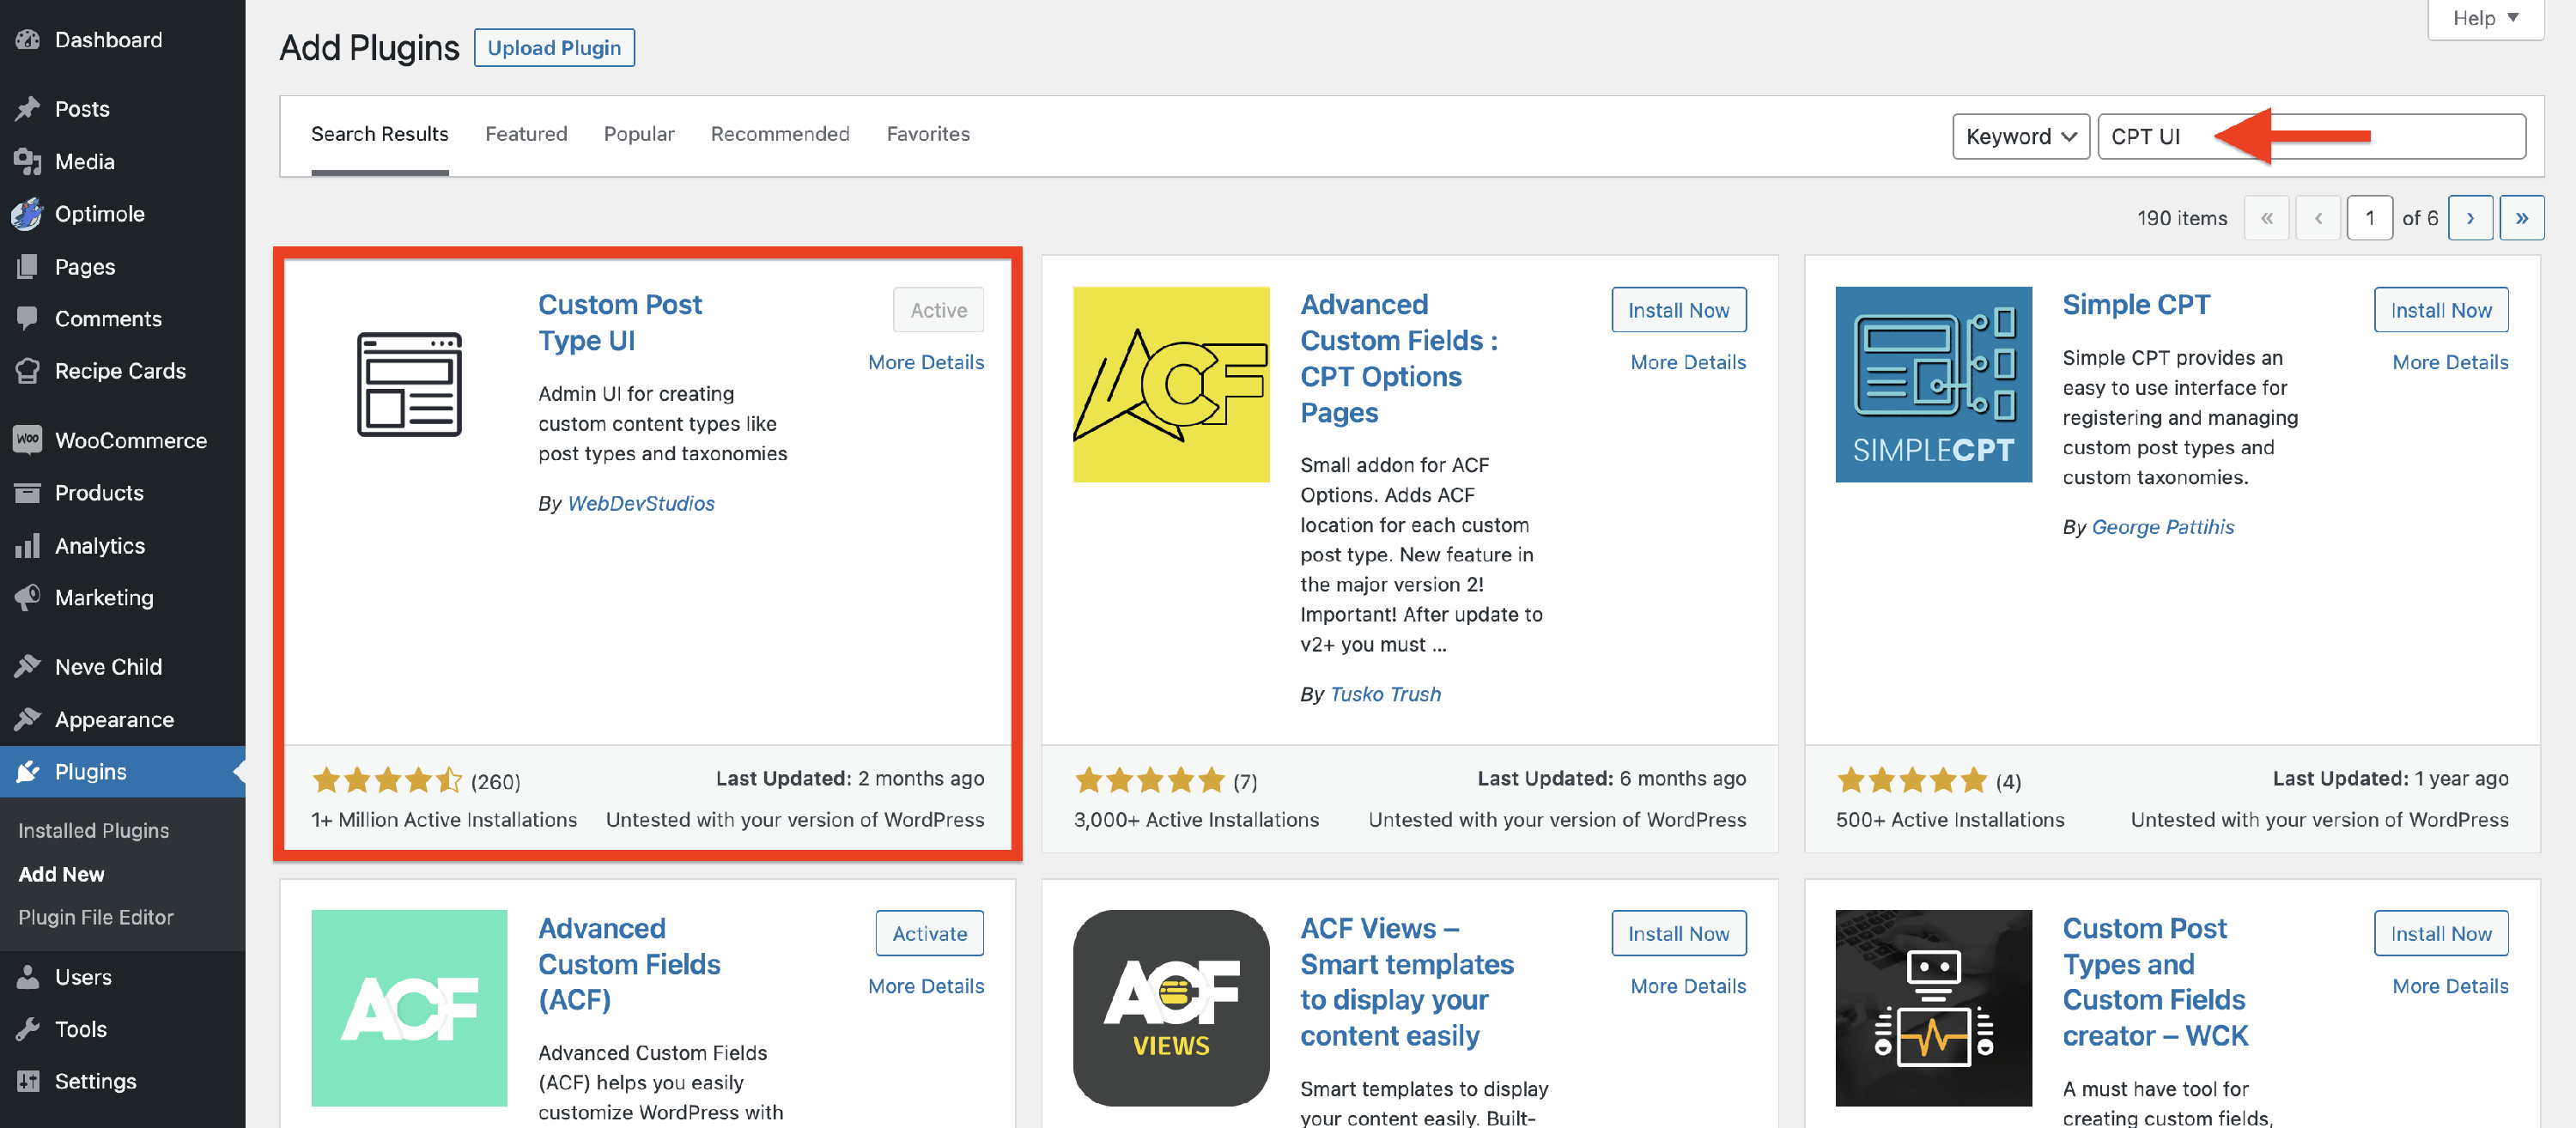
2. Navigate to Plugins > Add New.
3. In the search bar, enter the name of the CPT UI plugin.
4. Install and activate the plugin.
Create a Custom Taxonomy
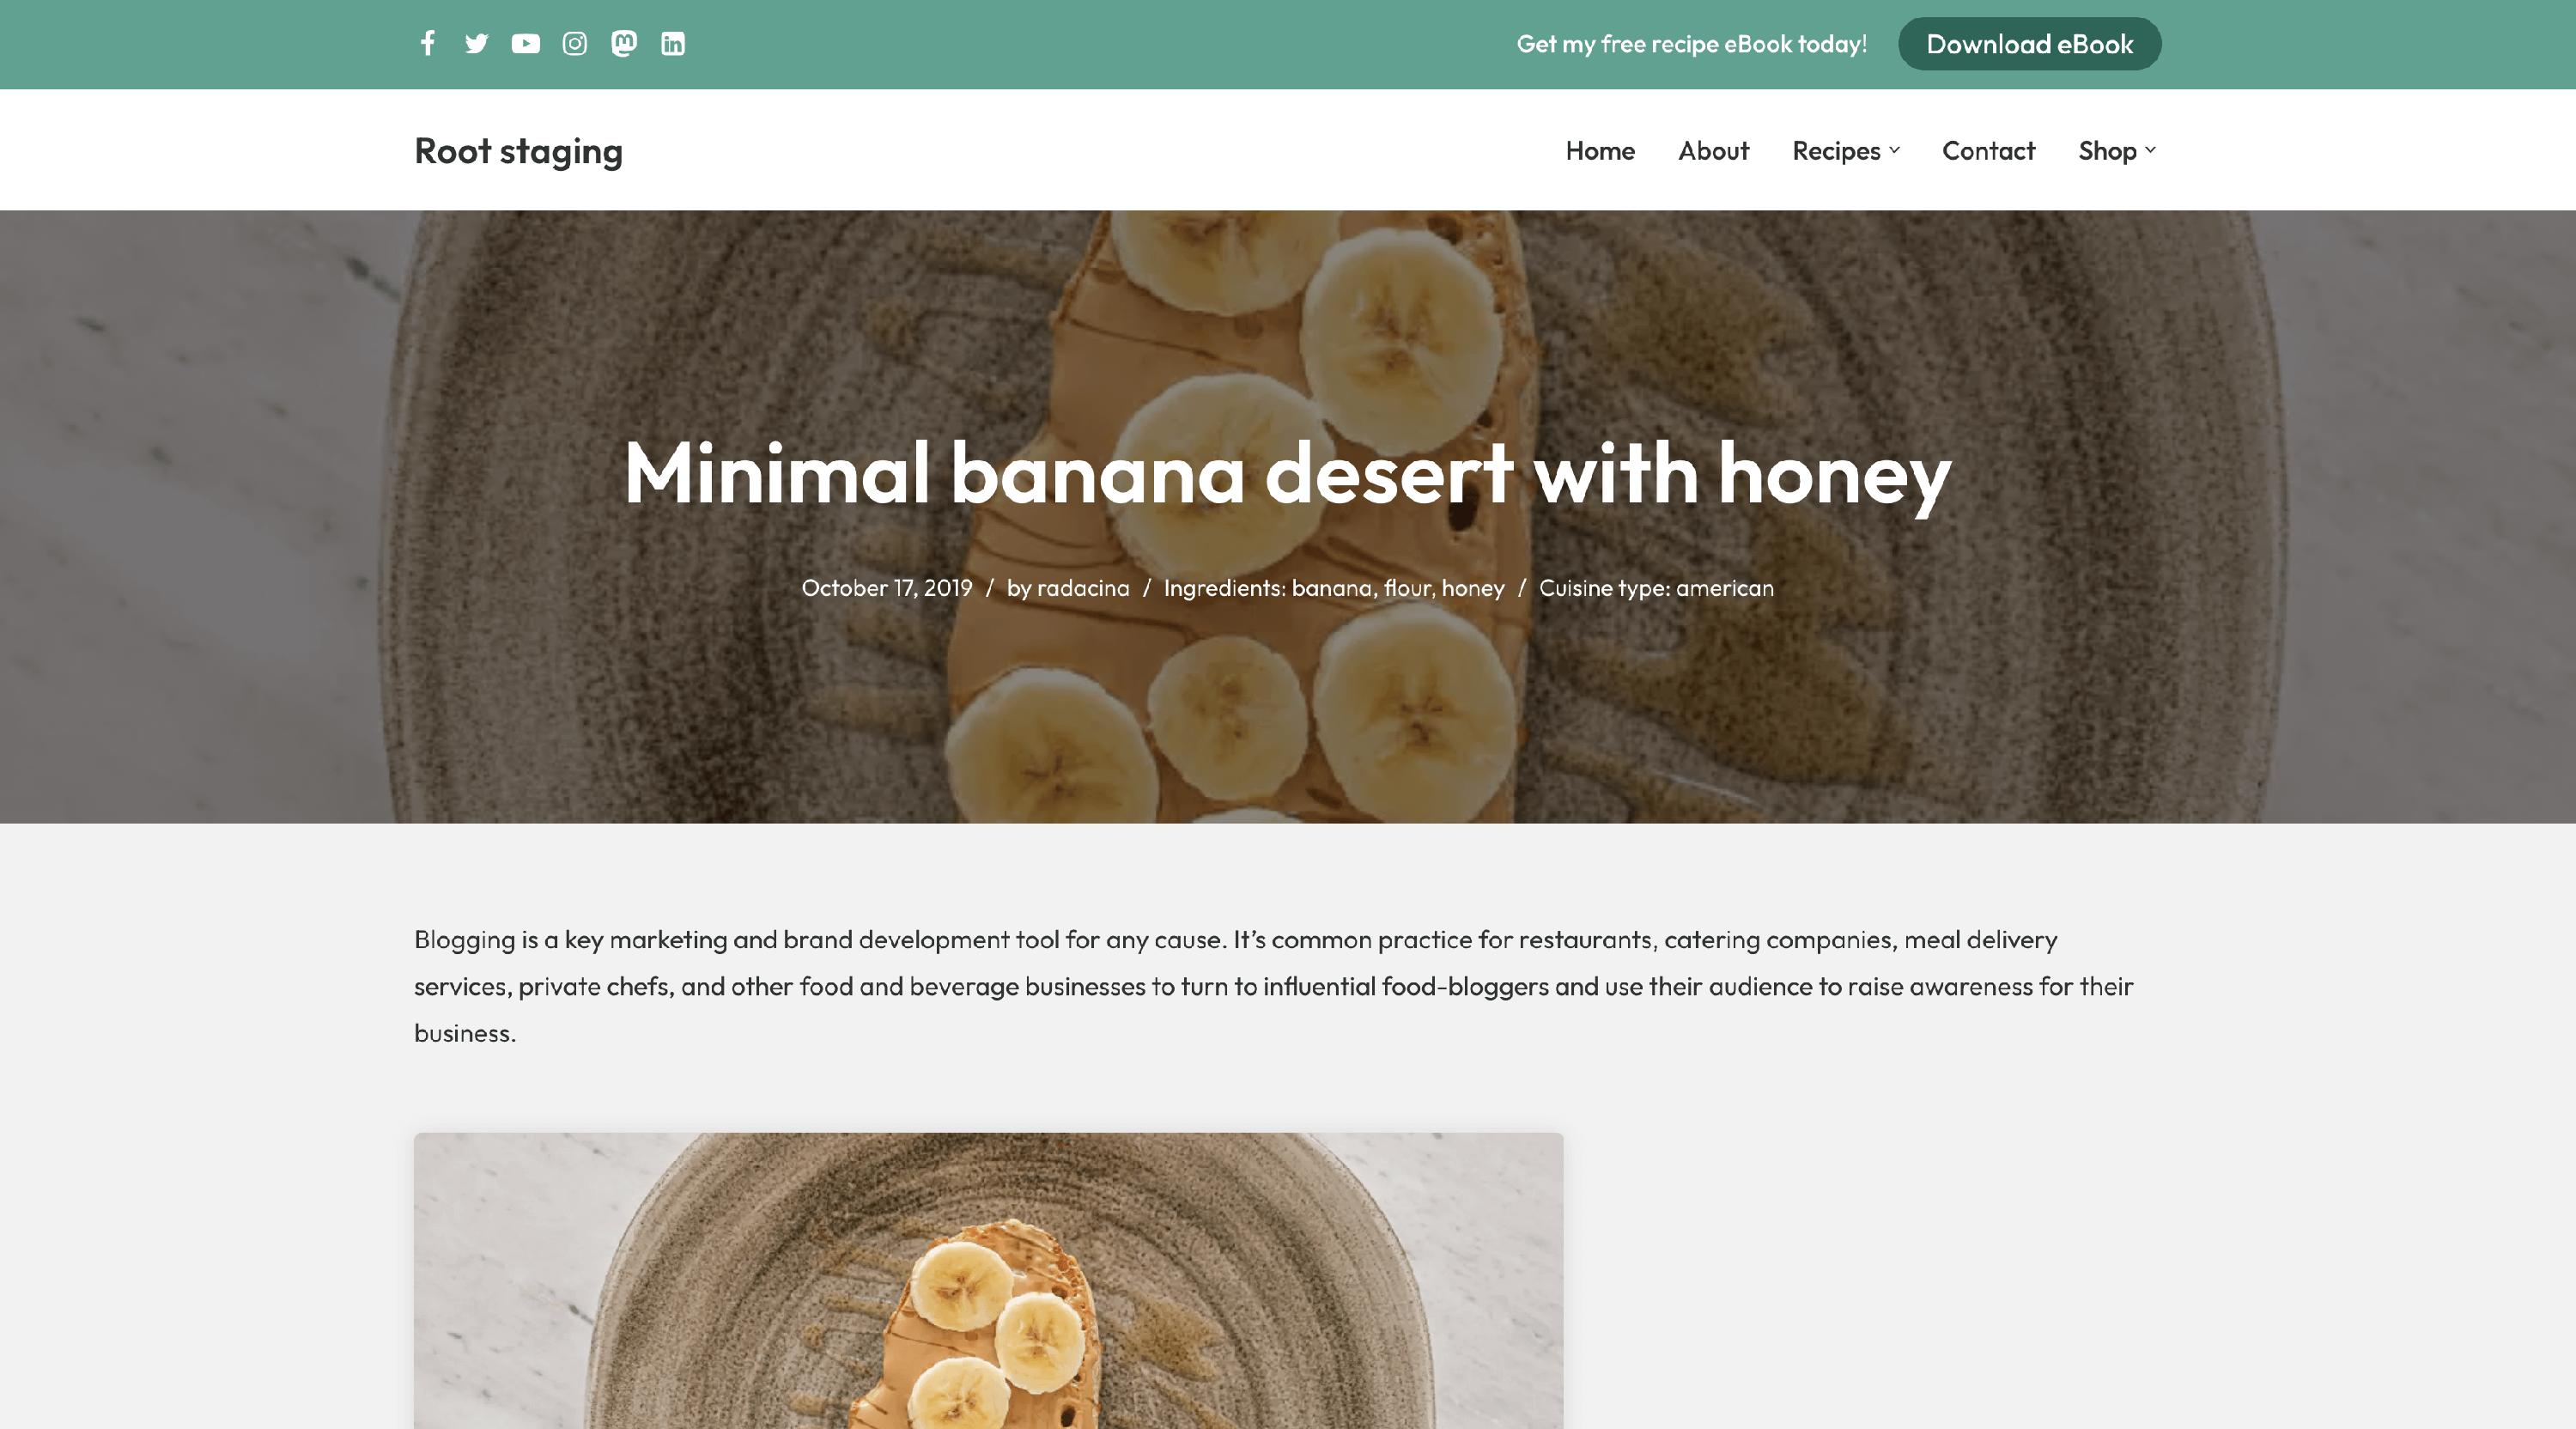
In the following steps, we will explain how to create a custom taxonomy called Ingredients, where we will add corresponding ingredients for our recipes (posts).
1. In your WordPress dashboard, go to CPT UI.
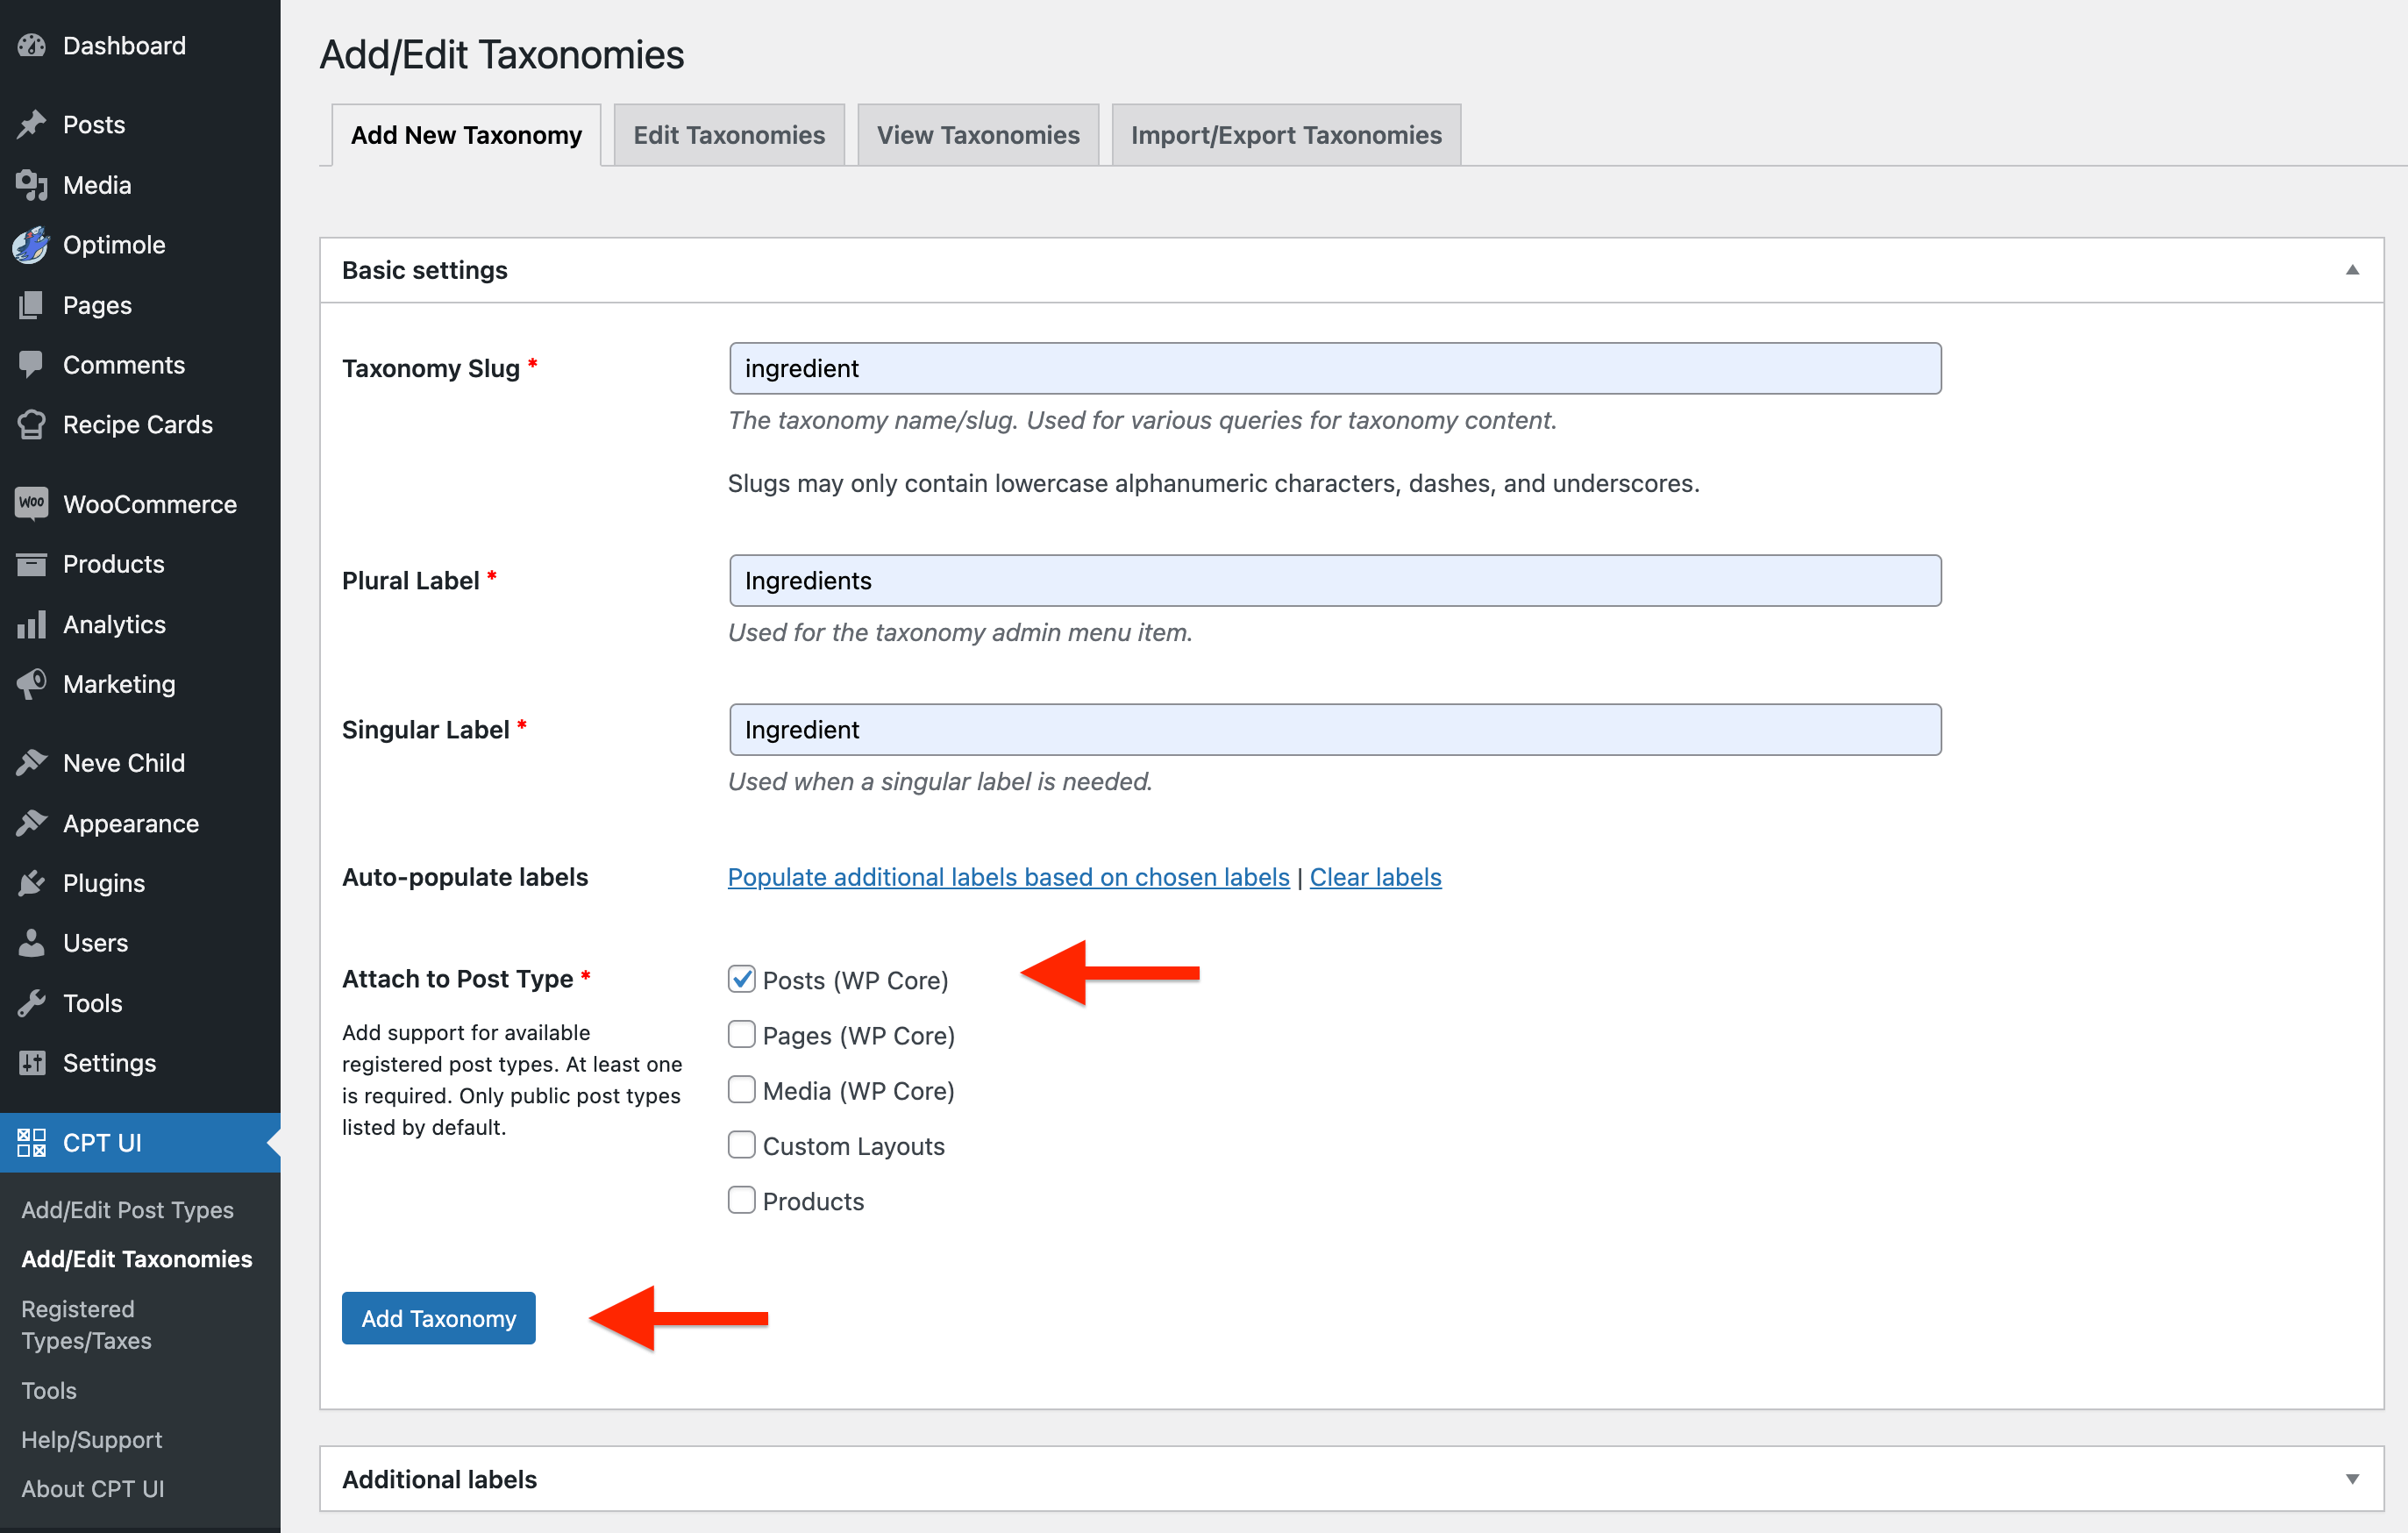
2. Click on Add/Edit Taxonomies.
3. Fill in the details for your custom taxonomy:
- Plural Label: Ingredients
- Singular Label: Ingredient
- Slug: ingredient
4. Check Posts (WP Core) to associate this taxonomy with regular blog posts.
5. Click the Add Taxonomy button to create your Ingredients custom taxonomy.
6. Repeat the above steps for as many taxonomies as you need.
Populate the Custom Taxonomy
Now that you have created the custom taxonomy for ingredients, you can add ingredients to your posts:
1. Edit an existing recipe post or create a new one.
2. In the post editor, look for the Ingredients accordion.
3. Enter an ingredient name, and WordPress will provide suggestions from the custom taxonomy.
4. Select the ingredient from the suggestions or type a new ingredient name if it doesn't exist.
5. Continue adding all the ingredients for your recipe, separating each ingredient with commas.

6. Update or publish the recipe to save your changes.
📝 Note: You can see the available ingredients in 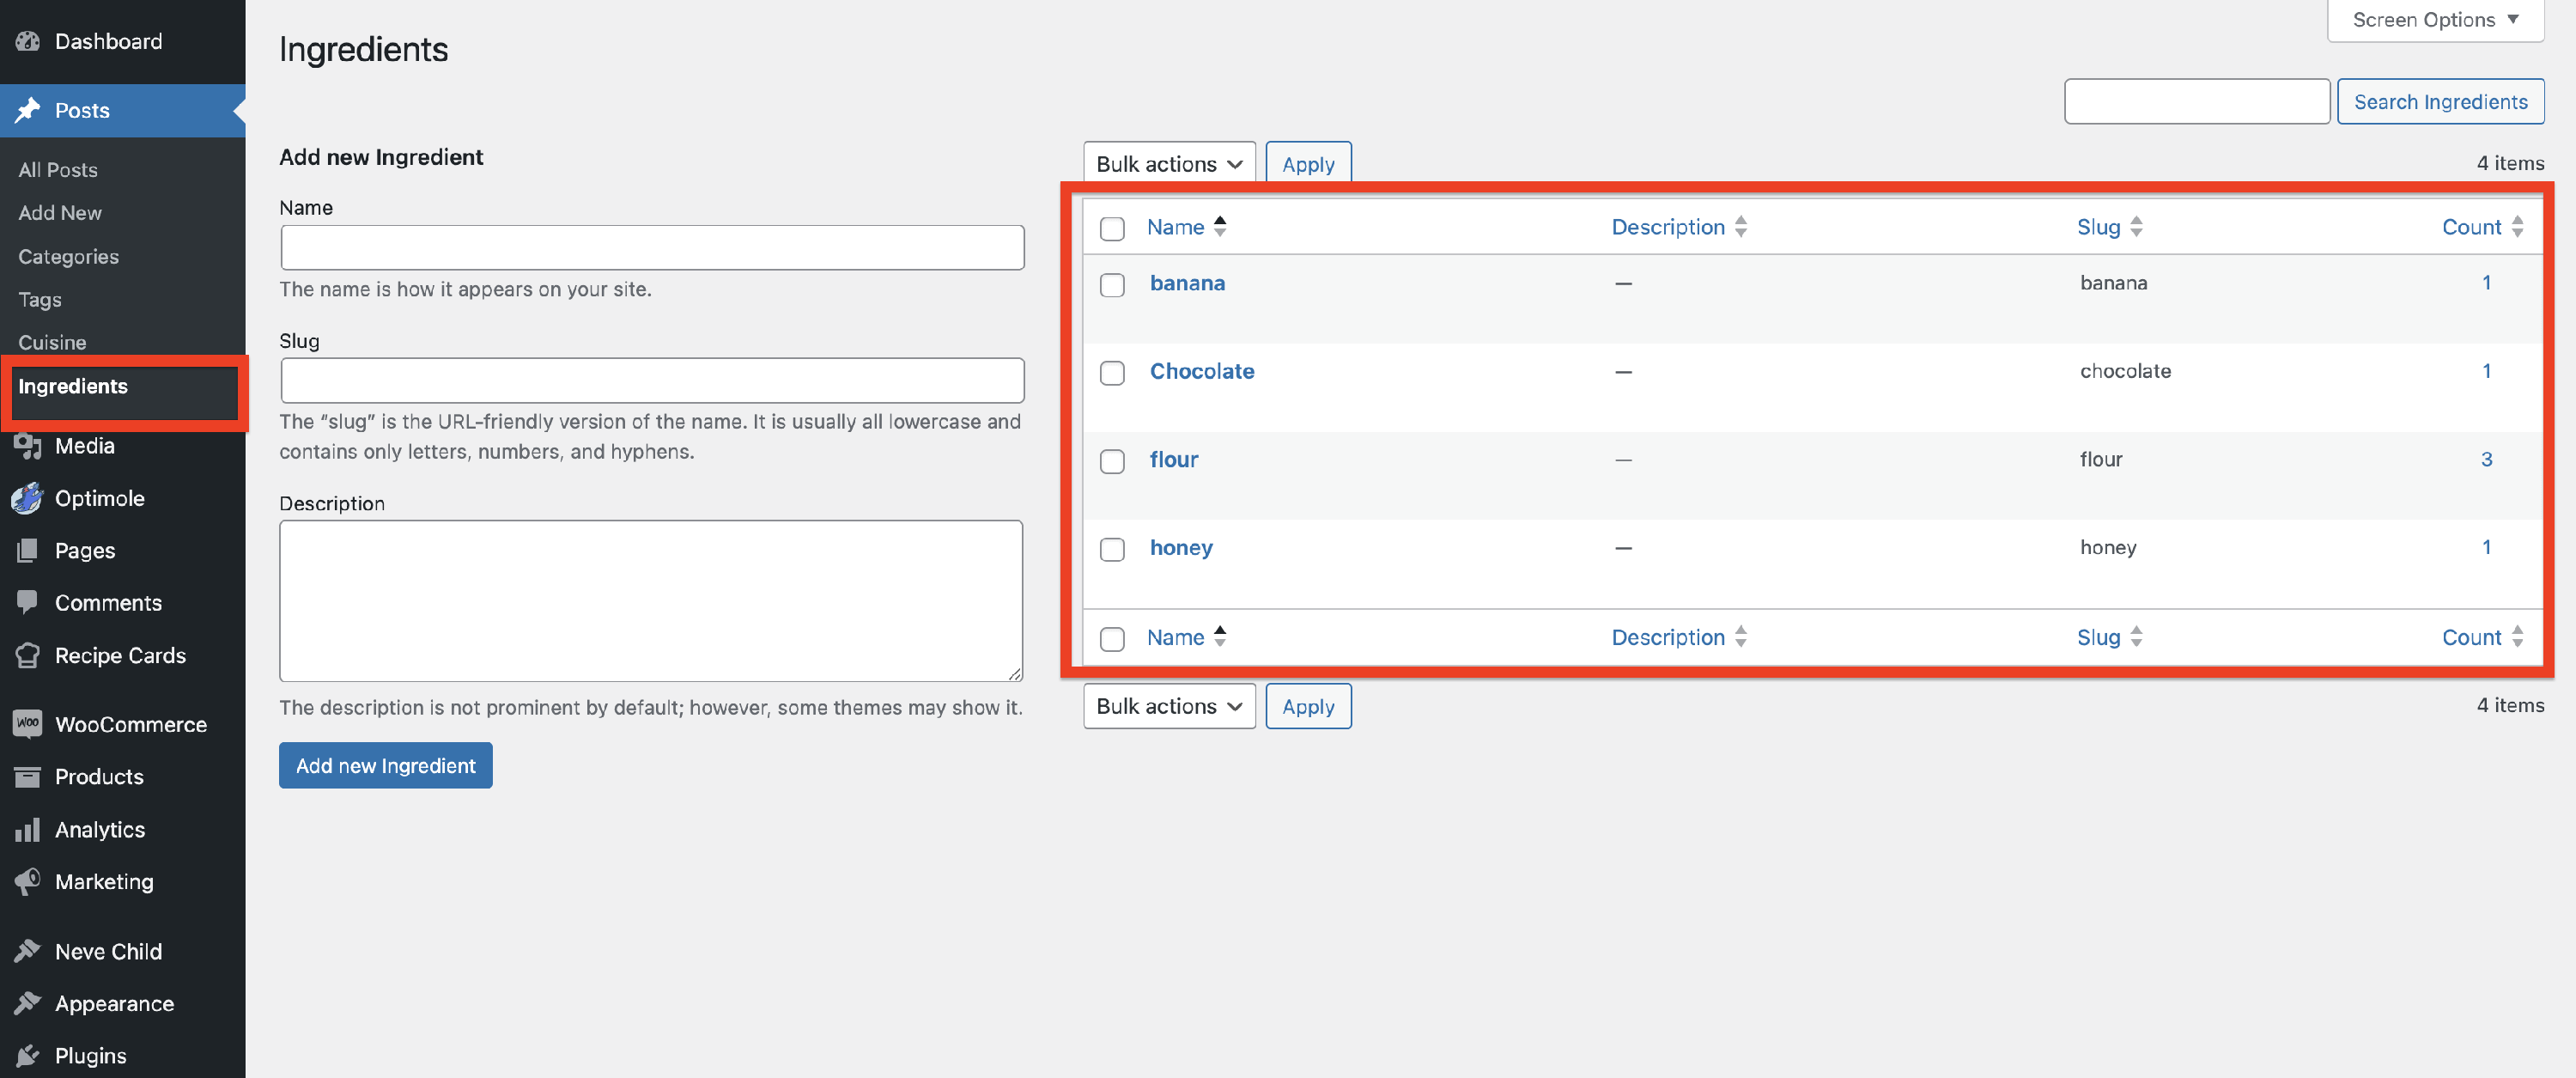 WP Dashboard > Posts > Ingredients. It's also an alternative for adding ingredients, apart from directly typing them, as we did above.
Display Custom Taxonomy Terms
To display the custom taxonomy terms (ingredients), we will use the in-build Neve Pro feature.
1. Navigate to Neve > Customize > Blog.
2. Open the Single Post panel.
3. Under Meta Order, click on Add Item.
4. Inside the Type accordion, select Custom Taxonomy.
5. Inside the Name, insert the custom taxonomy's slug (e.g. ingredient).
6. Optionally, edit the Format of the meta to be more suggestive (e.g. Ingredients:).
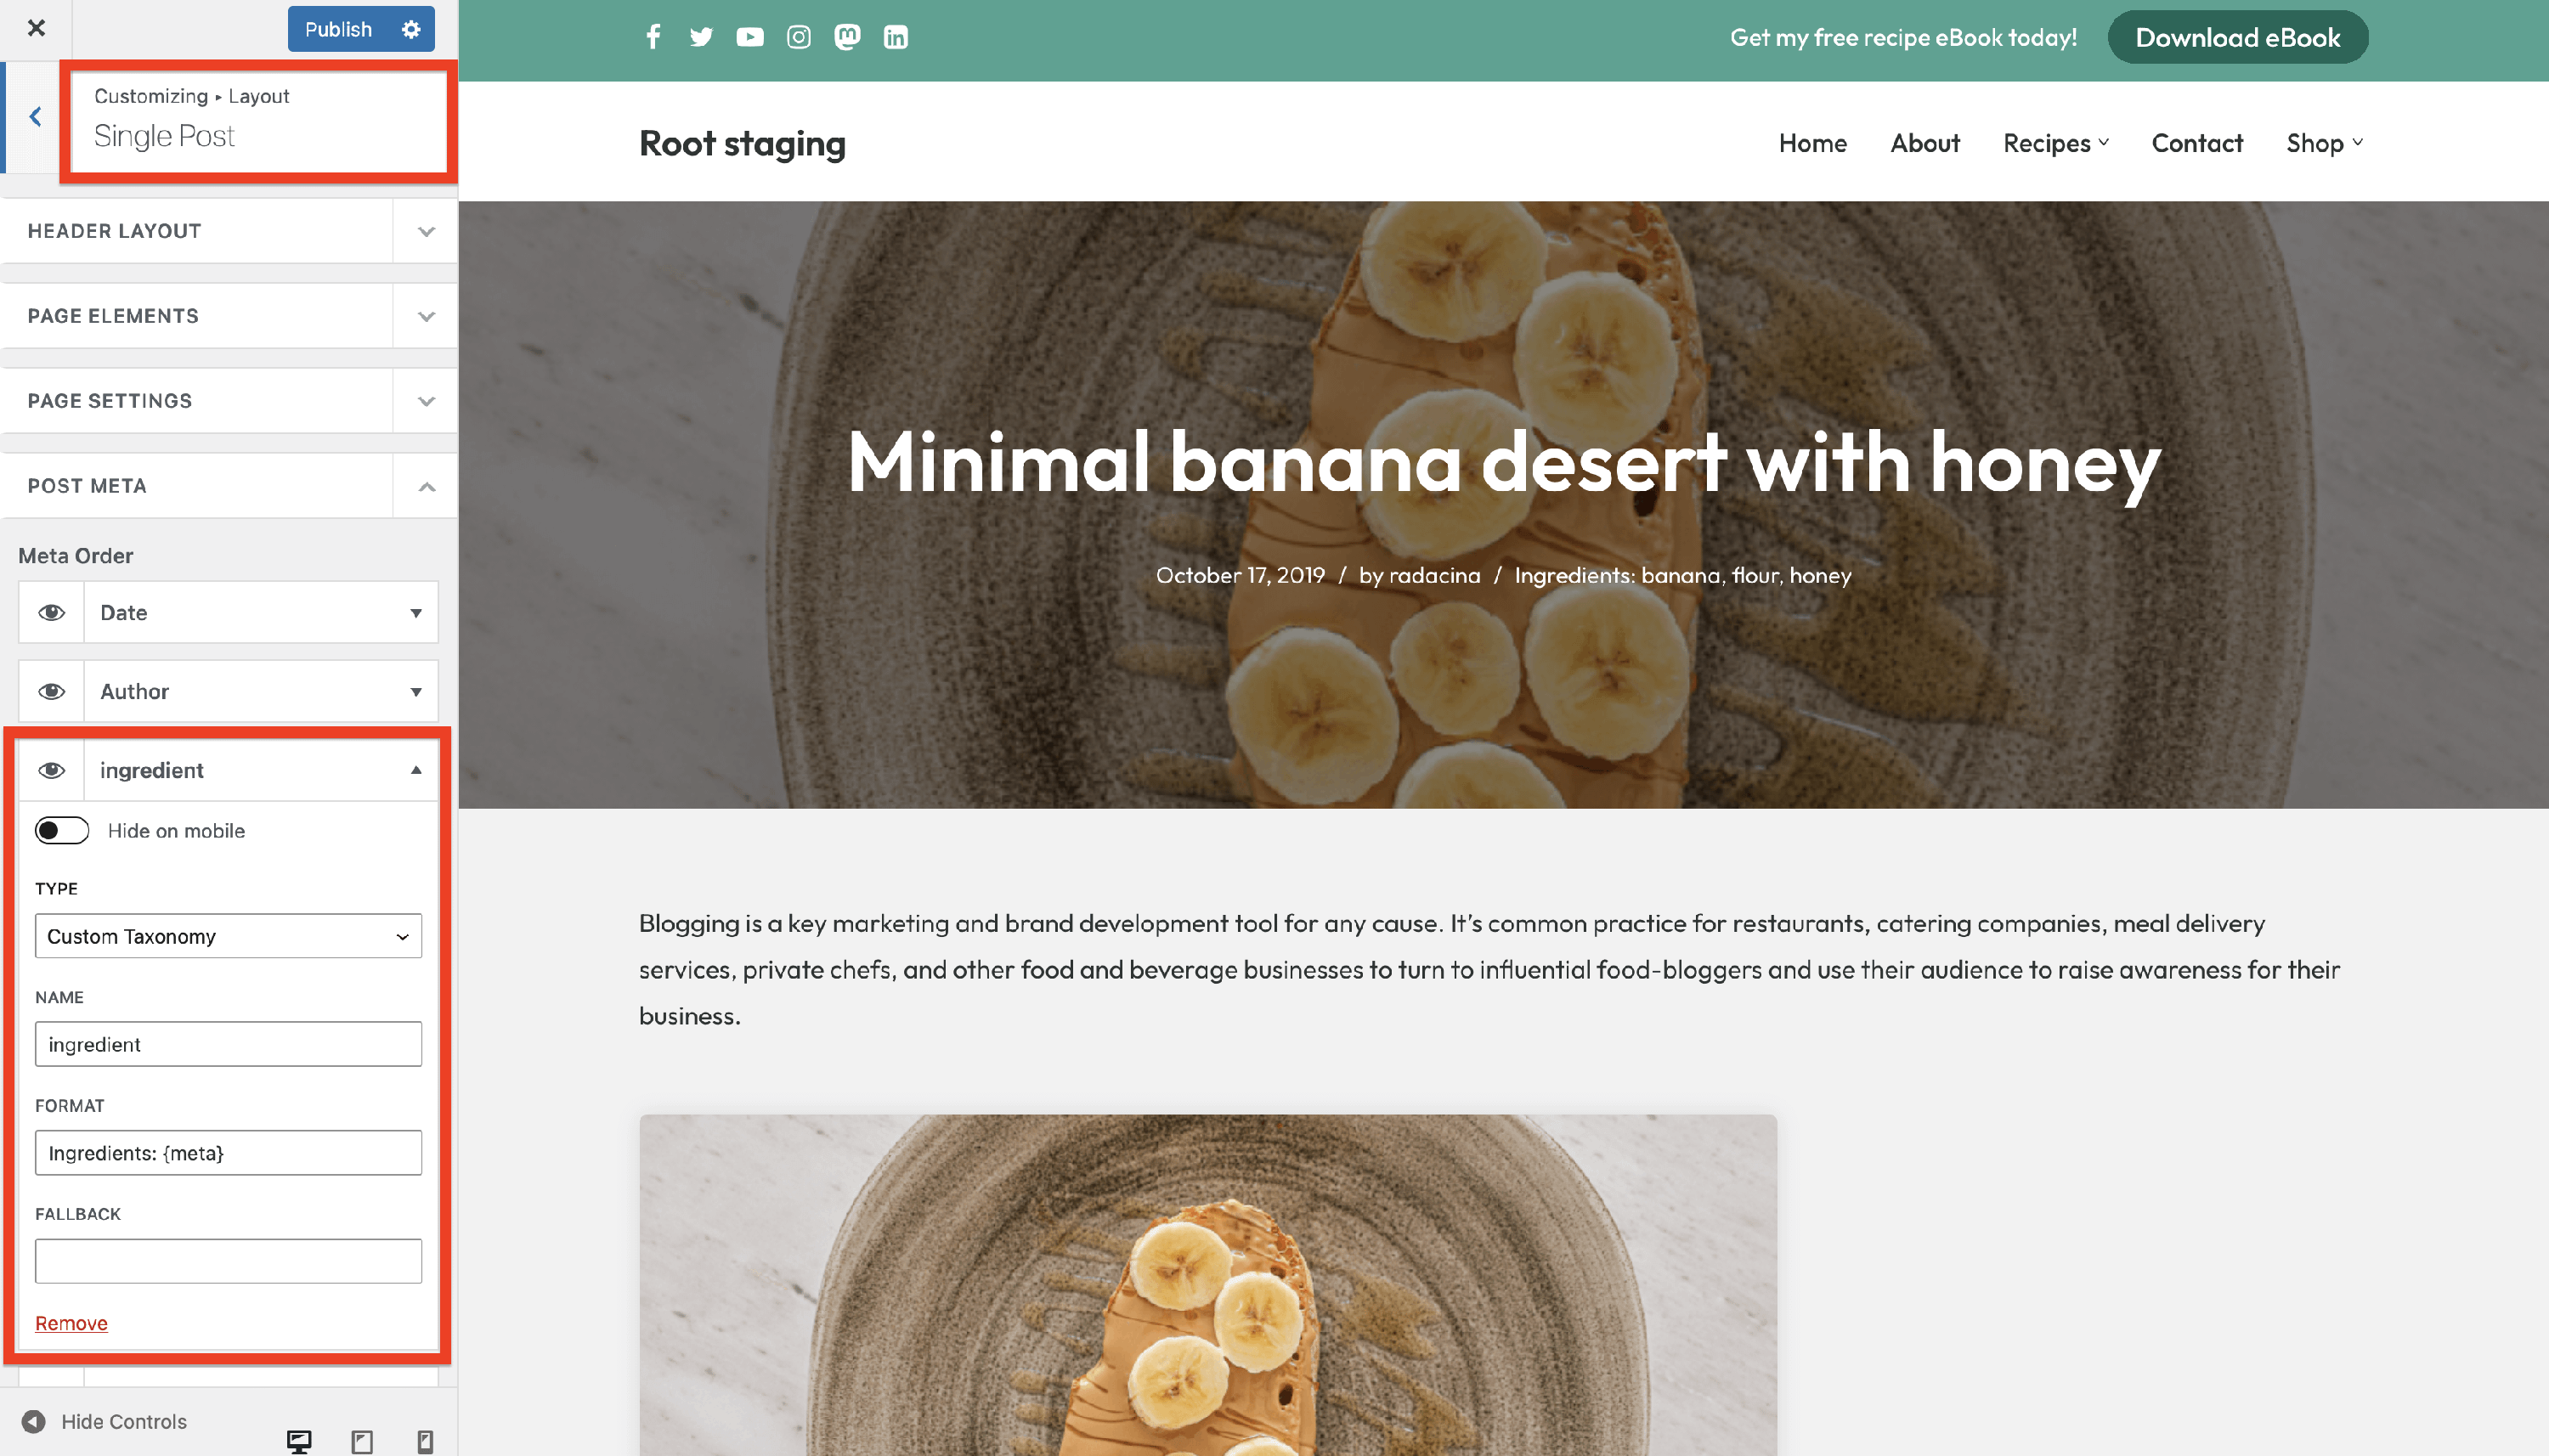
Result