LightStart - Maintenance Mode, Coming Soon, and Landing Page Builder Documentation
The LightStart - Maintenance Mode, Coming Soon, and Landing Page Builder plugin is a perfect tool for any website that lets visitors know your site is down for maintenance or add a coming soon page. These pages can be displayed for certain backend or frontend roles and can be easily adapted to your needs.
- ✨ fully customizable
- 🗂 wide palette of designs
In this article
Download and Install
To download and install the LightStart - Maintenance Mode, Coming Soon, and Landing Page Builder plugin, make sure you follow the steps below:
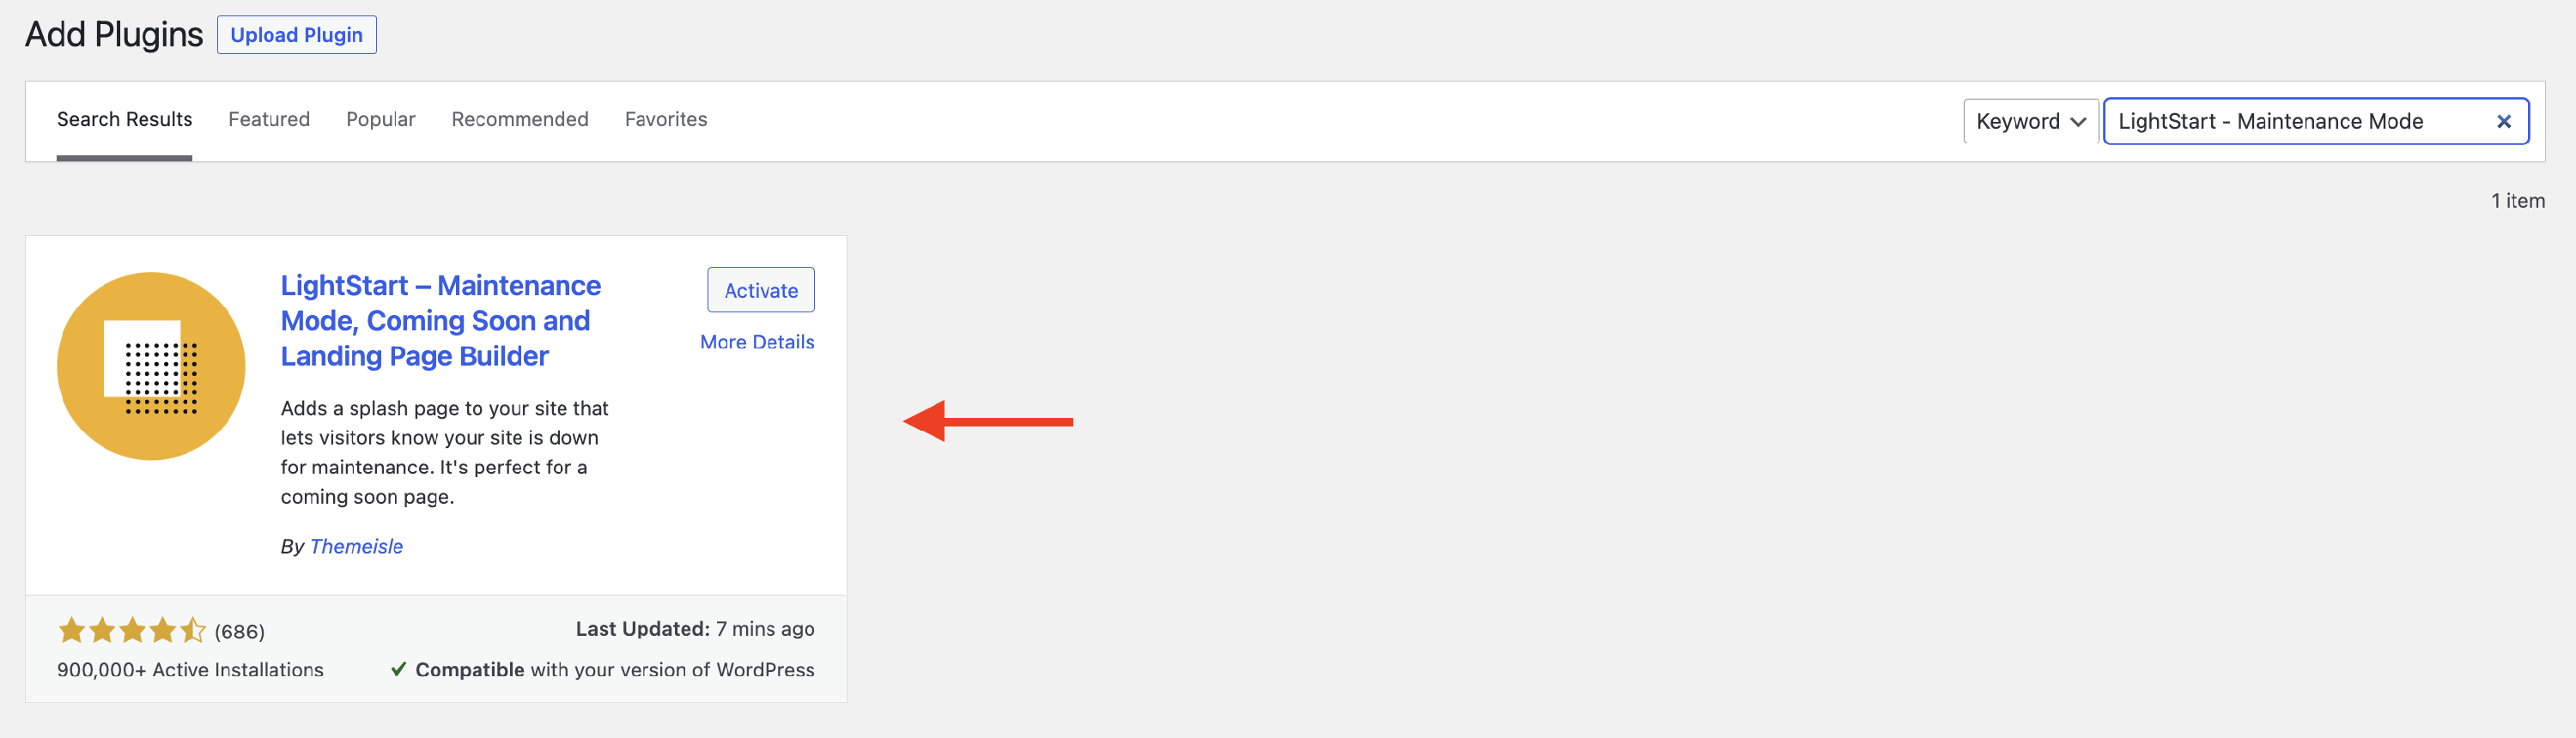
1. Navigate to the WordPress Dashboard > Plugins.
2. Click the Add New button and type in the Search Bar "LightStart - Maintenance Mode".
3. When the plugin appears, click on the Install button, and then, Activate the plugin, to start using it.
Using the plugin
To open the plugin settings, navigate to Dashboard > LightStart, then you will be able to see the configuration tabs.
📝 Note: LightStart may recommend installing Otter Blocks during onboarding or when importing pre-built templates. This recommendation is optional — Otter Blocks is not installed automatically, and you can skip this prompt and still use all core LightStart features. See Otter Blocks: Optional Recommendation below.
There you will see five panels with customizations for your website:
General
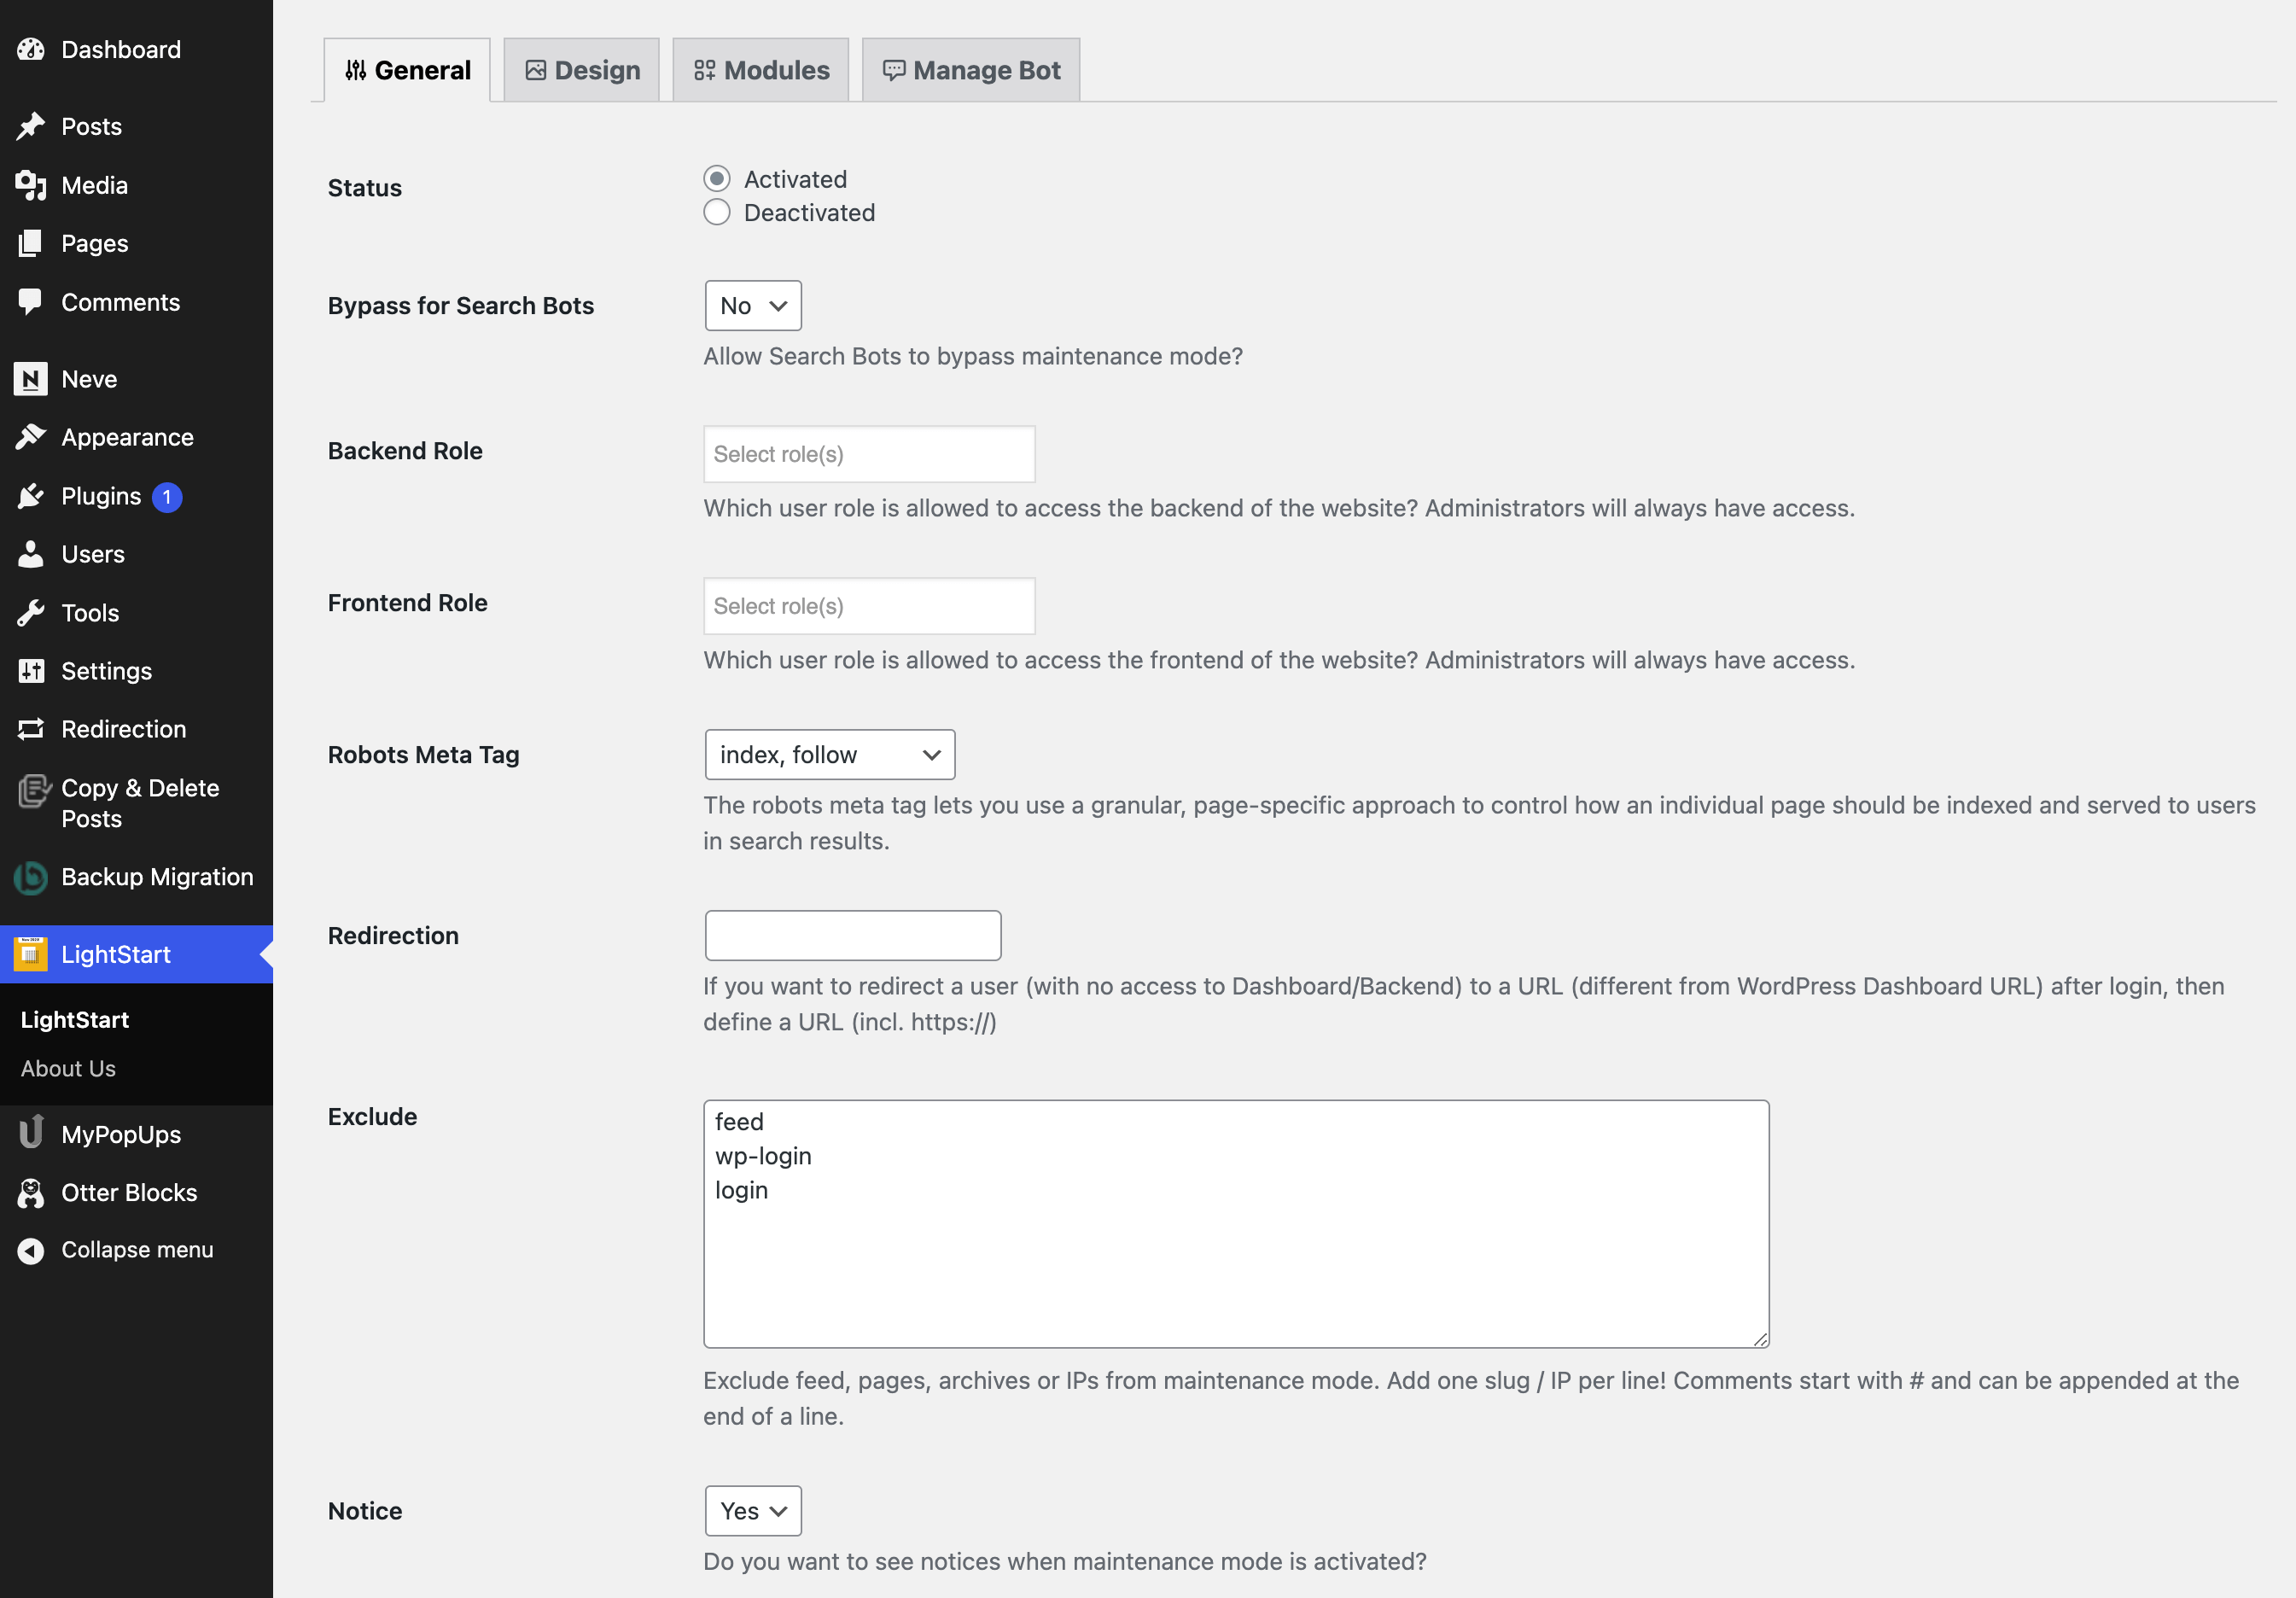
The general tab allows you to configure the common settings of the website while it's under construction. One important thing to note is that the maintenance mode has to be manually activated and deactivated from this tab:
- Status - decide if the plugin is Activated / Deactivated.
- Bypass for Search Bots - you can allow search bots to bypass the maintenance mode.
- Backend Role - opens a dropdown with the roles that can access the backend website.
- Frontend Role - opens a dropdown with the roles that can access the frontend website.
- Robots Meta Tag
- Redirection - you can add an URL for the users to be redirected during the period when the website is down.
- Exclude - add the URL paths, slugs, or IP addresses that should stay accessible while maintenance mode is active. Add one entry per line. See Excluding specific pages from maintenance mode below for the accepted format.
- Notice - accept / reject seeing notices during the maintenance mode.
⚠️ Important: Always set Status to Deactivated and click Save Settings before deactivating the plugin. If you deactivate LightStart without first turning off maintenance mode, your homepage will remain in maintenance mode for visitors even after the plugin is gone.
Don't forget to save the settings!
📝 Note: Please note that if a user enters one of the pages that you added inside the Exclude area, its content will be visible, but if he tries to switch to a different page, the maintenance mode will appear.
Excluding specific pages from maintenance mode
LightStart checks each Exclude entry against the visitor's page URL and lets the page through if the entry appears anywhere in that URL. Enter one path or slug per line, and use the path portion of the URL rather than the full domain.
To keep a specific page accessible, enter a distinctive part of its path — for example, /about/ for an About page or /contact/ for a Contact page.
Entering /home, /index, or the full site address will not exclude the homepage unless a page with that exact path actually exists. The WordPress homepage is served from the root URL (/), so those values do not match it.
⚠️ Pay attention: Because LightStart matches on any part of the URL, entering a single forward slash (/) matches every page on your site — the root URL / is part of every address. Adding / therefore excludes your whole site from maintenance mode, not just the homepage. There is no Exclude value that keeps only the homepage public while the rest of the site stays under maintenance, because the homepage URL is just /.
After editing the Exclude field, click Save Settings, then open your site in a logged-out or private browser window to confirm the result. If you use a caching plugin, clear its cache first, as a cached maintenance page can hide your changes. If you also want to customize the maintenance page, create a separate page for that purpose in the Design tab instead of reusing your live homepage.
Design
The Design tab is the one that allows you to customize the appearance of the page, set up a maintenance page, and import templates:
Before choosing a maintenance page
⚠️ Warning: Do not assign your current homepage or another live published page as the maintenance page template. When maintenance mode is disabled, LightStart can change that page to Private, which can make it return a 404 for visitors.
Instead, create a new page that is used only for maintenance mode, or import one of LightStart's built-in templates and customize that page. This is the safest setup when you want a custom design, especially because the homepage cannot be excluded on its own with the Exclude field.
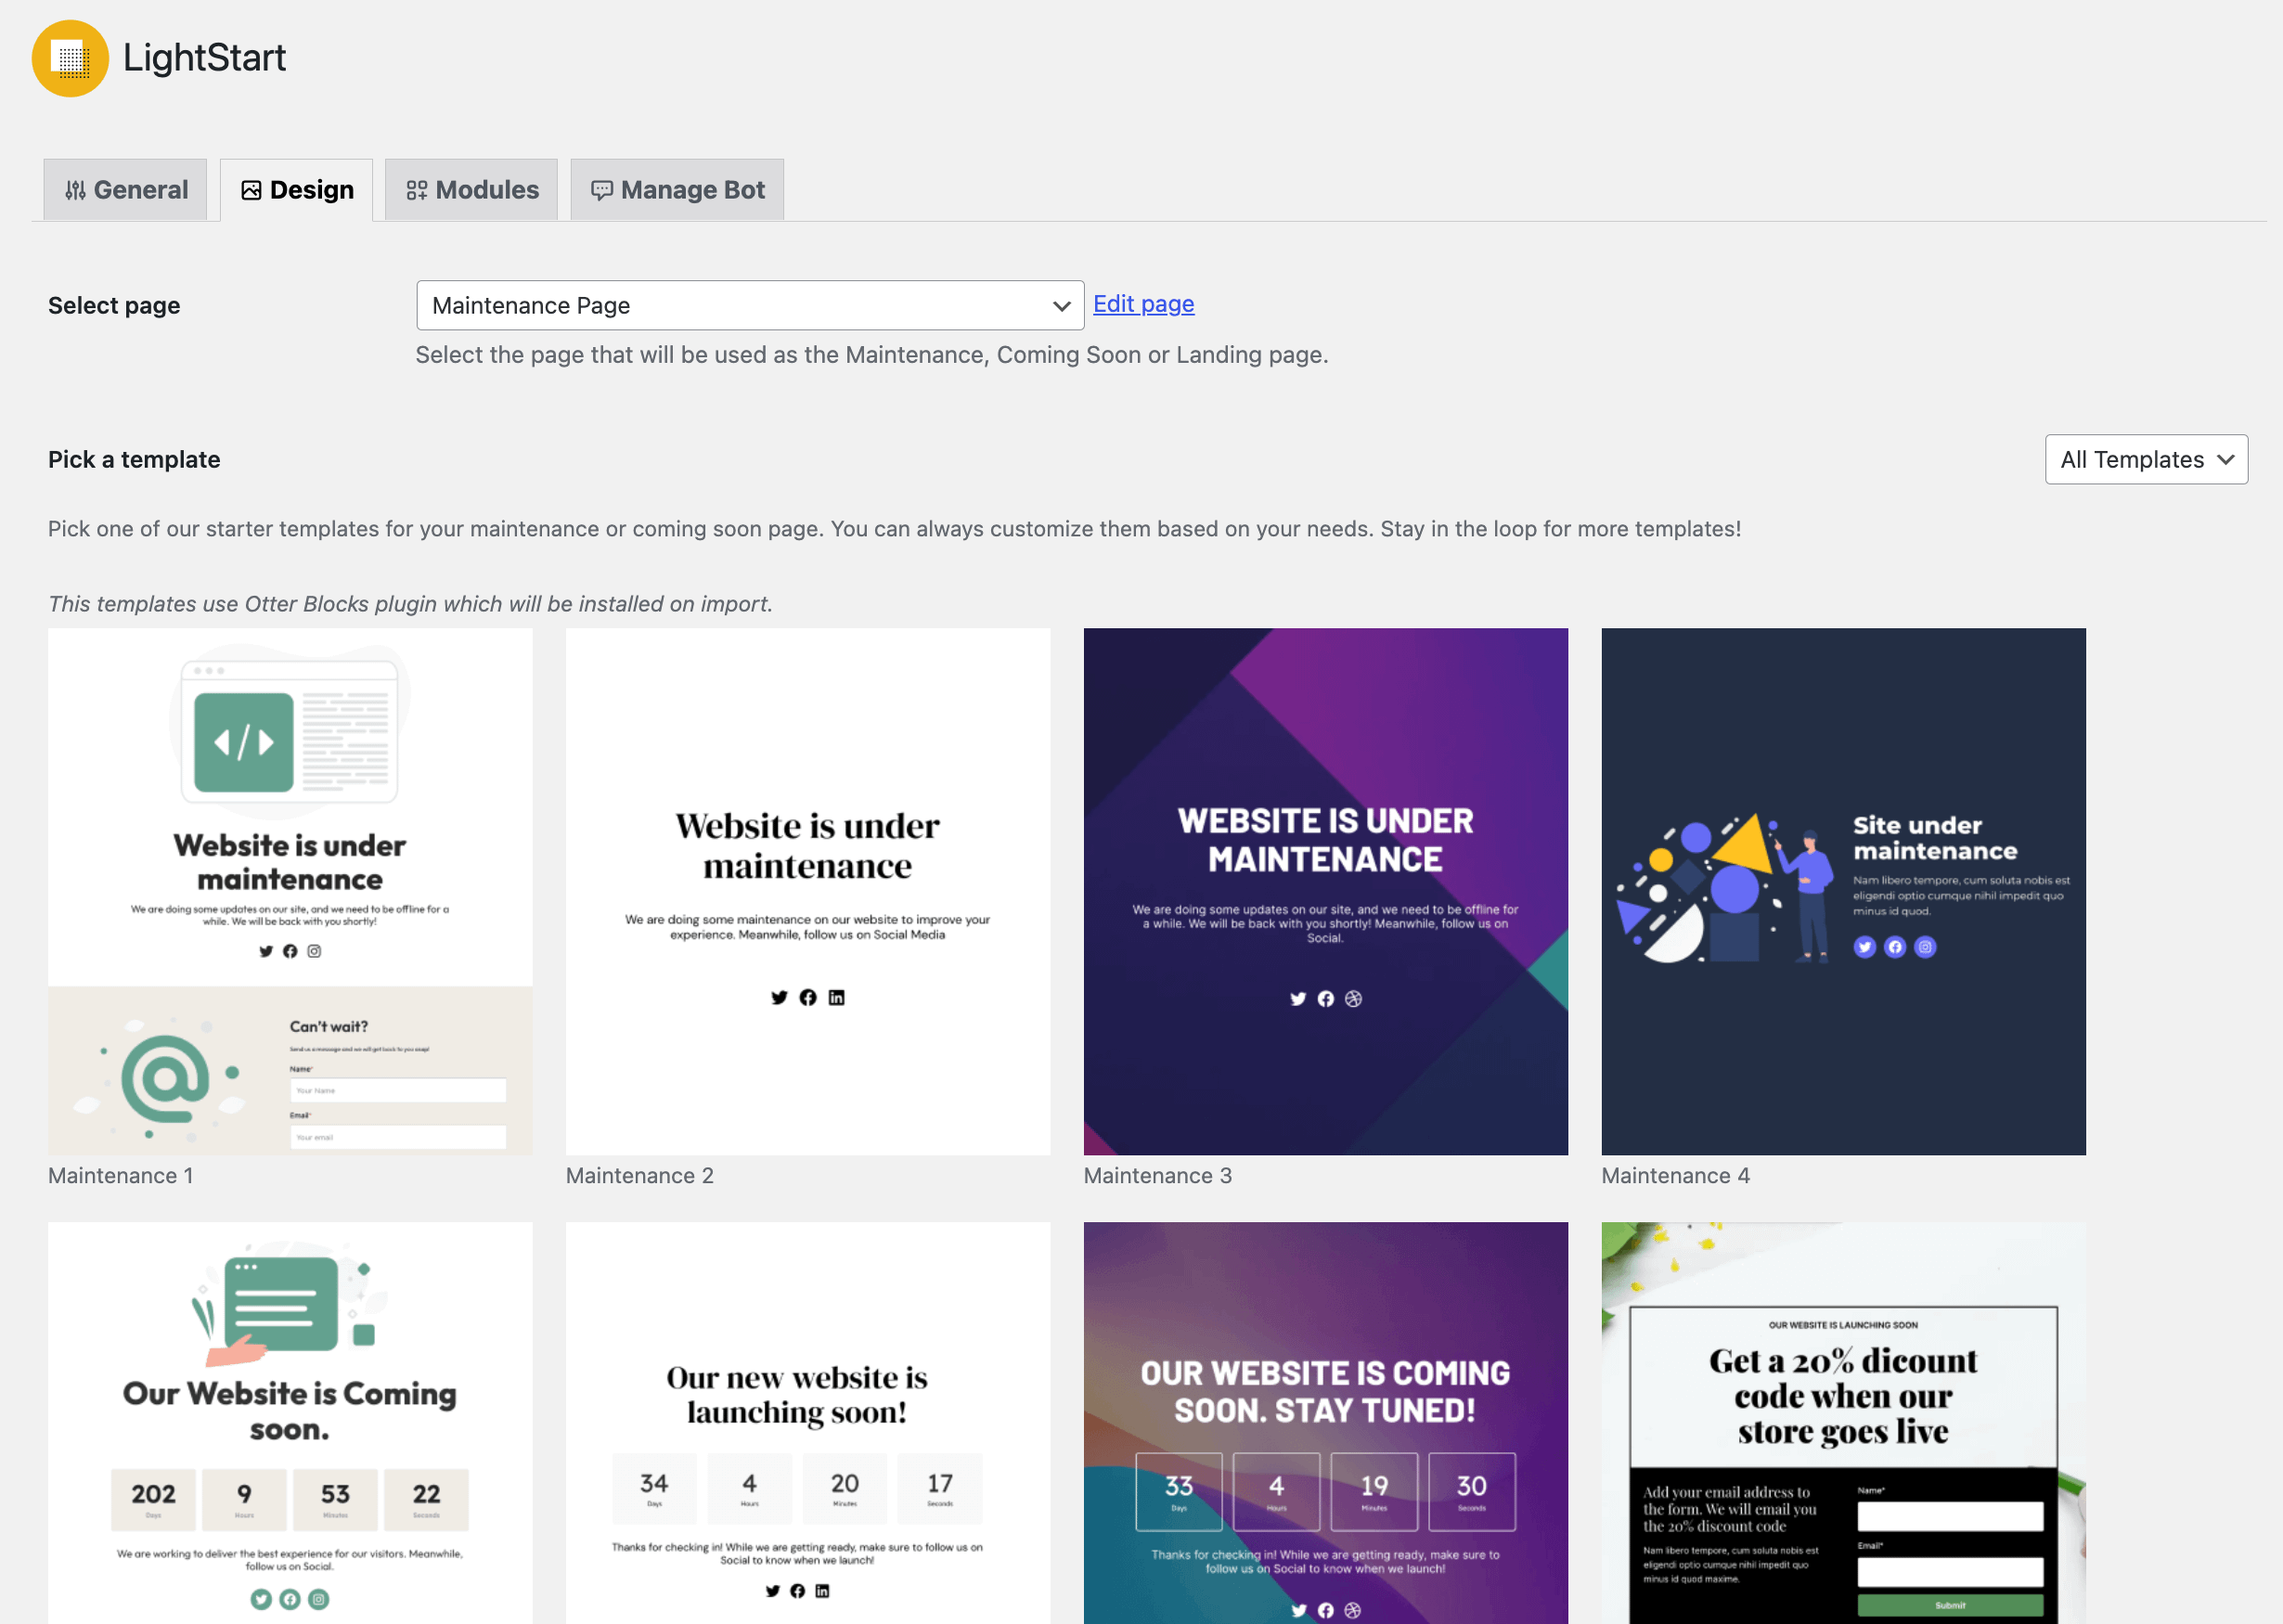
If you hover over the templates, the Import button will appear. After clicking on it, you will be notified that the previous import ( if you have done this ) will be replaced, and then you will be able to add your own customizations to the template by clicking on the Go to page button.
From this point, the page will be opened in the editor, and you can customize it as a regular page.

To reaccess the page, navigate to Pages and select the Maintenance Page from there.
💡 Tip: Use Otter Blocks to obtain even more outstanding results with your templates. Here is a dedicated doc.
Otter Blocks: Optional Recommendation
LightStart may prompt you to install Otter Blocks during onboarding or when working in the Design tab. This is a recommendation only — Otter Blocks is not installed automatically, and you can skip this prompt at any time without affecting core plugin functionality.
When Otter Blocks is needed
Otter Blocks is required only if you import and use pre-built LightStart templates that include Otter-powered blocks. If you choose not to install Otter Blocks:
- All core LightStart features — maintenance mode, coming soon pages, General settings, Modules, and Manage Bot — work fully without it.
- Imported templates that rely on Otter blocks may not render correctly until Otter Blocks is installed and activated.
If you skipped the recommendation during onboarding and want to install Otter Blocks later, navigate to Plugins > Add New and search for "Otter Blocks".
Modules
This panel ensures your website's engagement by allowing you to configure multiple popularity tools integrations:
- Subscribe - in this area, you will be able to track the subscribers, export that file as CSV, or empty the list.
- Google Analytics - be on track with the traffic on your website during the maintenance mode, using the Google Analytics options.

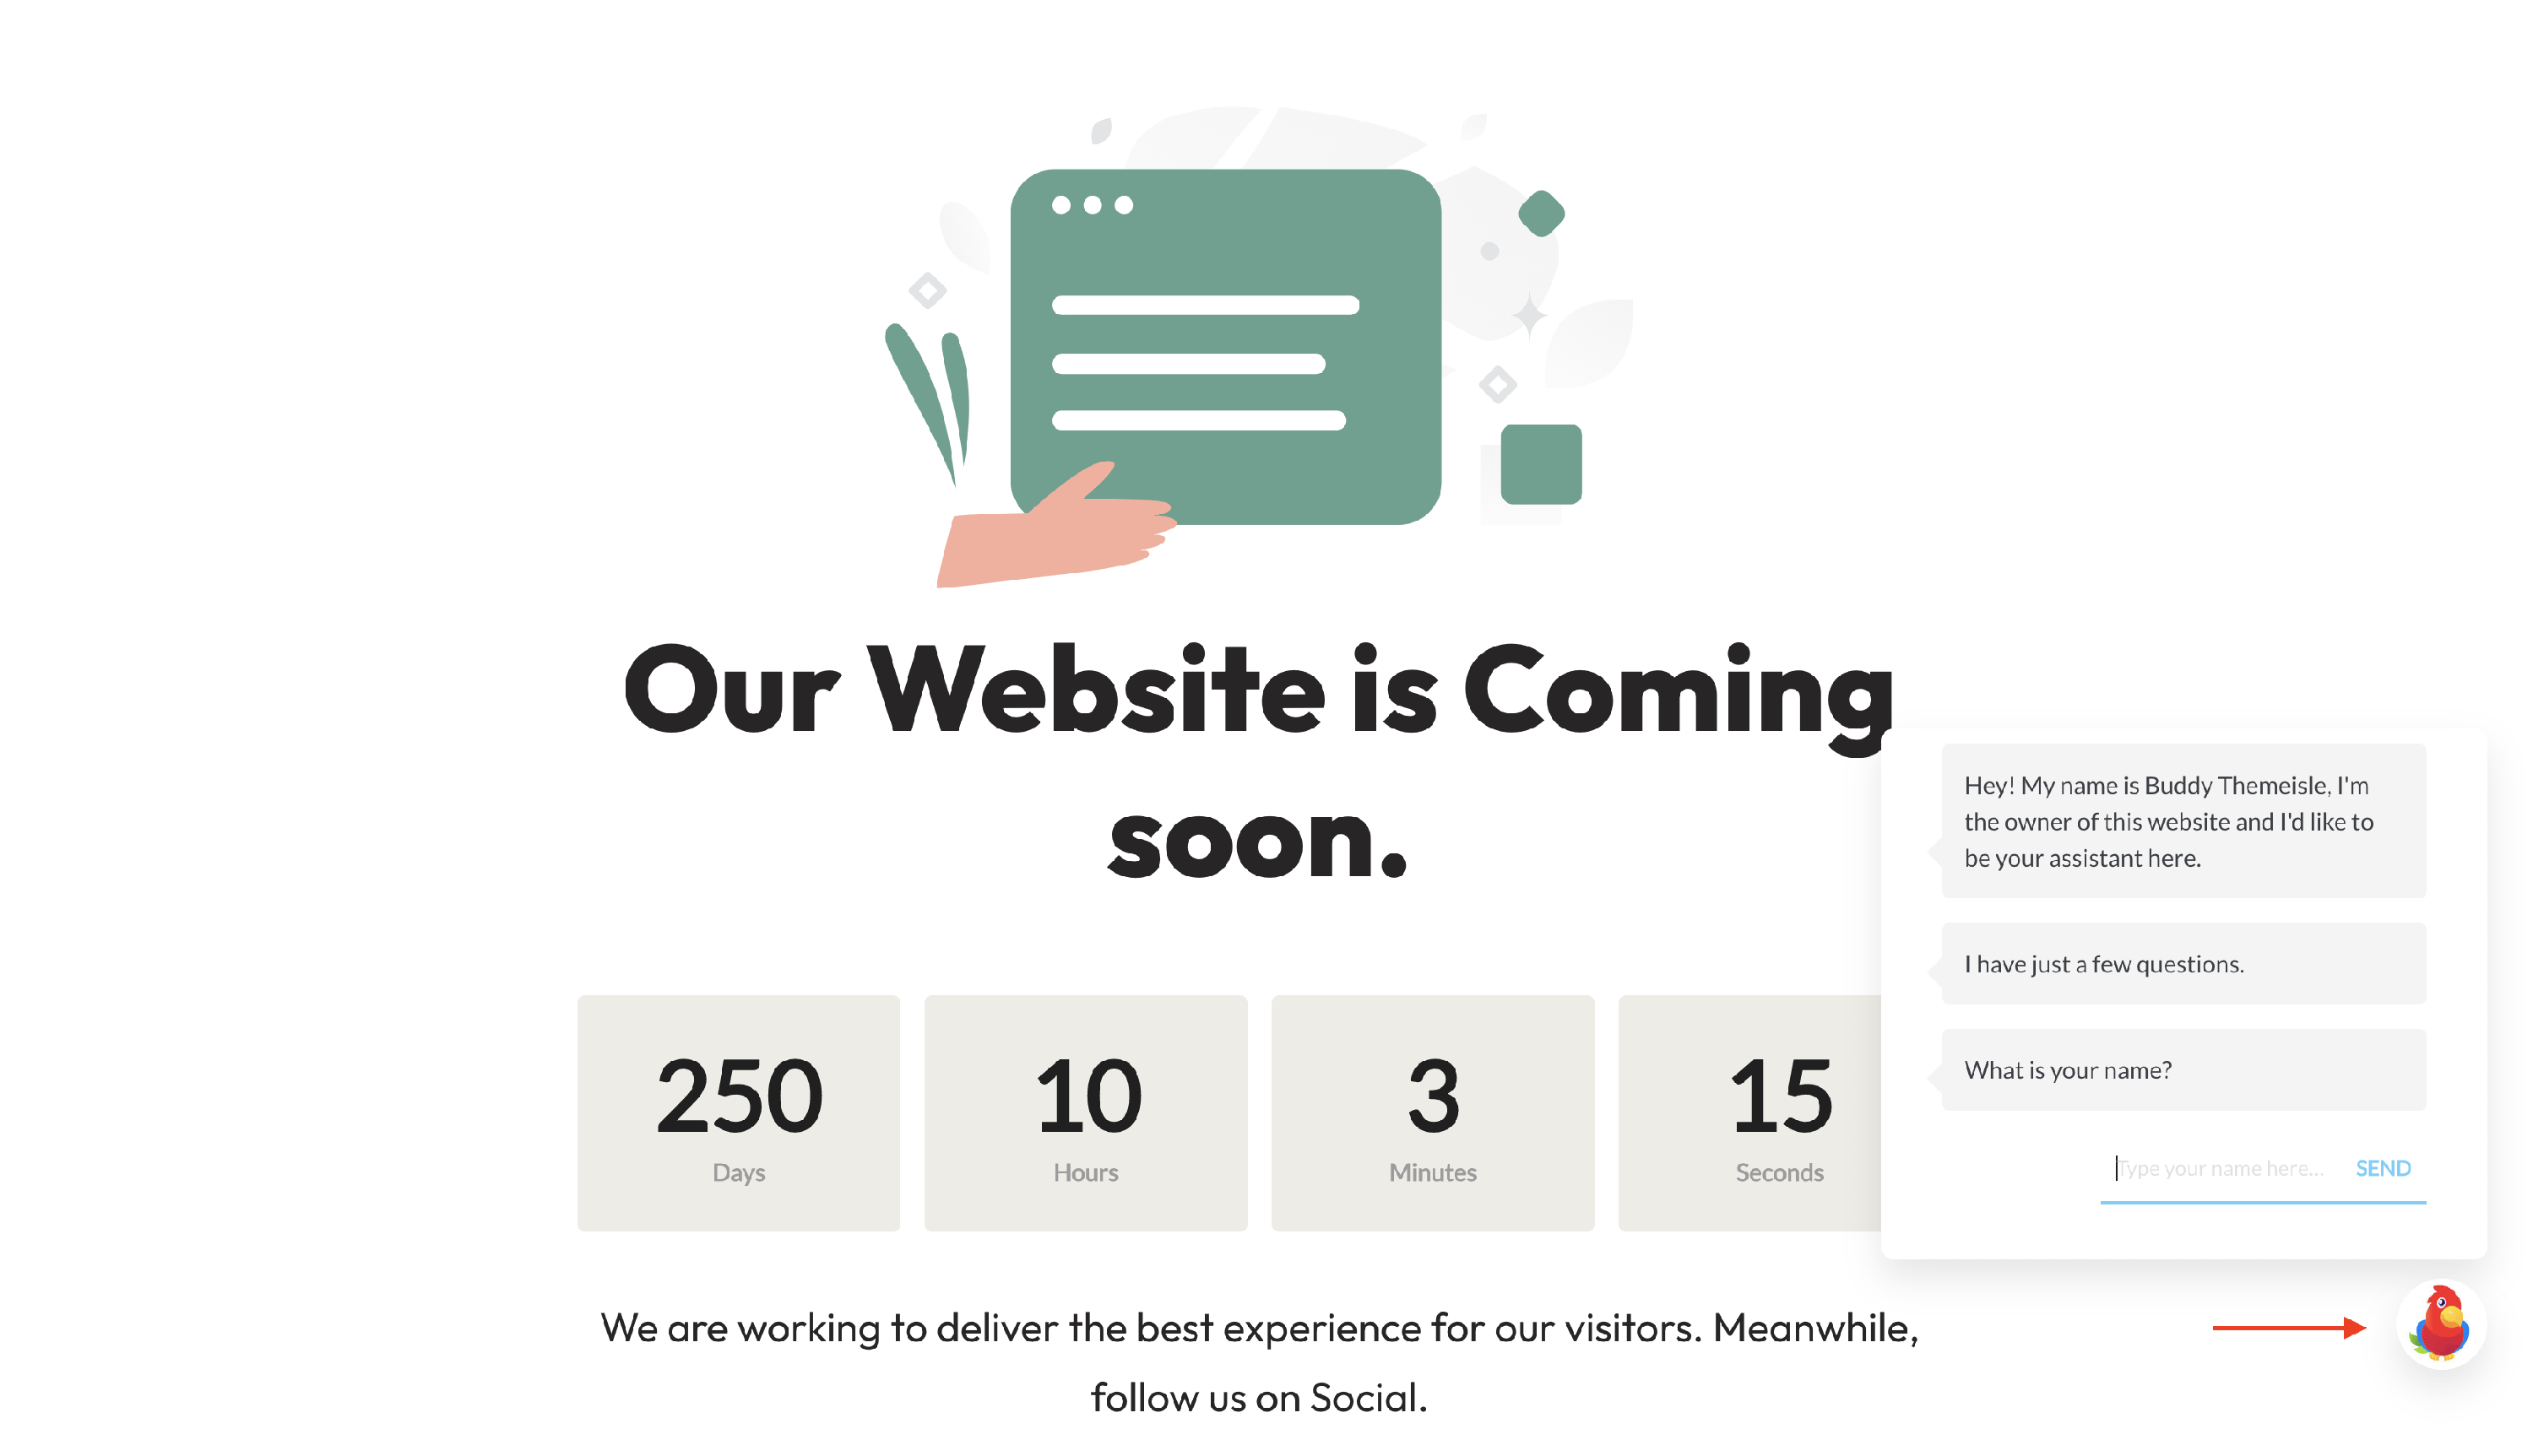
Manage Bot
This panel allows you to configure a bot that simulates visitors' conversations. You can set up the conversation steps, pick a name for the bot, and upload an avatar to boost confidence.
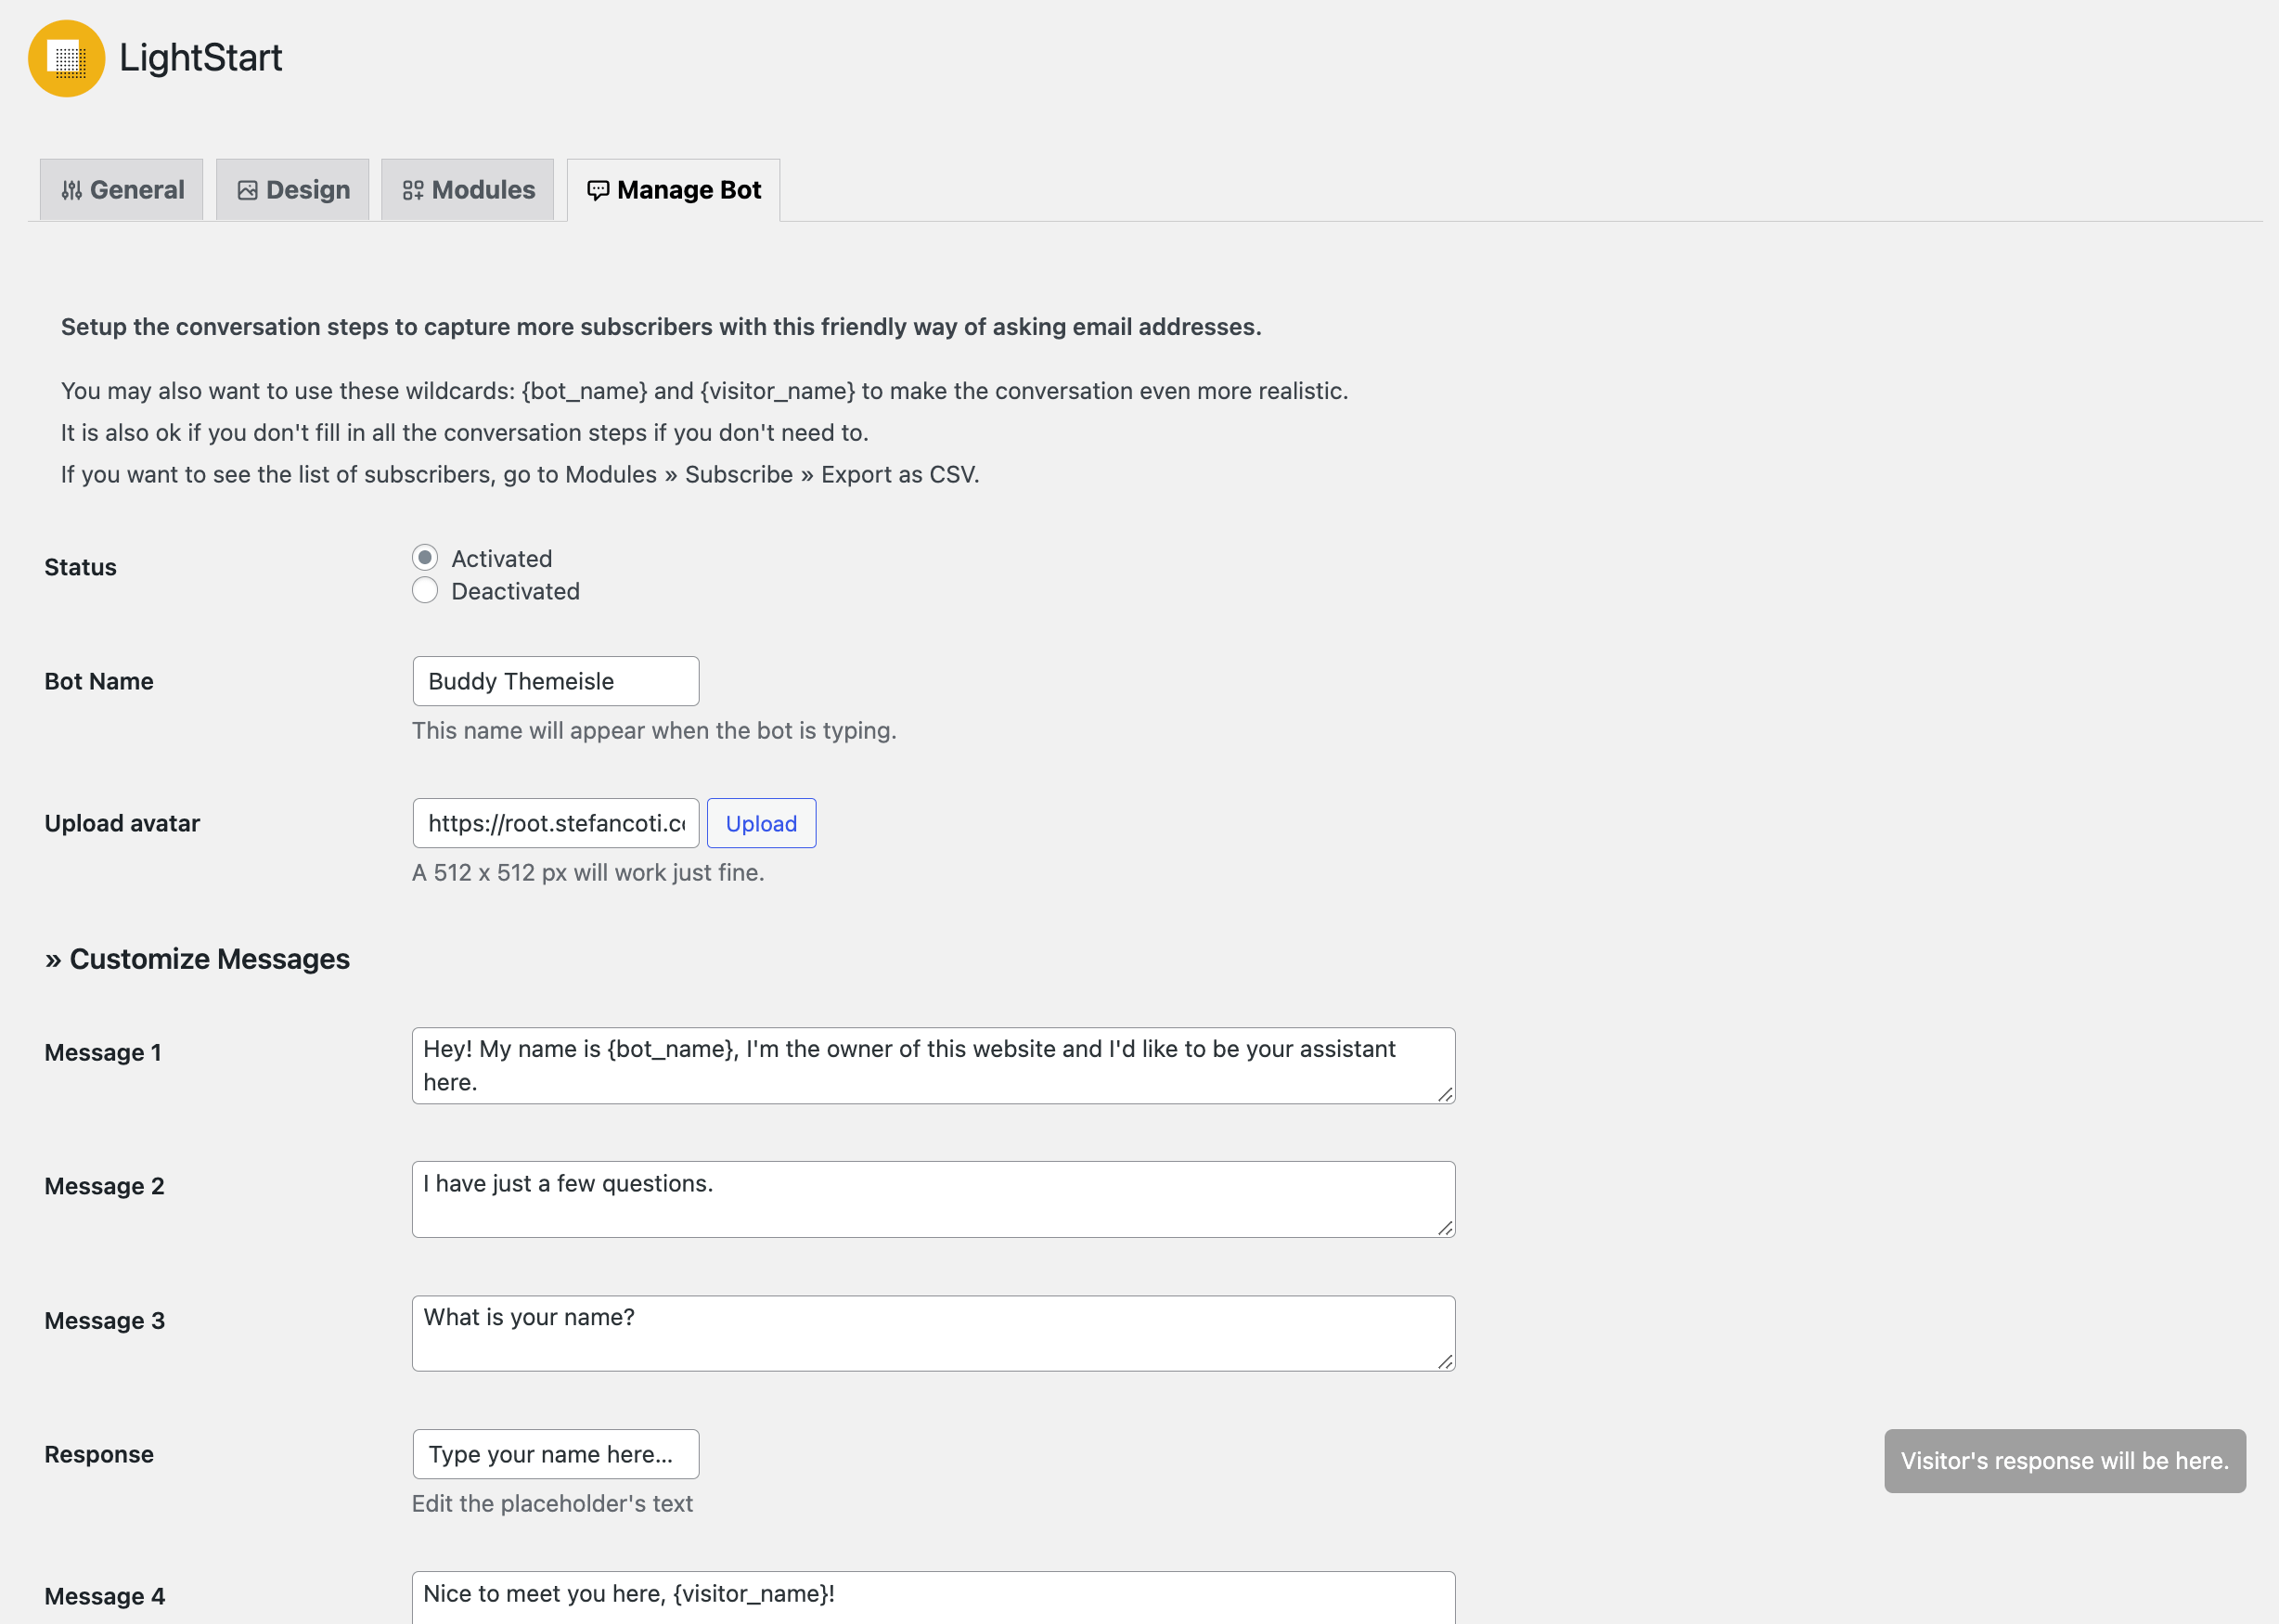
📝 Note: If you leave any field empty, it will not appear on the front end anymore.
💡 Result - adding a bot to engage the visitor
📝 Note: Please note that the countdown timer that you configure on the maintenance mode will not deactivate it once the time is gone. However, you can use its properties to pick a different end action, such as redirecting to a link or hiding it.
Video - How to put your website in Maintenance Mode
Advanced Customization with Hooks
LightStart provides the wpmm_head action hook, which lets you inject custom content — such as JavaScript — into the <head> section of your maintenance mode page. This is useful when you need to add tracking scripts, custom analytics, or any other JavaScript that isn't covered by the built-in plugin settings.
📝 Note: The wpmm_head hook only fires when maintenance mode is active. Code added through this hook will not run on regular pages or when the plugin is deactivated.
Adding an Inline Script
To add a custom inline JavaScript snippet to your maintenance page, paste the following code into your theme's functions.php file or use a code snippets plugin:
add_action( 'wpmm_head', function() {
    ?>
    <script>
        // Your custom JavaScript here
        console.log( 'Maintenance mode is active.' );
    </script>
    <?php
} );
Replace the console.log line with your own JavaScript code.
Adding an External Script
To load an external JavaScript file on the maintenance mode page, use wp_enqueue_script inside the wpmm_head hook:
add_action( 'wpmm_head', function() {
    wp_enqueue_script(
        'my-custom-script',
        'https://example.com/path/to/your-script.js',
        array(),
        '1.0.0',
        false
    );
    wp_scripts()->do_items( 'my-custom-script' );
} );
Replace 'https://example.com/path/to/your-script.js' with the full URL to your script file.
💡 Tip: If you prefer not to edit functions.php directly, you can use a plugin like Woody Code Snippets to add these PHP snippets safely without modifying theme files. This also ensures your customizations are not lost when you switch or update your theme.
Troubleshooting
Homepage Remains in Maintenance Mode After Deactivation
If your homepage still shows the maintenance mode page after you have deactivated the LightStart plugin, the plugin was likely deactivated without first setting Status to Deactivated in the General tab. Because LightStart saves its active state to the database, simply deactivating the plugin does not automatically turn off maintenance mode.
To fix this, follow the steps below:
- Reactivate the LightStart plugin from Plugins in the WordPress dashboard.
- Navigate to Dashboard > LightStart and open the General tab.
- Set Status to Deactivated and click Save Settings.
- Return to Plugins and deactivate or delete the LightStart plugin.
- Clear any caching plugins or server-side caches so visitors see the live site.
Homepage Returns a 404 After Disabling Maintenance Mode
If your homepage returns a 404 after you disable maintenance mode, LightStart may have changed that page to Private because it was used as the maintenance page template.
To restore the page, follow these steps:
- Navigate to WordPress Dashboard > Pages.
- Open the page that is used as your homepage.
- Change its status or visibility from Private back to Published or Public.
- Save or update the page.
- Open your homepage in a logged-out or private browser window to confirm that it loads correctly.
If the homepage still does not appear right away, clear your page cache, any caching plugin cache, and any server-side cache before testing again.