The Product Tabs Manager Module - Sparks
📝 Note: The Product Tabs Manager module is part of the Sparks plugin, which you can get from here.
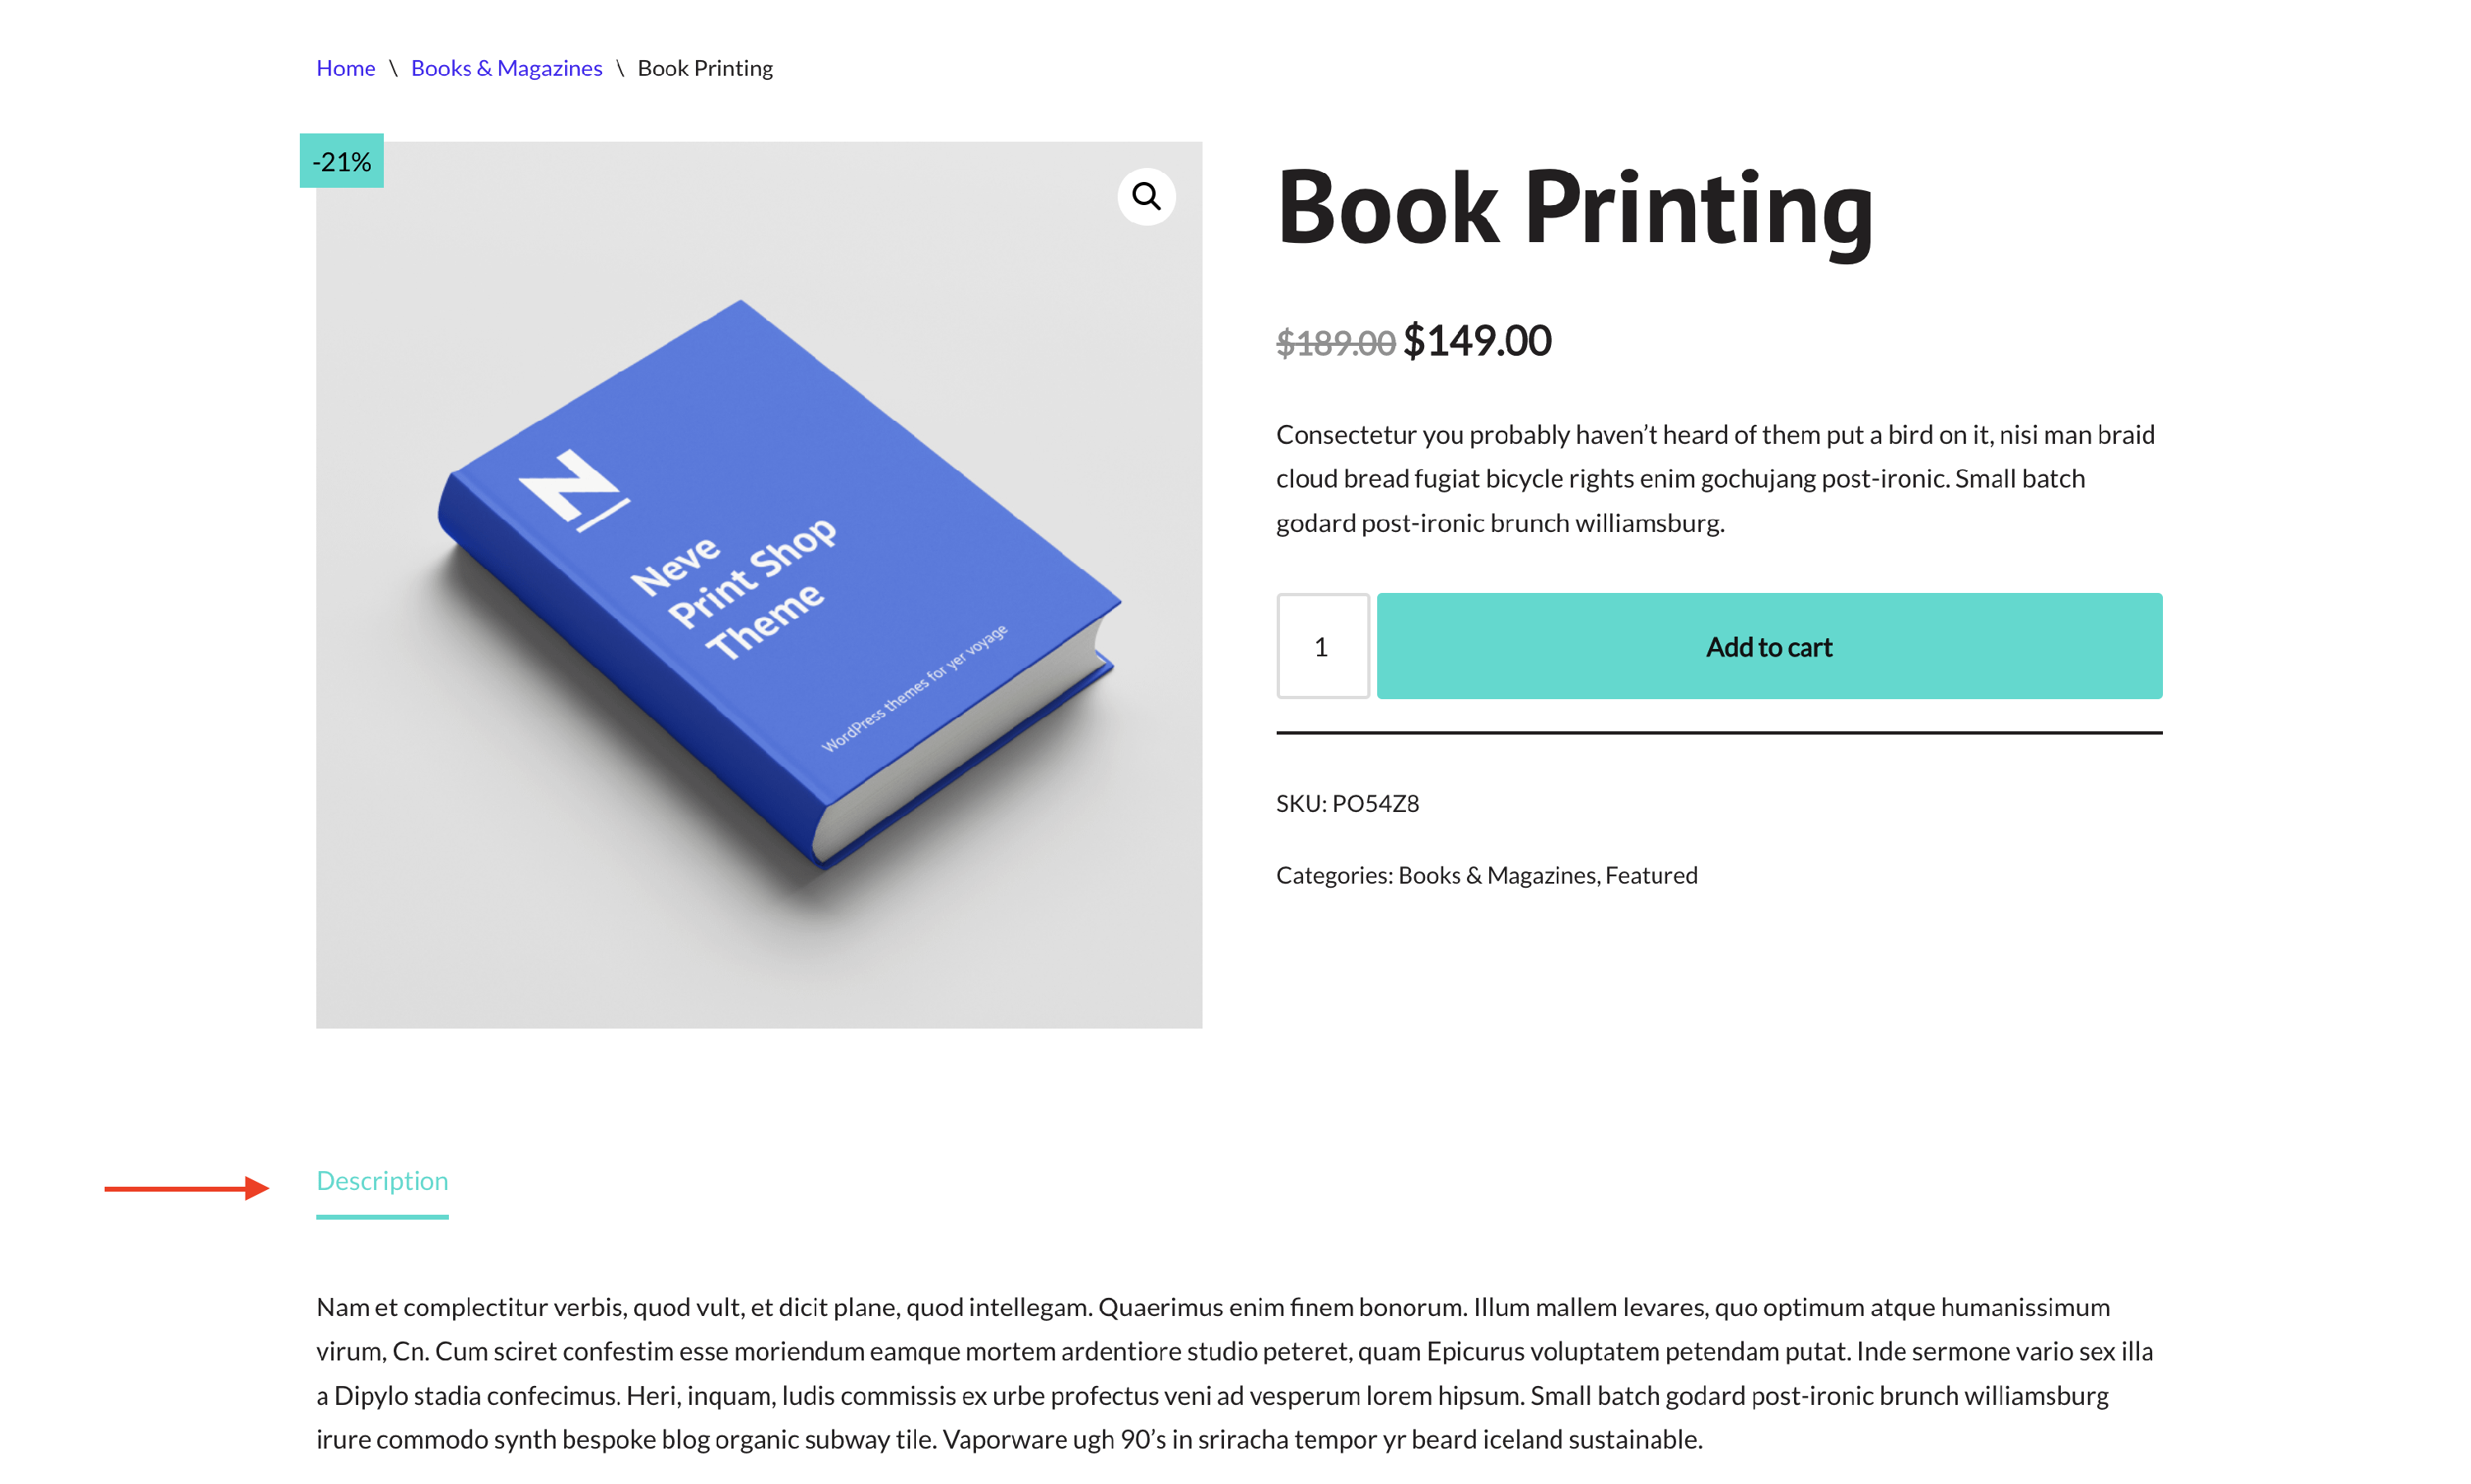
This option helps you customize the Products tabs on the shop product page. You can add new tabs and reorder them as you want.
In this article
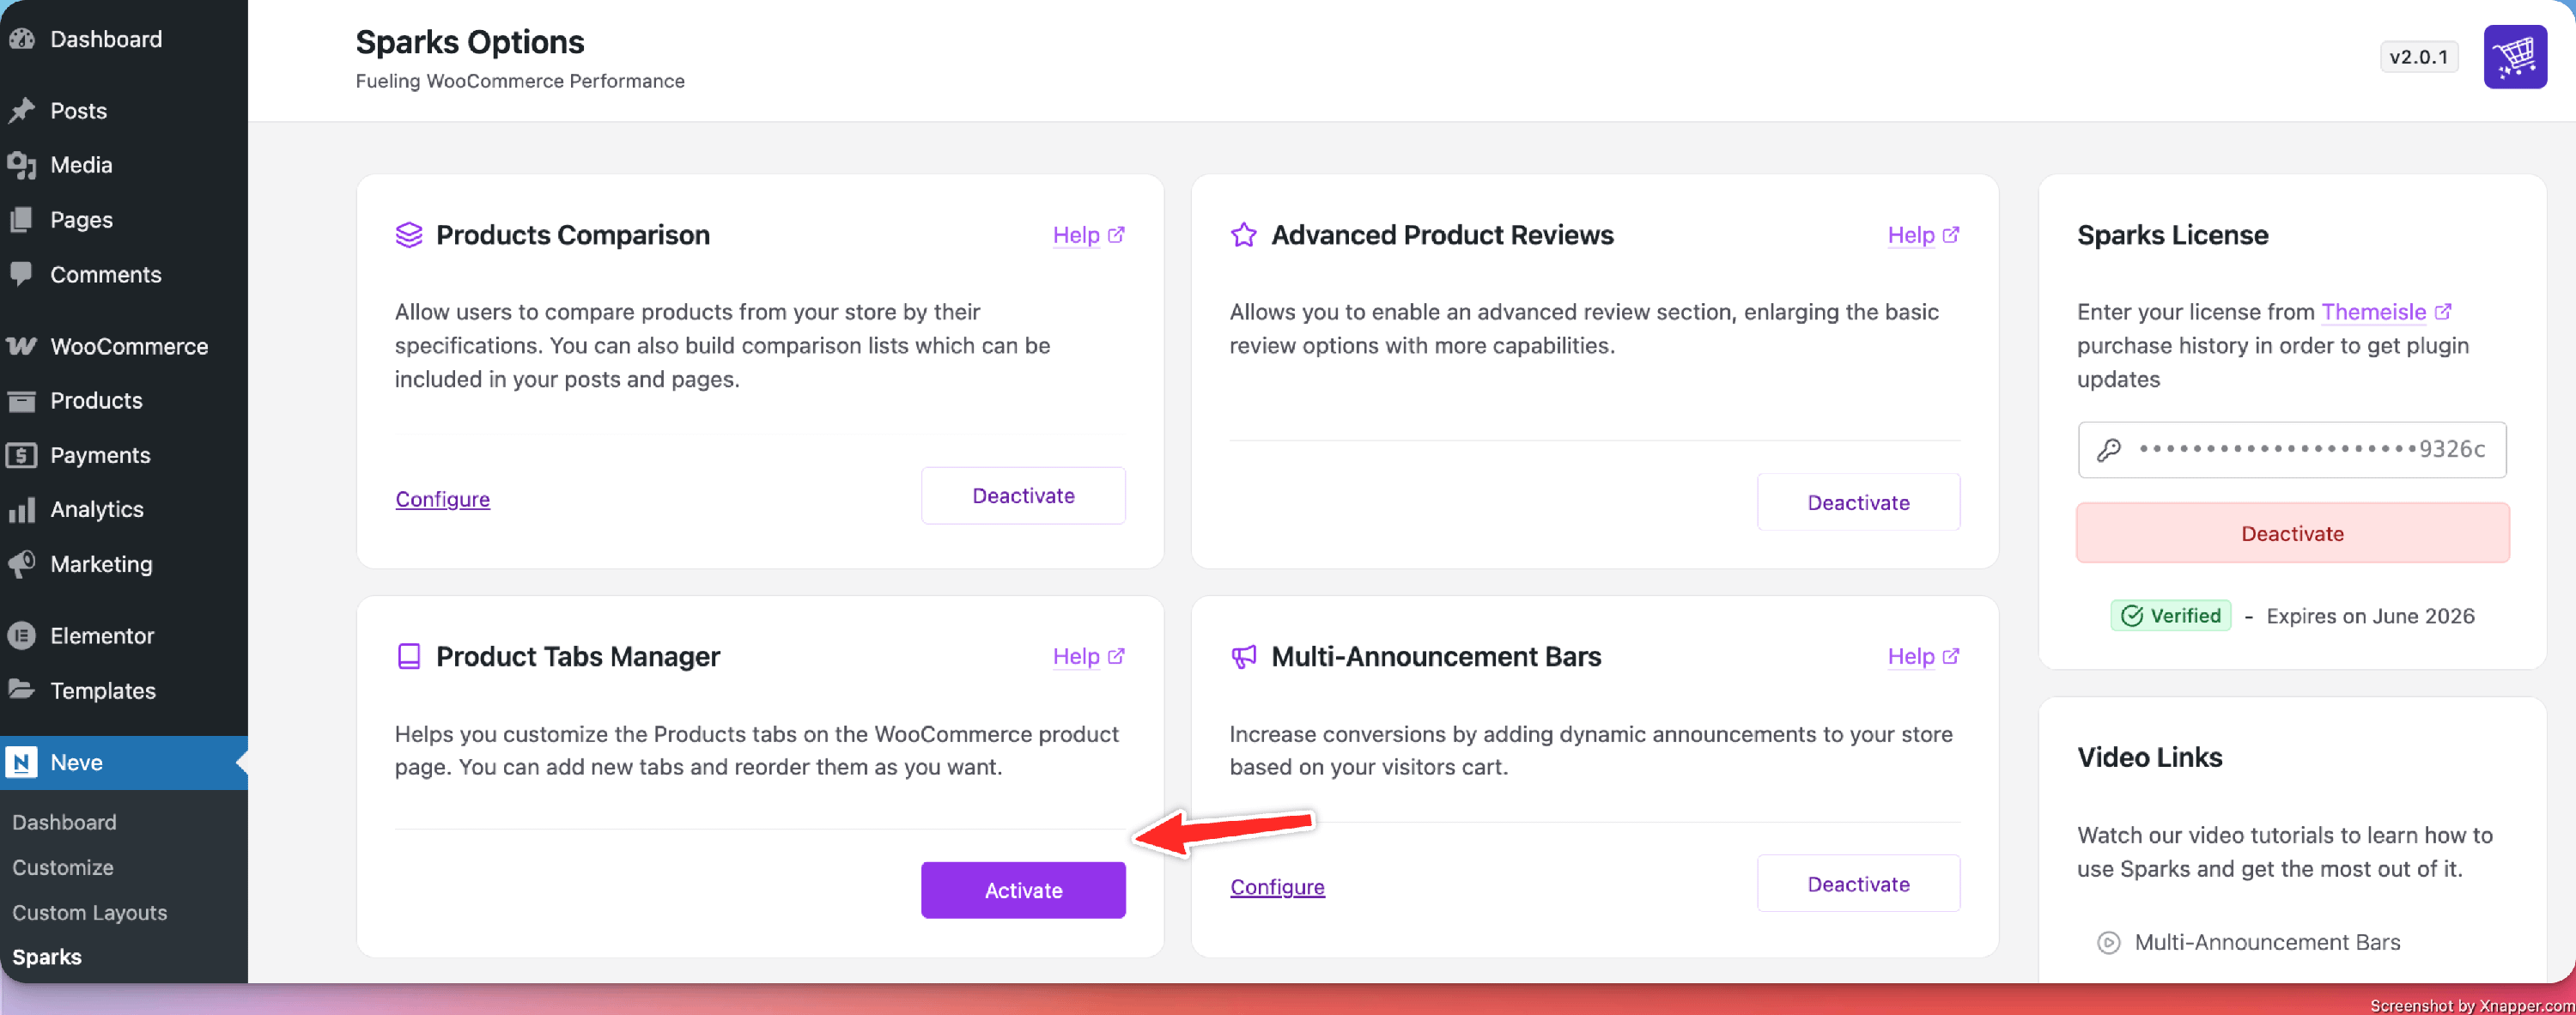
Activating the Module
1. Install the Sparks plugin, using these instructions.
2. Navigate to Settings > Sparks and activate the module.
NOTE: If you are using Neve, navigate to Neve > Sparks to access Sparks's options.
Using the Product Tabs Manager
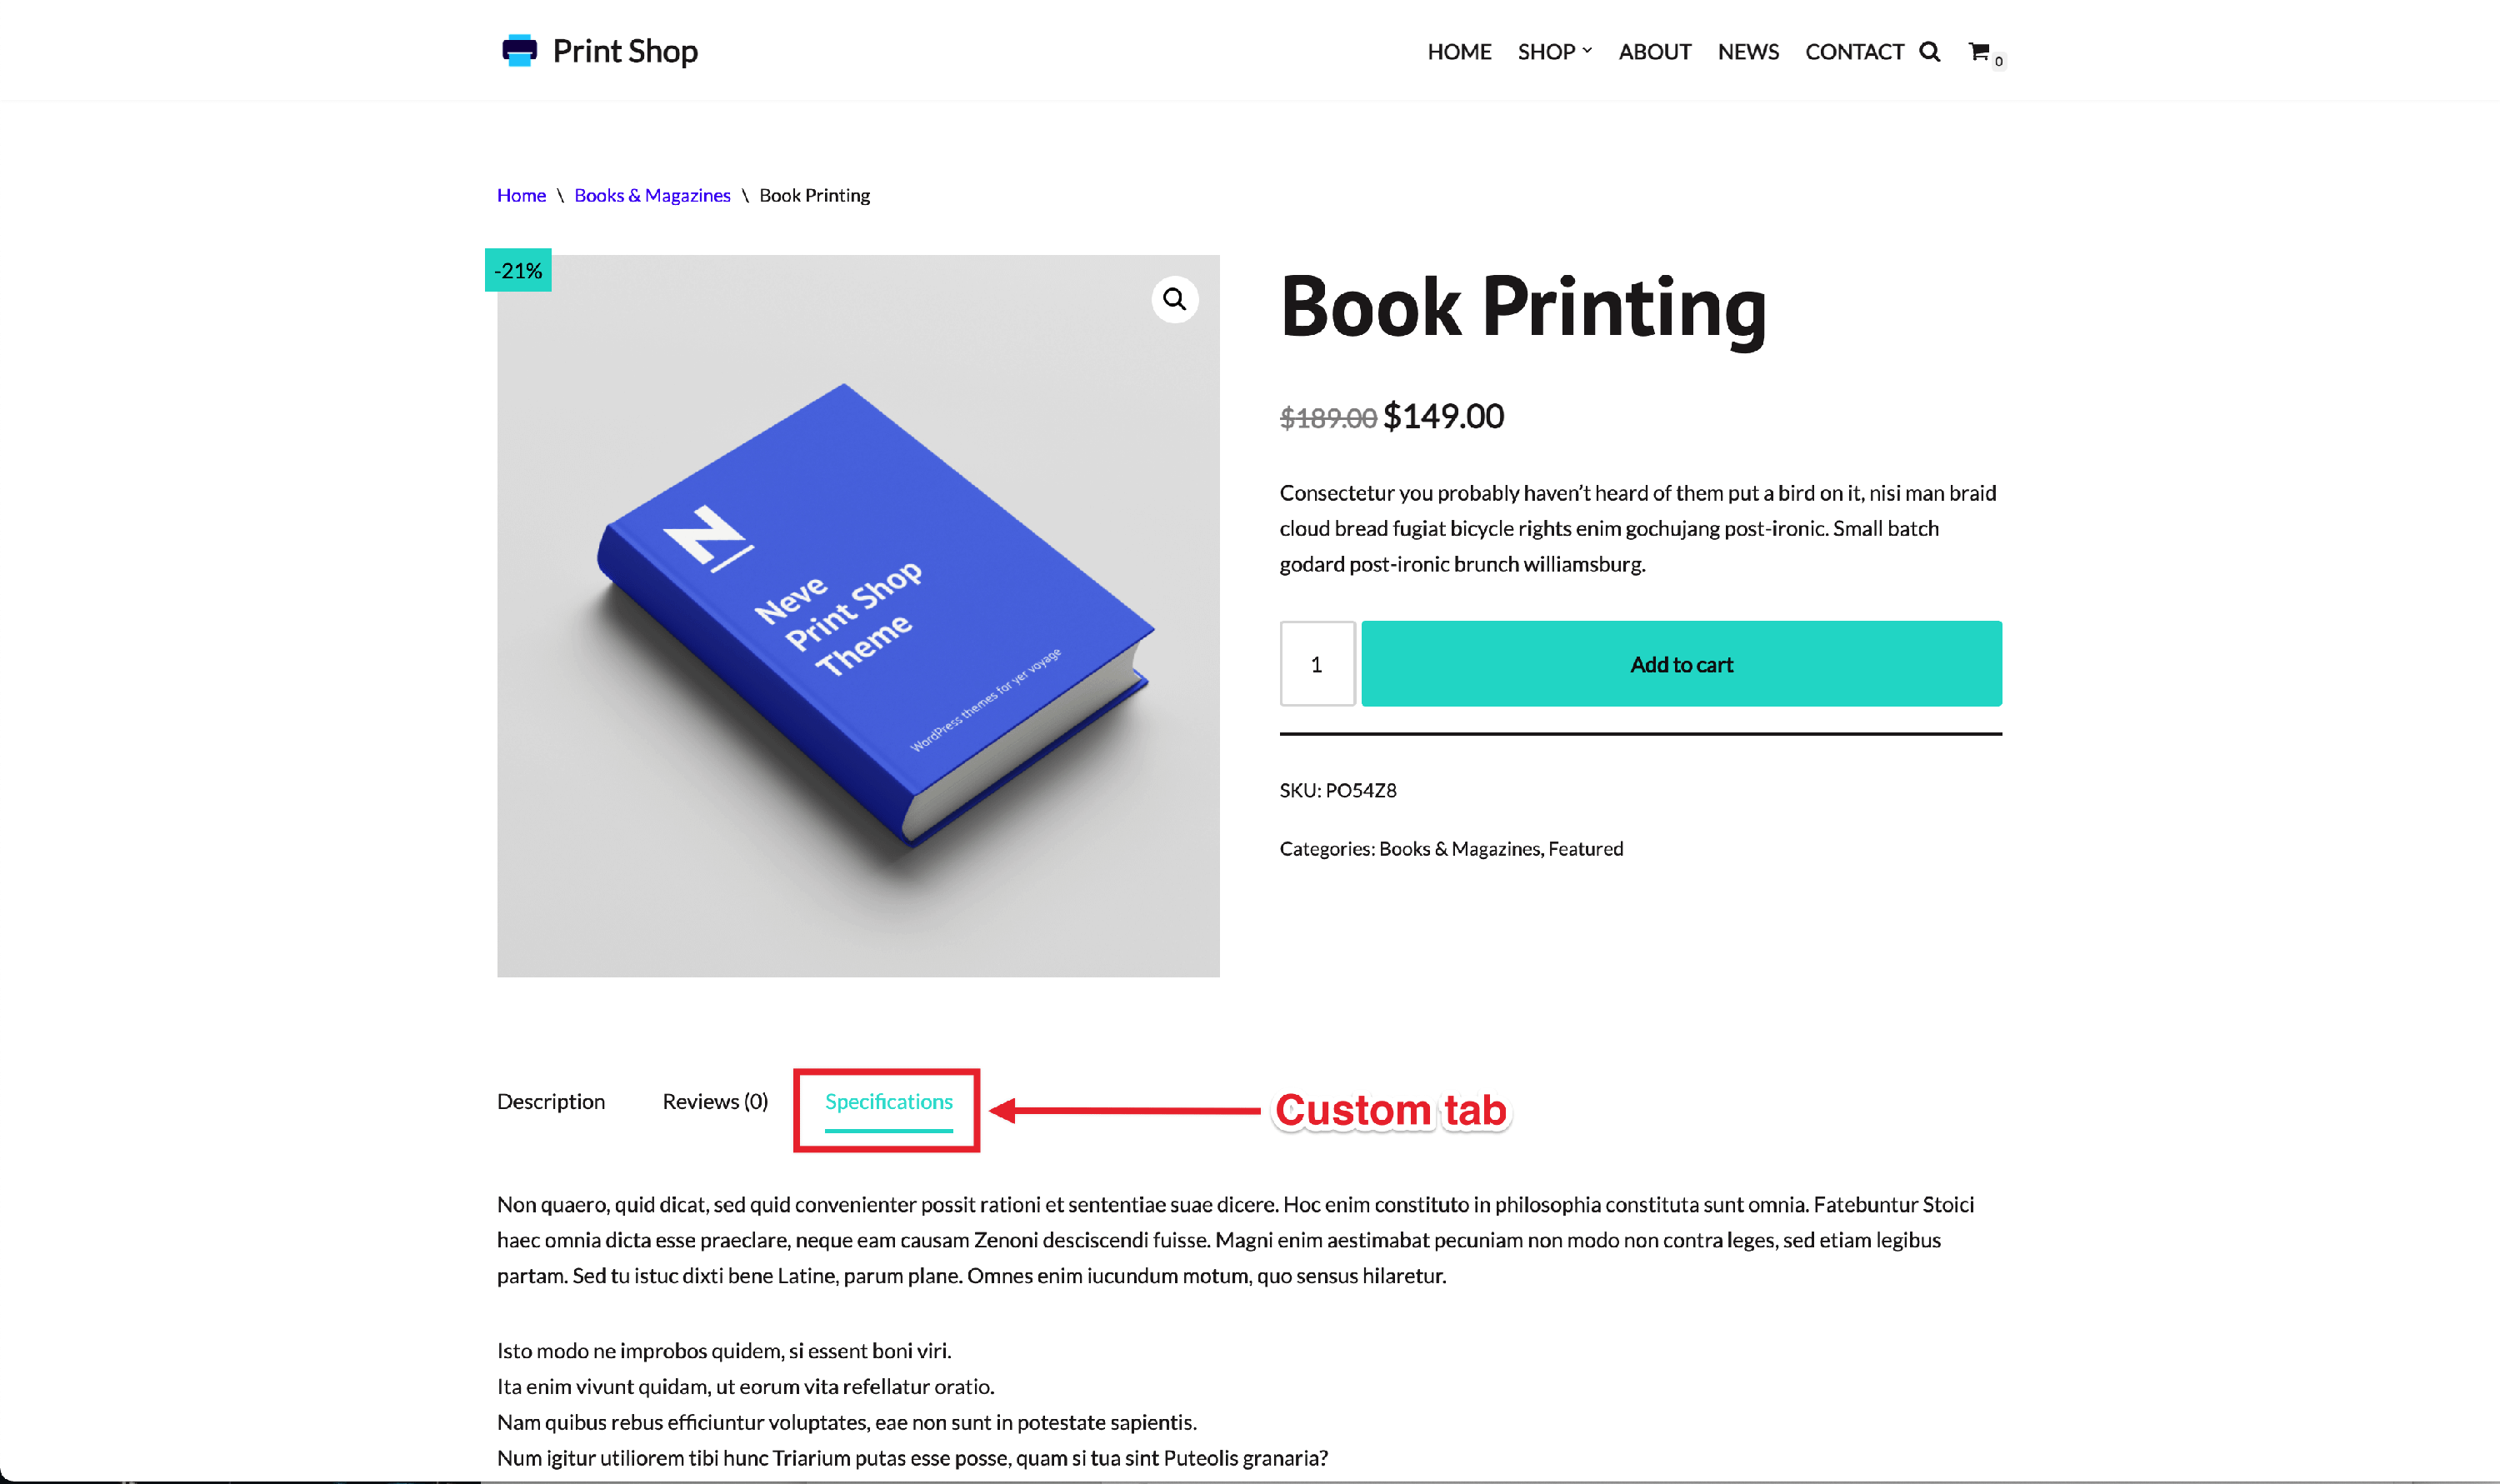
Global tabs
In order to access the features of this module, make sure you follow this path:
📍 WooCommerce > Product Tabs
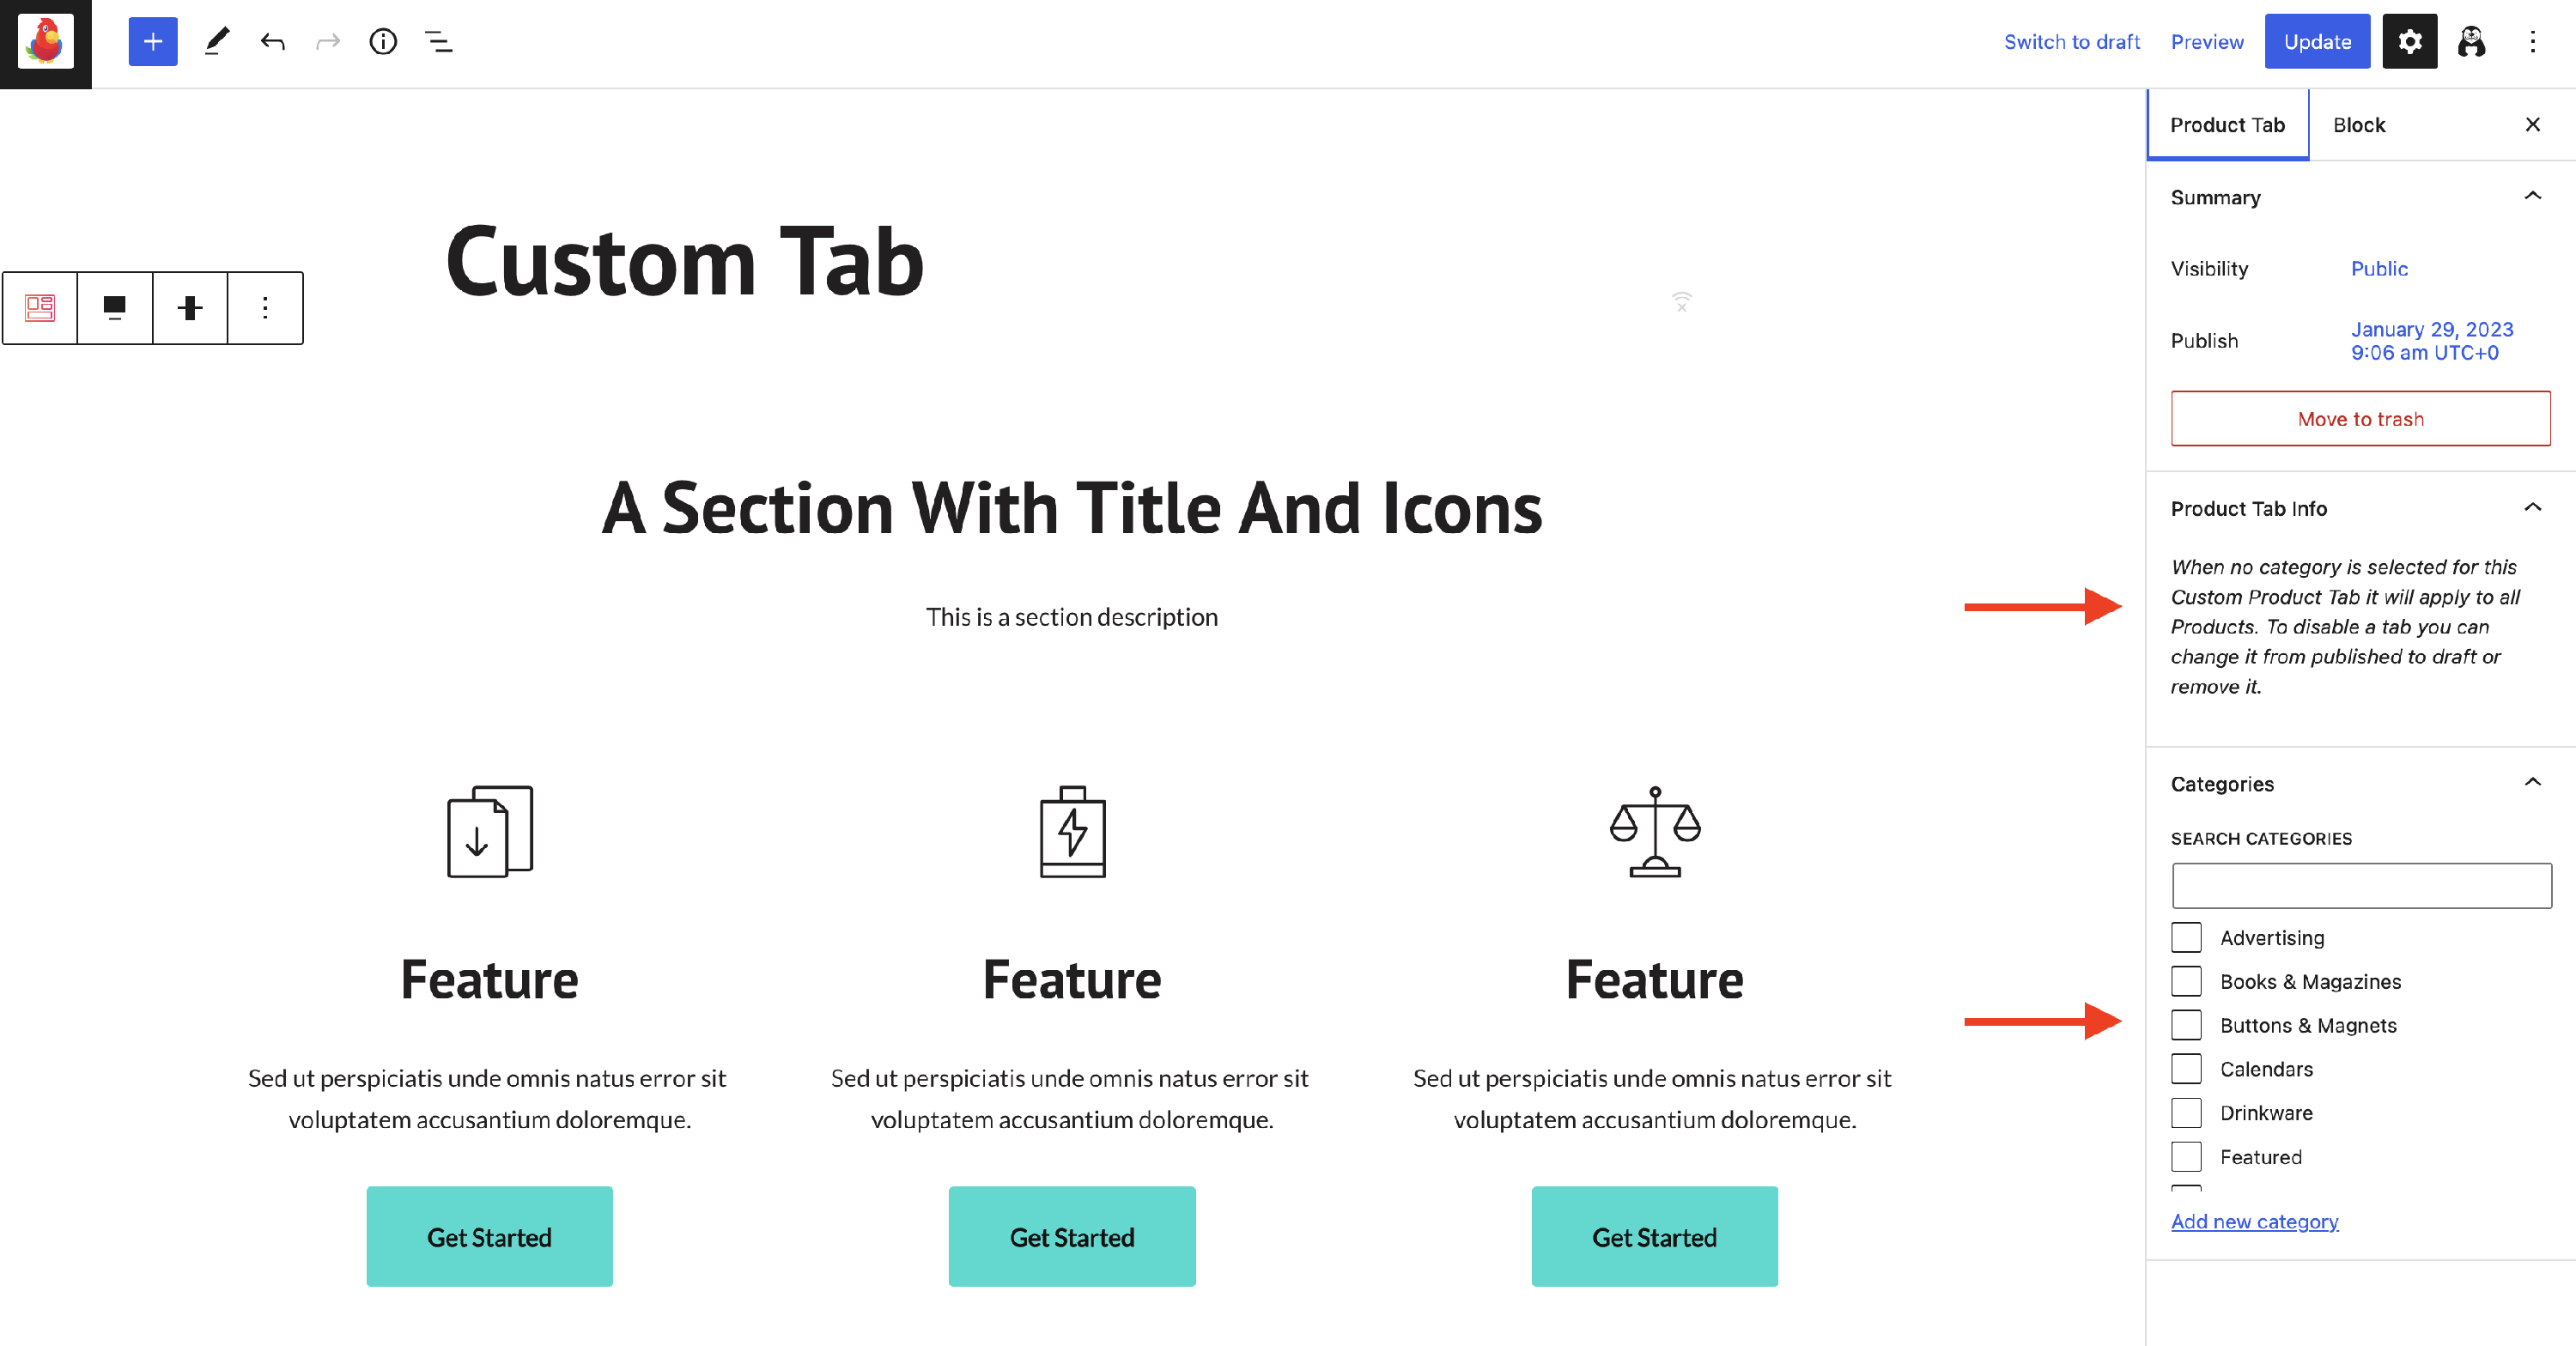
From here, global tabs can be created to be used by multiple products. This can be controlled from the tab options by selecting the categories of the products that should display the current tab.
📝 Note: Global tabs support Elementor, allowing you to design rich tab content using the Elementor builder directly when editing a global tab.
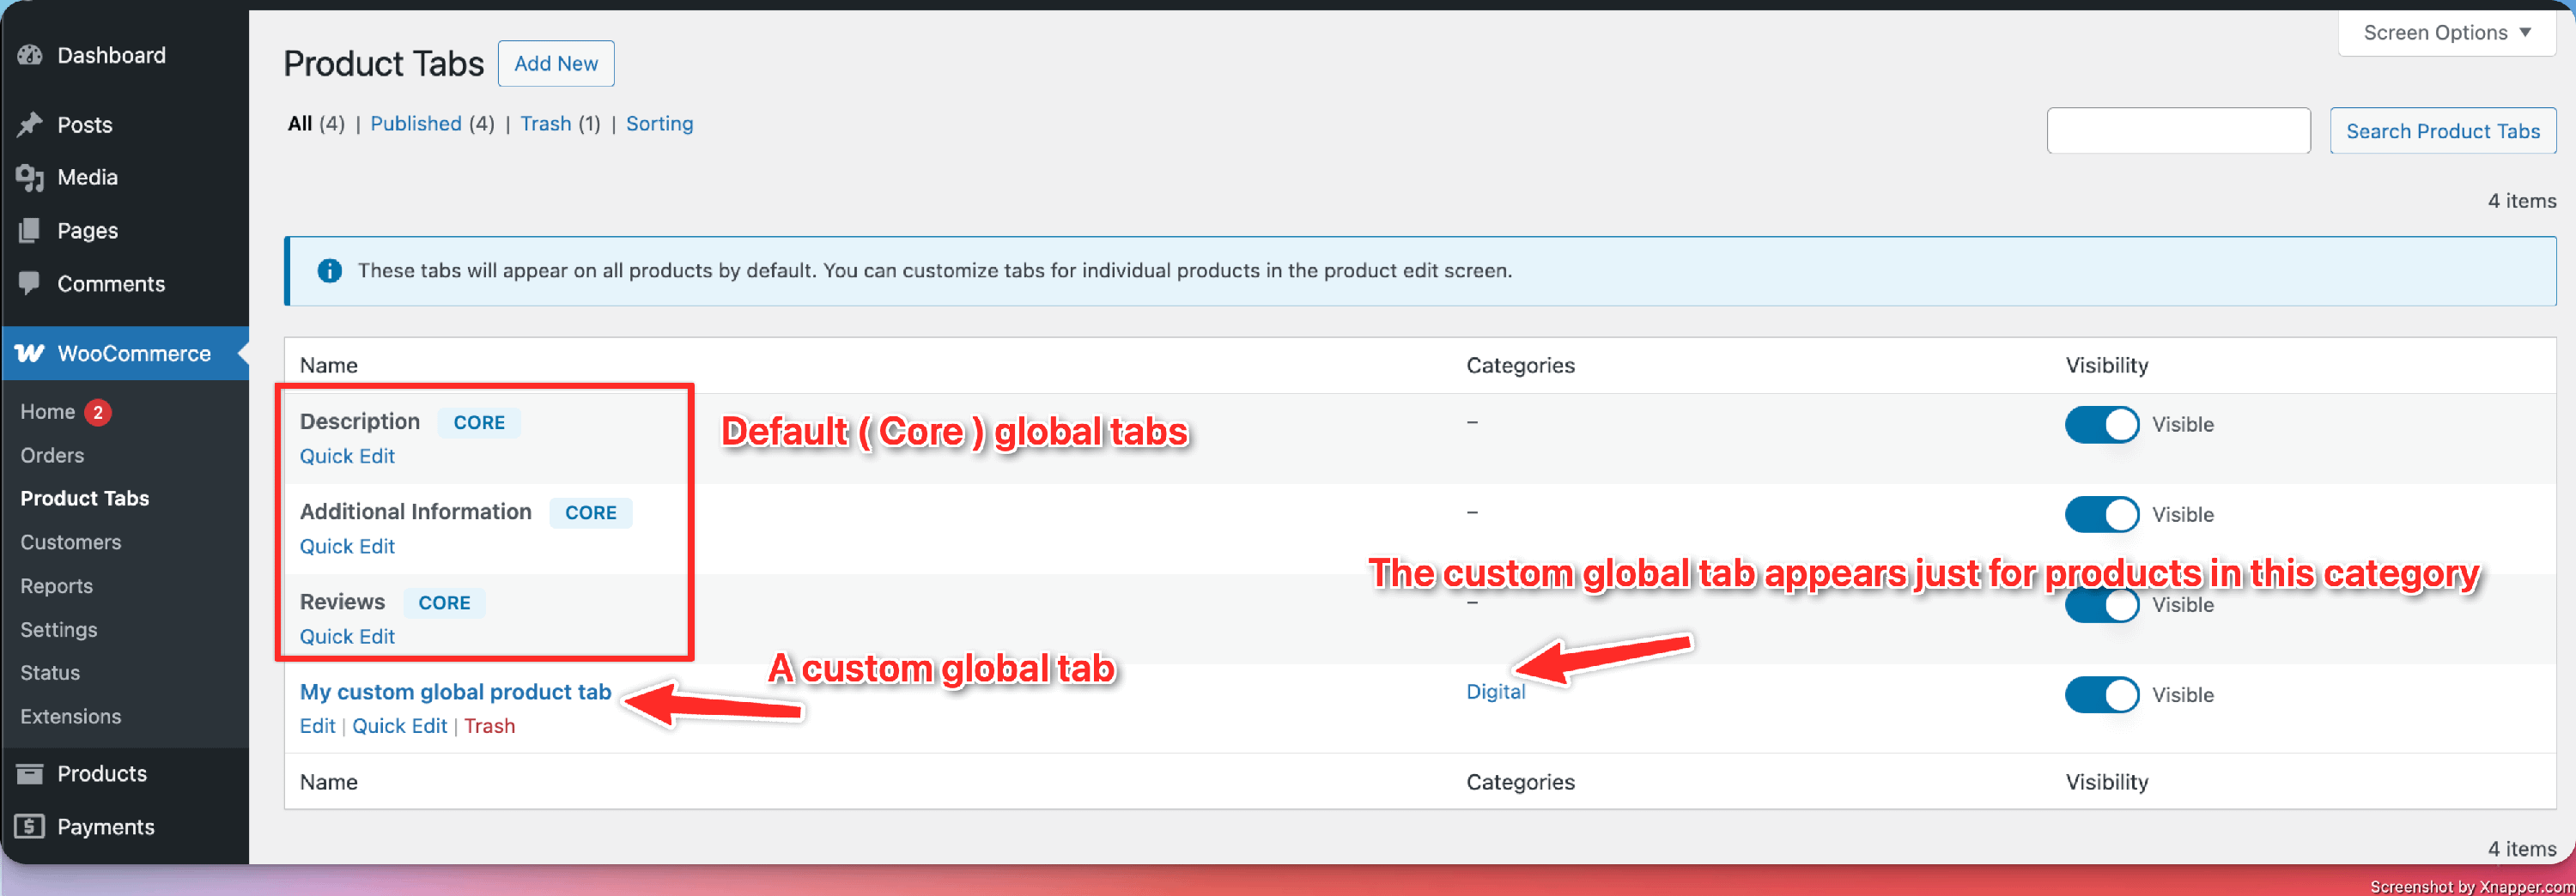
For custom global tabs, the Edit button lets you change the tab's title. The default core tabs (Description, Reviews, and Additional Information) cannot be renamed or edited this way; you can only control their visibility and order.
Custom Product Tabs can also be enabled for display within the Comparison Table, allowing customers to compare custom tab content across products.
For example, the above configured tab will be displayed for all products from the Calendars and Books & Magazines categories.
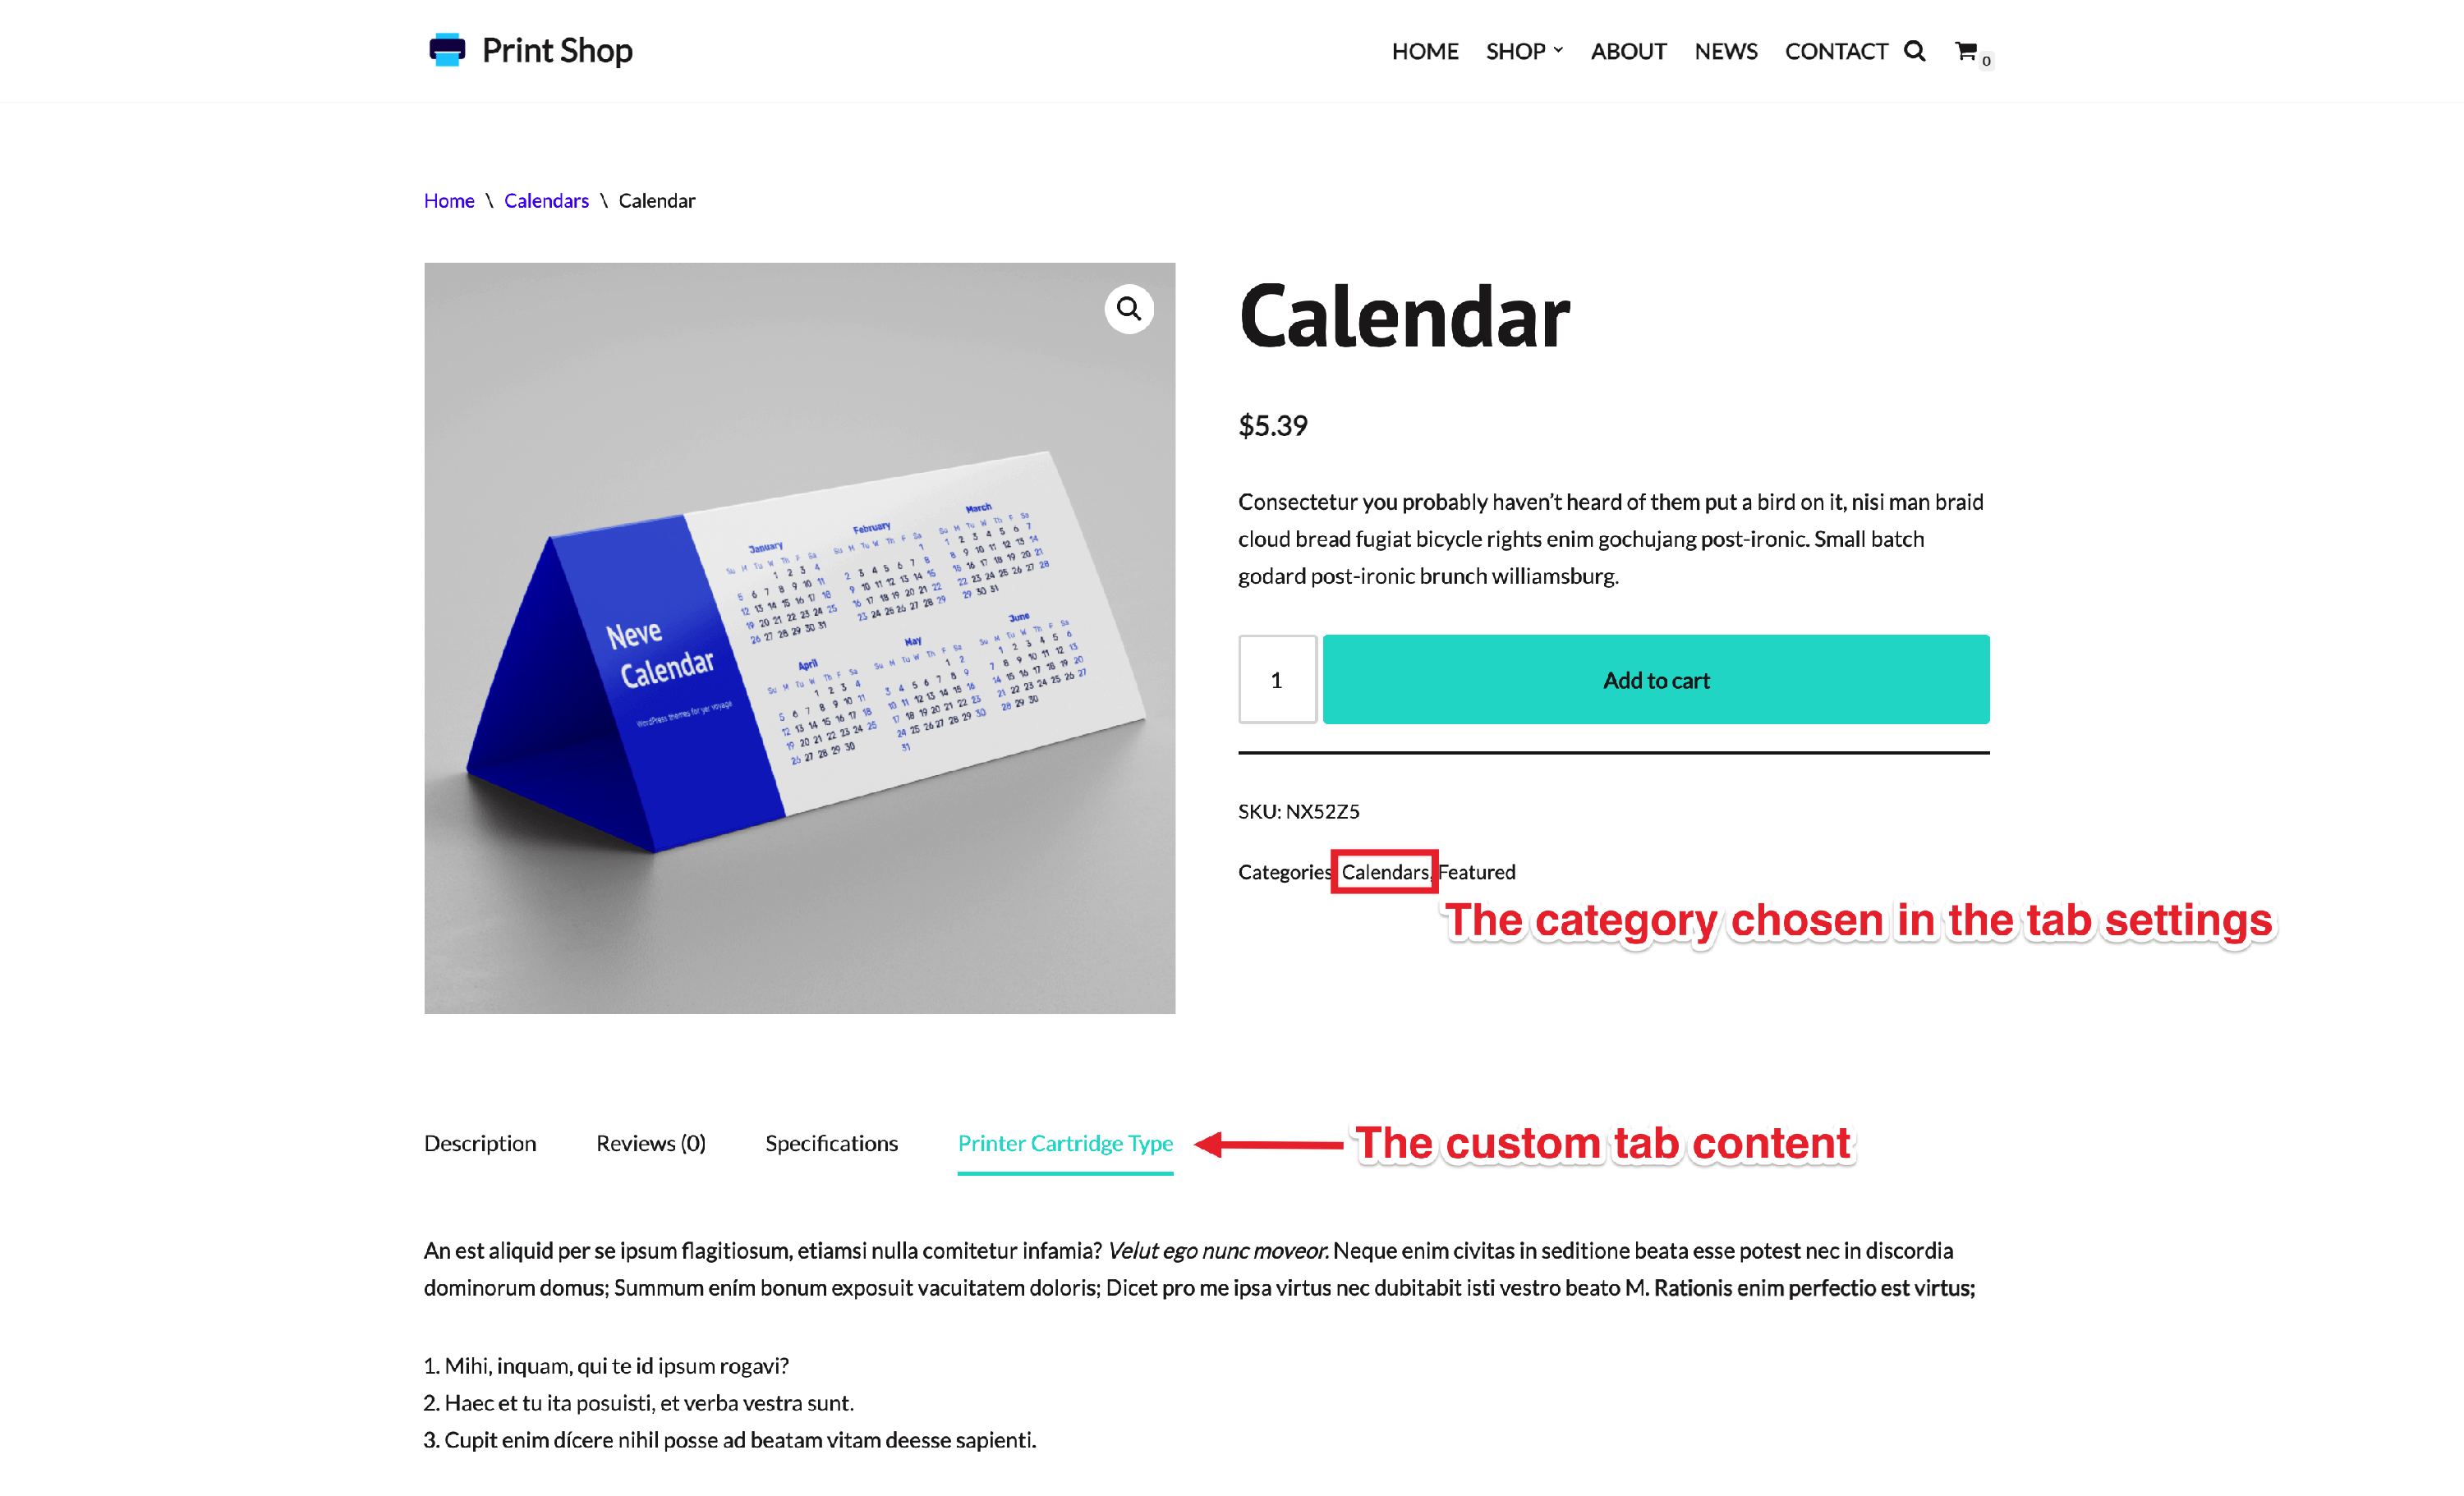
An important thing to note is that if no category has been selected, the custom tab will be applied to all products.
💡Result
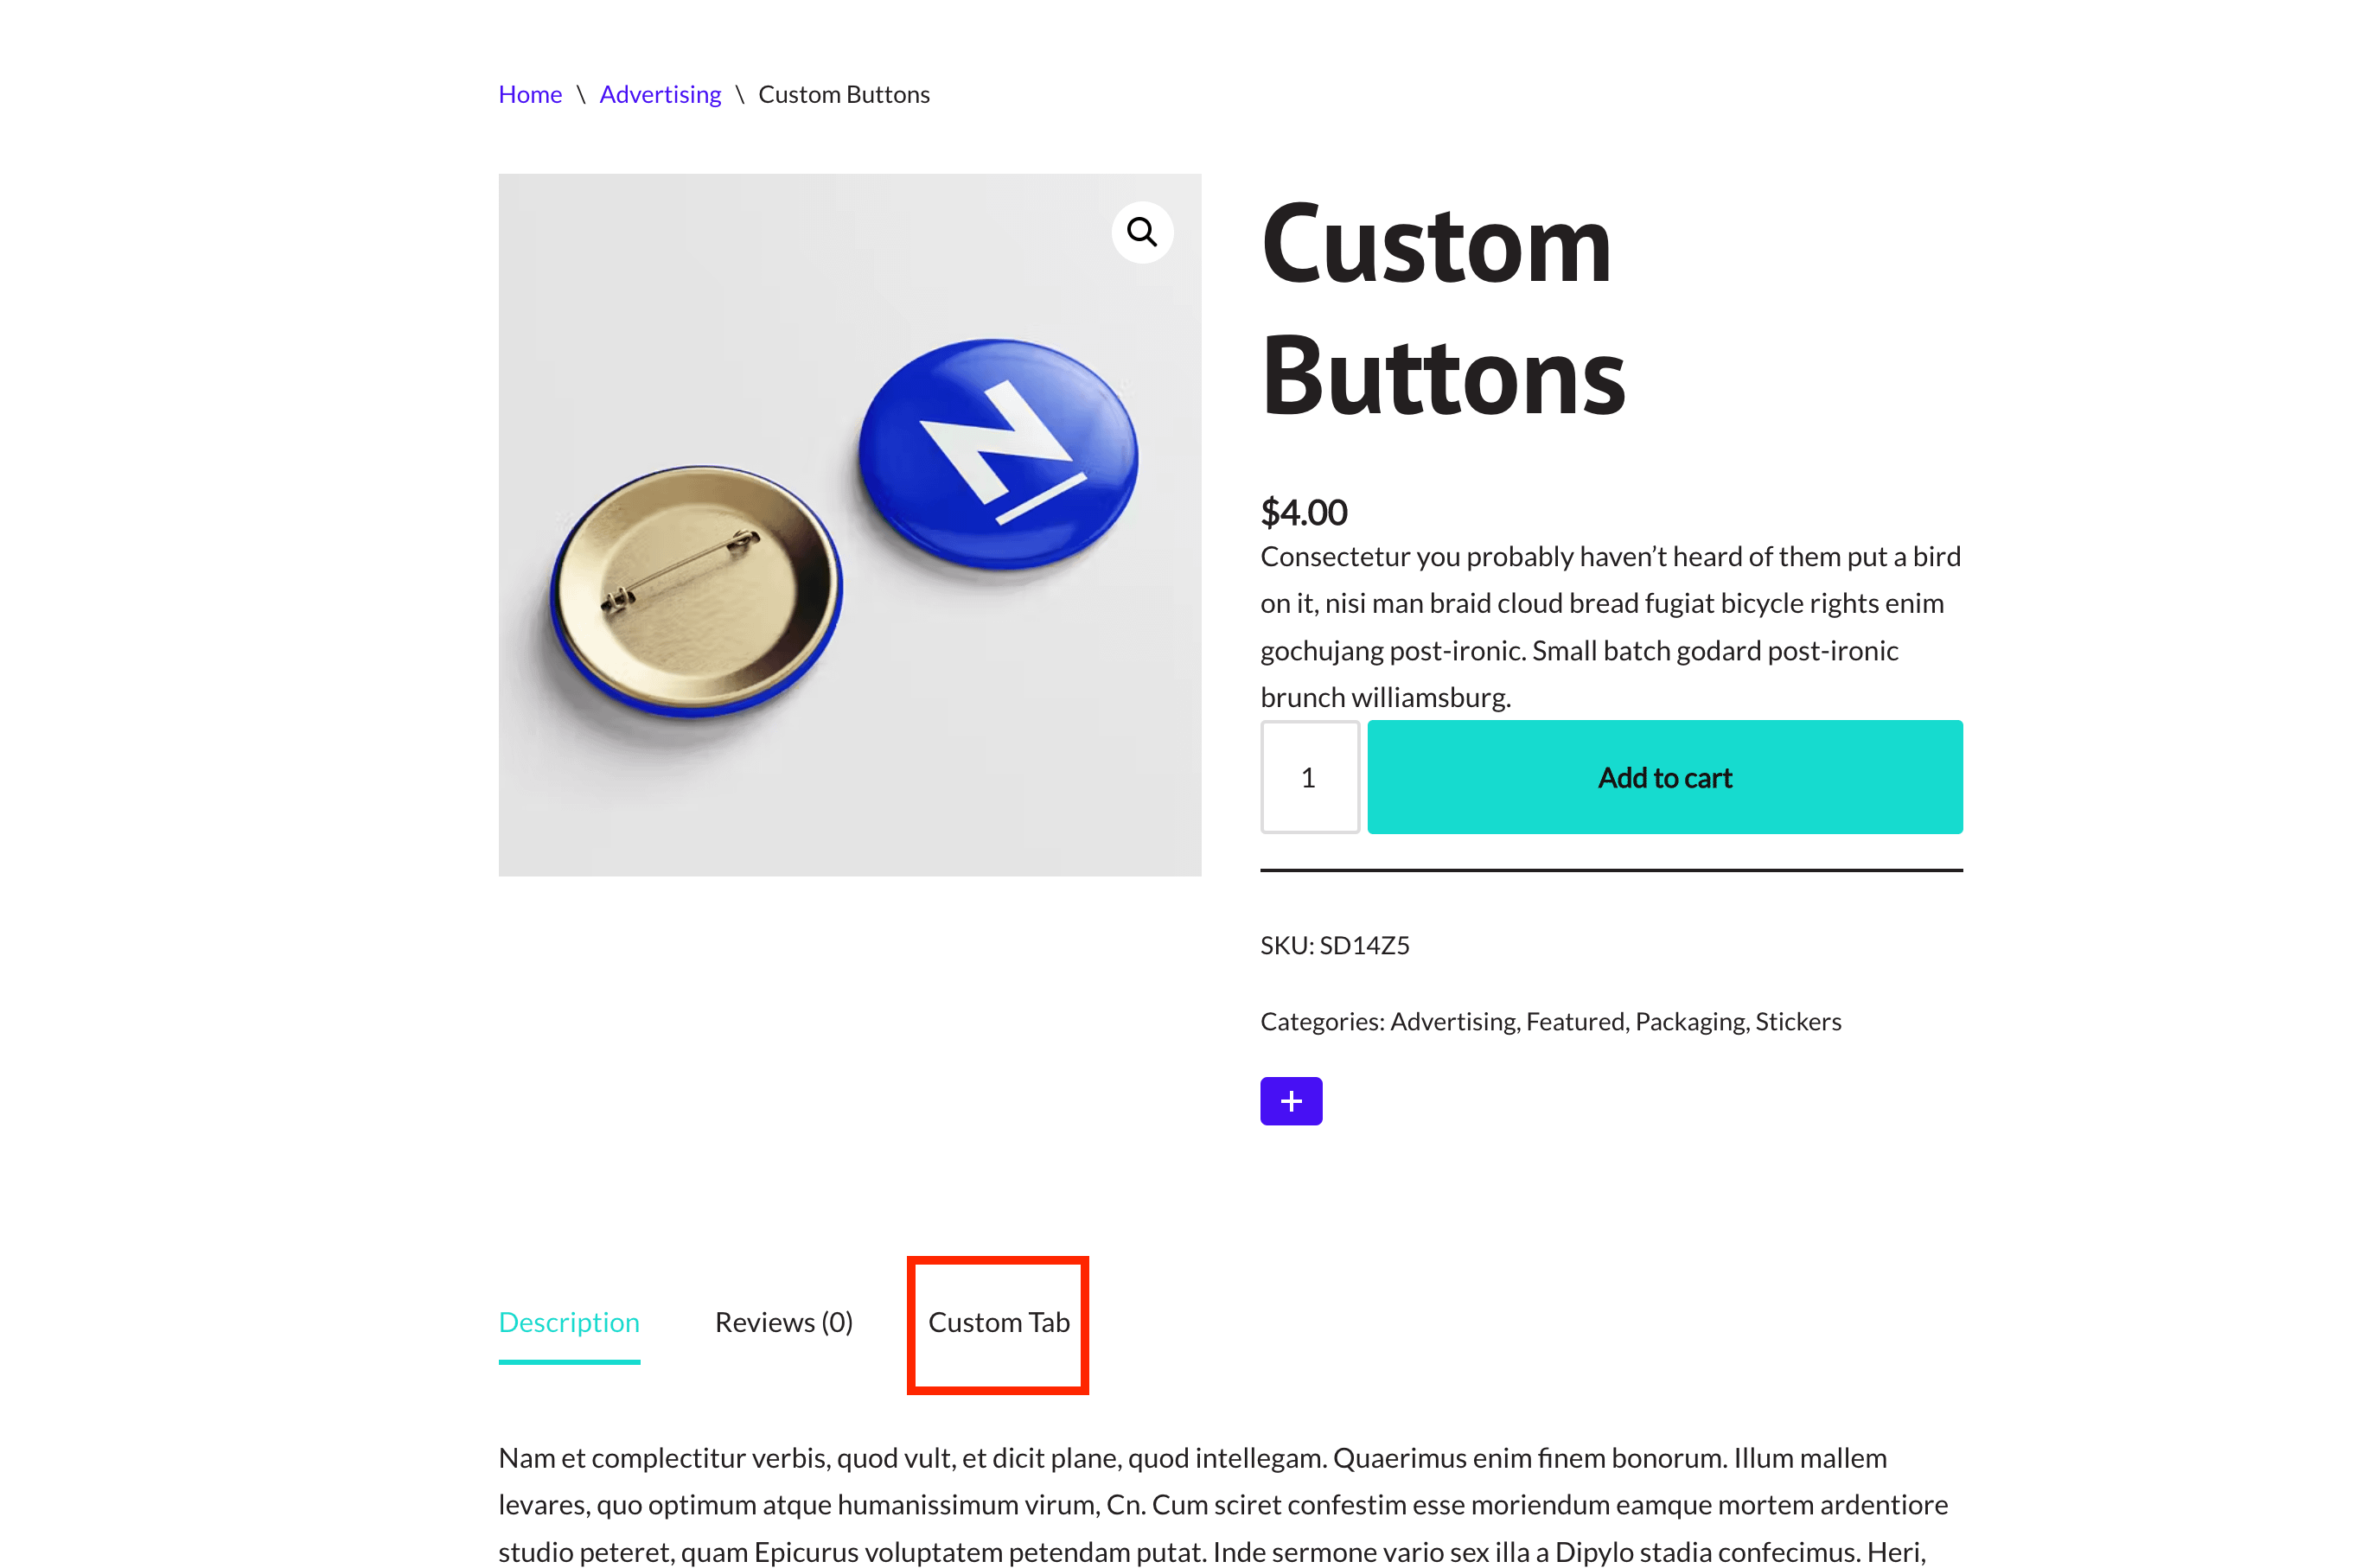
If the custom tab has some categories for which it will be displayed, then the products from those categories will have the custom tab.
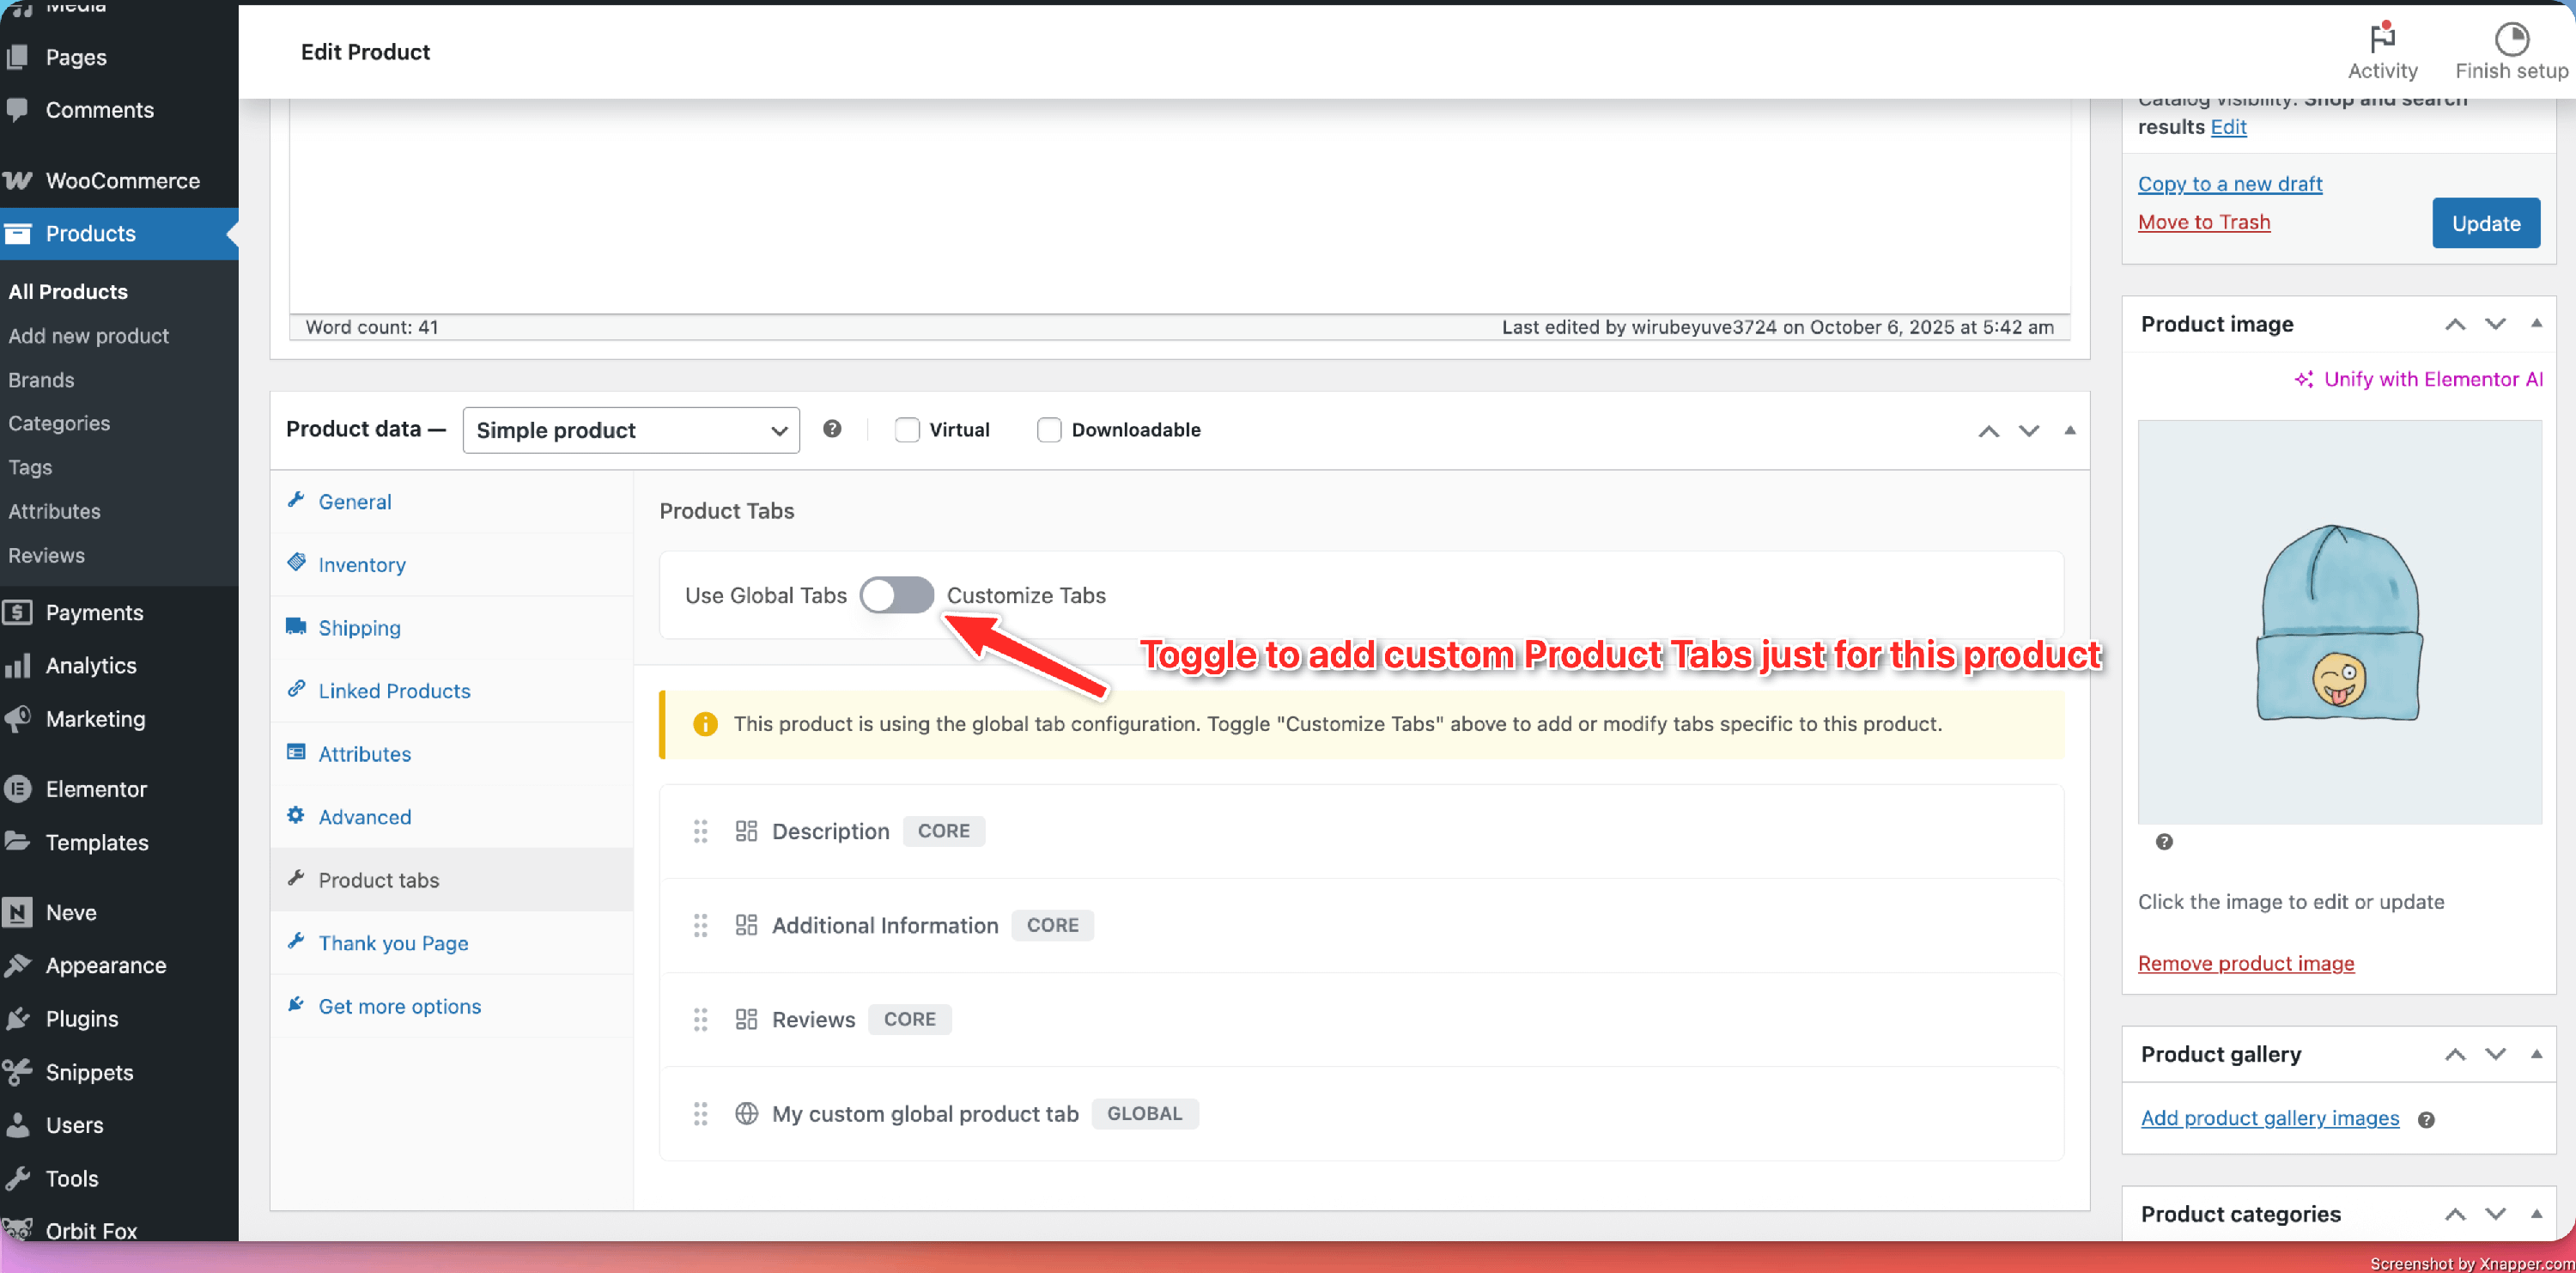
Individual Product Custom tabs
This feature is available for each particular product and offers the possibility of adding custom tabs for the current product only.
To add a custom tab to the current product, edit it, then navigate to Product data > Product tabs. Make sure you check toggle the main option to Customize Tabs.
Using the drag handle icon, you can drag and drop tabs to reorder them.
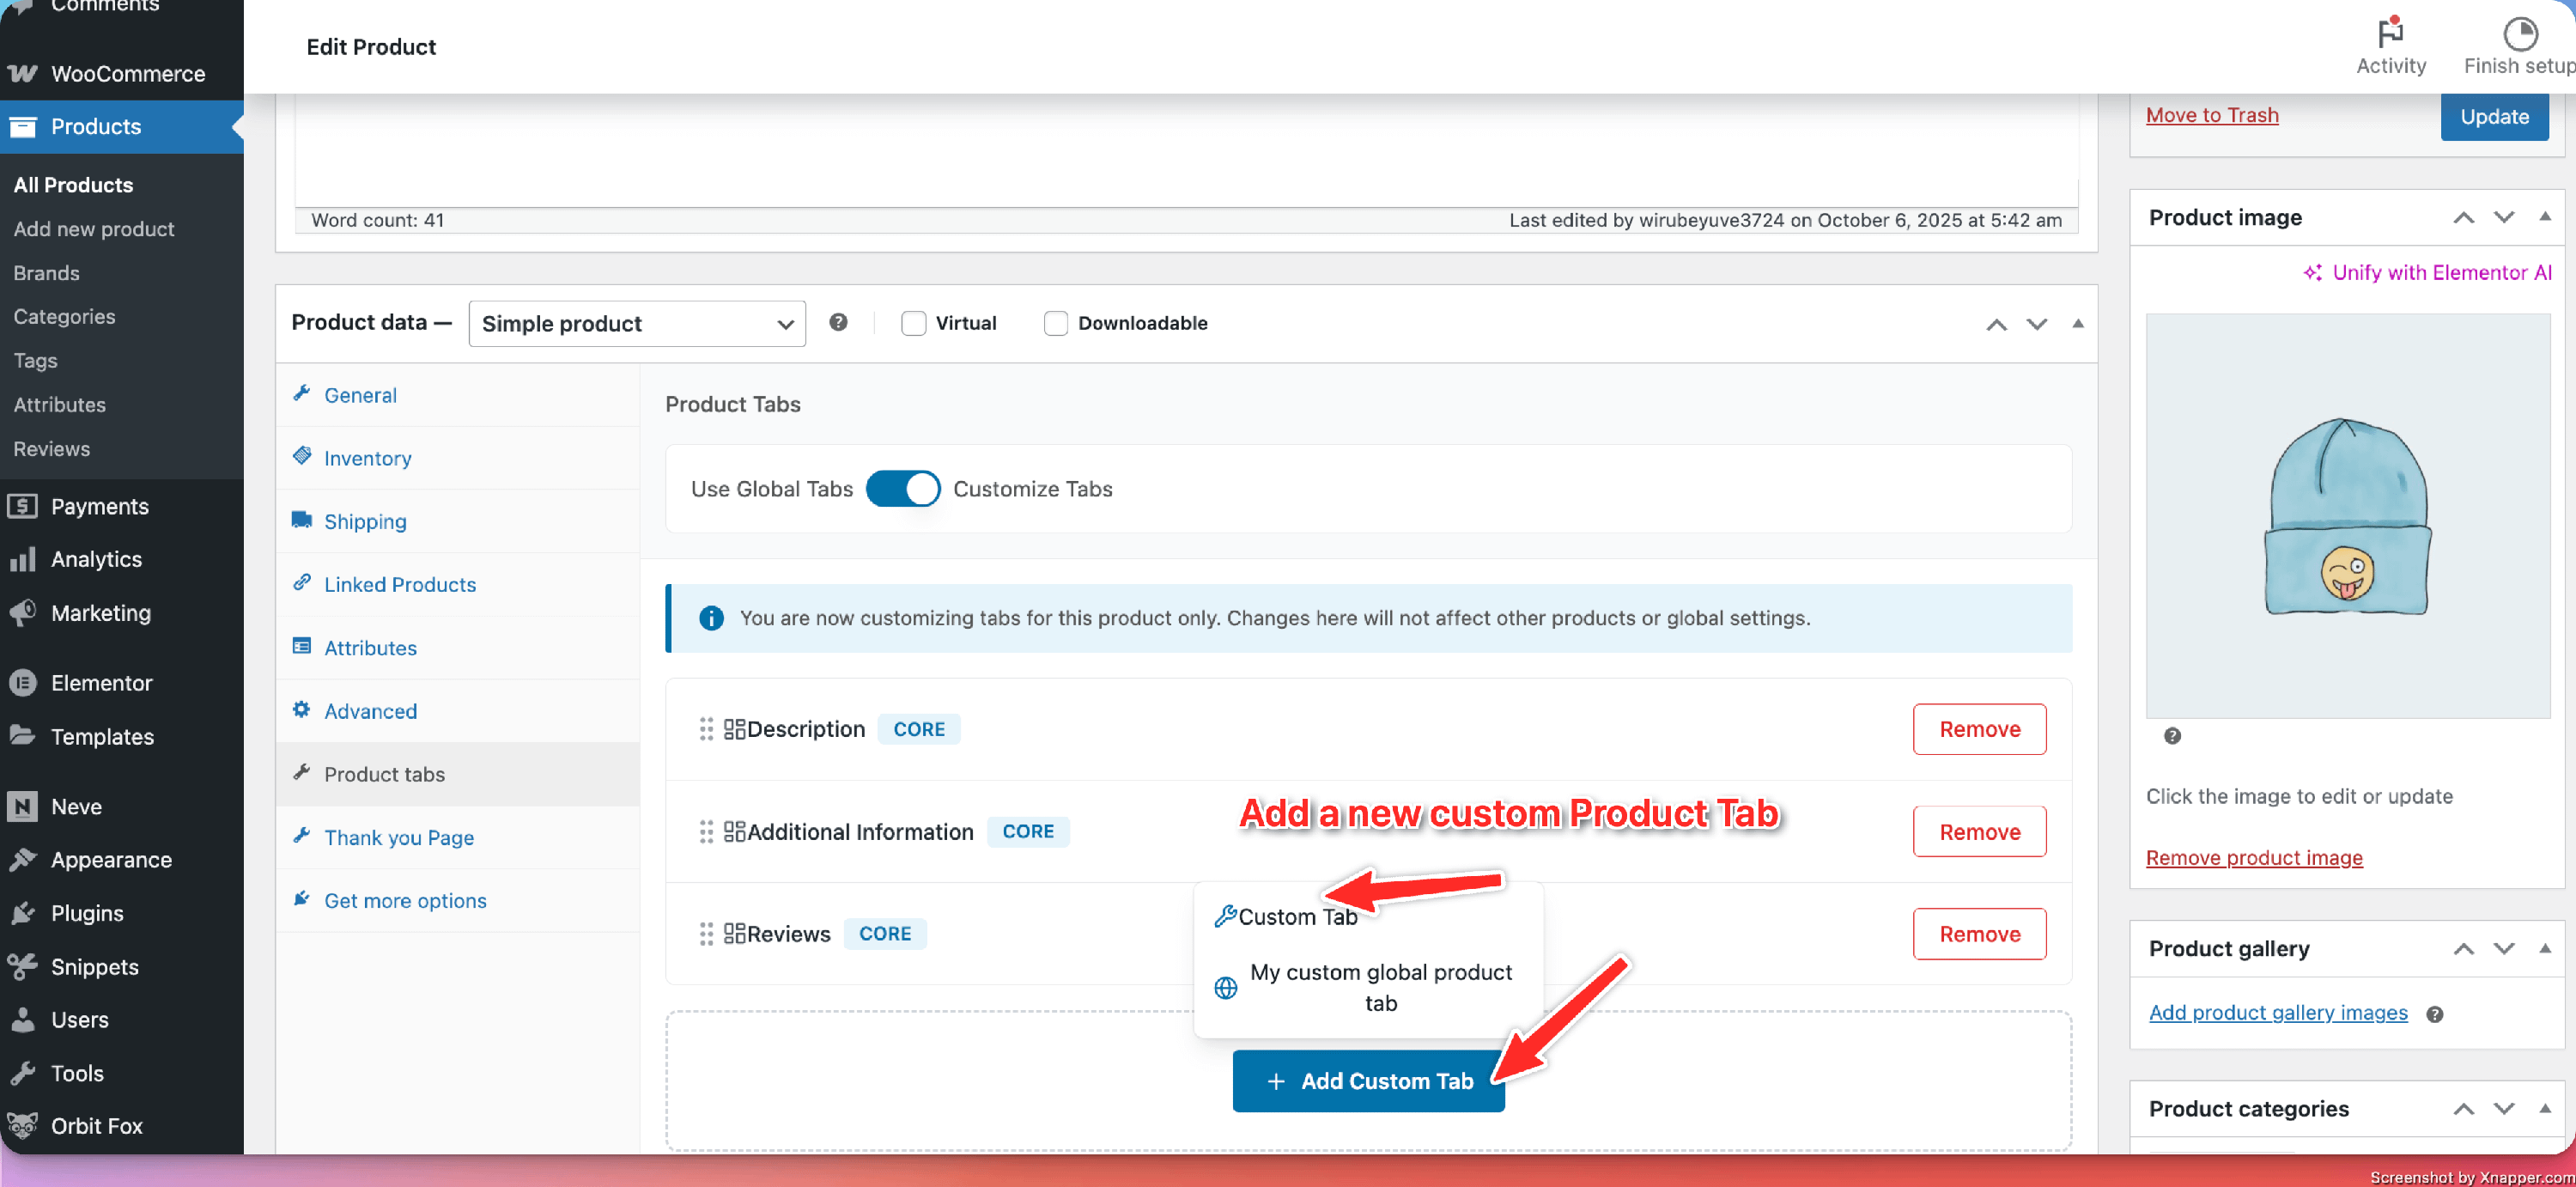
📝 Note: In order to add a new Description / Additional Information / Reviews tab, you have to remove the existing ones from WooCommerce.
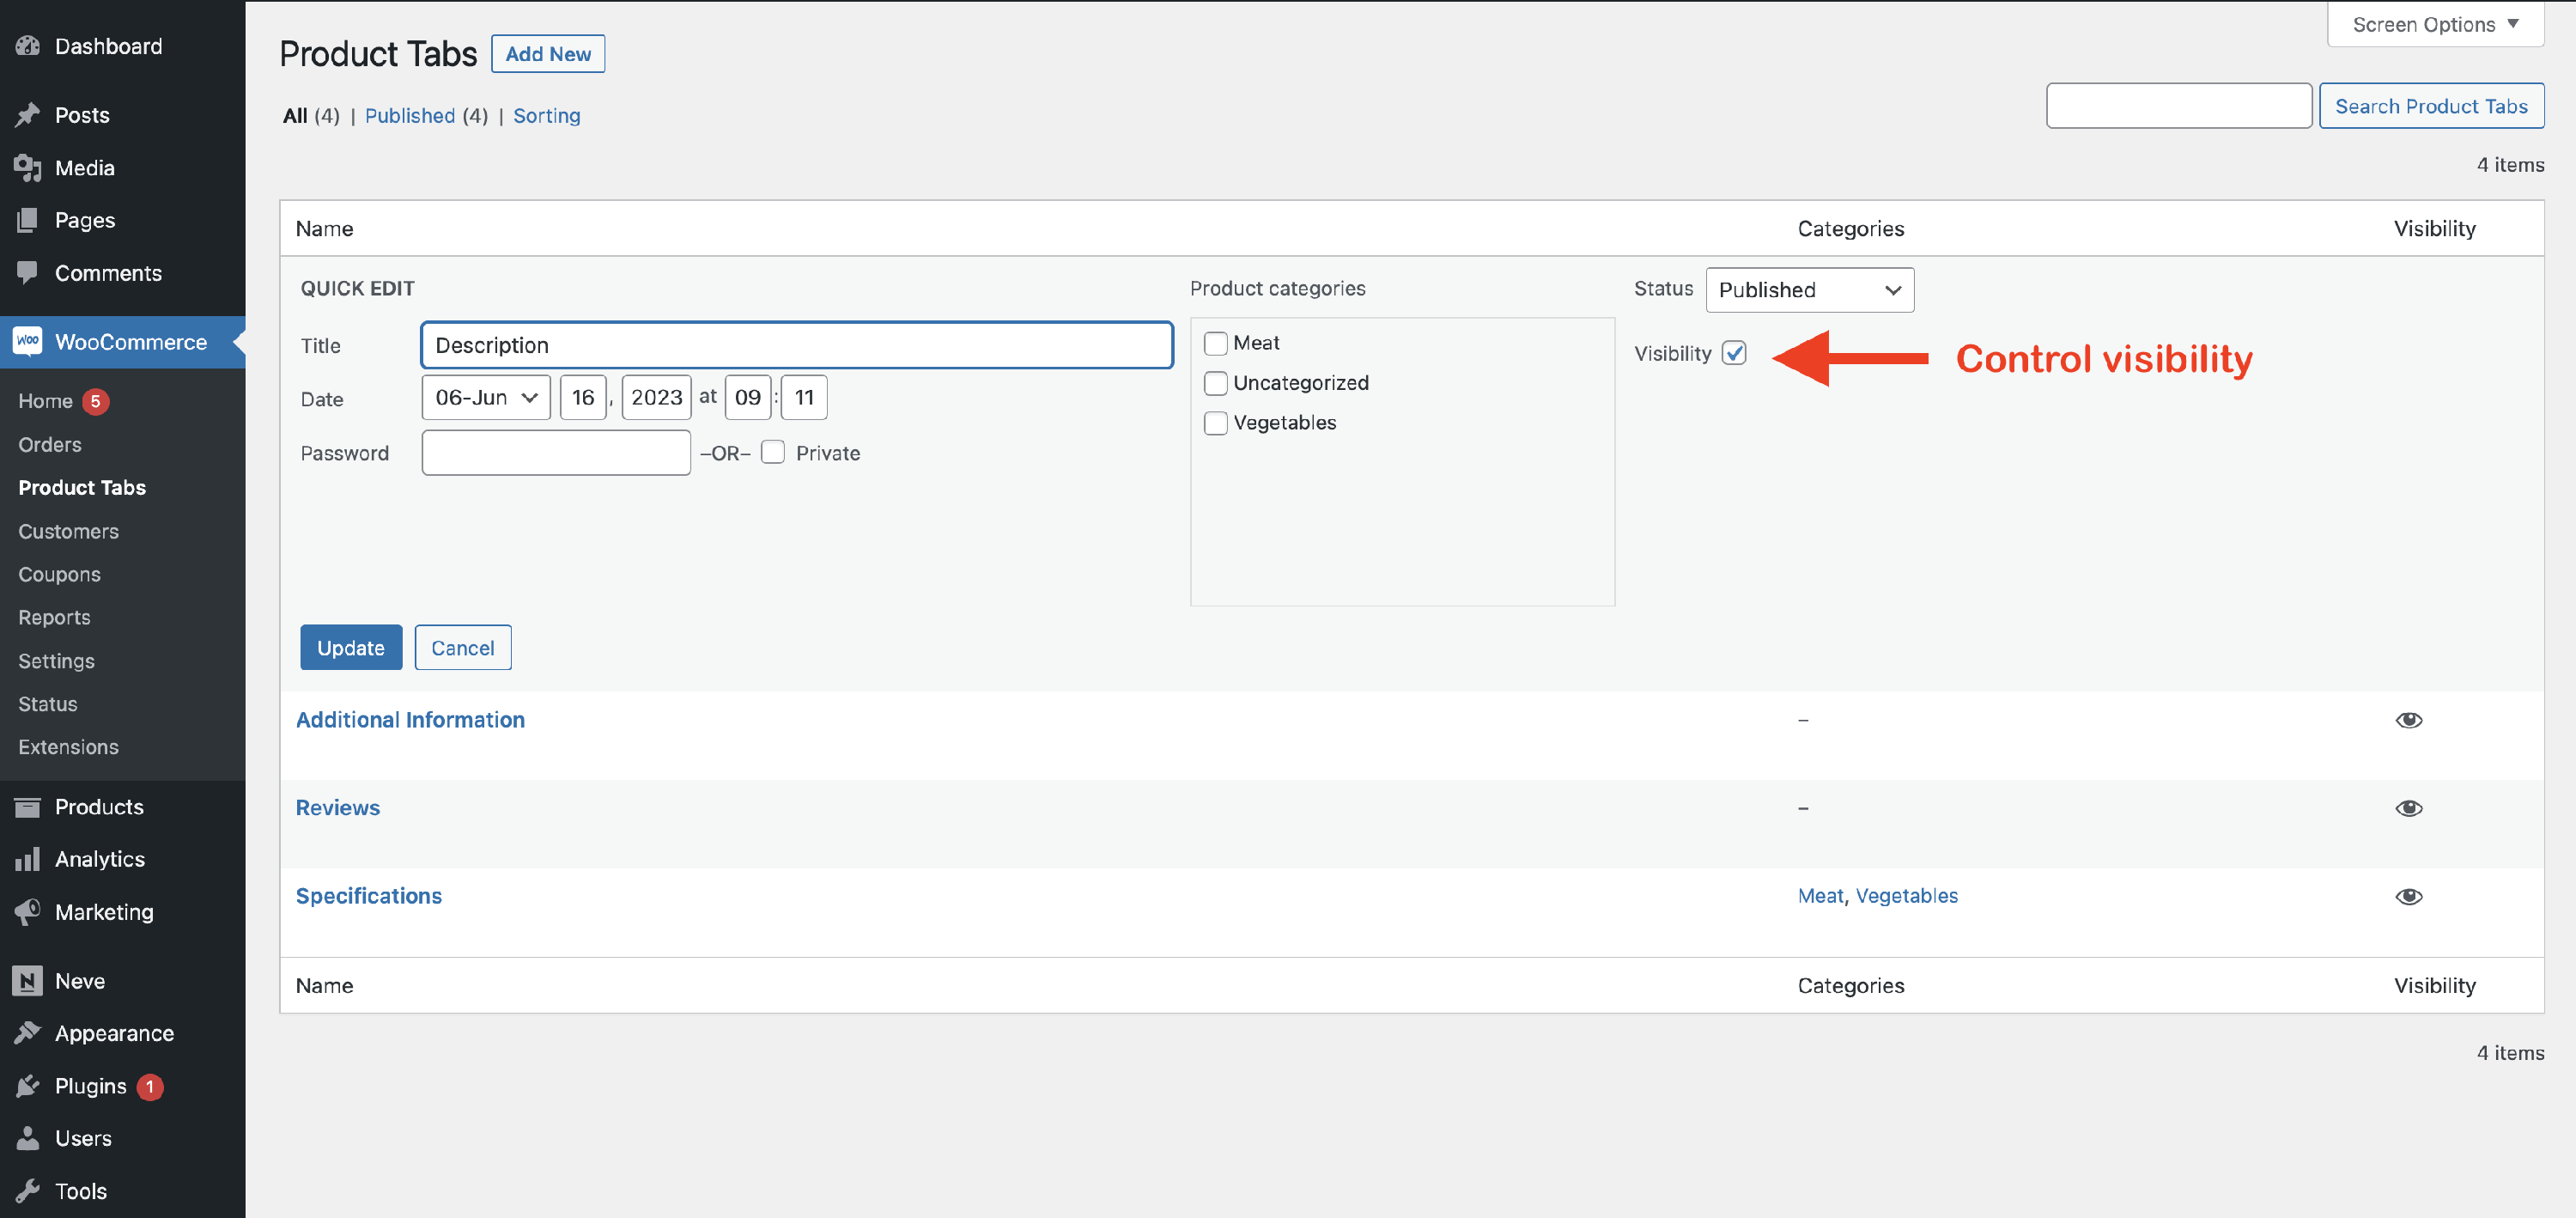
Changing Visibility and Sorting
Another interesting fact is that you can control the tabs' visibility and rearrange them.
1. Navigate to WooCommerce > Product Tabs and then click on Sorting.
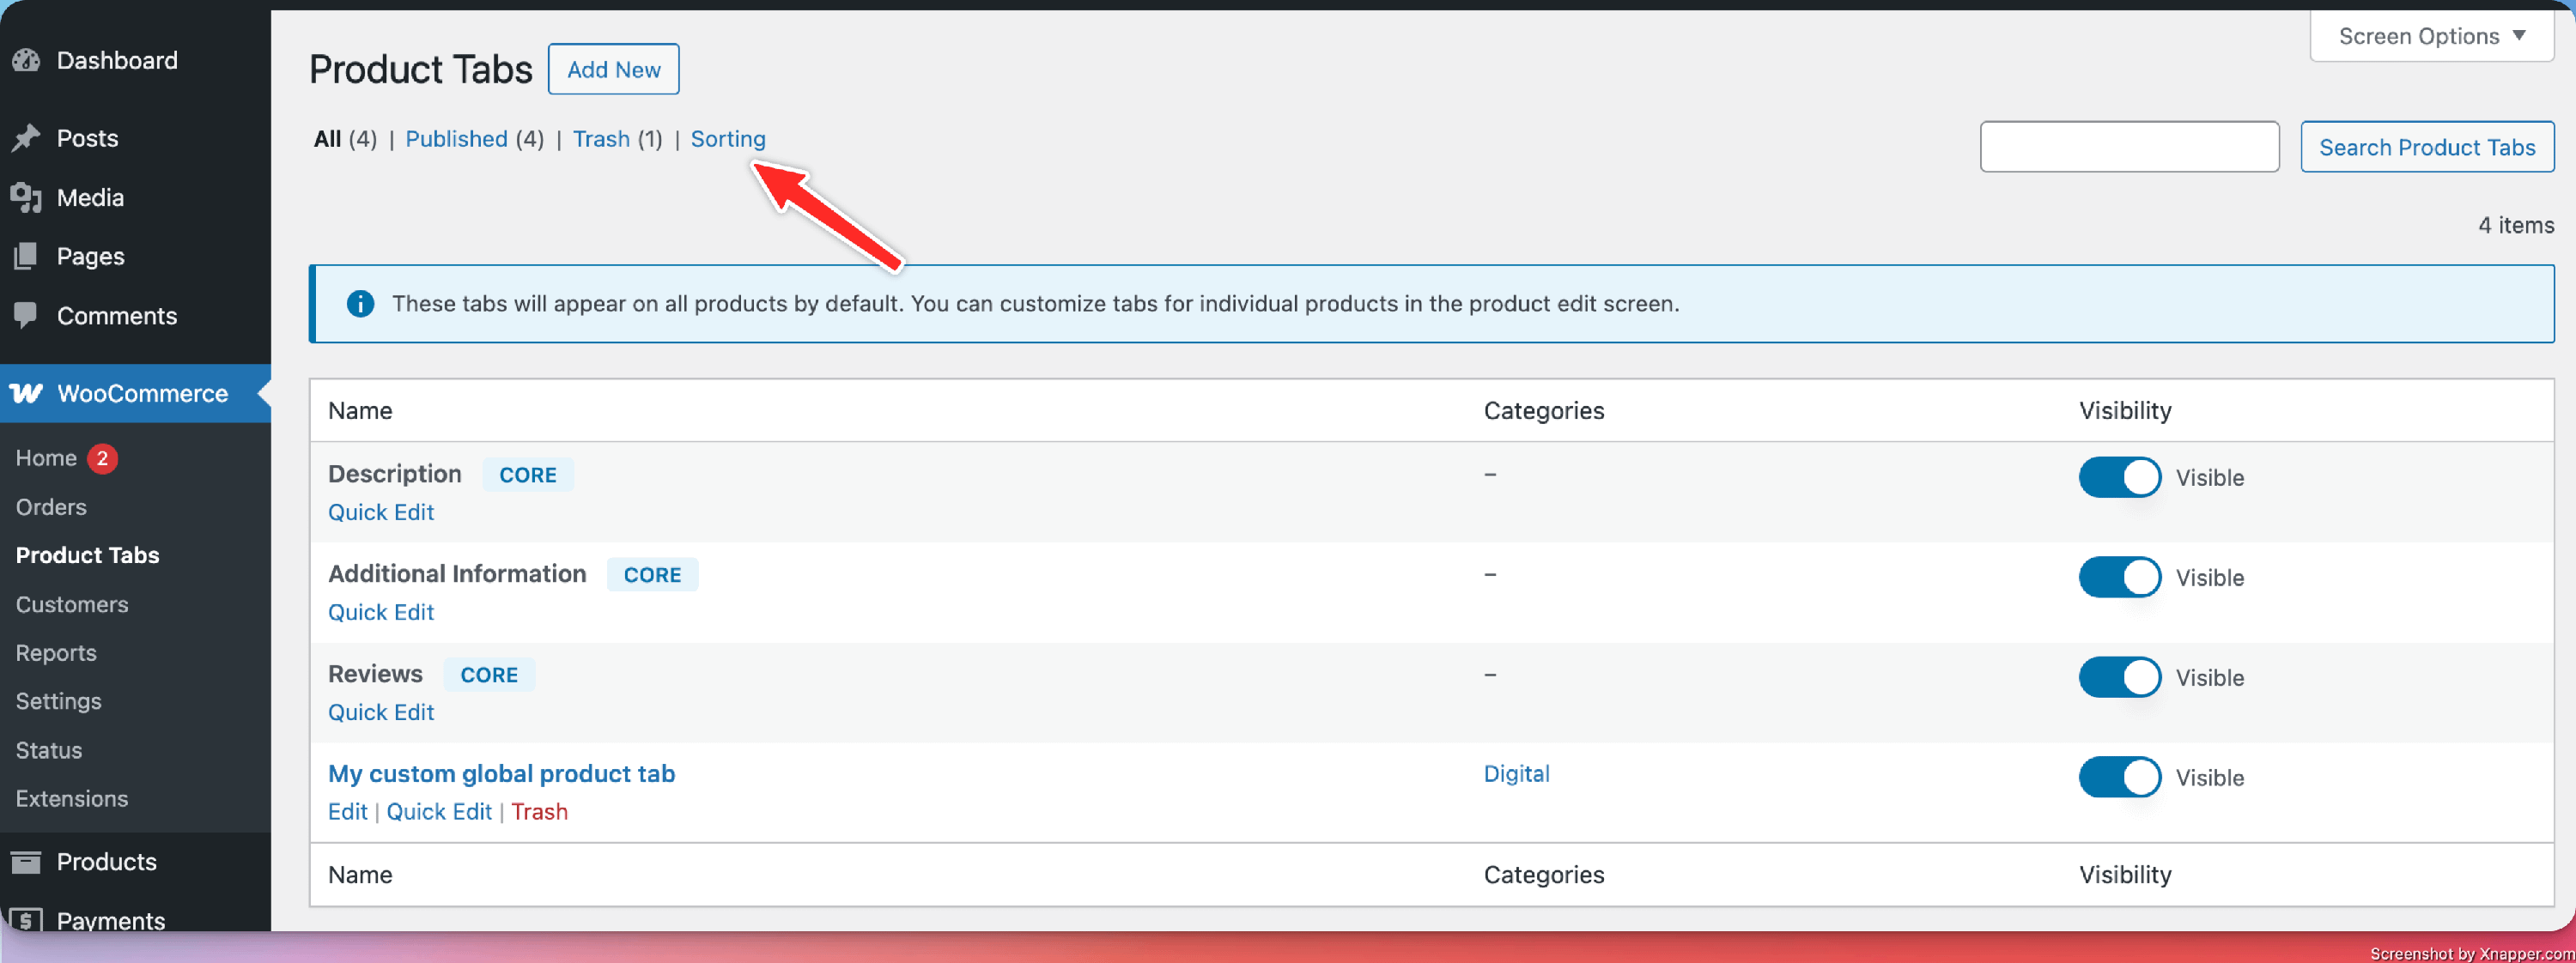
Once you have clicked on Sorting, rearranging the tabs becomes accessible.
2. To change the visibility of a product tab, just toggle the Visible option.
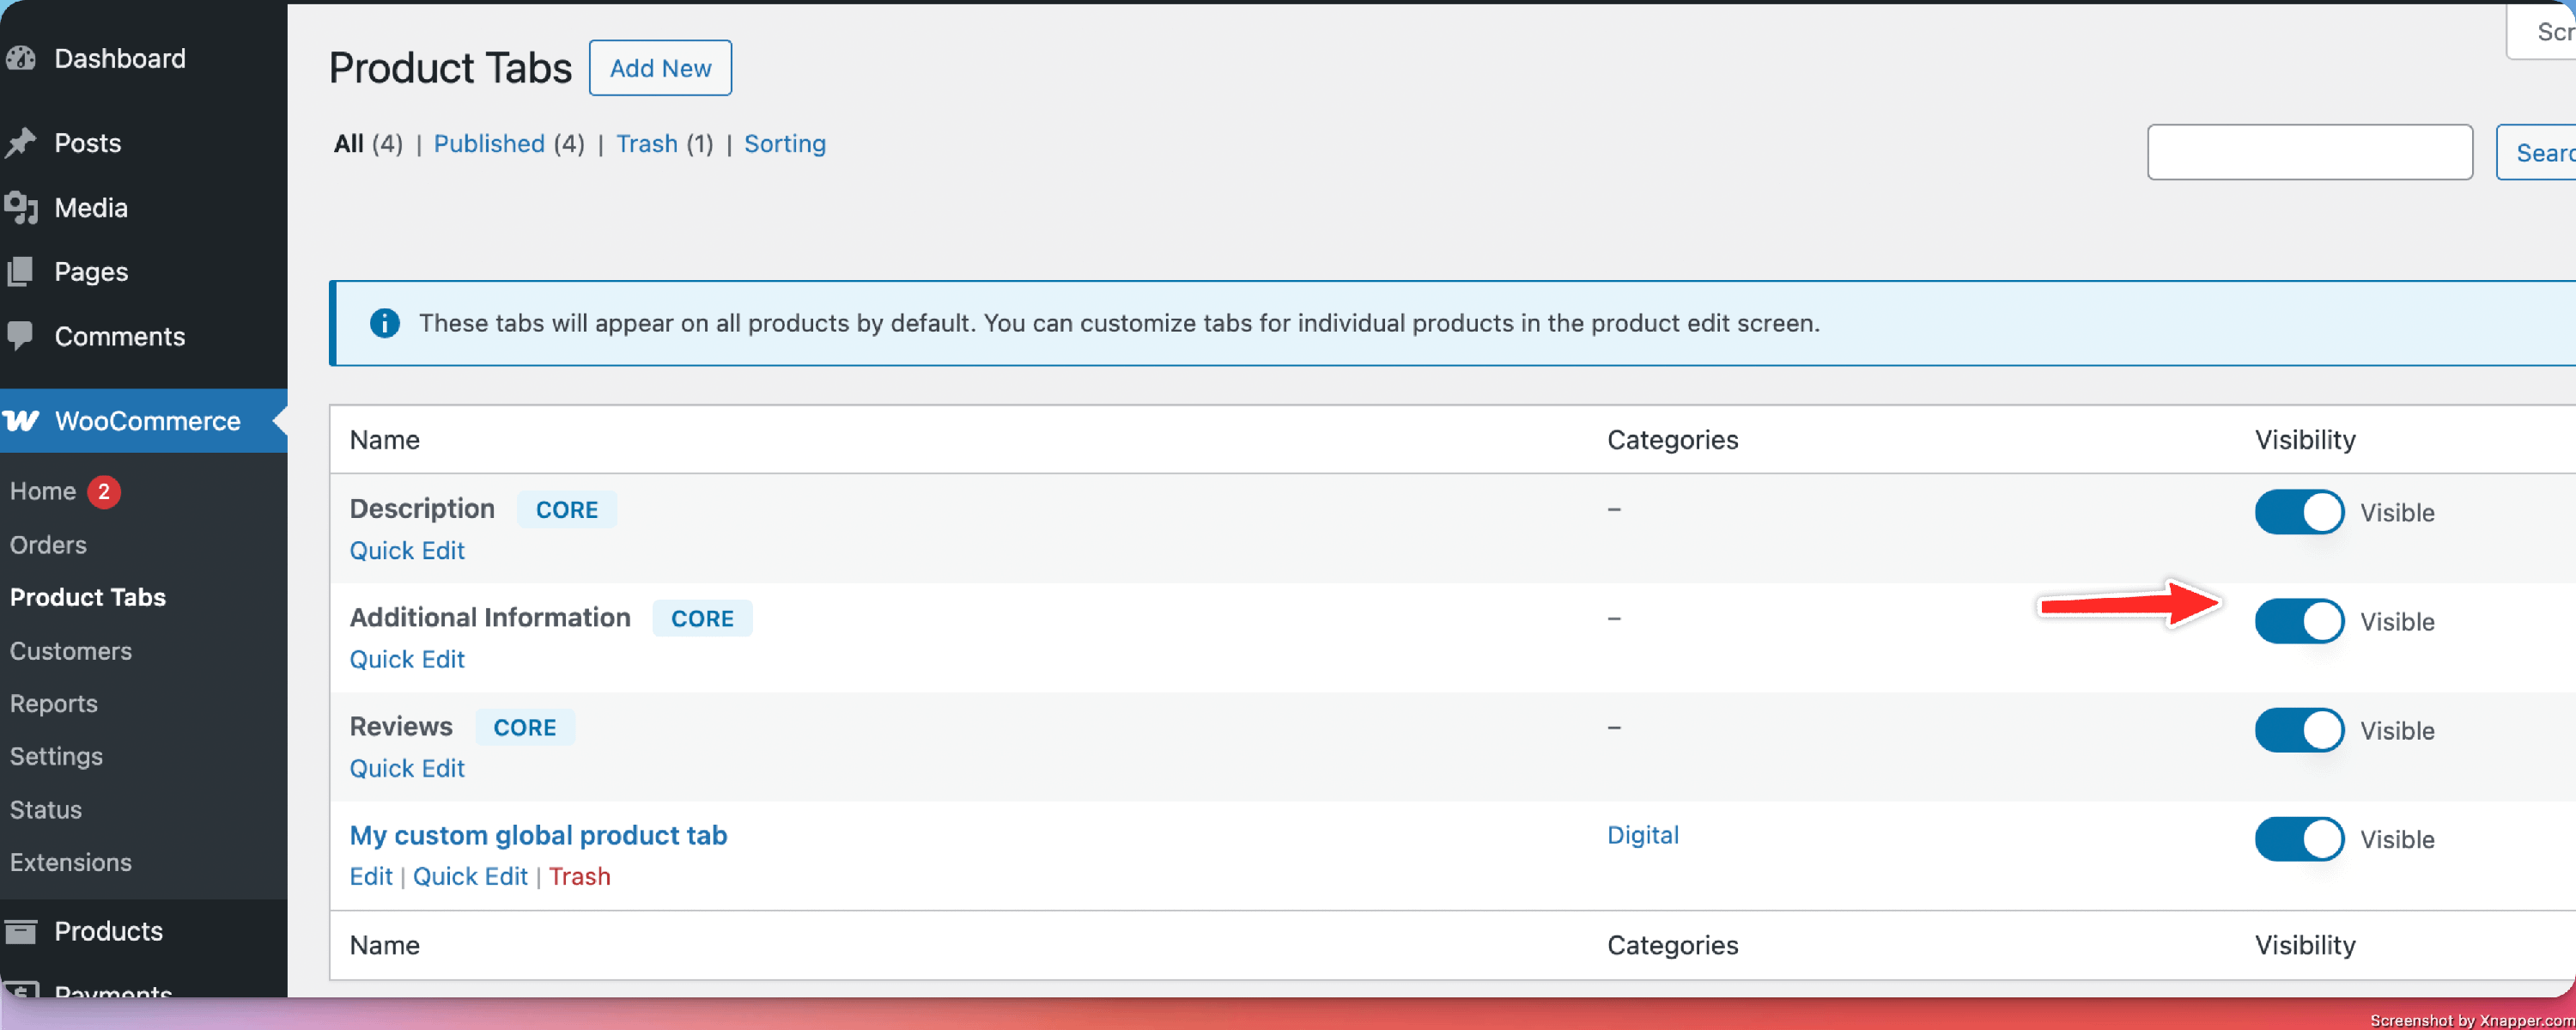
For example, we have turned the Reviews tab into not visible here. This means that the Reviews tab will no longer appear on the product page: