Neve Mega Menu (Pro)
📝Note: Neve Mega Menu is part of the Neve Pro which you can get from here.
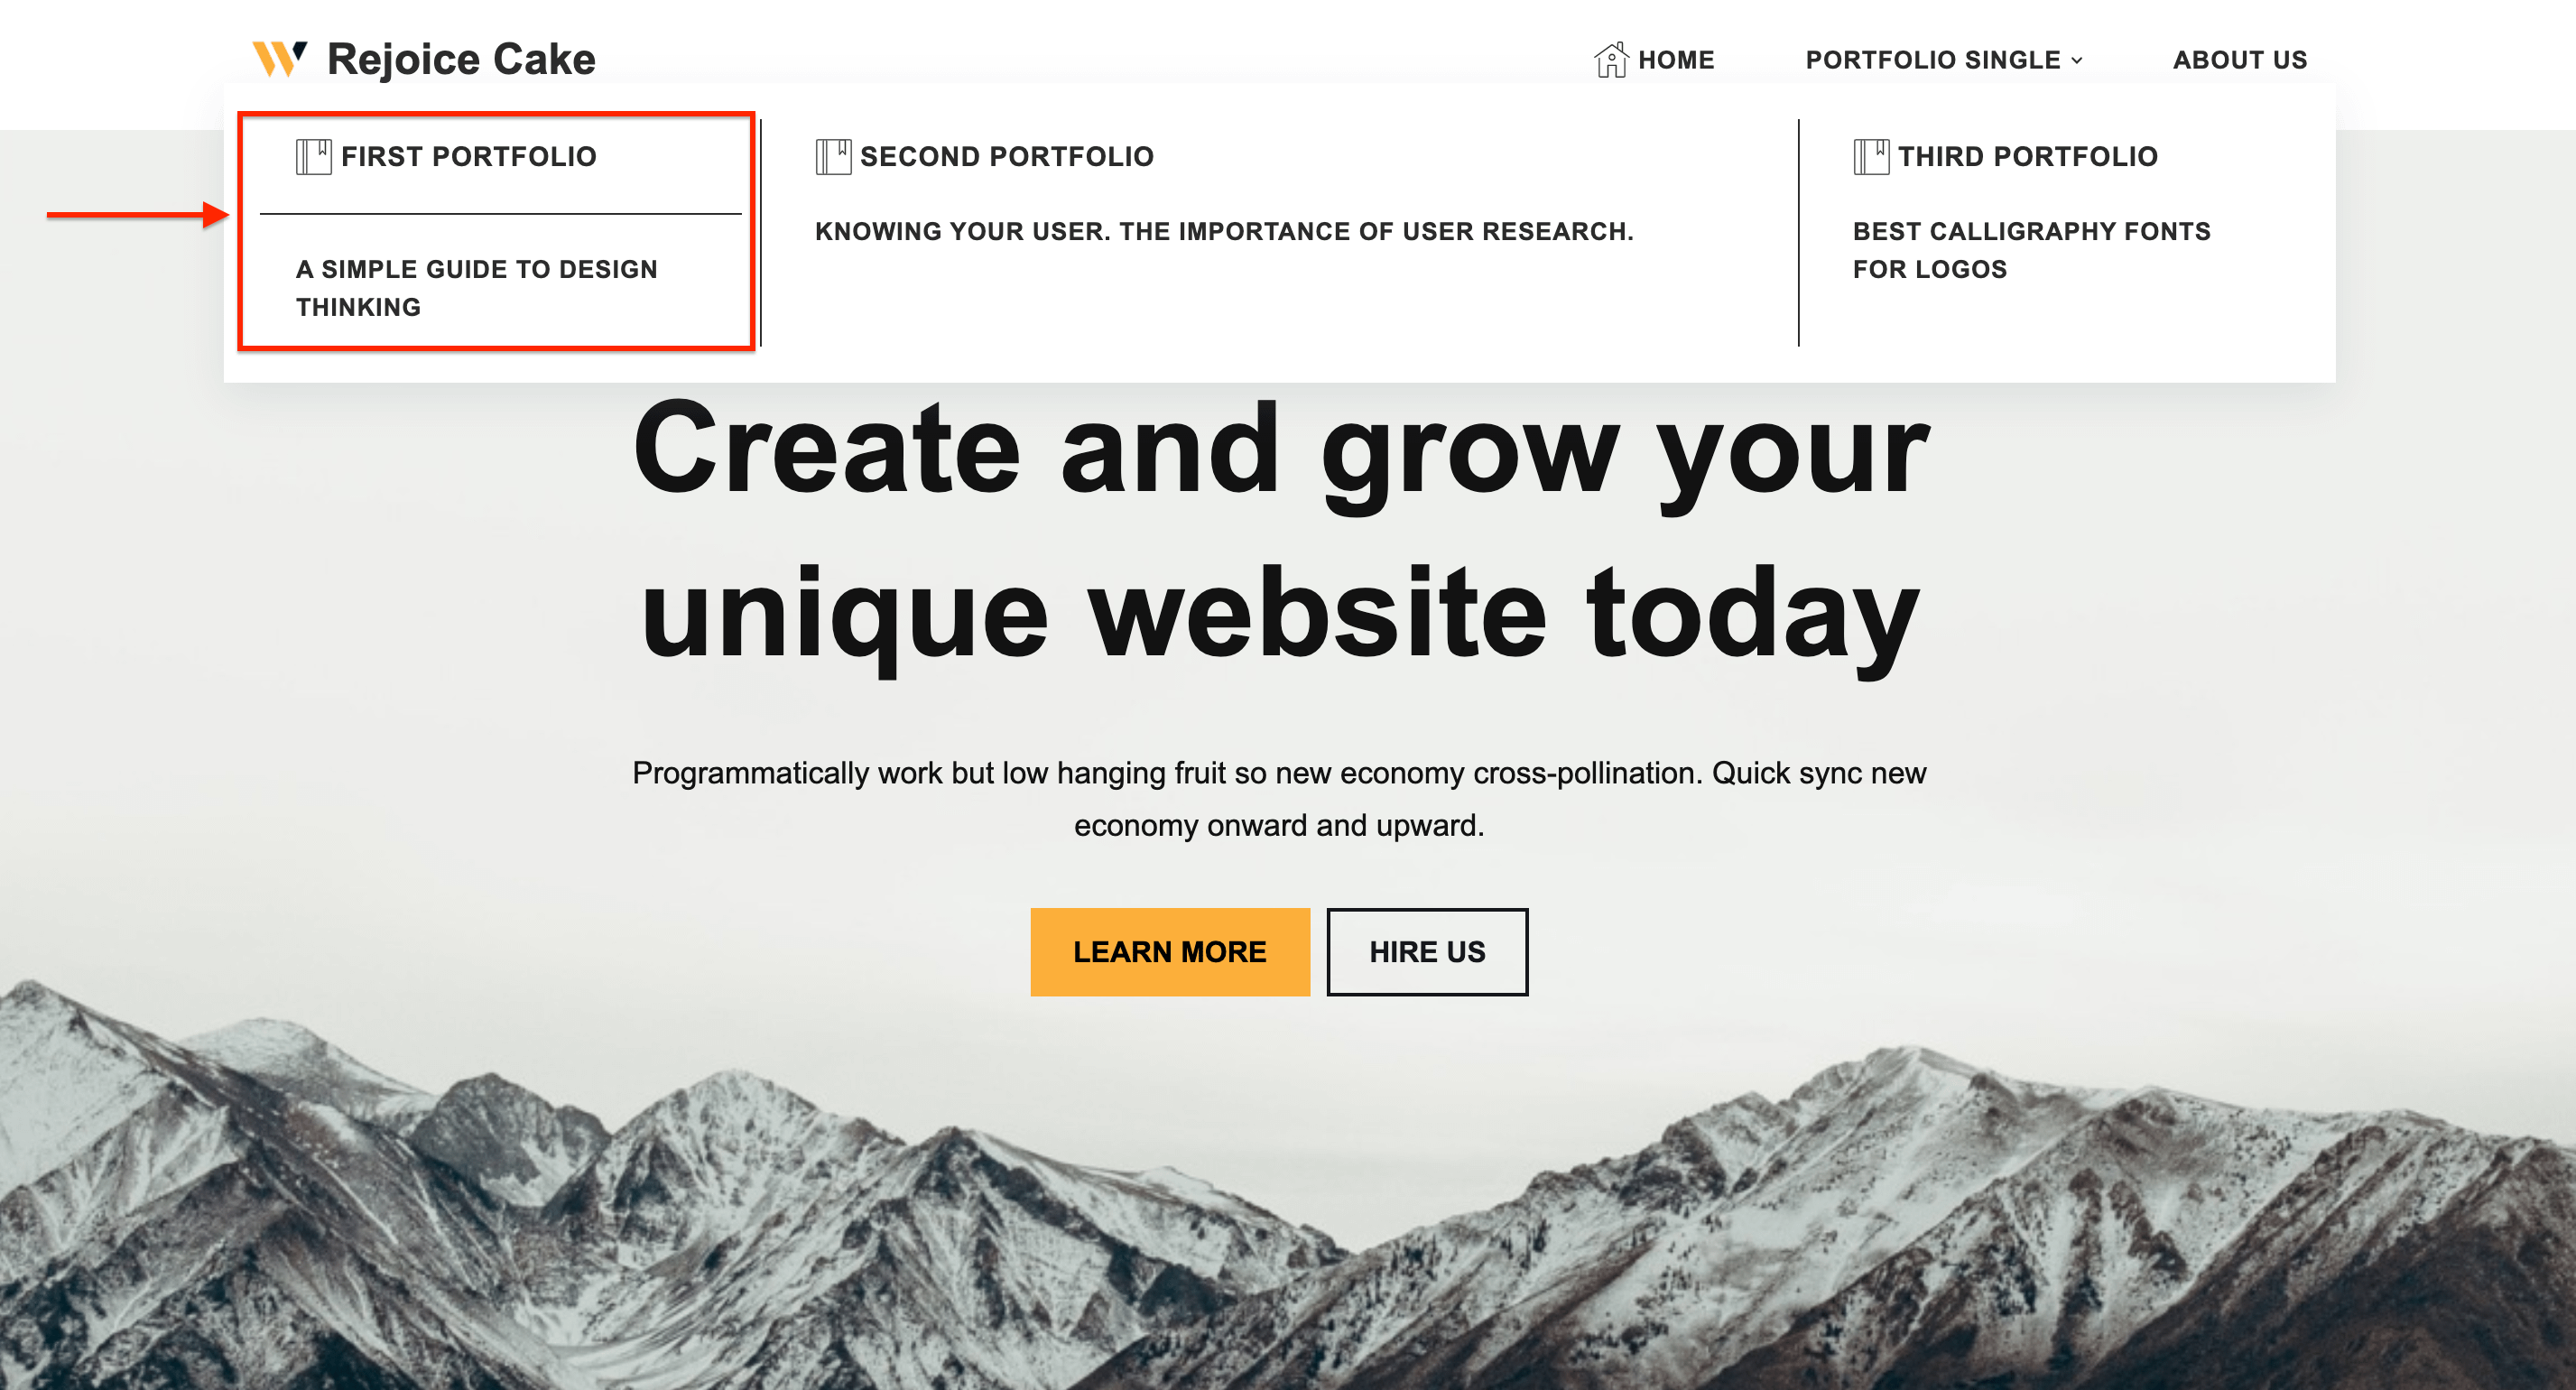
The Mega Menu of Neve allows you to present the sub-items of a certain panel in a better preview, add icons to the menu items, and also customize them with the Menu Item Settings.
🖲 Activating the Module
1. Install the Neve PRO plugin, using these instructions.
2. Navigate to Neve > Dashboard > Settings.
3. Under the General tab, enable the Mega Menu option.
![]()
⚙️ Using the Module
After enabling this module, navigate to Appearance > Menus and take a look at the Menu Structure. This generates buttons that allow the user to add icons to the menu items.
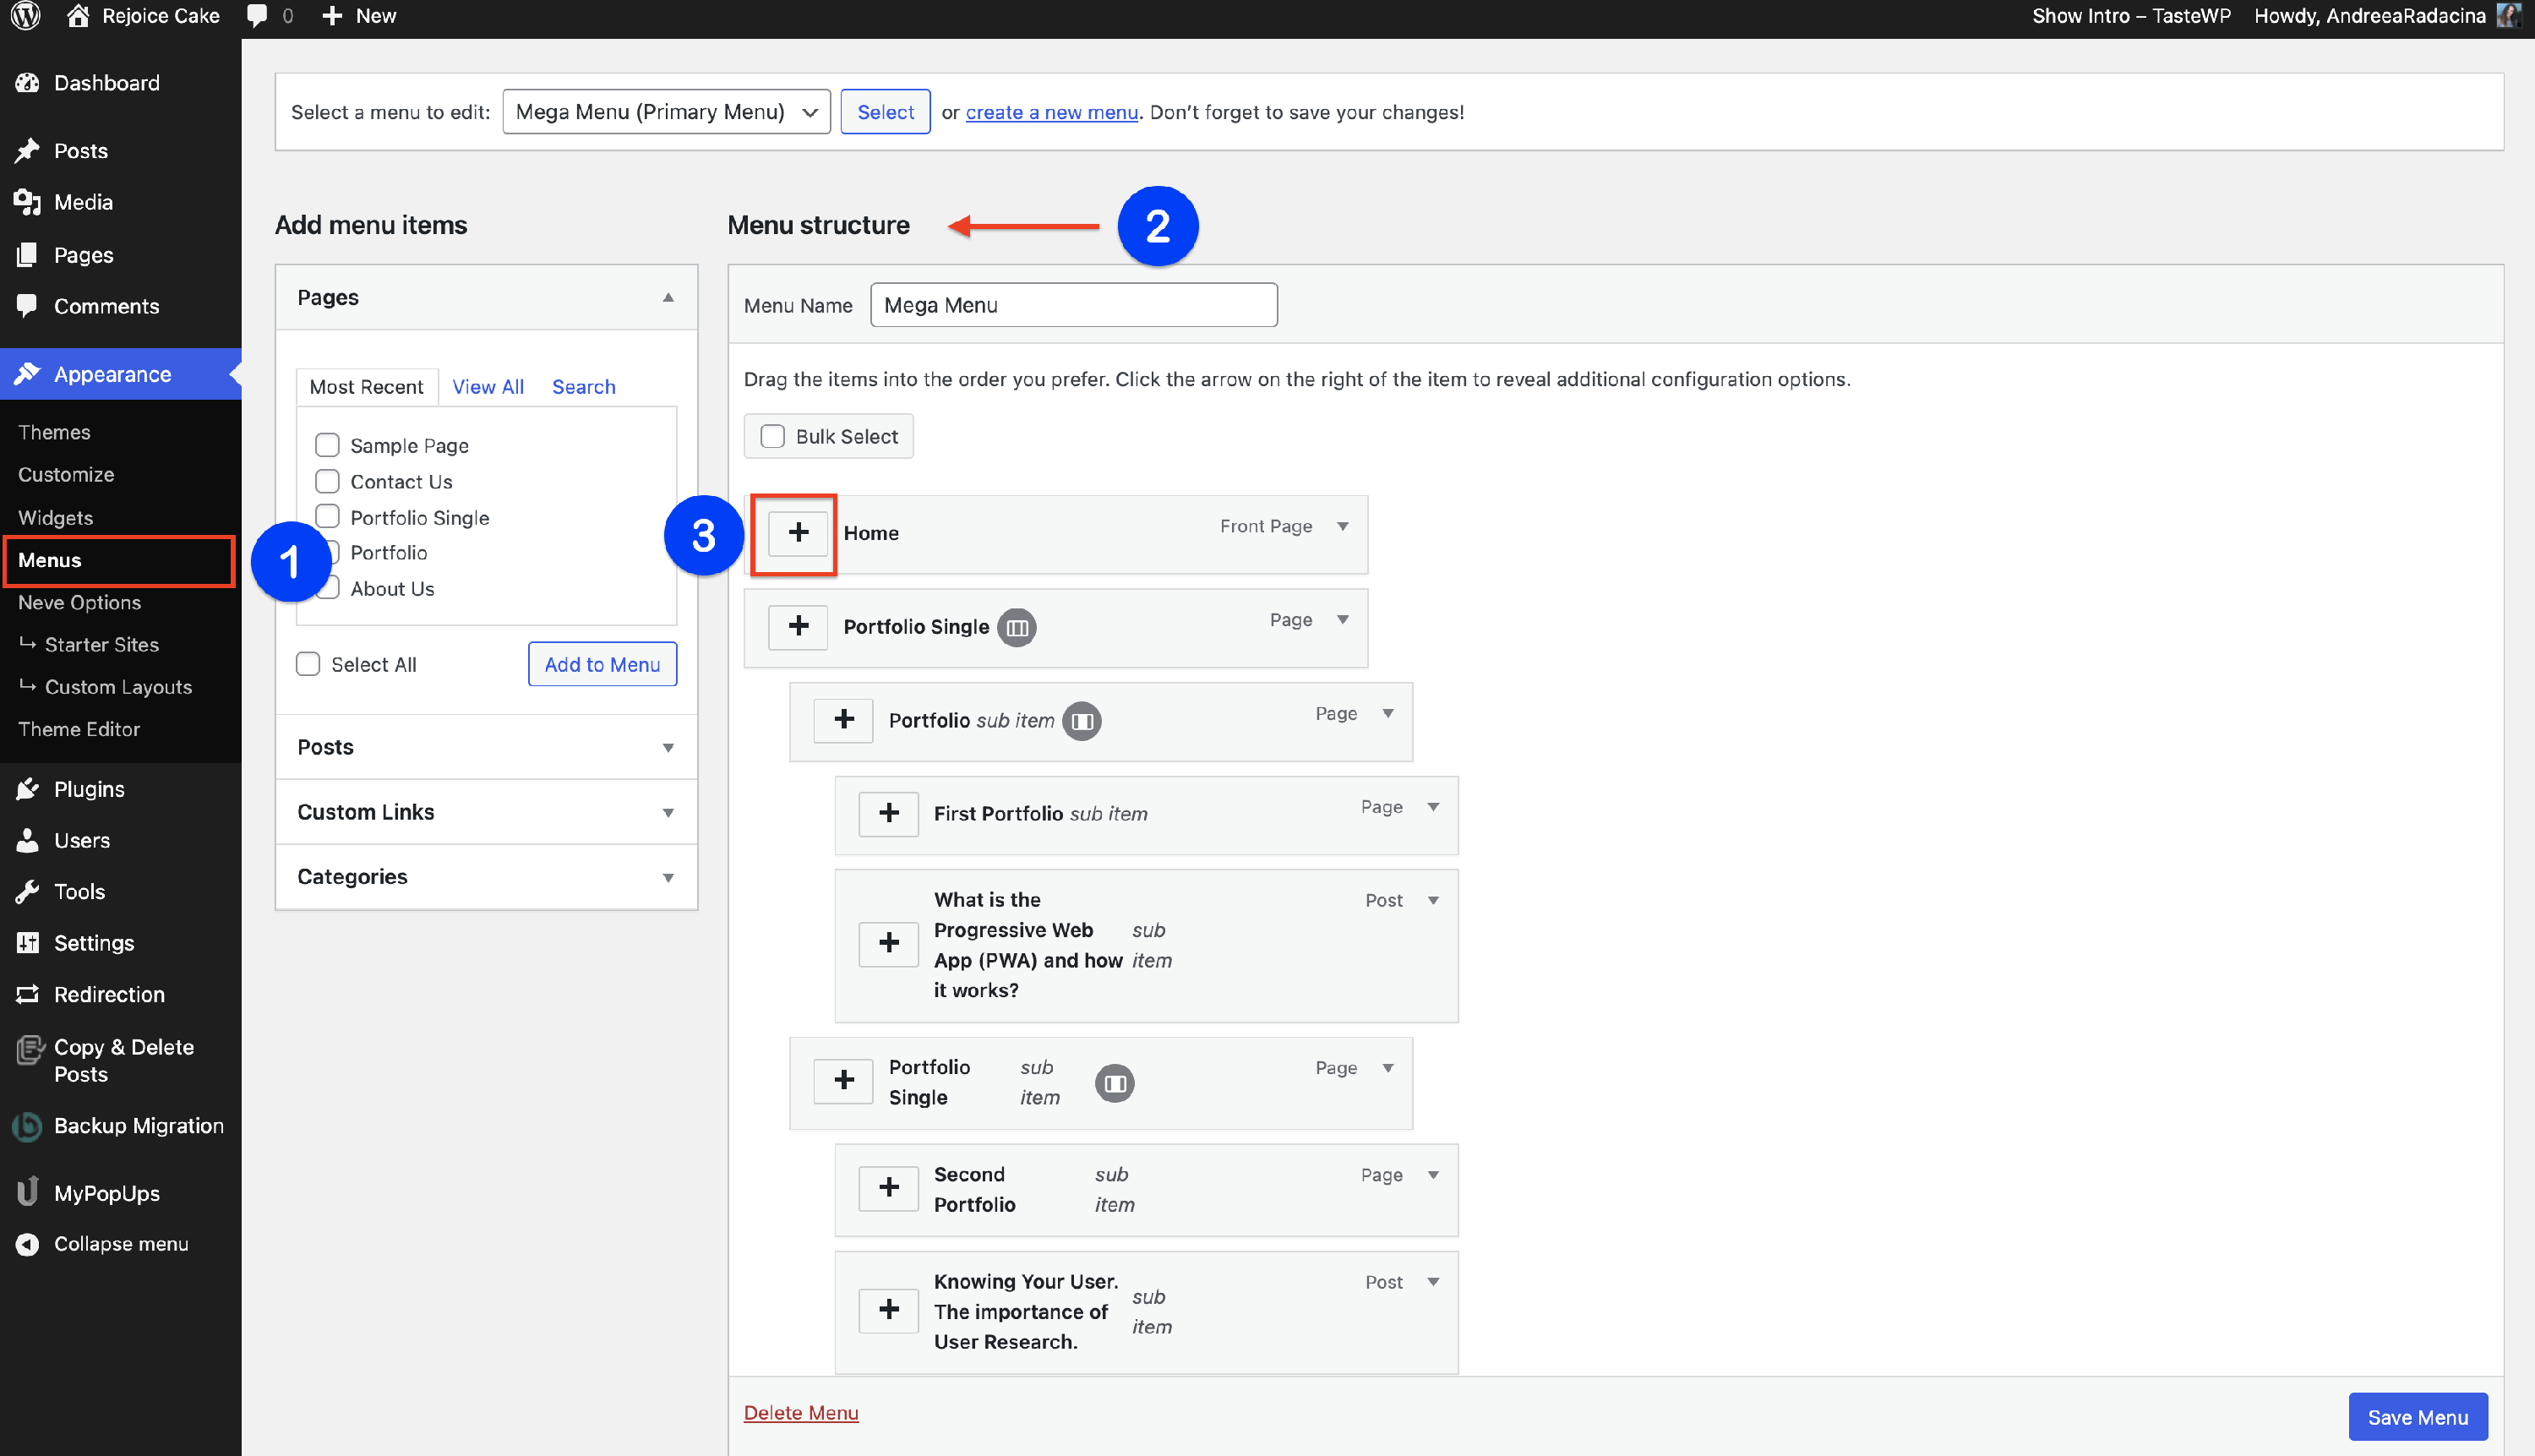
📝Note: Make sure you have created a Mega Menu, by following this doc.
Adding an Icon
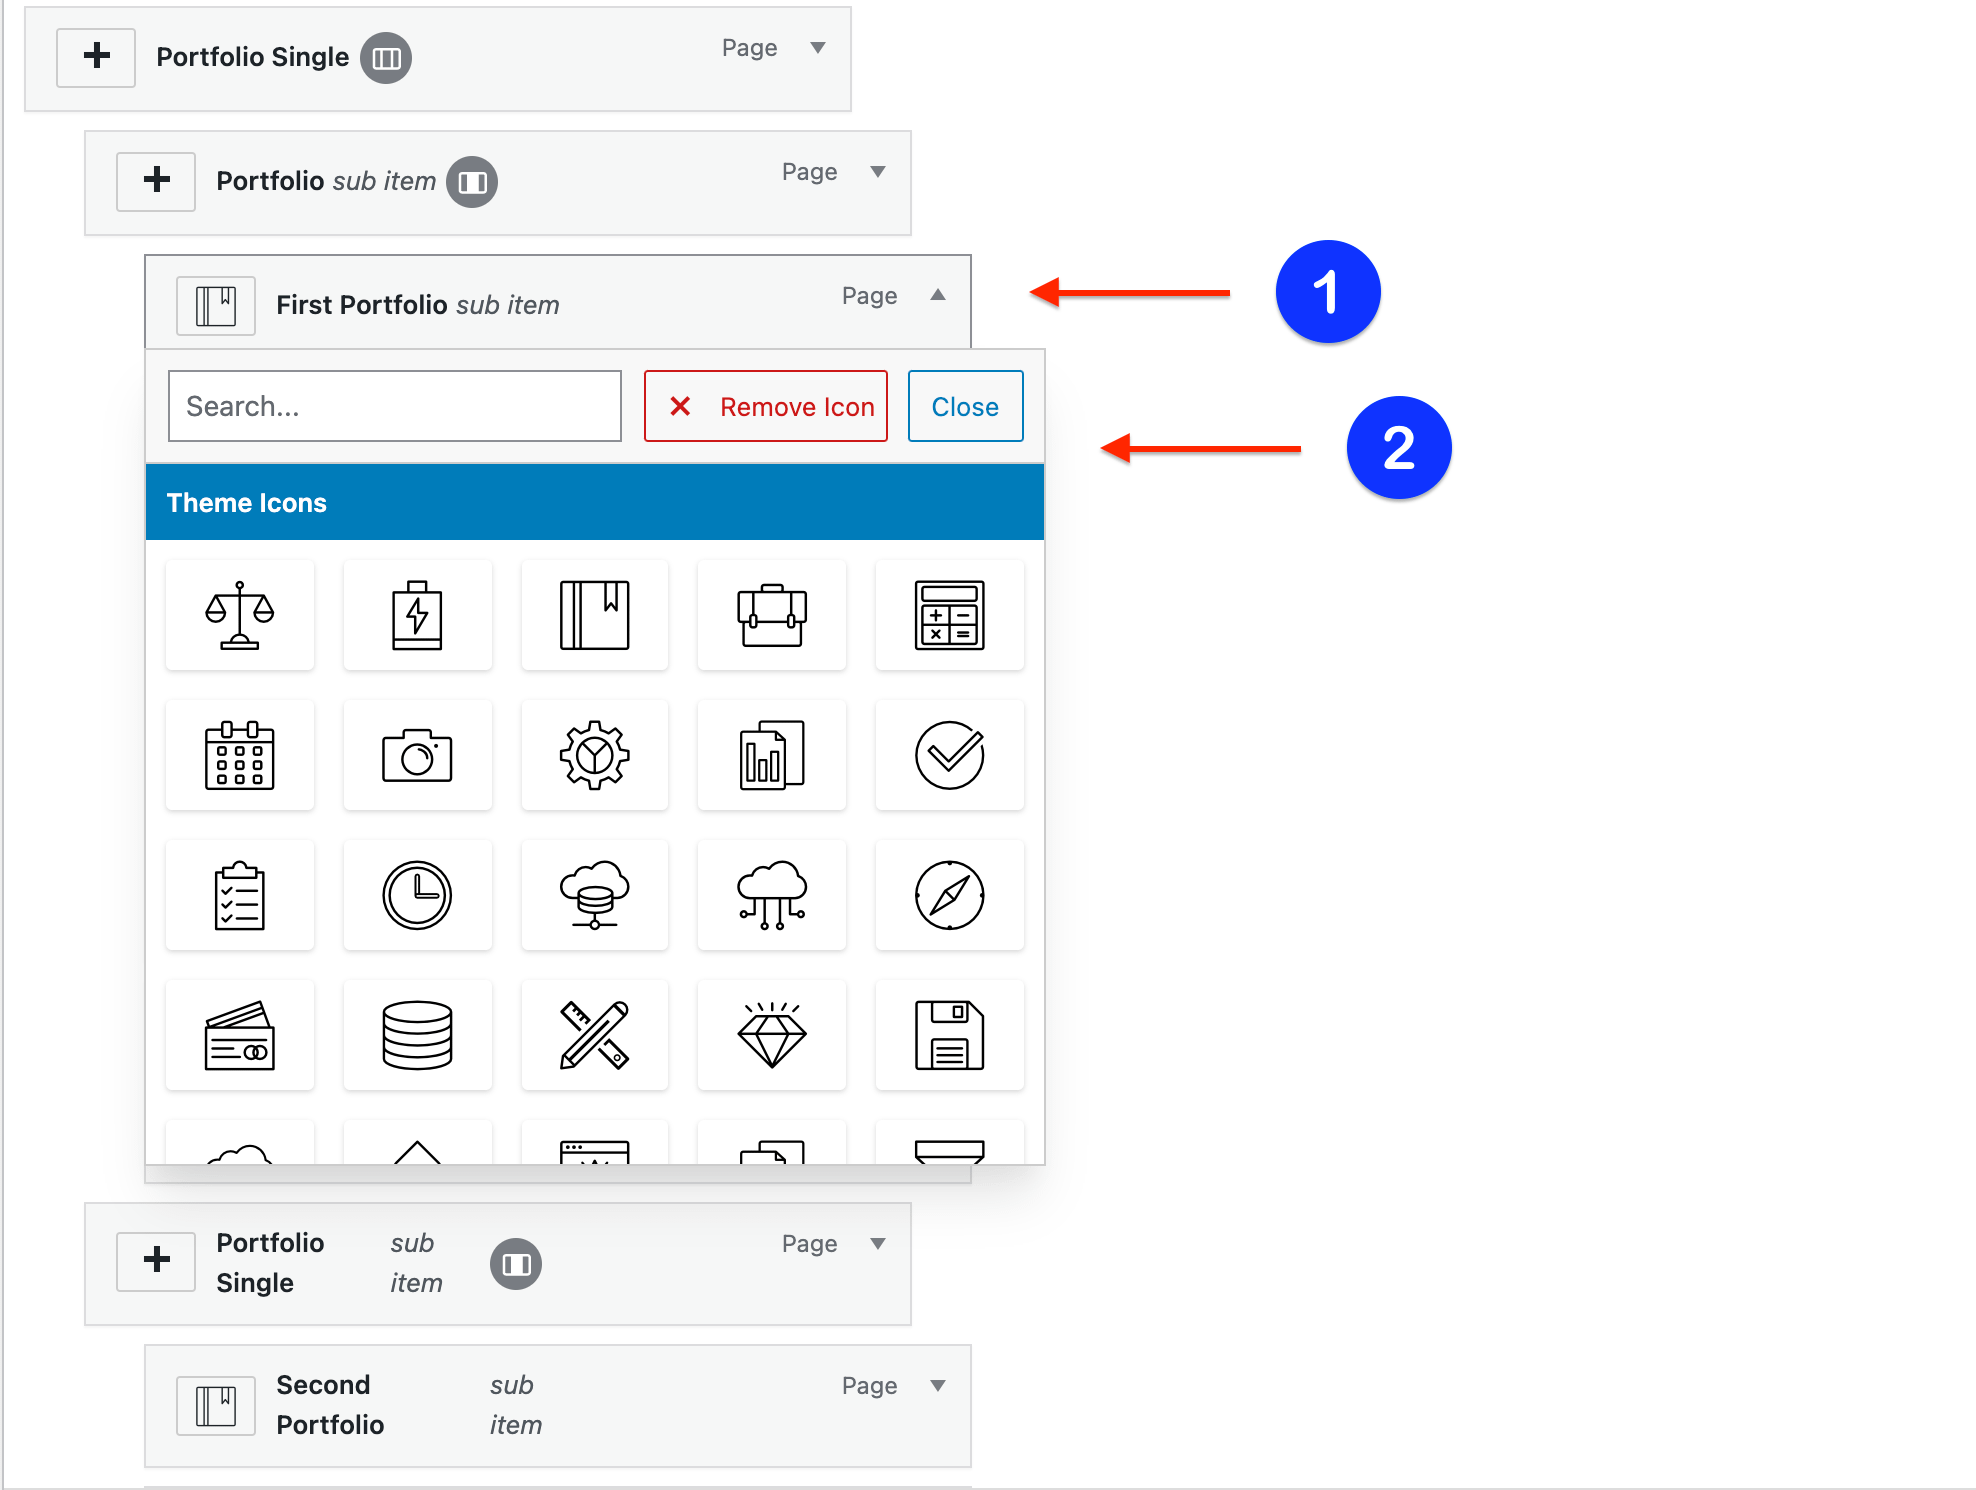
One of the most interesting facts about the Mega Menu is that you can easily insert icons for the menu items, by clicking on the ➕ button, next to the name of the item.
Then, select an icon from the icon library and check how it looks on your website after you save the changes.
Menu Item Settings
Click on the 🔽button of any menu item and a button with Menu Item Settings will appear.
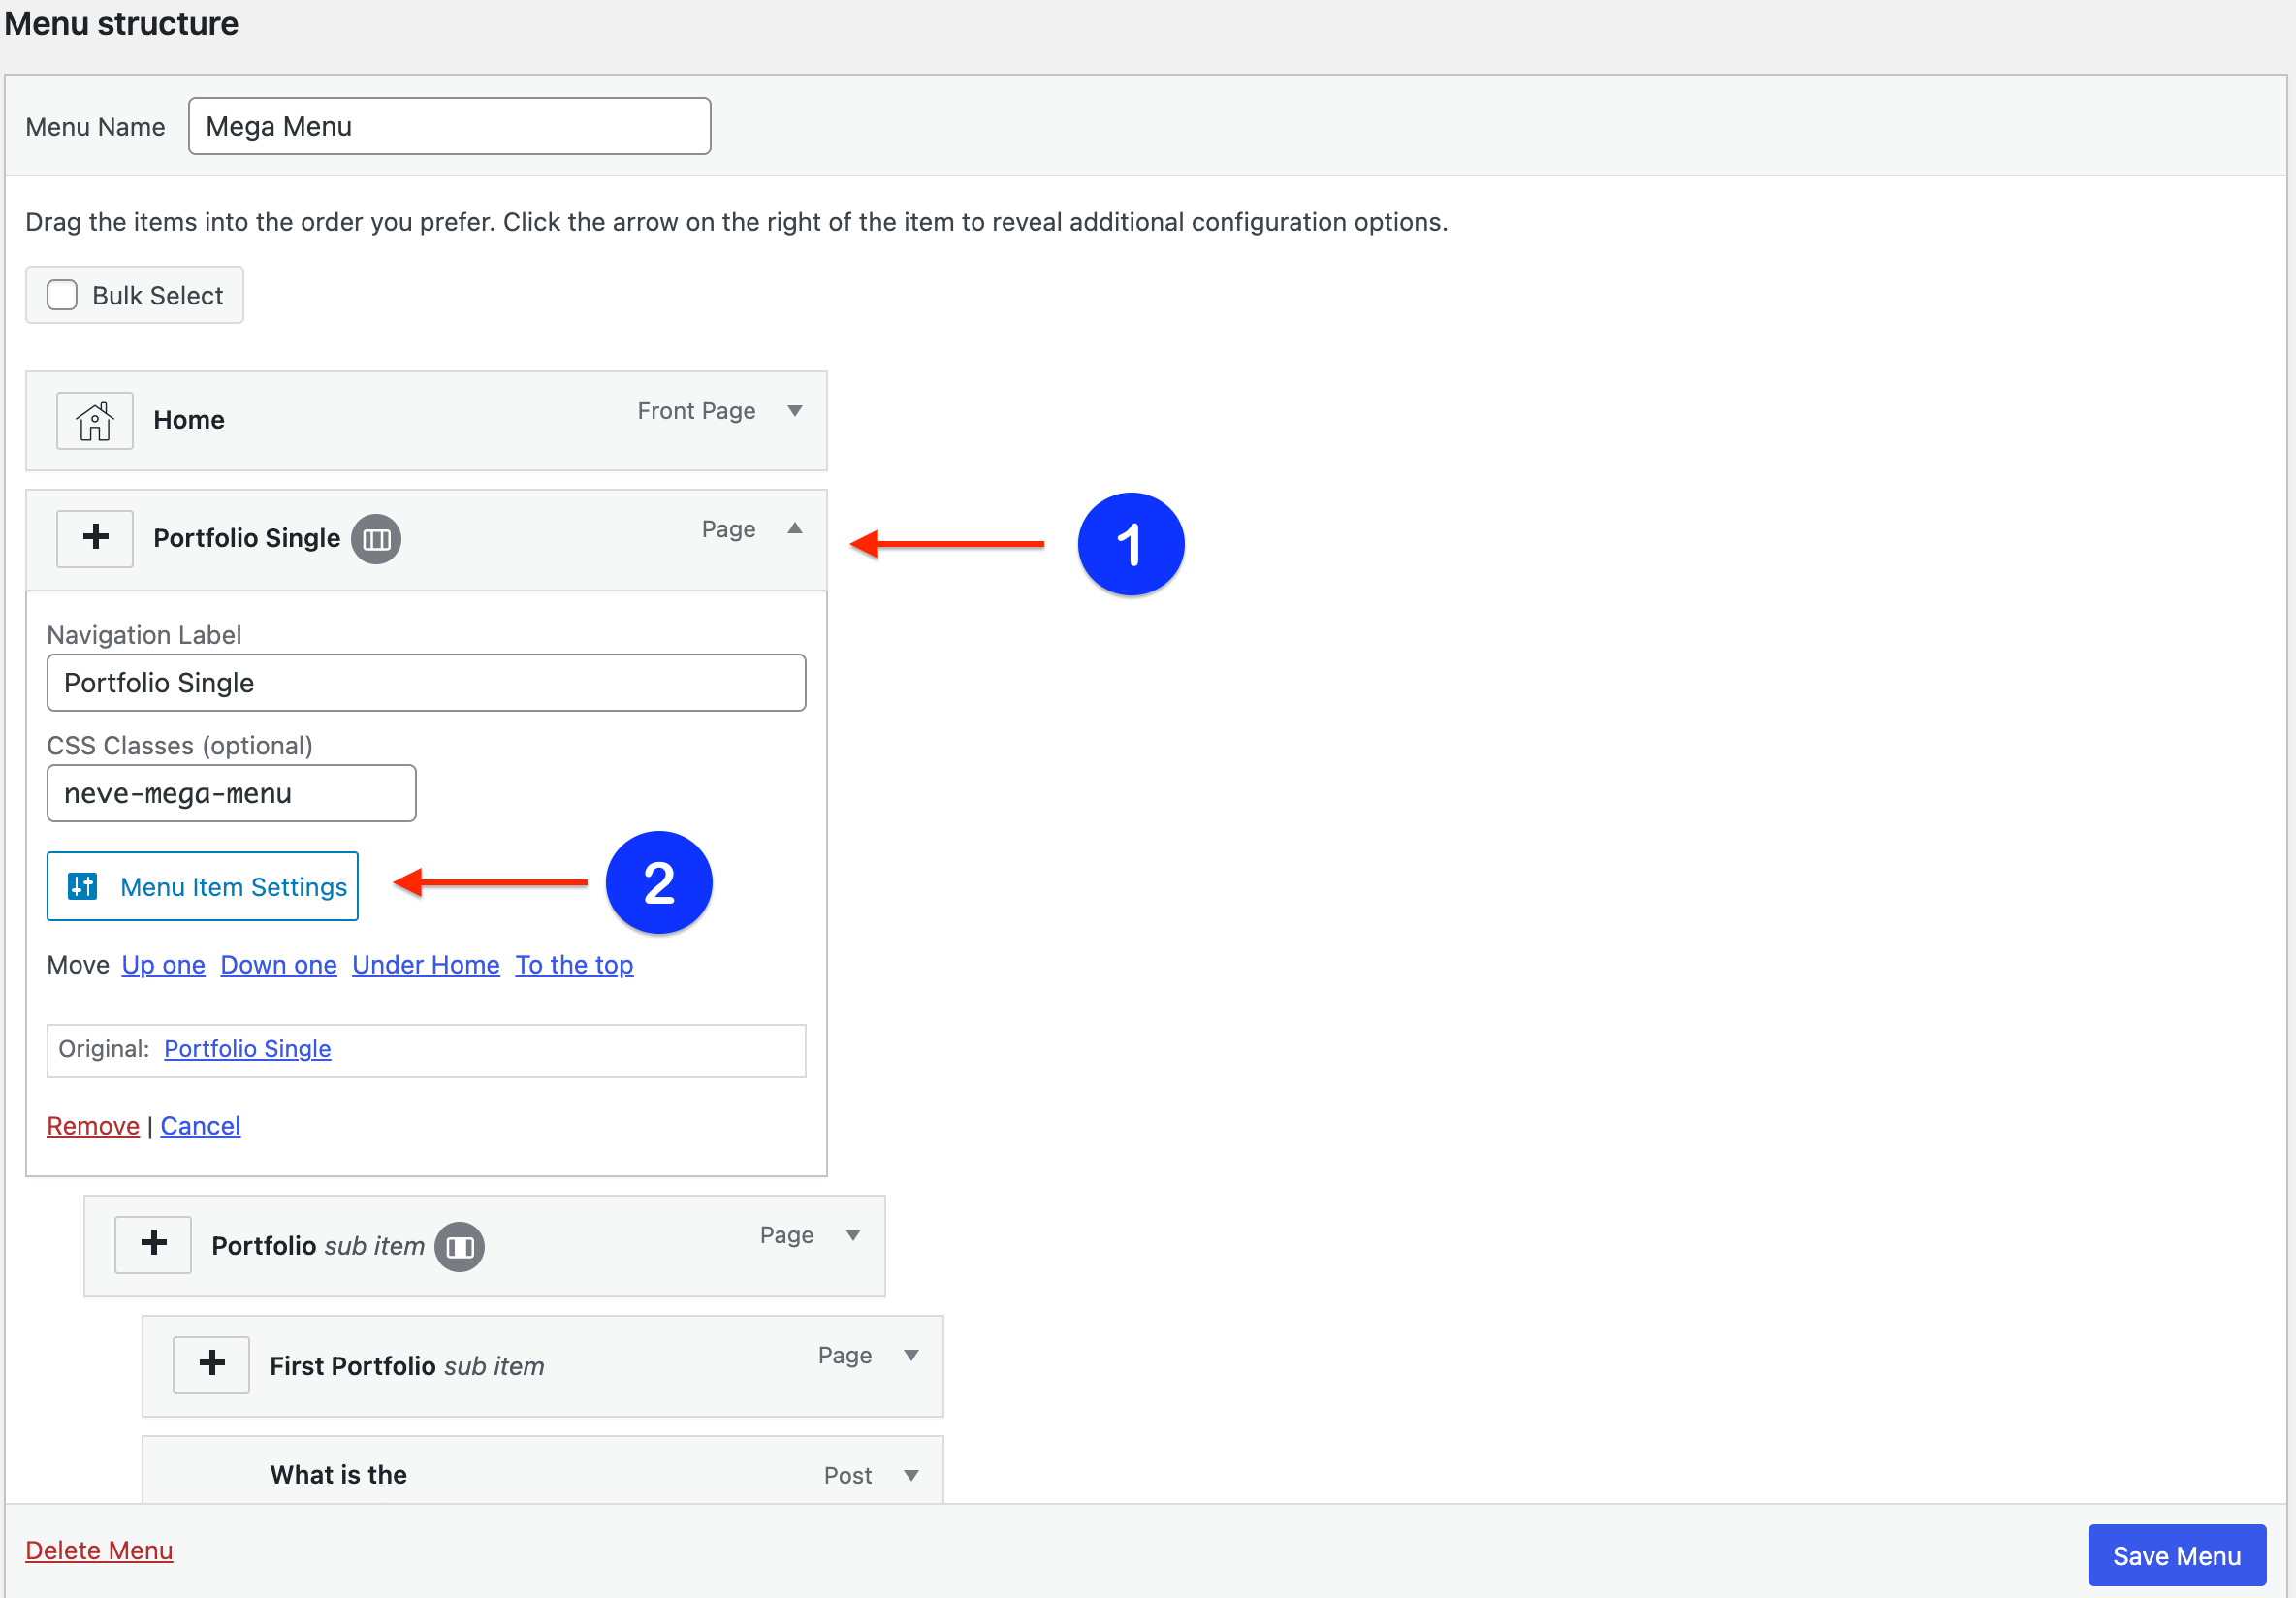
The Menu Item Settings will open a modal with options.
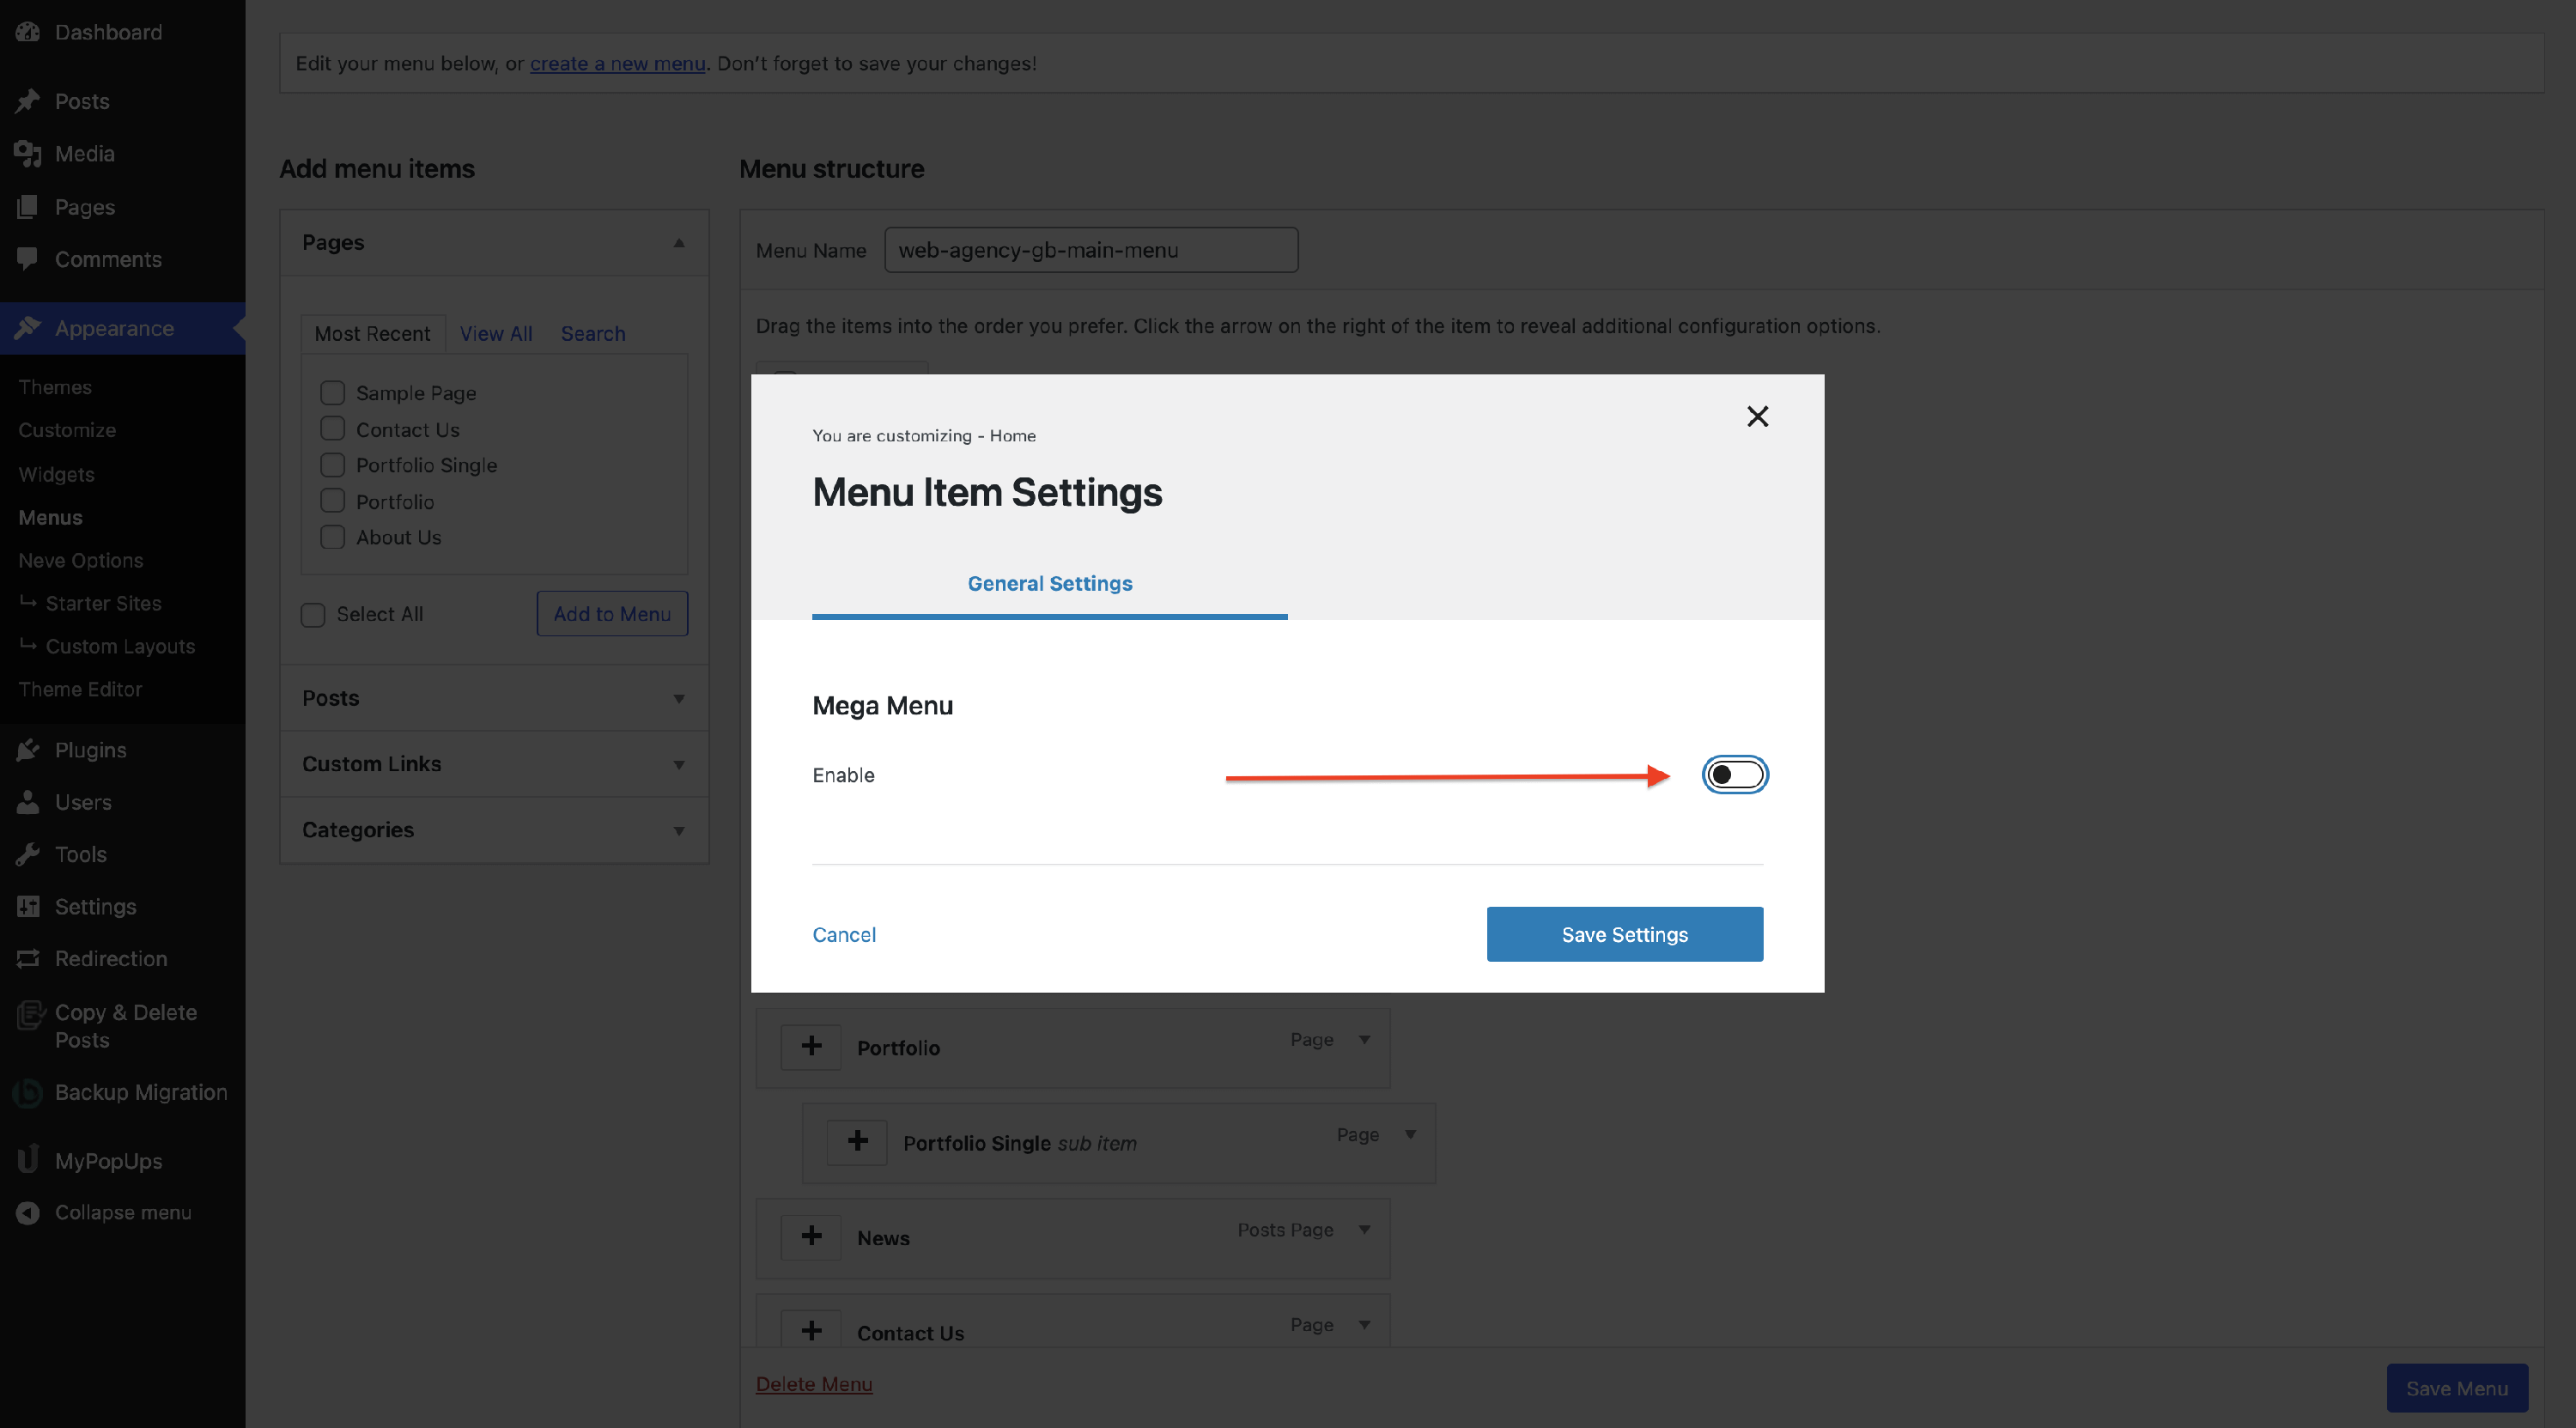
Enable the Mega Menu and it will generate two panels:
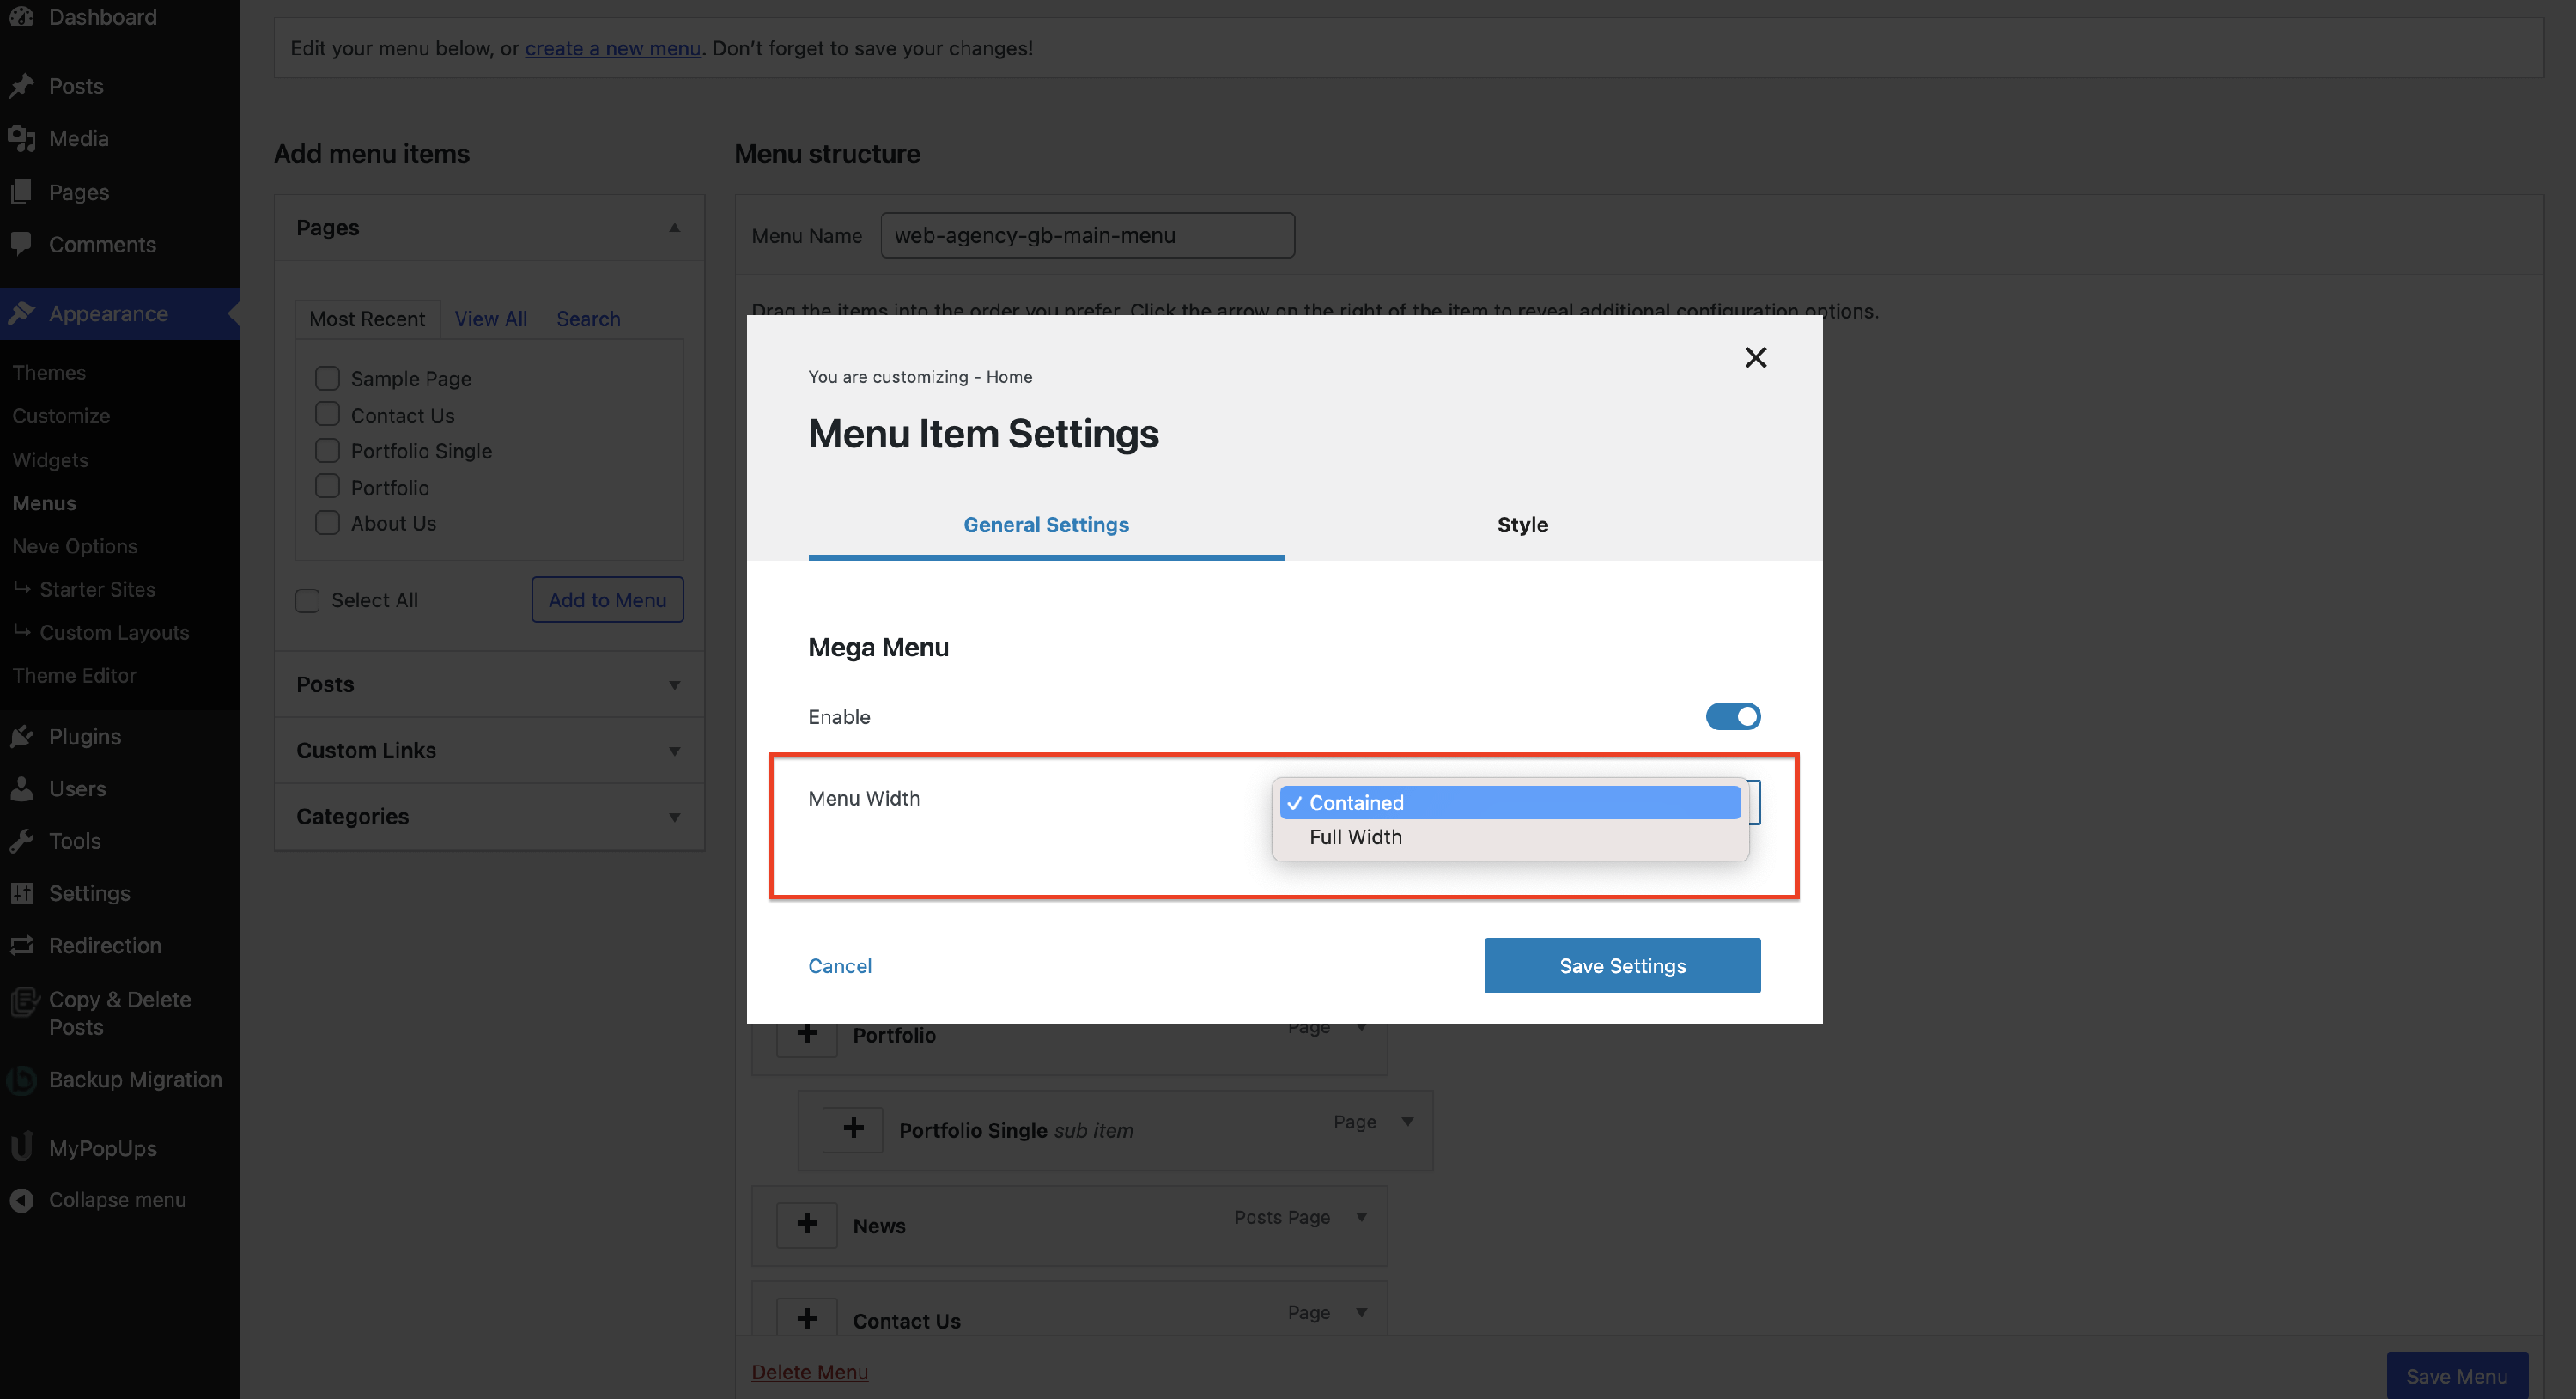
- General Settings
- Menu Width - select the desired layout for the mega menu, choosing from Contained ( it has a certain dimension ) / Full Width ( appears on the whole page ).
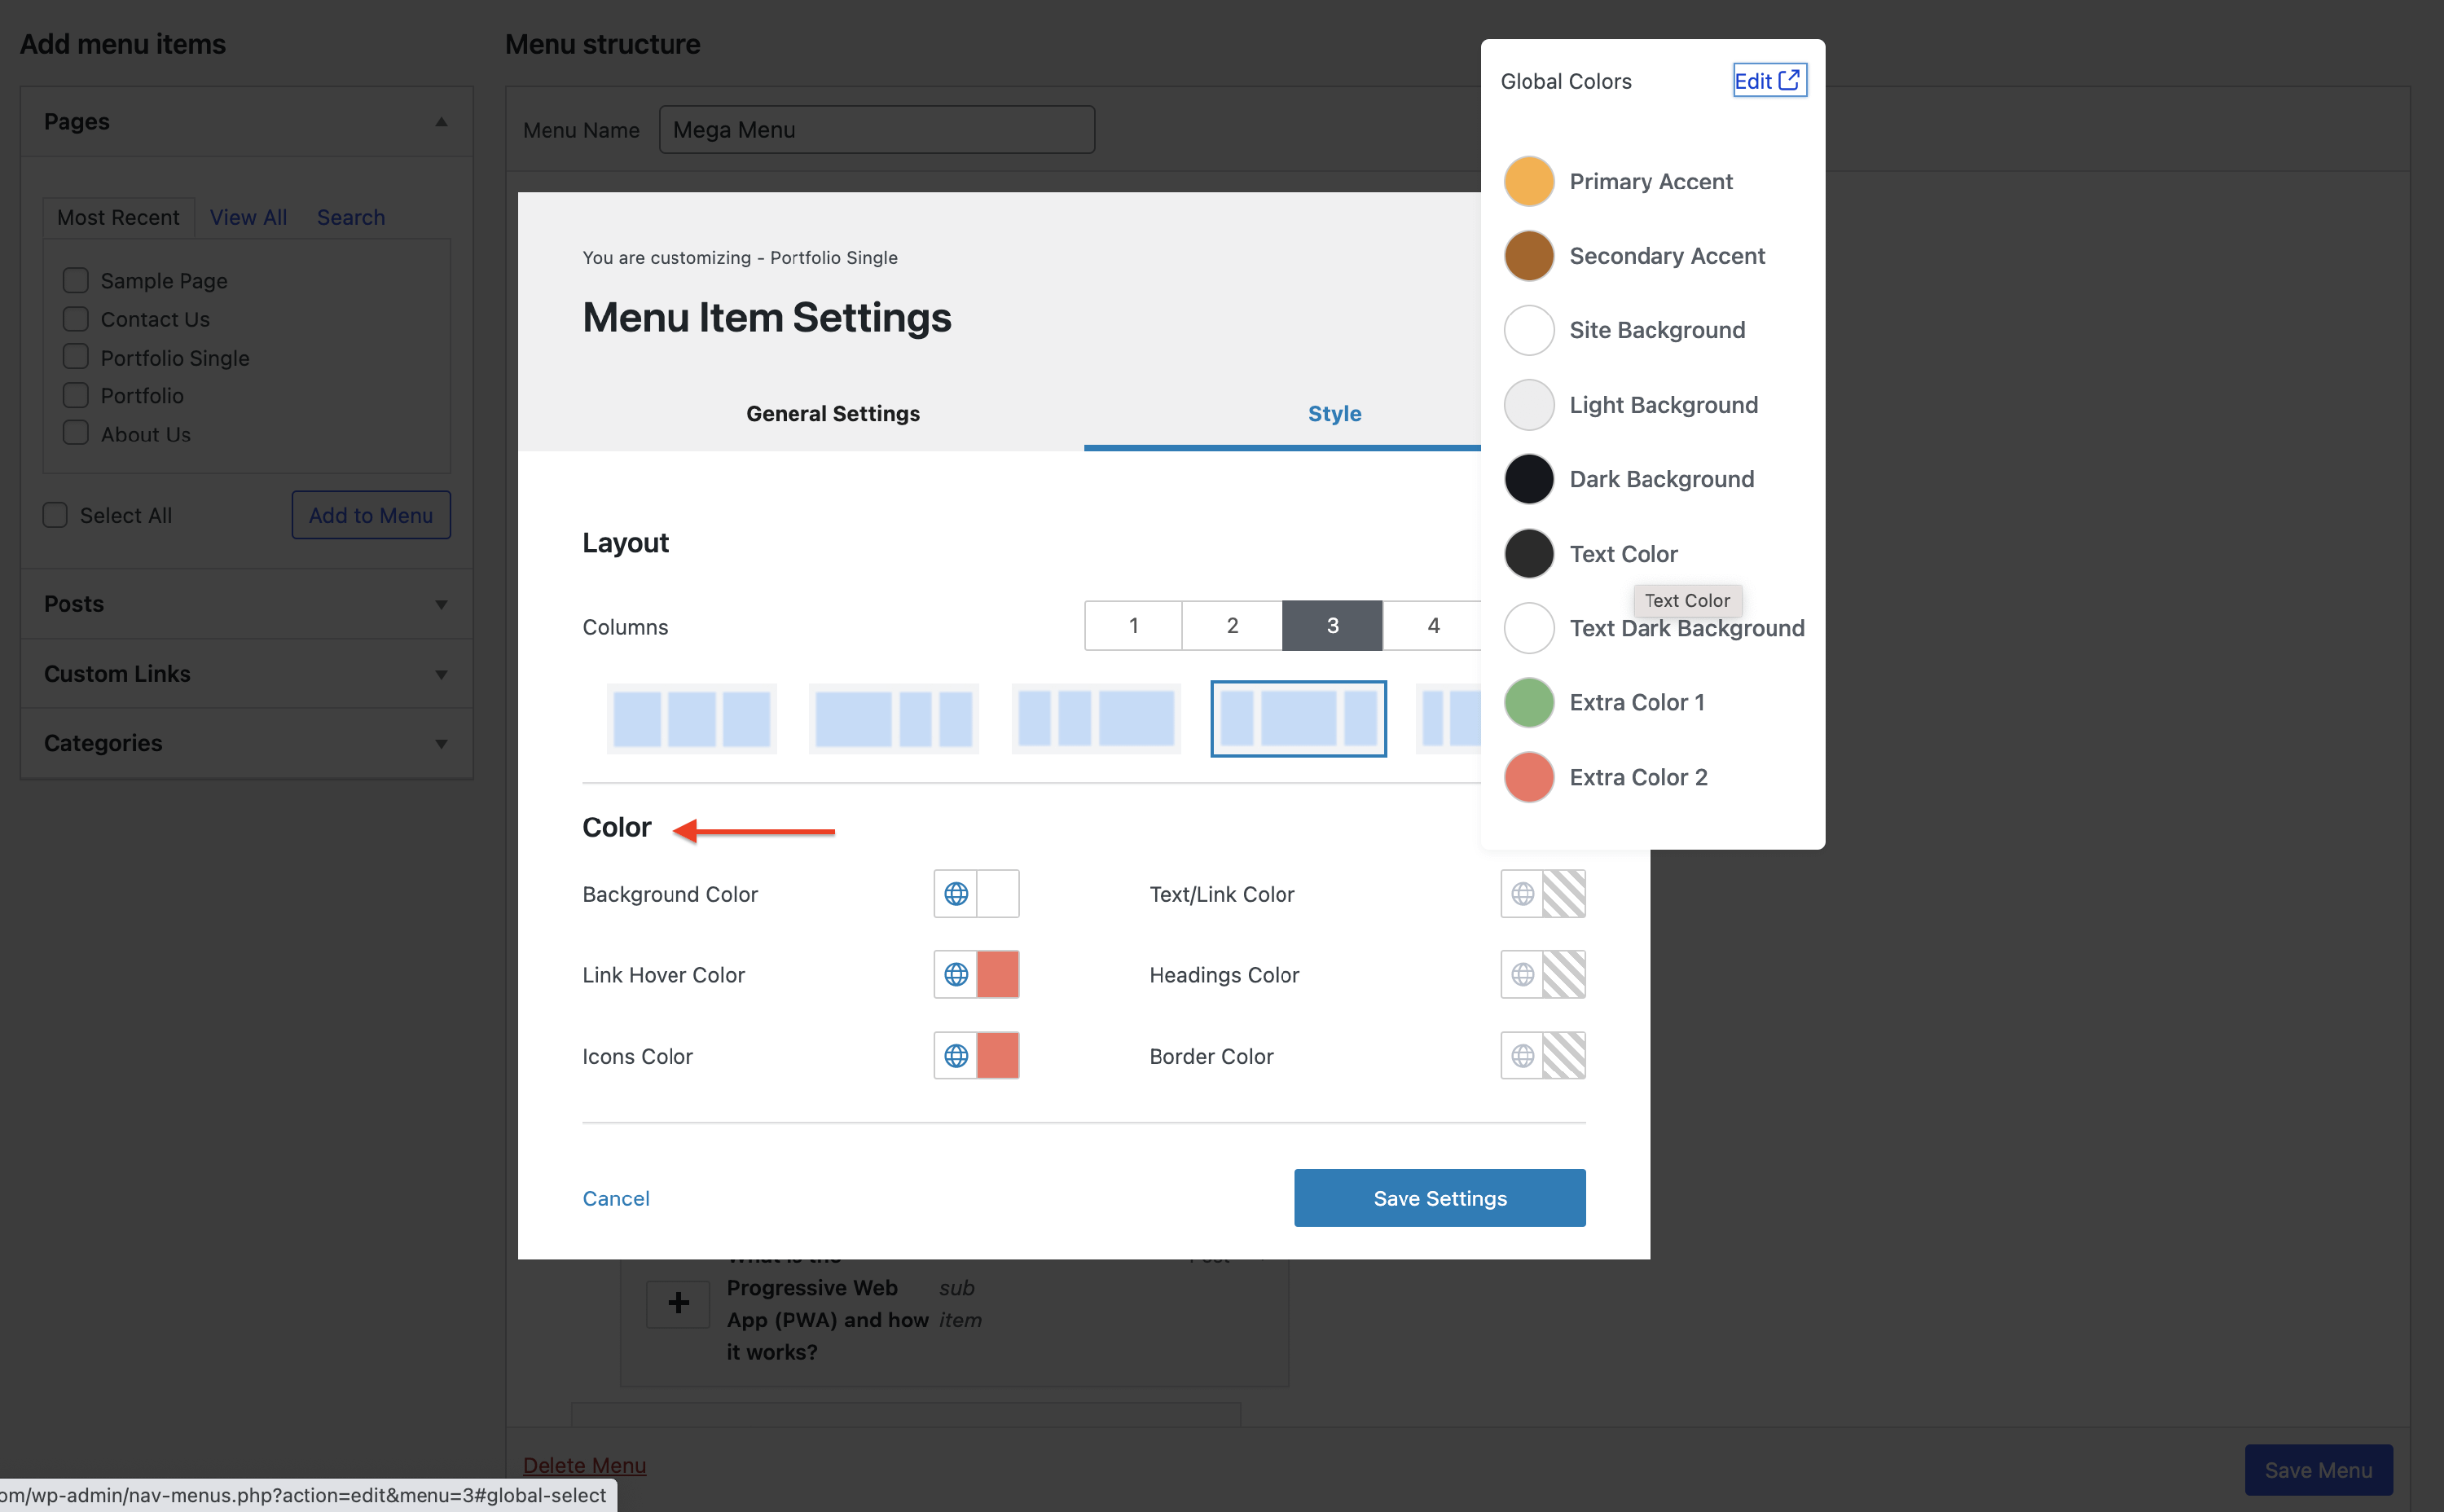
- Style
- Layout - from the layout tab pick the number of columns ( 1 to 5 ) and how you want them to be displayed.
- Color - adjust the colors of the Mega Menu.
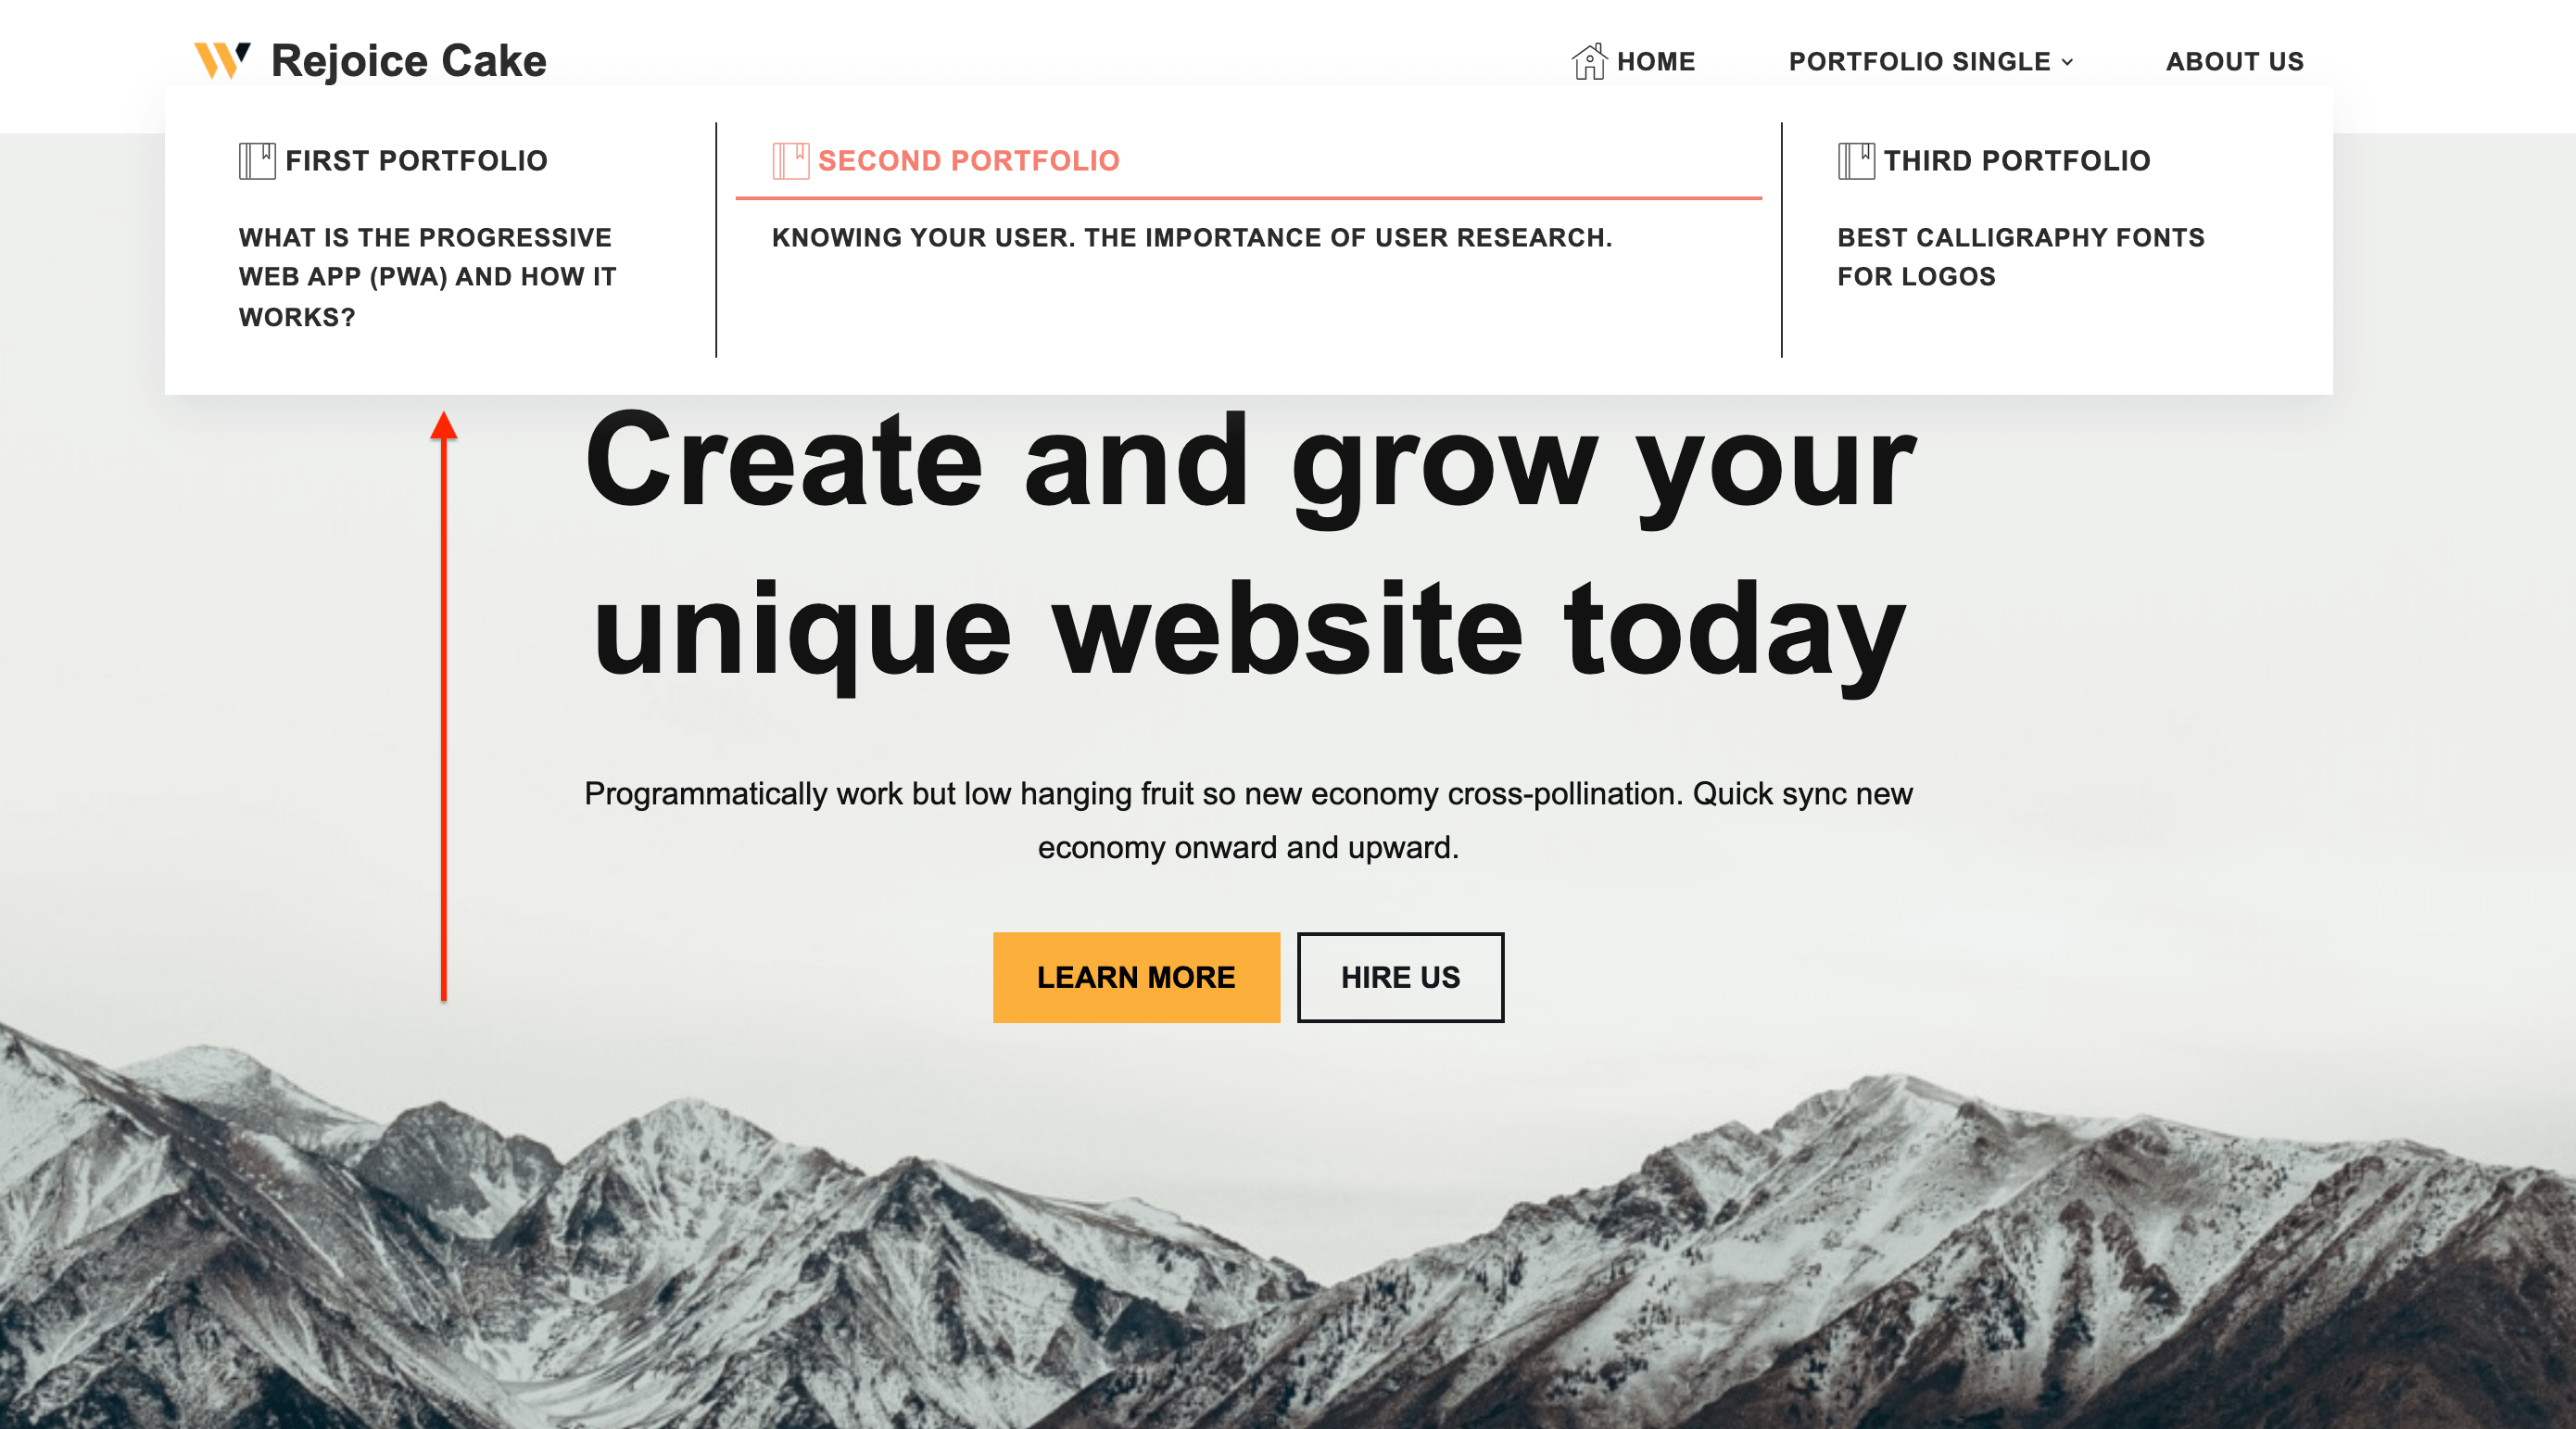
Save the changes and check the website to see the changes.
Sub-Item Settings
Inside the menu items, you can have the sub-items, similar to this case:
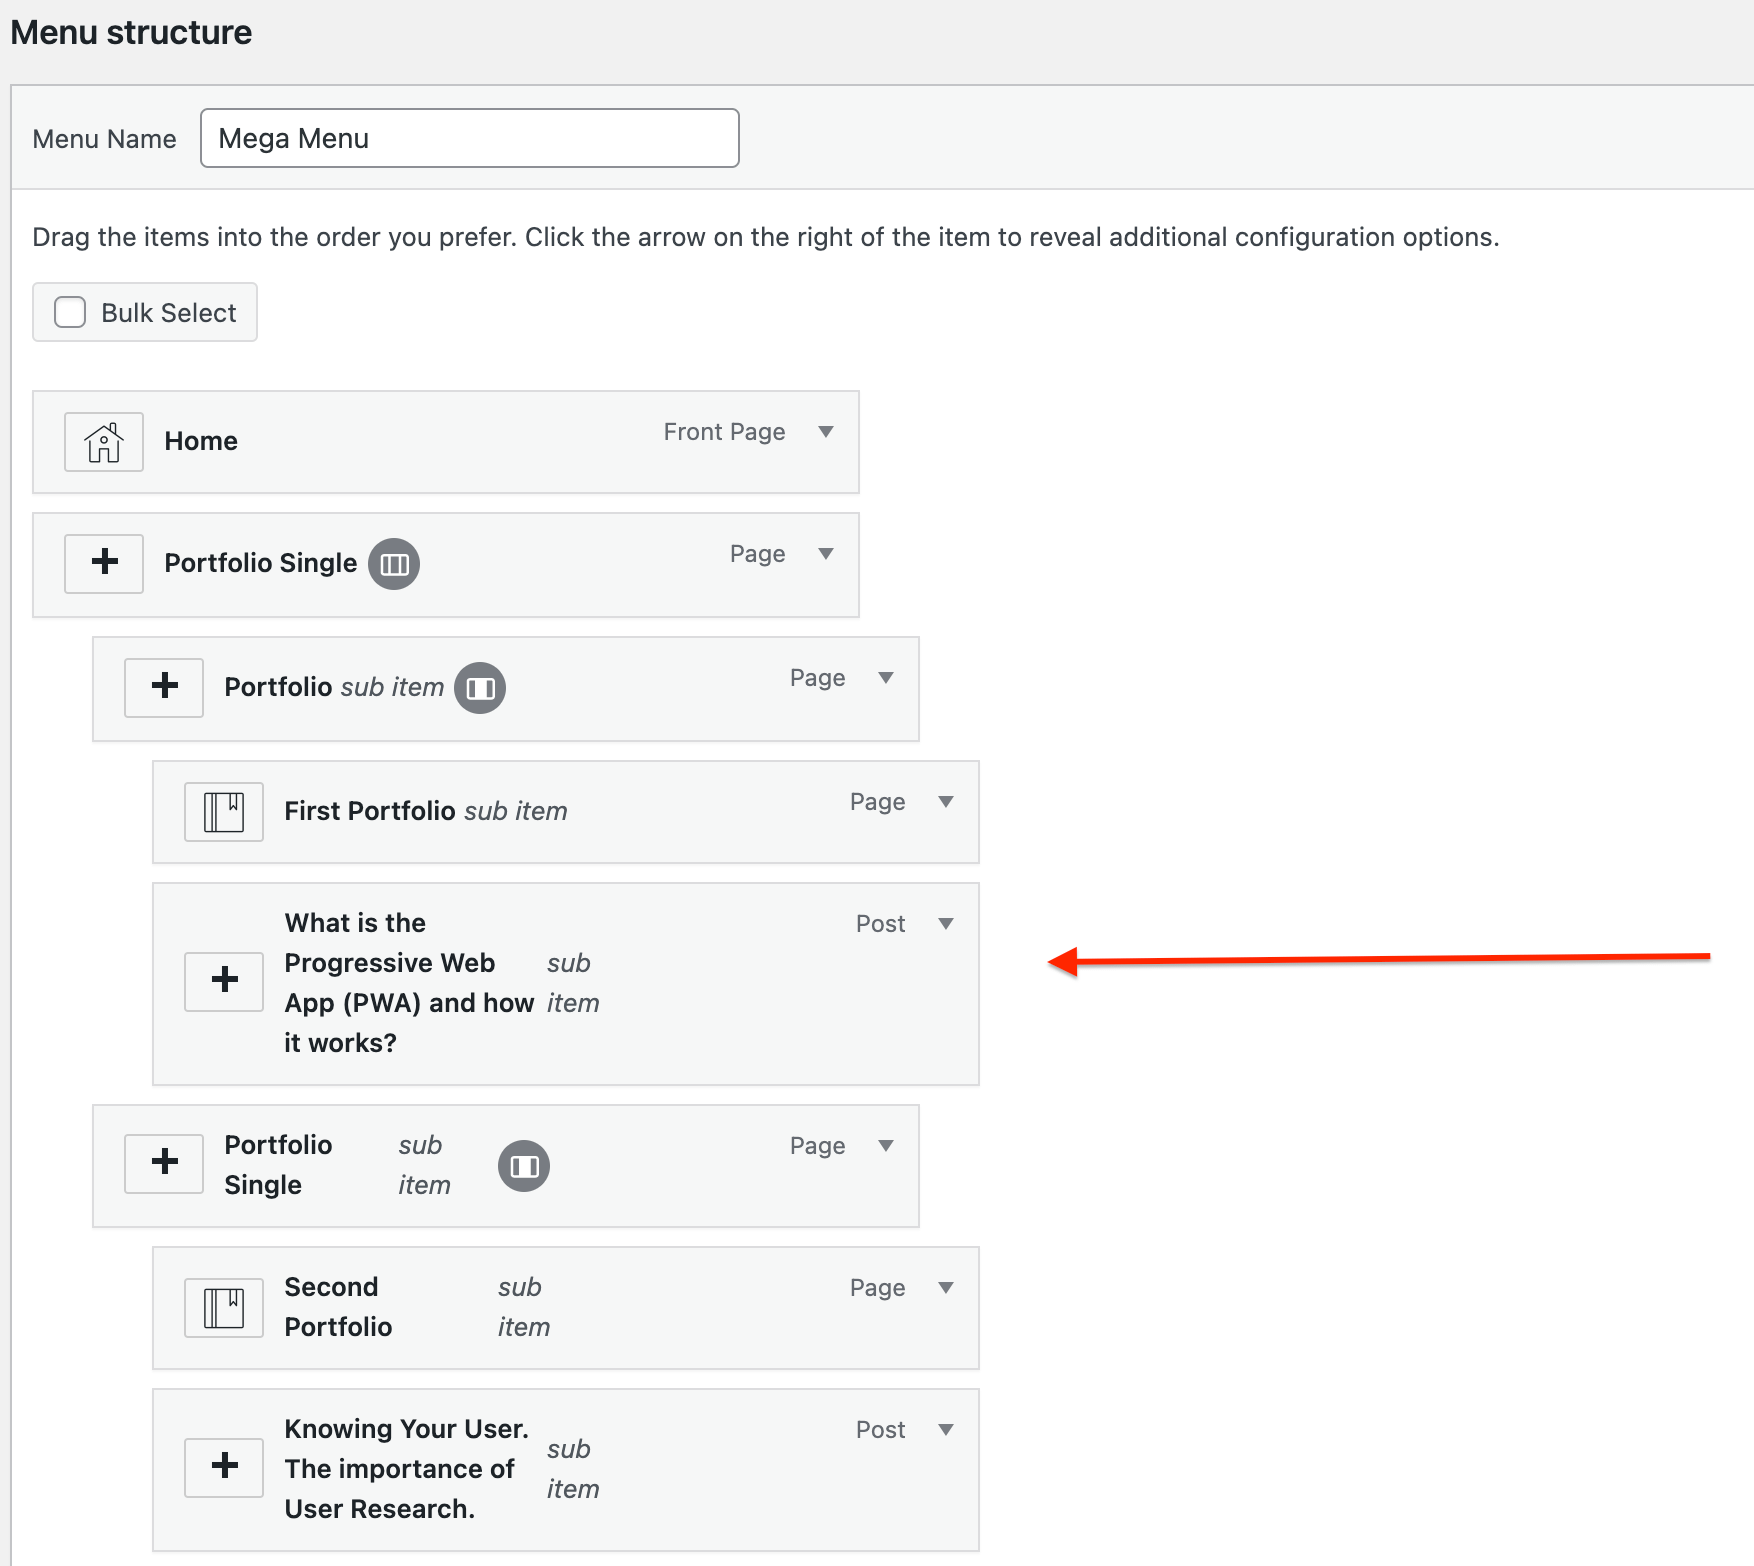
The Menu Item Settings will be different from the ones above:

- Content Type - select one of the available options to configure the content type.
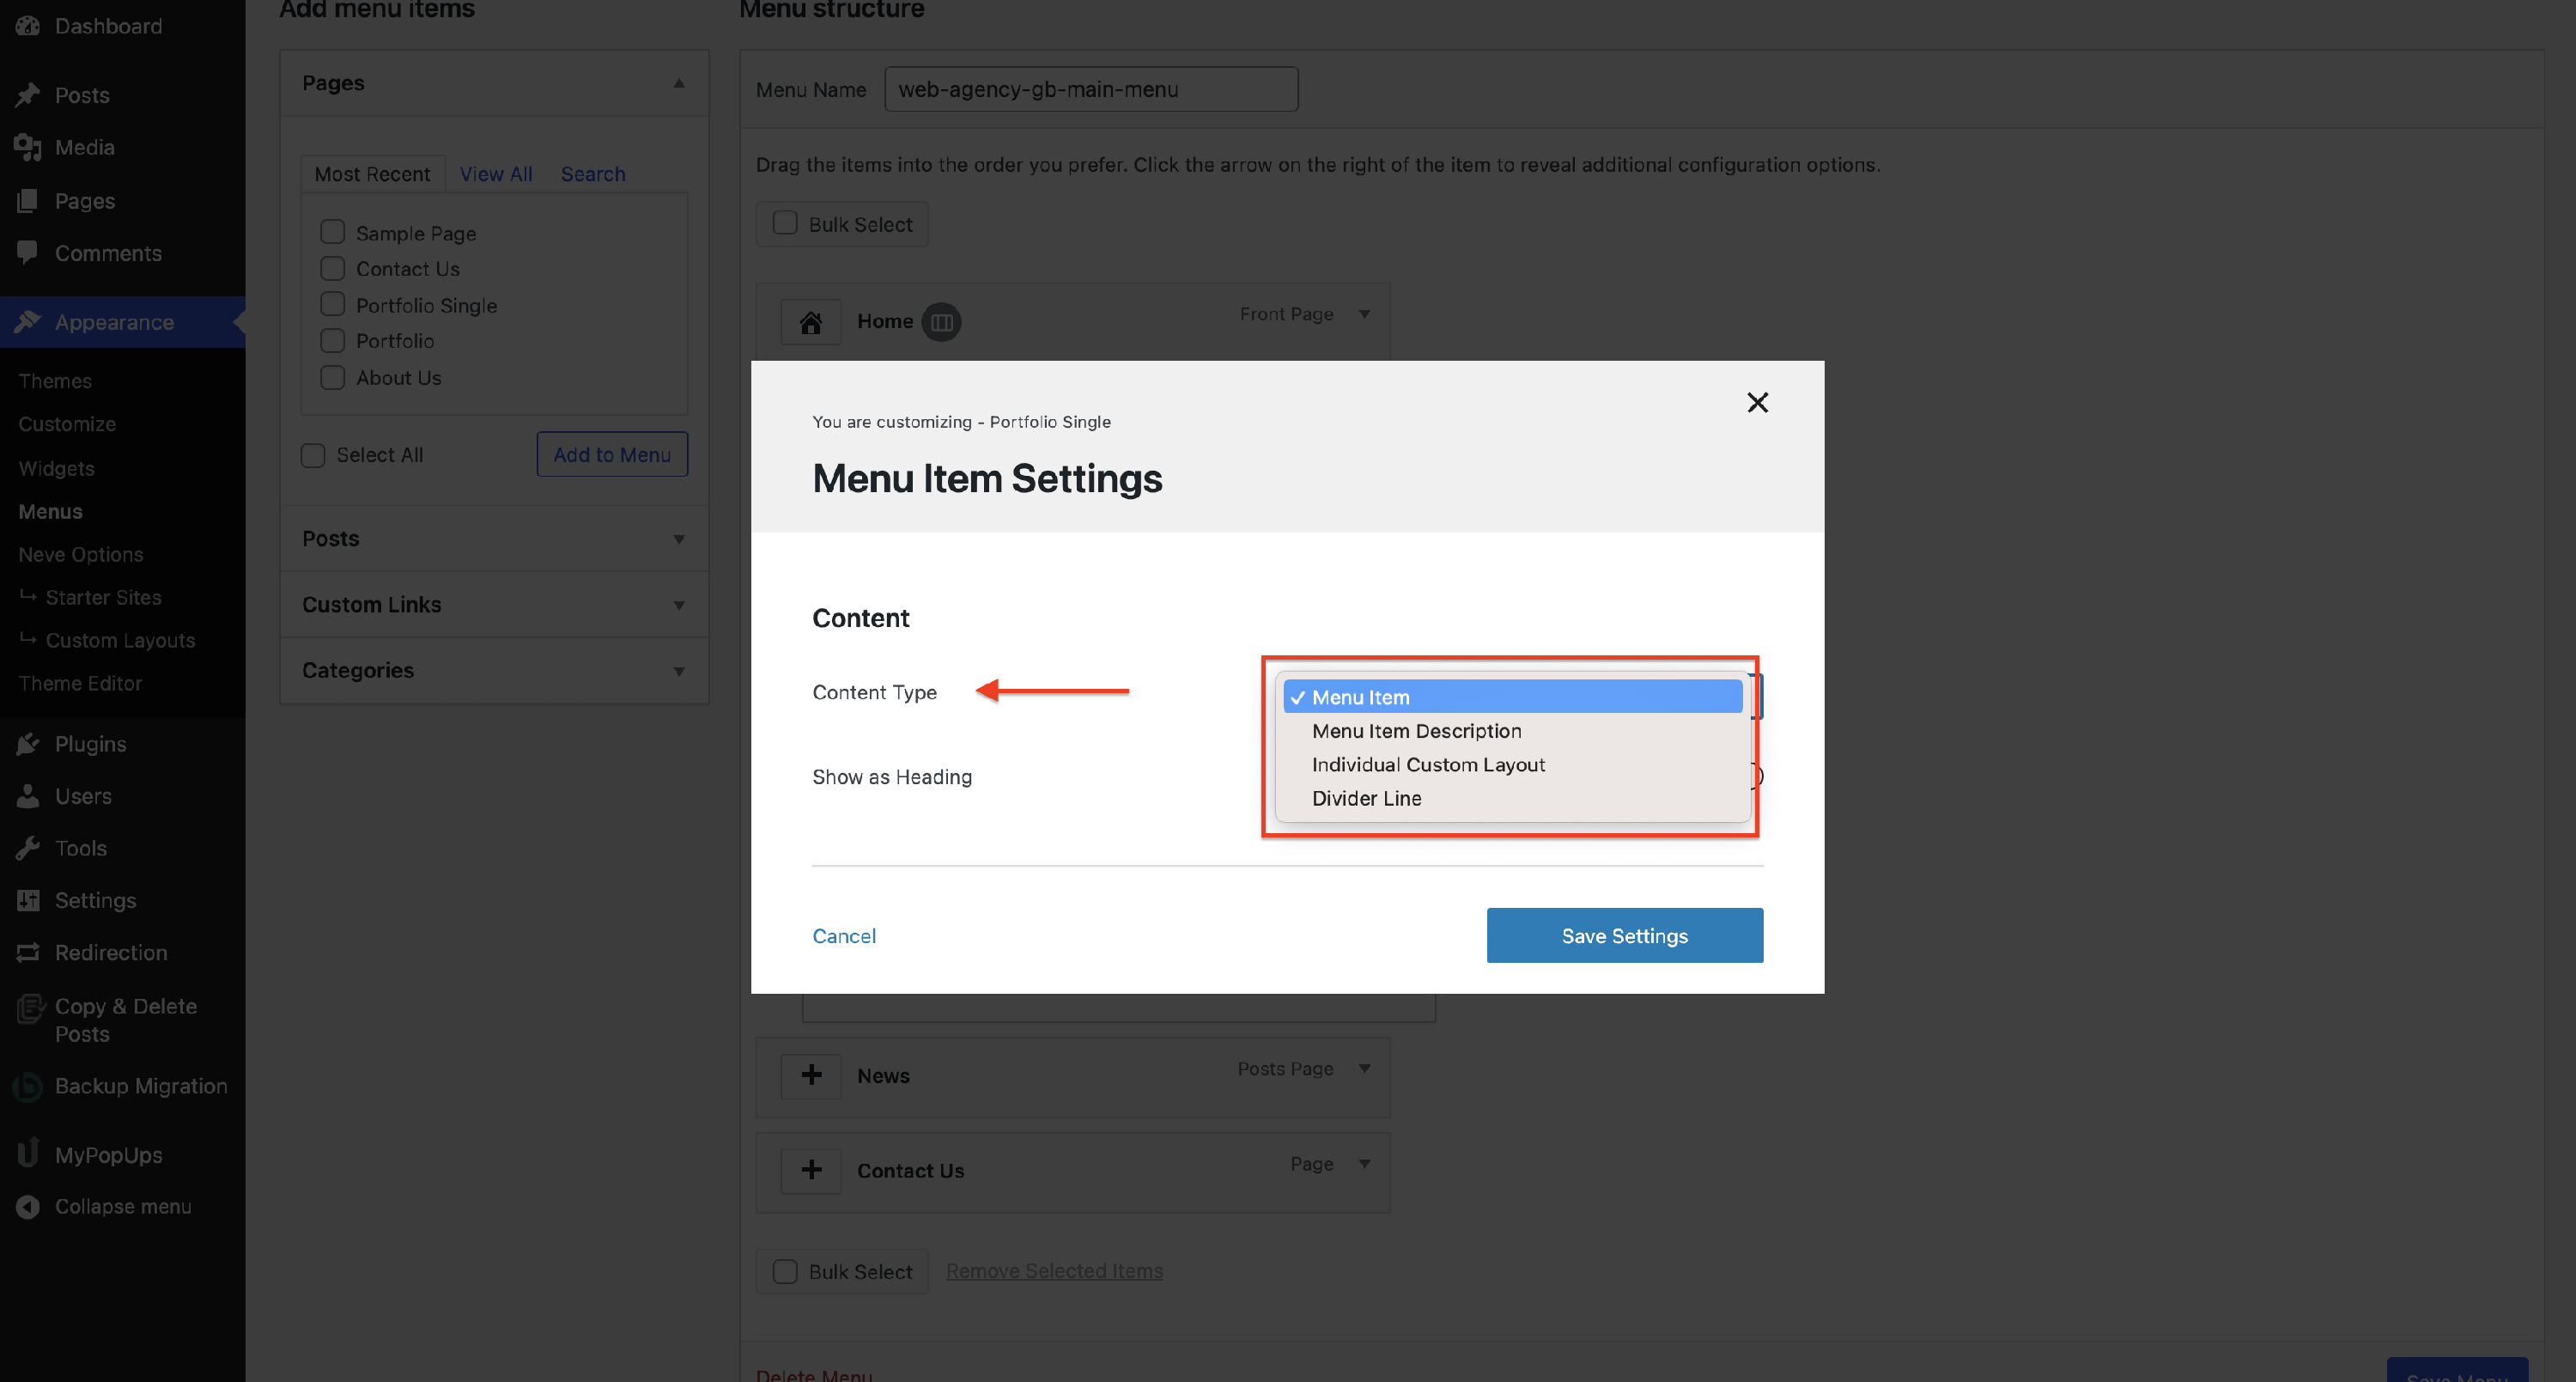
Each Content Type has different settings:
A
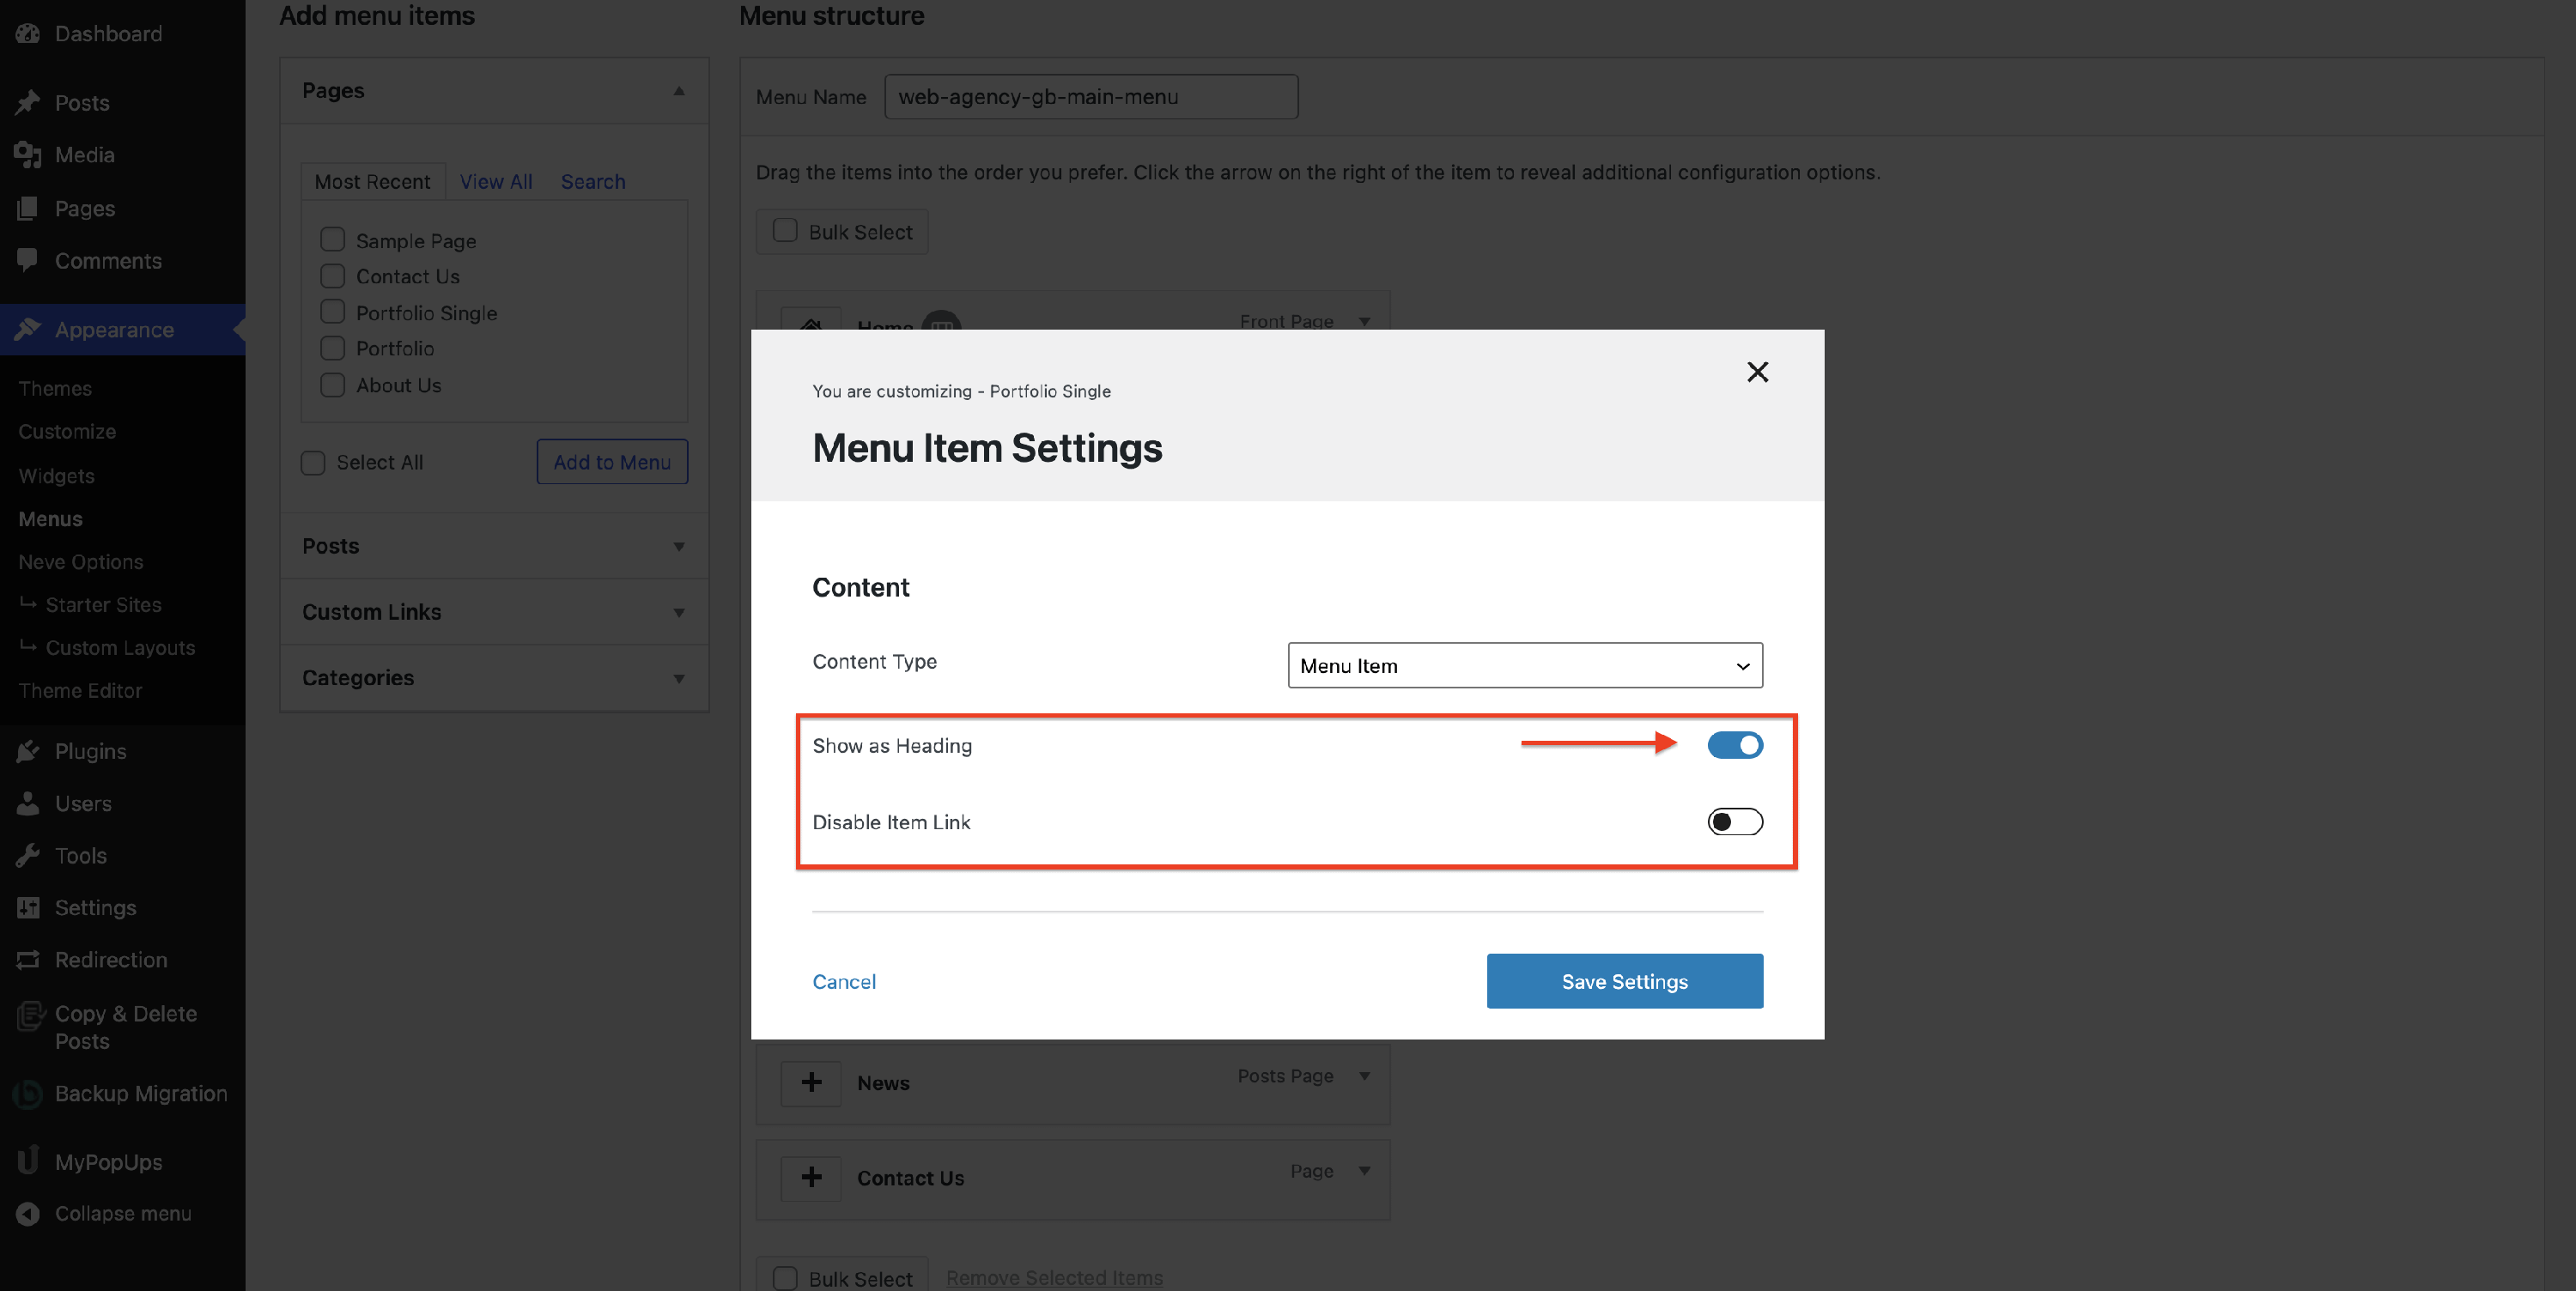
Menu Item
- Show as Heading - enable this option if you want the sub-item to be displayed as a heading.
- By enabling this possibility, it will generate a new option, to Disable Item Link.
💡Result

B
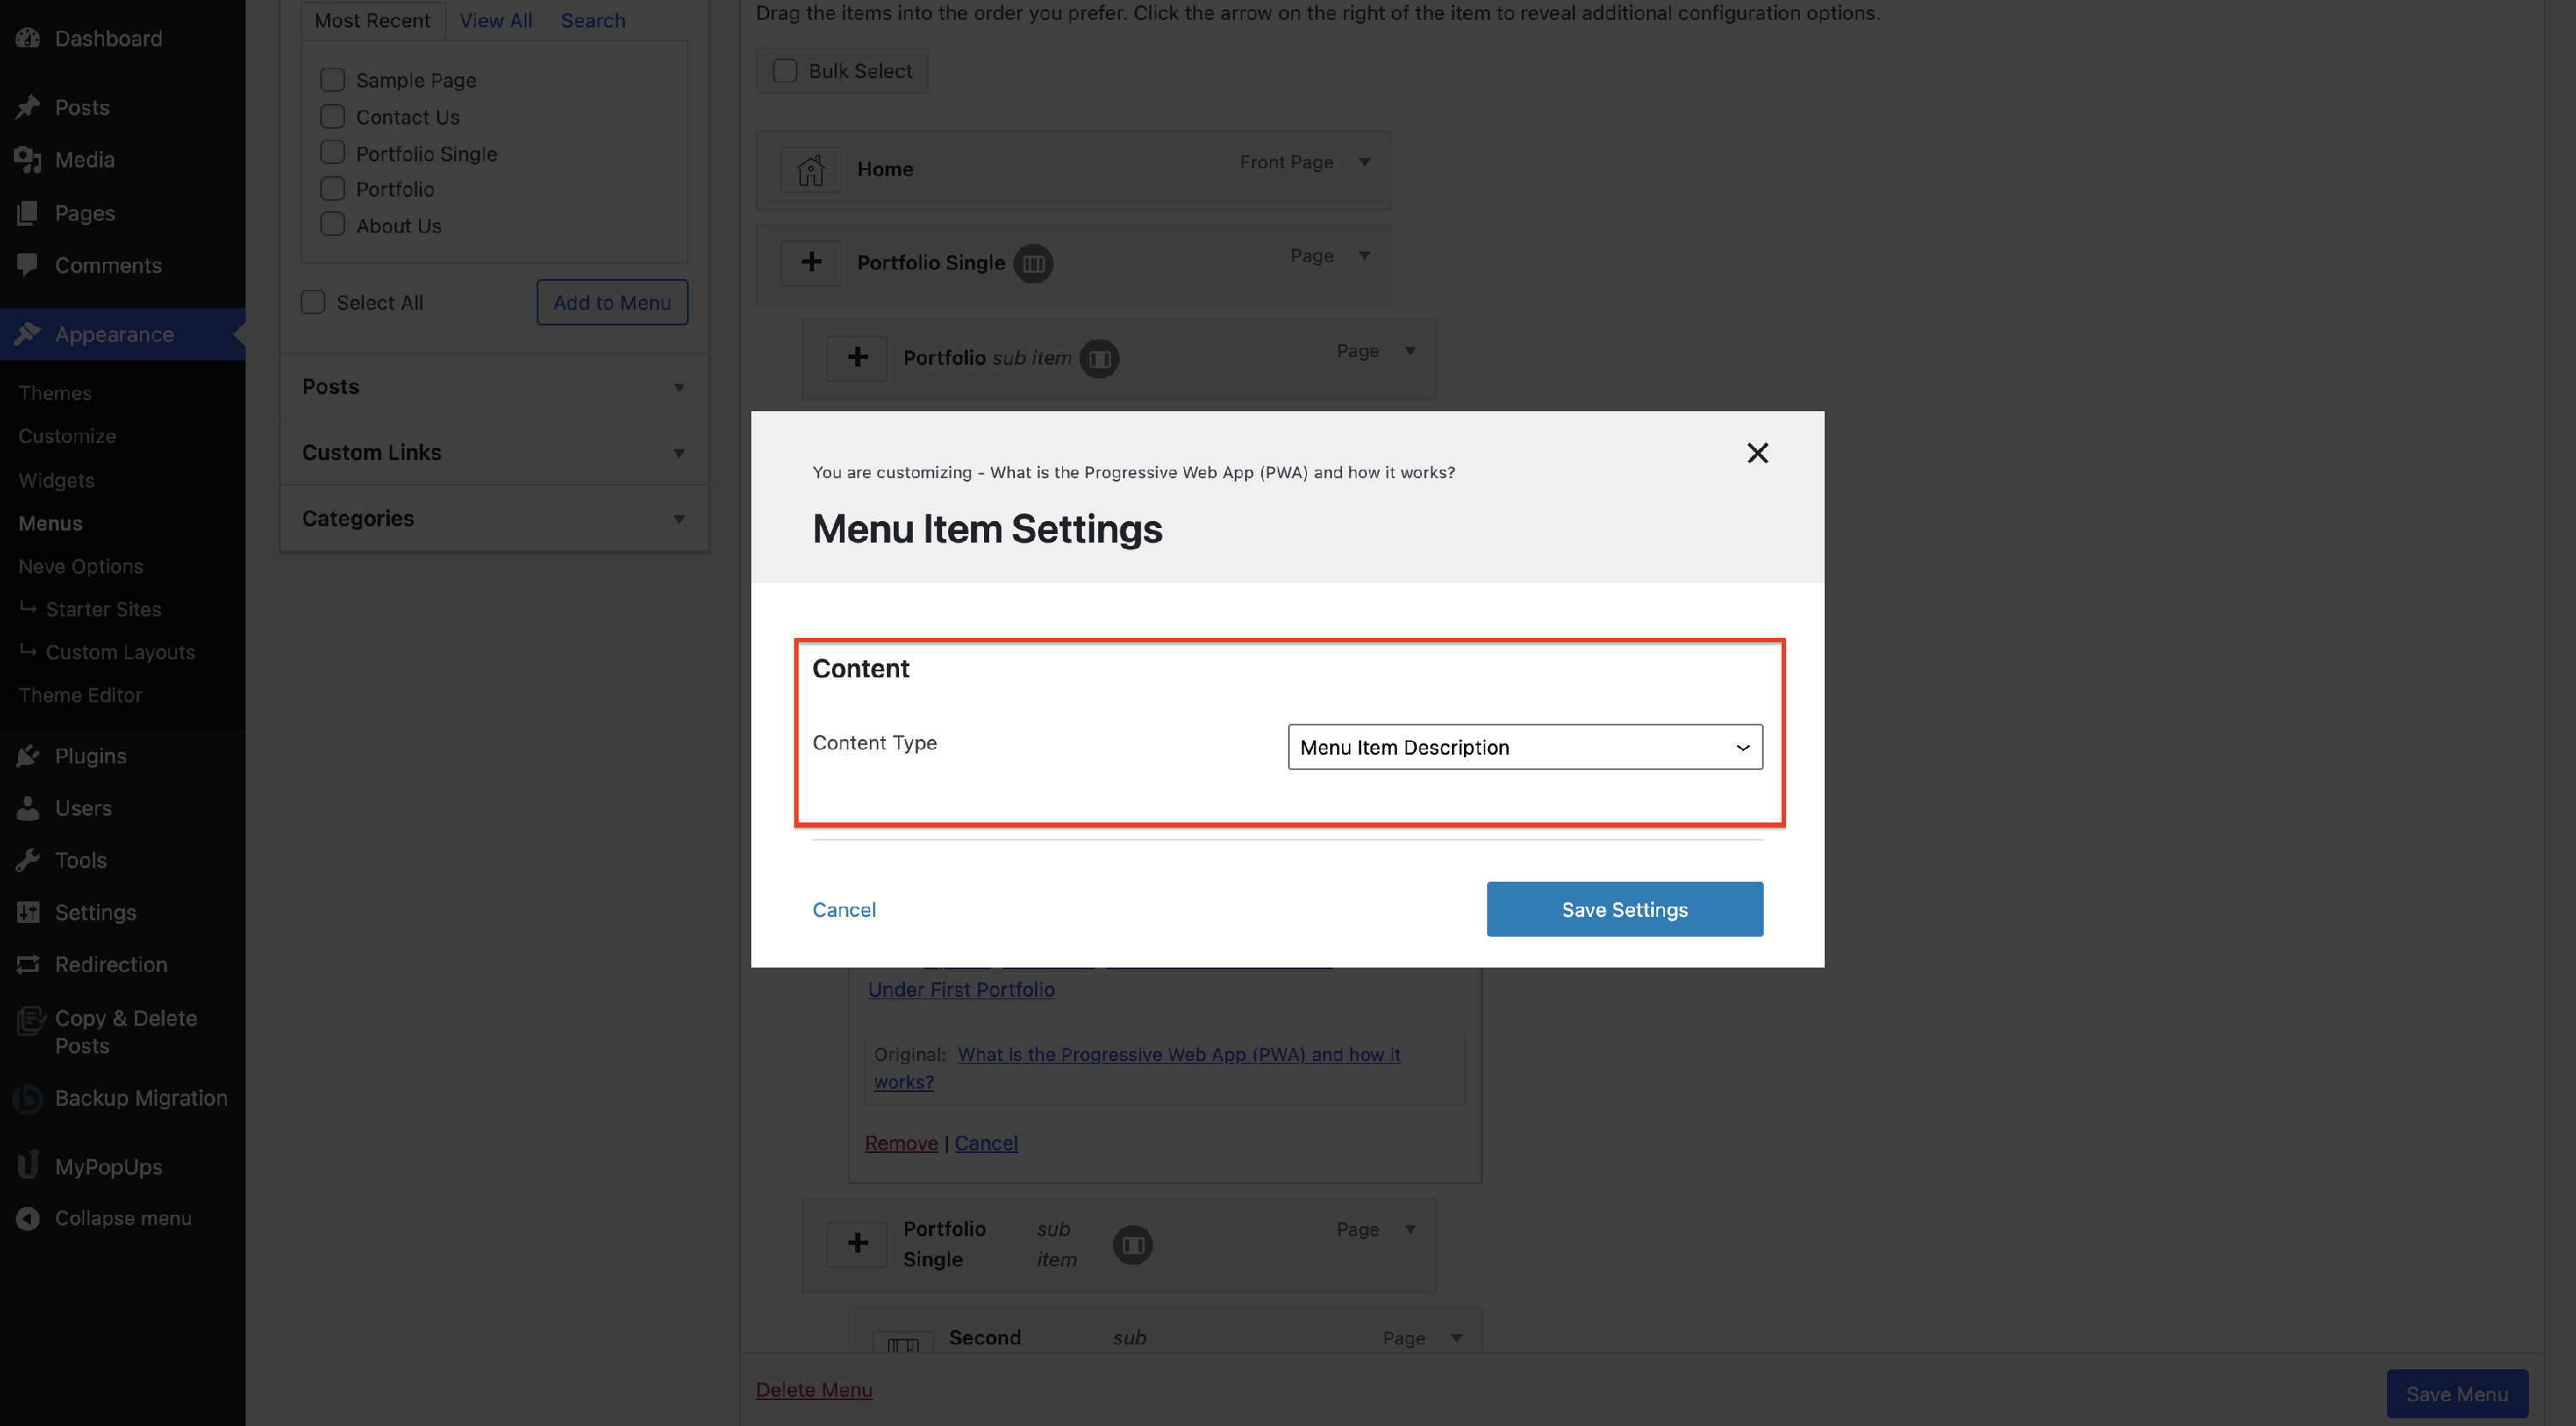
Menu Item Description
There are two ways to add a description to the mega menu.
The first method is by using the Menu Item Description option available for any item within the Mega Menu. This way, the current item being set as Menu Item Description won't be displayed, just the description will appear.
📝 Note: In case a menu item doesn't have any description added and it's set as Menu Item Description, it won't be displayed on the front end.
💡Result

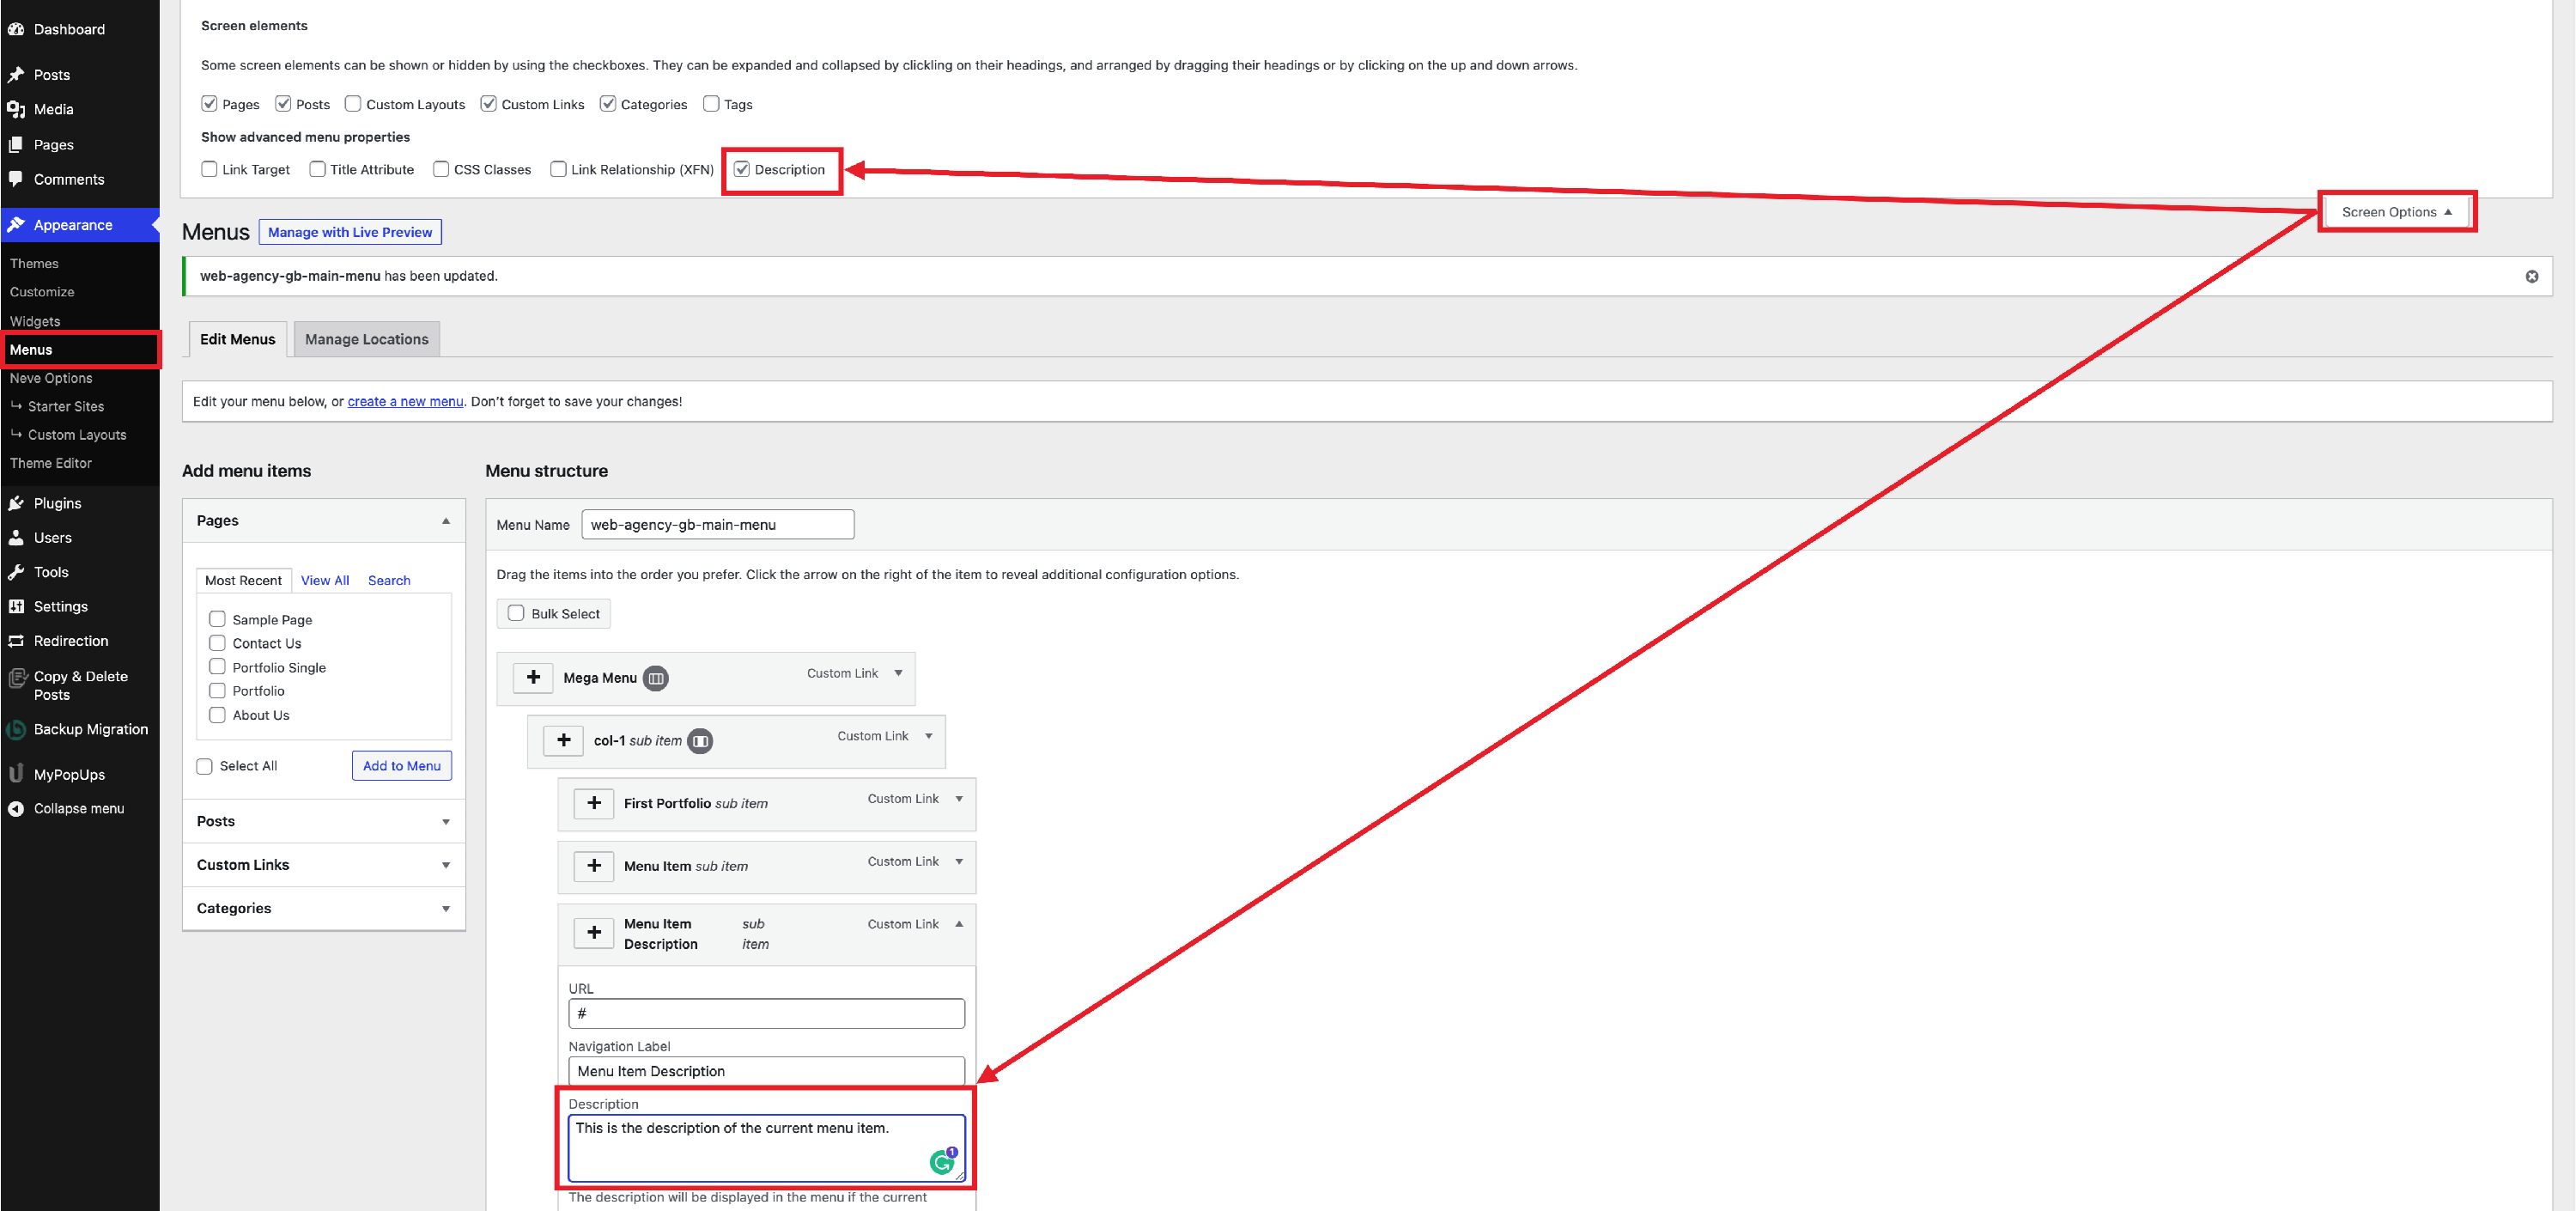
The second method of displaying a menu item description is without using any settings related to the Mega Menu of Neve, which will display the description below the menu item title. In order to make this work, just enable the Description checkbox in the Screen Options as in the following screenshot.
📝 Note: Make sure you have checked the Description checkbox from the Screen Options (click on the image to expand it).
C
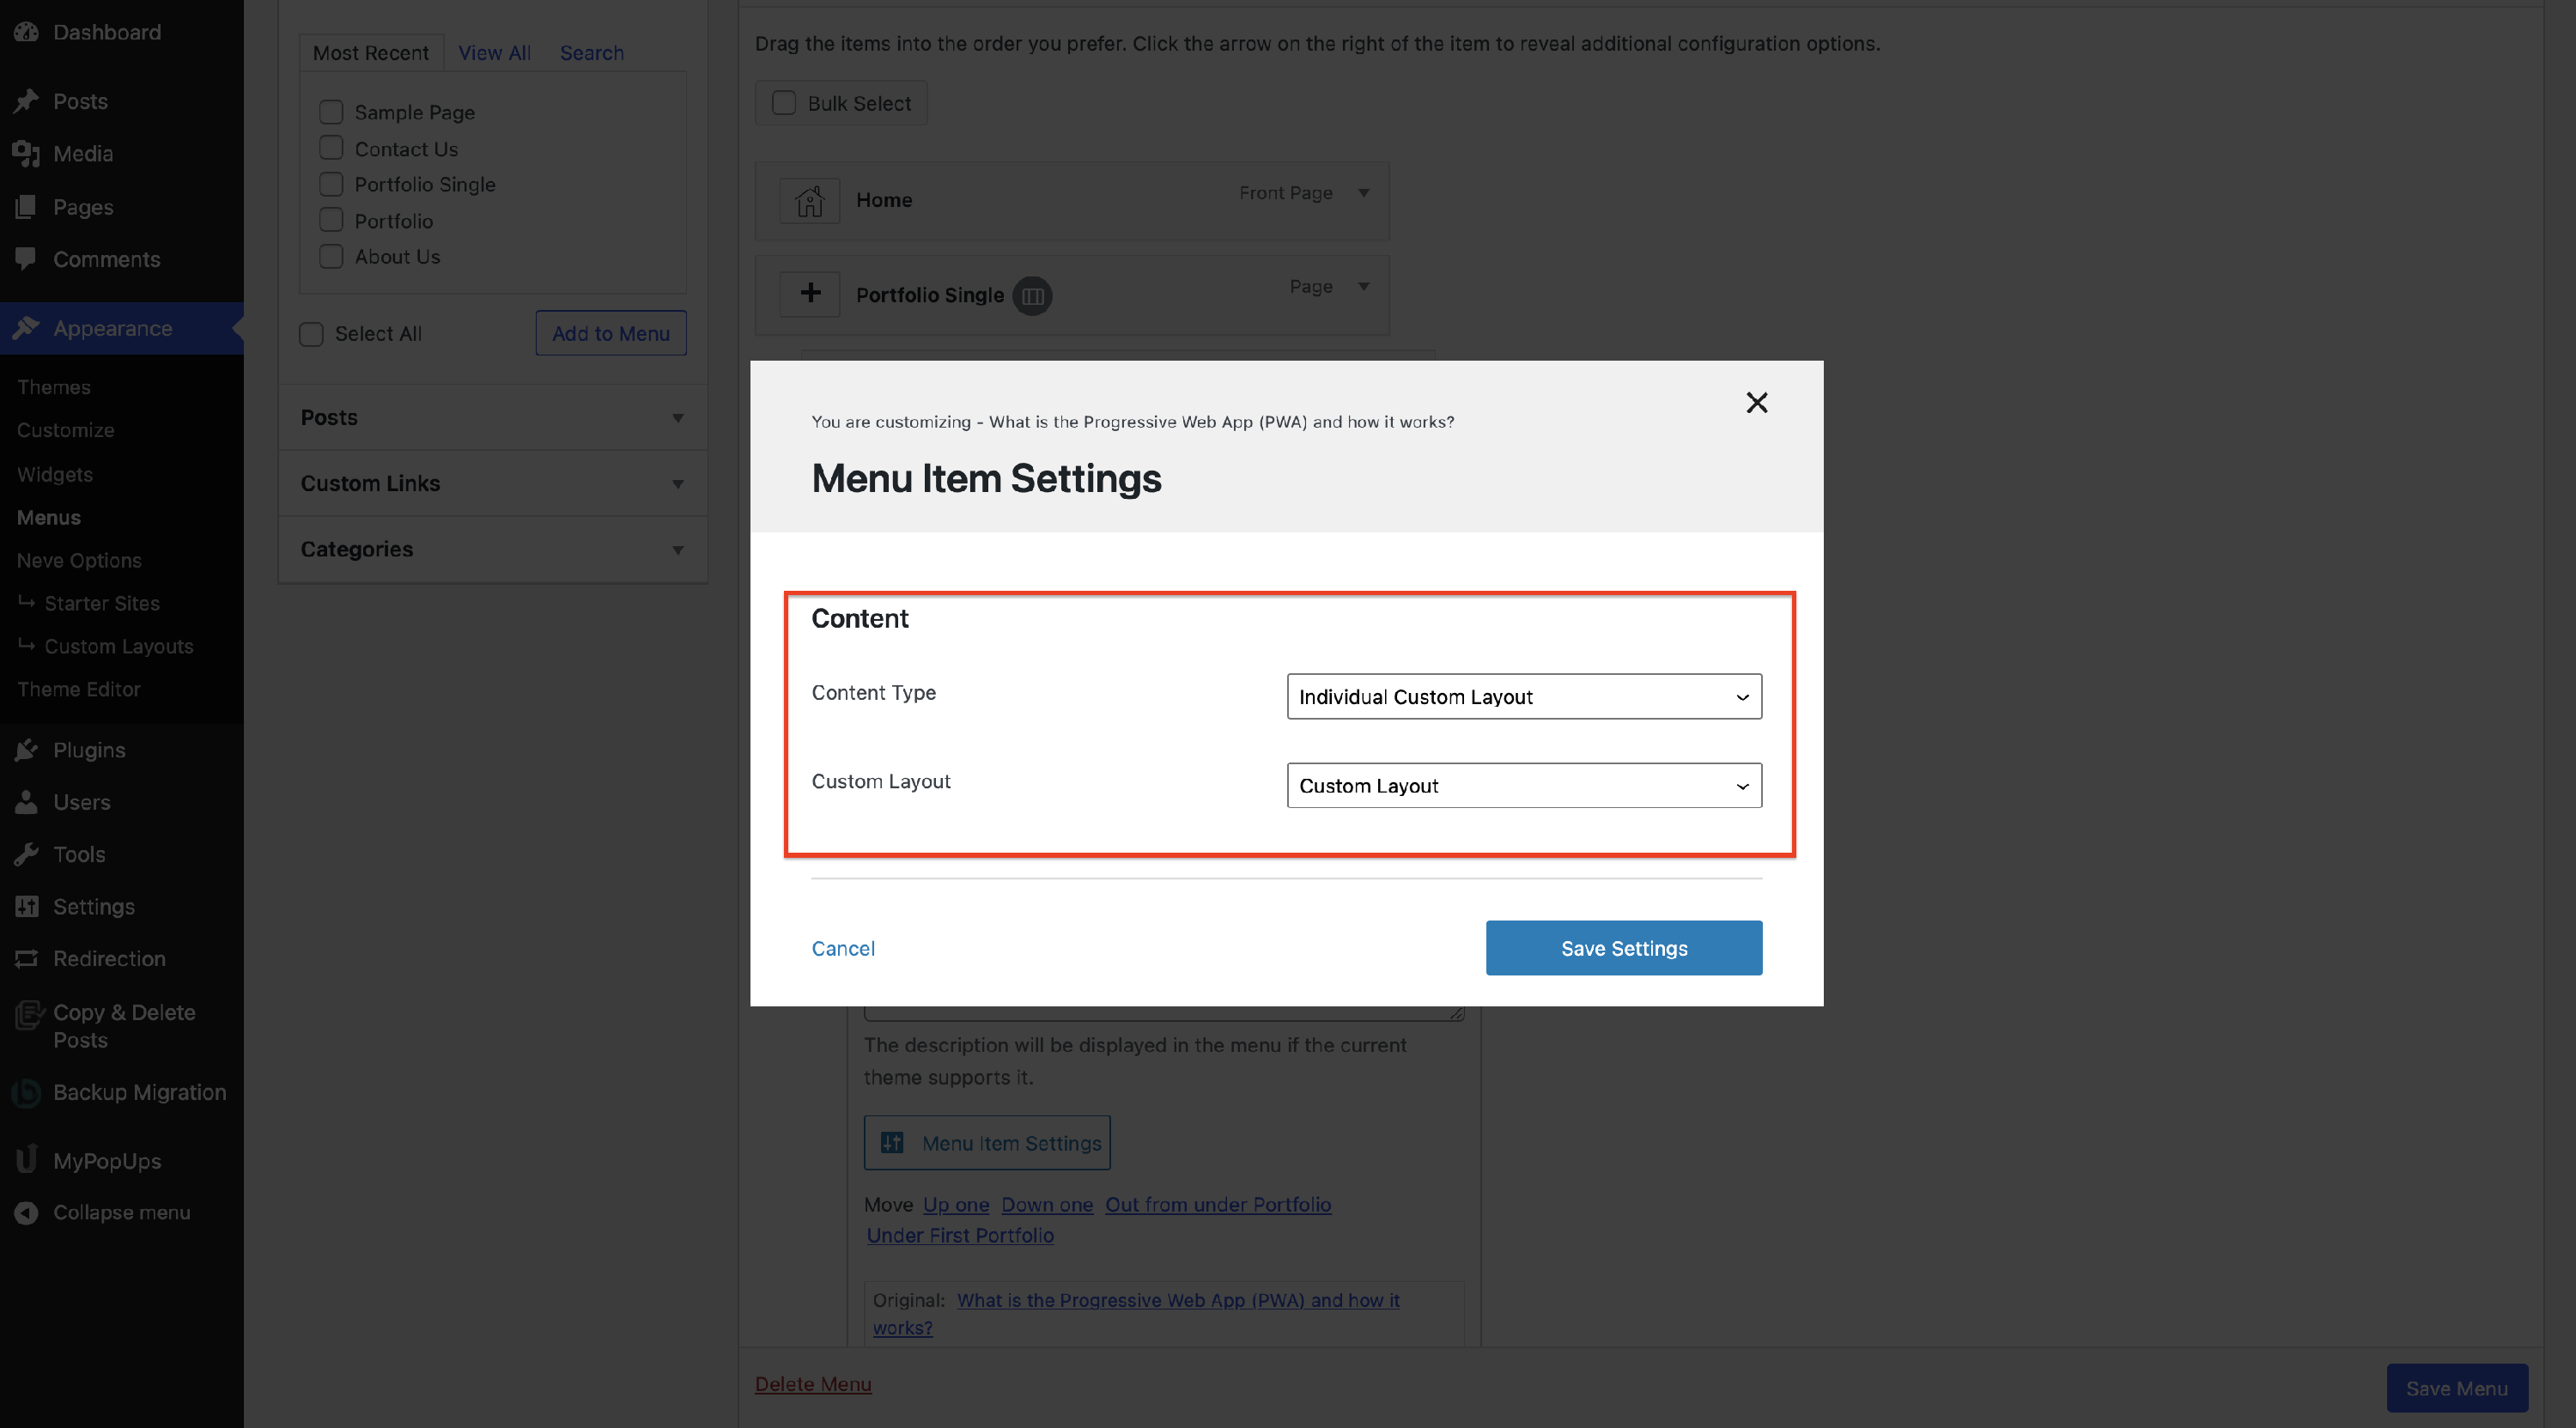
Individual Custom Layout
Once enabled, it will generate a new field, to select one custom layout already created.
D
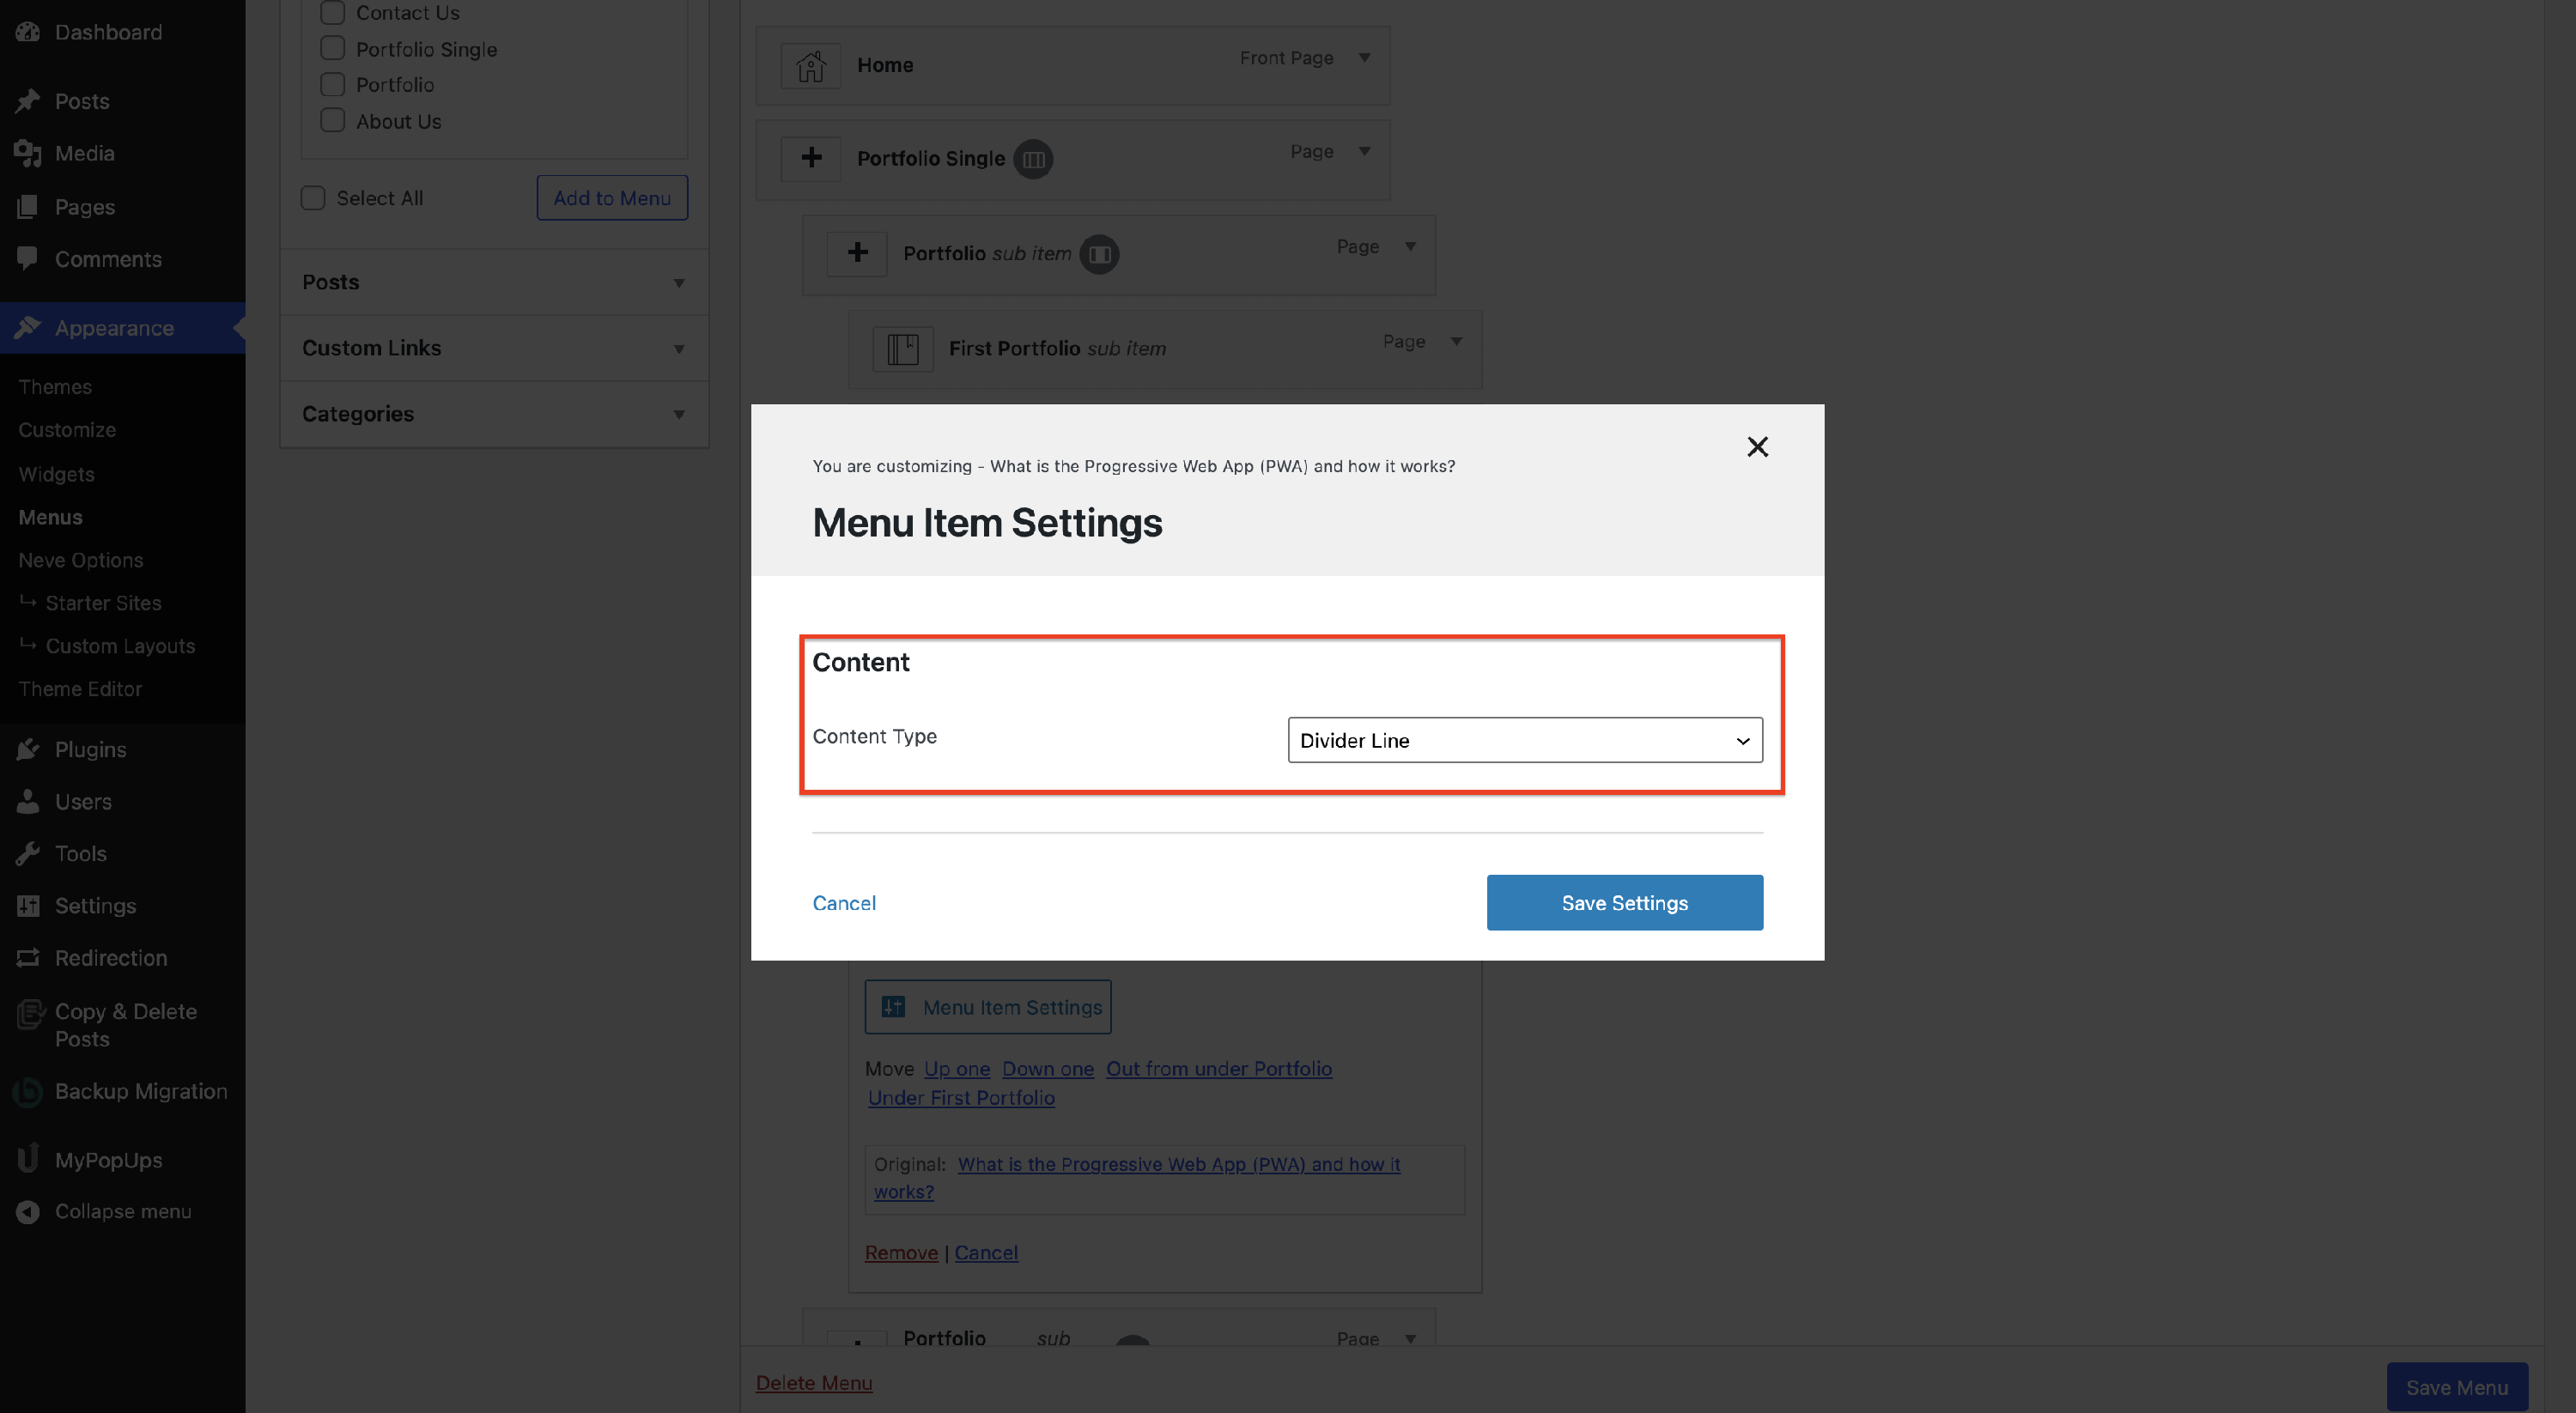
Divider Line
This content type will generate a divider between the menu item and the sub-menu item.
💡Result