How to use a custom font in Neve
There are two ways to add a custom font in Neve:
- Using plugins - Adobe font ( Typekit Fonts module ), Orbit Fox ( Custom Fonts ).
- Using CSS code - this article will present the exact steps that you need to follow,
Before

Step 1
First, you need to create a child theme for Neve.
Step 2
Download a font. In this example, we'll add this font. In your child theme create a folder called fonts and add there the BionicKidSimpleSlanted.ttf you've downloaded.
Step3
Load the font by adding the following code at the end of the functions.php file within the child theme
function add_custom_font() {
$font_path_ttf = get_stylesheet_directory_uri() . '/fonts/BionicKidSimpleSlanted.ttf';
?>
<style type="text/css">
@font-face {
font-family: 'BionicKidSimpleSlanted';
src: url( <?php echo esc_url( $font_path_ttf ); ?>) format('truetype');
}
</style>
<?php
}
add_action( 'wp_head', 'add_custom_font' );
add_action( 'customize_controls_print_styles', 'add_custom_font' );
function add_custom_fonts( $localized_data ) {
$localized_data['fonts']['Custom'][] = 'BionicKidSimpleSlanted';
return $localized_data;
}
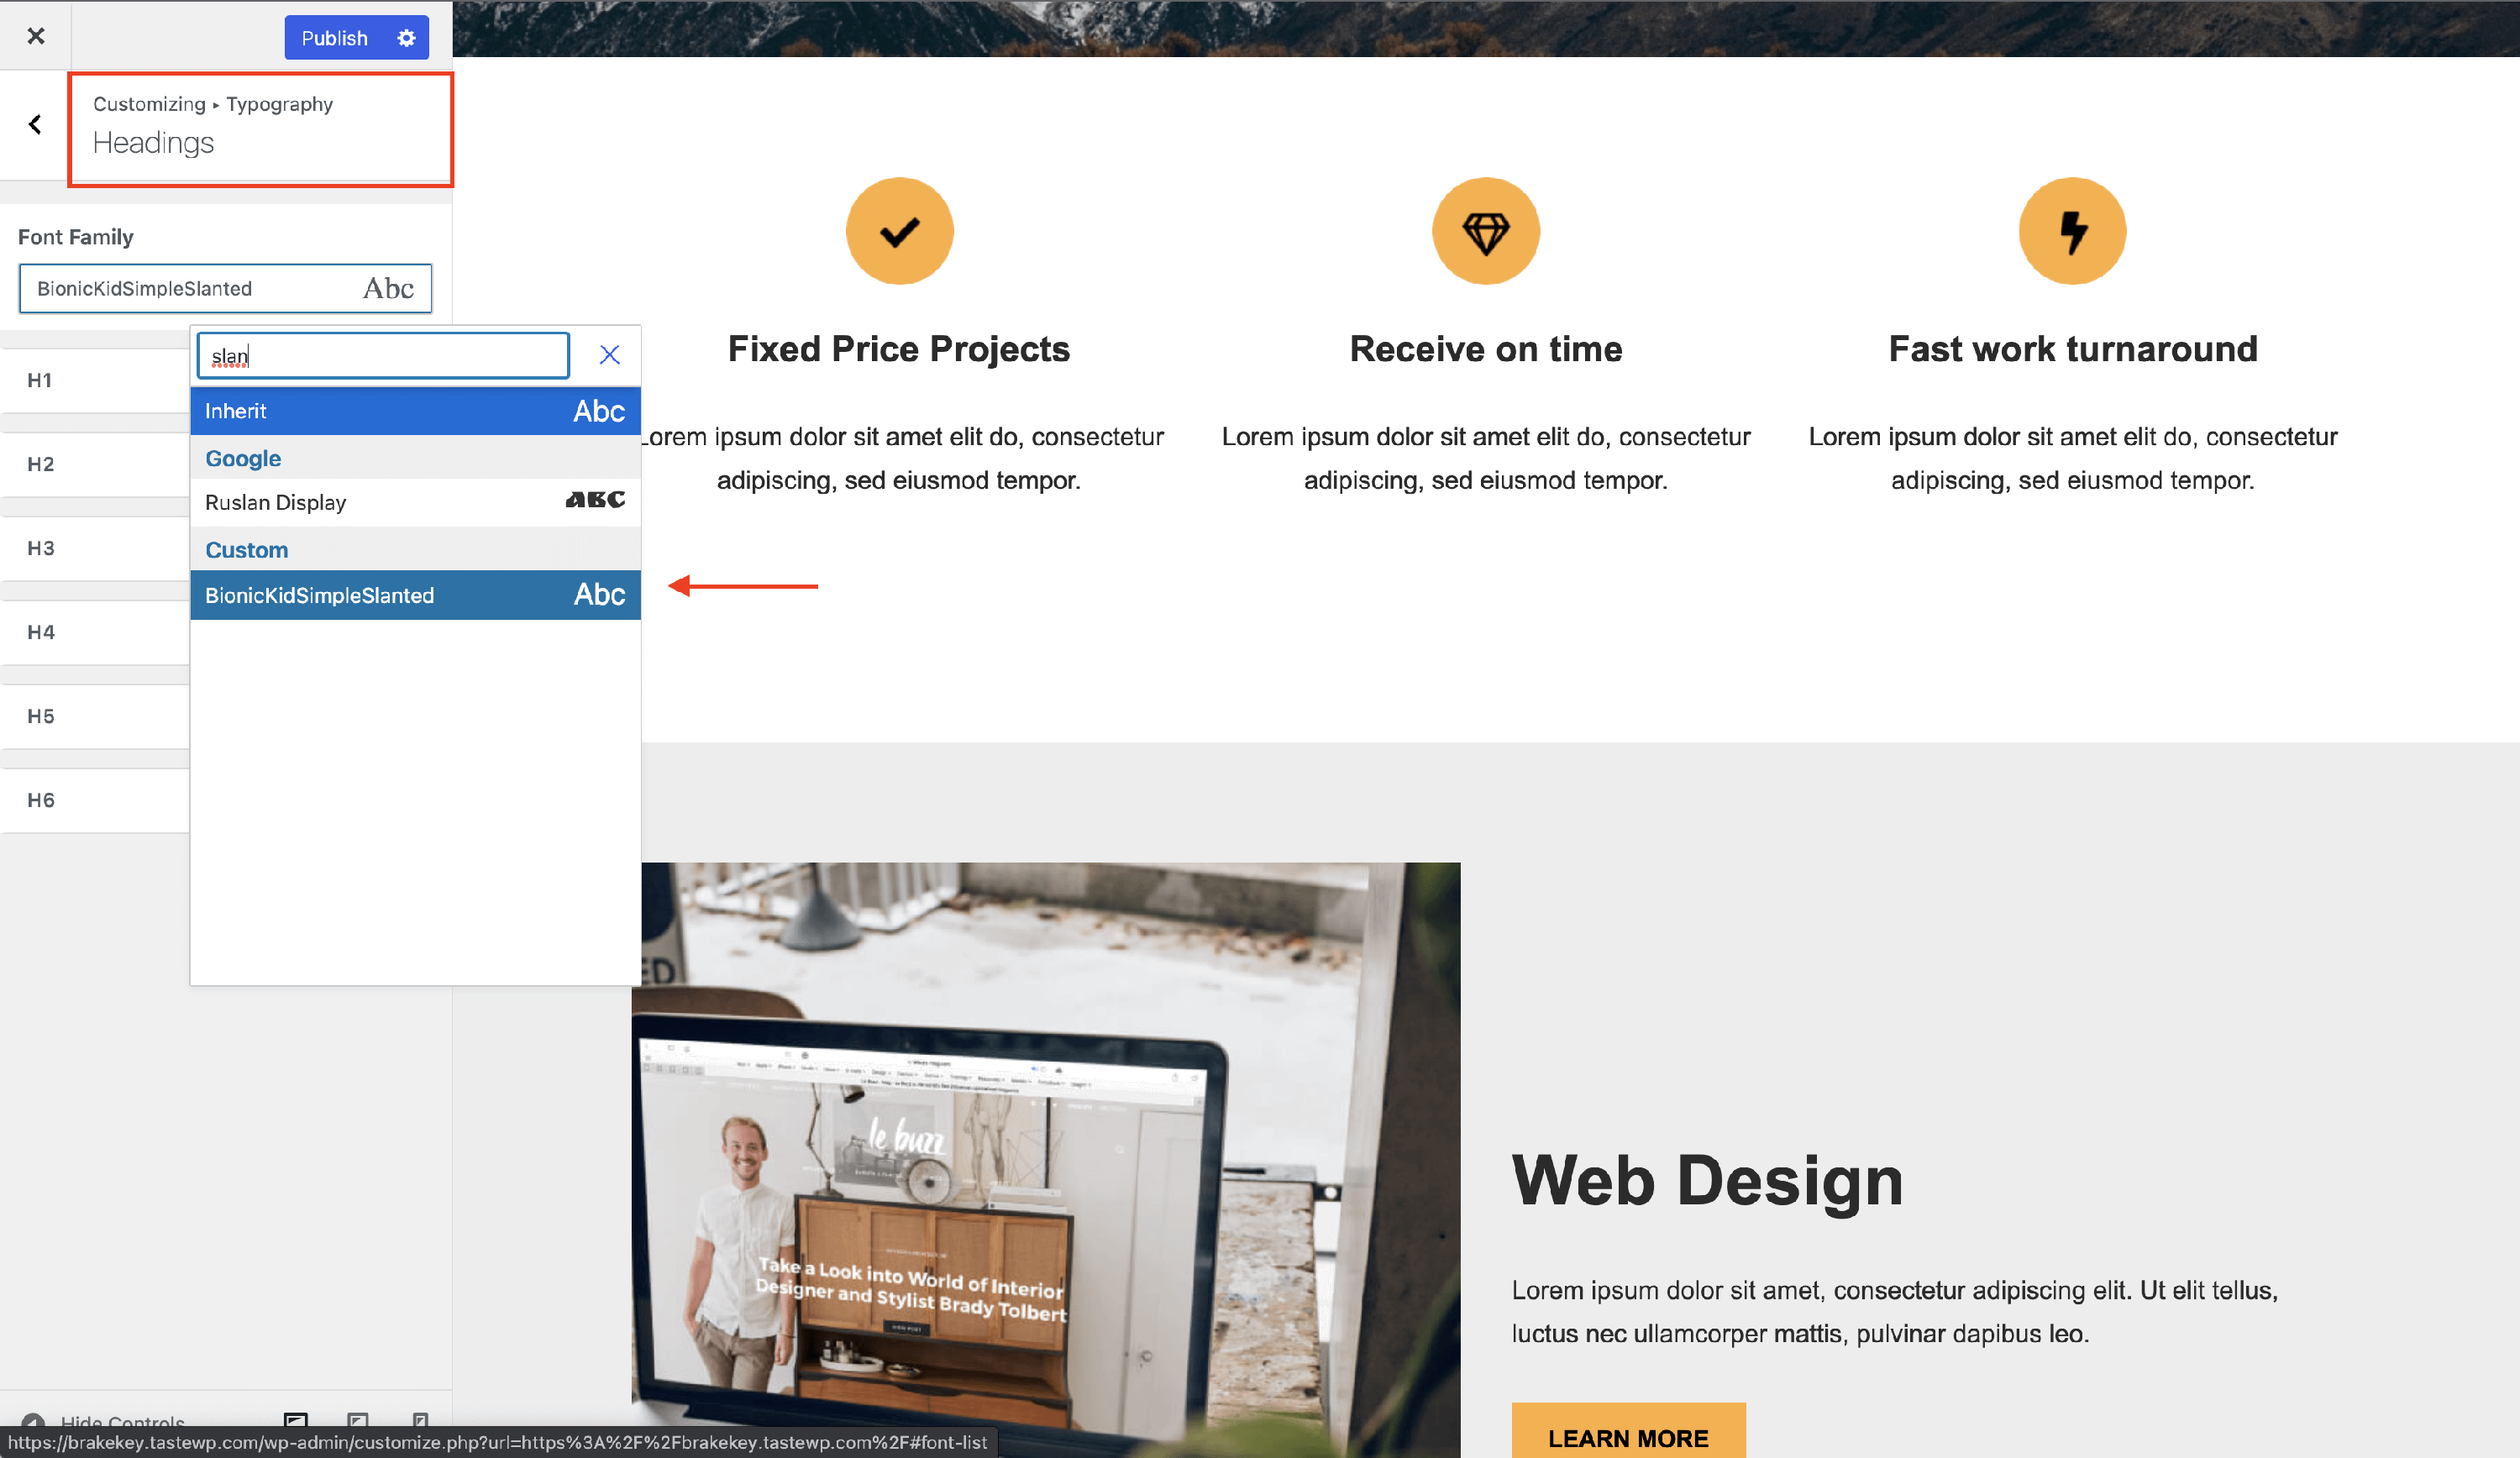
add_filter( 'neve_react_controls_localization', 'add_custom_fonts' );Step 4
Use the newly added font directly in the Typography options within the Customizer.
After
📝Note: For using multiple custom fonts we recommend uploading them by using the dedicated module within the Orbit Fox plugin, details here. The module has integration with the Neve theme.