How to automatically sync charts with online files
📝 Note: The steps provided in this article can be applied only to online files. To create an online file, please refer to this doc.
Sometimes you find yourself in a situation where you have a spreadsheet that you regularly update, and you want the chart to reflect the changes. Visualizer brings a feature that you can use to sync the data on a specific time interval, which you can set when creating the chart.
This article will present how to use the automatic syncing option and how to create custom import intervals.
📝 Note: Automatic (recurring) synchronization from online files is available on the Plus and Infinite plans only. The Personal plan supports one-time manual imports from an online file, but it cannot schedule recurring sync. See the pricing page for a full plan comparison.
In this article
Default import intervals
1. Navigate to Dashboard > Visualizer > Charts Library.
2. Pick the chart that you want to be always up to date and open its settings.
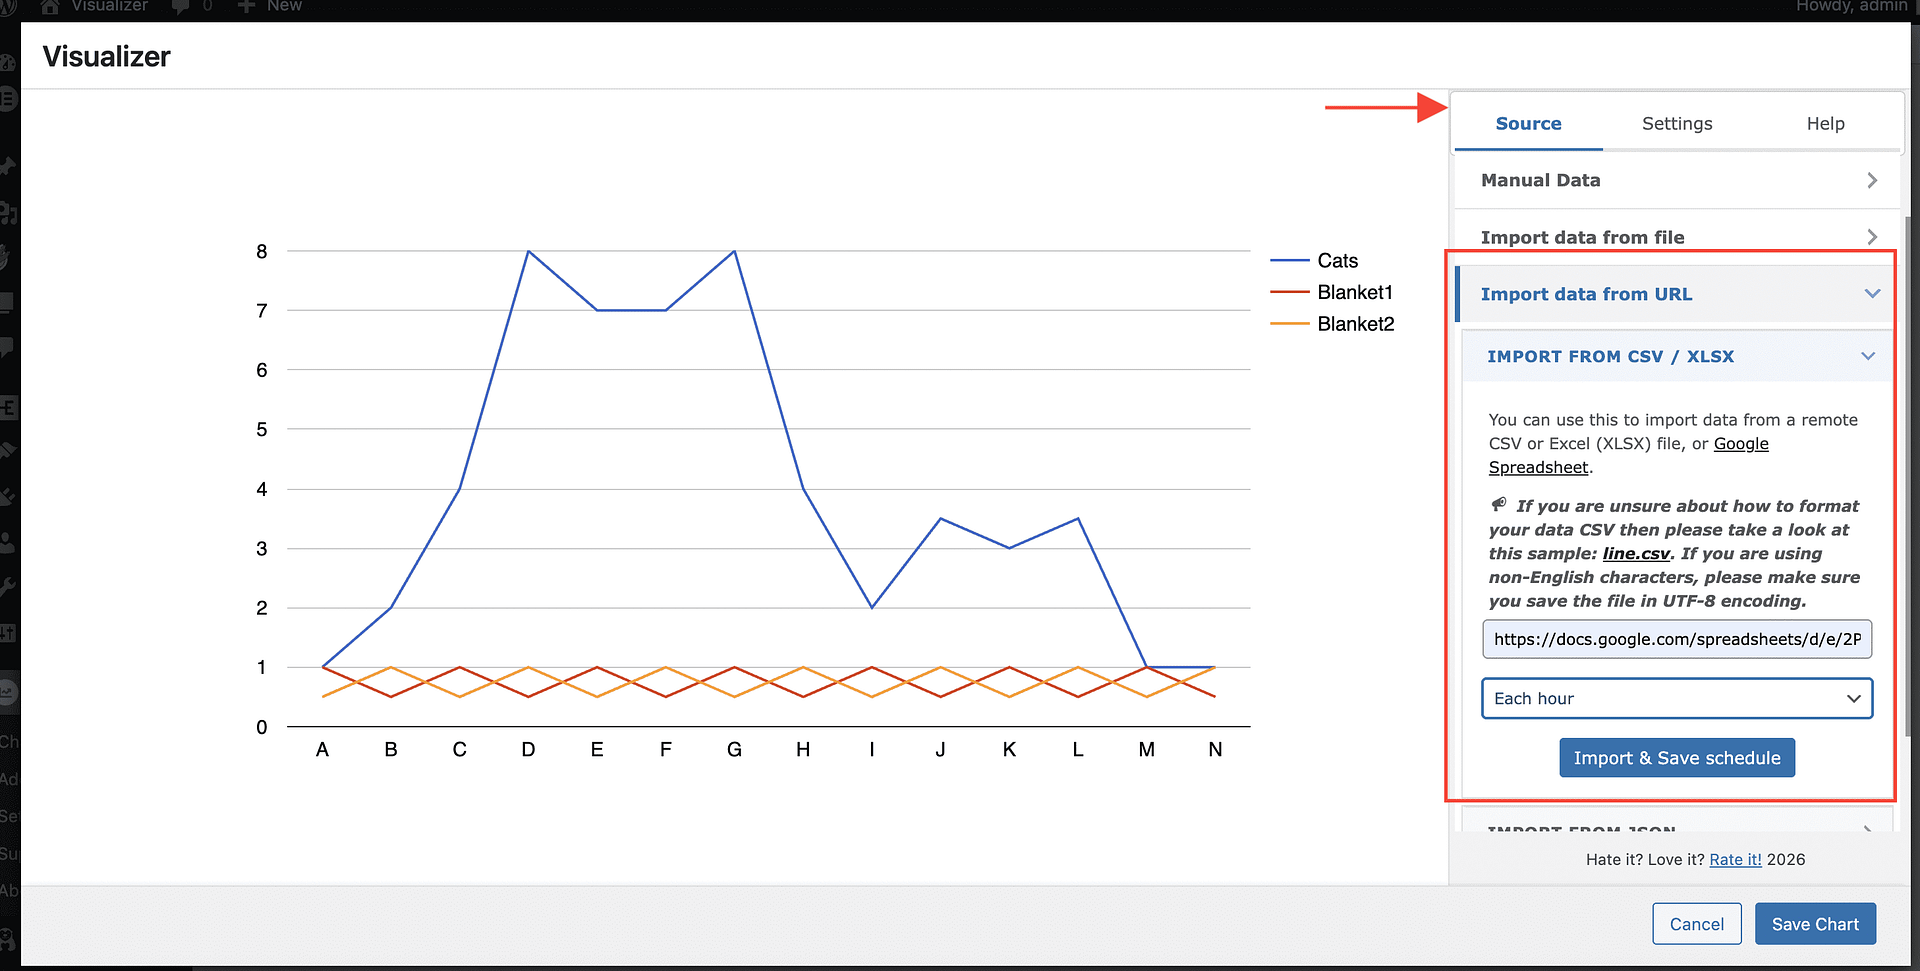
3. Under the Source tab, expand Import data from URL and Import from CSV / XLSX.
4. Under the link of the live source, use the dropdown to establish an import schedule.
Custom import intervals
The Visualizer plugin provides a feature to synchronize your chart data with a remote CSV file. The minimum time interval is one hour when the plugin checks the file URL. If you want to use a smaller interval than an hour to check the file more often, follow these steps:
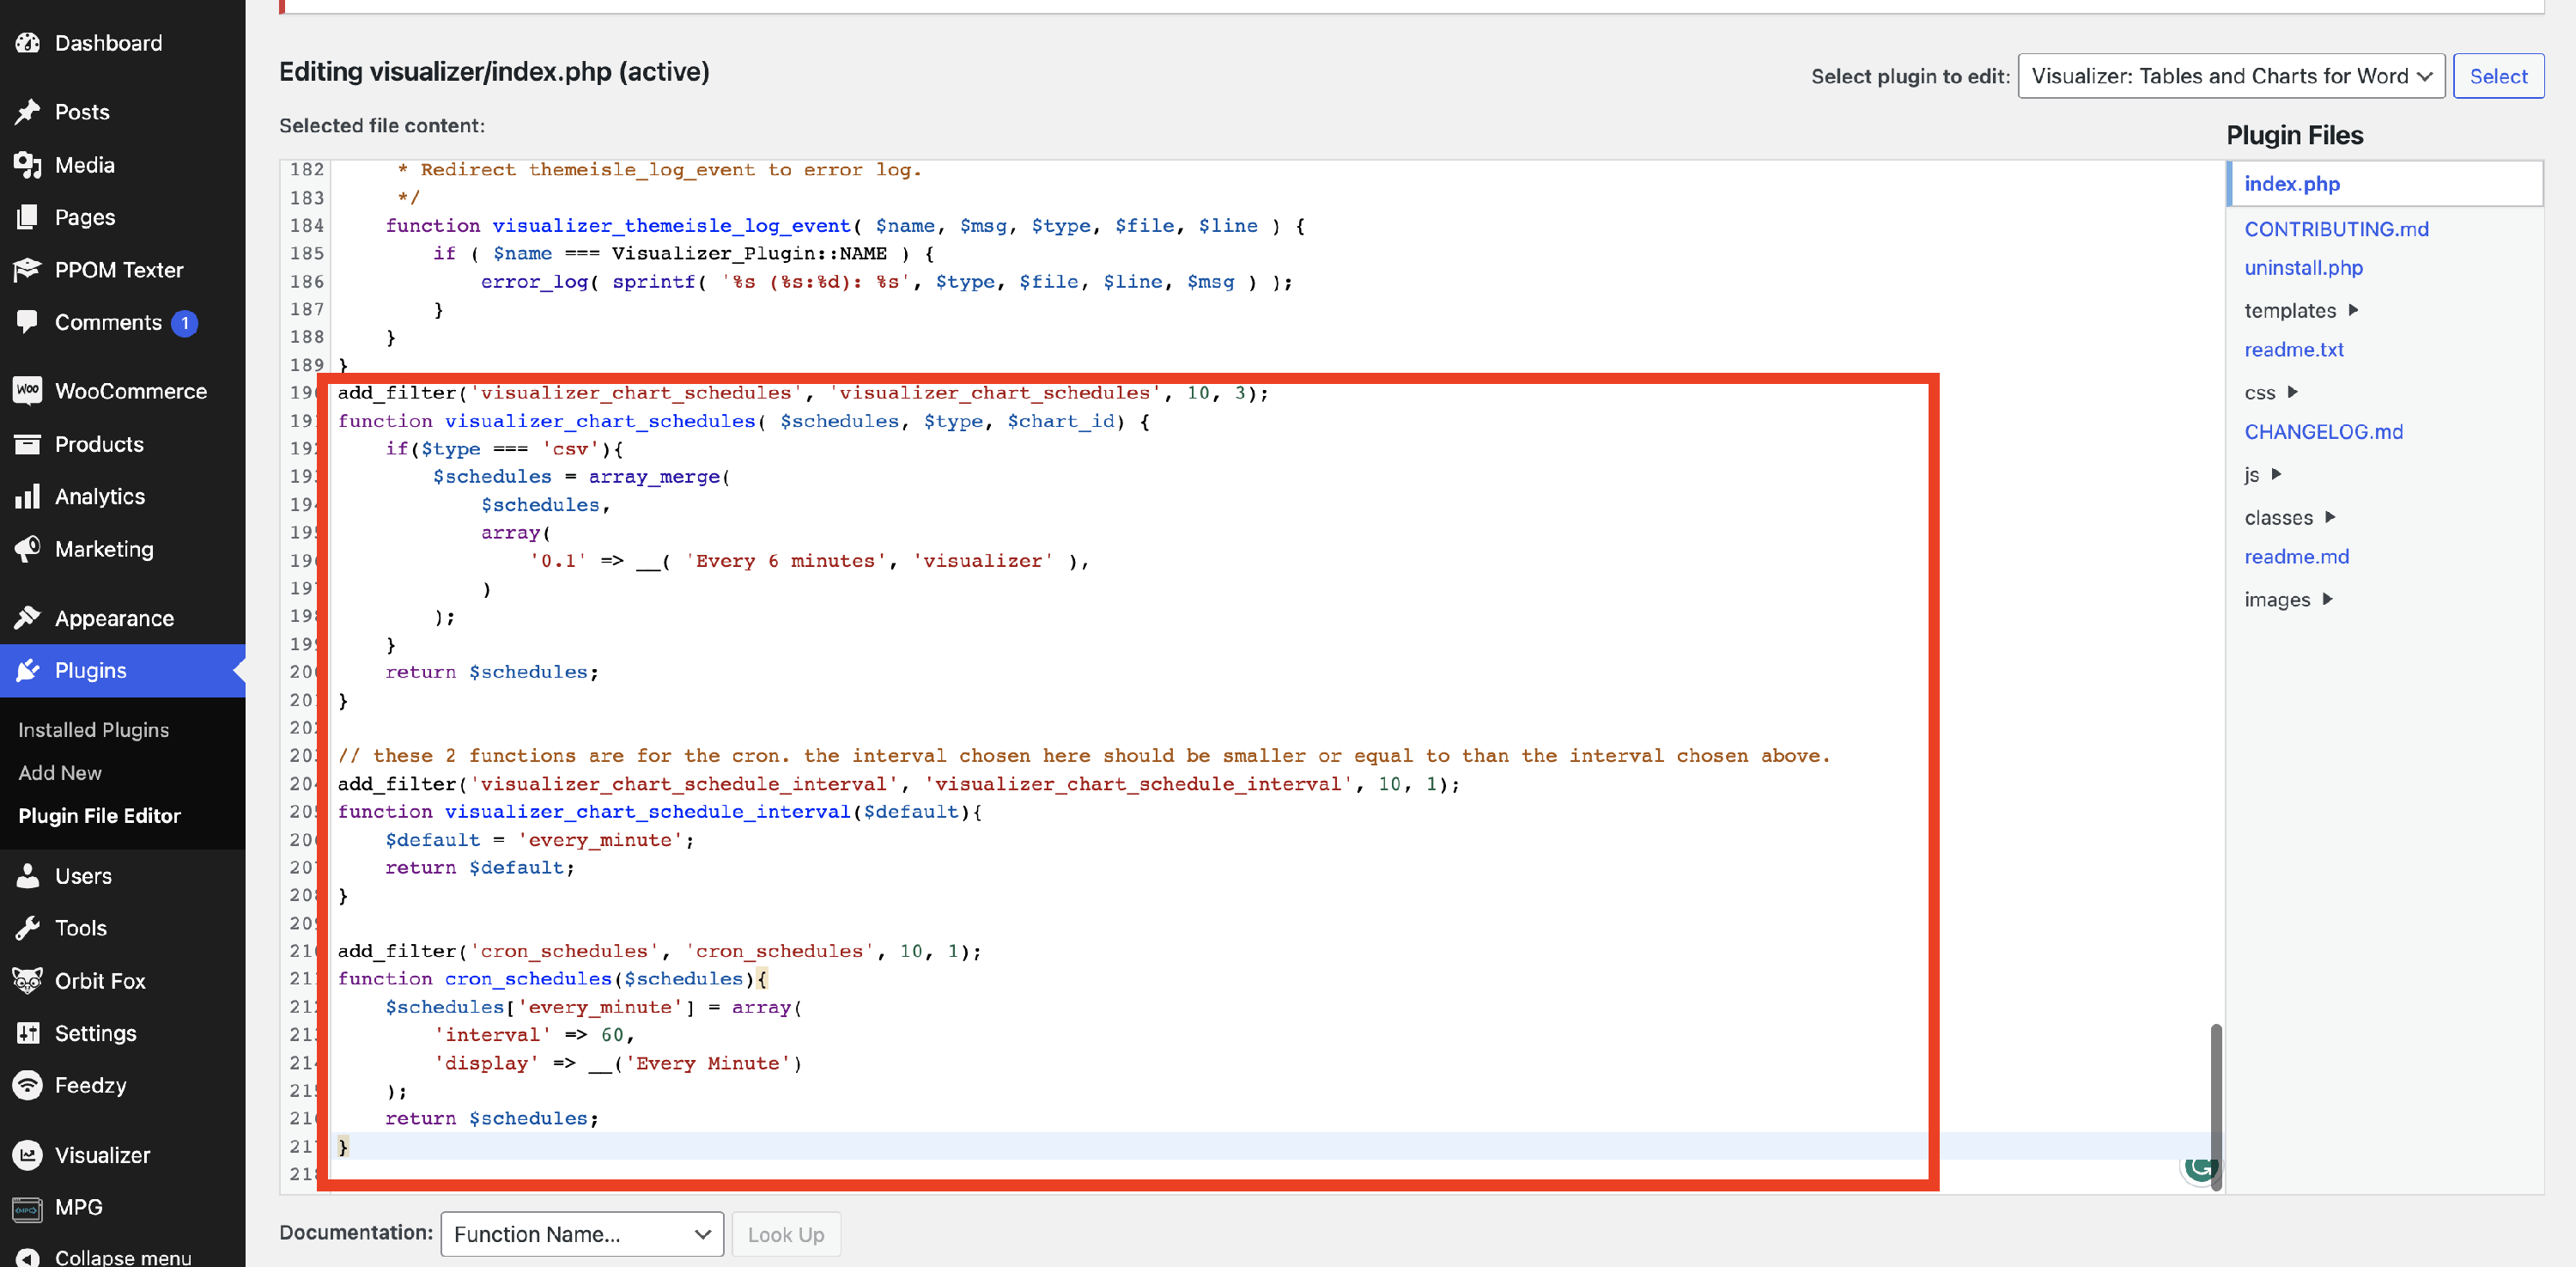
1. Copy this code snippet:
add_filter('visualizer_chart_schedules', 'visualizer_chart_schedules', 10, 3);
function visualizer_chart_schedules( $schedules, $type, $chart_id) {
	if($type === 'csv'){
		$schedules = array_merge(
			$schedules,
			array(
				'0.1' => __( 'Every 6 minutes', 'visualizer' ),
			)
		);
	}
	return $schedules;
}

// these 2 functions are for the cron. the interval chosen here should be smaller or equal to than the interval chosen above.
add_filter('visualizer_chart_schedule_interval', 'visualizer_chart_schedule_interval', 10, 1);
function visualizer_chart_schedule_interval($default){
	$default = 'every_minute';
	return $default;
}

add_filter('cron_schedules', 'cron_schedules', 10, 1);
function cron_schedules($schedules){
	$schedules['every_minute'] = array(
		'interval' => 60,
		'display' => __('Every Minute')
	);
	return $schedules;
}
2. Replace the intervals from the code to fit your needs.
3. Paste the code into the plugin's file.
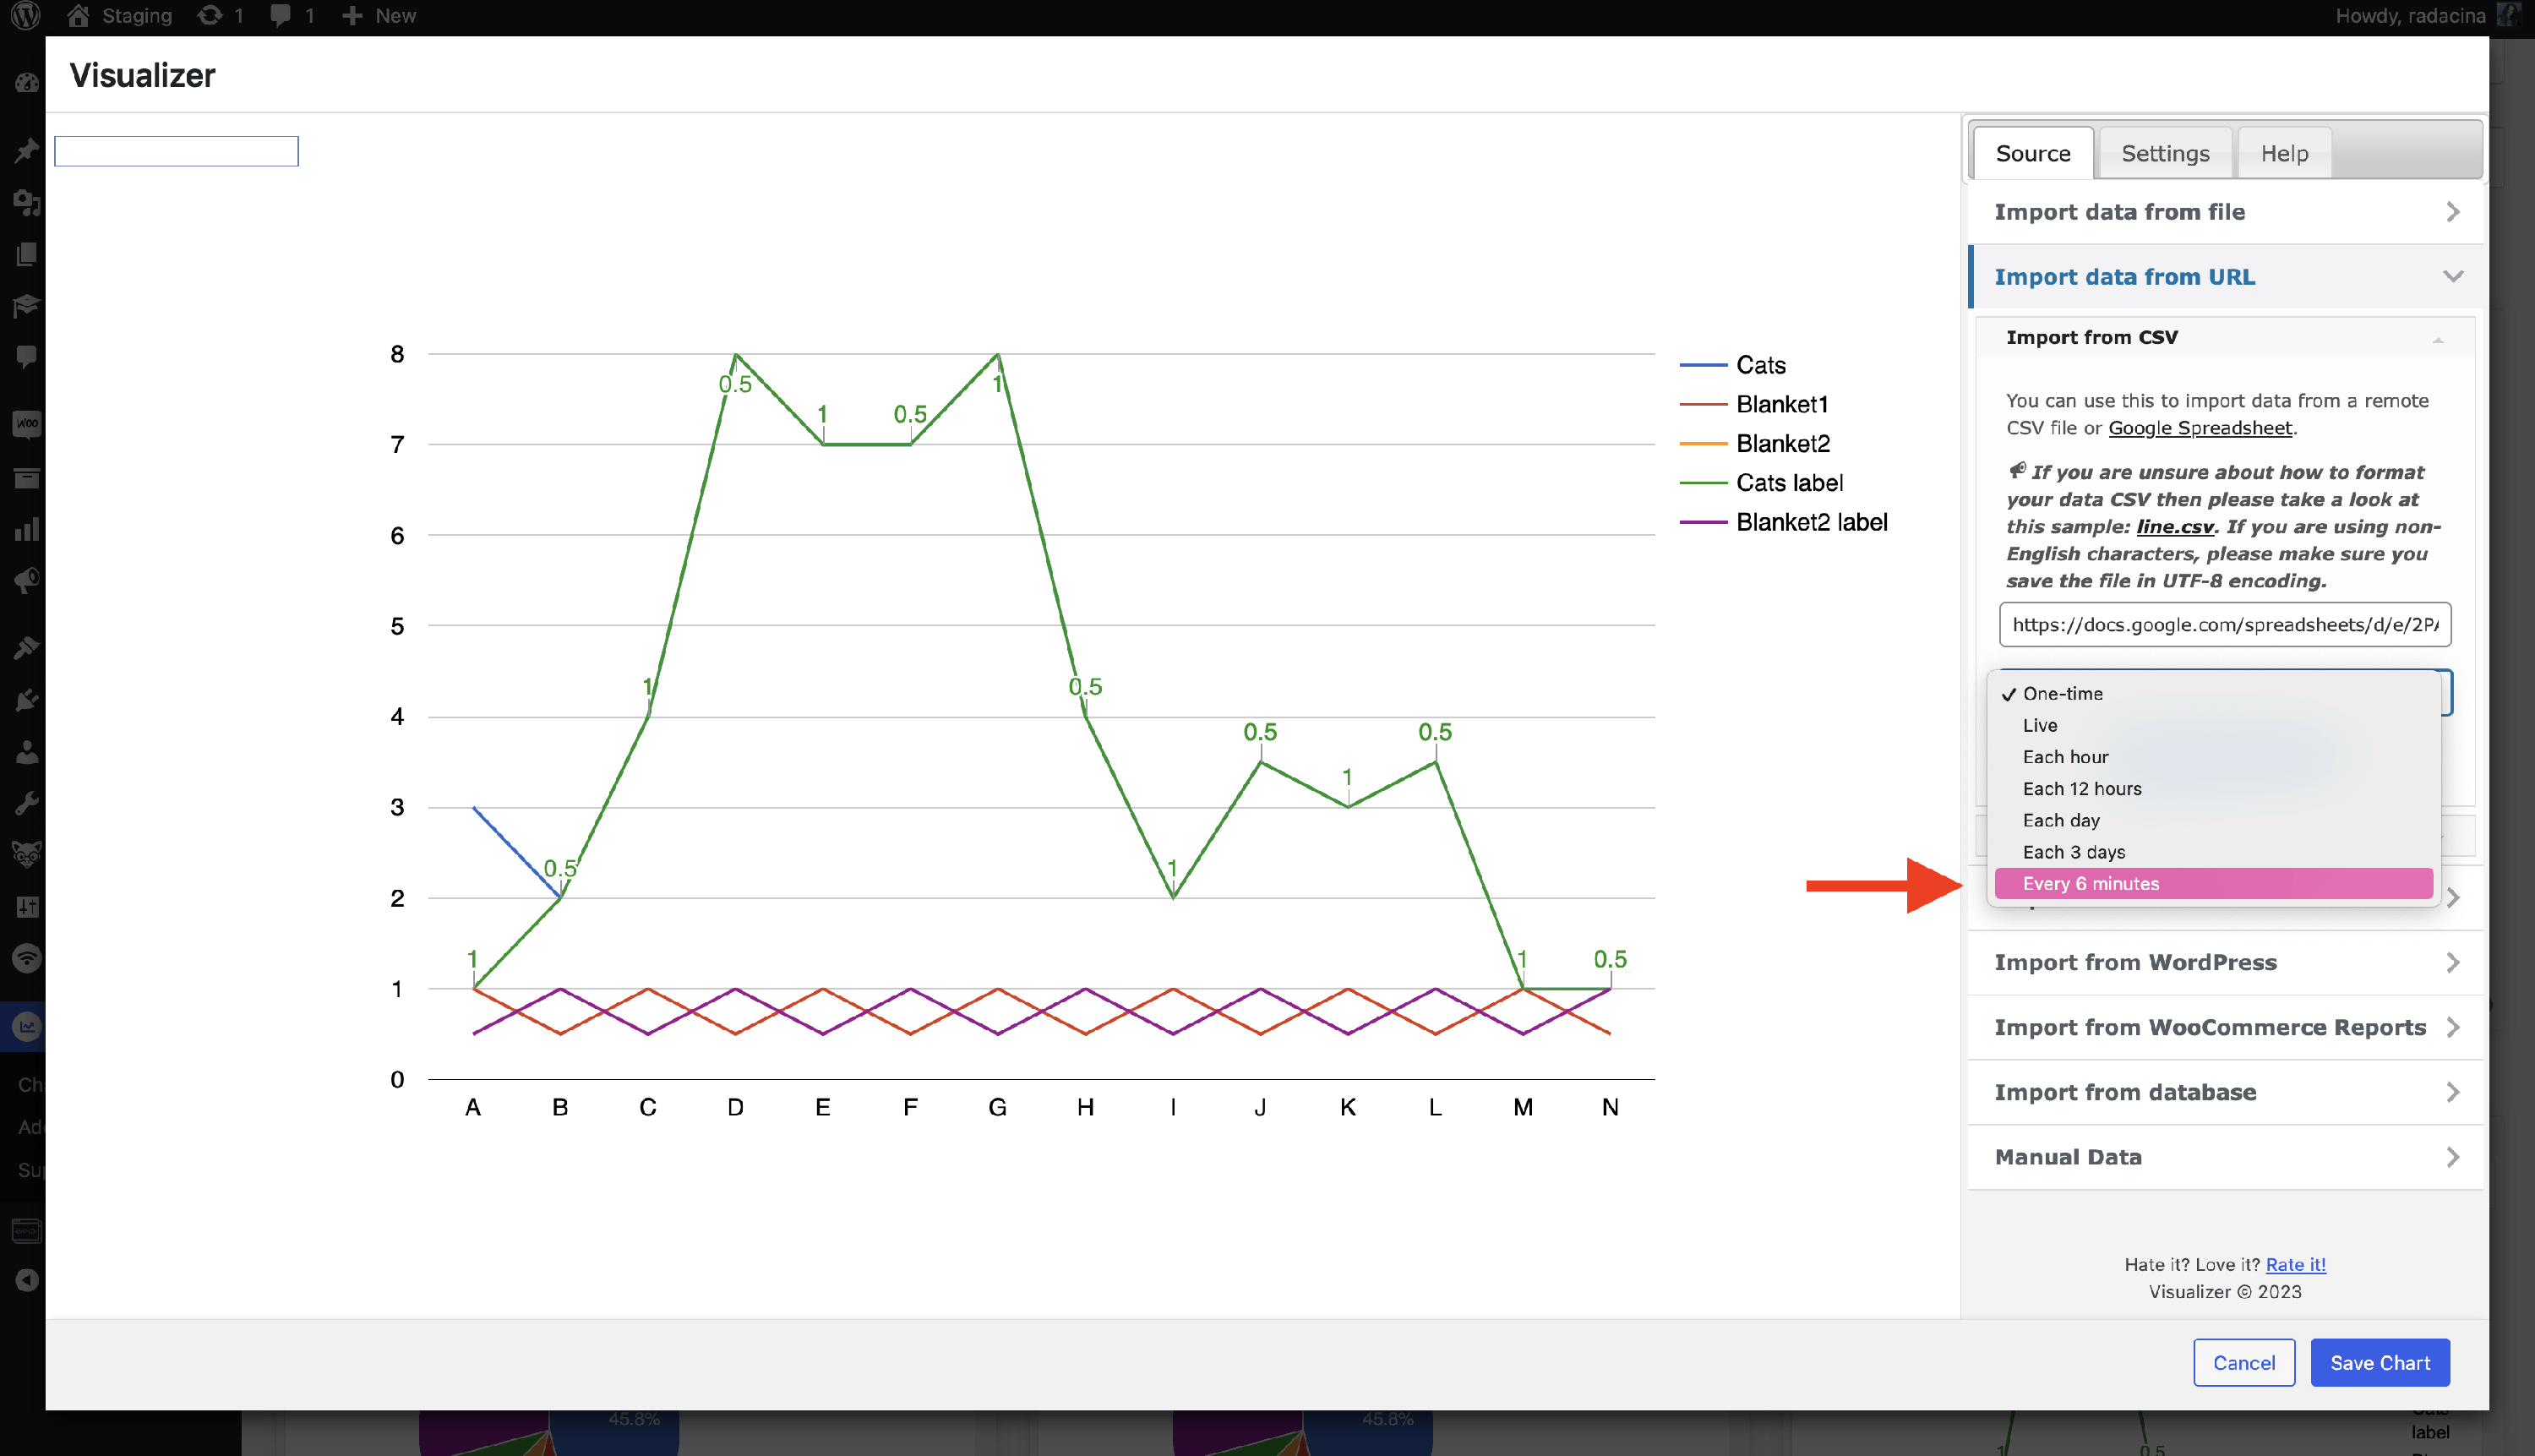
4. Save the changes, then check the available intervals again.
Result
If the import schedule option is grayed out
If the import schedule dropdown is disabled and you see an upgrade prompt, your current license tier does not include automatic synchronization. Scheduled recurring sync requires the Plus or Infinite plan.
On the Personal plan you can still import data from an online file as a one-time import, but the chart will not refresh automatically. To enable recurring sync, upgrade your subscription; see the pricing page to compare plans.